Tag: Comfort Food

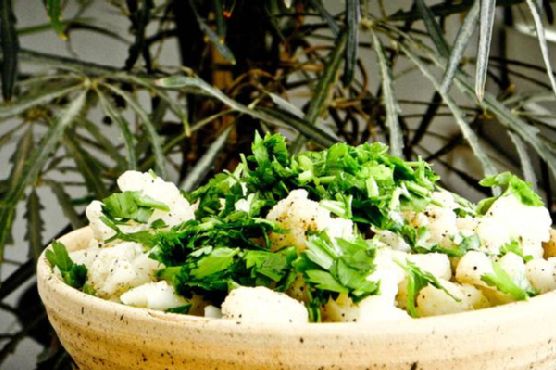
  • Spiced Egyptian Roasted Cauliflower Salad with Tahini Drizzle | Made by Meaghan Moineau

    Spiced Egyptian Roasted Cauliflower Salad with Tahini Drizzle | Made by Meaghan Moineau

    Spiced Egyptian Roasted Cauliflower Salad with Tahini Drizzle

    Imagine the sizzle of cauliflower roasting to a perfect golden-brown, enveloped in a fragrant cloud of smoky paprika and garlic. The anticipation builds as the creamy tahini drizzle awaits its turn to dance on top, promising a meal that’s as visually stunning as it is delicious.

    Personal Story

    Ah, cauliflower. It’s one of those humble vegetables that I used to overlook in my kitchen adventures. That is, until a trip to Cairo a few years back changed everything. I remember meandering through the bustling streets, where the air was filled with exotic spices and the scent of roasting vegetables from roadside stalls. I stumbled upon a small eatery tucked away in an alley, offering a simple yet transformative dish: a roasted cauliflower salad that was a revelation.

    Back home, I couldn’t shake the memory of that salad. The cauliflower was roasted to perfection, with a smoky depth that I couldn’t quite replicate with just plain ol’ steaming. So, I began experimenting in my kitchen, determined to recreate that unforgettable flavor. My first attempts were a bit of a kitchen mishap—too much spice here, not enough there—but eventually, I found my groove. The secret lay in a careful balance of smoked paprika, garlic powder, and the creamy tang of tahini.

    Now, whenever I prepare my Spiced Egyptian Roasted Cauliflower Salad, I’m transported back to that vibrant Cairo street corner. It’s a dish steeped in personal discovery and culinary triumph, and I’m thrilled to share it with you.

    What Makes This Version Special

    This isn’t your average roasted cauliflower salad. My version elevates the humble vegetable by roasting it with a medley of spices that imbue a smoky depth, then topping it with a luxurious creamy tahini drizzle. The magic happens in the roasting process, where the spices create a caramelized crust that’s simply irresistible. What sets this recipe apart is the interplay of textures and flavors: the silky tahini meets the nutty crunch of toasted pine nuts, and everything is brightened with a squeeze of fresh lemon juice.

    Flavor Profile

    Prepare for a taste journey that is smoky, nutty, and oh-so satisfying. The smoked paprika and garlic powder give the cauliflower a bold, earthy flavor, while the tahini drizzle adds a creamy, tangy finish. The roasted bell peppers bring a touch of sweetness, contrasting beautifully with the savory notes. Each bite is an experience, from the warm spices to the cool, refreshing mint that finishes the dish.

    Ingredients

    • 1 large cauliflower, cut into medium-sized florets
    • 2 tablespoons olive oil
    • 1 teaspoon smoked paprika
    • 1 teaspoon garlic powder
    • 1 teaspoon cumin
    • Salt, to taste
    • Freshly ground black pepper, to taste
    • 1 red bell pepper, diced
    • 2 tablespoons lemon juice
    • 1/4 cup tahini
    • 2 tablespoons water (to thin the tahini)
    • 1/4 cup toasted pine nuts
    • 1/4 cup chopped fresh parsley
    • 1/4 cup fresh mint leaves, torn

    Instructions

    1. Preheat your oven to 425°F (220°C). While the oven heats, separate the cauliflower into medium-sized florets. If you have a steamer, steam the cauliflower for 5 minutes until slightly tender. If not, you can boil the whole cauliflower for 5 minutes, then cut it into pieces once it cools slightly.
    2. In a large mixing bowl, toss the steamed cauliflower with olive oil, smoked paprika, garlic powder, cumin, and a generous pinch of salt and pepper. Spread the cauliflower in a single layer on a baking sheet lined with parchment paper.
    3. Roast in the oven for 20-25 minutes, or until the cauliflower is golden-brown and slightly crisp around the edges. The aroma will be irresistible!
    4. While the cauliflower is roasting, dice the bell pepper and toast the pine nuts in a dry skillet over medium heat until they are golden and fragrant. Be sure to stir frequently to prevent burning.
    5. In a small bowl, mix the tahini with lemon juice and water until smooth and slightly runny. Adjust the water amount if necessary to reach your desired consistency.
    6. Once the cauliflower is done, remove it from the oven and let it cool for a few minutes. Combine it with the diced bell pepper in a serving bowl.
    7. Drizzle the tahini mixture over the cauliflower and bell pepper. Sprinkle with toasted pine nuts, chopped parsley, and fresh mint leaves for a burst of flavor and color.

    Pro Tips from Meaghan’s Kitchen

    • Spice it up: Add a pinch of cayenne pepper to the spice mix for a touch of heat.
    • Crispy Cauliflower: Make sure the cauliflower is well-drained before roasting to achieve the perfect crispiness.
    • Tahini Tips: If your tahini is too thick, warm it slightly in the microwave to make it easier to mix.
    • Extra Crunch: Don’t skip the toasting step for the pine nuts; it enhances their flavor and adds an irresistible crunch.
    • Herbaceous Finish: Add a sprinkle of sumac for a tangy, lemony finish.

    Variations & Dietary Swaps

    • Vegetarian Delight: Add roasted chickpeas for added protein and texture.
    • Spice-it-up Version: Incorporate a teaspoon of harissa paste into the tahini drizzle for an extra kick.
    • Kids-Friendly Version: Swap smoked paprika with sweet paprika and omit the cumin for a milder flavor.

    What to Serve With It

    This Spiced Egyptian Roasted Cauliflower Salad pairs beautifully with a chilled glass of Sauvignon Blanc or a side of warm pita bread. For a heartier meal, serve it alongside grilled chicken or lamb kebabs. The salad’s vibrant flavors and textures also complement a simple bowl of couscous or quinoa, allowing the dish to shine as a centerpiece.

    Storage & Meal Prep

    This salad is best enjoyed fresh, but it can be stored in the refrigerator for up to 2 days in an airtight container. If you plan to make it ahead, keep the tahini drizzle and pine nuts separate until just before serving to maintain their texture. Reheat the salad gently in the oven at a low temperature, or enjoy it cold as a refreshing lunch option.

    FAQ

    Can I use frozen cauliflower?

    Yes, you can use frozen cauliflower. Just be sure to thaw and drain it well before roasting to prevent sogginess.

    What’s the best way to toast pine nuts?

    Toast pine nuts in a dry skillet over medium heat, stirring frequently, until they are golden and fragrant. This usually takes about 3-5 minutes.

    Is there a substitute for tahini?

    If tahini isn’t available, you can use almond butter or sunflower seed butter for a similar creamy texture, though the flavor will be different.

    Can I make this salad vegan?

    Absolutely! This recipe is already vegan-friendly as it is free from animal products.

    How can I add more protein to the salad?

    Consider adding roasted chickpeas or grilled tofu for an added protein boost.

    Final Thoughts

    I hope this Spiced Egyptian Roasted Cauliflower Salad with Tahini Drizzle finds its way into your kitchen and becomes a beloved part of your culinary repertoire. Its unique combination of flavors and textures is sure to impress at any gathering or simply elevate a weekday dinner. I’d love to hear how it turns out for you, so please share your thoughts or variations in the comments below. Happy cooking, my friends!

    Related update: Spiced Egyptian Roasted Cauliflower Salad with Tahini Drizzle

    Related update: Garlicky Kale with Toasted Pine Nuts and Sun-Dried Tomatoes
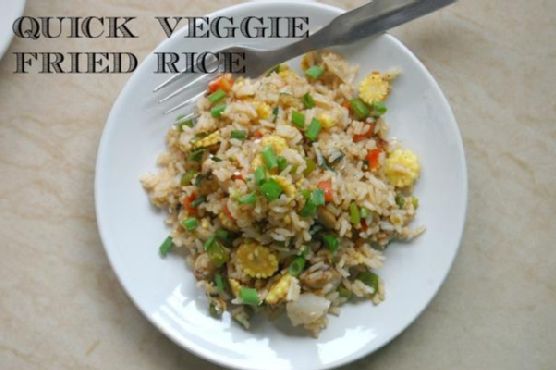
  • Umami-Packed Truffle Veggie Fried Rice with Crispy Shiitake | Made by Meaghan Moineau

    Umami-Packed Truffle Veggie Fried Rice with Crispy Shiitake | Made by Meaghan Moineau

    Umami-Packed Truffle Veggie Fried Rice with Crispy Shiitake

    Imagine walking into a kitchen filled with the earthy aroma of sautéed garlic and ginger, mingling with the rich scent of truffle oil. The sound of sizzling vegetables in the wok invites you closer, promising a dish that’s both comforting and luxurious. This is not just any fried rice; this is an Umami-Packed Truffle Veggie Fried Rice with Crispy Shiitake — a gourmet twist on a beloved classic.

    Personal Story

    My journey with fried rice started in my grandmother’s bustling kitchen, where the scent of soy sauce and sesame oil was as familiar as a warm hug. I remember sitting on the counter, peering over the edge of her well-worn wok, entranced by the rhythm of her spatula as she expertly tossed the rice and vegetables. Despite my fascination, I was too young to understand the magic of her seasoned hands, but I could certainly taste it.

    Years later, as I began exploring my culinary path, I found myself yearning to recreate those flavors. However, a kitchen mishap became a turning point: I accidentally added a drizzle of truffle oil to my rice while reaching for the soy sauce. What I expected to be a disaster turned out to be a revelation. The truffle oil added an unexpected depth, transforming the dish from simple to sensational. It was as if I had discovered a secret ingredient that could elevate a classic to new heights.

    Since that day, Umami-Packed Truffle Veggie Fried Rice with Crispy Shiitake has become a staple in my kitchen, a dish that marries the comforting nostalgia of my grandmother’s recipe with the sophisticated allure of gourmet dining. It’s a dish that tells a story — of tradition and innovation, of happy accidents and culinary inspiration.

    On a recent evening, as I stood in my kitchen, I couldn’t help but smile. The aroma of the sizzling shiitake mushrooms brought me back to those childhood days, but the luxurious twist of truffle reminded me of how far I’ve come. Each bite is a celebration of flavors that I can’t wait for you to experience.

    What Makes This Version Special

    What sets this version of fried rice apart is its luxurious infusion of truffle oil and the delightful crunch of crispy shiitake mushrooms. Traditional fried rice is undeniably comforting, but adding a touch of truffle oil transforms it into a sophisticated dish that’s perfect for any occasion. The crispy shiitake mushrooms provide a textural contrast that elevates the dish, making every bite an experience.

    Most fried rice recipes skip the step of separately sautéing the mushrooms, but this simple technique makes all the difference. By cooking the mushrooms until they’re golden and crisp, you add a layer of flavor that’s both earthy and umami-rich. This dish is not just a meal; it’s a journey of flavors and textures that will make you rethink everything you thought you knew about fried rice.

    Flavor Profile

    Prepare to be swept away by the earthy, aromatic notes of ginger and garlic, which form the foundation of this dish. The truffle oil adds a luxurious umami depth that’s both velvety and intoxicating, while the citrusy hint of lime juice cuts through the richness, leaving a refreshing finish on your palate. The crispy shiitake mushrooms bring an additional dimension with their nutty, savory crunch, creating a symphony of flavors that dance in your mouth.

    Ingredients

    • 3 teaspoons sesame oil, divided
    • 1 tablespoon minced ginger
    • 2 teaspoons minced garlic, divided
    • **1 cup shiitake mushrooms, sliced**
    • 1 cup baby corns, sliced
    • 1/2 cup green onions (white part), chopped
    • 1 carrot, julienned
    • 1 bell pepper, sliced
    • 2 tablespoons low sodium soy sauce
    • Salt and black pepper, to taste
    • **1 tablespoon truffle oil**
    • 1/2 cup edamame, shelled
    • Fresh cilantro, for garnish
    • **Juice of 1 lime**
    • 2 cups cooked cold rice
    • Sesame seeds, for garnish

    Instructions

    1. Heat a wok or large skillet over medium-high heat and add 1 teaspoon of sesame oil. Once shimmering, add the minced ginger and 1 teaspoon of minced garlic. Sauté for about 1 minute until fragrant but not burnt.
    2. Add the sliced shiitake mushrooms to the wok. Cook them until they are golden-brown and crispy, about 5-6 minutes. Keep an eye on them to prevent burning. Once done, transfer them to a bowl along with any juices.
    3. Heat the wok again and add another teaspoon of sesame oil. Add the remaining garlic and sauté until fragrant, about 30 seconds.
    4. Introduce all the vegetables (baby corns, green onions, carrot, bell pepper) to the wok. Stir them together over high heat, adding a pinch of salt, black pepper, and a splash of soy sauce. Toss to coat and let them cook for a few more minutes until they’re tender but still have a slight crunch.
    5. Add the cold, cooked rice to the wok. Gently stir everything together to combine, taking care not to break the rice grains. Allow the rice to warm through, maintaining a medium-high heat.
    6. Drizzle the remaining teaspoon of sesame oil over the rice, along with the rest of the soy sauce, and season with salt and pepper to taste. Return the crispy mushrooms to the pan. Mix gently, ensuring everything is well combined.
    7. Finish the dish with a drizzle of truffle oil and a squeeze of lime juice. Toss and taste, adjusting seasoning if necessary.
    8. Serve the fried rice garnished with the green parts of the green onions, a sprinkle of sesame seeds, and fresh cilantro.

    Pro Tips from Meaghan’s Kitchen

    • Use cold, day-old rice for the best texture in your fried rice. Freshly cooked rice can become mushy when stir-fried.
    • For the crispiest shiitake mushrooms, make sure not to overcrowd the pan. Cook them in batches if necessary to ensure even browning.
    • Adjust the amount of truffle oil to your taste. A little goes a long way, so start with a small amount and add more if desired.
    • To enhance the umami flavor, try adding a splash of fish sauce or miso paste to the rice during cooking.
    • If you’re short on time, pre-chop all your vegetables and have them ready to go before you start cooking. This will make the stir-frying process much smoother.

    Variations & Dietary Swaps

    • Vegetarian Swap: Use tofu instead of mushrooms for a protein-packed vegetarian option. Cook the tofu cubes until golden before adding them to the rice.
    • Spice-It-Up Version: Add a diced chili pepper or a dash of sriracha sauce for a spicy kick that complements the savory flavors.
    • Kids-Friendly Version: Omit the truffle oil and add a handful of sweet peas or corn kernels for a milder, kid-approved version of this dish.

    What to Serve With It

    This Umami-Packed Truffle Veggie Fried Rice with Crispy Shiitake pairs beautifully with a chilled glass of sake or a light, crisp white wine. For a complete meal, serve it alongside a simple cucumber salad or a bowl of miso soup to enhance the Asian fusion experience. The refreshing notes of these sides will balance the rich flavors of the fried rice perfectly.

    Storage & Meal Prep

    If you have leftovers, store the fried rice in an airtight container in the refrigerator for up to 3 days. To reheat, add a splash of water or soy sauce to a pan and warm the rice over medium heat, stirring occasionally to ensure even heating. For longer storage, freeze the fried rice in portions for up to 2 months. Thaw in the fridge overnight before reheating.

    FAQ

    Can I use other types of mushrooms?

    Absolutely! While shiitake mushrooms add a unique flavor and texture, you can substitute them with button mushrooms or portobello for a different taste.

    Do I have to use truffle oil?

    Truffle oil is optional, but it adds a luxurious depth to the dish. If you prefer a simpler flavor, you can omit it or substitute with a flavored olive oil.

    Why is my rice mushy?

    Mushy rice usually results from using freshly cooked rice. Be sure to use cold, day-old rice for the best texture in your fried rice.

    Can I add protein to this dish?

    Yes, you can easily add protein such as shrimp, chicken, or tofu. Cook the protein separately and add it to the rice during the final mixing stage.

    How can I make this dish gluten-free?

    To make this dish gluten-free, use tamari or a gluten-free soy sauce instead of regular soy sauce. Ensure all other ingredients are gluten-free as well.

    Final Thoughts

    Cooking is about embracing creativity and making each dish your own. This Umami-Packed Truffle Veggie Fried Rice with Crispy Shiitake is not just a recipe, but an invitation to explore flavors and techniques that elevate a classic into something extraordinary. I hope you enjoy making and sharing this dish as much as I do. I’d love to hear your thoughts and see your creations — feel free to leave a comment below or tag me in your culinary adventures. Happy cooking!

    Related update: Umami-Packed Truffle Veggie Fried Rice with Crispy Shiitake

    Related update: Mediterranean Stuffed Eggplants with Spiced Sausage and Herb-Crust

  • Spiced Rhubarb and Apple Phyllo Pockets with Hazelnut Drizzle | Made by Meaghan Moineau

    Spiced Rhubarb and Apple Phyllo Pockets with Hazelnut Drizzle | Made by Meaghan Moineau

    Spiced Rhubarb and Apple Phyllo Pockets with Hazelnut Drizzle

    Imagine biting into a warm, flaky pastry where the crunch gives way to a sweet and tart filling, perfumed with the scent of cinnamon and ginger, and topped with a luscious hazelnut drizzle. It’s not just dessert; it’s an experience to savor. Welcome to the world of Spiced Rhubarb and Apple Phyllo Pockets — a creation where the familiar meets the extraordinary.

    Personal Story

    It was a crisp autumn afternoon when I first stumbled upon the idea of making Spiced Rhubarb and Apple Phyllo Pockets. I was at the farmers’ market, surrounded by vibrant displays of fall produce. The rhubarb’s bright red stalks caught my eye, and I felt a pang of nostalgia. My grandmother used to bake rhubarb pie every Sunday, her farmhouse kitchen filled with a warm, comforting aroma that could chase away the chill of any October day.

    As a child, I’d sit on the worn wooden stool by the counter, eyes wide with anticipation as I watched her work magic with simple ingredients. The way she handled the dough, effortlessly rolling and folding, was like watching a dance. I wanted to capture that magic but with my own twist, something that would honor her legacy yet stand on its own.

    Fast forward a few years; I found myself experimenting with phyllo dough, its delicate layers a new canvas for my culinary adventures. The idea to meld the tartness of rhubarb with the crisp sweetness of Granny Smith apples struck me like a revelation. I added a dash of cinnamon and ginger, warming spices that evoke the coziness of a fall evening. To top it all off, a hazelnut drizzle — a nutty, sweet finish that tied everything together.

    My first batch of Spiced Rhubarb and Apple Phyllo Pockets wasn’t without hiccups. A phyllo sheet tore, the filling escaped, but the taste was incredible. With each attempt, I perfected the technique, and now, it’s a staple in my fall dessert repertoire. Every bite is a tribute to my grandmother, a nod to tradition with a deliciously modern twist.

    What Makes This Version Special

    What sets these Spiced Rhubarb and Apple Phyllo Pockets apart is the clever interplay of flavors and textures. The addition of diced Granny Smith apples introduces a crisp, sweet contrast to the tartness of the rhubarb. Meanwhile, the spiced hazelnut drizzle brings an unexpected yet delightful nuttiness that elevates the entire dish. Unlike a traditional rhubarb pie, these pockets offer a sophisticated spin, perfect for impressing dinner guests or savoring a quiet moment alone.

    Flavor Profile

    Prepare for a symphony of flavors with every bite of these phyllo pockets. The filling marries the sweet-tart blend of rhubarb and Granny Smith apples, enriched by the aromatic warmth of cinnamon and ginger. As you bite through the flaky, buttery layers of the phyllo, the crunch gives way to the juicy filling, which is perfectly complemented by the rich, nutty sweetness of the hazelnut drizzle. It’s a culinary journey that takes your taste buds from tangy heights to warm, spiced depths.

    Ingredients

    • 2 cups diced rhubarb
    • 1 cup diced Granny Smith apples
    • 1/2 cup granulated sugar
    • 2 tablespoons cornstarch
    • 1/4 teaspoon salt
    • 1 teaspoon vanilla extract
    • 1 teaspoon **cinnamon**
    • 1/2 teaspoon **ground ginger**
    • 8 phyllo sheets
    • 1/2 cup melted butter
    • 1/2 cup **chopped toasted hazelnuts**
    • 1/4 cup **honey**

    Instructions

    1. Combine the diced rhubarb, sugar, cornstarch, and salt in a medium saucepan over medium-low heat. Cook, stirring occasionally, until the rhubarb releases its liquid and begins to break down, creating a thick, chunky sauce, about 10 minutes. Remove from heat and stir in the vanilla extract. Set aside to cool to room temperature.
    2. In a small saucepan, melt a tablespoon of butter over low heat. Add the cinnamon and ground ginger, blooming them in the butter for about 30 seconds until aromatic. Stir this fragrant mixture into the rhubarb filling for added depth of flavor.
    3. Preheat the oven to 350°F (175°C). Layer four phyllo sheets, brushing each sheet with melted butter as you stack them. This ensures a crispy, golden outcome.
    4. Cut the phyllo stack into four 4-inch squares. Place 2 teaspoons of the cooled rhubarb and apple filling in the center of each square.
    5. Brush the edges of the phyllo from the filling to each point of the square lightly with water. Gather the points and pinch them together just above the filling to form a pouch. Brush the outside with butter to achieve that beautiful golden-brown finish.
    6. Place the filled pouches at least 1 inch apart on an ungreased baking sheet. Bake in the preheated oven for 12 to 15 minutes, or until the phyllo is crisp and golden brown.
    7. While the pockets bake, prepare the hazelnut drizzle. In a small saucepan, gently warm the honey and chopped toasted hazelnuts together until the honey is thin and the nuts are thoroughly coated. Remove from heat.
    8. Once the pockets are baked, remove them from the oven and let them cool on a wire rack for about 5 minutes. Drizzle the warm hazelnut honey over each pocket before serving.

    Pro Tips from Meaghan’s Kitchen

    • Always keep your phyllo sheets covered with a damp cloth while working to prevent them from drying out and becoming brittle.
    • If you don’t have hazelnuts, walnuts or pecans make a great substitute, offering a different but equally delicious nutty flavor.
    • For an even crispier texture, consider using clarified butter to brush the phyllo sheets.
    • Make sure your filling is completely cooled before assembling the pockets to avoid soggy dough.
    • Blooming your spices in butter is a game changer — it releases their full aromatic potential and infuses your dishes with deeper flavor.

    Variations & Dietary Swaps

    • Vegetarian Swap: This dish is naturally vegetarian, but for a vegan version, use vegan butter and agave nectar instead of honey for the drizzle.
    • Spice-it-up Version: Add a pinch of cayenne pepper to the filling for a surprising kick that will excite your taste buds.
    • Kids-friendly Version: Reduce the amount of ginger and cinnamon for a milder flavor that children will enjoy. You can also involve them in the assembly process for some family fun!

    What to Serve With It

    These Spiced Rhubarb and Apple Phyllo Pockets are a treat on their own, but they truly shine when paired with the right accompaniments. Serve them with a cold glass of apple cider for a refreshing contrast or, for an indulgent touch, a scoop of creamy vanilla ice cream. The warmth of the pockets against the chill of the ice cream creates a delightful taste and temperature sensation.

    Storage & Meal Prep

    These phyllo pockets can be stored in the refrigerator for up to three days. To maintain their crispiness, reheat them in a preheated oven at 350°F (175°C) for about 5-7 minutes. If you’d like to prep them ahead of time, assemble the pockets and freeze them unbaked. When ready to enjoy, bake straight from the freezer, adding a few extra minutes to the baking time.

    FAQ

    Can I use frozen rhubarb for this recipe?

    Yes, you can use frozen rhubarb. Just make sure to thaw and drain it well before using to avoid excess moisture in your filling.

    What if I can’t find phyllo dough?

    If phyllo dough is unavailable, you can substitute with puff pastry for a flakier texture. Adjust the baking time accordingly, as puff pastry may take a bit longer to achieve a golden brown color.

    Can I make the filling in advance?

    Absolutely! The filling can be made up to two days in advance and stored in the refrigerator. This not only saves time but also allows the flavors to meld together beautifully.

    What other nuts can I use instead of hazelnuts?

    Walnuts, pecans, or even almonds work well as substitutes for hazelnuts. Each type of nut will bring its own unique flavor profile to the dish.

    Final Thoughts

    Creating these Spiced Rhubarb and Apple Phyllo Pockets with Hazelnut Drizzle is like embarking on a culinary adventure, one that rewards with every flaky, sweet, and aromatic bite. I hope this recipe brings as much joy to your kitchen as it does to mine. I would love to hear your thoughts and see your creations, so please leave a comment below or share your photos on social media. Let’s keep the conversation (and the deliciousness) going!

    Related update: Spiced Rhubarb and Apple Phyllo Pockets with Hazelnut Drizzle

    Related update: Zesty Lemon-Lavender Bundt Cake with Vanilla Bean Glaze

  • Tropical Vegan Ambrosia Salad with Toasted Coconut and Lime Zest | Made by Meaghan Moineau

    Tropical Vegan Ambrosia Salad with Toasted Coconut and Lime Zest | Made by Meaghan Moineau

    Tropical Vegan Ambrosia Salad with Toasted Coconut and Lime Zest

    Imagine a lazy afternoon, the sun gently warming your skin as a cool breeze carries the scent of the sea. You’re about to dig into a bowl of Tropical Vegan Ambrosia Salad, where each bite transports you to a sun-soaked paradise with its blend of juicy fruits and creamy, nutty undertones. This salad isn’t just a dish; it’s an experience that captures the essence of summer in every spoonful.

    Personal Story

    The first time I encountered ambrosia salad was during a family picnic at the beach. I was just a kid, and my aunt brought a bowl of this mysterious creamy fruit concoction. I remember being skeptical at first — fruit in a creamy dressing? It sounded bizarre. But one taste, and I was hooked. The sweetness of the marshmallows, the tanginess of the fruits, and the subtle crunch of the nuts made it the highlight of that summer day.

    Fast forward a few years, and I was in my own kitchen, trying to recreate that nostalgic dish. My first few attempts were, shall we say, less than stellar. I over-whipped the cream once, turning it into a buttery mess, and another time I forgot to drain the fruit, resulting in a soupy disaster. But each mistake taught me something valuable, bringing me one step closer to mastering this classic.

    Then, during a trip to the Caribbean, inspiration struck. The local flavors, especially the abundance of coconut and citrus, made me rethink my approach to ambrosia. I decided to give this traditional American dish a tropical twist with toasted coconut and lime zest, adding a whole new dimension to the flavor profile.

    Now, every time I make this Tropical Vegan Ambrosia Salad, it reminds me of that transformative trip. It’s a reminder of how deliciously unpredictable life can be when you dare to experiment and embrace new flavors.

    What Makes This Version Special

    This Tropical Vegan Ambrosia Salad is not your grandmother’s ambrosia. By incorporating toasted coconut flakes, we introduce a nutty depth that complements the creamy and sweet nature of the dish. The addition of lime zest provides a zesty kick that elevates the freshness and keeps each bite exciting. Unlike the standard recipe, which can sometimes feel overly sweet, this version balances the flavors beautifully. The nuttiness from the coconut and the citrusy brightness from the lime zest make this ambrosia a standout at any gathering.

    Flavor Profile

    The taste of this salad is like a tropical escape in a bowl. From the first bite, you’ll be greeted by the rich creaminess of vegan heavy cream, perfectly balanced by the sweet-tart medley of clementine oranges and fresh pineapple. Toasted coconut flakes add a delightful crunch and a nutty aroma that fills the kitchen as they brown on the skillet. The lime zest provides a refreshing zing, cutting through the sweetness and highlighting the tropical notes. The vegan marshmallows melt slightly, adding a playful, pillowy texture, while the pecans and maraschino cherries offer a classic touch.

    Ingredients

    • 1 cup plain vegan heavy cream
    • 2 tablespoons sugar
    • 1 cup sour vegan cream
    • 1 cup vegan marshmallows
    • 1 cup clementine orange segments
    • 1 cup fresh pineapple, diced
    • 1/2 cup coconut flakes
    • 1/2 cup pecans, chopped
    • 1/2 cup maraschino cherries, halved
    • 1/2 cup toasted coconut flakes
    • Zest of 1 lime
    • A pinch of sea salt
    • Fresh mint leaves for garnish

    Instructions

    1. Begin by toasting the coconut flakes. Place them in a dry skillet over medium heat. Stir frequently for about 5 minutes, or until they’re golden-brown and aromatic.
    2. In the bowl of a stand mixer fitted with the whisk attachment, combine the plain vegan heavy cream and sugar. Whip on medium-high speed until stiff peaks form, about 3-5 minutes.
    3. Add the sour vegan cream to the whipped mixture, whisking just until combined to maintain the fluffy texture.
    4. Gently fold in the vegan marshmallows, clementine orange segments, fresh pineapple, chopped pecans, and maraschino cherries. Stir gently to ensure even distribution without deflating the mixture.
    5. Once the fruits and nuts are mixed in, fold in the toasted coconut flakes, lime zest, and a pinch of sea salt. This step balances the sweetness and adds depth to the flavors.
    6. Transfer the mixture to a large, clear glass serving bowl. Cover with plastic wrap and refrigerate for at least 2 hours to allow the flavors to meld and the marshmallows to soften.
    7. Before serving, garnish with fresh mint leaves for a pop of color and a hint of minty freshness.

    Pro Tips from Meaghan’s Kitchen

    • For the best results, use fresh, ripe fruits to enhance the natural sweetness and juiciness of the salad.
    • Ensure your mixing bowl and whisk are completely dry before whipping the cream — any moisture can prevent it from reaching stiff peaks.
    • Let the toasted coconut cool completely before adding it to the salad to maintain its crunch.
    • For an extra layer of flavor, you can lightly roast the pecans before chopping them.
    • If you find the salad too sweet, add an extra pinch of salt or an additional sprinkle of lime zest to balance it out.

    Variations & Dietary Swaps

    • Nut-Free Version: Omit the pecans and increase the amount of toasted coconut flakes for added crunch.
    • Spice-It-Up Version: Add a pinch of cayenne pepper or a dash of chili powder to the whipped cream mixture for a subtle kick.
    • Kids-Friendly Version: Swap the lime zest with a teaspoon of vanilla extract for a sweeter, more familiar flavor that kids love.

    What to Serve With It

    This Tropical Vegan Ambrosia Salad pairs beautifully with a chilled glass of sparkling grapefruit soda. The citrusy bubbles complement the salad’s tropical flavors and provide a refreshing contrast. For a more substantial meal, serve it alongside grilled tofu skewers or a light vegan pasta dish. The salad’s creaminess also works well as a palate cleanser after a spicy main course.

    Storage & Meal Prep

    Store any leftover salad in an airtight container in the refrigerator for up to 3 days. While the flavors will continue to meld, the toasted coconut may lose some of its crunch. To revive the salad before serving, give it a gentle stir and add a fresh sprinkle of lime zest. Due to the fresh fruits and cream base, this recipe is not suitable for freezing.

    FAQ

    Can I use canned fruit instead of fresh?

    Yes, you can use canned fruit, but make sure to thoroughly drain and pat them dry to avoid a watery salad. Fresh fruit is preferable for optimal texture and flavor.

    Is there a substitute for vegan marshmallows?

    If vegan marshmallows are hard to find, you can use small pieces of coconut jelly or agar-based fruit gummies as an alternative.

    Can I make this salad ahead of time?

    Absolutely! Preparing the salad a day in advance allows the flavors to develop. Just be sure to add the garnishes right before serving.

    How can I make this salad sweeter?

    If you prefer a sweeter ambrosia, increase the sugar in the whipped cream mixture by a tablespoon or add a drizzle of agave nectar.

    What’s the best way to zest a lime?

    Use a microplane or fine grater. Be cautious to only zest the green surface and avoid the bitter white pith underneath.

    Final Thoughts

    There you have it — a Tropical Vegan Ambrosia Salad that brings sunshine to your plate, no matter the season. I hope you enjoy making and sharing this delightful dish as much as I do. Feel free to leave a comment with your thoughts or any personal twists you’ve tried. And if you love it, share the recipe with friends and spread the joy of this tropical treat. Happy cooking, and may your kitchen adventures always be delicious!

    Related update: Tropical Vegan Ambrosia Salad with Toasted Coconut and Lime Zest

    Related update: Spiced Egyptian Roasted Cauliflower Salad with Tahini Drizzle

  • Nutty Banana-Peanut Butter Breakfast Cookies with Dark Chocolate and Sea Salt | Made by Meaghan Moineau

    Nutty Banana-Peanut Butter Breakfast Cookies with Dark Chocolate and Sea Salt | Made by Meaghan Moineau

    Nutty Banana-Peanut Butter Breakfast Cookies with Dark Chocolate and Sea Salt

    Picture this: the comforting aroma of warm peanut butter wafting through your kitchen, mingling with the irresistible scent of melting dark chocolate, as you anticipate a sweet, nutty bite of goodness. These Nutty Banana-Peanut Butter Breakfast Cookies with Dark Chocolate and Sea Salt are about to become your new morning obsession.

    Personal Story

    There was a time when breakfast in my house was a hurried affair, where a quick slice of toast or a bowl of cereal had to suffice before dashing out the door. But everything changed the morning I discovered the joy of breakfast cookies. It was a chilly autumn day, and I was craving something warm and comforting that I could enjoy leisurely with my cup of chai tea. That was the day these Nutty Banana-Peanut Butter Breakfast Cookies were born.

    The inspiration came from a kitchen mishap, believe it or not. I had intended to make banana bread, but with a toddler tugging at my apron strings, I misjudged the batter’s consistency and ended up with dough instead. With a quick pivot, I decided to scoop the mixture onto a baking sheet, and, voilà, breakfast cookies emerged from the oven.

    As I took my first bite, the sweet nuttiness combined with the rich chocolate finish and a hint of sea salt danced on my palate. It was a revelation. These cookies offered the comfort of a homemade breakfast with the portability of a grab-and-go snack, making them perfect for busy mornings.

    Since that serendipitous kitchen experiment, these cookies have become a staple in my family. I love making them ahead of a busy week, knowing that I have a delicious and wholesome option ready to go. Plus, they’re a hit with my little one, who loves to help me mix the ingredients and sprinkle the sea salt. It’s these simple, joyful moments that make cooking such a cherished part of my day.

    What Makes This Version Special

    What sets my Nutty Banana-Peanut Butter Breakfast Cookies apart is the luxurious touch of pure maple syrup and the strategic sprinkle of sea salt. The maple syrup adds a layer of richness that complements the creamy peanut butter and sweet bananas, creating a flavor profile that’s both familiar and elevated. Meanwhile, a sprinkle of sea salt on top of the cookies right after baking enhances the sweetness while balancing the nutty, chocolatey notes, offering a delightful contrast that keeps you reaching for just one more.

    Flavor Profile

    These breakfast cookies deliver a sweet, nutty, and slightly salty flavor experience. Imagine biting into a cookie where the warmth of creamy peanut butter meets the tropical sweetness of bananas, all underscored by the crunch of toasted mixed nuts. The dark chocolate chips melt into pockets of rich, velvety goodness, while the sea salt brightens each bite, making the flavors pop. It’s a harmonious blend that satisfies both sweet and savory cravings.

    Ingredients

    • 3 ripe bananas, mashed
    • 1/2 cup butter flavor shortening
    • **1 cup dark chocolate chips**
    • **1/2 cup creamy peanut butter**
    • 1 cup mixed nuts, lightly toasted
    • 2 cups oatmeal
    • 1/2 cup unsweetened applesauce
    • 1 teaspoon vanilla extract
    • 1 scoop vanilla protein powder
    • **1/4 cup pure maple syrup**
    • **Sea salt**, for sprinkling

    Instructions

    1. Preheat your oven to 350°F (175°C).
    2. In a large mixing bowl, combine the mashed bananas and creamy peanut butter until smooth and fully integrated.
    3. Add the unsweetened applesauce, vanilla protein powder, and vanilla extract to the banana mixture. Stir until all ingredients are well combined.
    4. Introduce the oatmeal and toasted mixed nuts to the bowl, and fold them into the banana mixture. If you prefer the chocolate chips mixed throughout, add them at this stage. Let the dough rest for 10 minutes to allow the oats to absorb moisture.
    5. Line a baking sheet with parchment paper. Drop spoonfuls of cookie dough onto the sheet, flattening each spoonful into a circle.
    6. For cookies with chocolate chips on top, sprinkle them now, pressing gently so they adhere.
    7. Bake in the preheated oven for 20-30 minutes, adjusting the time based on your preference for softer or crisper cookies. Look for a golden-brown color as a visual cue for doneness.
    8. Upon removing from the oven, sprinkle a pinch of sea salt over the warm cookies to enhance the sweetness and balance the flavors.
    9. Allow the cookies to rest on the baking sheet for 5 minutes before transferring to a cooling rack. If desired, use a pizza cutter or sharp knife to score the tops for a traditional look.
    10. Once completely cool, store the cookies in an airtight container. Enjoy them fresh or with your favorite cup of tea.

    Pro Tips from Meaghan’s Kitchen

    • Toasting the nuts: Lightly toasting the mixed nuts in a dry pan before incorporating them into the dough intensifies their flavor and adds a satisfying crunch.
    • Optimal banana ripeness: Use bananas that are ripe but not overly mushy for the best sweetness and texture.
    • Protein boost: Adjust the protein powder amount to suit your dietary needs, or substitute with almond flour for a different texture.
    • Sea salt timing: Sprinkle the sea salt immediately after baking while the cookies are still warm to ensure it adheres properly and enhances flavors.
    • Batch baking: Double the recipe and freeze half the dough for a quick, fresh batch later.

    Variations & Dietary Swaps

    • Vegetarian Swap: Ensure your vanilla protein powder is plant-based to maintain a vegetarian-friendly cookie.
    • Spice-it-up Version: Add a teaspoon of cinnamon or nutmeg to the dough for a warming spice twist.
    • Kids-Friendly Version: Substitute the dark chocolate chips with mini chocolate chips, and involve the kids in shaping the cookies for a fun family activity.

    What to Serve With It

    These Nutty Banana-Peanut Butter Breakfast Cookies are perfectly complemented by a steaming cup of chai tea, which enhances the warm spices and nuttiness. Alternatively, an almond milk latte offers a creamy, nutty counterpart to the rich chocolate finish of the cookies.

    Storage & Meal Prep

    For optimal freshness, store the cookies in an airtight container at room temperature for up to three days. For longer storage, place them in the refrigerator for up to a week. To freeze, lay the cookies flat in a single layer on a baking sheet, freeze until solid, then transfer to a freezer-safe bag or container. Reheat frozen cookies in a preheated oven at 300°F (150°C) for 5-8 minutes or until warm.

    FAQ

    Can I use a different type of nut butter?

    Absolutely! Almond butter or cashew butter would work wonderfully and bring their own unique flavors to the cookies.

    How can I make these cookies gluten-free?

    Simply substitute gluten-free oats into the recipe, ensuring all other ingredients are certified gluten-free as well.

    What if I don’t have vanilla protein powder?

    No problem! You can omit the protein powder or replace it with almond flour or additional oatmeal to maintain the texture.

    Can I use honey instead of maple syrup?

    Yes, honey can be used as a substitute for maple syrup, but note that it may slightly alter the flavor profile.

    How do I know when the cookies are fully baked?

    The cookies are done when they achieve a lovely golden-brown color. If you prefer them softer, aim for a lighter golden hue.

    Final Thoughts

    These Nutty Banana-Peanut Butter Breakfast Cookies with Dark Chocolate and Sea Salt are a delightful way to start your day or enjoy as a midday snack. Their balanced flavor profile and wholesome ingredients make them a favorite in my household, and I hope they become a staple in yours as well. I’d love to hear how they turned out for you, so feel free to leave a comment or share your own twists on the recipe. Happy baking!

    Related update: Nutty Banana-Peanut Butter Breakfast Cookies with Dark Chocolate and Sea Salt

  • Spicy Sardine Croquettes with Zesty Lime-Cilantro Aioli | Made by Meaghan Moineau

    Spicy Sardine Croquettes with Zesty Lime-Cilantro Aioli | Made by Meaghan Moineau

    Spicy Sardine Croquettes with Zesty Lime-Cilantro Aioli

    Picture this: the sizzle of croquettes hitting hot oil, a scent of garlic wafting through the kitchen, and a hint of lime cutting through the air with its zesty promise. This isn’t just any croquette; it’s a symphony of flavors, a Spanish classic reimagined with a refreshing and flavorful twist. Welcome to the world of Spicy Sardine Croquettes with Zesty Lime-Cilantro Aioli!

    Personal Story

    I still remember the first time I encountered croquettes. It was a sunny afternoon in Barcelona, sitting in a vibrant tapas bar tucked away in a cobblestone alley. The locals’ laughter harmonized with the clinking of glasses, and I had my first bite of a perfectly crisp, savory croquette. It was love at first taste.

    Returning home, I was determined to recreate that magical experience in my own kitchen. However, my initial attempts were, let’s say, less than successful. There was the time I confused baking powder with baking soda — the result was more of a pancake than a croquette. Or the afternoon when I learned the hard way that patience is a virtue as I hastily turned the croquettes too soon, leaving them pale and unsatisfying.

    But, as with any good recipe, persistence led to perfection. After many trials (and errors), I discovered that the secret to a truly remarkable croquette was in the details — the ingredients, the techniques, and the flavors that elevate it from ordinary to extraordinary.

    Today, I’m thrilled to share this special Spicy Sardine Croquettes recipe with you. It’s a testament to those sunlit afternoons in Spain and my kitchen escapades, with a delightful twist: a tangy lime-cilantro aioli and a hint of smoked paprika that make these croquettes stand out. Let’s dive into what makes this version something truly special.

    What Makes This Version Special

    What sets these Spicy Sardine Croquettes apart from the traditional recipe is the harmonious blend of classic and innovative elements. The addition of a tangy lime-cilantro aioli offers a refreshing contrast to the rich, savory croquettes, making every bite a delightful explosion of flavor. The aioli not only adds brightness but also enhances the overall taste experience with its herbaceous, zesty notes.

    Moreover, the hint of smoked paprika in the breadcrumbs provides these croquettes with a subtle yet distinctive smoky taste that elevates the dish. This spice, along with the briny depth of the sardines and the creaminess of parmesan cheese, creates a nuanced flavor profile that’s both comforting and bold. This version is more than just a snack; it’s a gourmet experience that’s better than the standard recipe because it plays with textures and flavors in a way that’s both familiar and exciting.

    Flavor Profile

    The Spicy Sardine Croquettes with Zesty Lime-Cilantro Aioli present a multi-layered taste adventure that’s hard to resist. Imagine biting into a perfectly crisp exterior, revealing a savory, moist interior bursting with the umami of sardines and the richness of parmesan cheese. The smoked paprika introduces a gentle, smoky undertone that lingers just long enough to intrigue your palate.

    Then comes the aioli — a vibrant, citrusy kick that brightens the dish. The lime juice and zest cut through the richness, while the cilantro adds a refreshing, aromatic note. Finally, the jalapeño pepper brings a gentle heat, ensuring that these croquettes are not just flavorful but also spirited. Together, these elements create a dish that is deeply satisfying and unexpectedly complex.

    Ingredients

    • 1 can sardines, drained
    • 2 cups frozen cassava, thawed
    • 1/2 cup parmesan cheese, grated
    • 2 egg yolks
    • 2 egg whites
    • 1 teaspoon baking powder
    • 1 cup plain bread crumbs
    • 1 tablespoon smoked paprika
    • 1/4 cup fresh cilantro, chopped
    • 1 clove garlic, minced
    • 1/2 teaspoon salt
    • 1/2 teaspoon black pepper
    • 1 lime, zested and juiced
    • 1 cup mayonnaise
    • 1 jalapeño pepper, minced
    • Oil for frying

    Instructions

    1. In a pot, bring salted water to a boil and cook the frozen cassava (yuca) until fork-tender, about 20 minutes. Drain and mash until smooth.
    2. In a large mixing bowl, combine the mashed cassava, drained sardines, parmesan cheese, egg yolks, baking powder, salt, pepper, and cilantro. Mix well until the ingredients are fully incorporated.
    3. Preheat the oil in a frying pan over medium heat. Add the minced garlic to the oil and let it infuse for about 2 minutes, then remove the garlic to prevent burning.
    4. With wet hands, shape the sardine mixture into small balls. Dip each ball into the egg whites, then roll in the smoked paprika-infused bread crumbs, ensuring each croquette is evenly coated.
    5. Carefully place the croquettes in the hot oil. Fry until golden-brown on all sides, about 4-5 minutes per batch. Remove and let them rest on a double-lined paper towel to absorb excess oil.
    6. For the aioli, in a small bowl, mix the mayonnaise, lime zest, lime juice, and minced jalapeño pepper. Stir until smooth and well combined.
    7. Serve the croquettes hot alongside the zesty lime-cilantro aioli for dipping.

    Pro Tips from Meaghan’s Kitchen

    • When mashing the cassava, ensure it’s smooth to avoid any lumps in your croquettes.
    • Infusing the oil with garlic before frying adds an aromatic depth to the croquettes. Just remember to remove the garlic to prevent it from burning.
    • Use a thermometer to maintain the oil temperature around 350°F for even frying without the croquettes absorbing too much oil.
    • For an extra crispy texture, double dip the croquettes in egg whites and bread crumbs.
    • Let the croquette mixture chill in the refrigerator for 30 minutes before shaping to make it easier to handle.

    Variations & Dietary Swaps

    • Vegetarian Swap: Replace sardines with mashed chickpeas or cooked lentils for a vegetarian option that retains the protein punch.
    • Spice-It-Up Version: Add a dash of cayenne pepper to the sardine mixture for those who love a fiery kick.
    • Kids-Friendly Version: Omit the jalapeño in the aioli and reduce the smoked paprika for a milder flavor that kids will enjoy.

    What to Serve With It

    These croquettes are wonderfully versatile and pair beautifully with a crisp, cold glass of Sauvignon Blanc, which complements the smoky and tangy flavors. Alternatively, a side of fresh mango salsa can add a sweet and fruity contrast that enhances the overall dish. For a full meal, consider serving with a simple green salad dressed with olive oil and vinegar to keep things light and refreshing.

    Storage & Meal Prep

    To store, place any leftover croquettes in an airtight container in the fridge for up to 3 days. For longer storage, freeze the uncooked, breaded croquettes in a single layer on a baking sheet. Once frozen, transfer them to a freezer-safe bag or container, where they’ll keep for up to 3 months. To reheat, bake the frozen croquettes in a preheated 375°F oven for 15-20 minutes, or until heated through and crispy.

    FAQ

    Can I use fresh cassava instead of frozen?

    Yes, fresh cassava can be used. Just peel and cut it into chunks before boiling. It might take a bit longer to cook, so check for tenderness with a fork before mashing.

    Is there an alternative to frying these croquettes?

    Absolutely! You can bake the croquettes on a baking sheet lined with parchment paper at 400°F for about 20-25 minutes or until golden and crispy.

    How can I make the aioli less spicy?

    To reduce the heat, simply omit the jalapeño pepper or use only half. You can also replace it with a milder pepper if you prefer.

    What if I don’t have smoked paprika?

    Regular paprika will work, though it won’t have the smoky flavor. You can add a drop of liquid smoke to the mixture for a similar effect.

    Can these croquettes be made gluten-free?

    Yes, just substitute the bread crumbs with gluten-free bread crumbs or crushed gluten-free crackers.

    Final Thoughts

    These Spicy Sardine Croquettes with Zesty Lime-Cilantro Aioli are a testament to the fact that classics can be reimagined in deliciously creative ways. Whether you’re hosting a tapas night or simply craving something extraordinary, these croquettes deliver on flavor and flair. I’m excited for you to try them and make them your own. Don’t forget to share your experiences and any unique twists you come up with in the comments below. Happy cooking!

    Related update: Zesty Crab Salad Avocado Boats with Mango Salsa

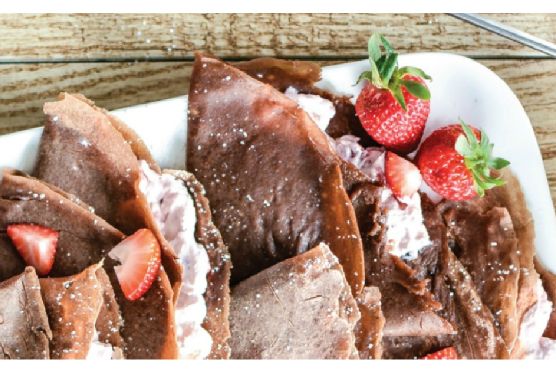
  • Gourmet Strawberry Cheesecake Crepes with Dark Chocolate Ganache | Made by Meaghan Moineau

    Gourmet Strawberry Cheesecake Crepes with Dark Chocolate Ganache | Made by Meaghan Moineau

    Gourmet Strawberry Cheesecake Crepes with Dark Chocolate Ganache

    Imagine the sweet aroma of strawberries mingling with the deep, luscious scent of chocolate as you glide a spatula under a paper-thin crepe, golden-brown and just shy of crisp. This is not just breakfast; it’s an indulgent affair — a dessert masquerading as a morning meal. Welcome to the world of Gourmet Strawberry Cheesecake Crepes with Dark Chocolate Ganache.

    Personal Story

    Growing up, crepes were a Sunday morning tradition in our household. My mother would whip up a batch of the thinnest pancakes, filling them with whatever fruit we had on hand. But it was my grandmother who introduced me to the concept of a crepe as a canvas for dessert. During one summer visit to her home in Provence, she prepared crepes filled with fresh strawberries and cream, drizzled with a simple chocolate sauce. It was love at first bite.

    Years later, as I embarked on my culinary journey, I decided to elevate this childhood delight. I wanted something that captured the essence of those lazy, sun-drenched mornings in Provence but with a touch of sophistication that speaks to my grown-up palate. That’s when I stumbled upon the magic of espresso-infused crepe batter. The hint of coffee elevates the chocolate notes and ties everything together beautifully.

    My first attempt was far from perfect. The filling was too runny, and the ganache seized up at the first hint of moisture. But after countless Sunday experiments, I finally found the balance. Now, every time I make these Gourmet Strawberry Cheesecake Crepes with Dark Chocolate Ganache, I am reminded of those cherished mornings in my grandmother’s kitchen.

    What Makes This Version Special

    What sets these crepes apart is the infusion of espresso in the batter, creating a subtle coffee undertone that enhances the depth of the chocolate ganache. By blooming the cocoa powder and instant espresso in melted butter before adding it to the batter, you unlock a more intense flavor profile that elevates the entire dish. And let’s not forget the luxurious dark chocolate ganache that cascades over the crepes, providing a decadent finish. This is not just another crepe recipe; it’s a sensory experience that transforms breakfast into something extraordinary.

    Flavor Profile

    Each bite of these crepes offers a creamy explosion of flavors: the tangy richness of the cheesecake filling, the burst of fresh strawberries, and the silky ganache — all wrapped in a crepe with a gentle coffee note. The combination of textures and tastes is akin to a symphony, with each ingredient playing its part to perfection. The espresso adds a whisper of warmth and complexity, making these crepes feel like an indulgent treat without being overwhelming.

    Ingredients

    • 1 cup flour
    • 2 tbsp granulated sugar
    • 2 tbsp unsweetened cocoa powder
    • 1/4 tsp kosher salt
    • 2 large eggs
    • 1 cup milk
    • 1/2 cup water
    • 3 tbsp unsalted butter, melted
    • 1 tsp vanilla extract
    • 1 tsp instant espresso powder
    • 8 oz cream cheese, softened
    • 1 cup diced strawberries
    • 1 tsp vanilla extract
    • 1 tbsp lemon juice
    • 3 tbsp granulated sugar
    • 1/2 cup dark chocolate chips
    • 1/4 cup heavy cream

    Instructions

    1. Prepare the Crepe Batter: In a small saucepan, melt 3 tablespoons of unsalted butter over low heat. Once melted, add the unsweetened cocoa powder and instant espresso powder. Stir until fully combined and aromatic. Set aside to cool slightly.
    2. In a blender, combine the flour, 2 tablespoons of granulated sugar, kosher salt, eggs, milk, and water. Blend until smooth. Add the cooled butter mixture and vanilla extract. Blend again until well incorporated. Let the batter rest for at least 30 minutes in the refrigerator.
    3. Make the Strawberry Cheesecake Filling: In a medium bowl, combine the cream cheese, diced strawberries, 1 teaspoon of vanilla extract, lemon juice, and 3 tablespoons of granulated sugar. Mix until smooth and creamy. Set aside.
    4. Cook the Crepes: Heat a crepe pan or an 8-10 inch non-stick skillet over medium heat. Lightly grease with butter. Pour 1/4 cup of batter into the center of the pan and swirl to cover the bottom. Cook for 2-3 minutes, until the bottom is golden-brown and the edges are set. Flip and cook for another minute. Remove and repeat with remaining batter.
    5. Prepare the Dark Chocolate Ganache: Set up a double boiler by placing a heatproof bowl over a pot of simmering water. Add the dark chocolate chips and heavy cream to the bowl. Stir continuously until the chocolate is melted and the mixture is smooth and glossy.
    6. Assemble the Crepes: Lay a crepe flat and spread a generous spoonful of the strawberry cheesecake filling down the center. Fold the crepe over the filling. Repeat with remaining crepes. Drizzle the dark chocolate ganache over the assembled crepes before serving.

    Pro Tips from Meaghan’s Kitchen

    • Resting the batter is crucial for a smooth crepe. It allows the flour to fully hydrate, resulting in a more tender texture.
    • For a perfectly smooth ganache, make sure your cream is warm before adding it to the chocolate.
    • If your crepes are sticking, a quick swipe of butter before each one will do wonders.
    • Strawberries not in season? Substitute with raspberries or even sliced bananas for a delicious twist.
    • Use high-quality chocolate for the ganache; it makes a noticeable difference in flavor.

    Variations & Dietary Swaps

    • Vegetarian Swap: These crepes are already vegetarian-friendly. For a vegan version, use a plant-based cream cheese and milk, and swap the eggs with a flax egg.
    • Spice-It-Up Version: Add a pinch of cinnamon and nutmeg to the crepe batter for a warm, spiced aroma.
    • Kids-Friendly Version: For a more kid-friendly version, leave out the espresso and replace the ganache with a simple dusting of powdered sugar.

    What to Serve With It

    Pair these elegant crepes with a glass of chilled Prosecco for a touch of effervescence that complements the creamy filling. Alternatively, a freshly brewed espresso will highlight the coffee undertones in the crepe batter. For a complete breakfast experience, serve alongside a fresh mixed berry salad.

    Storage & Meal Prep

    Store any leftover crepes in an airtight container in the refrigerator for up to three days. To freeze, layer parchment paper between each crepe and place in a freezer-safe bag for up to a month. Reheat in a non-stick skillet over low heat or in the microwave for 20-30 seconds.

    FAQ

    Can I make the crepe batter ahead of time?

    Absolutely! The batter can be made the night before and stored in the refrigerator. Just give it a good stir before using.

    What if my ganache is too thick?

    If your ganache is too thick, gently reheat it over a double boiler and add a splash more cream until it reaches your desired consistency.

    Can I use a regular frying pan for crepes?

    Yes, a non-stick frying pan works fine; just ensure it’s well-greased to prevent sticking.

    How do I prevent my crepes from tearing?

    Ensure your pan is at the right temperature — too hot, and the crepes will cook too quickly, causing them to tear. A medium heat should suffice.

    Can I use other fruits for the filling?

    Definitely! Feel free to experiment with different fruits like blueberries, raspberries, or peaches.

    Final Thoughts

    These Gourmet Strawberry Cheesecake Crepes with Dark Chocolate Ganache are more than just a recipe — they’re an experience, a little slice of French indulgence that can turn an ordinary morning into something truly special. I cannot wait for you to try them and make your own memories. If you do, please share your thoughts, or any delicious spins you put on the recipe, in the comments below. Bon Appétit!

    Related update: Gourmet Strawberry Cheesecake Crepes with Dark Chocolate Ganache

    Related update: Nutty Banana-Peanut Butter Breakfast Cookies with Dark Chocolate and Sea Salt

    Related update: Spiced Rhubarb and Apple Phyllo Pockets with Hazelnut Drizzle

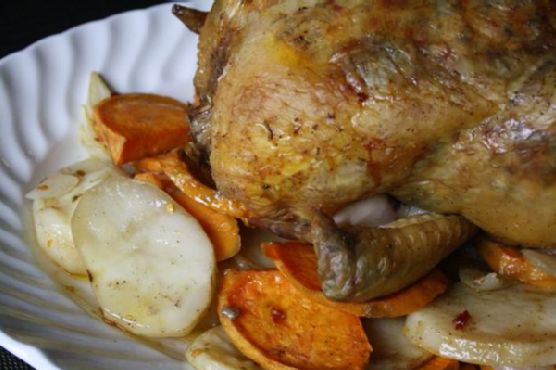
  • Herb-Crusted Lemon Roast Chicken with Truffle-Infused Potatoes | Made by Meaghan Moineau

    Herb-Crusted Lemon Roast Chicken with Truffle-Infused Potatoes | Made by Meaghan Moineau

    Herb-Crusted Lemon Roast Chicken with Truffle-Infused Potatoes

    The moment your kitchen fills with the aroma of roasting chicken mingling with fresh herbs and a whisper of citrus, you know dinner is going to be special. Picture this: crispy, golden-brown skin enveloping juicy, savory meat, with herbaceous notes dancing around your taste buds, all complemented by the earthy allure of truffle-oil-kissed potatoes. This is not just any roast chicken—it’s an experience.

    Personal Story

    My love affair with roast chicken started in my grandmother’s cozy kitchen, where Sundays were synonymous with her iconic roast dinners. I’d spend the mornings eagerly peeling potatoes, mesmerized by the alchemy of simple ingredients transforming into something extraordinary. Her secret, she whispered, was all about the seasoning—and a little bit of love.

    Years later, I found myself in a tiny Parisian bistro with the smell of rotisserie chicken wafting through the air, reigniting those cherished memories. The French, I discovered, had perfected the art of marrying simplicity with sophistication, creating dishes that were both comforting and refined. Inspired, I returned home determined to recreate that magic.

    After countless experiments (and a few crispy mishaps), I crafted my version of the perfect roast chicken. By adding a fragrant herb crust and finishing my potatoes with a touch of truffle oil, I found that I could evoke those nostalgic flavors while bringing a modern twist to the table. Every time I make this dish, I’m reminded that cooking is a delicious journey, full of stories waiting to be told.

    What Makes This Version Special

    This Herb-Crusted Lemon Roast Chicken with Truffle-Infused Potatoes takes the classic roast chicken to new heights. The herb crust—composed of fresh rosemary, thyme, parsley, and a sprinkle of grated parmesan cheese—adds layers of savory goodness that permeate the chicken skin, making it irresistibly crispy and flavorful. The truffle oil drizzled over the potatoes in the last ten minutes of roasting infuses them with a luxurious earthiness, elevating this dish to gourmet status. Unlike the usual roast chicken recipes, this version doesn’t just satisfy; it wows.

    Flavor Profile

    Imagine biting into a piece of chicken where the skin crackles with a herby, crunchy crust, releasing the fragrant oils of rosemary and thyme. The juicy meat underneath is subtly infused with lemony notes, creating a delicate balance of tang and warmth. Now, pair this with Yukon gold and sweet potatoes that are roasted to perfection, their creamy interiors contrasting with a crispy exterior. The final touch of truffle oil adds an earthy aroma that lingers, turning every bite into a sensory delight.

    Ingredients

    • 1 whole chicken, washed and patted dry
    • 2 tablespoons butter, softened
    • 3 cloves garlic, minced
    • Zest of 2 lemons
    • 1 teaspoon chili flakes
    • Salt and pepper to taste
    • 1 lemon, halved
    • 2 pounds Yukon gold potatoes, diced
    • 2 pounds sweet potatoes, diced
    • 1 teaspoon chili flakes
    • 2 tablespoons olive oil
    • **1 tablespoon truffle oil**
    • **2 tablespoons fresh rosemary, finely chopped**
    • **2 tablespoons fresh thyme, finely chopped**
    • **2 tablespoons parsley, finely chopped**
    • **1/2 cup grated parmesan cheese**

    Instructions

    1. Preheat your oven to 400°F (200°C). Ensure the chicken is thoroughly washed and patted dry, as a dry surface ensures crispy skin.
    2. Generously season the chicken inside, outside, and under the skin with salt and pepper. This is crucial for flavor.
    3. In a small bowl, mix softened butter with minced garlic, chili flakes, and lemon zest. Add a pinch of salt and pepper to taste.
    4. Gently lift the skin of the chicken and stuff the flavored butter underneath, spreading it over the breast, legs, and back for maximum flavor.
    5. Stuff half a lemon into the chicken cavity to infuse the meat with citrusy zest as it roasts.
    6. In a large baking pan, toss the diced Yukon gold and sweet potatoes with chili flakes, a pinch of salt and pepper, and olive oil. Spread them evenly across the bottom of the pan.
    7. Place a roasting rack over the potatoes and position the chicken breast-side up on the rack. This allows the potatoes to soak up the delicious drippings.
    8. Roast for the first 15 minutes at 400°F, then reduce the oven temperature to 300°F. Continue roasting for about an hour, basting occasionally with the pan juices.
    9. Halfway through, turn the chicken breast-side down. This helps even cooking and keeps the breast moist.
    10. In the last 10 minutes of roasting, drizzle a small amount of truffle oil over the potatoes for an aromatic finish.
    11. Check for doneness by piercing the thickest part of the chicken, the thigh. If the juices run clear, it’s ready. If not, give it more time.
    12. Once done, let the chicken rest for 10 minutes before carving. Serve it on a platter over the roasted potatoes.

    Pro Tips from Meaghan’s Kitchen

    • Dry your chicken well: A dry surface is key to achieving that crispy, golden-brown skin.
    • Herb crust trick: Press the herb mixture firmly onto the skin to ensure it sticks and crisps up beautifully.
    • Truffle oil timing: Add the truffle oil at the end to prevent it from losing its delicate flavor during cooking.
    • Rest before carving: Allowing the chicken to rest helps the juices redistribute, resulting in tender, juicy meat.
    • Save the pan juices: They make a fantastic gravy or sauce when reduced on the stovetop with a splash of white wine.

    Variations & Dietary Swaps

    • Vegetarian swap: Replace chicken with whole cauliflower. Coat with the same herb crust and roast until tender.
    • Spice-it-up version: Add smoked paprika and cumin to the butter mixture for a smoky kick.
    • Kids-friendly version: Omit chili flakes and add a touch of honey to the butter for a sweeter, milder flavor.

    What to Serve With It

    This dish pairs beautifully with a crisp Chardonnay, whose acidity complements the savory roast chicken and earthy truffle notes. For a fresh, vibrant side, serve with an arugula salad tossed in a lemon vinaigrette. The peppery arugula and zesty dressing cut through the richness, balancing the meal perfectly.

    Storage & Meal Prep

    Leftovers can be a lifesaver! Store any leftover chicken and potatoes in an airtight container in the fridge for up to three days. You can also freeze them for up to two months. To reheat, place in a 350°F oven until warmed through, or microwave for a quick fix, though the oven preserves the texture better.

    FAQ

    Can I use dried herbs instead of fresh ones?

    Yes, but fresh herbs provide a more vibrant flavor and aroma. If using dried herbs, reduce the quantity by about half.

    Is truffle oil necessary?

    While truffle oil adds a luxurious touch, it’s not essential. You can skip it or substitute with a drizzle of high-quality olive oil for a simpler finish.

    How do I know when the chicken is fully cooked?

    Check the internal temperature with a meat thermometer. It should read 165°F at the thickest part of the thigh. Alternatively, when pierced, the juices should run clear.

    What type of potatoes work best?

    Yukon gold and sweet potatoes offer a perfect texture contrast and sweetness. However, russets or red potatoes can also be used if preferred.

    Can I prepare this dish in advance?

    Absolutely! You can season and prepare the chicken a day ahead and store it covered in the fridge. This allows the flavors to meld, and all you need to do is roast it when you’re ready.

    Final Thoughts

    There’s something truly magical about gathering around a table and enjoying a home-cooked meal that’s been crafted with love and care. This Herb-Crusted Lemon Roast Chicken with Truffle-Infused Potatoes brings that magic to life, transforming a weeknight dinner into a culinary celebration. I’d love to hear your thoughts and any personal twists you might add to this recipe. Please share your experiences in the comments, and don’t forget to spread the love by sharing this recipe with friends and family. Happy cooking!

    Related update: Herb-Crusted Lemon Roast Chicken with Truffle-Infused Potatoes

    Related update: Umami-Packed Truffle Veggie Fried Rice with Crispy Shiitake

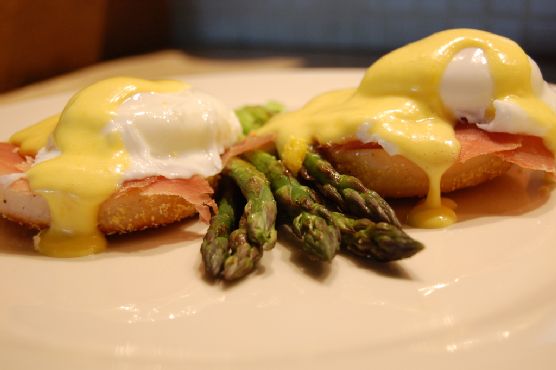
  • Asparagus Eggs Benedict with Truffle Hollandaise and Prosciutto | Made by Meaghan Moineau

    Asparagus Eggs Benedict with Truffle Hollandaise and Prosciutto | Made by Meaghan Moineau

    Asparagus Eggs Benedict with Truffle Hollandaise and Prosciutto

    Imagine waking up on a Sunday morning to the aroma of freshly brewed coffee mingling with the mouthwatering scent of butter browning in a hot skillet. You reach the heart of the kitchen where something magical happens — the classic Eggs Benedict is being transformed into a luxurious, gourmet experience with a truffle-infused twist.

    Personal Story

    The first time I attempted to make Eggs Benedict, I was a college student trying to impress a few friends over brunch. My tiny apartment kitchen was a whirlwind of activity, with English muffins toasting in the oven and eggs precariously poaching on the stove. The hollandaise sauce was a disaster — a split mess of curdled egg yolks and melted butter. Despite the chaos, we laughed until our stomachs ached and devoured every last bite.

    Years later, I found myself in a quaint Parisian café, where I tasted an Eggs Benedict variation that changed everything. Instead of the usual Canadian bacon, the chef used crispy prosciutto, and the hollandaise was subtly perfumed with truffle. It was an epiphany — the rich flavors danced across my palate, lingering long after the last morsel was gone.

    Back home, I was determined to recreate that culinary magic. After several experiments in my ever-evolving kitchen, I perfected my Asparagus Eggs Benedict with Truffle Hollandaise and Prosciutto. The addition of tender asparagus spears and a drizzle of truffle oil elevated the dish, transforming it from a humble breakfast staple to an indulgent feast. Now, it has become a weekend ritual, a special treat that brings a touch of elegance and nostalgia to my mornings.

    What Makes This Version Special

    This version of Asparagus Eggs Benedict adds a luxurious touch that sets it apart from the traditional recipe. By swapping out the ham for crispy prosciutto, this dish takes on a sophisticated edge. The prosciutto, crisped to perfection, adds a delightful crunch and a depth of flavor that pairs beautifully with the creaminess of the hollandaise sauce. But the true star is the truffle-infused hollandaise. A small drizzle of truffle oil weaves a subtle earthiness into the sauce, making each bite an experience in indulgence. This dish is not just better — it’s a revelation for your taste buds.

    Flavor Profile

    The Asparagus Eggs Benedict with Truffle Hollandaise and Prosciutto is a symphony of rich, savory flavors. The velvety hollandaise, enhanced with a hint of truffle, coats your tongue with a luxurious earthiness. The crispy prosciutto offers a salty, savory crunch, contrasting beautifully with the soft, poached eggs that ooze golden yolks at the touch of a fork. Asparagus spears, crisp-tender and vibrant, add a fresh note that balances the dish perfectly. It’s a flavor experience that’s both comforting and extravagant — a testament to the power of simple ingredients, artfully combined.

    Ingredients

    • 4 English muffins, split and toasted
    • 8 slices of **prosciutto**
    • 16 asparagus spears, trimmed
    • 8 fresh eggs
    • 4 egg yolks
    • 1 tablespoon fresh lemon juice
    • 1/2 cup butter, melted
    • 1/4 teaspoon salt
    • 1/8 teaspoon cayenne pepper
    • 2 teaspoons **truffle oil**
    • Black pepper, to taste
    • Chopped chives, for garnish

    Instructions

    1. In a medium saucepan or wide, deep skillet, fill three-quarters full with hot tap water. Bring to a boil over high heat, then reduce heat to maintain a gentle boil.
    2. In a large skillet over medium-high heat, crisp the **prosciutto** until golden and crunchy. Remove and set aside on a paper towel-lined plate.
    3. Place asparagus in a shallow microwave-safe casserole dish, cover with vented plastic wrap, and cook at HIGH power for 1-1/2 to 2-1/2 minutes until crisp-tender. Keep warm.
    4. Break whole eggs, one at a time, into a small dish. Slip eggs into simmering water. Cook for about 3 minutes for soft-set eggs or until cooked as desired. Use a slotted spoon to remove and drain.
    5. For the hollandaise, place egg yolks, lemon juice, salt, and cayenne pepper in a blender. With the blender running, slowly pour in the hot, melted butter in a steady stream. Blend for 30 seconds until thickened. Drizzle in **truffle oil** and blend briefly to incorporate.
    6. To assemble, place two prosciutto slices on each toasted English muffin half, top with about three asparagus spears, and a poached egg. Spoon the truffle hollandaise generously over the eggs.
    7. Finish with a sprinkle of freshly ground black pepper and chopped chives.

    Pro Tips from Meaghan’s Kitchen

    • Make sure to use fresh eggs for poaching — they hold their shape better and have a more vibrant yolk.
    • If your hollandaise sauce starts to thicken too much, add a teaspoon of warm water to loosen it.
    • For a deeper truffle flavor, use a high-quality truffle oil — a little goes a long way!
    • Use a slotted spoon to remove poached eggs, draining excess water and preventing a soggy muffin base.
    • Warm your serving plates in the oven for a few minutes; this keeps the assembled dish warm while you finish cooking.

    Variations & Dietary Swaps

    • Vegetarian Swap: Replace prosciutto with sautéed mushrooms for an earthy, vegetarian-friendly version.
    • Spice-It-Up Version: Add a pinch of smoked paprika to the hollandaise for a subtle, smoky heat.
    • Kids-Friendly Version: Substitute the truffle oil with a dash of mild mustard in the hollandaise for a flavor kids might be more familiar with.

    What to Serve With It

    This Asparagus Eggs Benedict pairs beautifully with a light, refreshing side salad of mixed greens and a tangy vinaigrette. For the ultimate brunch experience, serve it with a glass of sparkling wine or a mimosa. The effervescence of the bubbles cuts through the richness of the dish, creating a perfect balance.

    Storage & Meal Prep

    To store leftovers, place the components in separate airtight containers in the refrigerator. The hollandaise sauce can be kept for up to two days, while the poached eggs and asparagus are best consumed within one day. To reheat, gently warm the hollandaise over a double boiler or in the microwave at low power. Refresh the eggs by placing them in hot water for a minute or two. Assemble just before serving to maintain the best texture and flavor.

    FAQ

    Can I make the hollandaise sauce ahead of time?

    Yes, you can make the hollandaise sauce up to two hours in advance. Keep it warm in a double boiler or thermos until ready to serve.

    How do I know when the poached eggs are done?

    The whites should be set, and the yolks should remain soft. A cooking time of about three minutes usually achieves this, but it can vary slightly depending on the size of the eggs.

    What if I don’t have a blender for the hollandaise?

    You can whisk it by hand in a bowl set over simmering water. It’s more labor-intensive but yields a similarly delicious result.

    Can I use white truffle oil instead of black?

    Absolutely! White truffle oil has a slightly more intense aroma, which can add a different dimension to the dish.

    Is there a way to make this gluten-free?

    For a gluten-free version, use gluten-free English muffins or bread as the base for your Eggs Benedict.

    Final Thoughts

    Whether you’re hosting a fancy brunch or treating yourself to a luxurious breakfast, this Asparagus Eggs Benedict with Truffle Hollandaise and Prosciutto is sure to impress. The combination of flavors, textures, and the touch of indulgence from the truffle oil will make it a staple in your culinary repertoire. I hope you’ll try it and share your thoughts in the comments below. Happy cooking, and may your kitchen be filled with joy and delicious aromas!

    Related update: Asparagus Eggs Benedict with Truffle Hollandaise and Prosciutto

    Related update: Whole Wheat Crepes with Orange Blossom Ricotta and Honeyed Almonds

  • Spiced Carrot Cake Pancakes with Maple Cream Cheese Drizzle | Made by Meaghan Moineau

    Spiced Carrot Cake Pancakes with Maple Cream Cheese Drizzle | Made by Meaghan Moineau

    Spiced Carrot Cake Pancakes with Maple Cream Cheese Drizzle

    The sizzle of butter hitting a hot skillet is one of life’s most comforting sounds, especially when it means a stack of pancakes is in your future. Imagine the aroma of warm spices—cinnamon, nutmeg, and cardamom—mingling with the sweet, earthy scent of carrots. Add a drizzle of maple cream cheese, and suddenly, you’re not just making breakfast; you’re creating an experience.

    Personal Story

    Growing up, my family had a love affair with pancakes. Saturday mornings were filled with the sound of the griddle and the comforting scent of batter turning golden-brown. But it wasn’t until a culinary curiosity struck me in my twenties that I ventured beyond the classic buttermilk pancake. Inspired by my grandmother’s legendary carrot cake, I decided to experiment with incorporating those flavors into a breakfast favorite.

    It was a trial-and-error journey, with my first few attempts being less than stellar (think dense and overly carroty). One particularly memorable morning, I ended up with an orange mess that my husband jokingly referred to as “carrot mush.” But I was undeterred because the idea of waking up to the warm, spicy aroma of carrot cake pancakes was just too enticing.

    After a few tweaks and a serendipitous discovery of cardamom lingering in my spice cabinet, I finally created a version that not only pleased my family but also brought back memories of my grandmother’s kitchen. Each bite felt like a hug from her, with the unexpected twist of maple cream cheese drizzle adding a touch of indulgence. Now, these spiced carrot cake pancakes are a staple in our home, especially when we need a little extra warmth and comfort.

    What Makes This Version Special

    Infused with aromatic cardamom and topped with a luscious maple cream cheese drizzle, these pancakes transform a classic breakfast into an indulgent treat. Unlike standard carrot cake pancakes, which can sometimes be overly sweet or too dense, this version strikes the perfect balance between spice and sweetness. The use of real maple syrup in the cream cheese drizzle adds a sophisticated touch that elevates the entire dish.

    Flavor Profile

    These spiced carrot cake pancakes offer a delightful taste experience. The warm spices — cinnamon, nutmeg, and cardamom — create an aromatic and comforting base, while the addition of grated carrots provides natural sweetness and earthiness. The maple cream cheese drizzle introduces a creamy, sweet finish that enhances the pancakes’ flavor without overpowering it. It’s a symphony of spices and sweetness that delights with every bite.

    Ingredients

    • 3-4 medium carrots, peeled and grated (1-1.5 cups)
    • 1 cup white whole wheat flour
    • 1 tablespoon baking powder
    • 1/4 teaspoon salt
    • 1 teaspoon cinnamon
    • 1/2 teaspoon ground nutmeg
    • 1/4 teaspoon ground allspice
    • 1/4 teaspoon ground cardamom
    • 2 tablespoons butter, melted
    • 1 large egg
    • 1 cup milk
    • 2 tablespoons turbinado sugar
    • 1 teaspoon vanilla extract
    • 1/4 cup raisins (optional)
    • 1/4 cup chopped walnuts (optional)
    • 4 ounces cream cheese, softened
    • 3 tablespoons real maple syrup
    • 1 tablespoon powdered sugar

    Instructions

    1. Peel and grate the carrots. If you have more than 1 cup of grated carrots, that’s okay; the recipe can handle up to 1.5 cups.
    2. Microwave the grated carrots on medium for 3 minutes, or until they are soft and partially cooked.
    3. In a large bowl, mix together the dry ingredients: flour, baking powder, salt, cinnamon, nutmeg, allspice, and cardamom.
    4. In a separate bowl, whisk together the wet ingredients: melted butter, turbinado sugar, egg, milk, and vanilla extract.
    5. Add the wet ingredients to the dry ingredients, whisking until almost combined.
    6. Fold in the grated carrots and optional raisins and walnuts. Stir gently until everything is combined, being careful not to overmix.
    7. Heat a lightly oiled or buttered skillet over medium-low heat. Use heaping tablespoons or an ice cream scoop to add the batter to the pan.
    8. Cook each pancake for about 2-3 minutes, or until little bubbles form on the surface. Flip and cook for another 2-3 minutes, or until golden-brown and cooked through.
    9. For the maple cream cheese drizzle, mix the softened cream cheese with maple syrup and powdered sugar until smooth.
    10. Serve the pancakes warm with the maple cream cheese drizzle and your choice of butter, syrup, or powdered sugar.

    Pro Tips from Meaghan’s Kitchen

    • Bloom the spices in the melted butter before adding to the batter to intensify their flavors.
    • Use a microplane to grate the carrots finely; it helps them blend seamlessly into the batter.
    • For fluffier pancakes, let the batter rest for about 5 minutes before cooking.
    • Ensure the cream cheese is fully softened to achieve a smooth drizzle without lumps.
    • If you prefer a nuttier flavor, lightly toast the walnuts before folding them into the batter.

    Variations & Dietary Swaps

    • Vegetarian Swap: Use a flax egg instead of a regular egg to make the pancakes vegan-friendly.
    • Spice-It-Up Version: Add a pinch of cayenne pepper to the batter for a subtle heat that complements the sweetness.
    • Kids-Friendly Version: Skip the nuts and raisins, and add mini chocolate chips to the batter for a kid-approved twist.

    What to Serve With It

    Pair these spiced carrot cake pancakes with a spiced chai latte or a freshly brewed coffee for a breakfast experience that’s both comforting and invigorating. A side of crispy bacon or sausage can add a savory balance to the dish.

    Storage & Meal Prep

    Store any leftover pancakes in an airtight container in the refrigerator for up to 3 days. To freeze, place parchment paper between each pancake and store in a freezer-safe bag for up to a month. Reheat in a toaster or oven at 350°F until warmed through.

    FAQ

    Can I make the batter ahead of time?

    Yes, you can prepare the batter a day in advance. Store it in the refrigerator and give it a quick stir before cooking.

    What if I don’t have cardamom?

    If you don’t have cardamom, you can substitute with an equal amount of ground ginger for a slightly different but still delicious flavor.

    Can I use regular sugar instead of turbinado?

    Absolutely, regular granulated sugar can be used in place of turbinado sugar. The pancakes will still be deliciously sweet.

    How do I know when to flip the pancakes?

    Flip the pancakes when you see bubbles forming on the surface and the edges look set. This usually takes about 2-3 minutes.

    Can I omit the maple cream cheese drizzle?

    While the drizzle adds a lovely sweetness, you can omit it or replace it with your favorite syrup or topping if you wish.

    Final Thoughts

    These spiced carrot cake pancakes with maple cream cheese drizzle are more than just breakfast; they’re a journey into flavor that combines nostalgia with a modern twist. I hope you enjoy making and sharing them as much as I do. Please leave a comment below to share your thoughts or any delightful variations you’ve tried. Happy cooking!

    Related update: Spiced Carrot Cake Pancakes with Maple Cream Cheese Drizzle

    Related update: Asparagus Eggs Benedict with Truffle Hollandaise and Prosciutto