Tag: Comfort Food

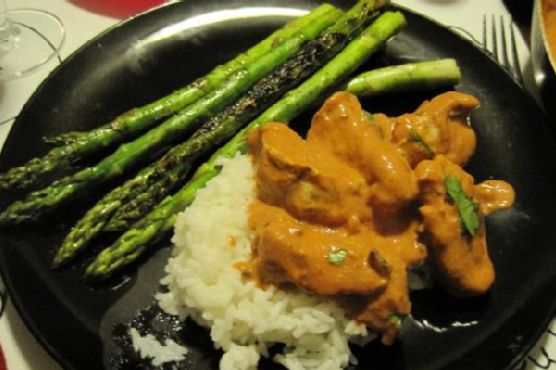
  • Smoky Cardamom-Infused Chicken Tikka Masala with Charred Peppers | Made by Meaghan Moineau

    Smoky Cardamom-Infused Chicken Tikka Masala with Charred Peppers | Made by Meaghan Moineau

    Smoky Cardamom-Infused Chicken Tikka Masala with Charred Peppers

    The tantalizing aroma of cardamom wafting through the kitchen, mingling with the subtle smokiness of charred bell peppers, is enough to make anyone’s mouth water. Imagine a rich, creamy sauce enveloping tender pieces of chicken, each bite more aromatic and flavorful than the last. This Smoky Cardamom-Infused Chicken Tikka Masala with Charred Peppers transforms a beloved classic into a new and exciting culinary adventure.

    Personal Story

    I remember the first time I attempted to make Chicken Tikka Masala at home. It was a cold Saturday afternoon, and I was feeling adventurous, ready to tackle what I thought was a complex dish only meant for restaurant kitchens. My tiny kitchen was soon filled with the heady aroma of spices toasting in the pan, and despite a few initial mishaps—like accidentally using twice the amount of chili powder—the end result was a revelation.

    Fast forward a few years and countless trials later, I’ve developed a version of Chicken Tikka Masala that not only satisfies my craving for this beloved dish but also elevates it with a personal twist. During one of my culinary escapades, I stumbled upon the magic of charring bell peppers. The slightly sweet, smoky flavor adds an unexpected depth to the traditional tikka masala, a discovery that was nothing short of a game-changer.

    This dish became a hit in my household, a comfort meal with a hint of sophistication. Sharing the recipe with friends and family, I watched as it became a staple in their kitchens as well. Each time I serve this dish, it’s like revisiting a cherished memory, reminding me of the journey from kitchen mishaps to mastering a recipe that feels truly my own.

    What Makes This Version Special

    This version of Chicken Tikka Masala stands out for its distinct smoky flavor, achieved by charring red bell peppers over an open flame. This technique brings a subtle sweetness and complexity to the dish that pairs beautifully with the traditional spices. Additionally, blooming the cardamom and smoked paprika in butter before adding the garlic and jalapeno creates a deeply aromatic base that elevates the overall flavor profile. This recipe not only retains the comforting richness of the original dish but also introduces an exciting new layer of taste that makes it even more irresistible.

    Flavor Profile

    Imagine biting into a piece of tender chicken, enveloped in a rich, creamy sauce that bursts with smoky, aromatic flavors. The charred red bell peppers add a subtle sweet char that dances on your taste buds, while the layers of warm spices like cardamom, cumin, and cinnamon create a symphony of flavors. Each spoonful is a warm, comforting experience, with a hint of heat from the jalapeno, balanced perfectly by the creamy, tangy richness of the sauce.

    Ingredients

    • 1 cup yogurt
    • 2 tablespoons lemon juice
    • **2 teaspoons ground cumin**
    • 1 teaspoon ground cinnamon
    • 1 teaspoon cayenne pepper
    • 1 teaspoon ground black pepper
    • 1 tablespoon grated fresh ginger
    • **4 teaspoons salt**
    • 1 ½ pounds skinless, boneless chicken breasts, cut into bite-size pieces
    • **1 red bell pepper**
    • **2 tablespoons unsalted butter**
    • 4 cloves garlic, minced
    • 1 jalapeno pepper, finely chopped
    • **2 teaspoons smoked paprika**
    • 2 teaspoons ground cardamom
    • 1 (15-ounce) can tomato sauce
    • 1 cup heavy cream
    • Fresh cilantro, chopped, for garnish

    Instructions

    1. In a large bowl, combine the yogurt, lemon juice, 2 teaspoons of ground cumin, ground cinnamon, cayenne pepper, ground black pepper, grated fresh ginger, and 4 teaspoons of salt. Stir well, then add the chicken pieces. Ensure each piece is well-coated, cover, and refrigerate for at least 1 hour to marinate.
    2. Preheat a grill for high heat. Lightly oil the grill grate. Remove the chicken from the marinade and thread onto skewers, discarding the marinade. Grill the chicken until the juices run clear, approximately 5 minutes on each side. Set aside.
    3. Char the red bell pepper by placing it directly over an open flame or under a broiler. Turn occasionally until the skin is blackened all over. Once charred, place the bell pepper in a bowl and cover with a plate or plastic wrap. After cooling, peel, remove seeds, and dice the pepper.
    4. In a large heavy skillet over medium heat, melt the unsalted butter. Add the minced garlic and jalapeno, sautéing for about 1 minute until fragrant. Then, sprinkle in the smoked paprika and ground cardamom, allowing them to bloom in the butter for an additional minute.
    5. Stir in the canned tomato sauce and heavy cream, mixing well. Allow the sauce to simmer on low heat until it thickens slightly, about 20 minutes.
    6. Add the grilled chicken pieces and diced charred bell pepper to the sauce. Let it simmer together for 10 more minutes, allowing the flavors to meld.
    7. Transfer the Chicken Tikka Masala to a serving platter, garnishing generously with fresh cilantro. Serve hot and enjoy!

    Pro Tips from Meaghan’s Kitchen

    • For an even deeper smoky flavor, try using smoked salt instead of regular salt in the marinade.
    • Always let the chicken come to room temperature before grilling to ensure even cooking.
    • If you don’t have a grill, you can broil the chicken in the oven on a wire rack to achieve a similar charred effect.
    • Blooming spices in butter is crucial for unlocking their full flavor potential. Do not skip this step!
    • Use full-fat yogurt for the marinade; it not only tenderizes the chicken but also adds richness to the dish.

    Variations & Dietary Swaps

    • Vegetarian Version: Substitute chicken with paneer or tofu. Marinate and grill as directed for a delightful vegetarian twist.
    • Spice-It-Up: Double the jalapeno and cayenne for those who love their tikka masala with extra heat.
    • Kid-Friendly: Omit the jalapeno and reduce the cayenne pepper to make the dish milder for little taste buds.

    What to Serve With It

    This Smoky Cardamom-Infused Chicken Tikka Masala pairs beautifully with a chilled glass of mango lassi, providing a refreshing contrast to the rich, spicy flavors. Additionally, buttery naan bread or fragrant basmati rice makes for the perfect accompaniment, allowing you to savor every drop of the luscious sauce.

    Storage & Meal Prep

    To store leftovers, transfer the Chicken Tikka Masala to an airtight container and refrigerate for up to 3 days. For longer storage, freeze in a freezer-safe container for up to 3 months. To reheat, thaw overnight in the fridge if frozen, then warm gently in a saucepan over medium heat, stirring occasionally until heated through.

    FAQ

    Can I use chicken thighs instead of breasts?

    Absolutely! Chicken thighs are juicier and stay tender during grilling. Just adjust the grilling time as they might take a bit longer to cook through.

    Is it necessary to char the bell peppers?

    While not strictly necessary, charring the bell peppers adds a depth of flavor that truly enhances the dish. It’s worth the extra step for the smoky sweetness it imparts.

    Can I make this dish ahead of time?

    Yes, you can prepare the sauce and the grilled chicken a day in advance. Store them separately in the fridge, and combine them when you’re ready to serve, reheating gently on the stove.

    What if I don’t have an open flame for charring?

    No worries! You can achieve a similar effect by broiling the peppers in the oven, turning them occasionally until the skin is blackened.

    How can I make this dish dairy-free?

    For a dairy-free version, substitute the yogurt with a coconut or almond milk-based yogurt, and replace the heavy cream with coconut cream.

    Final Thoughts

    There’s something magical about transforming classic recipes into something uniquely yours, and this Smoky Cardamom-Infused Chicken Tikka Masala with Charred Peppers does just that. Whether you’re serving it for a family dinner or impressing guests at a dinner party, this dish is sure to delight with its rich, smoky flavors and aromatic spices. I’d love to hear how this recipe turns out for you! Feel free to leave a comment below, and don’t forget to share your kitchen adventures with my recipe on social media. Happy cooking, friends!

    Related update: Smoky Cardamom-Infused Chicken Tikka Masala with Charred Peppers
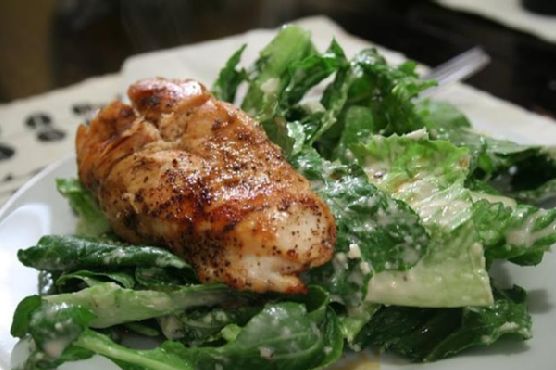
  • Smoky Maple-Glazed Salmon Caesar Salad with Toasted Pepitas | Made by Meaghan Moineau

    Smoky Maple-Glazed Salmon Caesar Salad with Toasted Pepitas | Made by Meaghan Moineau

    Smoky Maple-Glazed Salmon Caesar Salad with Toasted Pepitas

    The aroma of salmon sizzling in a hot skillet, mingling with the sweet, smoky whisper of maple syrup and smoked paprika, is a scent that promises pure culinary magic. Picture a golden-brown fillet, its surface glistening with a glaze that invites both the eyes and taste buds for a delightful dance. This isn’t just any salad; it’s a Smoky Maple-Glazed Salmon Caesar Salad with Toasted Pepitas, a dish that transforms the ordinary into the extraordinary.

    Personal Story

    I still remember the first time I boldly deviated from the standard Caesar salad. It was a sunny Saturday afternoon, and I was hosting an impromptu gathering for friends. My fridge revealed a lone salmon fillet, a half-empty bottle of maple syrup, and a packet of pepitas. The clock was ticking and my options were few, but inspiration struck like a lightning bolt. What if I merged these elements into a dish that was both familiar yet thrillingly new?

    As I stood over the stove, the salmon began to transform under the glaze of sticky maple syrup and aromatic smoked paprika. It was a revelation, the sweet and smoky flavors melding into a perfect harmony. The subtle crunch of toasted pepitas added a delightful contrast, and the addition of fresh dill brought a refreshing herbal note. My friends, initially skeptical, were soon enchanted. That day, the Smoky Maple-Glazed Salmon Caesar Salad with Toasted Pepitas not only became a staple in my culinary repertoire but a cherished memory.

    Since then, this dish has been my go-to for impressing guests or indulging in a personal treat. It evokes the nostalgia of that sunny afternoon every time I prepare it, yet each iteration brings a new layer of discovery. Whether it’s experimenting with different spice levels or swapping ingredients to suit dietary preferences, this salad is a canvas for creativity.

    What Makes This Version Special

    At the heart of this Smoky Maple-Glazed Salmon Caesar Salad with Toasted Pepitas is the unique combination of flavors and textures. The star of the show, the maple syrup and smoked paprika glaze, infuses the salmon with a smoky-sweet richness that elevates the dish beyond the typical Caesar salad. The addition of toasted pepitas, with their nutty crunch, complements the creamy dressing and tender salmon, creating a symphony of textures that dance across your palate. Fresh dill adds an unexpected yet refreshing herbal note, lifting the entire dish with its vibrant aroma.

    Unlike traditional Caesar salads, which can sometimes be heavy and one-dimensional, this version brims with a delightful complexity. The balance of flavors — sweet, smoky, and herby — combined with the rich umami of parmesan cheese, make this recipe a far superior choice. It’s more than just a salad; it’s an experience that brings together the best of fresh, wholesome ingredients in a unique and memorable way.

    Flavor Profile

    The first bite of this Smoky Maple-Glazed Salmon Caesar Salad with Toasted Pepitas is a sensory journey. The sweet warmth of the maple glaze hits first, followed by the smoky depth of smoked paprika. As you savor the salmon, the fresh dill offers a bright, herbaceous finish that cleanses the palate. The creamy Caesar dressing and nutty parmesan cheese provide a rich backdrop, while the toasted pepitas punctuate each mouthful with a satisfying crunch. It’s an intricate dance of flavors and textures, leaving you lingering over each forkful with delight.

    Ingredients

    • 2 tablespoons **maple syrup**
    • 1 teaspoon **smoked paprika**
    • 4 cups romaine lettuce, chopped
    • 1/4 cup light Caesar dressing
    • 1 tablespoon lemon juice
    • 2 tablespoons olive oil
    • 1/4 cup shredded parmesan cheese
    • 1/4 teaspoon black pepper
    • 1 pound salmon fillet
    • 1/4 teaspoon salt
    • 2 tablespoons slivered almonds
    • 2 tablespoons **pepitas (pumpkin seeds)**
    • 1 tablespoon fresh dill, chopped

    Instructions

    1. Preheat a skillet over medium heat. Combine the maple syrup and smoked paprika in a small bowl to create your glaze.
    2. Rub the salmon fillet with olive oil, salt, and black pepper. Place the salmon in the hot skillet, cooking for 4-5 minutes on each side until lightly browned and flaky.
    3. During the last 2 minutes of cooking, brush the maple-paprika glaze generously over the salmon. Allow it to caramelize slightly, forming a glossy coat.
    4. Remove the salmon from the skillet and let it rest for a minute. Squeeze fresh lemon juice over the top for a burst of acidity.
    5. In a separate small pan, toast the pepitas with a pinch of salt over medium heat. Stir frequently until they begin to puff up and turn golden brown, about 2-3 minutes.
    6. In a large bowl, toss the chopped romaine with Caesar dressing until evenly coated. Transfer to a serving platter and sprinkle with shredded parmesan and slivered almonds.
    7. Slice the salmon into strips and arrange over the dressed romaine. Garnish with toasted pepitas and a sprinkle of fresh dill.
    8. Finish with an extra drizzle of lemon juice and a dash of black pepper before serving.

    Pro Tips from Meaghan’s Kitchen

    • When choosing salmon, opt for a fillet with the skin on. It helps retain moisture during cooking and prevents sticking.
    • Feel free to adjust the amount of smoked paprika in the glaze depending on your taste preference for smokiness.
    • For an extra layer of flavor, try adding a touch of garlic powder to the glaze.
    • To keep the Caesar dressing light, whisk in a tablespoon of Greek yogurt for a creamy texture without the added calories.
    • If you don’t have fresh dill on hand, substitute with fresh parsley or chives for a similar herbal note.

    Variations & Dietary Swaps

    • Vegetarian Version: Replace the salmon with grilled portobello mushrooms or extra-firm tofu marinated in the maple-paprika glaze.
    • Spice-It-Up Version: Add a pinch of cayenne pepper to the glaze for an extra kick of heat.
    • Kids-Friendly Version: Use honey instead of maple syrup for a milder sweetness and skip the paprika for a more subtle flavor profile.

    What to Serve With It

    This Smoky Maple-Glazed Salmon Caesar Salad with Toasted Pepitas pairs beautifully with a crisp, chilled glass of Sauvignon Blanc. The wine’s acidity complements the sweetness of the glaze and the creaminess of the dressing. For a complete meal, serve alongside a warm, crusty baguette or a simple side of roasted asparagus.

    Storage & Meal Prep

    To store leftovers, place the salad in an airtight container and refrigerate for up to 2 days. To reheat the salmon, gently warm it in a skillet over low heat or in the microwave until just heated through. For meal prep, you can prepare the glaze, toast the pepitas, and chop the vegetables in advance to save time on busy days.

    FAQ

    Can I use frozen salmon for this recipe?

    Absolutely! Just make sure to thaw the salmon completely and pat it dry before cooking to ensure even browning and proper glaze adherence.

    What if I don’t have smoked paprika?

    In a pinch, you can substitute regular paprika, although you might lose a bit of that smoky depth. A drop of liquid smoke can also add a similar flavor.

    How do I know when the salmon is perfectly cooked?

    Look for a golden-brown crust and check for flakiness with a fork. The interior should be opaque and just slightly pink for medium doneness.

    Is there a way to make this dish dairy-free?

    Certainly! Use a dairy-free Caesar dressing and swap the parmesan for a plant-based cheese or nutritional yeast for that cheesy flavor.

    Final Thoughts

    This Smoky Maple-Glazed Salmon Caesar Salad with Toasted Pepitas is more than a dish; it’s a celebration of flavors and textures that promise to delight your senses. I hope it finds a place at your table as it has at mine. Don’t forget to share your own twists and experiences in the comments — I love hearing how you make this recipe your own!

    Related update: Smoky Maple-Glazed Salmon Caesar Salad with Toasted Pepitas

  • Savory Vegetarian Scotch Eggs with Herb-Infused Panko and Spicy Sriracha Aioli | Made by Meaghan Moineau

    Savory Vegetarian Scotch Eggs with Herb-Infused Panko and Spicy Sriracha Aioli | Made by Meaghan Moineau

    Savory Vegetarian Scotch Eggs with Herb-Infused Panko and Spicy Sriracha Aioli

    Imagine biting into a perfectly crispy, golden-brown shell that reveals a soft, flavorful interior. The aroma of freshly chopped herbs mingles with the satisfying crunch of Panko, all elevated by a spicy, creamy Sriracha aioli. This is not just any scotch egg; it’s a culinary experience that dances on your palate and leaves you craving more.

    Personal Story

    Ah, the humble scotch egg. For those who grew up in a British household, it’s more than just a picnic staple — it’s a cherished memory. I remember the first time I attempted to recreate this classic dish. My kitchen was a mess of flour and breadcrumbs, and my eggs were more hard-boiled than soft. Yet, I was determined to perfect it, driven by my love for this traditional delight.

    One summer, during a family gathering at our cottage, I decided to surprise everyone with a batch of homemade scotch eggs. As the aroma filled the air, it was like a magnet pulling everyone into the kitchen. My grandmother, the original scotch egg master, watched with a knowing smile as I nervously plated my creation.

    She took a bite and paused — time seemed to slow. Then, with a twinkle in her eye, she nodded in approval. That moment was like a warm hug, affirming my culinary journey. Since then, I’ve experimented with flavors and techniques, mixing tradition with innovation, to create a version that feels both nostalgic and new.

    And now, I’m sharing that delicious evolution with you. This savory vegetarian scotch egg, with its herb-infused Panko and spicy Sriracha aioli, is not just a recipe; it’s a story of family, perseverance, and a love for food that transcends generations.

    What Makes This Version Special

    This version of the scotch egg isn’t your standard pub fare. First, we swap out the traditional sausage meat for a vegetarian-friendly option that’s just as satisfying. But the real twist comes with the **herb-infused Panko breadcrumbs**, which add an extra layer of crunch and a fragrant, herbaceous note that elevates the entire dish. Each bite is a perfect balance of textures and flavors, thanks to the combination of fresh chives and flat-leaf parsley.

    To add some heat and depth, I’ve paired these scotch eggs with a **spicy Sriracha aioli**. This tangy, creamy sauce complements the crispy coating and soft egg center beautifully. The subtle heat of the Sriracha is mellowed by the creamy mayonnaise and brightened with a splash of lemon juice, creating a sauce that you’ll want to drizzle on everything.

    Flavor Profile

    Imagine the first crisp bite into the golden Panko coating, seasoned with a hint of smoked paprika that adds a subtle smokiness. The freshness of the chives and parsley cuts through, offering a bright, herbaceous contrast to the rich, creamy egg yolk. As you dip into the Sriracha aioli, the heat gently builds, adding a spicy kick that lingers just long enough to make you reach for another bite. It’s a symphony of flavors — crispy, creamy, spicy, and utterly satisfying.

    Ingredients

    • 4 medium eggs, plus 1 egg, whisked
    • **1 cup Panko breadcrumbs**
    • **1 teaspoon smoked paprika**
    • **1 tablespoon Sriracha**
    • **1/2 cup mayonnaise**
    • **1 teaspoon lemon juice**
    • 1 fresh dessert spoon of chives, finely chopped
    • 1 fresh dessert spoon of flat-leaf parsley, finely chopped
    • 1 cup fresh breadcrumbs
    • Black salt and pepper, to taste
    • Vegetable oil, for frying

    Instructions

    1. Preheat your oven to 325°F (170°C). Prepare an ice bath for cooling your eggs later.
    2. Place the 4 eggs in a pan and cover them completely with cold water. Bring to a boil, then reduce the heat and simmer for 4 minutes. Immediately transfer them to the ice bath to cool.
    3. Once cooled, carefully peel the eggs and set them aside.
    4. In a small bowl, whisk together the remaining egg and set aside.
    5. In a separate bowl, combine the fresh breadcrumbs, chopped chives, and parsley. Season with black salt and pepper.
    6. For the Panko coating, mix the **Panko breadcrumbs** with the **smoked paprika** until evenly distributed.
    7. Gently roll each peeled egg in flour, then dip in the whisked egg, and finally coat them in the herb mixture, pressing gently to adhere.
    8. In a large frying pan, heat the vegetable oil to a depth of about 2 inches (5 cm). The oil should be hot but not smoking.
    9. Fry the breadcrumb-coated eggs until golden-brown, turning occasionally to ensure even cooking, for about 2-3 minutes.
    10. Using a slotted spoon, remove the eggs from the oil, allowing any excess to drain, and place them in an ovenproof dish.
    11. Transfer the dish to the oven and heat through for an additional 3-4 minutes.
    12. While the eggs are finishing in the oven, prepare the Sriracha aioli by mixing **Sriracha**, **mayonnaise**, and **lemon juice** in a small bowl. Stir until smooth and creamy.
    13. Serve the scotch eggs warm with a generous drizzle of the spicy Sriracha aioli.

    Pro Tips from Meaghan’s Kitchen

    • For perfectly soft-boiled eggs, use a timer. Even an extra minute can change the texture dramatically.
    • If you’re worried about the breadcrumbs sticking, lightly dust the eggs with flour before dipping them in the egg wash — it acts as a binder.
    • To prevent the oil from overheating, use a thermometer to maintain the temperature around 350°F (175°C).
    • Don’t overcrowd the pan while frying. Fry in batches if necessary to maintain the oil temperature and ensure even cooking.
    • Letting the eggs rest on a wire rack after frying helps keep them crispy as any excess oil drains away.

    Variations & Dietary Swaps

    • Vegetarian Swap: Use a plant-based egg alternative for the coating and aioli to make this dish completely vegan.
    • Spice-it-Up Version: Add a teaspoon of cayenne pepper to the Panko mix for an extra kick.
    • Kids-Friendly Version: Replace Sriracha with ketchup in the aioli for a milder, kid-friendly dipping sauce.

    What to Serve With It

    These savory vegetarian scotch eggs pair beautifully with a crisp, cold lager, which complements the spice and richness perfectly. For a refreshing side, try a simple cucumber salad tossed with lemon juice and dill. The cool, crunchy cucumbers provide a delightful contrast to the warm, crispy eggs.

    Storage & Meal Prep

    Store any leftover scotch eggs in an airtight container in the refrigerator for up to 3 days. To reheat, place them in a preheated oven at 350°F (175°C) for about 10 minutes until heated through. Avoid microwaving, as this can make the coating soggy.

    If you want to freeze them, allow the cooked scotch eggs to cool completely, then wrap each one individually in plastic wrap before placing them in a freezer-safe bag. They can be frozen for up to 1 month. To reheat, thaw in the refrigerator overnight and follow the oven reheating instructions.

    FAQ

    Can I make these scotch eggs ahead of time?

    Yes, you can prepare the eggs up to the frying step and refrigerate them. When you’re ready to serve, simply fry and bake them as instructed.

    What can I use instead of Panko breadcrumbs?

    If Panko isn’t available, you can use regular breadcrumbs, though they won’t be as crunchy. Alternatively, crushed cornflakes can also work for extra texture.

    How do I prevent the eggs from overcooking during frying?

    Ensure your oil is at the right temperature — not too hot. Frying at a steady 350°F (175°C) will brown the coating quickly without overcooking the egg inside.

    Is there a way to make these gluten-free?

    Absolutely! Use gluten-free breadcrumbs and flour to make this dish suitable for a gluten-free diet.

    Can I use this recipe with meat?

    Of course! If you prefer a traditional scotch egg, you can replace the herb mixture with ground pork or sausage meat seasoned with herbs and spices.

    Final Thoughts

    These savory vegetarian scotch eggs with herb-infused Panko and spicy Sriracha aioli are a delightful twist on a classic British favorite. I hope this recipe brings you as much joy and deliciousness as it has brought to my family. As always, I love to hear your thoughts and see your creations, so feel free to leave a comment or share your photos. Happy cooking, and may your kitchen be filled with warmth and wonderful aromas!

    Related update: Savory Vegetarian Scotch Eggs with Herb-Infused Panko and Spicy Sriracha Aioli

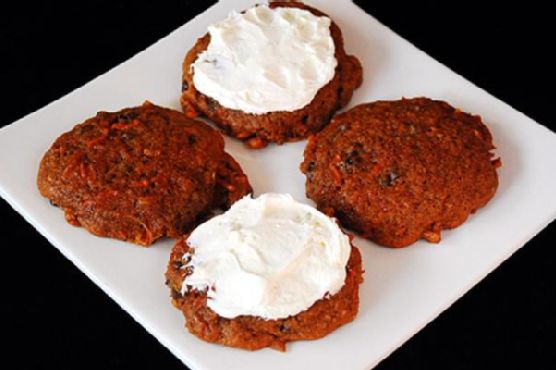
  • Chai-Spiced Carrot Raisin Chocolate Chip Cookies | Made by Meaghan Moineau

    Chai-Spiced Carrot Raisin Chocolate Chip Cookies | Made by Meaghan Moineau

    Chai-Spiced Carrot Raisin Chocolate Chip Cookies

    Picture this: the cozy aroma of freshly baked cookies wafting through your kitchen, mingling with the warmth of chai spices and the sweetness of maple syrup. These aren’t just any cookies; they’re my Chai-Spiced Carrot Raisin Chocolate Chip Cookies, a delicious twist on a beloved classic that’s guaranteed to become your new favorite.

    Personal Story

    Growing up, my grandma’s kitchen was a treasure trove of comforting smells and endless treats. Every Sunday, I’d find myself perched on a stool, eagerly watching her whip up batches of cookies that seemed to disappear almost as quickly as she could bake them. One of my fondest memories is of her carrot cake, a luscious, spiced creation topped with a creamy frosting. The way the cake melded the sweetness of carrots and raisins with the warmth of spices was pure magic. It was these flavors that inspired me to create my own cookie version.

    Fast forward a few years, and I found myself in my own kitchen, attempting to recreate my grandmother’s iconic flavors. There was a lot of trial and error involved; once, I mistakenly added cayenne instead of cinnamon, turning my cookies into a spicy disaster! However, it was during these moments of kitchen mishaps that I discovered the joy of experimenting with flavors, leading me to infuse my cookies with chai spices and a hint of maple syrup.

    Last winter, during one particularly chilly afternoon, I decided to revisit those flavors, but with a little twist. I imagined a cookie that would capture the essence of those Sunday afternoons while also offering something new and exciting. Thus, my Chai-Spiced Carrot Raisin Chocolate Chip Cookies were born, marrying the classic comfort of carrot cake with the warm, spicy hug of chai.

    These cookies have become a cherished staple in my home, especially during the cooler months when the need for cozy, comforting bakes is at its peak. My friends and family adore them, and I’m thrilled to share this recipe with you, hoping it brings as much warmth and joy to your home as it does to mine.

    What Makes This Version Special

    This version of Chai-Spiced Carrot Raisin Chocolate Chip Cookies is anything but ordinary. I’ve infused the classic cookie with warming chai spices — a fragrant blend of cinnamon, cardamom, ginger, and cloves — which elevates the flavor profile to new heights. The touch of maple syrup adds a subtle sweetness that perfectly complements the spice, creating an aromatic experience that’s both cozy and inviting. These cookies stand out from the standard recipe, offering a depth of flavor that’s both unique and irresistible.

    Flavor Profile

    Imagine biting into a warm, chewy cookie where the sweet, earthy notes of carrots and raisins are met with the exotic spice of chai. The chocolate chips add a rich, velvety contrast, while the **toasted walnuts** contribute a delightful crunch and nuttiness. Each bite is a harmonious blend of flavors, with the maple syrup providing a gentle, lingering sweetness that ties everything together. These cookies are a symphony of taste and texture, making each bite a memorable experience.

    Ingredients

    • 1 box Duncan Hines Classic Decadent Cake Mix
    • 2 large eggs
    • 1/2 cup unsalted butter, softened
    • 1 cup hot water
    • 1 cup chocolate chips
    • 1 tablespoon chai spice mix (cinnamon, cardamom, ginger, cloves)
    • 1 tablespoon maple syrup
    • 1/2 cup chopped walnuts
    • Carrot and raisin packet (from the cake mix box)

    Instructions

    1. Preheat your oven to 350°F (175°C). Line a baking sheet with parchment paper.
    2. Hydrate the carrot and raisin packet in 1 cup of hot water for 5 minutes. Drain and squeeze out the extra water, ensuring no excess moisture remains.
    3. In a small bowl, mix the chai spices with the sugar from the cake mix to bloom their flavors.
    4. In a large bowl, beat together the softened butter, cake mix, and eggs until just combined. Be careful not to overmix.
    5. Add the drained carrots and raisins to the batter and mix well to distribute evenly.
    6. Stir in the chocolate chips and toasted walnuts, folding them into the dough until well combined.
    7. Using a small ice cream scoop, place spoonfuls of dough onto the prepared baking sheet, leaving about 2 inches of space between each.
    8. Gently smooth the tops of the cookies with a knife or offset spatula for an even bake.
    9. Bake in the preheated oven for 12 minutes, or until the edges are golden-brown and the centers are set.
    10. Let the cookies cool on the baking sheet for 1 minute before transferring them to a wire rack to cool completely.
    11. Once cooled, you can enjoy them plain or frost them with cream cheese frosting for an extra indulgent treat.

    Pro Tips from Meaghan’s Kitchen

    • Toast the walnuts: Before adding to the dough, toast the walnuts in a dry pan over medium heat until fragrant. This enhances their flavor and adds a lovely crunch to the cookies.
    • Bloom the spices: Mixing the chai spices with sugar allows their flavors to bloom, creating a more pronounced spice profile in the cookies.
    • Butter consistency: Ensure your butter is soft but not melted for the perfect cookie texture. Leave it out at room temperature for about an hour before baking.
    • Chill the dough: If your dough feels too soft, chill it in the fridge for 15-20 minutes. This prevents the cookies from spreading too much while baking.
    • Don’t skip the parchment: Lining your baking sheet with parchment paper ensures easy removal and prevents the cookies from sticking.

    Variations & Dietary Swaps

    • Vegetarian Swap: Use a flaxseed egg (1 tablespoon flaxseed meal + 2.5 tablespoons water) instead of eggs to make these cookies vegetarian-friendly.
    • Spice-It-Up Version: Add a pinch of cayenne pepper to the chai spice mix for a subtle kick that enhances the cookies’ warmth.
    • Kids-Friendly Version: Omit the walnuts and replace them with colorful sprinkles to make the cookies more appealing to kids.

    What to Serve With It

    These Chai-Spiced Carrot Raisin Chocolate Chip Cookies pair beautifully with a steaming cup of chai latte or hot spiced tea. The spicy warmth of the cookies complements the aromatic spiciness of the tea, creating a cozy, comforting combination that’s perfect for a chilly afternoon or a cozy evening treat.

    Storage & Meal Prep

    To store, place the cookies in an airtight container at room temperature for up to 5 days. For longer storage, freeze the cookies in a single layer on a baking sheet before transferring them to a zip-top bag. They can be kept frozen for up to 3 months. To reheat, simply let them thaw at room temperature or warm them in a 300°F (150°C) oven for 5–7 minutes until they’re just warmed through.

    FAQ

    Can I make the dough ahead of time?

    Yes, you can prepare the dough ahead of time and refrigerate it for up to 24 hours before baking. This can enhance the flavors and make the cookies even more delicious.

    Can I use fresh carrots instead of the packet?

    Sure! Grate about 1/2 cup of fresh carrots and use them in place of the rehydrated packet. Just make sure to squeeze out any excess moisture before adding them to the dough.

    What if I don’t have chai spice mix?

    If you don’t have a pre-made chai spice mix, you can make your own by combining equal parts of ground cinnamon, cardamom, ginger, and cloves.

    Can I substitute another type of nut for the walnuts?

    Definitely! Pecans or almonds would work well as a substitute for walnuts in this recipe, offering different flavors and textures.

    How do I prevent my cookies from spreading too much?

    Ensure your butter isn’t too soft and chill the dough for 15-20 minutes before baking. This will help the cookies maintain their shape and prevent excessive spreading.

    Final Thoughts

    I hope you enjoy making and savoring these Chai-Spiced Carrot Raisin Chocolate Chip Cookies as much as I do. They’re a delightful twist on a classic treat, perfect for sharing with loved ones or indulging in a moment of cozy solitude. I’d love to hear about your baking adventures and any variations you try, so feel free to leave a comment and share your experiences. Happy baking!

    Related update: Chai-Spiced Carrot Raisin Chocolate Chip Cookies

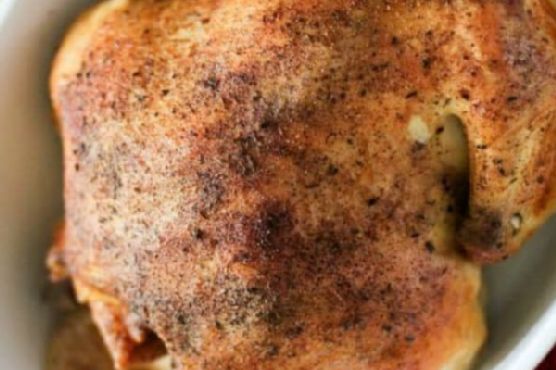
  • Mediterranean Slow Cooker Chicken with Rosemary and Olives | Made by Meaghan Moineau

    Mediterranean Slow Cooker Chicken with Rosemary and Olives | Made by Meaghan Moineau

    Mediterranean Slow Cooker Chicken with Rosemary and Olives

    Picture this: the kitchen is filled with the intoxicating aroma of rosemary mingling with the earthy sweetness of sun-dried tomatoes, as a golden-brown chicken slowly cooks to perfection in your slow cooker. This is not just any chicken recipe — it’s a Mediterranean masterpiece that promises to whisk you away to sun-drenched shores with every bite.

    Personal Story

    Years ago, on a spontaneous trip to the Mediterranean coast, I stumbled upon a hidden gem of a restaurant. The chef, an elderly woman whose laughter was as hearty as her meals, served me a dish so memorable that it lingered in my taste buds long after I’d left. It was a simple chicken, but with a twist — it encapsulated the vibrant, fresh flavors of the region: olives, tomatoes, and fragrant herbs.

    Once back home, I found myself longing to recreate that experience, but with a twist of my own. I wanted the dish to be as aromatic and comforting as those Mediterranean evenings, yet convenient enough to fit into a busy lifestyle. Thus, the idea of a slow cooker adaptation was born. After several attempts, I finally captured the essence of that unforgettable meal: a slow cooker chicken enriched with the bold flavors of olives and sun-dried tomatoes.

    One particularly chilly afternoon, I decided to give my newly crafted recipe a go, seeking warmth and nostalgia. As the chicken simmered away, my home was enveloped in the most delightful aroma, reminiscent of that distant seaside town. When my family gathered around the table that evening, their excited smiles confirmed what I already knew: this dish was a keeper.

    What Makes This Version Special

    This version of slow cooker chicken is a culinary journey to the Mediterranean without leaving your kitchen. Traditional slow cooker chicken is comforting and tender, but adding olives and sun-dried tomatoes takes the flavor profile to a whole new level. The briny olives and sweet sun-dried tomatoes meld together beautifully, imparting a rich and savory depth to the dish that is simply irresistible. Plus, the use of fresh rosemary and thyme adds a layer of fragrant complexity that makes this dish stand out from the standard recipes.

    Flavor Profile

    The flavor profile of this Mediterranean Slow Cooker Chicken is nothing short of a sensory delight. Picture rich, savory notes enveloped in layers of citrusy brightness, thanks to the fresh lemons that permeate the dish. Earthy undertones from the rosemary and thyme are enhanced by the subtle brininess of the olives. The sun-dried tomatoes introduce a sweet yet tangy element, creating a harmonious balance that dances on your palate. It’s like a symphony of flavors, each note complementing the other, making every bite an experience to savor.

    Ingredients

    • 1 whole chicken, about 4 pounds
    • **2 tablespoons extra virgin olive oil**
    • 1 lemon, halved
    • 1 large onion, quartered
    • **1 tablespoon paprika**
    • 1 teaspoon freshly ground pepper
    • 2 tablespoons fresh rosemary, chopped
    • 1 teaspoon salt
    • **2 tablespoons unsalted butter**
    • 1/4 cup water
    • **1/2 cup kalamata olives, pitted and halved**
    • **1/3 cup sun-dried tomatoes, julienned**
    • 1 tablespoon fresh thyme leaves
    • **3 garlic cloves, minced**

    Instructions

    1. Begin by setting the stage: gather all your ingredients, allowing the chicken to reach room temperature for even cooking.
    2. In a small bowl, combine the paprika, salt, and pepper, reserving half of the rosemary for later. This will ensure a pop of flavor both inside and out.
    3. Over medium-high heat, sear the chicken in a large skillet with the olive oil and unsalted butter, skin-side down, until it’s golden and crispy. This step is crucial for locking in that delicious flavor and texture.
    4. In the same pan, bloom the minced garlic and paprika in the remaining olive oil for about a minute, until fragrant. This enhances their flavors, creating a deeper, more complex taste for your dish.
    5. Rub the seasoned butter mixture all over the chicken, ensuring it’s evenly coated. Don’t forget to include a generous dash of the paprika and garlic blend for added depth.
    6. Stuff half of the onion, lemon halves, and half of the rosemary into the chicken’s cavity, infusing it with bright, citrusy notes.
    7. Roll up three small lemon-sized balls of aluminum foil and place them at the bottom of your slow cooker. This keeps the chicken elevated, ensuring it cooks evenly all around.
    8. Add the remaining onion and lemon halves to the slow cooker, along with the water and olives. These ingredients will create a flavorful base for the chicken to soak in.
    9. Place the chicken on top of the foil balls, sprinkle the rest of the rosemary and thyme over it, cover, and cook on low for 7-8 hours, or on high for 4-5 hours, until the chicken is tender and fully cooked.

    Pro Tips from Meaghan’s Kitchen

    • For an extra crispy skin, transfer the chicken to a baking sheet and place it under the broiler for a few minutes after slow cooking. Keep a close eye to prevent burning.
    • If you’re short on time, prep the chicken and ingredients the night before, and simply set your slow cooker in the morning.
    • Save any leftover broth from the slow cooker to use as a base for soups or as a flavorful addition to grains like rice or couscous.
    • For a milder garlic flavor, roast the garlic cloves before adding them to the dish.
    • Feel free to add a splash of white wine to the slow cooker for an added layer of sophistication.

    Variations & Dietary Swaps

    • Vegetarian Swap: Replace the chicken with hearty vegetables like eggplant, zucchini, and bell peppers. Add chickpeas for protein, and cook as directed.
    • Spice-It-Up Version: Add a teaspoon of red pepper flakes or a sliced jalapeño to the seasoning mix for a bit of heat.
    • Kids-Friendly Version: Substitute the olives with sliced mushrooms or bell peppers, and reduce the paprika for a milder flavor profile.

    What to Serve With It

    This Mediterranean Slow Cooker Chicken pairs beautifully with a side of roasted garlic mashed potatoes, their creamy texture complementing the savory, flavorful chicken. For a complete meal, add a fresh, crisp Greek salad with cucumbers and feta. A glass of chilled Chardonnay makes for a perfect pairing, accentuating the dish’s citrusy notes while balancing its richness.

    Storage & Meal Prep

    To store leftovers, place the chicken in an airtight container and refrigerate for up to 3 days. For freezing, separate the meat from the bones and freeze in portions for up to 2 months. Reheat the chicken gently in the microwave or on the stovetop over low heat, adding a splash of broth or water to prevent it from drying out. This dish is ideal for meal prep, as its flavors only deepen with time.

    FAQ

    Can I use chicken breasts instead of a whole chicken?

    Absolutely! Chicken breasts will work well, though they may cook faster, so keep an eye on them to avoid overcooking.

    Can I add vegetables directly to the slow cooker?

    Yes, adding vegetables like carrots, potatoes, or bell peppers can enhance the dish. Just be sure to cut them into uniform pieces for even cooking.

    What if I don’t have fresh herbs?

    No worries! You can substitute dried rosemary and thyme, using about one-third of the fresh amount.

    How can I make this dish gluten-free?

    The recipe is naturally gluten-free, just ensure your sun-dried tomatoes don’t contain any added wheat-based ingredients.

    Final Thoughts

    Cooking this Mediterranean Slow Cooker Chicken with Rosemary and Olives is an experience that not only fills your home with mouthwatering aromas but also brings a touch of Mediterranean magic to your dinner table. I invite you to try this recipe and share your thoughts in the comments below. Happy slow cooking, and may your kitchen always be filled with joy and deliciousness!

    Related update: Mediterranean Slow Cooker Chicken with Rosemary and Olives

    Related update: Smoky Cardamom-Infused Chicken Tikka Masala with Charred Peppers

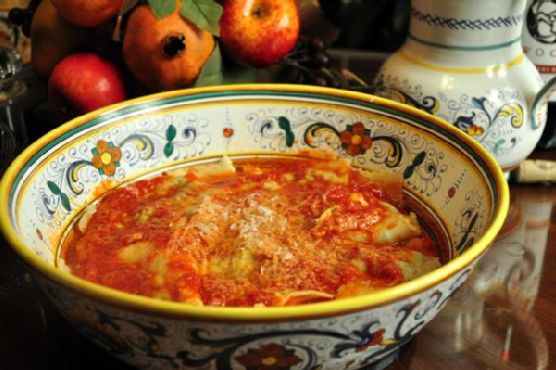
  • Truffle-Infused 3 Cheese Ravioli with Sage Brown Butter | Made by Meaghan Moineau

    Truffle-Infused 3 Cheese Ravioli with Sage Brown Butter | Made by Meaghan Moineau

    Truffle-Infused 3 Cheese Ravioli with Sage Brown Butter

    Imagine this: a cozy kitchen filled with the irresistible aroma of nutty brown butter, and delicate hints of earthy truffle weaving through the air. Your hands gently work the dough, crafting each ravioli with love and anticipation. Today, we’re diving into a recipe that transforms a classic Italian dish into a gourmet experience — Truffle-Infused 3 Cheese Ravioli with Sage Brown Butter.

    Personal Story

    There’s something about making ravioli from scratch that feels like a loving nod to tradition. Growing up, my grandmother would spend hours in the kitchen, teaching me the art of pasta making. Her kitchen was a sanctuary of sorts, where flour dusted countertops were a badge of pride, and each ravioli was a little pocket of familial history. I can still see her, rolling out dough with practiced hands, her face a mask of concentration and joy.

    One particularly memorable afternoon, during a rare rainy day in our usually sunny town, I decided to surprise her with my first solo attempt at her cherished recipe. Armed with youthful confidence and a bit of naiveté, I set to work. As you might expect, it didn’t go exactly as planned. The dough was too thick, the filling uneven, and my ravioli fell apart in the pot. But my grandmother, ever the gentle teacher, simply smiled and encouraged me to try again, humorously noting that even the most imperfect ravioli could still be delicious.

    Fast forward a few years, and I’ve put my own spin on her classic recipe, infusing it with new flavors and techniques I’ve picked up along the way. I cherish those moments of culinary trial and error because they brought me to this point — sharing this elevated version with you all. This recipe is a testament to the learning and love that goes into homemade cooking, seasoned with a luxurious twist that makes it truly special.

    What Makes This Version Special

    This isn’t just any three-cheese ravioli. By introducing the luxurious aroma of truffle oil and the earthy richness of a sage-infused brown butter sauce, we elevate the humble cheese ravioli to gourmet levels. The truffle oil infuses the cheese mixture with an unparalleled depth of flavor, while the sage brown butter adds a nutty, aromatic finish that dances on the palate. These additions transform the dish, making it not only a meal but an experience.

    Flavor Profile

    Prepare yourself for a rich and decadent taste experience with this Truffle-Infused 3 Cheese Ravioli with Sage Brown Butter. The creamy trio of Gruyere, Parmesan, and ricotta cheeses creates a luscious filling, enhanced by the earthy undertones of truffle oil. As you take a bite, the delicate pasta yields to the creamy interior, releasing bursts of flavor. The brown butter sauce, with its nutty richness and fragrant sage, envelops each ravioli, while a hint of citrus brightness from lemon zest enlivens the dish, balancing the richness with a zesty finish. It’s an elegant symphony of flavors that you’ll savor with every bite.

    Ingredients

    • 2 cups all-purpose flour
    • 3 large eggs, plus 1 for the filling
    • 1 tablespoon cooking oil
    • 1 pinch of salt
    • 1 cup ricotta cheese
    • 1/2 cup grated **Gruyere cheese**
    • 1/2 cup grated **Parmesan cheese**
    • 1 tablespoon chopped parsley
    • 1/4 teaspoon ground nutmeg
    • Salt and pepper, to taste
    • 3 tablespoons **truffle oil**
    • 4 tablespoons unsalted butter
    • 6-8 fresh **sage leaves**
    • 1 teaspoon lemon zest
    • 4 cups chicken stock or water

    Instructions

    1. In a large bowl, mix the flour, three eggs, cooking oil, and a pinch of salt together. Use your hands to form a ball of dough, kneading until smooth. Let the dough rest for about 1 hour under a damp cloth.
    2. In another bowl, combine the ricotta, Gruyere, and Parmesan cheeses with one egg, parsley, ground nutmeg, salt, and pepper. Add a few drops of truffle oil to this mixture for a luxurious depth of flavor. Mix until smooth and set aside.
    3. Divide the rested dough into two equal parts. Roll each half into large, thin rectangles using a rolling pin, aiming for an even thickness throughout.
    4. Place tablespoons of the cheese filling on one sheet of dough, leaving about an inch of space between each mound. Brush a little water around each filling mound to help seal the ravioli.
    5. Lay the second sheet of dough over the first, pressing gently around the filling to seal. Use a pizza cutter to cut the ravioli into squares.
    6. Bring the chicken stock or water to a boil in a large pot. Gently add the ravioli and cook for 3-5 minutes, or until they float to the top. Remove and drain.
    7. In a saucepan, melt the butter over medium heat. Add the fresh sage leaves and cook until the butter turns a golden-brown color and releases a nutty aroma. This creates the aromatic brown butter sauce.
    8. Remove the sage leaves and toss the cooked ravioli in the brown butter sauce. Add the lemon zest and a final drizzle of truffle oil before serving hot, garnished with extra Parmesan if desired.

    Pro Tips from Meaghan’s Kitchen

    • For perfectly smooth dough, knead it until it feels silky and elastic. This ensures the ravioli will cook evenly.
    • When making the brown butter, keep a close eye on the color. The butter can quickly go from golden-brown to burnt.
    • Use fresh sage leaves for the sauce to capture their full aromatic potential — dried leaves just won’t compare.
    • Let the ravioli dough rest. This relaxes the gluten and makes it easier to roll out.
    • If you’re new to making ravioli, try using a ravioli mold to help keep the filling contained and the shapes uniform.

    Variations & Dietary Swaps

    • Vegetarian Swap: Use vegetable stock instead of chicken stock to keep the dish vegetarian.
    • Spice-It-Up Version: Add a pinch of red pepper flakes to the cheese mixture for a subtle kick.
    • Kids-Friendly Version: Skip the truffle oil and use all Parmesan cheese for a milder flavor that kids love.

    What to Serve With It

    This truffle-infused ravioli shines brightest when paired with a chilled glass of Chardonnay or a crisp Pinot Grigio. For a fresh and vibrant side, serve it alongside an arugula salad tossed with a simple lemon vinaigrette. The peppery notes of the arugula and the citrus from the vinaigrette perfectly cut through the richness of the ravioli, creating a harmonious balance.

    Storage & Meal Prep

    If you have leftovers (though I doubt you will!), store them in an airtight container in the fridge for up to three days. For longer storage, freeze the uncooked ravioli on a baking sheet until solid, then transfer them to a freezer bag. They can be cooked directly from frozen, adding an extra minute to the boiling time. To reheat cooked ravioli, gently warm them in a saucepan with a bit of extra brown butter sauce to prevent drying out.

    FAQ

    Can I make the ravioli dough in advance?

    Yes, you can prepare the dough a day ahead. Wrap it tightly in plastic wrap and store it in the fridge. Let it come to room temperature before rolling out.

    Is there an alternative to truffle oil?

    If you’re not a fan of truffle oil, you can skip it or substitute it with a drizzle of high-quality olive oil for a different depth of flavor.

    What if I don’t have Gruyere cheese?

    No worries! You can use Fontina or Emmental as a substitute. These cheeses will still provide that creamy, nutty flavor we love in this dish.

    Can I use dried sage instead of fresh?

    While fresh sage is preferred for its vibrant flavor, you can use dried sage in a pinch. Use about a third less than the recipe calls for in fresh.

    How do I know when the brown butter is ready?

    The butter is ready when it turns a deep golden-brown and gives off a nutty aroma. Be sure to remove it from the heat immediately to prevent burning.

    Final Thoughts

    I hope this Truffle-Infused 3 Cheese Ravioli with Sage Brown Butter becomes a cherished addition to your culinary repertoire. It’s a dish that invites you to slow down, savor the process, and enjoy every luxurious bite. I’d love to hear about your experiences making this gourmet delight — feel free to share your kitchen triumphs, tips, or any creative variations you come up with. Let’s keep the conversation and inspiration going in the comments below!

    Related update: Truffle-Infused 3 Cheese Ravioli with Sage Brown Butter

    Related update: Mediterranean Slow Cooker Chicken with Rosemary and Olives

  • Exotic Cardamom-Poached Pears with Spicy Mango-Nectar Reduction and Pistachio Crumble | Made by Meaghan Moineau

    Exotic Cardamom-Poached Pears with Spicy Mango-Nectar Reduction and Pistachio Crumble | Made by Meaghan Moineau

    Exotic Cardamom-Poached Pears with Spicy Mango-Nectar Reduction and Pistachio Crumble

    Imagine the gentle sizzle of cardamom pods toasting in a pan, releasing their intoxicating fragrance, while a golden syrup simmers alongside. This isn’t your average poached pear recipe; it’s an aromatic journey that will transform your kitchen into a paradise of exotic flavors. Your senses are about to be enveloped in a dance of spice, sweetness, and crunch.

    Personal Story

    I still remember that crisp autumn afternoon when I stumbled upon this recipe’s inspiration. Wandering through a bustling farmer’s market, I was drawn to a vendor with an array of vibrant pears, their skins glistening under the soft sunlight. Intrigued, I picked up a Bartlett, its firm texture promising the perfect poach. As I walked away, a gentle breeze carried the scent of cardamom from a nearby spice stall, and an idea began to blossom.

    Back in my cozy kitchen, I set out to create a dish that would marry the traditional elegance of poached pears with the bold allure of global spices. My first attempt was a comedy of errors — too much cardamom, not enough sweetness. My kitchen smelled divine, but the taste didn’t quite match. Not one to be deterred, I tweaked and tested, learning from each delicious mistake.

    And then, finally, that magical balance was struck. The pears, poached to perfection, absorbed the spicy-sweet notes of the cardamom syrup, while a pistachio crumble provided an unexpected crunch. The addition of a spicy mango-nectar reduction elevated the dish to something truly special. Every time I make it now, I’m reminded of that market day and the joy of discovery it sparked.

    What Makes This Version Special

    This is no ordinary poached pear recipe. By infusing the poaching liquid with **cardamom pods**, we unlock a deep, aromatic flavor that dances on your palate. Toasting the pods before adding them to the syrup ensures that their oils fully release, giving the dish an unparalleled depth. But it doesn’t stop there. A **pistachio crumble**, scented with honey and vanilla bean seeds, adds a delightful texture that contrasts beautifully with the tender pears. This combination transforms a classic dessert into a culinary masterpiece, offering layers of flavor and texture in every bite.

    Flavor Profile

    When you bite into these exotic cardamom-poached pears, you’re greeted with a symphony of rich and aromatic flavors. The cardamom infuses the pears with a warm, spicy fragrance that lingers on the tongue, while the spicy mango-nectar reduction adds a sweet and slightly tart contrast. The **pistachio crumble** provides a satisfying crunch, with a fragrant hint of honey and vanilla. Every mouthful is a sensory journey, inviting you to savor the intricate dance of flavors and textures.

    Ingredients

    • 4 firm pears, peeled with stems intact
    • 1 tablespoon lemon juice
    • 1/2 cup sugar
    • 1 cup water
    • 1/2 cup mango pulp
    • 1/2 cup fruit juice (orange or apple)
    • 1 tablespoon orange rind
    • 1 dash cinnamon
    • **5 cardamom pods**
    • **1/2 cup pistachios**
    • **2 tablespoons honey**
    • **Seeds from 1 vanilla bean**
    • Mint leaves, for garnish

    Instructions

    1. Peel the pears and slice a small piece off the bottom so they can stand upright. Gently dab each pear with lemon juice to prevent browning and set aside.
    2. In a medium pot, combine the sugar and water. Heat over medium until the sugar dissolves, creating a simple syrup.
    3. In a dry pan, toast the **cardamom pods** over medium heat until they’re fragrant, about 2 minutes. Add the pods to the syrup.
    4. Add mango pulp, fruit juice, orange rind, and a dash of cinnamon to the syrup. Stir to combine.
    5. Submerge the pears in the syrup. Poach on low heat for 15 to 20 minutes, until the pears are tender and have taken on an amber hue from the mango syrup, ensuring they’re completely immersed.
    6. Meanwhile, create the **pistachio crumble** by pulsing pistachios, honey, and vanilla bean seeds in a food processor until coarse and crumbly.
    7. Once the pears are tender, remove them from the syrup and let them cool slightly on a plate.
    8. Garnish each pear with a mint sprig and drizzle with the spicy mango-nectar reduction. Sprinkle the pistachio crumble generously over the top.

    Pro Tips from Meaghan’s Kitchen

    • Choose pears that are firm to the touch for poaching; they hold their shape better during cooking.
    • Don’t skip toasting the cardamom pods. This step is key to releasing their full flavor potential.
    • If you prefer a less sweet dessert, reduce the sugar in the syrup by a tablespoon or two.
    • For an extra zing, consider adding a tiny pinch of saffron to the syrup during poaching.
    • Ensure the syrup fully covers the pears while poaching to ensure even flavor absorption.

    Variations & Dietary Swaps

    • For a gluten-free version, ensure your vanilla bean and other ingredients are certified gluten-free.
    • To spice it up, add a pinch of cayenne pepper to the pistachio crumble for a subtle heat.
    • For a kid-friendly version, serve the poached pears with a scoop of vanilla ice cream instead of the pistachio crumble.

    What to Serve With It

    This exquisite dessert pairs beautifully with a glass of sweet Riesling, offering a refreshing contrast to the rich flavors of the poached pears and pistachio crumble. Alternatively, a dollop of freshly whipped cream can complement the dish’s spicy and sweet notes.

    Storage & Meal Prep

    To store, place the poached pears in an airtight container with their syrup and refrigerate for up to 3 days. The pistachio crumble should be kept separately in an airtight container at room temperature. To reheat, gently warm the pears in their syrup on the stove until heated through. Avoid reheating the crumble to maintain its crunch.

    FAQ

    Can I use canned pears instead of fresh ones?

    While fresh pears provide the best texture and flavor, canned pears can be used in a pinch. Be sure to choose ones that are not overly sweetened and reduce the sugar in the syrup accordingly.

    What other nuts can I use for the crumble?

    If you don’t have pistachios, almonds or hazelnuts make excellent substitutes, offering a similar crunch and nutty flavor.

    Can I make this dish ahead of time?

    Yes, you can prepare the pears and syrup a day in advance and store them in the refrigerator. Just assemble with the pistachio crumble and mint before serving.

    How do I prevent the pears from browning?

    Dabbing the peeled pears with lemon juice, as mentioned in the recipe, will help prevent browning and maintain their fresh appearance.

    Is there a non-alcoholic pairing suggestion?

    A fragrant herbal tea, such as chamomile or jasmine, complements the exotic flavors of this dish beautifully.

    Final Thoughts

    I hope this recipe brings as much joy to your table as it does to mine. It’s a celebration of flavors and textures that invites you to savor each bite. I’d love to hear how your own culinary adventure unfolds — feel free to leave a comment below or share your experience on social media. Happy cooking!

    Related update: Exotic Cardamom-Poached Pears with Spicy Mango-Nectar Reduction and Pistachio Crumble

    Related update: Chai-Spiced Carrot Raisin Chocolate Chip Cookies

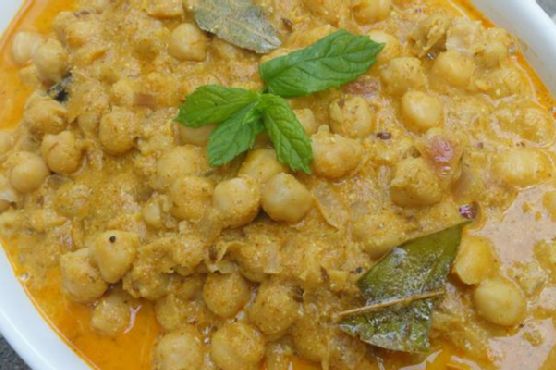
  • Zesty Chana Masala with Charred Lime and Mint Yogurt Drizzle | Made by Meaghan Moineau

    Zesty Chana Masala with Charred Lime and Mint Yogurt Drizzle | Made by Meaghan Moineau

    Zesty Chana Masala with Charred Lime and Mint Yogurt Drizzle

    Picture this: the comforting aroma of spices wafting through your kitchen, mingling with the tantalizing, smoky scent of charred lime. This isn’t just any chana masala; it’s a sensory journey that awakens your taste buds and transports you straight to the bustling streets of India. Are you intrigued yet? Well, read on, because this dish is about to become your new favorite dinnertime staple.

    Personal Story

    I still remember the first time I tried chana masala. It was a blustery fall evening, and I was huddled around a table with friends at a local Indian restaurant. I hadn’t expected the dish to leave such a lasting impression, but one spoonful of the warmly spiced chickpeas, and I was hooked. The rich, complex flavors felt like a warm hug in a bowl. That night, I became determined to replicate those flavors in my own kitchen.

    Things didn’t start off smoothly. My first attempt was, to put it kindly, a bit bland. I hadn’t yet learned about the essential role of blooming spices like cumin seeds and bay leaves in hot oil. It was a rookie mistake. But as with all culinary endeavors, practice makes perfect. Over time, my chana masala began to resemble the dish I had fallen in love with — rich, aromatic, and comforting.

    Yet, I wanted more from the dish — a unique twist that would make it truly my own. On a whim one day, I decided to experiment. I charred lime halves in a dry pan, intrigued by the possibilities. The smoky, tangy burst they added was revolutionary, cutting through the richness of the dish and enhancing its flavors. Then, a drizzle of cooling mint yogurt brought it all together, offering a refreshing contrast that made each bite irresistible. My Zesty Chana Masala with Charred Lime and Mint Yogurt Drizzle was born, and my kitchen has never been the same since.

    What Makes This Version Special

    This isn’t just any chana masala; it’s an elevated experience that brings new dimensions to a classic Indian dish. By introducing the refreshing zest of charred lime, this version takes a bold step beyond the traditional recipe. The lime’s smoky, tangy flavor cuts through the warmth of the spices, adding a surprising layer of complexity. To balance it all, a luxurious drizzle of mint yogurt brings a cool, creamy finish. This Zesty Chana Masala is not just better than the standard recipe; it’s a celebration of flavors that dance together on your palate.

    Flavor Profile

    Prepare for a taste sensation that’s smoky, tangy, and utterly refreshing. The chickpeas simmer in a savory, spice-laden sauce, warmed by the gentle heat of red chili powder and the earthy notes of cumin and coriander. As you savor each bite, the charred lime’s citrusy tang emerges, adding a surprising zing that keeps you coming back for more. Finally, the mint yogurt drizzle cools things down, offering a creamy contrast that ties all the flavors together beautifully. It’s a dish that promises to excite and delight your senses.

    Ingredients

    • 1 bay leaf
    • 1 can chickpeas, drained and rinsed
    • 1 tablespoon chana masala powder
    • 1 tablespoon coriander powder
    • 1 teaspoon cumin seeds
    • 3 cloves garlic, minced
    • 1-inch piece ginger, grated
    • 1/4 cup fresh mint leaves
    • 2 tablespoons oil
    • 1 large onion, chopped
    • 1 teaspoon red chili powder
    • Salt to taste
    • 2 large tomatoes, chopped
    • 1/2 teaspoon turmeric powder
    • 1/2 cup yogurt
    • 1 lime, halved and charred
    • Fresh cilantro, chopped, for garnish
    • 1/4 teaspoon black salt

    Instructions

    1. Start by blending the tomatoes, ginger, garlic, and mint leaves into a smooth paste. No need to add water — the tomatoes will provide enough moisture.
    2. Heat the oil in a large pan over medium heat. Once hot, add the cumin seeds and bay leaf. Fry for about 10 seconds until fragrant.
    3. Add the chopped onion and sauté until it turns soft and translucent, about 5 minutes.
    4. Sprinkle in the coriander powder, chana masala powder, turmeric powder, and red chili powder. Fry the spices with the onions for 2 minutes to develop their flavors.
    5. Stir in the blended tomato paste, mixing well. Cook until the oil starts to separate from the paste, about 10 minutes, stirring occasionally.
    6. Add the drained chickpeas and salt, mixing thoroughly. Let them cook in the sauce for 7-8 minutes, allowing the flavors to meld.
    7. Lower the heat to a simmer and carefully fold in the yogurt. If the mixture looks too thick, add 1/4 cup of water to loosen it. Let it simmer gently for 5 minutes.
    8. Meanwhile, in a dry pan, char the lime halves cut-side down over medium-high heat until they are beautifully browned and aromatic.
    9. Once done, squeeze the charred lime juice into the chickpea mixture, stirring to combine.
    10. In a small bowl, mix the remaining yogurt with finely chopped mint and a pinch of black salt. Drizzle this over the chana masala just before serving.
    11. Garnish with fresh cilantro and serve hot with rice, roti, or naan.

    Pro Tips from Meaghan’s Kitchen

    • For a richer flavor, make the chana masala a day in advance. The spices will have more time to meld together.
    • Don’t skip the step of frying the spices; it’s crucial for unlocking their full flavor potential.
    • Control the heat level by adjusting the amount of red chili powder to suit your preference.
    • Use a cast iron pan to char the lime for the best results and an even char.
    • Chill the mint yogurt drizzle before serving for an extra refreshing touch.

    Variations & Dietary Swaps

    • Vegetarian Swap: This dish is naturally vegetarian. For a vegan version, use coconut yogurt instead of dairy yogurt.
    • Spice-It-Up Version: Add finely chopped green chilies along with the spices for an extra kick.
    • Kids-Friendly Version: Reduce the amount of chili powder and serve with a dollop of plain yogurt to mellow the heat.

    What to Serve With It

    This Zesty Chana Masala pairs perfectly with a chilled mango lassi or a refreshing cucumber raita, balancing the spice with cool, creamy flavors. Serve it alongside fluffy basmati rice or warm naan to soak up every last drop of the savory sauce.

    Storage & Meal Prep

    Store leftover chana masala in an airtight container in the fridge for up to 3 days. To freeze, pack it in a freezer-safe container, leaving some space at the top for expansion, and store for up to 3 months. Reheat gently on the stove, adding a splash of water to loosen the sauce if needed.

    FAQ

    Can I use fresh chickpeas instead of canned?

    Absolutely! Just be sure to soak them overnight and cook until tender before using them in the recipe.

    How do I prevent the yogurt from curdling?

    Ensure the heat is low when adding the yogurt, and stir continuously to incorporate it smoothly into the sauce.

    Can I use lemon instead of lime?

    You can, but the charred lime provides a unique smoky flavor that really sets this dish apart.

    What if I don’t have chana masala powder?

    You can substitute with a mix of garam masala and cumin, though the flavor profile will be slightly different.

    Is it okay to skip the mint yogurt drizzle?

    You can skip it, but the drizzle adds a refreshing element that really complements the smokiness of the lime. I highly recommend trying it!

    Final Thoughts

    Cooking this Zesty Chana Masala with Charred Lime and Mint Yogurt Drizzle is not just about making a meal; it’s about creating an experience that’s fun, flavorful, and deeply satisfying. I hope you enjoy making and eating this dish as much as I do. Please share your thoughts, variations, or questions in the comments below. I’d love to hear how your chana masala journey unfolds!

    Related update: Zesty Chana Masala with Charred Lime and Mint Yogurt Drizzle

    Related update: Truffle-Infused 3 Cheese Ravioli with Sage Brown Butter

  • Tuscan White Bean & Kale Pasta Fagioli with Lemon Zest | Made by Meaghan Moineau

    Tuscan White Bean & Kale Pasta Fagioli with Lemon Zest | Made by Meaghan Moineau

    Tuscan White Bean & Kale Pasta Fagioli with Lemon Zest

    Picture this: a chilly autumn evening, the kind where a crisp breeze carries the scent of fireplace smoke and golden leaves crunch underfoot. Inside, the kitchen is warm and inviting, filled with the rich aroma of simmering herbs and the intoxicating scent of garlic sautéing in olive oil. This is the moment when a bowl of Tuscan White Bean & Kale Pasta Fagioli with Lemon Zest becomes more than just dinner — it’s a comforting embrace from the inside out.

    Personal Story

    My love affair with Pasta Fagioli began in a small trattoria in Florence, where the owner, an affable man with a hearty laugh, dished up bowls of this soul-satisfying dish to locals and tourists alike. It was a chilly evening, and I was seated at a rustic wooden table, warmed by the glow of a flickering candle and the hearty flavors of this classic Italian soup. Each spoonful was a revelation — a symphony of tender beans, al dente pasta, and an aromatic broth that spoke of time-honored traditions.

    Back home, I tried countless times to recreate that culinary magic in my own kitchen. My early attempts were valiant yet lacking that certain je ne sais quoi. A near kitchen disaster, when I accidentally added twice the amount of garlic, led to an unexpected discovery: the depth and warmth that an extra punch of garlic could bring to the dish. It was a happy accident that opened my eyes to the possibilities of tweaking a classic.

    Over time, I began to experiment with my own variations, each pot simmering with the promise of something new. Kale found its way into the mix on a day when I was short on spinach, and it brought a vibrant, nutrient-rich twist that felt like it had always belonged. The final flourish of lemon zest came on a whim, inspired by a sun-drenched lemon grove visit during a Tuscan tour. This bright addition elevated the dish to new heights, creating a balance of hearty and fresh that quickly became my signature version.

    Now, every time I make this dish, I’m reminded of that little trattoria and the joy of discovery that a simple bowl of soup can bring.

    What Makes This Version Special

    This version of Tuscan White Bean & Kale Pasta Fagioli includes nutrient-rich kale and a hint of lemon zest to brighten up the classic flavors, offering a fresh take on a hearty Italian staple. The kale introduces a robust, earthy note that complements the beans and pasta beautifully, while the lemon zest adds a zesty brightness that cuts through the richness of the dish. By incorporating these elements, the soup becomes not only a comforting classic but also a vibrant and healthful meal that feels both indulgent and nourishing.

    Flavor Profile

    Imagine a bowl of this Pasta Fagioli: it’s rich and hearty, with the creamy texture of white beans and the slight chew of whole wheat penne pasta. The kale brings an herbaceous lift, mingling with the aromatic garlic and Italian seasoning blend. As you savor each spoonful, a refreshing citrus note from the lemon zest emerges, dancing on your palate and leaving a fragrant finish. It’s a delightful balance of warmth and brightness, with a touch of spice from the red pepper flakes, rounding out a truly memorable taste experience.

    Ingredients

    • 1 pound lean ground turkey
    • 2 tablespoons olive oil
    • 1 large onion, diced
    • 2 carrots, diced
    • 2 celery stalks, diced
    • 4 garlic cloves, minced
    • 1 can (14.5 ounces) diced tomatoes
    • 1 can (15 ounces) red kidney beans, rinsed and drained
    • 1 can (15 ounces) white kidney beans, rinsed and drained
    • 1 can (15 ounces) great northern beans, rinsed and drained
    • 5 cups beef broth
    • 1 cup pasta sauce
    • 1 zucchini, diced
    • 1 tablespoon Italian seasoning blend
    • Fresh ground pepper, to taste
    • 2 cups whole wheat penne pasta
    • Grated Parmesan cheese, for serving
    • 2 cups fresh kale, chopped
    • Zest of 1 lemon
    • 1/2 teaspoon red pepper flakes
    • Fresh basil leaves, for garnish

    Instructions

    1. In a large soup pot, brown the lean ground turkey over medium-high heat, breaking it up with a wooden spoon, until it’s no longer pink. This should take about 5-7 minutes. Drain the meat in a colander and set aside.
    2. In the same pot, heat the olive oil over medium heat. Add the diced onions, carrots, celery, and minced garlic. Sauté the mixture for about 5 minutes, stirring often, until the vegetables are just beginning to soften and the garlic is fragrant.
    3. Return the turkey to the pot, stirring to combine. Pour in the diced tomatoes, red kidney beans, white kidney beans, great northern beans, beef broth, and pasta sauce. Stir in the diced zucchini, Italian seasoning blend, and fresh ground pepper.
    4. Bring the soup to a boil, then reduce the heat to low. Cover the pot and let it simmer for 50 minutes, allowing the flavors to meld together beautifully.
    5. Meanwhile, in a separate skillet, sauté the chopped kale and minced garlic over medium heat with a touch of olive oil. Cook until the kale is bright green and slightly wilted, about 3-4 minutes. This step ensures the kale retains its vibrant color and adds a delightful texture to the soup.
    6. Add the sautéed kale to the soup, followed by the whole wheat penne pasta. Stir well, cover, and let the soup continue to simmer for another 10 minutes, or until the pasta is tender but still has a nice bite.
    7. Finish the dish by stirring in the lemon zest and a sprinkle of red pepper flakes to taste. Garnish with fresh basil leaves and a generous grating of Parmesan cheese before serving.

    Pro Tips from Meaghan’s Kitchen

    • For an extra depth of flavor, try browning the turkey with a splash of balsamic vinegar. It adds a subtle sweetness that complements the tomatoes beautifully.
    • Keep the kale bright by sautéing it separately. This prevents it from overcooking in the soup, maintaining its vibrant color and texture.
    • Adjust the seasoning at the end. As the soup simmers, flavors can intensify, so taste and tweak the salt and pepper as needed before serving.
    • Don’t skimp on the lemon zest. It’s the secret ingredient that elevates the dish, adding a fresh, zesty aroma that ties all the flavors together.
    • If you like a bit more heat, feel free to increase the red pepper flakes or add a dash of hot sauce for an extra kick.

    Variations & Dietary Swaps

    • Vegetarian Version: Omit the turkey and use vegetable broth instead of beef broth. Add extra beans or a can of chickpeas for added protein.
    • Spice-It-Up Version: For those who love heat, add a chopped jalapeño or a sprinkle of cayenne pepper along with the red pepper flakes.
    • Kids-Friendly Version: Reduce the amount of garlic and red pepper flakes. Use orzo or small pasta shapes to make it more fun and approachable for little ones.

    What to Serve With It

    This Tuscan White Bean & Kale Pasta Fagioli pairs beautifully with a chilled glass of Pinot Grigio, which complements the citrus notes and balances the hearty flavors of the soup. Alternatively, a side of crusty garlic bread is perfect for soaking up every last drop of the delicious broth. For a lighter side, consider a simple mixed green salad with a lemon vinaigrette to enhance the zesty notes in the dish.

    Storage & Meal Prep

    Store leftovers of your Pasta Fagioli in an airtight container in the refrigerator for up to 4 days. For longer storage, freeze the soup in individual portions — it keeps well for up to 3 months. When reheating, gently warm the soup on the stovetop over medium heat, adding a splash of broth or water if needed to reach your desired consistency. Avoid reheating in the microwave if possible, as it may overcook the pasta and kale, diminishing their texture.

    FAQ

    Can I use fresh tomatoes instead of canned?

    Yes, you can use fresh tomatoes if you prefer. Simply blanch and peel them, then chop and use in place of the canned tomatoes. Keep in mind that canned tomatoes have a more concentrated flavor, so you may want to adjust the seasoning.

    Can I make this soup in a slow cooker?

    Absolutely! Brown the turkey and sauté the vegetables as directed, then transfer everything to a slow cooker. Cook on low for 6-7 hours or on high for 3-4 hours, adding the pasta and kale in the last 30 minutes of cooking.

    Is it possible to make this dish gluten-free?

    Yes, simply substitute the whole wheat penne with your favorite gluten-free pasta. Be mindful of cooking times, as gluten-free pasta tends to cook faster and may become mushy if overcooked.

    What other types of beans can I use?

    You can experiment with different beans based on your preference or what you have on hand. Cannellini beans or chickpeas make great substitutes, offering a creamy texture and a hearty bite.

    How can I thicken the soup?

    If you prefer a thicker soup, mash some of the beans before adding them to the pot. This will release their natural starches, creating a creamier consistency.

    Final Thoughts

    Embarking on the culinary adventure of making Tuscan White Bean & Kale Pasta Fagioli with Lemon Zest is a delicious way to bring a taste of Italy into your home. Whether you’re cooking for family, entertaining friends, or simply savoring a quiet meal alone, this dish is sure to impress with its hearty yet fresh flavors. I hope you find joy in every spoonful as I do, and I invite you to share your own twists and experiences in the comments below. Happy cooking, and remember, the kitchen is your canvas!

    Related update: Tuscan White Bean & Kale Pasta Fagioli with Lemon Zest

    Related update: Zesty Chana Masala with Charred Lime and Mint Yogurt Drizzle

  • Zesty Lemon-Honey Glazed Chicken with Ginger-Infused Mashed Potatoes | Made by Meaghan Moineau

    Zesty Lemon-Honey Glazed Chicken with Ginger-Infused Mashed Potatoes | Made by Meaghan Moineau

    Zesty Lemon-Honey Glazed Chicken with Ginger-Infused Mashed Potatoes

    Imagine your kitchen filled with the enticing aroma of zesty lemon and sweet honey caramelizing into a perfect glaze, while the gentle hum of bubbling potatoes promises a creamy, aromatic side dish. This dish is a celebration of bold flavors and comforting textures, ready to elevate any dinner gathering or a cozy night in.

    Personal Story

    Growing up, Sunday dinners were a sacred affair in our household. My grandmother would somehow transform a humble chicken into something magical, her secret always a mystery. It wasn’t until years later, when I attempted to replicate her magic, that I stumbled upon my own secret twist: a hint of ginger and turmeric to the mashed potatoes.

    I remember the first time I made this dish vividly. It was a rainy afternoon, the kind that beckons you to stay indoors and embrace the warmth of your kitchen. As I stood there, garlic sizzling in olive oil, I felt a connection to my grandmother’s kitchen, the same comforting symphony of flavors filling the air.

    Of course, there was a mishap or two. Like when I accidentally used too much turmeric, turning my potatoes an alarming shade of yellow. But with each attempt, the recipe became a comforting ritual. The zing of lemon, the sweetness of honey, and the earthy warmth of ginger and turmeric became my signature touch.

    Sharing this recipe with friends and family, I found it brought the same joy to others as it did to me. It’s not just a meal; it’s a shared experience, a conversation starter, and a tribute to culinary creativity.

    What Makes This Version Special

    This version of Zesty Lemon-Honey Glazed Chicken with Ginger-Infused Mashed Potatoes stands out because it introduces a subtle complexity to the classic combination. The addition of fresh ginger and ground turmeric to the mashed potatoes not only adds a burst of color but also a depth of flavor that harmonizes beautifully with the citrusy glaze of the chicken. It’s a fusion of comfort and sophistication, offering a delightful twist that surprises and delights.

    Unlike traditional mashed potatoes, this version boasts a hint of spice and fragrance from the ginger and turmeric, which are bloomed in butter before being mixed into the sweet potatoes. This technique elevates the dish, transforming it from a simple side into a star on your plate. Accompanied by the sweet and tart glaze on the chicken, this meal becomes a symphony of flavors, each bite more intriguing than the last.

    Flavor Profile

    Sink your teeth into the sweet and tangy chicken, where a citrusy glaze envelops each piece in a delightful, sticky hug. The garlic and thyme infuse the meat with a savory depth, while the honey and lemon slices caramelize into a glossy finish. Paired with the warm, earthy notes of ginger and turmeric in the creamy mashed potatoes, this dish offers a balanced flavor journey. The potatoes are rich and velvety, with a pop of freshness from scallions and a slight nuttiness from the buttermilk.

    Ingredients

    • 8 chicken thighs
    • 2 teaspoons black sea salt
    • 1 teaspoon pepper
    • 2 tablespoons olive oil
    • 4 cloves garlic, minced
    • 4 sprigs thyme
    • 1 splash red wine vinegar
    • 2 tablespoons dark soy sauce
    • 3 tablespoons honey
    • 1 lemon, thinly sliced
    • 2 tablespoons flat leaf parsley, chopped
    • 1 inch fresh ginger, grated
    • 1 teaspoon ground turmeric
    • 1 cup buttermilk
    • 4 large sweet potatoes, peeled and cubed
    • 2 scallions, sliced

    Instructions

    1. Season the chicken thighs with salt and pepper. Heat olive oil in a large sauté pan over medium-high heat. Add the chicken, skin-side down, in a single layer. Brown the chicken pieces (in batches if necessary) along with the garlic and thyme for 2-3 minutes on each side until golden brown. Remove and set aside.
    2. Return all the chicken to the pan. Add a splash of red wine vinegar and let it bubble until reduced by half. Drizzle the soy sauce and honey over the chicken, then shake the pan to mix all ingredients thoroughly.
    3. Pour 1/2 cup of hot water into the pan and add the lemon slices. Let the liquid bubble and reduce down until syrupy, which will take about 10 minutes or so. By now, the chicken should be cooked through. Transfer the chicken to a platter and sprinkle over the chopped parsley.
    4. Meanwhile, boil the sweet potatoes in salted water until tender, about 15-20 minutes. Drain and set aside.
    5. In a small pan, melt a tablespoon of butter over low heat. Add the grated ginger and turmeric, and bloom them in the butter for about 1-2 minutes until fragrant.
    6. In a large bowl, mash the sweet potatoes with the buttermilk and the spiced butter mixture until smooth and creamy. Stir in the scallions for a fresh finish.
    7. Serve the chicken hot, accompanied by the ginger-infused mashed sweet potatoes.

    Pro Tips from Meaghan’s Kitchen

    • Bloom spices: Always bloom your ginger and turmeric in butter before adding them to the mashed potatoes. This step releases their essential oils, enhancing the fragrance and flavor.
    • Use the right soy sauce: Dark soy sauce adds a richer color and deeper flavor to the glaze. Don’t substitute with regular soy sauce if you want that deep umami.
    • Caramelize your lemons: Allow the lemon slices to caramelize slightly in the pan for an extra depth of flavor that complements the sweet and savory notes of the glaze.
    • Adjust sweetness: If you prefer a slightly less sweet glaze, reduce the honey by one tablespoon and add a touch more vinegar for balance.
    • Rest the chicken: Let the chicken rest for a few minutes after cooking to reabsorb juices, ensuring moist and flavorful meat.

    Variations & Dietary Swaps

    • Vegetarian Swap: Replace chicken with tofu. Use the same glaze ingredients and method for a plant-based alternative.
    • Spice-it-up Version: Add a pinch of cayenne pepper to the glaze for a spicy kick that pairs beautifully with the sweetness of the honey.
    • Kids-Friendly Version: Substitute sweet potatoes with regular potatoes for a milder flavor and skip the turmeric if your little ones aren’t fan of the color or taste.

    What to Serve With It

    This dish pairs beautifully with a chilled Riesling, whose crispness complements the sweet and tart glaze of the chicken. Alternatively, a lightly sparkling elderflower soda is a refreshing, non-alcoholic option that enhances the floral notes of the dish. For a complete meal, consider serving with a side of lightly sautéed green beans or a simple arugula salad tossed in lemon vinaigrette.

    Storage & Meal Prep

    Store any leftovers in an airtight container in the fridge for up to 3 days. To reheat, place in a 350°F oven until warmed through, about 15 minutes. Alternatively, you can freeze the chicken and mashed potatoes separately for up to 2 months. Thaw overnight in the fridge before reheating.

    FAQ

    Can I use chicken breasts instead of thighs?

    Yes, you can use boneless chicken breasts. Keep in mind they cook faster, so monitor them closely to avoid drying out.

    Can I make this dish ahead of time?

    Absolutely! Prepare the chicken and mashed potatoes in advance, then reheat before serving. The flavors meld beautifully, making it an ideal make-ahead dish.

    What if I don’t have fresh ginger?

    You can substitute with 1/2 teaspoon of ground ginger, but the flavor might not be as vibrant as fresh ginger.

    Is there a non-dairy substitute for buttermilk?

    Yes, use almond milk with a teaspoon of apple cider vinegar or lemon juice. Let it sit for a few minutes to curdle slightly before using.

    How can I thicken the glaze if it’s too runny?

    If the glaze is too runny, let it simmer longer to reduce or add a cornstarch slurry (1 teaspoon cornstarch mixed with 1 tablespoon cold water) to thicken it quickly.

    Final Thoughts

    There you have it, a dish that combines tradition with a twist, bringing warmth and flavor to your table. I hope you find as much joy in making Zesty Lemon-Honey Glazed Chicken with Ginger-Infused Mashed Potatoes as I do. I’d love to hear about your experiences and any creative spins you might add. Don’t forget to share your culinary adventures and spread the love of cooking!

    Related update: Zesty Lemon-Honey Glazed Chicken with Ginger-Infused Mashed Potatoes