Tag: Comfort Food

  • Damn Good Corn Pudding ~from 12 Bones Smokehouse | Made by Meaghan Moineau

    Damn Good Corn Pudding ~from 12 Bones Smokehouse | Made by Meaghan Moineau

    Damn Good Corn Pudding from 12 Bones Smokehouse

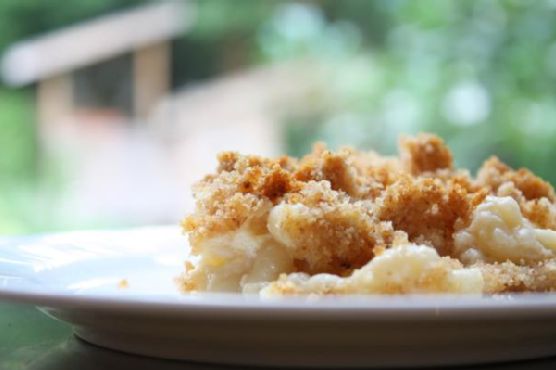
    Welcome to another delightful culinary adventure! Today, we’re diving into the soul-satisfying world of corn pudding, a dish that embodies comfort and warmth. Originating from the renowned 12 Bones Smokehouse, this Damn Good Corn Pudding is a crowd-pleaser that combines the sweetness of corn with a subtle spicy kick, creating a perfect harmony of flavors. As we embark on this journey, I’ll also share a cherished memory of how this dish became a staple in my family gatherings.

    Why You’ll Love It

    This corn pudding is not just another side dish; it’s an experience. Here’s why you’ll fall head over heels for it:

    • Perfect Balance: The combination of sweet corn and spicy poblanos ensures every bite is a burst of flavor.
    • Texture Delight: With a texture akin to a moist cake, it’s hearty enough to be a standalone dish yet versatile enough to accompany any meal.
    • Easy to Make: With simple ingredients and straightforward instructions, this dish is beginner-friendly and forgiving.
    • Customizable: You can easily adapt it to suit your taste preferences or dietary needs.
    • Memorable: It’s one of those dishes that sparks conversation and leaves a lasting impression on your taste buds.

    I remember the first time I tasted this corn pudding was at a family reunion. My grandmother, known for her Southern cooking prowess, brought it out as a surprise. The moment she placed it on the table, the room was filled with an inviting aroma that transported us back to our roots. Ever since, it’s been a beloved tradition to have this dish at our gatherings, each time bringing with it a wave of nostalgia and joy.

    Ingredients

    • 1 cup flour
    • 1/2 cup sugar
    • 2 teaspoons baking powder
    • 1/2 teaspoon salt
    • 1/2 teaspoon red pepper flakes
    • 1/2 teaspoon cumin
    • 1/2 teaspoon coriander
    • 3 large eggs
    • 1 stick butter, melted
    • 1 cup heavy cream
    • 2 cans (14.75 oz each) creamed corn
    • 2 diced fresh poblano peppers
    • 1 cup fresh corn kernels

    Instructions

    1. Preheat your oven to 350 degrees F (175 degrees C).
    2. In a mixing bowl, combine the flour, sugar, baking powder, salt, red pepper flakes, cumin, and coriander. Set aside.
    3. In an electric mixer, blend together the eggs, melted butter, heavy cream, and creamed corn until smooth.
    4. Stir in the diced poblano peppers and fresh corn kernels.
    5. Gradually add the dry ingredients to the wet mixture, mixing until just combined. The consistency should resemble cake batter.
    6. Grease a large 11 x 15-inch rimmed baking dish (or two smaller dishes) and pour the pudding mixture into it.
    7. Lightly tent the dish with foil and bake for 1 hour, or until the center is just set. If using smaller pans, bake for 30-40 minutes.
    8. For a golden top, remove the foil in the last 10-15 minutes of baking.
    9. Once done, allow it to cool slightly before serving. Enjoy as a main dish or a side!

    Tips

    • Consistency Check: Ensure your batter is not too thick; it should pour easily but not be runny.
    • Foil Tent: The foil prevents the top from browning too quickly while ensuring the center cooks evenly.
    • Testing Doneness: The pudding should have a slight jiggle in the center when done. It will continue to firm up as it cools.

    Variations & Substitutions

    Feel free to make this recipe your own with these variations:

    • Cheese Lover’s Delight: Add shredded cheddar cheese to the batter for a cheesy twist.
    • Spice It Up: Swap the poblano peppers for jalapeños if you prefer more heat.
    • Vegan Version: Use plant-based butter, coconut cream, and flax eggs for a vegan-friendly option.

    Storage

    To store your corn pudding:

    • Let it cool to room temperature before transferring to an airtight container.
    • Store in the refrigerator for up to 3-4 days.
    • Reheat in the oven at 300 degrees F until warm, or microwave individual portions as needed.

    FAQ

    Can I make this corn pudding ahead of time?

    Absolutely! You can prepare the batter a day in advance and store it in the refrigerator. Just give it a good stir before baking. Alternatively, bake it fully and store it, reheating before serving.

    What can I serve with corn pudding?

    Corn pudding pairs wonderfully with grilled meats, barbecue dishes, or a fresh green salad. It’s versatile enough to complement a wide range of main courses.

    Is it possible to freeze corn pudding?

    Yes, you can freeze corn pudding. Wrap it tightly in plastic wrap and aluminum foil, then store it in the freezer for up to two months. Thaw in the refrigerator overnight before reheating.

    Nutrition

    This recipe serves 8-10 people, depending on portion size. Each serving contains approximately:

    • Calories: 320
    • Fat: 18g
    • Carbohydrates: 35g
    • Protein: 5g
    • Fiber: 2g
    • Sugar: 9g

    Final Thoughts

    This Damn Good Corn Pudding is more than just a recipe; it’s a cherished tradition that brings people together. Whether you’re making it for a holiday feast or a simple family dinner, it’s sure to become a beloved staple in your home too. Feel free to experiment with it and tailor it to your preferences. Happy cooking, and may every bite bring warmth and joy to your table!

    Related update: Damn Good Corn Pudding ~from 12 Bones Smokehouse

  • Chicken Cordon Bleu | Made by Meaghan Moineau

    Chicken Cordon Bleu | Made by Meaghan Moineau

    Chicken Cordon Bleu: A Classic Dish with a Twist

    Welcome to my kitchen! Today, I’m sharing a recipe that brings back fond memories of family gatherings and cozy dinners: Chicken Cordon Bleu. This classic dish, with its crispy exterior and gooey, savory filling, never fails to impress. Whether you’re cooking to impress guests or simply treating yourself to something special, you’ll find this recipe both delightful and rewarding.

    Why You’ll Love It

    Chicken Cordon Bleu is a dish that combines the best of flavors and textures. Imagine tender chicken encasing a melty layer of Swiss cheese and savory ham—it’s pure comfort on a plate. What makes this recipe particularly special is its simplicity and adaptability. No need for complex techniques or obscure ingredients; just straightforward cooking that yields fantastic results. Plus, the satisfaction of slicing into the perfectly cooked roulade is truly unparalleled.

    Ingredients

    • 4 skinless boneless chicken breasts
    • 8 slices of Swiss cheese
    • 8 slices of deli ham
    • 1/2 cup flour
    • 2 eggs
    • 2 tablespoons water
    • 1 cup panko bread crumbs
    • 1 tablespoon fresh thyme leaves
    • 1 teaspoon kosher salt
    • 1/2 teaspoon black pepper
    • 2 tablespoons olive oil

    Instructions

    1. Preheat your oven to 350°F (175°C).
    2. Butterfly the chicken breasts by slicing them in half lengthwise, but do not cut all the way through.
    3. Place each breast between two pieces of plastic wrap. Using the flat side of a meat mallet, gently pound to about 1/4-inch thick, being careful not to tear the meat.
    4. Lay 2 slices of Swiss cheese on each chicken breast, followed by 2 slices of ham, and another 2 slices of cheese, leaving a half-inch margin around the edges.
    5. Tuck in the sides of the chicken and roll it tightly like a jellyroll. Gently squeeze the roll to help seal it.
    6. Season the flour with salt and pepper and spread it on wax paper or a flat dish.
    7. Mix the breadcrumbs with thyme, kosher salt, pepper, and olive oil to help the crust brown nicely.
    8. Beat together the eggs and water until fluid.
    9. Lightly dust each chicken roll with the seasoned flour, dip it into the egg mixture, and then gently coat it with the breadcrumb mixture.
    10. Carefully transfer the rolls to a baking pan and bake for about 20 minutes, or until browned and cooked through.
    11. Serve whole or slice into pinwheels for a beautiful presentation.

    Tips

    To ensure your Chicken Cordon Bleu turns out perfectly, here are a few tips:

    • Even Pounding: Make sure the chicken is evenly pounded to ensure uniform cooking.
    • Sealing the Roll: Tucking in the sides and rolling tightly help keep the cheese and ham contained.
    • Crust Perfection: The olive oil in the breadcrumb mixture is key for a golden crust.

    Variations & Substitutions

    This classic dish is versatile and can be customized to your liking:

    • Cheese: Swap Swiss cheese for Gruyère or mozzarella for a different flavor profile.
    • Ham: Prosciutto is a fantastic alternative, offering a slightly saltier taste.
    • Seasoning: Feel free to add garlic powder or paprika to the breadcrumb mix for an extra kick.

    Storage

    Leftover Chicken Cordon Bleu can be stored in an airtight container in the refrigerator for up to 3 days. To reheat, place it in a preheated oven at 325°F until warmed through. Avoid microwaving as it might make the breadcrumb coating soggy.

    FAQ

    Can I prepare Chicken Cordon Bleu in advance?

    Absolutely! You can prepare the chicken rolls up to the breadcrumb coating step and refrigerate them for up to 24 hours before baking.

    What should I serve with Chicken Cordon Bleu?

    This dish pairs beautifully with a fresh green salad, roasted vegetables, or creamy mashed potatoes.

    Is it possible to make this dish gluten-free?

    Yes, simply substitute the flour and panko bread crumbs with gluten-free alternatives.

    Nutrition

    While Chicken Cordon Bleu is indulgent, it’s also a good source of protein. To make it a bit lighter, you can use reduced-fat cheese and leaner cuts of deli meat.

    Final Thoughts

    Chicken Cordon Bleu is more than just a dish; it’s an experience. From the moment you start preparing it to the first bite, it promises comfort and satisfaction. I hope this recipe brings as much joy to your table as it has to mine. Happy cooking!

    Related update: Chicken Cordon Bleu

  • Rugelach | Made by Meaghan Moineau

    Rugelach | Made by Meaghan Moineau

    Delightful Rugelach: A Comforting Classic

    There’s something magical about the aroma of freshly baked rugelach wafting through the house. It takes me back to my grandmother’s cozy kitchen, where I first learned how to roll these delicate pastries. I remember the way she would hum softly, her hands expertly folding the dough around sweet preserves and crunchy walnuts. These moments, filled with warmth and love, are the essence of why I adore baking rugelach. Now, I’m excited to share this beloved recipe with you, hoping it brings the same joy and comfort to your home.

    Why You’ll Love It

    Rugelach is a delightful pastry that combines a tender, buttery dough with a sweet and nutty filling. It’s perfect for any occasion, whether you’re hosting a tea party, celebrating a holiday, or simply enjoying a quiet moment with a cup of coffee. Here’s why you’ll fall in love with this recipe:

    • Easy to make: With simple ingredients and clear instructions, this recipe is accessible for bakers of all levels.
    • Irresistible flavor: The combination of buttery dough, fruity preserves, and spiced cinnamon-sugar is simply divine.
    • Versatile: You can easily adapt the filling to suit your preferences or what you have on hand.

    Ingredients

    • Salted butter
    • Block of cream cheese
    • Salt
    • Plain flour
    • Egg yolks
    • Vanilla extract
    • Caster sugar
    • Fruit preserves
    • Walnuts
    • Butter (for brushing)
    • Ground cinnamon

    Instructions

    1. Leave butter and cream cheese in a warm place for a couple of hours to soften. They have to be soft and cannot be used straight out of the fridge.
    2. Pre-heat oven to 180°C.
    3. Place softened butter in a large mixing bowl. Add a block of cream cheese. Use block cream cheese, not cream cheese in a tub.
    4. Set the beater to medium speed and beat the butter and cream cheese until combined and light and fluffy.
    5. Add 2 large egg yolks, 1 teaspoon of vanilla extract, 1/2 cup of caster sugar, a pinch of salt, and 2.5 cups of plain flour. Mix all the ingredients together in the mixer on medium speed until the dough comes together.
    6. While the dough is being mixed, chop 1/2 cup of walnuts into fine pieces and set aside.
    7. When the dough is ready, scatter some flour on the table or countertop. Knead the dough and gently form it into a large block. Add more flour if the dough is too sticky. The dough should be a nice elastic block.
    8. Cut the dough into 4 equal pieces. Set 3 pieces of dough aside, covering them with a slightly damp cloth to prevent them from drying out.
    9. Roll the 4th piece of dough into a ball. Using a floured rolling pin, roll out the ball of dough into a flat circle about 2 to 3 mm thick.
    10. Cut the rolled dough into 8 triangles.
    11. Prepare some fruit preserves. If the preserves are thick and difficult to spread, whisk them with a fork for a minute.
    12. Place one teaspoon of preserves on the long end of each triangular piece of dough. Lightly spread it towards the other end, keeping most of the preserves on the long end.
    13. Scatter some chopped walnuts on the preserves at the long end.
    14. To roll the rugelach, tuck in the sides of the triangle slightly to hold the preserves and nuts in. Roll towards the third corner of the triangle.
    15. Repeat for all the blocks of dough until the rugelach are prepared.
    16. Place all the prepared rugelach on a sheet of baking paper on a baking tray.
    17. Mix 1/4 cup of caster sugar and 1 teaspoon of ground cinnamon in a small bowl.
    18. Melt 50g of butter. Gently brush each rugelach with melted butter and sprinkle with the cinnamon-sugar mixture. You can also roll the rugelach in the mixture.
    19. Place the rugelach in the pre-heated oven and bake at 180°C for about 35 minutes or until they are a dark golden brown.
    20. Leave the rugelach to cool before storing them.

    Tips

    • Softening: Make sure the butter and cream cheese are softened before you start. This ensures a smooth, cohesive dough.
    • Rolling: Keep your rolling pin and surface lightly floured to prevent sticking.
    • Filling: Be generous with the preserves and walnuts for a more flavorful pastry.

    Variations & Substitutions

    Rugelach is wonderfully adaptable, so feel free to experiment with different flavors:

    • Preserves: Try raspberry, apricot, or fig preserves for a different twist.
    • Nuts: Substitute pecans or almonds for walnuts if you prefer.
    • Spices: Add a pinch of nutmeg or cardamom to the cinnamon-sugar mix for an extra layer of flavor.

    Storage

    Store your rugelach in an airtight container at room temperature for up to a week. For longer storage, place them in a freezer-safe bag and freeze for up to three months. Just thaw them at room temperature before serving.

    FAQ

    Can I prepare the dough in advance?

    Absolutely! You can prepare the dough up to two days in advance. Just wrap it tightly in plastic wrap and store it in the refrigerator. Let it come to room temperature before rolling it out.

    Is it possible to use low-fat cream cheese?

    While you can use low-fat cream cheese, the texture and flavor may not be as rich. For the best results, I recommend using full-fat block cream cheese.

    Nutrition

    Each rugelach contains approximately 150 calories, 10g of fat, 15g of carbohydrates, and 2g of protein. Keep in mind that these values can vary based on the specific ingredients and portion sizes you use.

    Final Thoughts

    Baking rugelach is a beautiful way to connect with tradition while creating new memories with loved ones. Whether you’re savoring them fresh from the oven or sharing them with friends over tea, these delightful pastries are sure to bring happiness and warmth to your table. I hope this recipe becomes a cherished part of your baking repertoire, just as it has been for me.

    Related update: Rugelach

    Related update: Almond Cookie Bar

  • Apple Dumplings In Fanta Sauce | Made by Meaghan Moineau

    Apple Dumplings In Fanta Sauce | Made by Meaghan Moineau

    Apple Dumplings In Fanta Sauce

    There’s something about the smell of apples and cinnamon baking in the oven that can transport you back to a simpler time. Growing up, my grandmother would make apple dumplings every autumn. The warm, sweet aroma would fill the kitchen, drawing everyone in for a taste. She had a secret ingredient that made her dumplings truly special—Fanta. Today, I’m excited to share a modern twist on her classic recipe: Apple Dumplings in Fanta Sauce.

    Why You’ll Love It

    This recipe is a delightful blend of sweet and tangy flavors, with a touch of nostalgia. The flaky puff pastry envelops tender apple crescents, while the Fanta sauce adds a unique citrusy sweetness that perfectly complements the apples. It’s a fun and easy recipe that even beginners can tackle with confidence. Whether you’re serving it as a dessert or a special treat, these apple dumplings are sure to become a family favorite.

    Ingredients

    • 2 crusts package puff pastry
    • 4 apples
    • 1 lemon (juice)
    • 1 cup Fanta Lemon
    • 1 cup sugar
    • 1/2 cup butter
    • 1 teaspoon lemon extract
    • Grounded cinnamon (optional)

    Instructions

    1. Preheat your oven to 400°F (about 200°C).
    2. Peel and core the apples, then cut each apple into 8 crescent-shaped pieces. Sprinkle them with lemon juice to prevent browning.
    3. Unroll the puff pastry and cut each crust into 8 equal triangles.
    4. Place an apple crescent on each puff pastry triangle and roll it up towards the top, enclosing the apple.
    5. In a pan, melt the butter. Add sugar and lemon extract, stirring well to combine.
    6. Arrange the dumplings in a baking pan, ensuring they are close enough to touch each other.
    7. Pour the melted butter and sugar mixture generously over each dumpling.
    8. Pour Fanta Lemon over the dumplings, ensuring they are well coated.
    9. Optionally, sprinkle with grounded cinnamon for extra flavor.
    10. Bake in the preheated oven for about 30 minutes. After the first 15-20 minutes, cover with baking paper to prevent burning.

    Tips

    For best results, make sure your puff pastry is cold before working with it. This will make it easier to cut and roll. If you find your dumplings browning too quickly, reduce the oven temperature slightly and cover them with baking paper to prevent burning. Keep an eye on the baking time as ovens can vary.

    Variations & Substitutions

    Feel free to experiment with different types of apples for this recipe. Granny Smith apples offer a tart contrast to the sweet sauce, while Honeycrisp and Fuji apples provide a sweeter profile. If you don’t have Fanta Lemon, you can substitute with another citrus-flavored soda or even a splash of lemon-lime soda mixed with orange juice. For a spicier kick, try adding a pinch of nutmeg or cloves to the sugar mixture.

    Storage

    Store any leftover apple dumplings in an airtight container in the refrigerator for up to 3 days. To reheat, simply pop them in a preheated oven at 350°F (175°C) for about 10 minutes or until heated through. You can also microwave them for a quick warm-up, but the pastry may lose some of its crispiness.

    FAQ

    Can I make these apple dumplings ahead of time?

    Yes, you can prepare the dumplings up to the baking step and refrigerate them for a few hours before baking. This can be a great time-saver if you’re planning to serve them at a gathering. Just ensure that the dumplings are well-covered so they don’t dry out in the fridge.

    What type of apples work best for this recipe?

    While you can use any type of apple, firmer varieties like Granny Smith or Honeycrisp hold their shape well during baking. Their flavor profiles also complement the sweet and tangy sauce beautifully.

    Can I use homemade puff pastry?

    Absolutely! Homemade puff pastry can elevate the dish, offering a richer, buttery flavor. Just ensure it’s rolled out to the same thickness as store-bought pastry for consistent results.

    Nutrition

    The nutritional content will vary depending on the type of apples and soda used. On average, each dumpling contains approximately 200-250 calories. It’s a treat best enjoyed in moderation, but the delicious flavor is well worth it!

    Final Thoughts

    Apple Dumplings in Fanta Sauce is a delightful recipe that combines the warmth and comfort of traditional apple desserts with a modern twist. It’s perfect for any occasion, from a cozy family dinner to a festive holiday gathering. The ease of preparation and the unique flavor make it a standout dish that you’ll return to time and again. Enjoy the sweet nostalgia and happy baking!

    Related update: Apple Dumplings In Fanta Sauce

    Related update: Eggless Blueberry and White Chocolate Baked Cheesecake

  • Ginger Snap and Pumpkin Ice Cream Sandwiches | Made by Meaghan Moineau

    Ginger Snap and Pumpkin Ice Cream Sandwiches

    There’s something enchantingly nostalgic about ice cream sandwiches. They remind me of warm summer evenings spent on my grandmother’s porch, where the world seemed to pause for a moment. With a gentle breeze and the laughter of family in the background, we would savor every bite, letting the creamy goodness melt away the day’s worries. As autumn rolls in, I find myself craving that same delightful treat, reimagined with the rich, spicy flavors of the season. Enter Ginger Snap and Pumpkin Ice Cream Sandwiches—a perfect fusion of summer nostalgia and autumn warmth.

    Why You’ll Love It

    This recipe is the epitome of seasonal indulgence, combining the creamy richness of homemade pumpkin ice cream with the spicy crunch of ginger snap cookies. It’s the best of both worlds: a cool treat for those sunny fall days and a comforting spice for the crisp evenings. Each bite is a sensory delight, offering a harmonious blend of flavors and textures that will leave you and your loved ones reaching for seconds.

    Ingredients

    • Whole milk
    • Heavy cream
    • Granulated sugar
    • Ground cinnamon
    • Nutmeg
    • Ground ginger
    • Whole cinnamon stick
    • Kosher salt
    • Egg yolks
    • Canned pumpkin puree
    • Vanilla
    • All-purpose flour
    • Baking soda
    • Ground pepper
    • Unsalted butter
    • Molasses
    • Egg

    Instructions

    1. In a medium saucepan over medium heat, combine the milk, cream, granulated sugar, ginger, ground cinnamon, cinnamon stick, nutmeg, and salt. Heat the mixture until steaming and it begins to foam. Remove from the heat.
    2. In a small bowl, whisk the egg yolks until pale yellow. Gradually whisk in one cup of the warm cream mixture, whisking constantly.
    3. Pour the yolks and cream mixture back into the saucepan and cook over low heat, stirring constantly. Continue cooking until the mixture thickens and coats the back of a spoon.
    4. Place some ice and water into a large bowl and place a smaller bowl inside. Pour the cream mixture through a mesh strainer into the bowl. Stir in the pumpkin and vanilla, add the cinnamon stick back to the mixture. Chill thoroughly, preferably overnight.
    5. Pour the mixture into the freezer can of an electric ice cream maker and freeze according to the manufacturer’s instructions.
    6. In a small bowl, whisk together the dry ingredients for the cookies.
    7. In the bowl of an electric mixer, beat the butter until soft. Add the sugar and continue beating until smooth and creamy, occasionally scraping down the sides of the bowl.
    8. Stir in the vanilla, molasses, and egg; combine thoroughly. Mix in the dry ingredients gradually until the dough is smooth.
    9. Turn the dough out onto a lightly floured surface and divide in half. Roll each half into a log about 2 inches around. Wrap each log in plastic wrap and roll them lightly to smooth them out. Refrigerate or freeze until firm.
    10. Preheat the oven to 350 degrees and line two baking sheets with parchment.
    11. Slice the dough into 1/4 inch rounds with a serrated knife, being careful to keep their shape. Place the rounds on the baking sheet and sprinkle with granulated or coarse sugar.
    12. Bake for 10-13 minutes, rotating the pans halfway through. Let the cookies cool in the pan for about 2 minutes and then transfer to a wire cooling rack. Dough can be refrigerated for up to five days or frozen for up to three months. Baked cookies can be stored in an air-tight container for approximately a week.

    Tips

    For best results, make sure all your ingredients are at room temperature before starting. This helps everything blend smoothly and evenly. If you’re short on time, the cookies can be prepared ahead and stored, as mentioned, which will make assembling the sandwiches a breeze when your ice cream is ready!

    Variations & Substitutions

    If you’re not a fan of ginger, you can substitute the ginger snap cookies with chocolate chip cookies for a different but equally delightful flavor combination. For a dairy-free version, substitute coconut milk and cream for the whole milk and heavy cream, and use a dairy-free butter alternative for the cookies.

    Storage

    Store any leftover ice cream sandwiches in an airtight container in the freezer. If you want to avoid them sticking together, place a small piece of parchment paper between each sandwich. They should keep well for up to a month, though they’re so delicious they probably won’t last that long!

    FAQ

    Can I make the ice cream without an ice cream maker?

    Yes, you can! Simply pour the chilled mixture into a shallow dish and freeze. Stir the mixture every 30 minutes to break up ice crystals until it’s fully frozen. This method might result in a slightly less creamy texture, but it’s still delicious!

    What can I use instead of canned pumpkin puree?

    If you prefer fresh, you can roast and puree your own pumpkin. Make sure it’s well-drained to avoid excess moisture, which can affect the texture of the ice cream.

    Nutrition

    While these indulgent treats are meant to be enjoyed without too much concern for calories, it’s good to know that they contain wholesome ingredients. Each sandwich offers a balanced mix of carbohydrates, fats, and proteins, along with a dose of dietary fiber from the pumpkin. Plus, the spices bring antioxidants, aiding in overall health. Enjoy them as an occasional treat and savor each delightful bite!

    Final Thoughts

    Ginger Snap and Pumpkin Ice Cream Sandwiches are more than just a dessert; they’re a tribute to cherished memories and the comforting flavors of fall. Whether you’re sharing them with family on a cozy evening or surprising guests at a festive gathering, these sandwiches are sure to bring smiles and spark joy. So, gather your ingredients, embrace the process, and enjoy the delicious rewards of your labor. Happy indulging!

    Related update: Ginger Snap and Pumpkin Ice Cream Sandwiches

    Related update: Apple Dumplings In Fanta Sauce

  • Venison Stew | Made by Meaghan Moineau

    Venison Stew | Made by Meaghan Moineau

    Hearty Venison Stew

    Welcome to a journey of flavor and warmth with this classic Venison Stew recipe. As the weather turns crisp and the leaves begin to fall, there’s nothing quite like a stew simmering on the stove to bring comfort and joy. This recipe is not just a dish; it’s a memory. I remember, as a child, visiting my grandparents’ cabin nestled in the woods. My grandfather would often return from a morning hunt with venison, and my grandmother would transform it into the most delicious stew. The aroma would fill the cabin, mingling with the scent of pine and the crackling wood fire. It’s a memory that has stayed with me, and I’m thrilled to share this special recipe with you.

    Why You’ll Love It

    This venison stew is a celebration of rich, earthy flavors and tender meat. Here’s why you’ll fall head over heels for it:

    • Flavorful and Hearty: Each bite is packed with the robust flavors of venison and vegetables, simmered to perfection.
    • Nutritious: Venison is a lean protein source that’s rich in vitamins and minerals.
    • Perfect for Any Occasion: Whether it’s a family dinner or a cozy night in, this stew is a crowd-pleaser.
    • Memorable: It’s a dish that brings people together, creating cherished memories around the table.

    Ingredients

    • 2 pounds venison stew meat
    • 1 cup flour, plus 3 tablespoons for thickening
    • 2 tablespoons vegetable oil
    • 4 cups water
    • 2 beef bouillon cubes
    • 4 large potatoes, peeled and diced
    • 1 large onion, chopped
    • 1 cup baby carrots, sliced
    • 4 stalks celery, sliced
    • 1 can mushrooms, drained
    • 1 green bell pepper, chopped
    • Salt and pepper to taste

    Instructions

    1. Cut the venison, potatoes, onion, baby carrots, celery, mushrooms, and green bell pepper into 1-inch pieces.
    2. In a large bowl, mix the venison with 1 cup of flour, salt, and pepper to coat evenly.
    3. In a large pot, heat the vegetable oil over medium-high heat. Brown the venison on all sides.
    4. Add the water and beef bouillon cubes to the pot. Bring to a boil, then reduce the heat and let it simmer for 2 hours.
    5. After 2 hours, add the potatoes, onion, carrots, celery, mushrooms, and green bell pepper to the pot. Simmer for an additional 30 minutes.
    6. In a small bowl, mix the remaining 3 tablespoons of flour with 1 cup of cold water. Stir this mixture into the stew to thicken.
    7. Continue to simmer for another 5-10 minutes until the stew has thickened to your desired consistency. Adjust seasoning with salt and pepper if needed.

    Tips

    • Be Patient: Allowing the venison to slowly cook over a couple of hours ensures it becomes tender and flavorful.
    • Consistent Cuts: Cutting the vegetables and meat into uniform sizes ensures even cooking.
    • Thickening Tips: If you prefer a thicker stew, add an additional tablespoon of flour to the thickening mixture.

    Variations & Substitutions

    • Meat Alternatives: If venison is not available, you can substitute it with beef or lamb for a different but equally delicious experience.
    • Vegetables: Feel free to add or substitute other vegetables such as parsnips or turnips for added depth and flavor.
    • Spices: Enhance the flavor with herbs like thyme, rosemary, or bay leaves.

    Storage

    Leftover venison stew can be stored in an airtight container in the refrigerator for up to 3 days. It also freezes well; simply place it in a freezer-safe container, where it can be stored for up to 3 months. To reheat, thaw overnight in the refrigerator and warm on the stove over medium heat until heated through.

    FAQ

    Can I use a slow cooker for this recipe?

    Absolutely! After browning the venison, transfer it along with all the other ingredients into a slow cooker. Cook on low for 6-8 hours or until the meat is tender.

    What can I serve with venison stew?

    This stew pairs wonderfully with crusty bread or a side of mashed potatoes. A fresh green salad also complements the hearty flavors beautifully.

    Nutrition

    Venison is a lean protein source that’s low in fat and calories, making this stew a nutritious option. It provides essential nutrients such as iron, zinc, and B vitamins. Combined with a medley of vegetables, this dish is both satisfying and wholesome.

    Final Thoughts

    This venison stew is more than just a meal; it’s an experience of warmth, nostalgia, and community. Whether you’re reminiscing about family gatherings or creating new memories, this stew is sure to become a treasured recipe in your collection. I hope you enjoy making and sharing it as much as I do. Bon appétit!

    Related update: Venison Stew

    Related update: Cavatappi pasta with salmon crab surimi

  • Classic Matzo Ball Soup | Made by Meaghan Moineau

    Classic Matzo Ball Soup | Made by Meaghan Moineau

    Classic Matzo Ball Soup

    Why You’ll Love It

    There’s something truly magical about a steaming bowl of matzo ball soup, a dish that’s not just a meal but also a comforting hug in a bowl. This classic recipe has been a staple in my family for generations. As a child, I remember sitting at my grandmother’s table, eagerly waiting for her to serve her famous matzo ball soup. The aroma filled the house, teasing the senses and wrapping us in warmth. It’s not just the taste that makes this soup special; it’s the tradition, the love, and the memories that come with every spoonful.

    Ingredients

    • 1 whole chicken
    • 2 celery stalks, chopped
    • 3 carrots, peeled and chopped
    • 1 onion, peeled and quartered
    • Fresh dill (optional)
    • Fresh parsley
    • Salt and pepper, to taste
    • 4 eggs
    • 4 tablespoons chicken fat (or vegetable oil)
    • 1 cup matzo meal
    • 1/4 cup seltzer water

    Instructions

    1. Wash the chicken with cold water and place it in a large pot. Cover with water and bring to a simmer. Avoid boiling to ensure a clear broth.
    2. Skim off any bubbling foam that forms on the surface.
    3. Add the celery, carrots, onion, fresh herbs, salt, and pepper. Continue to simmer for about 45 minutes.
    4. Pour the soup through a strainer and let it cool. Once the broth has completely cooled, remove the chicken meat and skim off the fat. Save this fat for the matzo balls.
    5. In a mixing bowl, beat together 4 eggs and 4 tablespoons of chicken fat (or vegetable oil).
    6. Stir in the matzo meal and a pinch of salt. Add the seltzer water and mix until combined. Cover and refrigerate the mixture for at least 1 hour.
    7. Form the matzo dough into teaspoon-sized balls.
    8. Bring the chicken broth to a boil. Add the matzo balls, cover, and cook for 20 minutes.
    9. Serve immediately, garnished with fresh dill or parsley.

    Tips

    For perfectly fluffy matzo balls, it’s crucial to let the matzo meal mixture rest in the refrigerator. This resting period allows the matzo meal to absorb the liquid and helps the balls hold their shape. Additionally, using seltzer water is a little secret that adds lightness to the matzo balls, ensuring they are tender and airy.

    Variations & Substitutions

    If you’re looking to mix things up, you can add a variety of vegetables to the broth, such as parsnips or turnips, for additional flavor. For those who prefer a vegetarian version, replace the chicken and chicken fat with vegetable broth and olive oil. You can also experiment with different herbs, like thyme or rosemary, to create a unique taste profile that suits your palate.

    Storage

    Leftover soup can be stored in an airtight container in the refrigerator for up to 3 days. If you want to keep it longer, it freezes beautifully. Just make sure to store the matzo balls separately from the broth to maintain their texture. When ready to enjoy, simply defrost the soup and matzo balls in the refrigerator overnight and reheat gently on the stove.

    FAQ

    Can I make matzo ball soup ahead of time?

    Absolutely! Matzo ball soup is a fantastic make-ahead meal. Prepare the broth and matzo balls separately and store them in the refrigerator. When you’re ready to serve, reheat the broth and add the matzo balls to warm through before serving.

    Why is my matzo ball soup cloudy?

    A cloudy broth is often the result of boiling the soup too vigorously. To ensure a clear broth, keep the soup at a gentle simmer and avoid stirring too much. Skimming off the foam as it forms will also help maintain clarity.

    Nutrition

    While the exact nutritional content can vary based on specific ingredients and portion sizes, a serving of matzo ball soup is generally rich in protein and fiber, thanks to the chicken and vegetables. It’s a hearty, nourishing dish that’s also relatively low in calories, making it a comforting yet healthy option for any meal.

    Final Thoughts

    Classic matzo ball soup is more than just a recipe; it’s a cherished tradition that brings people together. Whether you’re seeking comfort on a chilly evening or sharing a meal with family and friends, this beloved dish offers warmth and solace with every spoonful. I hope this recipe brings as much joy and comfort to your table as it has to mine. Happy cooking!

    Related update: Classic Matzo Ball Soup

    Related update: Venison Stew

    Related update: Tuscan White Bean Soup with Olive Oil and Rosemary

  • Roasted Endive Salad With Prosciutto, Figs and Pistachios | Made by Meaghan Moineau

    Roasted Endive Salad With Prosciutto, Figs and Pistachios | Made by Meaghan Moineau

    Roasted Endive Salad With Prosciutto, Figs and Pistachios

    Why You’ll Love It

    As the leaves begin to fall and the air turns crisp, there’s nothing quite like a warm salad to bring comfort and elegance to your table. This Roasted Endive Salad with Prosciutto, Figs, and Pistachios is one of those dishes that combines simplicity with sophistication, making it perfect for both weeknight dinners and special occasions. The combination of roasted endive’s slightly bitter taste with the sweetness of figs, the salty crunch of prosciutto, and the nutty flavor of pistachios creates a symphony of flavors that will have you coming back for more.

    Growing up, my grandmother would often prepare a similar salad during the holiday season. The aroma of roasting endive would fill the kitchen, and I remember sneaking crispy bits of prosciutto off the counter when she wasn’t looking. It was a dish that brought the family together, a recipe filled with love and joy, and one that I am now excited to share with you.

    Ingredients

    • 4 heads of red or green endive
    • 2 tablespoons olive oil
    • 4 slices prosciutto
    • 1/2 cup dried figs, sliced
    • 1/4 cup pistachio nuts, shelled
    • 2 tablespoons honey

    Instructions

    1. Preheat your oven to 350°F (this is a great toaster oven candidate for smaller batches). Line a rimmed baking sheet with aluminum foil.
    2. Wash the endive thoroughly and remove any unsightly outer leaves. Slice each endive head in half lengthwise, from the stem to the tip.
    3. Arrange the endive cut side up on the foil-lined baking sheet. Generously coat each piece with olive oil.
    4. Bake in the oven for 30 minutes, or until the outer edges of the endive are golden brown.
    5. While the endive is roasting, fry the prosciutto slices in a skillet over medium heat until crispy. Drain them on paper towels, then crumble and set aside.
    6. Once the endive is done roasting, arrange three pieces on each plate. Add a handful of sliced dried figs and pistachio nuts.
    7. Drizzle a spoonful of honey over each plate, then sprinkle with about 1/4 of the crumbled prosciutto.

    Tips

    For the best results, choose endives that are fresh and crisp. When selecting figs, opt for those that are slightly soft but not mushy. If you’re short on time, you can roast the endive and fry the prosciutto a day ahead, then assemble the salad just before serving.

    Variations & Substitutions

    If you’re looking to mix things up, consider swapping out the dried figs for fresh figs when they’re in season. You can also try using a different type of nut, such as walnuts or almonds, for a different texture and flavor. For a vegetarian version, omit the prosciutto and add a sprinkle of feta cheese for a salty kick.

    Storage

    This salad is best enjoyed fresh, but if you have leftovers, store them in an airtight container in the refrigerator for up to two days. Reheat the endive gently in the oven to retain its texture before serving again.

    FAQ

    Can I make this salad ahead of time?

    Yes, you can prepare the components ahead of time. Roast the endive and fry the prosciutto in advance, then store them separately in the refrigerator. Assemble the salad just before serving for the best taste and texture.

    What can I serve with this salad?

    This salad pairs wonderfully with a light protein like grilled chicken or fish. It also works as a delicious starter for a multi-course meal or as part of a larger spread for a festive gathering.

    Nutrition

    While this salad is a treat for the taste buds, it is also packed with nutrients. Endive is a great source of vitamins A and K, while figs provide dietary fiber and antioxidants. Prosciutto adds protein, and pistachios offer healthy fats and additional fiber. A drizzle of honey rounds out the dish with a natural sweetness, making this salad both nutritious and satisfying.

    Final Thoughts

    Roasted Endive Salad with Prosciutto, Figs, and Pistachios is more than just a dish; it’s a celebration of flavors that come together beautifully. Whether you’re hosting a dinner party or looking for a cozy meal to enjoy with your family, this salad is sure to impress. I hope it becomes a cherished part of your recipe repertoire, just as it has been in mine. Bon appétit!

    Related update: Roasted Endive Salad With Prosciutto, Figs and Pistachios

  • Chicken Adobo & Coconut Ginger Rice | Made by Meaghan Moineau

    Chicken Adobo & Coconut Ginger Rice | Made by Meaghan Moineau

    Chicken Adobo & Coconut Ginger Rice

    There’s something truly comforting about the rich aroma of Chicken Adobo wafting through the kitchen. This dish takes me back to my childhood, where Sundays meant gathering around the table with family, sharing stories as the flavors of soy sauce, vinegar, and bay leaves worked their magic on tender chicken thighs. Today, I hope to bring a little piece of that nostalgia into your home with this delightful recipe for Chicken Adobo & Coconut Ginger Rice.

    Why You’ll Love It

    This Chicken Adobo & Coconut Ginger Rice recipe is a heartwarming blend of savory, sweet, and tangy flavors that come together in a truly satisfying meal. The tender chicken, marinated in a rich adobo sauce, is perfectly complemented by the fragrant coconut ginger rice. It’s a dish that feels like a warm hug, perfect for cozy dinners or entertaining guests. Whether you’re new to Filipino cuisine or a seasoned fan, this recipe is sure to become a staple in your kitchen.

    Ingredients

    • 1/2 cup low sodium soy sauce
    • 1/2 cup apple cider vinegar
    • 4 cloves garlic, minced
    • 1 tablespoon whole peppercorns
    • 2 tablespoons brown sugar
    • 3 bay leaves
    • 6 bone-in chicken thighs
    • 1 tablespoon grapeseed oil
    • 1 cup chicken broth
    • 1 tablespoon cornstarch
    • 1/4 cup water
    • 3 cups water (for rice)
    • 1 1/2 cups rice
    • 1 tablespoon fresh ginger, grated
    • 1/2 cup sweetened shredded coconut
    • 2 scallions, chopped
    • 2 tablespoons fresh parsley, chopped
    • Kosher salt, to taste

    Instructions

    1. In a large bowl or flat dish, combine soy sauce, vinegar, garlic, peppercorns, brown sugar, and bay leaves with the chicken. Marinate for at least an hour or overnight.
    2. When ready to cook, heat grapeseed oil in a pan over medium-high heat. Lay the chicken thighs down, leaving the marinade in the dish. Brown the chicken on both sides, approximately 2-3 minutes per side, then remove from the pan and set aside.
    3. Pour the marinade and chicken broth into the pan and bring to a boil. Once boiling, return the chicken to the pan, cover, and cook for about 10 minutes.
    4. In a small bowl, whisk 1/4 cup water with the cornstarch, then add to the pan. Turn the chicken pieces over, cover again, and cook until the juices run clear, approximately 6-9 minutes.
    5. For the rice, bring 3 cups of water to a boil in a saucepan. Add a pinch of salt, then add the rice and cook according to package instructions. Once the rice is done, toss with scallions, parsley, ginger, and coconut.
    6. Serve the chicken over the coconut ginger rice and drizzle with a bit of the sauce from the pan.

    Tips

    For the best results, marinate the chicken overnight. This allows the flavors to penetrate deeply, resulting in more flavorful and tender chicken. When browning the chicken, make sure your pan is hot enough to give it a nice sear; this adds depth to the flavor.

    Variations & Substitutions

    If you prefer, you can use boneless chicken thighs or even chicken breasts for a leaner option. For those who enjoy a little heat, add a sliced chili or a dash of chili flakes to the marinade. If you’re avoiding soy, tamari or coconut aminos can be substituted for soy sauce.

    Storage

    Leftover Chicken Adobo can be stored in an airtight container in the refrigerator for up to 3 days. The rice can be stored separately in the refrigerator for up to 2 days. To reheat, add a splash of water to the chicken and warm it on the stove over low heat until heated through.

    FAQ

    Can I make this dish ahead of time?

    Absolutely! Chicken Adobo often tastes even better the next day as the flavors continue to develop. Feel free to make it a day ahead for a quick and easy meal.

    What can I serve with Chicken Adobo & Coconut Ginger Rice?

    This dish pairs wonderfully with a simple green salad or steamed vegetables such as broccoli or bok choy. The freshness of the greens complements the rich flavors of the adobo.

    Nutrition

    Each serving of Chicken Adobo & Coconut Ginger Rice provides a balanced meal of protein, carbohydrates, and healthy fats. It’s a great source of vitamins and minerals, particularly from the fresh herbs and ginger. For those watching their sodium intake, using low sodium soy sauce helps keep the levels in check.

    Final Thoughts

    Chicken Adobo & Coconut Ginger Rice is a dish that brings warmth and comfort with each bite. It’s perfect for family dinners or when you want to impress your guests with something both exotic and homey. I hope this recipe fills your home with the same joy and delicious smells it brings to mine. Enjoy every moment of cooking and savoring this delightful meal!

    Related update: Chicken Adobo & Coconut Ginger Rice

  • Pasta with Peas and Italian Sausage | Made by Meaghan Moineau

    Pasta with Peas and Italian Sausage

    Intro

    There are few things more comforting than a bowl of pasta, and this recipe for Pasta with Peas and Italian Sausage holds a special place in my heart. Growing up, Sunday dinners were a cherished tradition in my family. My grandmother would spend the afternoon bustling around the kitchen, filling the house with the aroma of fresh herbs, garlic, and tomatoes. One of her signature dishes was this simple yet flavorful pasta recipe. It’s a dish that brings back memories of laughter and love shared around the dinner table, and I’m thrilled to share it with you today.

    Why You’ll Love It

    This Pasta with Peas and Italian Sausage recipe is a delightful blend of flavors and textures that come together in perfect harmony. You’ll love how the sweet and savory Italian sausage complements the freshness of the peas, all enveloped in a rich, tomato-based sauce. It’s a hearty meal that’s incredibly easy to prepare, making it perfect for busy weeknights or a cozy weekend dinner. Plus, it’s a one-pot wonder that minimizes cleanup, allowing you more time to relax and savor your meal.

    Ingredients

    • 1 lb farfalle pasta
    • 2 tablespoons olive oil
    • 4 Italian sweet sausages, casings removed
    • 1 cup frozen peas
    • 1 can (14 oz) canned tomatoes
    • 1 cup Pomi strained tomato sauce
    • 2 tablespoons butter
    • Salt and pepper to taste

    Instructions

    1. Cook the pasta following the package directions until al dente. Drain and set aside.
    2. In a very large skillet over medium heat, add the olive oil.
    3. Add the Italian sausage meat to the skillet and sauté until slightly brown all over.
    4. Stir in the frozen peas and canned tomatoes.
    5. Season with salt and pepper to taste.
    6. Lower the heat to medium and cook for another 10 to 15 minutes, allowing the flavors to meld together.
    7. Return the drained pasta to the pan and add the butter.
    8. Pour in the tomato sauce with sausage and mix well until everything is combined.
    9. Serve hot, garnished with grated Parmesan cheese if desired.

    Tips

    Here are some tips to ensure your Pasta with Peas and Italian Sausage turns out perfectly every time:

    • Use high-quality Italian sausage for the best flavor. You can choose between sweet or spicy depending on your preference.
    • If you have fresh peas on hand, feel free to use them instead of frozen peas.
    • Be sure to cook the pasta to al dente, as it will continue to cook slightly when mixed with the sauce.
    • For an extra touch of flavor, add a pinch of red pepper flakes to the sauce.

    Variations & Substitutions

    This recipe is wonderfully versatile. Here are some variations and substitutions you can try:

    • Vegetarian Version: Omit the sausage and add more vegetables like bell peppers or mushrooms.
    • Different Pasta: Feel free to swap the farfalle for another type of pasta like penne or fusilli.
    • Gluten-Free: Use your favorite gluten-free pasta to make this dish suitable for those with gluten sensitivities.

    Storage

    Leftovers can be stored in an airtight container in the refrigerator for up to 3 days. To reheat, warm gently in a skillet over medium heat, adding a splash of water if needed to loosen the sauce. This dish can also be frozen for up to 2 months. Thaw in the refrigerator overnight before reheating.

    FAQ

    Can I use fresh tomatoes instead of canned?

    Yes, fresh tomatoes can be substituted for canned. Simply chop them and cook until they break down and form a sauce. You may need to adjust the cooking time slightly to achieve the desired consistency.

    How can I make this dish spicier?

    If you prefer a spicier dish, use hot Italian sausage instead of sweet, or add a pinch of red pepper flakes to the sauce.

    What can I serve with this pasta?

    This pasta is a meal in itself, but it pairs beautifully with a simple green salad and crusty garlic bread for a complete dinner.

    Nutrition

    This dish is a hearty meal that provides a good balance of protein, carbohydrates, and fats. The peas add a nice dose of fiber and vitamins, while the sausage contributes protein and flavor. Adjustments can be made based on dietary needs or preferences, such as using turkey sausage for a leaner option.

    Conclusion

    There you have it, a heartwarming recipe for Pasta with Peas and Italian Sausage that’s sure to become a family favorite. It’s easy to see why this dish has been a staple in my family for generations. Not only is it delicious and satisfying, but it’s also a breeze to prepare, making it perfect for any occasion. I hope this recipe brings as much joy to your table as it has to mine. Enjoy!

    Related update: Pasta with Peas and Italian Sausage

    Related update: Salmon In Banana Leaf