Tag: Comfort Food

  • Sauteed Chicken With Mushrooms and Cream | Made by Meaghan Moineau

    Sauteed Chicken With Mushrooms and Cream | Made by Meaghan Moineau

    Sauteed Chicken With Mushrooms and Cream

    Welcome to a dish that brings warmth and comfort to your table, Sauteed Chicken With Mushrooms and Cream. This recipe has been a beloved staple in my family for generations, often gracing our tables during special gatherings and Sunday dinners. I fondly remember my grandmother preparing this dish with such love and care, her kitchen filled with the rich aroma of sautéed mushrooms and creamy sauce. Today, I share this cherished recipe with you, hoping it brings as much joy to your family as it has to mine.

    Why You’ll Love It

    This Sauteed Chicken With Mushrooms and Cream is a culinary delight that you’ll find yourself returning to again and again. Here’s why:

    • Rich and Flavorful: The combination of tender chicken, earthy mushrooms, and a creamy wine sauce creates a depth of flavor that’s simply irresistible.
    • Easy to Prepare: Despite its gourmet taste, this dish is straightforward to make, requiring just a few steps to bring it all together.
    • Perfect for Any Occasion: Whether it’s a weeknight dinner or a special occasion, this dish fits the bill, impressing family and friends alike.

    Ingredients

    • Frying chicken parts
    • Mushrooms
    • Butter
    • Olive oil
    • Salt
    • Black fresh ground pepper
    • Dry white wine
    • Heavy cream

    Instructions

    1. Rinse the chicken in cool water, then pat dry with clean paper towels.
    2. Set a heavy-bottomed frying pan over moderately-high heat. Add 2 tablespoons of butter and 1 tablespoon of olive oil to the pan.
    3. When very hot (but not smoking), place the chicken pieces skin-side down and season with salt and pepper.
    4. Saute for 5-6 minutes, basting with the juices and fat, until the underside is browned. Turn pieces over, season again with salt and pepper, and saute the same way for an additional 5-6 minutes, or until juices run clear.
    5. While the chicken is cooking, in a separate pan, saute the mushrooms in 1 tablespoon of butter. Remove to a plate when finished browning.
    6. When chicken is finished cooking, remove to a warm plate.
    7. Rapidly spoon all but a tablespoon of fat out of the pan. Add 1/2 cup of wine to deglaze the pan, scraping the sides and bottom to incorporate all the seasoning into the liquid. Deglaze until the alcohol has burned off.
    8. Add cream and mushrooms to the deglazing sauce and incorporate; boil down rapidly for a minute or two, or until the sauce starts to thicken.
    9. Add the chicken and baste with the sauce and mushrooms. Cover and simmer 2-3 minutes to bring the chicken back up to a hot temperature. Season again if necessary with salt and pepper.

    Tips

    • Use Fresh Ingredients: Fresh mushrooms and quality chicken make a significant difference in flavor.
    • Patience is Key: Allow the sauce to thicken naturally by simmering, enhancing its richness.
    • Season to Taste: Remember to taste the sauce before serving and adjust the seasoning as needed.

    Variations & Substitutions

    This recipe is versatile and can be adapted to suit your preferences:

    • Swap the Mushrooms: Try using a mix of mushrooms like cremini, shiitake, or portobello for added texture and flavor.
    • Wine Alternatives: If you prefer not to use wine, chicken broth makes a good substitute, though you might lose some of the depth that wine provides.
    • Herb Additions: Adding herbs like thyme or rosemary can enhance the dish’s aromatic profile.

    Storage

    Store any leftovers in an airtight container in the refrigerator for up to 3 days. To reheat, gently warm the chicken and sauce in a pan over low heat, adding a splash of cream if the sauce has thickened too much.

    FAQ

    Can I use chicken breasts instead of parts?

    Yes, boneless chicken breasts can be used. Adjust the cooking time accordingly to ensure they don’t dry out. Chicken thighs are also a great option for added juiciness.

    What is the best type of white wine to use?

    A dry white wine, such as Sauvignon Blanc or Chardonnay, works best for deglazing and complements the creamy sauce beautifully.

    Can I make this dish dairy-free?

    For a dairy-free version, substitute the butter with olive oil and use coconut cream in place of heavy cream. Note that the flavor will change slightly, but it will still be delicious.

    Nutrition

    This dish, rich in protein and healthy fats, can be part of a balanced meal. However, due to the cream and butter, it’s higher in calories and fat. Adjust portion sizes or pair with a light side salad to balance your meal.

    Final Thoughts

    Sauteed Chicken With Mushrooms and Cream is more than just a meal; it’s a comforting embrace on a plate, carrying with it the essence of family gatherings and cherished memories. Whether you’re recreating a nostalgic dish or trying it for the first time, I hope this recipe finds a special place in your heart and home. Enjoy every bite!

    Related update: Sauteed Chicken With Mushrooms and Cream

    Related update: Classic Greek Moussaka

  • Yorkshire Pudding | Made by Meaghan Moineau

    Yorkshire Pudding | Made by Meaghan Moineau

    Yorkshire Pudding: A Classic British Delight

    There’s something magical about the aroma of Yorkshire puddings baking in the oven, reminiscent of Sunday family dinners and festive holiday gatherings. I remember as a child, eagerly waiting by the kitchen door, peeking through the oven window to watch these golden puffs rise to perfection. This classic British side dish is the perfect complement to a roast beef dinner, and today, I’m thrilled to share with you my family’s cherished recipe.

    Why You’ll Love It

    Yorkshire pudding is a versatile and delectable addition to any meal. Its crispy exterior and soft, airy interior make it the perfect vehicle for soaking up savory sauces and gravies. Whether you’re serving it alongside a traditional roast beef or experimenting with other dishes, Yorkshire pudding is sure to impress your guests with its delightful texture and rich flavor. Plus, it’s made with just a few simple ingredients you likely have on hand.

    Ingredients

    • 3 large eggs
    • 1 cup all-purpose flour
    • 1 cup milk
    • 2-3 tablespoons pan drippings from roast beef (or vegetable oil)
    • 1/2 teaspoon salt

    Instructions

    1. Preheat your oven to between 400-450°F (200-230°C). The exact temperature can vary depending on your oven, so once you’ve made these a few times, you’ll be able to fine-tune it to your liking.
    2. Sift the flour and salt together into a large mixing bowl.
    3. In a separate bowl, beat the eggs and milk together until well combined.
    4. Gradually add the flour mixture to the wet ingredients, stirring continuously to avoid lumps. The batter should be smooth and slightly runny.
    5. Pour the pan drippings into your Yorkshire pudding tray. A muffin or cupcake tray works well too. Place the tray in the oven to heat the oil until it’s nice and hot.
    6. Once the oil is heated, carefully remove the tray from the oven. Quickly spoon a couple of tablespoons of batter into each section of your tray.
    7. Return the tray to the oven and bake for about 20 minutes or until the puddings are golden brown and puffed up. It’s crucial not to open the oven during this time, as it will cause the puddings to deflate.

    Tips

    For the best Yorkshire puddings, make sure your batter is smooth and your oil is sizzling hot before adding the batter. This will ensure they rise beautifully. Additionally, resist the urge to open the oven door while they’re baking, as the sudden change in temperature can cause them to collapse.

    Variations & Substitutions

    If you don’t have pan drippings, you can substitute with vegetable oil or melted butter. For a fun twist, try adding a pinch of herbs like rosemary or thyme to the batter for an aromatic flair. You can also experiment with different types of flour, such as whole wheat or gluten-free blends, to suit dietary preferences.

    Storage

    Yorkshire puddings are best enjoyed fresh out of the oven, but if you have leftovers, store them in an airtight container in the refrigerator for up to two days. To reheat, place them in a preheated oven at 350°F (175°C) for about 5-8 minutes until warmed through and crispy again.

    FAQ

    Why did my Yorkshire puddings not rise?

    If your Yorkshire puddings didn’t rise, it could be due to a few reasons. Ensure your oven is preheated to the correct temperature, and your oil is hot before adding the batter. Also, avoid opening the oven door during baking, as this can cause them to deflate.

    Can I make Yorkshire pudding without eggs?

    Eggs are crucial for the structure and texture of Yorkshire puddings, but you can try using an egg substitute if you have dietary restrictions. Keep in mind that the texture may vary slightly.

    Nutrition

    Yorkshire puddings are relatively low in calories, with each pudding containing around 80-100 calories. They provide a modest amount of protein from the eggs and are a good source of carbohydrates. However, their nutritional content can vary based on the type of oil or drippings used.

    Final Thoughts

    Yorkshire pudding is a beloved classic that brings warmth and comfort to any meal. With its simple ingredients and easy preparation, it’s a dish that allows you to focus on spending time with loved ones rather than fussing in the kitchen. Whether you’re new to making Yorkshire pudding or a seasoned pro, I hope this recipe finds a special place at your table, evoking cherished memories and creating new ones. Happy cooking!

    Related update: Yorkshire Pudding

  • Make Olive Garden’s Delicious Pasta Fagioli At Home | Made by Meaghan Moineau

    Make Olive Garden’s Delicious Pasta Fagioli At Home | Made by Meaghan Moineau

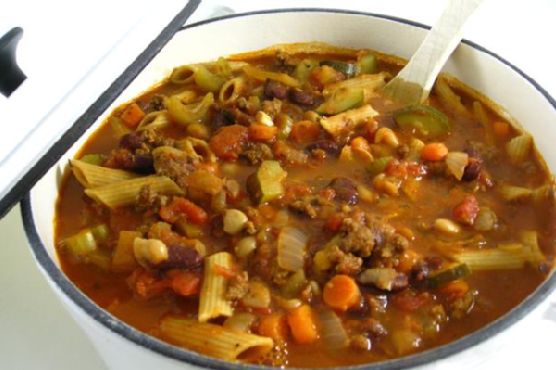
    Make Olive Garden’s Delicious Pasta Fagioli At Home

    There’s something incredibly comforting about a steaming bowl of soup, especially when it’s inspired by a beloved restaurant favorite. Olive Garden’s Pasta Fagioli has always been a dish that evokes warmth and a sense of home. I remember the first time I tasted it; I was dining out with my family, and the rich, hearty flavors made me feel like I was wrapped in a cozy blanket. It’s been a staple in my kitchen ever since, and today, I’m excited to share how you can recreate this delicious soup at home.

    Why You’ll Love It

    This homemade version of Olive Garden’s Pasta Fagioli is not only delicious and hearty but also incredibly easy to make. It brings together healthy ingredients in a way that feels indulgent without being heavy. Here’s why you’ll fall in love with making this soup at home:

    • Hearty and Filling: Packed with protein-rich beans and lean ground turkey, this soup is a meal in itself.
    • Nutritious: Loaded with vegetables like carrots, celery, and zucchini, it’s a great way to get your daily dose of veggies.
    • Easy to Prepare: With simple steps and common ingredients, it’s a dish that fits into any busy schedule.
    • Family Favorite: It’s a crowd-pleaser that’s perfect for family dinners or gatherings with friends.
    • Customizable: Easily tweak the recipe to suit your dietary preferences or what you have on hand.

    Ingredients

    • 1 pound lean ground turkey
    • 2 tablespoons olive oil
    • 1 cup chopped onions
    • 1 cup chopped carrots
    • 1 cup chopped celery stalks
    • 3 garlic cloves, minced
    • 2 cans (14.5 oz each) diced tomatoes, undrained
    • 1 can (15 oz) red kidney beans, drained and rinsed
    • 1 can (15 oz) white kidney beans, drained and rinsed
    • 1 can (15 oz) great northern beans, drained and rinsed
    • 4 cups canned beef broth
    • 1 jar (24 oz) pasta sauce
    • 1 medium zucchini, chopped
    • 2 teaspoons Italian seasoning blend
    • Fresh ground pepper to taste
    • 1 cup whole wheat penne pasta
    • Grated Parmesan cheese (optional, for serving)

    Instructions

    1. In a large soup pot, brown the ground turkey over medium heat. Once cooked, drain the turkey in a colander and set aside.
    2. In the same pot, heat the olive oil over medium heat. Add the onions, carrots, celery, and garlic, and cook for about 2 minutes, stirring often to prevent sticking.
    3. Return the drained turkey to the pot. Add the canned tomatoes, red kidney beans, white kidney beans, great northern beans, beef broth, pasta sauce, chopped zucchini, Italian seasoning, and fresh ground pepper. Stir well to combine.
    4. Bring the soup to a boil. Then, reduce the heat to a simmer, cover the pot, and let it cook for 50 minutes, allowing the flavors to meld together.
    5. Add the whole wheat penne pasta to the soup. Cover the pot again and cook for about 10 minutes or until the pasta is tender.
    6. Ladle the soup into bowls and top with grated Parmesan cheese if desired. Serve hot and enjoy!

    Tips

    • For a richer flavor, consider browning the turkey with a little garlic and onion powder.
    • Ensure you stir the soup occasionally as it simmers to prevent the ingredients from sticking to the bottom of the pot.
    • If you prefer a thicker soup, reduce the amount of broth or simmer uncovered for the last 10 minutes of cooking.

    Variations & Substitutions

    • Meat Substitutes: Replace ground turkey with ground beef, chicken, or even a plant-based meat alternative for a vegetarian version.
    • Bean Choices: If you don’t have the specified beans, feel free to use any combination of beans you have on hand.
    • Gluten-Free Option: Use gluten-free pasta to make this dish suitable for those with gluten sensitivities.
    • Spice it Up: Add a pinch of red pepper flakes for some heat, or use spicy Italian sausage instead of turkey.

    Storage

    This Pasta Fagioli soup stores well, making it perfect for meal prep. Here’s how to store it:

    • Refrigerator: Store leftovers in an airtight container in the refrigerator for up to 4 days. Reheat on the stove or in the microwave.
    • Freezer: This soup freezes beautifully. Allow it to cool completely, then transfer to freezer-safe containers. It will keep for up to 3 months. Thaw overnight in the refrigerator before reheating.

    FAQ

    Can I use fresh tomatoes instead of canned?

    Yes, you can use fresh tomatoes if desired. Use about 4 cups of chopped fresh tomatoes. You may need to add an extra cup of broth to maintain the soup’s consistency.

    Is it necessary to use beef broth?

    While beef broth adds depth to the soup, you can substitute chicken broth or vegetable broth if preferred. Each will slightly alter the flavor profile, but the soup will still be delicious.

    How can I make this soup vegetarian?

    To make a vegetarian version, simply omit the ground turkey and use vegetable broth instead of beef broth. You can also add extra beans or vegetables for additional texture and flavor.

    Nutrition

    This soup is a hearty meal that provides an excellent balance of protein, fiber, and essential nutrients. Here’s a rough estimate of the nutritional information per serving (without Parmesan cheese):

    • Calories: 250
    • Protein: 18g
    • Carbohydrates: 35g
    • Fat: 6g
    • Fiber: 8g
    • Sodium: 600mg

    Final Thoughts

    Making Olive Garden’s Pasta Fagioli at home is not just about recreating a favorite restaurant dish; it’s about bringing a bit of comfort and warmth to your table. This recipe is straightforward, adaptable, and sure to become a staple in your meal rotation. Whether you’re enjoying it on a chilly evening or sharing it with family and friends, it’s a dish that brings people together. I hope you enjoy making and eating it as much as I do!

    Related update: Make Olive Garden’s Delicious Pasta Fagioli At Home

    Related update: Curried Chicken Roll-Ups

    Related update: Truffle-Infused Mushroom Soup with Parmesan Crisps & Tarragon Creme Fraiche

  • Jambalaya Stew | Made by Meaghan Moineau

    Jambalaya Stew | Made by Meaghan Moineau

    Jambalaya Stew: A Cozy, Flavor-Packed Delight

    There’s something about a hearty stew that feels like a warm hug on a chilly day. Jambalaya Stew, with its rich flavors and comforting ingredients, is one of those dishes that transports you straight to the vibrant heart of Louisiana. I remember my first taste of Jambalaya during a family trip to New Orleans. The bustling streets, soulful music, and the aroma of spices in the air made it an unforgettable experience. This recipe is my homage to that memory, bringing a taste of the bayou to your kitchen.

    Why You’ll Love It

    Jambalaya Stew is not just a meal; it’s an experience. Here’s why you’ll fall in love with this dish:

    • Flavor Explosion: The blend of Italian sweet chicken sausage, shrimp, and Cajun spices creates a symphony of flavors that dance on your taste buds.
    • Wholesome Ingredients: Packed with vegetables, lean meats, and whole grains, this stew is as nutritious as it is delicious.
    • Simple and Satisfying: With an easy one-pot preparation, you’ll spend less time cooking and more time savoring the rich, hearty goodness.
    • Versatile Comfort: Perfect for a family dinner, a cozy night in, or entertaining guests with a dish that captures the essence of Southern hospitality.

    Ingredients

    • 2 cooked Italian sweet chicken sausage links, sliced
    • 1 can (14.5 oz) diced tomatoes
    • 1 medium onion, chopped
    • 1 yellow bell pepper, diced
    • 1 green bell pepper, diced
    • 2 stalks celery, chopped
    • 4 cups low sodium chicken broth
    • 1 cup brown rice
    • 3 cloves garlic, minced
    • 2 tablespoons Cajun seasoning
    • 1 tablespoon hot sauce (plus more to taste)
    • 1 teaspoon dried oregano
    • 1 teaspoon dried thyme
    • 1 pound raw shrimp, peeled and deveined

    Instructions

    1. Add all ingredients except the shrimp to a large pot on the stove. Mix thoroughly to combine.
    2. Bring the mixture to a boil over medium-high heat.
    3. Once boiling, reduce the heat to medium-low. Cover the pot and let it simmer until the vegetables are tender and the rice is fluffy, about 35 minutes.
    4. Add the shrimp and re-cover the pot. Continue to cook until the shrimp are tender and cooked through, about 6 minutes.
    5. If desired, season the stew to taste with salt, black pepper, and additional hot sauce.
    6. Serve hot and enjoy the comforting flavors of this Southern classic!

    Tips

    • Prep Ahead: Chop the vegetables and sausage the night before to save time during the cooking process.
    • Flavor Boost: For an extra kick, add a splash of Worcestershire sauce or a squeeze of fresh lemon juice before serving.
    • Adjust the Heat: Control the spiciness by adjusting the amount of Cajun seasoning and hot sauce to suit your taste.

    Variations & Substitutions

    This Jambalaya Stew is wonderfully versatile. Here are some ideas to make it your own:

    • Protein Swap: Substitute chicken or andouille sausage for the Italian sweet chicken sausage for a more traditional flavor.
    • Vegetarian Version: Omit the sausage and shrimp, and add more vegetables like zucchini or mushrooms for a vegetarian-friendly dish.
    • Rice Alternatives: Use white rice, quinoa, or even cauliflower rice for different textures and nutritional profiles.

    Storage

    Store any leftover Jambalaya Stew in an airtight container in the refrigerator for up to 3 days. Reheat gently on the stove or in the microwave, adding a splash of broth or water if needed to maintain the desired consistency.

    FAQ

    Can I make this stew in advance?

    Absolutely! Jambalaya Stew is an excellent make-ahead meal. The flavors meld beautifully when allowed to rest, making it even more delicious the next day.

    Can I freeze Jambalaya Stew?

    Yes, you can freeze the stew for up to 3 months. Allow it to cool completely before transferring it to freezer-safe containers. Thaw in the refrigerator overnight before reheating.

    What can I serve with Jambalaya Stew?

    This stew is a hearty meal on its own, but you can serve it with crusty bread, cornbread, or a simple side salad for a complete feast.

    Nutrition

    While exact nutrition can vary based on specific ingredients and serving sizes, this Jambalaya Stew is a balanced meal, rich in protein from the sausage and shrimp, fiber from the vegetables and brown rice, and packed with essential vitamins and minerals. It’s a wholesome choice for a satisfying dinner.

    Final Thoughts

    Jambalaya Stew is a dish that brings people together, much like the vibrant culture from which it originates. It’s a celebration of flavors and a reminder of the warmth and joy that comes from sharing a meal with loved ones. Whether you’re a seasoned cook or a kitchen novice, this recipe is approachable and rewarding, ensuring a delightful dining experience every time. So gather your ingredients, let the spices fill your kitchen, and enjoy the cozy embrace of Jambalaya Stew.

    Related update: Jambalaya Stew

  • Cyndee’s Neiman Marcus Cake | Made by Meaghan Moineau

    Cyndee’s Neiman Marcus Cake | Made by Meaghan Moineau

    Cyndee’s Neiman Marcus Cake

    There’s something magical about baking a cake that fills the air with warmth and nostalgia. I distinctly remember the first time I tasted Cyndee’s Neiman Marcus Cake—it was at a family gathering, and each bite was a comforting reminder of the love and care that goes into homemade treats. This cake, with its rich, buttery flavor and a hint of lemon zest, quickly became a family favorite. Today, I’m excited to share this treasured recipe with you, so you can create your own sweet memories.

    Why You’ll Love It

    This Neiman Marcus Cake is the epitome of comfort food, combining simplicity with indulgence. Here’s why you and your loved ones will adore it:

    • Rich and Creamy: The combination of cream cheese and butter creates a luscious, rich texture that melts in your mouth.
    • Easy to Make: With straightforward steps and everyday ingredients, this cake is perfect for both novice bakers and seasoned pros.
    • Versatile: Perfect for any occasion—from birthdays to casual get-togethers.
    • A Touch of Nostalgia: Each bite brings a sense of warmth and familiarity, reminiscent of cherished family gatherings.

    Ingredients

    • Baking soda
    • Butter
    • Cornstarch
    • Cream cheese
    • Eggs
    • Flour
    • Kosher salt
    • Lemon zest
    • Sour cream
    • Sugar
    • Vanilla extract

    Instructions

    1. Preheat your oven to 350°F (175°C) and grease a 9 by 13 inch baking pan.
    2. To make the cake layer from scratch, cream the butter and sugar on medium-high speed in the bowl of an electric mixer fitted with a paddle attachment until light and fluffy, about 5 minutes.
    3. On medium speed, add the eggs, one at a time, then the sour cream, vanilla, and lemon zest, scraping down the bowl as needed. Mix well.
    4. Sift together the flour, cornstarch, salt, and baking soda.
    5. With the mixer on low speed, slowly add the flour mixture to the butter mixture and stir just until smooth. Finish mixing by hand to ensure the batter is well mixed.
    6. Pour the batter evenly into the prepared baking pan.
    7. Mix the ingredients for the topping and spread evenly on top of the batter.
    8. Bake for about 30-35 minutes and let the cake cool before removing it from the pan.

    Tips

    • Ensure all ingredients are at room temperature before starting. This helps in achieving a smooth and well-incorporated batter.
    • When mixing the batter, avoid over-mixing once you add the flour to maintain a tender crumb.
    • Let the cake cool completely in the pan to prevent it from breaking apart when removed.

    Variations & Substitutions

    While the original recipe is delightful, here are a few ideas to tailor it to your taste:

    • Flavor Boost: Add a teaspoon of almond extract for a nutty flavor or swap lemon zest with orange zest for a citrus twist.
    • Texture Variations: Fold in a handful of chopped nuts or chocolate chips into the batter for added texture.
    • Gluten-Free Option: Use a 1:1 gluten-free flour blend instead of regular flour.

    Storage

    To keep your Neiman Marcus Cake fresh, store it in an airtight container at room temperature for up to 3 days. For longer storage, refrigerate it for up to a week. You can also freeze the cake for up to 3 months. Just make sure to wrap it tightly in plastic wrap and foil before freezing. Thaw it in the refrigerator overnight before serving.

    FAQ

    Can I make this cake ahead of time?

    Absolutely! This cake holds up well, so feel free to bake it a day or two in advance. Store it in an airtight container to ensure it stays moist and delicious.

    What can I use as a substitute for sour cream?

    If you don’t have sour cream on hand, you can use Greek yogurt or buttermilk as a substitute. Both will maintain the cake’s moisture and tangy flavor.

    Can I use salted butter instead of unsalted?

    Yes, you can use salted butter, but be sure to reduce the added kosher salt in the recipe to balance the flavors.

    Nutrition

    While I don’t have exact nutritional information, this cake is a delightful indulgence meant to be enjoyed in moderation. To make it a tad healthier, consider using less sugar or substituting some with a natural sweetener like honey or maple syrup.

    Final Thoughts

    Cyndee’s Neiman Marcus Cake is more than just a dessert; it’s a slice of love and tradition. Whether you’re sharing it at family gatherings or enjoying a quiet moment with a cup of tea, this cake is sure to bring joy and a sense of comfort. I hope you find as much pleasure in baking and savoring this cake as my family has over the years. Happy baking!

    Related update: Cyndee’s Neiman Marcus Cake

    Related update: Creme Brulee

  • Kale and Chickpea Soup with Lemon | Made by Meaghan Moineau

    Kale and Chickpea Soup with Lemon | Made by Meaghan Moineau

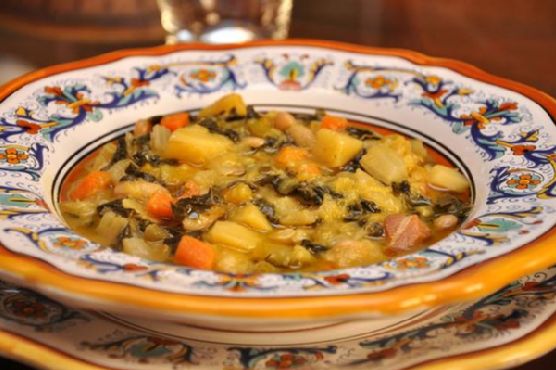
    Kale and Chickpea Soup with Lemon

    As the weather turns colder, there’s nothing more comforting than a bowl of homemade soup. This Kale and Chickpea Soup with Lemon is one of my favorites, reminding me of the cozy evenings spent in my grandmother’s kitchen. The aroma of the soup simmering on the stove, mingling with the scent of crusty bread toasting in the oven, transports me back to those cherished moments. This recipe is not only delicious but also packed with nutritious ingredients that make it a hearty and healthy option for any meal.

    Why You’ll Love It

    This soup is a delightful blend of flavors and textures that will warm your soul and nourish your body. The combination of kale and chickpeas provides a hearty base, while the lemon adds a refreshing zing. It’s an easy recipe to make, perfect for both weeknight dinners and special occasions. Whether you’re a seasoned chef or a kitchen novice, you’ll appreciate the simplicity and depth of flavor in this dish.

    Ingredients

    • 2 banana shallots, finely diced
    • 1 bay leaf
    • 1 can of chickpeas, drained and rinsed
    • 2 celery stalks, diced
    • 1/2 teaspoon chili flakes
    • Crusty bread, for serving
    • 1 garlic clove, peeled and crushed
    • Juice of 1 lemon
    • 2 cups of chopped kale
    • 1 lemon, sliced for garnish
    • 2 tablespoons olive oil
    • Parmesan cheese, for serving
    • 1 sprig of rosemary, finely chopped
    • Salt, to taste
    • 4 cups of vegetable or chicken stock

    Instructions

    1. Set a dutch oven or large saucepan over medium heat; pour in the olive oil.
    2. Add the finely diced shallots to the pan, stirring to coat with the oil.
    3. Make 4 or 5 long horizontal slices in the celery stalk and dice. Add this to the pan and stir.
    4. Finely chop the rosemary leaves and stir into the pan together with the bay leaf and the chili flakes.
    5. Peel the garlic clove and using the flat of your knife and the heel of your hand, crush so that it is still whole and add to the pan.
    6. Add the chickpeas and the kale and stir.
    7. Pour in the hot stock, let it come to a boil, and then turn down the heat. Let it simmer for 20 minutes until the kale is tender.
    8. Squeeze in the juice of half a lemon. Check the seasoning and adjust to taste. You might want more lemon or salt, depending on your stock.
    9. Working in batches or in the pan itself if you have a stick blender, blitz until you have the texture you like. I like mine to still have a few chickpeas and pieces of kale through it, so I set aside a couple of ladlefuls and used a stick blender to blitz the rest.
    10. Serve hot, floating a couple of slices of lemon on top of each serving and pass around the parmesan cheese for everyone to help themselves. Lovely with toasted crusty bread.

    Tips

    For the best results, use fresh kale and high-quality stock. If you prefer a thicker soup, reduce the amount of stock or simmer the soup longer. If you like a bit more heat, feel free to increase the amount of chili flakes.

    Variations & Substitutions

    If you’re looking to switch things up, you can substitute spinach or Swiss chard for kale. For a vegan version, skip the parmesan cheese or use a plant-based alternative. You can also add a handful of cooked quinoa or rice for added texture and nutrition.

    Storage

    This soup can be stored in an airtight container in the refrigerator for up to three days. It can also be frozen for up to three months. To reheat, simply thaw in the refrigerator overnight and warm on the stovetop over medium heat until hot.

    FAQ

    Can I make this soup in advance?

    Absolutely! This soup is perfect for meal prep and tastes even better the next day as the flavors meld together. Simply store it in the refrigerator and reheat before serving.

    What can I serve with this soup?

    This soup pairs wonderfully with a slice of crusty bread or a side salad. For a heartier meal, consider serving it alongside a grilled cheese sandwich.

    Nutrition

    This soup is a nutritious option, rich in fiber and vitamins A and C from the kale, as well as protein from the chickpeas. It’s a wholesome meal that will keep you full and satisfied.

    Final Thoughts

    This Kale and Chickpea Soup with Lemon is a comforting and healthy dish that’s perfect for any occasion. Whether you’re looking to warm up on a chilly day or enjoy a light and refreshing meal, this soup is sure to hit the spot. I hope you enjoy making and sharing this recipe with your loved ones, creating your own cherished memories around the table.

    Related update: Kale and Chickpea Soup with Lemon

    Related update: Make Olive Garden’s Delicious Pasta Fagioli At Home

  • Indian Butter Chicken | Made by Meaghan Moineau

    Indian Butter Chicken | Made by Meaghan Moineau

    Indian Butter Chicken

    There’s something about the rich, creamy flavors of Indian Butter Chicken that transports me back to my childhood. I remember the sweet aroma that would fill our kitchen as my mother prepared this delightful dish. It was a staple for our family dinners, and its warmth and comforting flavors always brought us together. Now, I’m thrilled to share this cherished recipe with you, hoping it becomes a part of your family gatherings too.

    Why You’ll Love It

    Indian Butter Chicken is a dish that’s sure to win over even the pickiest eaters. Its luscious, creamy sauce envelops tender pieces of chicken, creating a harmonious blend of spices that’s both bold and soothing. Whether you’re a fan of spicy food or prefer something milder, this recipe can be adapted to suit your taste. It’s perfect for a cozy night in, a family dinner, or even a special occasion. Plus, it’s surprisingly easy to make, allowing you to enjoy the taste of a restaurant-quality meal right at home.

    Ingredients

    • 2 tablespoons oil
    • 1 pound chicken breasts, chopped
    • 3 cloves garlic, minced
    • 2 tablespoons garam masala
    • 1 onion, chopped
    • 1 tablespoon ginger, grated
    • Juice of 1 lemon
    • 2 tablespoons butter
    • 1 cup diced tomatoes
    • 1 cup chicken broth
    • 1/2 cup plain yogurt
    • 1/2 cup sour cream
    • Salt and pepper to taste

    Instructions

    1. Start out by adding the oil to your pan and heating it up on medium-high heat.
    2. Add in your chopped chicken, garlic, and garam masala. Swirl it together and cook for about two to three minutes.
    3. Next, add in your onion and ginger. Continue cooking until the chicken is cooked through.
    4. Turn your heat down to medium and add in your lemon juice and butter.
    5. Let the butter melt completely, then add in the tomatoes and broth.
    6. Give the dish a minute or two to heat back up, then stir in the yogurt and sour cream.
    7. Mix it all together and add salt and pepper to taste.
    8. Serve over rice.

    Tips

    For the best results, marinate your chicken in yogurt and spices overnight. This will enhance the flavors and make the chicken even more tender. Additionally, if you prefer a spicier dish, consider adding a pinch of cayenne pepper or a small chopped chili to the recipe.

    Variations & Substitutions

    If you’re looking to switch things up, try using chicken thighs instead of breasts for a richer flavor. You can also substitute coconut milk for sour cream if you prefer a dairy-free version. For a vegetarian option, replace the chicken with paneer or tofu, and use vegetable broth instead of chicken broth.

    Storage

    Leftovers can be stored in an airtight container in the refrigerator for up to 3 days. To reheat, simply warm it on the stove over low heat, stirring occasionally. You can also freeze the dish for up to 2 months. Just make sure to thaw it in the refrigerator overnight before reheating.

    FAQ

    Can I use pre-cooked chicken?

    Yes, you can use pre-cooked chicken. Simply add it to the pan when you add the lemon juice and butter. This will save you some time and still give you the delicious flavor you’re looking for.

    Is this dish very spicy?

    Indian Butter Chicken is typically mild, but you can adjust the heat level to your preference. If you want it spicier, add more garam masala or a pinch of cayenne pepper. For a milder taste, reduce the amount of spices used.

    Nutrition

    This dish is rich in protein, thanks to the chicken and yogurt, and offers a good balance of carbohydrates when served with rice. It’s a hearty meal that provides essential nutrients, but keep in mind that it can be high in calories due to the butter and sour cream. For a lighter version, consider using reduced-fat yogurt and sour cream.

    Final Thoughts

    Indian Butter Chicken is more than just a meal; it’s an experience. It’s a dish that embodies warmth, flavor, and tradition, making it perfect for creating lasting memories with your loved ones. I hope this recipe brings as much joy to your home as it has to mine. So, gather your ingredients, embrace the aromas, and indulge in the delightful taste of Indian Butter Chicken.

    Related update: Indian Butter Chicken

  • Almond Ricotta Cake | Made by Meaghan Moineau

    Almond Ricotta Cake | Made by Meaghan Moineau

    Almond Ricotta Cake

    There’s something deeply comforting about baking a cake that fills your home with the warm, inviting aroma of almonds and citrus. This Almond Ricotta Cake is a cherished recipe passed down through generations in my family. I remember watching my grandmother whip up this cake in her cozy kitchen, her hands moving with the kind of practiced ease that only comes from years of baking. She would always let me lick the spoon, and to this day, the taste of this cake brings back the fondest memories of those afternoons spent in her sunlit kitchen. I’m thrilled to share this recipe with you, and I hope it becomes a treasured part of your family traditions as well.

    Why You’ll Love It

    This Almond Ricotta Cake is the perfect blend of moist, tender crumb and rich flavors. The ricotta cheese adds an incredible creaminess, while the almond extract and zest of fresh lemon bring a bright, aromatic profile. With a delightful topping of almonds and a sweet apricot glaze, this cake is both elegant and delicious. Whether you’re serving it for a special occasion or simply enjoying a slice with your afternoon tea, this cake is sure to impress.

    Ingredients

    • 1 cup all-purpose flour
    • 1 teaspoon almond extract
    • 1 cup ground almonds
    • 1/4 cup apricot jam
    • 1 teaspoon baking powder
    • 1/2 cup canola oil
    • 1 large egg
    • 3 large eggs
    • 2 tablespoons lemon juice
    • Zest of 1 lemon
    • 1/4 cup milk
    • 2 tablespoons orange liqueur
    • 3/4 cup 2% ricotta cheese, plus 3/4 cup for topping
    • 1 tablespoon rum
    • 1/4 teaspoon salt
    • 2 tablespoons sugar, plus 1/4 cup for topping
    • 1 cup sugar
    • 1 teaspoon vanilla extract
    • 1/2 cup sliced almonds

    Instructions

    1. Cake: In a large mixing bowl, beat the eggs, sugar, and oil on high speed until thick and pale, about 8 minutes. Add the ricotta, lemon juice, zest, rum, vanilla, and almond extract. Mix until blended.
    2. In a separate bowl, sift together the ground almonds, flour, baking powder, and salt. Whisk into the ricotta mixture in 3 additions.
    3. Pour the batter into a 10″ springform pan that has been buttered and the bottom lined with parchment paper. Bake in a preheated 350°F oven for 45-50 minutes. The cake is done when a wooden skewer inserted in the center comes out clean.
    4. Topping: Increase your oven temperature to 375°F. Heat the milk and stir in 2 tablespoons of sugar. Toss in the almonds, ensuring they are coated.
    5. In a separate bowl, blend together 3/4 cup ricotta, the egg, 1/4 cup sugar, zest, and vanilla. Spread the ricotta mixture topping over the baked cake and sprinkle with the almond slices.
    6. Return to the oven and continue baking for 15 minutes, until the almonds are golden brown.
    7. Remove from the oven and spread the glaze over the almonds. Allow the cake to cool before removing from the cake pan.
    8. Glaze: In the microwave or in a small pan, heat the apricot jam until it starts to liquefy, about 1-2 minutes. Stir to ensure it doesn’t burn. Strain the jam if there is a large amount of pulp. Brush gently on the baked cake.

    Tips

    • Ensure all ingredients are at room temperature before beginning to mix for a smoother batter.
    • Use fresh lemon for the best flavor; the zest adds a lovely aromatic quality to the cake.
    • Allow the cake to cool completely before glazing to prevent the glaze from soaking into the cake.

    Variations & Substitutions

    • Dairy-Free: Substitute the ricotta cheese with a plant-based ricotta alternative and use almond milk instead of regular milk.
    • Gluten-Free: Replace the all-purpose flour with a gluten-free flour blend suitable for baking.
    • Flavor Twist: Try using different citrus zests, like orange or lime, for a unique twist on the original recipe.

    Storage

    This cake can be stored in an airtight container at room temperature for up to 3 days. If you wish to keep it longer, place it in the refrigerator for up to a week. For even longer storage, wrap it tightly in plastic wrap and freeze for up to a month. Thaw overnight in the refrigerator before serving.

    FAQ

    Can I use a different type of nut for the topping?

    Yes, you can experiment with other nuts like pistachios or walnuts for the topping. Just ensure they are sliced thinly for even baking.

    What can I use instead of apricot jam for the glaze?

    If you don’t have apricot jam, you can substitute it with peach or orange marmalade for a similar sweet and tangy flavor.

    Nutrition

    While this cake is a delightful treat, it’s important to enjoy it in moderation. Each slice contains approximately:

    • Calories: 320
    • Fat: 18g
    • Carbohydrates: 34g
    • Protein: 7g
    • Sugar: 21g

    Final Thoughts

    This Almond Ricotta Cake is more than just a dessert; it’s a delicious reminder of the love and care that goes into home baking. Whether you’re enjoying it with family or sharing it with friends, this cake is sure to warm hearts and create lasting memories. I hope this recipe becomes a beloved part of your baking repertoire, just as it has in mine. Happy baking!

    Related update: Almond Ricotta Cake

  • Steamed Clams In Wine and Chorizo | Made by Meaghan Moineau

    Steamed Clams In Wine and Chorizo | Made by Meaghan Moineau

    Steamed Clams in Wine and Chorizo

    Welcome to my kitchen! Today, I’m excited to share with you a recipe that carries a special place in my heart: Steamed Clams in Wine and Chorizo. This dish is a delightful fusion of flavors that brings back fond memories of summer evenings spent by the seaside. I remember the first time I enjoyed this dish was during a family vacation in Spain. We gathered around a big table, the sea breeze gently brushing against our faces, as we eagerly dipped crusty bread into the rich, savory broth. It was an experience that made me fall in love with the simplicity and charm of this meal. Now, I’m thrilled to recreate this dish with you, bringing a taste of the coast into your home.

    Why You’ll Love It

    This recipe is a magnificent blend of simplicity and flavor that captures the essence of coastal dining. The savory chorizo complements the briny clams perfectly, while the hint of cumin and the vibrant freshness of cilantro add depth and complexity. Plus, it’s a one-pot dish, making it both convenient and quick to prepare. Whether you’re hosting a dinner party or enjoying a cozy night in, this dish is sure to impress and delight your guests.

    Ingredients

    • 1 Spanish chorizo, cut into slices
    • 1 teaspoon cumin seeds
    • 1 cup dry white wine
    • 1/4 cup fresh cilantro, chopped
    • 1 garlic clove, minced
    • 2 pounds little neck clams, scrubbed
    • 2 tablespoons olive oil
    • 1 onion, diced
    • 1/2 teaspoon salt
    • 1 yellow bell pepper, diced

    Instructions

    1. Heat the olive oil in a deep pot over moderate heat. Add the onion, yellow bell pepper, garlic, cumin seeds, and salt. Cook, stirring occasionally, until the vegetables are softened, about 7 to 9 minutes.
    2. Stir in the dry white wine and bring the mixture to a boil.
    3. Add the clams and chorizo to the pot. Cover and boil until the clams open, approximately 7 to 8 minutes. Discard any clams that do not open.
    4. Season the dish with freshly cracked pepper and stir in the chopped cilantro.
    5. Serve the clams with some crusty bread to sop up the delicious sauce.

    Tips

    For the best results, ensure your clams are fresh. They should have a pleasant, briny smell and be tightly closed. If any are open, give them a tap; they should close. If not, discard them. Additionally, don’t skip the crusty bread! It’s perfect for soaking up the flavorful broth and makes the meal truly satisfying.

    Variations & Substitutions

    If you’re not a fan of cilantro, you can swap it for fresh parsley, which will also add a nice herbaceous note. Feel free to experiment with different types of chorizo or even replace it with another smoked sausage if you prefer a milder flavor. For a spicier kick, add a pinch of red pepper flakes to the pot along with the cumin seeds.

    Storage

    If you have leftovers, store them in an airtight container in the refrigerator for up to two days. To reheat, gently warm them in a saucepan over low heat, adding a splash of water or broth if needed to restore the sauce’s consistency. However, this dish is best enjoyed fresh, as reheating can sometimes affect the texture of the clams.

    FAQ

    Can I use frozen clams?

    While fresh clams are recommended for the best flavor and texture, you can use frozen clams in a pinch. Just make sure they’re fully thawed before cooking, and adjust the cooking time as needed.

    What type of white wine should I use?

    A dry white wine like Sauvignon Blanc or Pinot Grigio works wonderfully in this recipe, adding a crisp acidity that pairs beautifully with the briny clams and rich chorizo.

    Nutrition

    This dish is not only delicious but also a good source of protein and essential nutrients. Clams are high in iron and vitamin B12, while chorizo adds flavorful fats and proteins. Just be mindful of the sodium content, especially if you’re watching your salt intake.

    Final Thoughts

    Steamed Clams in Wine and Chorizo is more than just a dish; it’s an invitation to experience the flavors of the sea, the warmth of the chorizo, and the comfort of a home-cooked meal. I hope that as you prepare and share this recipe with your loved ones, it brings as much joy and fond memories to your table as it has to mine. Bon appétit!

    Related update: Steamed Clams In Wine and Chorizo

    Related update: Masala-Tofu Burger

    Related update: Steak with lemon and capers

  • Minestrone | Made by Meaghan Moineau

    Minestrone | Made by Meaghan Moineau

    Minestrone: A Comforting Bowl of Italian Tradition

    There’s something magical about a steaming bowl of minestrone soup that’s hard to put into words. It’s more than just a meal; it’s a nostalgic embrace on a chilly evening, a celebration of fresh vegetables in every spoonful, and a testament to the simplicity of good cooking. I remember my grandmother simmering this hearty soup on the stove, her kitchen filled with the rich aroma of herbs and simmering tomatoes. Those memories of gathering around her table, slurping the warm broth alongside chunks of crusty bread, are treasured moments of comfort and joy.

    Why You’ll Love It

    Minestrone is a versatile and comforting dish that warms the soul. It’s packed with nutritious vegetables, making it not only delicious but also healthy. This recipe is perfect for those who love to experiment with flavors and textures, as it is easily adaptable to whatever ingredients you have on hand. Whether you’re a veteran cook or a kitchen novice, you’ll appreciate how straightforward and rewarding this dish is to make.

    • Nutritious and Filling: Packed with a variety of vegetables, it’s a nutrient-dense meal.
    • Comfort in a Bowl: Perfect for chilly days or when you need a comforting meal.
    • Customizable: You can easily adjust the ingredients to suit your taste or dietary needs.
    • Easy to Make: Simple steps lead to a delicious result, making it perfect for weeknight dinners.

    Ingredients

    • 2 tablespoons butter
    • 2 cups carrots, diced
    • 2 cups celery, diced
    • 2 cups onions, chopped
    • 4 cloves garlic, minced
    • 2 cups cabbage, shredded
    • 1 can (28 ounces) canned tomatoes
    • 6 cups water
    • 1 cup brown rice
    • 2 teaspoons salt
    • 1 teaspoon Worcestershire sauce
    • 1 tablespoon Italian mixed seasoning
    • 1/2 teaspoon pepper
    • 2 cups potatoes, diced
    • 2 beef bouillon cubes
    • 2 cups zucchini, sliced
    • 1 can (15 ounces) canned kidney beans, drained and rinsed
    • 1 cup frozen spinach
    • 1/2 cup Parmesan cheese, grated

    Instructions

    1. Melt butter in a large soup kettle over medium heat.
    2. Add carrots, celery, onions, garlic, and cabbage. Sauté for about 20 minutes, stirring often, until the vegetables are tender.
    3. Stir in canned tomatoes, water, brown rice, salt, Worcestershire sauce, Italian seasoning, pepper, potatoes, bouillon cubes, and zucchini.
    4. Bring the mixture to a boil, then reduce the heat and simmer covered for at least 30 minutes.
    5. Add the kidney beans and frozen spinach. Return the soup to a boil and cook over medium heat until the spinach is cooked through. Add more water if needed to reach your desired consistency.
    6. Serve hot, garnished with grated Parmesan cheese. Enjoy!

    Tips

    • Prep Ahead: Chop your vegetables in advance to make the cooking process quicker and smoother.
    • Consistent Size: Dice your vegetables to a similar size to ensure even cooking.
    • Stir Often: Stir the pot frequently, especially during the initial sauté step, to prevent sticking.

    Variations & Substitutions

    This minestrone soup is highly adaptable. Here are a few ideas to make it your own:

    • Vegetable Substitutions: Feel free to swap in other vegetables such as green beans, peas, or bell peppers.
    • Grain Alternatives: If you’re not a fan of brown rice, try using pasta, quinoa, or barley.
    • Protein Boost: Add cooked chicken or sausage for extra protein.
    • Vegan Version: Use vegetable bouillon cubes and omit the Parmesan cheese.

    Storage

    Minestrone soup stores exceptionally well, making it perfect for meal prep:

    • Refrigerator: Store in an airtight container for up to 5 days.
    • Freezer: Freeze in portioned containers for up to 3 months. Thaw overnight in the refrigerator before reheating.
    • Reheating: Gently reheat on the stovetop over medium heat, adding a splash of water if the soup has thickened too much.

    FAQ

    Can I make this soup in a slow cooker?

    Yes, you can! Simply add all the ingredients except for the kidney beans, spinach, and Parmesan cheese to your slow cooker. Cook on low for 6-8 hours or on high for 3-4 hours. Stir in the beans and spinach in the last 30 minutes of cooking, and garnish with Parmesan before serving.

    What can I serve with minestrone?

    Minestrone is delightful on its own but pairs beautifully with a side of crusty bread, a fresh green salad, or even a cheesy garlic bread for a bit of indulgence.

    Nutrition

    This minestrone soup is not only tasty but also nutritious, packed with vitamins, minerals, and fiber from a variety of vegetables. Each serving (without Parmesan cheese) contains approximately:

    • Calories: 150
    • Protein: 6g
    • Carbohydrates: 30g
    • Fat: 3g
    • Fiber: 7g

    Final Thoughts

    Minestrone is more than just a soup; it’s a warm hug in a bowl. Whether you’re cooking for family, friends, or just yourself, this recipe is sure to bring comfort and satisfaction. Its adaptability and ease of preparation make it a staple in any kitchen, and its rich flavors are bound to make it a favorite in your household. So, gather around the table and enjoy the simple pleasure of a homemade meal that speaks to the heart and soul.

    Related update: Minestrone

    Related update: Kale and Chickpea Soup with Lemon