Tag: Comfort Food

  • Truffle-Infused Mushroom Soup with Parmesan Crisps & Tarragon Creme Fraiche | Made by Meaghan Moineau

    Truffle-Infused Mushroom Soup with Parmesan Crisps & Tarragon Creme Fraiche | Made by Meaghan Moineau

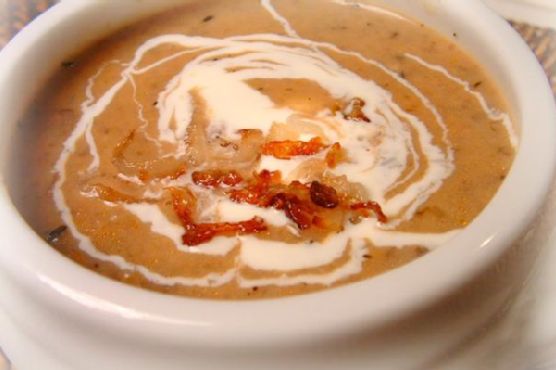
    Truffle-Infused Mushroom Soup with Parmesan Crisps & Tarragon Crème Fraîche

    The earthy aroma of mushrooms sizzling in a pot is pure magic, especially when that pot contains a soon-to-be masterpiece — Truffle-Infused Mushroom Soup with Parmesan Crisps & Tarragon Crème Fraîche. Imagine yourself wrapped in a cozy sweater, with a warm bowl in hand, the steam mingling with the luxurious scent of truffle oil and the cheesy crunch of homemade Parmesan crisps. Welcome to culinary heaven.

    Personal Story

    My love affair with mushroom soup began in a tiny bistro nestled in the heart of Paris. It was during a trip meant to rekindle my sense of adventure, and every bite of that classic French cuisine was a revelation. The soup was a simple cream of mushroom, yet it was transcendent. I remember thinking, “How could something so humble be so utterly luxurious?” Just like that, I was hooked.

    When I returned home, I set out to recreate that experience. My first few attempts were clumsy — my mushrooms were soggy, and my soup was more gray than golden. But with each mishap, I honed my technique, learning the nuances of heat and timing. The dish became a canvas for creativity, and soon, I was adding my own twists — enter, the truffle oil and Parmesan crisps.

    One particularly chilly autumn afternoon, I invited my closest friends over for lunch. As the soup simmered on the stove, the kitchen filled with an intoxicating aroma. We gathered around the table, bowls in hand, and as we dipped our spoons into the velvety soup, the room fell silent. It was a moment of shared joy, a culinary revelation that I knew I had to share with the world.

    Since then, my Truffle-Infused Mushroom Soup with Parmesan Crisps & Tarragon Crème Fraîche has become a staple in my home. It’s not just a dish; it’s a story, a memory, and a promise of warmth and comfort, one that’s meant to be shared with others.

    What Makes This Version Special

    This isn’t just any mushroom soup — it’s an elevated experience. By introducing the luxurious aroma of truffle oil and the crunchy, cheesy goodness of homemade Parmesan crisps, this version transforms the classic cream of mushroom soup into something truly special. Truffle oil is the secret ingredient that adds a sophisticated depth, catching you off guard with its intoxicating scent and flavor. Paired with the savory crunch of Parmesan crisps, every spoonful becomes a delightful exploration of textures and tastes. This version is not just better than the standard recipe; it’s in a league of its own, bringing gourmet flair to your table.

    Flavor Profile

    Prepare your taste buds for an indulgent journey — this soup is earthy and umami-rich, with a delicate hint of truffle that lingers with each bite. The mushrooms provide a deep, woodsy flavor, while the tarragon crème fraîche adds a slight herbal note, cutting through the richness with refreshing brightness. As you bite into the crispy Parmesan, you’ll experience a cheesy, savory crunch that perfectly complements the velvety soup. It’s an orchestration of flavors that dances on your palate and keeps you coming back for more.

    Ingredients

    • 2 tablespoons olive oil, divided
    • 2 tablespoons butter
    • **1 pound cremini mushrooms**, sliced
    • 2 shallots, sliced thin
    • 3 cloves garlic, minced
    • 1 teaspoon fresh dried thyme
    • 2 tablespoons flour
    • 1 tablespoon tomato paste
    • 4 cups chicken stock
    • 1 cup half and half
    • **Truffle oil** (for drizzling)
    • **1/2 cup crème fraîche**
    • 1 tablespoon fresh tarragon, chopped
    • **1 cup Parmesan cheese**, grated
    • Kosher salt and black pepper to taste

    Instructions

    1. Preheat your oven to 350°F (175°C) and line a baking sheet with parchment paper.
    2. To make the Parmesan crisps, place thinly grated Parmesan cheese in small mounds on the prepared baking sheet. Flatten slightly and bake for about 5-7 minutes, until golden and crispy. Set aside to cool.
    3. In a Dutch oven, heat 1 tablespoon of olive oil and the butter over medium heat. Add the mushrooms and cook for 3-5 minutes, until golden. Remove and set aside.
    4. In the same pot, add the remaining olive oil. Sauté the sliced shallots until tender, about 3 minutes. Add minced garlic and cook for an additional minute.
    5. Season with kosher salt, black pepper, and fresh dried thyme. Sprinkle in the flour, stir, and cook for about one minute to remove the raw flour taste.
    6. Return the mushrooms to the pot and mix in the tomato paste. Pour in 1 cup of chicken stock, stirring to combine.
    7. Add the remaining chicken stock and bring the mixture to a simmer. Cook for about 10 minutes, allowing the flavors to meld.
    8. Using an immersion blender, carefully puree the soup directly in the pot until smooth, but with some small chunks of mushrooms remaining for texture. If you prefer, you can use a blender to process the soup in batches.
    9. Add the half and half and stir to incorporate. Taste and adjust the seasoning as needed.
    10. For serving, ladle the soup into bowls, drizzle with truffle oil, and top with a dollop of crème fraîche mixed with fresh tarragon. Garnish with the crispy Parmesan crisps and serve immediately.

    Pro Tips from Meaghan’s Kitchen

    • Choose mushrooms that are fresh and firm. Avoid any with slimy spots as they won’t brown nicely.
    • Don’t rush the mushroom browning process. Let them sit undisturbed in the pan to develop a deep, golden color.
    • For an extra kick, add a splash of white wine to deglaze the pot after sautéing the garlic.
    • Truffle oil is potent, so a little goes a long way. Start with a small drizzle, and adjust to taste.
    • Parmesan crisps can be made ahead of time and stored in an airtight container, staying crisp for days.

    Variations & Dietary Swaps

    • Vegetarian Swap: Use vegetable stock in place of chicken stock for a meat-free version.
    • Spice-It-Up Version: Add a pinch of red pepper flakes when sautéing the shallots for a subtle heat.
    • Kids-Friendly Version: Omit the truffle oil and replace with a small pat of butter for a milder flavor.

    What to Serve With It

    This Truffle-Infused Mushroom Soup pairs beautifully with a chilled glass of Chardonnay, which complements the earthy flavors and truffle aroma. On the side, a crusty baguette provides the perfect vessel to soak up every last drop of the rich broth. For a complete meal, consider serving alongside a light, refreshing salad dressed in a simple vinaigrette.

    Storage & Meal Prep

    Store any leftover soup in an airtight container in the refrigerator for up to 3 days. For longer storage, freeze the soup for up to 3 months. When reheating, gently warm the soup on the stove over low heat, stirring occasionally until heated through. Avoid boiling to prevent curdling of the cream. The Parmesan crisps are best enjoyed fresh, but they can be stored at room temperature for up to 5 days in an airtight container.

    FAQ

    Can I use a different type of mushroom?

    Absolutely! While cremini mushrooms are my go-to, you can experiment with shiitake, portobello, or a mix of wild mushrooms for a different flavor profile.

    What can I substitute for crème fraîche?

    If crème fraîche is unavailable, sour cream or Greek yogurt can be used as a substitute, but remember to adjust the seasoning as these have different flavor profiles.

    How do I prevent the soup from curdling?

    To prevent curdling, avoid bringing the soup to a rapid boil after adding the half and half. Keep the heat low and stir gently while reheating.

    Is truffle oil essential for this recipe?

    Truffle oil adds a luxurious aroma and flavor that truly elevates the dish, but if you don’t have it on hand, the soup will still be delicious without it.

    Can I make this soup in advance?

    Yes, the soup can be made a day ahead. In fact, the flavors often deepen and improve after resting overnight in the fridge.

    Final Thoughts

    Creating this Truffle-Infused Mushroom Soup with Parmesan Crisps & Tarragon Crème Fraîche is more than just cooking; it’s an opportunity to bring a little bit of French culinary magic into your home. I hope this recipe not only fills your kitchen with delightful aromas but also creates memories with those you share it with. I’d love to hear your thoughts and see your creations — feel free to leave a comment or share your soup adventures with me on social media. Bon appétit!

    Related update: Truffle-Infused Mushroom Soup with Parmesan Crisps & Tarragon Creme Fraiche

  • Banana Blueberry Pancakes with Lemon Ricotta and Almond Crunch | Made by Meaghan Moineau

    Banana Blueberry Pancakes with Lemon Ricotta and Almond Crunch | Made by Meaghan Moineau

    Banana Blueberry Pancakes with Lemon Ricotta and Almond Crunch

    Picture this: a lazy Sunday morning, rays of sunlight streaming through your kitchen window, the air filled with the irresistible aroma of pancakes sizzling on the griddle. These aren’t just any pancakes; these are Banana Blueberry Pancakes with Lemon Ricotta and Almond Crunch — a delightful symphony of flavors and textures that will make your taste buds dance.

    Personal Story

    I still remember the first time I tried to make pancakes from scratch. I was a teenager, determined to surprise my family with a breakfast that would rival the best brunch spots in town. Armed with a basic recipe I found online, I embarked on what I thought would be a simple task. But as it turns out, my youthful confidence didn’t quite match my kitchen skills. The batter was too runny, the pancakes were either overcooked or raw in the middle, and my family graciously ate them with forced smiles. That day taught me a valuable lesson: great pancakes require a little finesse.

    Fast forward a few years, and I’ve become somewhat of a pancake aficionado, constantly tweaking and experimenting until I landed on a recipe that not only works but shines. The inspiration for these Banana Blueberry Pancakes with Lemon Ricotta and Almond Crunch came on a whim. I was at the farmer’s market, surrounded by the bounty of fresh produce, when I spotted some ripe bananas and plump blueberries. Suddenly, I was transported back to the kitchen mishap of my teenage years, but this time, I was armed with experience and a spark of creativity.

    By adding lemon zest and ricotta cheese to the mix, I discovered a way to bring brightness and creaminess to the pancakes. The sliced almonds, toasted with honey and a touch of salt, add a delightful crunch to contrast the pillowy softness of the pancakes. It’s a recipe that feels like a hug on a plate, and it’s become a beloved staple in my home.

    These pancakes aren’t just about satisfying hunger; they’re about creating a moment — a pause in the hustle and bustle of life to savor something truly special. And today, I’m thrilled to share this journey and recipe with you.

    What Makes This Version Special

    This isn’t just your average stack of pancakes. What sets these Banana Blueberry Pancakes apart is the infusion of **zesty lemon ricotta** and a **crunchy almond topping**. The lemon zest and ricotta bring a tangy creaminess that elevates the humble pancake into something utterly irresistible. Meanwhile, the almond crunch, with its honey-kissed golden edges, adds texture and a touch of sophistication. These aren’t just breakfast pancakes; they’re an experience, a delicious departure from the norm.

    Flavor Profile

    Every bite of these pancakes is a delightful journey through layers of flavor and texture. The soft, fluffy pancakes are punctuated with bursts of sweet, juicy blueberries and creamy banana. The lemon ricotta adds a subtle citrusy zing, complementing the natural sweetness of the fruits. And then, there’s the almond crunch — nutty, slightly salty, with a hint of honey that ties everything together. It’s a symphony of taste and texture that dances on your palate, leaving you craving another bite.

    Ingredients

    • 3 whole eggs
    • 1/2 cup water
    • 2 tablespoons liquid coconut oil
    • 1/3 cup coconut flour
    • 1 teaspoon cream of tartar
    • 1/2 teaspoon ground cinnamon
    • 2 ripe bananas, mashed
    • 1 cup frozen blueberries
    • 1 tablespoon **lemon zest**
    • 1/2 cup **ricotta cheese**
    • 1/4 cup **sliced almonds**
    • 1 tablespoon **honey**
    • 1 teaspoon vanilla extract

    Instructions

    1. In a large mixing bowl, beat the eggs for 1 minute until they are fluffy and pale. This helps create a lighter pancake.
    2. Add the water, liquid coconut oil, and coconut flour to the eggs. Whisk together until the mixture is smooth and lump-free. Allow the batter to sit for 5 minutes so the coconut flour can absorb the liquid and expand. This step is crucial for achieving a tender texture.
    3. Mix in the cream of tartar, ground cinnamon, and mashed bananas. Whisk until combined, ensuring the bananas are evenly distributed.
    4. Gently fold in the frozen blueberries with a spatula. Be careful not to over-mix, as this can lead to tough pancakes.
    5. Fold the lemon zest and ricotta cheese into the batter just before cooking. This ensures the fresh lemon flavor stands out.
    6. In a skillet over medium heat, toast the sliced almonds with honey and a pinch of salt, stirring frequently until they’re golden and fragrant. Remove from the skillet and set aside.
    7. Heat a little oil or butter in the same skillet over medium to low heat. Ladle 1/2 cup of batter for each pancake onto the hot skillet. Cook for about 5 minutes on one side, or until bubbles form and the edges look set.
    8. Flip the pancakes and cook the other side until they are golden-brown and cooked through, about 3 more minutes.
    9. Repeat the process until all the batter is used, keeping the cooked pancakes warm in an oven on low heat if desired.
    10. Serve the pancakes topped with the toasted almond crunch and a drizzle of maple syrup if desired.

    Pro Tips from Meaghan’s Kitchen

    • For extra fluffy pancakes, make sure your eggs are at room temperature before you start.
    • Don’t rush the resting phase of the batter; it’s key for the coconut flour to do its magic.
    • If you find your batter too thick after resting, add a splash more water to reach your desired consistency.
    • Use a non-stick skillet and a light hand with the oil to ensure perfectly golden pancakes every time.
    • Experiment with different nut toppings like pecans or walnuts for a twist on the almond crunch.

    Variations & Dietary Swaps

    If you’re looking to make these Banana Blueberry Pancakes with Lemon Ricotta and Almond Crunch your own, here are a few ideas:

    • Vegetarian Swap: Substitute the honey in the almond crunch with maple syrup or agave nectar.
    • Spice-It-Up Version: Add a pinch of nutmeg or cardamom to the batter for a warming spice note.
    • Kids-Friendly Version: Top the pancakes with a dollop of whipped cream and rainbow sprinkles for a fun twist that kids will love.

    What to Serve With It

    These pancakes are a meal in themselves, but why not make breakfast even more special? Serve them with a frothy cappuccino for a classic pairing, or try an iced matcha latte for a refreshing contrast. Fresh fruit or a side of crispy bacon would also complement the pancakes beautifully.

    Storage & Meal Prep

    If you find yourself with leftovers (a rare occurrence, I assure you), these pancakes store beautifully. Stack them with parchment paper in between each pancake and store in an airtight container in the fridge for up to 3 days. For longer storage, freeze them in a single layer before transferring to a freezer bag. To reheat, simply pop them in the toaster or a warm oven until heated through.

    FAQ

    Can I use fresh blueberries instead of frozen?

    Absolutely! Fresh blueberries work just as well. Just be gentle when folding them into the batter to avoid bursting them.

    Can I make the batter ahead of time?

    It’s best to prepare the batter fresh, but you can mix the dry ingredients a day ahead. Add wet ingredients just before cooking for optimal texture.

    What if I don’t have coconut flour?

    You can substitute with all-purpose flour or almond flour, but you’ll need to adjust the liquid amounts as coconut flour is more absorbent.

    How do I prevent pancakes from sticking?

    Ensure your skillet is hot before adding the batter and use a non-stick pan or a well-greased surface to prevent sticking.

    Can I skip the almond crunch?

    While the almond crunch adds a delightful texture, you can skip it or substitute with another nut or seed topping for a different crunch.

    Final Thoughts

    Cooking is about more than just following a recipe; it’s about creating memories and savoring moments. These Banana Blueberry Pancakes with Lemon Ricotta and Almond Crunch are not just a delicious breakfast treat — they’re an invitation to pause, enjoy, and share with those you love. I hope you’ll give this recipe a try, and I’d love to hear your thoughts. Did you add your own twist? Let me know in the comments below or share your pancake creations on social media. Happy cooking!

    Related update: Banana Blueberry Pancakes with Lemon Ricotta and Almond Crunch

    Related update: Fluffy Buttermilk Pancakes with Vanilla-Cinnamon Swirl

  • Spicy Black Bean and Quinoa Burgers with Pineapple-Jalapeño Salsa | Made by Meaghan Moineau

    Spicy Black Bean and Quinoa Burgers with Pineapple-Jalapeño Salsa

    Imagine the savory aroma of smoky black beans mingling with the tropical sweetness of grilled pineapple, all encased in a golden-brown crust. These Spicy Black Bean and Quinoa Burgers with Pineapple-Jalapeño Salsa are more than just a meal; they’re an experience for your senses, right from the first sizzling bite.

    Personal Story

    I first stumbled upon the idea of using quinoa in burgers during a summer barbecue when my vegetarian friend challenged me to create a dish that would satisfy her plant-based lifestyle. I have to admit, I was skeptical at first. Could these little grains actually hold up in a burger? It was a culinary experiment that needed just the right balance of flavors and textures.

    As I rummaged through my pantry that day, the idea of adding a sweet-spicy twist to the standard veggie burger hit me like a flash of inspiration. I had some fresh pineapple and jalapeños in the fridge, and the rest, as they say, is history. The combination of smoky black beans and nutty quinoa, paired with a zesty pineapple-jalapeño salsa, turned out to be a game-changer. My friend, along with everyone else at the barbecue, was hooked on these Spicy Black Bean and Quinoa Burgers.

    Since then, this recipe has become a staple in my kitchen. It reminds me of that sunny afternoon, full of laughter and good company. Every time I make these burgers, it’s like having a little piece of that day right in my home. Sharing this recipe with you feels like inviting you to that very barbecue, where every bite is a celebration of flavors.

    What Makes This Version Special

    The unique twist in these Spicy Black Bean and Quinoa Burgers lies in the addition of quinoa and a sweet-spicy pineapple twist to the salsa. Quinoa isn’t just a trendy grain; it’s the secret to achieving that hearty yet fluffy texture that makes these burgers stand out. Toasting the quinoa before cooking enhances its nutty flavor, adding depth to the burger base.

    Moreover, the Pineapple-Jalapeño Salsa is where the magic truly happens. Grilling the pineapple slices before dicing them infuses a smoky sweetness that complements the jalapeño’s heat, creating a delightful contrast of flavors. This salsa isn’t just a topping; it’s a transformative element that elevates these veggie burgers to a whole new level.

    Flavor Profile

    Biting into these Spicy Black Bean and Quinoa Burgers is a multi-sensory experience. The patties are smoky and spicy, thanks to the smoked paprika and jalapeños, with a hint of tropical sweetness from the pineapple. Each bite delivers a hearty texture from the toasted quinoa, balanced by the freshness of the cilantro and the tanginess of lime. It’s a culinary dance of flavors that keeps your taste buds engaged from start to finish.

    Ingredients

    • 1 can black beans, drained and rinsed
    • **1 cup cooked quinoa**
    • 1 carrot, diced and microwaved
    • 1 stalk celery, diced
    • **1/2 cup diced fresh pineapple**
    • 1/2 cup canned corn, drained
    • 1 jalapeño, diced
    • 1/2 cup diced tomatoes
    • 2 green onions, diced
    • 1-2 garlic cloves, minced
    • 1/4 cup fresh parsley, chopped
    • Juice of 1 lime
    • 1 tsp creole seasoning
    • 1 tsp smoked paprika
    • 1 tsp cumin
    • 1/2 cup oatmeal
    • 1/2 cup panko breadcrumbs
    • 1/4 cup flour
    • Salt and pepper, to taste

    Instructions

    1. Preheat your oven to 425 degrees F. Lightly spray two baking sheets with nonstick spray and set aside.
    2. Toast the **quinoa** in a dry pan over medium heat for about 5 minutes or until you hear popping, and it turns golden-brown. Cook the quinoa according to package instructions.
    3. In a large bowl, mash the drained black beans until they reach a chunky consistency. Add the microwaved diced carrot and mix.
    4. Add the diced celery, smoked paprika, cumin, oatmeal, panko breadcrumbs, and creole seasoning to the bean mixture. Stir to combine.
    5. If the mixture is too moist, add more flour a tablespoon at a time until you can form patties without them falling apart.
    6. Form the mixture into patties, about 1/2 inch thick, and place them on the prepared baking sheets. Bake for 20 minutes, flipping halfway through until they are firm and golden-brown.
    7. While the burgers are baking, prepare the salsa. Grill the pineapple slices on a grill pan over medium-high heat until they have char marks, about 3 minutes per side. Dice the grilled pineapple and combine with canned corn, jalapeño, tomatoes, green onions, garlic, parsley, lime juice, salt, and pepper. Mix well and chill for about an hour before serving.
    8. Serve the burgers hot off the oven, topped with a generous spoonful of Pineapple-Jalapeño Salsa.

    Pro Tips from Meaghan’s Kitchen

    • For extra crispy edges, run a tablespoon of oil around the patties before baking.
    • To prevent the patties from sticking, let them rest for a minute before trying to flip them.
    • Chill the salsa for at least an hour to allow the flavors to meld together beautifully.
    • Use a potato masher for a quick and uniform mash of the black beans.

    Variations & Dietary Swaps

    • To make it gluten-free, swap the panko breadcrumbs for a gluten-free alternative.
    • For a spicier version, add an extra jalapeño to the salsa or sprinkle red pepper flakes into the burger mix.
    • Make it kid-friendly by replacing the jalapeño with a small, mild sweet bell pepper in the salsa.

    What to Serve With It

    These Spicy Black Bean and Quinoa Burgers pair perfectly with a chilled mango-lime agua fresca for a refreshing contrast. A side of crispy sweet potato fries complements the meal beautifully. If you’re feeling indulgent, add a slice of creamy avocado on top of your burger — it’s the perfect cool counterpart to the spicy salsa.

    Storage & Meal Prep

    Store cooked burger patties in an airtight container in the refrigerator for up to 3 days. For longer storage, freeze the patties on a baking sheet until solid, then transfer to a freezer-safe bag for up to 2 months. Reheat from frozen in a 350 degrees F oven for about 15 minutes or until heated through. The salsa, however, is best consumed fresh, as the texture changes over time.

    FAQ

    Can I use canned pineapple instead of fresh?

    While fresh pineapple is preferable for its vibrant flavor, canned pineapple can be used in a pinch. Ensure to drain it well before grilling.

    How can I make the burgers firmer?

    If your patties aren’t firm enough, try adding more panko breadcrumbs or flour to the mixture until you achieve the desired consistency.

    Can these burgers be grilled?

    Yes, these burgers can be grilled. Just be sure to oil the grill grates to prevent sticking, and handle the patties gently as they can be more fragile than meat-based burgers.

    Is there a way to make the salsa less spicy?

    To make the salsa milder, reduce the number of jalapeños or remove the seeds and membranes before dicing.

    What can I use instead of black beans?

    If you’re out of black beans, kidney beans or chickpeas make excellent substitutes in this recipe.

    Final Thoughts

    There you have it, friends — a recipe that brings a touch of tropical summers into your kitchen, with every bite of these Spicy Black Bean and Quinoa Burgers with Pineapple-Jalapeño Salsa bursting with flavor and heartiness. I hope you feel inspired to bring this dish to your next meal, and if you do, I’d love to hear all about it! Share your experiences, tweaks, and photos in the comments below. Happy cooking!

    Related update: Spicy Black Bean and Quinoa Burgers with Pineapple-Jalapeño Salsa

    Related update: Mediterranean Swiss Chard Wraps with Spicy Citrus Tahini

  • Maple Pecan Honey Cornbread with Orange Zest | Made by Meaghan Moineau

    Maple Pecan Honey Cornbread with Orange Zest | Made by Meaghan Moineau

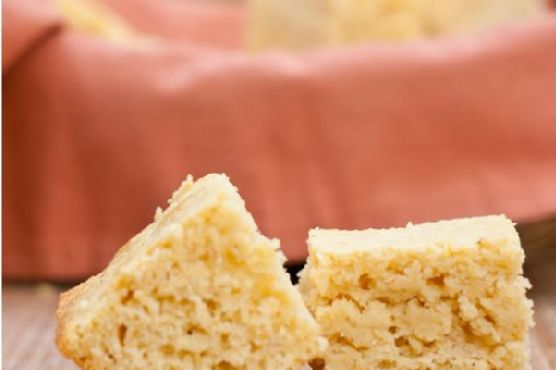
    Maple Pecan Honey Cornbread with Orange Zest

    Imagine this: the golden crust of a freshly baked cornbread, still warm from the oven, with a sweet aroma that dances through your kitchen. A slice reveals a moist, sun-kissed interior dotted with crunchy pecans and hints of bright orange zest. This is not your grandmother’s cornbread — it’s something a little more magical.

    My Love Affair with Cornbread

    Growing up in the South, cornbread was more than just a side dish; it was a family staple, gracing our table during Sunday dinners, holiday feasts, and even simple weekday suppers. My earliest memory of this comforting dish is watching my grandmother expertly mix cornmeal and buttermilk in her old ceramic bowl, a routine she had perfected over decades. I vividly remember the scent of it baking, mingling with the savory tang of collard greens or the rich aroma of a beef stew.

    However, my journey to crafting the perfect cornbread was not without its hiccups. I recall a particularly chaotic Thanksgiving where, in my excitement to impress the family with my own take on the classic, I inadvertently forgot the baking powder. The result was a flat, sad disk that my family graciously ate with polite smiles. That little mishap taught me a valuable lesson about the science of baking and the importance of precision.

    Determined to redeem myself, I spent months experimenting with different ingredients and techniques, seeking to elevate the traditional recipe without losing its comforting soul. It was during a trip to a local farmer’s market that I stumbled upon fresh pecans and a basket of fragrant oranges, sparking an idea. What if I could infuse my cornbread with these vibrant flavors? Hence, the Maple Pecan Honey Cornbread with Orange Zest was born, a creation that has since become a beloved staple in my home.

    What Makes This Version Special

    This isn’t just any cornbread recipe, and here’s why: by infusing the batter with aromatic **orange zest** and crunchy **pecans**, I’ve added layers of texture and flavor that transform this humble side into a standout dish. The warm, earthy notes of **maple syrup** replace the usual vanilla, giving it a subtle sweetness that’s both comforting and sophisticated. Each element plays its part in creating a cornbread that is vibrant, complex, and utterly satisfying.

    Flavor Profile

    The Maple Pecan Honey Cornbread with Orange Zest bursts with a sweet and nutty profile, where each bite reveals a bright citrus aroma and a warm maple undertone. The cornmeal provides a heartiness, while the pecans add a delightful crunch. The orange zest weaves a thread of freshness throughout, ensuring a balanced bite that is both familiar and refreshingly new.

    Ingredients

    • 1 cup corn meal
    • 1 cup flour
    • 1 tablespoon baking powder
    • 1/2 cup white sugar
    • 1/2 teaspoon salt
    • 1/4 cup **honey**
    • 1/4 cup **maple syrup**
    • 1 large egg
    • 1 cup milk
    • 1/2 cup melted butter
    • 1 tablespoon grated **orange zest**
    • 1/2 cup chopped **pecans**

    Instructions

    1. Preheat your oven to 350°F (175°C) and grease a 9×9 inch baking pan.
    2. In a large bowl, combine the corn meal, flour, baking powder, sugar, and salt. Whisk these dry ingredients together until well mixed.
    3. In a separate bowl, whisk together the honey, maple syrup, egg, and milk. Ensure the mixture is smooth and the honey is fully integrated.
    4. Pour the wet ingredients into the dry ingredients and stir until just combined. Avoid over-mixing as this can lead to a dense cornbread.
    5. Gently fold in the melted butter, followed by the grated orange zest. Be careful to preserve the citrus aroma by folding lightly.
    6. Heat a dry skillet over medium heat and toast the pecans until they are fragrant and slightly golden, about 3-4 minutes. This step enhances their flavor and crunch.
    7. Fold the toasted pecans into the batter, distributing evenly.
    8. Pour the batter into the prepared pan and smooth the top with a spatula. Bake in the preheated oven for 25-30 minutes, or until the top is golden-brown and a toothpick inserted into the center comes out clean.
    9. Allow the cornbread to cool in the pan for at least 10 minutes before slicing. Serve warm.

    Pro Tips from Meaghan’s Kitchen

    • Use fresh orange zest for maximum flavor. Store-bought zest can sometimes be dry and lack vibrancy.
    • To ensure even mixing, bring your egg and milk to room temperature before combining with other ingredients.
    • If you prefer a slightly sweeter cornbread, try drizzling a bit of maple syrup over the top before serving.
    • For a more robust flavor, use dark maple syrup instead of the regular one.
    • Letting the cornbread cool slightly before cutting will make it easier to get clean slices.

    Variations & Dietary Swaps

    • Vegetarian Swap: Substitute the butter with a plant-based alternative like coconut oil or vegan butter for a vegetarian-friendly version.
    • Spice-It-Up Version: Add a teaspoon of cinnamon or nutmeg to the dry ingredients for a warm, spiced version.
    • Kids-Friendly Version: Reduce the orange zest to a teaspoon and add in a handful of mini chocolate chips for a sweeter, kid-approved treat.

    What to Serve With It

    Pair this Maple Pecan Honey Cornbread with a refreshing glass of iced green tea or a light citrus salad to complement its flavors. It’s also a fantastic side for hearty soups or chili, where its sweet nuttiness can shine against savory, spicy notes.

    Storage & Meal Prep

    Store any leftover cornbread in an airtight container at room temperature for up to 3 days. For longer storage, wrap individual slices in plastic wrap and place them in a zip-top freezer bag. Freeze for up to 3 months. To reheat, simply thaw at room temperature and warm in a 350°F oven for about 10 minutes.

    FAQ

    Can I use whole wheat flour instead of all-purpose flour?

    Yes, you can substitute whole wheat flour, but it may result in a denser texture. Consider using half whole wheat and half all-purpose to maintain a lighter crumb.

    How can I make this cornbread gluten-free?

    To make it gluten-free, you can use a 1:1 gluten-free baking flour blend in place of the all-purpose flour. Ensure your cornmeal is also certified gluten-free.

    What if I don’t have fresh oranges?

    If fresh oranges aren’t available, you can use store-bought orange juice and a teaspoon of orange extract as a substitute. However, fresh zest is recommended for the best flavor.

    Can I add other nuts or seeds?

    Absolutely! Feel free to swap the pecans for walnuts or even add sunflower seeds for extra crunch.

    How do I know when the cornbread is done?

    The cornbread is done when the top is golden-brown and a toothpick inserted into the center comes out clean. If the top browns too quickly, cover it with foil and continue baking.

    Final Thoughts

    There you have it, my dear kitchen adventurers, a Maple Pecan Honey Cornbread with Orange Zest that is sure to become a favorite in your baking repertoire. I hope this recipe brings warmth and joy to your table, just as it has to mine. Please feel free to leave comments about how your cornbread turned out or any tweaks you made. Sharing is caring, after all — let’s spread the cornbread love!

    Related update: Maple Pecan Honey Cornbread with Orange Zest

    Related update: Spicy Maple-Roasted Autumn Vegetables with Herbed Goat Cheese Drizzle

  • Decadent Caramel Bourbon Apple Brown Betty | Made by Meaghan Moineau

    Decadent Caramel Bourbon Apple Brown Betty | Made by Meaghan Moineau

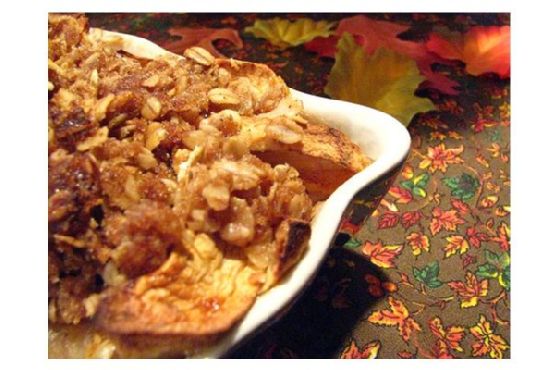
    Decadent Caramel Bourbon Apple Brown Betty

    Picture this: a cozy kitchen filled with the warm, inviting aroma of sweet spiced apples mingling with the rich, buttery scent of freshly toasted bread. As the apples soften and release their juices, the air becomes heavy with notes of caramel and a whisper of bourbon. It’s an olfactory delight that promises comfort and indulgence in every bite.

    My Journey with Apple Brown Betty

    My love affair with Apple Brown Betty began in my grandmother’s sun-dappled kitchen. Every fall, she would orchestrate a symphony of flavors with the simplest of ingredients: apples picked from the backyard, day-old bread, and a dusting of brown sugar and cinnamon. It was a humble dessert, but to me, it was magic. I remember the way the top layer would turn irresistibly crispy, giving way to the tender, spiced apples beneath. Each spoonful was a taste of nostalgia, a reminder of her warm embrace and endless love.

    But let me share a little secret: not all my adventures with Apple Brown Betty were seamless. There was the time I ambitiously tried to make it for a Thanksgiving potluck, only to discover I’d forgotten to buy apples. I had to improvise with pears and, though delicious, it just wasn’t the same. It taught me an important lesson about the integrity of ingredients and the stories they carry. The apples were more than a flavor — they were a bridge to my past.

    Years later, as I grew more confident in my culinary skills, I decided to give this classic dessert an adult twist. Inspired by a bottle of bourbon gifted by a dear friend and a craving for something a little more decadent, I embarked on a mission to elevate my beloved Apple Brown Betty. The result? A rich caramel bourbon sauce that transforms each layer of apples into something truly luxurious. And for a touch of crunch, a sprinkle of candied pecans that adds a delightful contrast to the soft, spiced filling.

    What Makes This Version Special

    This version of Apple Brown Betty takes a beloved classic and infuses it with a touch of indulgence that feels both familiar and exciting. The addition of a **caramel bourbon sauce** brings an elevated richness, enhancing the natural sweetness of the apples while adding a smoky depth that’s utterly irresistible. But that’s not all. The **candied pecans** I use for this recipe add a delightful crunch, offering a nutty counterpoint that pairs perfectly with the soft, buttery bread cubes.

    By toasting the bread cubes before layering them with the apples, we enhance their texture and flavor, ensuring that the final dessert has a satisfying crispness that contrasts beautifully with the tender apple layers. This upgraded version is not just an Apple Brown Betty, but an experience — one that marries tradition with a modern twist, creating a dessert that’s perfect for cozy evenings and special occasions alike.

    Flavor Profile

    Prepare your senses for a journey through layers of warm, rich flavors with this Decadent Caramel Bourbon Apple Brown Betty. The first bite greets you with the buttery crunch of toasted bread, mingled with the toasty sweetness of caramel. As you delve deeper, the apples reveal themselves — tender and juicy, infused with the aromatic spice of cinnamon and the sophisticated warmth of bourbon. The candied pecans punctuate the experience, adding a nutty sweetness that lingers on your palate, making each spoonful a harmonious blend of textures and tastes.

    Ingredients

    • 5 cups of diced apples, peeled and cored
    • 3 cups of cubed bread (preferably day-old)
    • **1/2 cup of butter, melted**
    • 1/2 cup of white sugar
    • 1 teaspoon of cinnamon
    • 1 teaspoon of nutmeg
    • Juice of 1 lemon
    • **1/2 cup of caramel sauce**
    • **1/4 cup of bourbon**
    • **1/2 cup of candied pecans**

    Instructions

    1. Preheat your oven to 375°F (190°C). Butter a soufflé dish that holds 1-1/2 quarts to ensure the dessert doesn’t stick.
    2. In a large bowl, mix the diced apples with the white sugar, cinnamon, and nutmeg until well combined. Add the lemon juice and toss to coat, which helps to prevent the apples from browning and enhances their flavor.
    3. On a baking sheet, spread the cubed bread and toast in the oven for about 10 minutes, or until lightly golden-brown. This step not only intensifies the bread’s flavor but also helps it absorb the delicious apple juices without becoming soggy.
    4. In a small saucepan over medium heat, combine the **caramel sauce** with the **bourbon**, stirring until the mixture is smooth and aromatic. This will be our luscious drizzle that ties all the flavors together.
    5. Begin layering in the prepared soufflé dish: start with a base layer of toasted bread cubes. Add a layer of the apple mixture, followed by a drizzle of the caramel bourbon sauce. Dot with some of the melted butter.
    6. Repeat the layering process, ending with a top layer of bread cubes. Make sure the dish is well-heaped, as the ingredients will settle as they bake.
    7. Cover the dish with foil and bake in the preheated oven for 30 minutes.
    8. Remove the foil and continue baking for an additional 30 minutes, or until the apples are tender and the top is a beautiful golden-brown.
    9. Once out of the oven, sprinkle the **candied pecans** over the top for a finishing touch.

    Pro Tips from Meaghan’s Kitchen

    • Choose apples that hold up well during baking, like Granny Smith or Honeycrisp, for the best texture.
    • If your caramel sauce is too thick, gently warm it before mixing with the bourbon to ensure a smooth consistency.
    • For extra depth of flavor, consider adding a pinch of salt to the caramel bourbon mixture.
    • You can prepare the bread cubes and apple mixture a day ahead, saving you time on the day of baking.
    • If you prefer a less sweet dessert, reduce the sugar to 1/3 cup and let the natural sweetness of the apples shine.

    Variations & Dietary Swaps

    • Vegetarian Swap: Use a plant-based butter alternative and ensure your caramel sauce contains no dairy for a vegan-friendly dessert.
    • Spice-It-Up Version: Add a pinch of ground cloves or ginger to the apple mixture for a spicier kick.
    • Kids-Friendly Version: Omit the bourbon and use a splash of apple juice instead for a family-friendly treat.

    What to Serve With It

    This Decadent Caramel Bourbon Apple Brown Betty pairs beautifully with a scoop of vanilla bean ice cream, allowing the cold, creamy texture to balance the warm, spiced flavors of the dessert. For a cozy beverage pairing, consider a glass of spiced cider — the subtle warmth of the spices will complement the dessert wonderfully.

    Storage & Meal Prep

    Any leftovers can be stored in an airtight container in the fridge for up to three days. For longer storage, wrap portions individually and freeze for up to a month. When you’re ready to enjoy your Apple Brown Betty again, simply reheat in a 350°F (175°C) oven until warmed through, or microwave on medium power to maintain the dessert’s delightful texture.

    FAQ

    Can I use a different type of bread?

    Absolutely! While day-old white bread works well, you can experiment with brioche or challah for a richer flavor, or even whole wheat if you prefer a heartier texture.

    What can I use if I don’t have bourbon?

    If bourbon isn’t available, you can substitute it with a similar spirit like rum or omit it altogether for a non-alcoholic version.

    How can I make this gluten-free?

    Simply replace the bread cubes with a gluten-free bread variety. Make sure all other ingredients, like the caramel sauce, are also gluten-free.

    Does the alcohol cook out?

    Yes, most of the alcohol in the bourbon will cook off during baking, leaving behind just the rich, complex flavors.

    Can I prepare this dish in advance?

    Yes! You can assemble the dish a day in advance and store it in the fridge. Bake it fresh before serving for the best results.

    Final Thoughts

    There you have it — a sumptuous twist on the classic Apple Brown Betty, perfect for impressing guests or simply indulging yourself. I hope you find as much joy in making and eating this dessert as I do. If you try it, I’d love to hear your thoughts and see your creations! Share your experiences in the comments below, and don’t hesitate to pass this recipe along to fellow dessert lovers.

    Related update: Decadent Caramel Bourbon Apple Brown Betty

    Related update: Almond Amaretto Cloud Cake with Rosewater Marzipan Glaze

  • Bourbon-Infused Mini Cherry Pies with Pecan Streusel | Made by Meaghan Moineau

    Bourbon-Infused Mini Cherry Pies with Pecan Streusel | Made by Meaghan Moineau

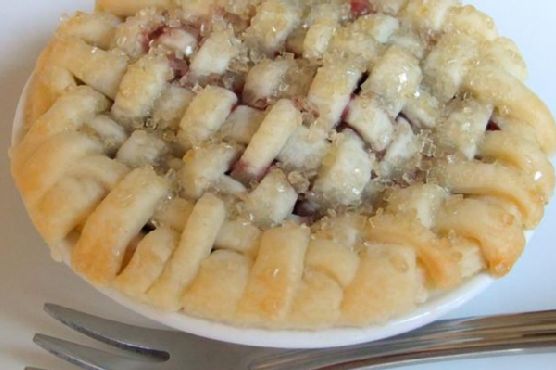
    Bourbon-Infused Mini Cherry Pies with Pecan Streusel

    Imagine a warm summer evening, the air thick with the fragrance of ripe cherries mingling with a hint of vanilla and the subtle allure of bourbon. These mini cherry pies, crowned with a delightful pecan streusel, promise to be the star of any dessert table. Each bite offers a rich tapestry of flavors, leaving you longing for more.

    My Cherry Pie Love Affair

    There’s something about cherry pies that always takes me back to my childhood. Growing up, summer weekends meant visits to my grandmother’s house. Her kitchen was a sanctuary filled with the sweet and tangy aroma of freshly baked pies cooling by the window. I remember her laughing as I tried to sneak a cherry from the bowl while she wasn’t looking, always failing to escape her watchful eye. Those moments sparked my love for baking and the magic of turning simple ingredients into something extraordinary.

    Fast forward a few years, and I’m in my own kitchen, trying to recreate those memories. I soon discovered that while I could replicate the basics, I had a desire to make the recipe my own. I wanted to elevate the classic cherry pie with a twist that would resonate with my adult palate. After a few kitchen experiments, I found that a splash of bourbon in the filling, paired with a crunchy pecan streusel, brought out an intriguing depth and complexity to the pies.

    However, it wasn’t always smooth sailing. There was a time I miscalculated the amount of bourbon, and let’s just say the pies were more suited for a cocktail party than a family gathering! But with each attempt, I fine-tuned the recipe until it became a cherished favorite that I’m thrilled to share with you today.

    What Makes This Version Special

    Our Bourbon-Infused Mini Cherry Pies with Pecan Streusel are not your grandmother’s cherry pies — they’re a bold, grown-up take on the classic. The addition of bourbon adds a smoky undertone that beautifully complements the tart cherries. Meanwhile, the pecan streusel topping provides a delightful crunch that contrasts with the soft, juicy filling. This unique twist transforms a traditional dessert into an unforgettable treat that’s perfect for any occasion.

    Flavor Profile

    These mini pies offer a symphony of flavors and textures that dance on your taste buds. The filling is rich and fruity, with the cherries providing a natural sweetness that’s enhanced by the hint of smokiness from the bourbon. The pecan streusel topping adds a satisfying crunch and a nutty warmth, while the buttery crust holds it all together. Each bite is a complex, satisfying experience that leaves a lingering taste of nostalgia and innovation.

    Ingredients

    • 2 cups fresh or frozen sour cherries, pitted
    • **2 tablespoons bourbon**
    • 1/4 cup granulated sugar
    • 1 tablespoon cornstarch
    • 1 tablespoon fresh lemon juice
    • 1 teaspoon vanilla extract
    • 1 1/2 cups all-purpose flour
    • 1/4 cup **brown sugar**
    • 1/2 teaspoon ground cinnamon
    • 1/2 cup **chopped pecans**
    • 1/2 cup (1 stick) unsalted butter, cold and cut into cubes
    • 2/3 cup cold water
    • 1 tablespoon heavy whipping cream
    • 2 teaspoons turbinado sugar
    • 1/2 teaspoon salt

    Instructions

    1. Start by preparing the pie crust. In a food processor, combine flour and salt. Add butter to the mixture, pulsing until the mixture resembles coarse crumbs, approximately 30 seconds.
    2. With the processor running, gradually add 2/3 cup cold water in a slow, steady stream through the lid opening until the mixture forms a ball. Divide the dough into two disks, wrap in plastic wrap, and refrigerate for 1 hour.
    3. Preheat your oven to 350°F (175°C). On a lightly floured surface, roll one pastry disk to a 1/8-inch thickness. Fit the dough into 12 (2-1/2-inch) mini pie plates. Trim the dough around the edges and freeze until firm, about 10 minutes.
    4. Prick the bottoms and sides of the dough with a fork and bake until golden, about 6 to 8 minutes. Remove from the oven and let cool.
    5. In a small bowl, mix cornstarch with 2 tablespoons cold water until blended. In a large saucepan, combine cherries, bourbon, cornstarch mixture, sugar, and salt. Cook over medium heat until cherries are soft and the mixture is thickened. Stir in lemon juice and vanilla extract, then set aside to cool slightly.
    6. For the pecan streusel topping, mix chopped pecans, brown sugar, flour, and cinnamon in a bowl. Make sure it’s well-combined and set aside.
    7. Roll the remaining pastry disk to a 1/8-inch thickness. Cut into thin strips for lattice topping. Weave strips over each pie to create a lattice pattern. Carefully transfer lattice tops to prepared pie plates and seal the edges.
    8. Brush the tops and edges with cream and sprinkle each pie with turbinado sugar.
    9. Bake until the crusts are golden and the streusel is crisp, about 18 to 24 minutes. Serve warm, perhaps with a scoop of bourbon vanilla ice cream for the perfect finishing touch.

    Pro Tips from Meaghan’s Kitchen

    • For the best crust, keep your butter and water as cold as possible. This ensures a flaky, tender pastry.
    • When weaving your lattice, use a ruler to keep your strips even and straight for a professional-looking finish.
    • If using frozen cherries, thaw and drain them well to prevent a soggy filling.
    • Enhance the streusel by toasting the pecans before adding them for a deeper nutty flavor.
    • Let the pies cool slightly before serving to allow the filling to set, making slicing easier.

    Variations & Dietary Swaps

    • Vegetarian Swap: The original recipe is vegetarian, but ensure your bourbon is vegetarian-friendly by checking for any animal-derived clarifiers.
    • Gluten-Free Version: Use a gluten-free flour blend for the crust and streusel topping to make these pies celiac-friendly.
    • Kid-Friendly Version: Skip the bourbon and add an extra tablespoon of vanilla extract to keep the flavor rich without the alcohol.

    What to Serve With It

    These mini cherry pies are a delight on their own, but pairing them with a glass of chilled dessert wine elevates the experience. Alternatively, a scoop of bourbon vanilla ice cream perfectly complements the smoky undertones of the pie, creating a harmonious dessert duo that will undoubtedly impress your guests.

    Storage & Meal Prep

    To store leftovers, cover the pies with plastic wrap or place them in an airtight container in the refrigerator for up to 3 days. For longer storage, freeze the baked pies in a single layer on a baking sheet, then transfer them to a freezer-safe container for up to 1 month. To reheat, place frozen pies in a preheated 350°F (175°C) oven for about 10-15 minutes or until warmed through.

    FAQ

    Can I make the pie dough ahead of time?

    Absolutely! The dough can be made and refrigerated for up to two days in advance. Just be sure to let it sit at room temperature for about 10 minutes before rolling it out.

    What if I don’t have mini pie plates?

    No mini pie plates? No problem. You can use a muffin tin as an alternative. Simply adjust the dough circle size to fit each muffin cup.

    Can I use canned cherries instead of fresh or frozen?

    Yes, canned cherries can work. Just make sure to drain them well and adjust the sugar in the filling since canned cherries are often in syrup.

    Is there a non-alcoholic substitute for bourbon?

    If you’d prefer to avoid alcohol, replace the bourbon with an equal amount of apple juice or cherry juice for a similar depth of flavor without the booze.

    How do I prevent my pie filling from being too runny?

    Ensure your cornstarch mixture is well combined and cooked until thick before adding it to the pie. If your cherries are particularly juicy, you may need to increase the cornstarch slightly.

    Final Thoughts

    These Bourbon-Infused Mini Cherry Pies with Pecan Streusel are a testament to how a classic can be reimagined with a touch of creativity and a dash of bold flavors. I hope this recipe brings as much joy to your table as it has to mine. I’d love to hear about your baking adventures and any tweaks you make to the recipe. Please feel free to share your experiences or any questions in the comments below. Happy baking, my friends!

    Related update: Bourbon-Infused Mini Cherry Pies with Pecan Streusel

    Related update: Decadent Caramel Bourbon Apple Brown Betty

  • Madras Beef Curry | Made by Meaghan Moineau

    Madras Beef Curry | Made by Meaghan Moineau

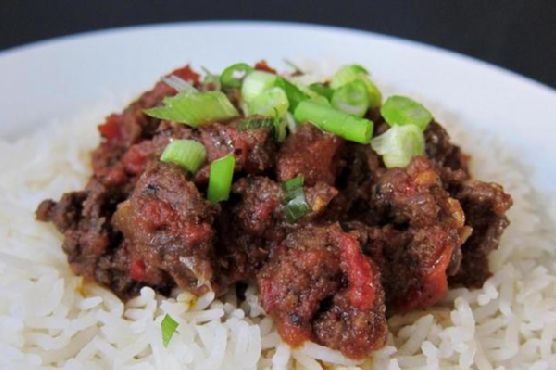
    Madras Beef Curry

    Welcome to a journey into the warmth and spice of Indian cuisine with our Madras Beef Curry. This dish, filled with the aromatic flavors of garam masala and the heat of cayenne pepper, is bound to become a favorite in your household. Growing up, Sunday evenings at my grandmother’s house were always dedicated to exploring different cuisines, and the delightful aroma of curry simmering in the kitchen was my favorite. This Madras Beef Curry recipe brings back those cherished memories and is sure to create new ones for your family as well.

    Why You’ll Love It

    This Madras Beef Curry is a vibrant and hearty dish that will tantalize your taste buds. Here are a few reasons why you’ll fall in love with it:

    • Flavor Explosion: The combination of garam masala, cinnamon, and curry powder creates a symphony of flavors that dances on the palate.
    • Customizable Heat: Whether you like it mild or spicy, you can adjust the cayenne pepper to suit your taste.
    • Perfect for Meal Prep: This curry stores well and tastes even better the next day, making it ideal for meal prepping.
    • Comforting and Satisfying: Served over warm basmati rice, this curry provides a comforting meal that’s perfect for any occasion.

    Ingredients

    • 2 tsp garam masala
    • 1/2 tsp ground cinnamon
    • 2 tbsp curry powder
    • 1/2 tsp black pepper
    • 1 tsp salt
    • 1/4 tsp cayenne pepper
    • 1 tbsp light brown sugar
    • 4 garlic cloves, minced
    • 1-inch piece of ginger, grated
    • 2 tbsp lemon juice
    • 2 tbsp vegetable oil
    • 1.5 lbs beef, thinly sliced
    • 1 can (14 oz) diced tomatoes
    • 2 green onions, chopped
    • Cooked basmati rice, for serving

    Instructions

    1. Slice the beef thinly (as for a stir fry) and place it in a medium bowl.
    2. Add all of the other ingredients, except the tomatoes, green onions, and rice, and combine to coat the meat well.
    3. Let sit for 10-15 minutes to allow the flavors to infuse into the meat.
    4. Heat a medium pan with a lid over medium heat. Add the meat and brown well, stirring occasionally.
    5. Continue to cook over medium heat until all of the meat juices have evaporated and only oil remains in the bottom of the pan with the meat.
    6. Add the tomatoes, stir to combine, and lower the heat to medium low. Cover and simmer, stirring occasionally, until the meat is tender and most of the moisture from the tomatoes has been absorbed by the meat, about 30 minutes.
    7. If the sauce becomes too thick before the beef is tender, add 1/4 cup water and continue to simmer with the lid on.
    8. Taste and adjust the seasoning, adding additional salt if needed. For a spicier curry, additional cayenne pepper may be added at this point.
    9. Serve over steamed basmati rice with chopped green onions on top.

    Tips

    To ensure the best results, here are some tips:

    • Beef Selection: Choose a cut of beef that is suitable for quick cooking, such as sirloin or flank steak, to keep it tender.
    • Marinating Time: If you have extra time, marinate the beef longer for deeper flavors.
    • Consistent Slicing: Slice the beef evenly for uniform cooking.

    Variations & Substitutions

    This recipe is flexible and can be adapted to suit your preferences:

    • Protein Swap: Substitute chicken or lamb for beef. Adjust cooking time as needed.
    • Vegetarian Option: Use tofu or chickpeas in place of beef for a plant-based version.
    • Spice Level: Adjust the cayenne pepper to make it as mild or spicy as you like.

    Storage

    Leftover Madras Beef Curry can be stored in an airtight container in the refrigerator for up to 3 days. For longer storage, freeze in a freezer-safe container for up to 3 months. Reheat gently on the stovetop or in the microwave before serving.

    FAQ

    Can I make this curry ahead of time?

    Absolutely! This curry actually tastes better the next day as the flavors continue to develop. Just store it in the refrigerator and reheat before serving.

    What can I serve with Madras Beef Curry?

    This curry is traditionally served with basmati rice, but it also pairs well with naan bread or a side of steamed vegetables.

    Nutrition

    This Madras Beef Curry is not only delicious but also packed with protein and spices that may boost metabolism. For a lighter option, you can serve it with brown rice or quinoa.

    Final Thoughts

    Madras Beef Curry is more than just a meal; it’s an experience. Each bite invites you into a world of rich aromas and bold flavors, reminiscent of a cozy family dinner filled with laughter and good conversation. Whether you’re cooking for yourself, your family, or entertaining guests, this recipe is sure to impress. Enjoy the process of creating this dish and the warmth it brings to your table. Happy cooking!

    Related update: Madras Beef Curry

    Related update: Spicy Black Bean and Quinoa Burgers with Pineapple-Jalapeño Salsa

  • Bacon & Egg Toast Cups | Made by Meaghan Moineau

    Bacon & Egg Toast Cups | Made by Meaghan Moineau

    Bacon & Egg Toast Cups

    Introduction

    There’s something undeniably comforting about the combination of bacon and eggs, wrapped snugly in a cup of crispy bread. It takes me back to those lazy Sunday mornings at my grandmother’s house, where the aroma of sizzling bacon would gently nudge me awake. We’d gather around the table, and she’d serve her famous bacon and egg toast cups, each one a little parcel of breakfast joy. If you’re looking for a dish that brings warmth and nostalgia to your morning routine, these Bacon & Egg Toast Cups will do just the trick.

    Why You’ll Love It

    This recipe is a delightful twist on the classic bacon and eggs breakfast. It’s perfect for impressing guests at brunch, or for a cozy breakfast in bed. Here are a few reasons you’ll fall in love with this dish:

    • Easy to make: With simple ingredients and straightforward steps, this recipe is accessible even for beginner cooks.
    • Customizable: You can easily adjust the ingredients to suit your taste, making it a versatile addition to your breakfast repertoire.
    • Perfect for meal prep: These cups can be made in advance, saving you time on busy mornings.
    • Kid-friendly: The fun presentation makes it a hit with kids, and they can even help make them!

    Ingredients

    • Unsalted butter
    • 6 slices of sandwich bread
    • 6 slices of bacon
    • 6 eggs
    • Salt & pepper to taste

    Instructions

    1. Preheat your oven to 375°F (190°C).
    2. Lightly butter six standard muffin cups.
    3. Flatten the bread slices slightly with a rolling pin, and with a 4.5-inch cookie cutter, cut into four rounds. Cut each round in half, then press the two halves into each muffin cup, overlapping slightly and making sure bread comes up to the edges. Use extra bread and crusts to patch any holes if necessary. Brush with remaining butter.
    4. In a large skillet, cook the bacon until almost crisp, about four minutes, flipping once. Lay one bacon slice in each bread cup.
    5. Crack an egg over each bacon slice. Season with salt & pepper.
    6. Bake until egg whites are just set, about 25 minutes. The bacon will continue to cook in the oven.
    7. Run a small knife around cups to loosen toast cups before serving.

    Tips

    • Make sure to pre-cook the bacon just until it’s almost crispy; it will continue to cook in the oven.
    • For even cooking, crack the eggs gently to avoid breaking the yolks.
    • For easier removal, allow the cups to cool slightly before running a knife around the edges.

    Variations & Substitutions

    These Bacon & Egg Toast Cups are flexible and can be tailored to suit your preferences:

    • Cheese: Add a sprinkle of shredded cheese on top of the eggs before baking for a cheesy twist.
    • Vegetarian: Omit the bacon and add sautéed spinach or mushrooms for a vegetarian version.
    • Spicy: Sprinkle some red pepper flakes or drizzle a bit of hot sauce for a spicy kick.
    • Bread: Use whole grain or gluten-free bread to cater to dietary needs.

    Storage

    These toast cups can be stored in an airtight container in the refrigerator for up to three days. To reheat, place them in a preheated oven at 350°F (175°C) for about 10 minutes or until warmed through. Avoid microwaving, as it can make the bread soggy.

    FAQ

    Can I make these ahead of time?

    Yes, you can prepare the bread cups and bacon the night before and store them in the refrigerator. In the morning, simply add the eggs and bake.

    Can I freeze Bacon & Egg Toast Cups?

    It’s best to enjoy these fresh or refrigerated. Freezing can alter the texture of the bread and eggs, leading to a less desirable outcome.

    What can I serve with these toast cups?

    These cups are quite filling on their own, but you can pair them with a fresh fruit salad or a side of roasted potatoes for a hearty breakfast.

    Nutrition

    Each Bacon & Egg Toast Cup contains approximately 250 calories, 14g of protein, 18g of fat, and 12g of carbohydrates. This makes them a balanced option for a nutritious start to your day.

    Final Thoughts

    Bacon & Egg Toast Cups are more than just a meal; they’re a comforting reminder of mornings filled with love and warmth. Whether you’re enjoying them solo or sharing with family and friends, they’re sure to bring a smile to your face and a delicious start to your day. Give this recipe a try, and perhaps you’ll find your own nostalgic moment wrapped in these delightful little cups.

    Related update: Bacon & Egg Toast Cups

    Related update: Madras Beef Curry

    Related update: Chocolate Chip Coconut Muffins

  • Chocolate Spelt Cake | Made by Meaghan Moineau

    Chocolate Spelt Cake | Made by Meaghan Moineau

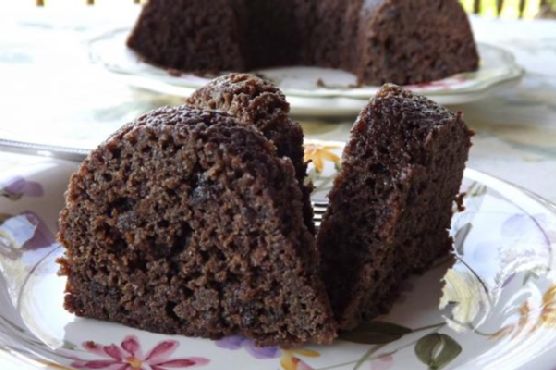
    Chocolate Spelt Cake: A Nostalgic Delight

    There’s something truly magical about baking a cake that fills your home with warmth and the tantalizing aroma of chocolate. This Chocolate Spelt Cake is more than just a dessert; it’s a heartfelt journey back to simpler times, where every bite brings a flood of cherished memories. I remember my grandmother baking this delightful cake for family gatherings, her kitchen brimming with laughter and the irresistible scent of cocoa. Today, I’m thrilled to share this beloved recipe with you, so you too can create beautiful memories with your loved ones.

    Why You’ll Love It

    This Chocolate Spelt Cake is a must-try for several reasons. First, it offers a healthier twist on a classic chocolate cake by using spelt flour, which is rich in nutrients and adds a slightly nutty flavor. The combination of rich cocoa and warm coffee creates a depth of flavor that is both indulgent and comforting. Plus, the addition of currants provides a delightful burst of sweetness in every bite. Whether you’re a seasoned baker or a novice, this cake is simple to make and guaranteed to impress your family and friends.

    Ingredients

    • 1 1/2 cups spelt flour
    • 1 cup unsalted butter, room temperature
    • 1 cup warm coffee
    • 1 tablespoon instant coffee
    • 1 teaspoon vanilla extract
    • 1 teaspoon baking soda
    • 1/2 teaspoon salt
    • 1 cup brown sugar
    • 1/2 cup white sugar
    • 2 large eggs
    • 3/4 cup cocoa powder
    • 1/2 cup sour cream
    • 1/2 cup currants

    Instructions

    1. Preheat your oven to 350°F (175°C).
    2. Add the tablespoon of instant coffee to the warm coffee along with the vanilla, baking soda, and currants. Stir until frothy.
    3. In a medium bowl, combine the spelt flour, cocoa powder, and salt.
    4. In a mix-master, beat the butter, brown sugar, and white sugar until smooth and creamy.
    5. Add the eggs, one at a time, mixing well after each addition.
    6. Slowly add the coffee mixture to the butter mixture, continuing to mix until well combined.
    7. While mixing on low speed, gradually add the spelt flour mixture and mix until just combined.
    8. Prepare a bundt pan by greasing it with butter and dusting with cocoa powder.
    9. Pour the batter into the prepared bundt pan and smooth the top.
    10. Bake for 50-55 minutes, or until a toothpick inserted into the center comes out clean.
    11. Let the cake cool slightly before removing it from the pan.

    Tips

    • Ensure all ingredients are at room temperature before you start mixing. This helps the batter to mix evenly and results in a perfectly textured cake.
    • For a more intense chocolate flavor, consider using a high-quality cocoa powder.
    • Be cautious not to overmix the batter once the flour is added, as this can result in a dense cake.

    Variations & Substitutions

    Feel free to get creative with this recipe:

    • Flour: If you don’t have spelt flour, you can substitute with whole wheat flour or all-purpose flour, though the texture and flavor will slightly differ.
    • Sugar: For a deeper flavor, replace white sugar with coconut sugar or muscovado sugar.
    • Add-ins: Try adding chopped nuts like walnuts or pecans for extra crunch.
    • Frosting: This cake pairs beautifully with a simple chocolate ganache or a dusting of powdered sugar.

    Storage

    Store the Chocolate Spelt Cake in an airtight container at room temperature for up to three days. For longer storage, you can refrigerate it for up to a week. To enjoy it warm, simply microwave a slice for a few seconds before serving.

    FAQ

    Can I use regular flour instead of spelt flour?

    Yes, you can substitute spelt flour with all-purpose flour. However, keep in mind that spelt flour provides a unique nutty flavor and a slightly different texture.

    How can I make this cake dairy-free?

    To make this cake dairy-free, substitute the butter with a plant-based butter and use a dairy-free sour cream alternative or yogurt.

    Can I freeze this cake?

    Absolutely! Wrap the cooled cake tightly in plastic wrap and then in aluminum foil before placing it in the freezer. It can be frozen for up to three months. Thaw overnight in the refrigerator before serving.

    Nutrition

    This Chocolate Spelt Cake offers a balanced indulgence. Each slice (assuming 12 slices per cake) provides approximately:

    • Calories: 280
    • Fat: 14g
    • Carbohydrates: 38g
    • Protein: 4g
    • Fiber: 3g
    • Sugar: 22g

    Final Thoughts

    This Chocolate Spelt Cake is more than just a dessert; it’s a way to create lasting memories with your loved ones. Whether you’re enjoying it as a cozy treat on a rainy afternoon or serving it at a festive gathering, this cake is sure to bring joy and warmth to any occasion. So, gather your ingredients, preheat your oven, and embrace the simple pleasure of baking. I hope this recipe becomes a cherished favorite in your home, just as it has been in mine.

    Related update: Chocolate Spelt Cake

    Related update: Mangolicious Upside Down Cake

  • Sweet and Spicy Country-Style Ribs | Made by Meaghan Moineau

    Sweet and Spicy Country-Style Ribs | Made by Meaghan Moineau

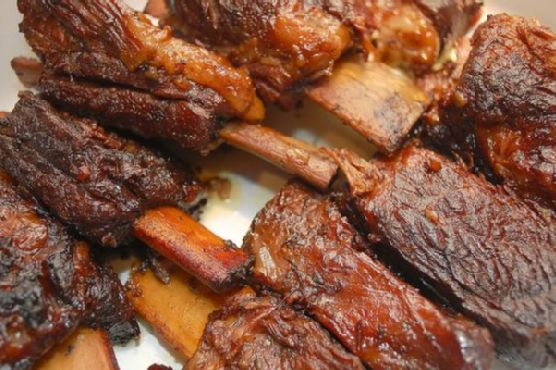
    Sweet and Spicy Country-Style Ribs

    There’s something incredibly comforting about the aroma of ribs slowly cooking in a rich, spicy sauce. This recipe for Sweet and Spicy Country-Style Ribs brings back memories of long summer evenings spent with family in the backyard, the air filled with laughter and the tantalizing smell of barbecue wafting through the air. When I was a child, my grandfather would often prepare ribs for our family gatherings, and I remember watching him patiently tend to the grill, basting the ribs with a secret sauce he had perfected over the years. This recipe is inspired by those cherished memories, with a modern twist that adds a little extra kick.

    Why You’ll Love It

    These Sweet and Spicy Country-Style Ribs are a perfect blend of flavors that will satisfy both your sweet and savory cravings. The rich tomato sauce is balanced with the sweetness of honey and the tang of apple cider vinegar, while a touch of cayenne pepper and hot sauce adds just the right amount of heat. This dish is perfect for any occasion, whether you’re hosting a barbecue, enjoying a Sunday family dinner, or simply looking to treat yourself to a delicious homemade meal.

    Ingredients

    • 2 lbs beef short ribs
    • 2 tablespoons vegetable oil
    • 1 large yellow onion, diced
    • 2 cloves garlic, minced
    • 2 tablespoons unsalted butter
    • 1 cup tomato sauce
    • 1/4 cup apple cider vinegar
    • 3 tablespoons honey
    • 2 tablespoons hot sauce
    • 1/2 teaspoon cayenne pepper
    • 1 tablespoon ancho chili powder
    • 1 teaspoon salt
    • 1 teaspoon dry mustard
    • Vegetable scraps – carrot, celery, etc.
    • 3 cups beef stock
    • Water, as needed

    Instructions

    1. Heat the vegetable oil in a 6-quart enameled Dutch oven over medium-high heat. Brown the ribs on all sides.
    2. Pour in the beef stock; add water to cover if necessary. Add the vegetable scraps and bring to a boil. Lower the heat to a simmer, cover, and cook for 45 minutes to an hour, or until the ribs are tender.
    3. While the ribs are braising, melt the unsalted butter in a large cast-iron skillet over medium-low heat. Sauté the onions until soft, then add the garlic and sauté for another minute more.
    4. Stir in the tomato sauce, apple cider vinegar, honey, hot sauce, cayenne pepper, ancho chili powder, salt, and dry mustard. Bring the mixture to a boil, then reduce the heat and simmer uncovered for 25 minutes, stirring occasionally.
    5. When the ribs are tender, remove them from the braising liquid and add them to the spicy tomato sauce in the skillet.
    6. Raise the heat and cook, stirring frequently, until the sauce has glazed the ribs, about 10 minutes.
    7. Serve the ribs with the remaining sauce on the side, if desired.

    Tips

    To ensure the ribs are perfectly tender, make sure to simmer them gently and check for doneness by inserting a fork; it should slide in easily. If you find the ribs are tough, allow them to simmer a bit longer. Also, don’t rush the sauce; letting it simmer slowly allows the flavors to meld beautifully.

    Variations & Substitutions

    If you prefer a milder flavor, you can reduce the amount of cayenne pepper or omit the hot sauce altogether. For a different twist, try using maple syrup instead of honey for a deeper sweetness, or substitute red wine vinegar for apple cider vinegar for a more robust flavor. If you don’t have beef short ribs, pork ribs can be an excellent alternative.

    Storage

    Leftover ribs can be stored in an airtight container in the refrigerator for up to 3 days. To reheat, place the ribs in a baking dish, cover with foil, and warm them in a preheated oven at 350°F (175°C) until heated through. You can also freeze the ribs for up to 2 months; just make sure to thaw them in the refrigerator before reheating.

    FAQ

    Can I make these ribs in advance?

    Absolutely! You can prepare the ribs and sauce a day ahead, then store them separately in the refrigerator. When you’re ready to serve, simply reheat the ribs, combine them with the sauce, and let them cook together until the sauce is perfectly glazed.

    What side dishes go well with these ribs?

    These Sweet and Spicy Country-Style Ribs pair wonderfully with classic barbecue sides like coleslaw, cornbread, or baked beans. For a lighter option, a simple green salad or roasted vegetables would also complement the flavors nicely.

    Nutrition

    While specific nutritional values can vary based on the exact ingredients and serving sizes, a general serving of these ribs provides a hearty amount of protein, along with essential vitamins and minerals from the vegetables and spices. If you’re watching your sodium intake, you may wish to reduce the added salt or choose a low-sodium beef stock.

    Final Thoughts

    These Sweet and Spicy Country-Style Ribs are more than just a meal; they’re a way to bring people together. Whether you’re reminiscing about family gatherings or creating new memories, this dish offers a delightful blend of flavors that are sure to impress. So gather your loved ones, roll up your sleeves, and dive into these delicious ribs. Enjoy every sticky, savory-sweet bite!

    Related update: Sweet and Spicy Country-Style Ribs