Tag: Weeknight Dinner

  • Szechuan-Style Spicy Chicken Lo Mein with Crunchy Cashews | Made by Meaghan Moineau

    Szechuan-Style Spicy Chicken Lo Mein with Crunchy Cashews | Made by Meaghan Moineau

    Szechuan-Style Spicy Chicken Lo Mein with Crunchy Cashews

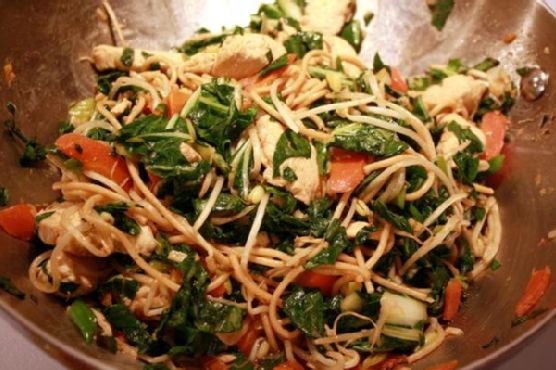
    Imagine a sizzling pan filled with tender strips of chicken, vibrant vegetables, and a glossy, spicy sauce that coats every strand of noodle. The air is thick with the aroma of ginger and garlic, dancing together in a fragrant waltz that promises a delicious adventure. This isn’t just any lo mein; it’s my Szechuan-Style Spicy Chicken Lo Mein with Crunchy Cashews, a dish that tantalizes the senses and transforms your kitchen into a bustling Chinese eatery.

    Personal Story

    I still vividly recall the first time I attempted to make lo mein at home. It was a rainy Sunday afternoon, and I was craving something comforting yet vibrant. As the rain poured down, I turned on my favorite playlist and began experimenting in the kitchen. I had a stack of takeout menus on my counter, but I was determined to create something better, something with more life and zest.

    In my quest for the perfect lo mein, I had my fair share of mishaps. I once added too much soy sauce, transforming my noodles into a salty ocean. Another time, I overcooked the vegetables until they resembled a soggy mess. But each kitchen mishap brought me closer to discovering the secrets of a truly remarkable dish.

    Then came the revelation: a jar of Szechuan peppercorns tucked away in my spice cabinet. I toasted them with red chili flakes in hot peanut oil, and the aroma was sensational. It was a game-changer. That spicy, tingly kick turned my ordinary lo mein into something extraordinary. I knew I had found the secret ingredient that would define my version of this classic dish.

    It’s amazing how a simple twist can elevate a recipe, turning it into something uniquely yours. My Szechuan-Style Spicy Chicken Lo Mein is now a family favorite, the dish we turn to when we need a little culinary excitement. And every time I make it, I smile, remembering that rainy afternoon and the delicious journey it inspired.

    What Makes This Version Special

    This Szechuan-Style Spicy Chicken Lo Mein isn’t just your standard takeout fare. What makes this version special is the spicy Szechuan twist that comes from a homemade chili oil. By toasting Szechuan peppercorns and red chili flakes in peanut oil, we infuse the dish with a deep, spicy flavor that’s both bold and tingly. The addition of crunchy roasted cashews elevates the texture, providing a delightful contrast to the tender noodles and chicken. This version is all about layers of flavor and texture, making each bite an exciting experience.

    Flavor Profile

    Prepare your taste buds for an adventure. This lo mein offers a spicy, savory experience with a hint of sweetness from honey and a satisfying nutty crunch from roasted cashews. The dish balances the heat of Szechuan peppercorns and chili flakes with the aromatic warmth of garlic and ginger. Each mouthful is a symphony of flavors, where the spicy notes are harmonized by the subtle sweetness and rounded out by the umami of soy sauce. The freshness of bok choy and bean sprouts adds a crisp, clean finish to this delicious ensemble.

    Ingredients

    • 8 oz skinless boneless chicken breast, sliced thin
    • 2 tablespoons peanut oil
    • 1 tablespoon Szechuan peppercorns
    • 1 teaspoon red chili flakes
    • 3 cloves garlic, minced
    • 1 tablespoon fresh ginger, grated
    • 2 cups cooked spaghetti
    • 1 cup bok choy, chopped
    • 1 cup bean sprouts
    • 1 carrot, julienned
    • 1 cup mushrooms, sliced
    • 1/4 cup low sodium chicken broth
    • 2 tablespoons low sodium soy sauce
    • 1 tablespoon honey
    • 2 tablespoons roasted cashews, chopped
    • 1 tablespoon sesame oil
    • 2 scallions, sliced
    • Fresh cilantro, for garnish

    Instructions

    1. Start by preparing the homemade chili oil. In a large nonstick skillet over medium heat, add the peanut oil. Once shimmering, add the Szechuan peppercorns and red chili flakes. Toast them for about 2 minutes until fragrant. Remove from heat and strain the oil into a bowl, discarding the solids.
    2. Return the infused oil to the skillet. Add the garlic and ginger, cooking over medium heat for 1 minute until aromatic. Be careful not to burn them; you want a gentle sizzle.
    3. Increase the heat to medium-high and add the sliced chicken breast and carrot. Stir-fry for about 2 minutes until the chicken is lightly browned and the carrot is starting to soften.
    4. Add the mushrooms, bok choy, and bean sprouts to the skillet. Pour in the chicken broth and soy sauce, and drizzle with honey. Stir constantly, cooking for about 3 minutes until the vegetables are tender-crisp.
    5. Reduce the heat to low and add the cooked spaghetti. Toss everything together, ensuring the noodles are well coated with the sauce. Cook for another minute until heated through.
    6. Finish by garnishing with the roasted cashews, scallions, and fresh cilantro. Drizzle with sesame oil just before serving for a fragrant touch.

    Pro Tips from Meaghan’s Kitchen

    • To ensure even cooking, slice the chicken breast thinly and uniformly. This allows it to cook quickly without drying out.
    • Keep your vegetables crisp by not over-stirring. Let them sit in the pan for a few seconds before tossing, which helps them develop a slight char and deeper flavor.
    • If you prefer a milder heat, reduce the amount of red chili flakes in the chili oil. You can always add more spice later.
    • Use freshly cooked spaghetti for the best texture, but if you’re using leftovers, rinse them under hot water to refresh before adding to the skillet.
    • For an extra punch of flavor, add a dash of rice vinegar or lime juice just before serving to brighten up the dish.

    Variations & Dietary Swaps

    • Vegetarian Swap: Replace the chicken with firm tofu or tempeh. Ensure it’s well-pressed and seasoned before adding to the stir-fry.
    • Spice-It-Up Version: Add extra chili flakes or a splash of hot sauce for those who love a fiery kick.
    • Kids-Friendly Version: Dial down the spices and add sweet bell peppers for a colorful, mild version that kids will love.

    What to Serve With It

    This Szechuan-Style Spicy Chicken Lo Mein pairs beautifully with a cold, crisp lager, which complements the spicy elements perfectly. For a non-alcoholic option, serve it with jasmine tea, which offers a soothing contrast to the heat. A side of steamed dumplings or a simple cucumber salad would round out the meal nicely, adding a refreshing crunch.

    Storage & Meal Prep

    Leftovers can be stored in an airtight container in the fridge for up to 3 days. To reheat, add a splash of water or chicken broth and warm gently in a skillet over medium heat until heated through. For longer storage, freeze the lo mein in individual portions for up to 2 months. Thaw overnight in the fridge before reheating.

    FAQ

    Can I use a different type of noodle?

    Absolutely! While spaghetti is convenient, you can use traditional lo mein noodles, udon, or even rice noodles for a gluten-free option.

    How can I make this dish less spicy?

    To reduce the heat, use fewer red chili flakes when making the chili oil. You can also serve the dish with a dollop of plain yogurt or a squeeze of lime to mellow the spice.

    What other vegetables can I add?

    Feel free to get creative with your vegetables. Snap peas, bell peppers, and broccoli all work wonderfully in this recipe.

    Can I make this dish in advance?

    Yes, you can prepare the components separately and combine them just before serving. The homemade chili oil can be made days in advance and stored in the fridge.

    How do I ensure the chicken stays tender?

    Thinly slice the chicken and avoid overcooking. Stir-fry over medium-high heat and remove from the pan as soon as it’s browned.

    Final Thoughts

    I hope you’re as excited to try this Szechuan-Style Spicy Chicken Lo Mein with Crunchy Cashews as I was when I first discovered its magic. It’s a dish that brings warmth, flavor, and a touch of adventure to your table. I’d love to hear how it turns out for you, so feel free to leave a comment or share your own creative twists on the recipe. Happy cooking!

    Related update: Szechuan-Style Spicy Chicken Lo Mein with Crunchy Cashews

    Related update: Saffron-Infused Seafood & Chorizo Paella with Roasted Red Peppers
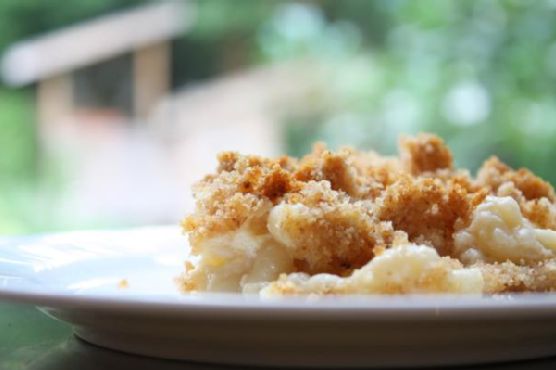
  • Truffle-Infused Macaroni and Cheese with Crispy Pancetta Crumble | Made by Meaghan Moineau

    Truffle-Infused Macaroni and Cheese with Crispy Pancetta Crumble | Made by Meaghan Moineau

    Truffle-Infused Macaroni and Cheese with Crispy Pancetta Crumble

    Imagine a chilly evening with a comforting blanket of warmth enveloping your kitchen, the air heavy with the decadent aroma of truffle oil mingling with bubbling cheese. As the golden-brown crust of your macaroni and cheese forms and crisps under a blanket of pancetta crumble, anticipation builds for that first creamy, savory bite.

    Personal Story

    The first time I tasted truffle oil, I was in a cozy bistro in Paris, where the chef drizzled it over a simple risotto. The earthy, luxurious aroma transported me to a place of pure culinary bliss. Since then, I’ve been on a quest to incorporate that same level of indulgence into my own cooking. Truffle oil, with its distinct and irresistible fragrance, became my secret weapon in transforming everyday dishes into gourmet experiences.

    Macaroni and cheese, a beloved American classic, was one of the first dishes I experimented with. I recall a time when, as a child, Kraft’s boxed version was a staple in our household, a quick and easy comfort after long school days. The ritual of mixing in the powdered cheese with milk and butter holds a nostalgic charm, but my grown-up palate craved more sophistication.

    On a rainy Saturday afternoon, I decided to take the plunge and experiment. The idea was simple: elevate my childhood favorite by marrying its comforting aspects with the luxurious notes of truffle and the salty, crispy delight of pancetta. The result was far beyond my expectations, and it quickly became a signature dish at gatherings, always met with wide-eyed approval and requests for seconds.

    Since then, this truffle-infused macaroni and cheese with crispy pancetta crumble has become a staple in my repertoire, a testament to the comforting power of home-cooked food elevated with a few gourmet touches. It’s a dish that never fails to impress and satisfy, and I’m thrilled to share it with you.

    What Makes This Version Special

    This version stands out not just for its rich, creamy texture but for the luxurious addition of truffle oil. By incorporating this ingredient just before serving, we preserve its aromatic qualities, ensuring that each bite carries its full, earthy essence. The crispy pancetta crumble isn’t just a garnish; it adds a savory, salty crunch that perfectly contrasts the smoothness of the cheese sauce. The combination transforms a standard macaroni and cheese into a gourmet delight, worthy of any dinner party or cozy night in.

    Flavor Profile

    This dish offers an indulgent taste experience. The creamy cheese sauce, enriched with Gruyere and white cheddar, blankets each piece of macaroni in a velvety embrace. The subtle heat from cayenne pepper and the aromatic nutmeg enhance the cheese’s complexity without overpowering it. The truffle oil’s distinct, earthy aroma complements the cheese, creating an olfactory symphony. Finally, the topping of crispy pancetta and fresh thyme adds a delightful crunch and a savory note, creating a perfect balance of flavors and textures.

    Ingredients

    • 1 pound elbow macaroni
    • 8 tablespoons unsalted butter, divided
    • 2 cups whole milk
    • 1/4 cup all-purpose flour
    • **1 tablespoon truffle oil**
    • **1/2 cup diced pancetta**
    • 3 cups sharp white cheddar cheese, shredded
    • 2 cups Gruyere cheese, shredded
    • 1/2 cup Parmesan cheese, grated
    • 1/4 teaspoon cayenne pepper
    • 1/4 teaspoon grated nutmeg
    • Kosher salt, to taste
    • Freshly ground black pepper, to taste
    • **1 cup white bread, torn into small pieces**
    • 2 tablespoons fresh thyme leaves

    Instructions

    1. Preheat your oven to 375 degrees Fahrenheit. Butter a 3-quart casserole dish and set it aside.
    2. In a medium bowl, place the torn pieces of white bread. In a small saucepan over medium heat, melt 2 tablespoons of butter. Pour the melted butter over the bread pieces, tossing to coat evenly. Set the breadcrumbs aside.
    3. Heat the whole milk in a medium saucepan over medium heat until it is hot but not boiling. Keep it warm.
    4. In a high-sided skillet over medium heat, melt the remaining 6 tablespoons of butter. Once the butter starts bubbling, add the flour and cook, stirring constantly, for about 1 minute to form a roux.
    5. Slowly pour the hot milk into the roux, whisking vigorously to prevent lumps. Continue cooking and whisking until the mixture starts to bubble and thickens to a smooth, creamy consistency.
    6. Remove the pan from the heat and stir in the salt, nutmeg, black pepper, cayenne pepper, 3 cups of white cheddar cheese, and 1 1/2 cups of Gruyere cheese. Mix until the cheese is fully melted and the sauce is smooth. Set the cheese sauce aside.
    7. Fill a large saucepan with salted water and bring it to a boil. Add the macaroni and cook for 2 to 3 minutes less than the package instructions, ensuring the pasta is slightly undercooked. Drain the macaroni and rinse it under cold water to stop the cooking process.
    8. Gently fold the drained macaroni into the cheese sauce until all the pasta is well coated. Add the truffle oil, stirring just before transferring the mixture to the casserole dish to preserve its aromatic quality.
    9. Pour the macaroni and cheese mixture into the prepared casserole dish. Sprinkle the remaining 1 1/2 cups of cheddar and 1/2 cup of Gruyere over the top, followed by the buttered breadcrumbs.
    10. Fry the diced pancetta in a skillet over medium heat until crispy. In a small bowl, toss the crispy pancetta with breadcrumbs and fresh thyme.
    11. Scatter the pancetta crumble over the macaroni and cheese. Bake in the oven for about 30 minutes, or until the top is golden-brown and crispy.
    12. Transfer the dish to a wire rack and let it cool for 5 minutes before serving. Enjoy your gourmet creation!

    Pro Tips from Meaghan’s Kitchen

    • Don’t overcook your pasta; it will continue cooking in the oven and absorb more flavor from the cheese sauce.
    • Use freshly grated cheese for the best melting quality. Pre-shredded cheese often contains anti-caking agents that can affect the sauce’s texture.
    • Adjust the amount of truffle oil to your taste. A little goes a long way, so start with less and add more if desired.
    • If you want a more pronounced truffle flavor, consider adding a bit of truffle salt in addition to the kosher salt.
    • For a richer topping, mix some Parmesan cheese with the breadcrumbs before baking.

    Variations & Dietary Swaps

    • Vegetarian Version: Simply omit the pancetta and opt for a mix of sautéed mushrooms to complement the truffle oil’s earthy notes.
    • Spicy Version: Amp up the heat by adding finely diced jalapeños or a sprinkle of red pepper flakes to the cheese sauce.
    • Kids-Friendly Version: Skip the truffle oil and pancetta, focusing on a creamy, cheesy core with a breadcrumb topping for a milder approach that’s sure to please young palates.

    What to Serve With It

    This truffle-infused macaroni and cheese pairs beautifully with a crisp, chilled glass of Sauvignon Blanc, whose acidity cuts through the rich creaminess of the dish. Alternatively, a light, fruity Pinot Noir makes a great companion, enhancing the earthy, savory notes. For a non-alcoholic option, consider serving it with a refreshing glass of iced tea or sparkling water with a twist of lemon.

    Storage & Meal Prep

    Leftovers can be stored in an airtight container in the refrigerator for up to 3 days. To reheat, cover with foil and warm in a 350-degree oven until heated through. If freezing, do so before baking—assemble the dish in a freezer-safe container, cover tightly, and freeze for up to 2 months. When ready to serve, thaw overnight in the refrigerator, then bake as directed, adding an extra 5-10 minutes to the cooking time.

    FAQ

    Can I make this dish ahead of time?

    Yes, you can assemble the macaroni and cheese without baking it, cover it, and refrigerate it for up to 24 hours before baking. Just remember to add a few extra minutes to the baking time if it’s coming straight from the fridge.

    What can I substitute for truffle oil if I don’t have any?

    If you don’t have truffle oil, you can omit it or substitute it with truffle salt or a touch of mushroom powder for a similar earthy flavor.

    How do I prevent my cheese sauce from becoming grainy?

    To keep your cheese sauce smooth, make sure to whisk constantly when adding the milk to the roux and use low heat to melt the cheese slowly, preventing it from seizing up.

    Can I use a different type of pasta?

    Absolutely! While elbow macaroni is traditional, shell pasta or cavatappi are excellent alternatives, as their shapes hold the cheese sauce well.

    Is there a lower-fat version of this recipe?

    You can reduce the fat content by using reduced-fat cheese and milk, though this may slightly alter the creamy texture. Consider adding a bit more seasoning to compensate for the reduced richness.

    Final Thoughts

    This truffle-infused macaroni and cheese with crispy pancetta crumble is more than just a meal; it’s an experience to be savored. I hope you enjoy making and sharing this dish as much as I have. Please leave a comment and let me know how it turns out for you—or share your own creative twist! Happy cooking, friends.

    Related update: Truffle-Infused Macaroni and Cheese with Crispy Pancetta Crumble

    Related update: Szechuan-Style Spicy Chicken Lo Mein with Crunchy Cashews

  • Spicy Maple Andouille Sausage and Sweet Potato Hash | Made by Meaghan Moineau

    Spicy Maple Andouille Sausage and Sweet Potato Hash | Made by Meaghan Moineau

    Spicy Maple Andouille Sausage and Sweet Potato Hash

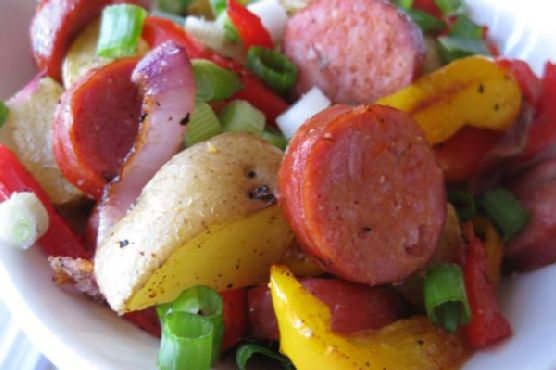
    Imagine the sizzle of sausage as it hits a hot pan, mingling with the sweet aroma of caramelized onions and the earthy scent of roasting sweet potatoes. Each bite is a delightful dance of sweet, smoky, and spicy flavors, a cozy culinary hug perfect for any meal of the day. Welcome to Spicy Maple Andouille Sausage and Sweet Potato Hash — a dish that turns any breakfast, brunch, or dinner into a flavor adventure.

    Personal Story

    There’s something about the humble hash that takes me straight back to lazy Sunday mornings in my grandmother’s kitchen. As a child, I remember waking up to the smells of sizzling sausage and sweet onions, drifting into the dining room like an aromatic alarm clock. My grandmother, with her flour-dusted apron and ever-present wooden spoon, would hum to herself as she worked, adding a dash of this or a sprinkle of that, creating magic from simple ingredients.

    One particularly rainy Sunday, the cupboard was bare of regular potatoes, and we were left with only sweet potatoes. My grandmother, never one to be deterred by minor setbacks, decided to improvise. A little spicy, a little sweet, and suddenly our beloved breakfast took on a new life. The sweet potatoes added a depth and warmth to the dish that paired beautifully with the smoky sausage.

    Years later, inspired by her creativity, I decided to take her idea and run with it. I added a spicy maple glaze to the mix, giving the dish a sweet heat that complements the smoky andouille sausage and sweet potatoes. This unique twist has made this hash a go-to favorite in my home — a testament to my grandmother’s legacy of culinary ingenuity and resourcefulness.

    What Makes This Version Special

    This version of the classic hash stands out with its bold use of sweet potatoes instead of the traditional yukon golds, adding natural sweetness and a beautiful color contrast. But the real secret weapon here is the spicy maple glaze. By reducing maple syrup with smoked paprika and cayenne, you get a glaze that envelops the roasted ingredients in a sweet, smoky heat, perfectly balancing the savory andouille sausage.

    The combination of sweet and spicy, with the rich, smoky undertones of the sausage, elevates this dish beyond a simple hash. It’s an unforgettable ensemble of flavors that brings comfort and excitement to the table, making it perfect for both special occasions and everyday meals.

    Flavor Profile

    Biting into this hash is an experience of contrasts and harmony. The sweet potatoes bring a soft, earthy sweetness that is beautifully contrasted by the smoky, robust flavor of the andouille sausage. Meanwhile, the spicy maple glaze adds a layer of complexity, delivering a gentle heat that lingers pleasantly on the palate. The caramelized onions and roasted peppers add a sweetness and aroma that rounds out the dish, while fresh thyme and scallions provide a burst of herbal freshness in every bite.

    Ingredients

    • 1 large Yukon Gold potato, diced
    • 1 large sweet potato, diced
    • 1 red bell pepper, diced
    • 1 yellow bell pepper, diced
    • 1 large red onion, sliced
    • 8 oz smoked pork andouille sausage, sliced
    • 2 teaspoons canola oil
    • 1 teaspoon garlic salt
    • 1/4 teaspoon cayenne pepper
    • 2 tablespoons maple syrup
    • 1 teaspoon smoked paprika
    • 1 tablespoon fresh thyme, chopped
    • 2 scallions, finely chopped, for garnish

    Instructions

    1. Preheat your oven to 425°F (220°C). This high heat is crucial for ensuring the potatoes and peppers develop a lovely golden-brown crispness.
    2. In a large mixing bowl, toss the diced Yukon Gold potato, sweet potato, red bell pepper, yellow bell pepper, and sliced red onion with 1 teaspoon of canola oil. Spread this mixture evenly onto a baking sheet. Sprinkle with garlic salt and a dash of black pepper for seasoning.
    3. Roast in the preheated oven for 10 minutes. This initial roasting helps the vegetables start to caramelize, enhancing their natural sweetness.
    4. While the vegetables are roasting, create the spicy maple glaze. In a small saucepan over medium heat, combine the maple syrup, smoked paprika, and cayenne pepper. Stir frequently, allowing the mixture to reduce slightly, about 5 minutes, until it thickens.
    5. Remove the baking sheet from the oven and add the sliced andouille sausage. Toss everything together, ensuring the sausage is evenly distributed amongst the vegetables. Return to the oven and roast for an additional 10 minutes, or until the sausage is cooked through and the potatoes are fork-tender.
    6. Remove the pan from the oven and drizzle the spicy maple glaze over the roasted hash, tossing to coat all the pieces evenly. This will add a beautiful glossy finish and infuse every bite with flavor.
    7. Sprinkle with fresh thyme and garnish with finely chopped scallions for a pop of green and a touch of freshness. Serve immediately and enjoy the symphony of flavors!

    Pro Tips from Meaghan’s Kitchen

    • Caramelization is Key: Don’t rush the initial roasting. Allowing the vegetables to develop a deep golden-brown color brings out their natural sweetness and adds depth to the hash.
    • Balance the Heat: If you’re sensitive to spice, reduce the cayenne pepper in the glaze. You can always add more to taste after serving.
    • Prep Ahead: Chop all your veggies the night before and store them in airtight containers. This makes the morning prep a breeze!
    • Get Creative with Sausage: If you can’t find andouille, try using chorizo for a similar smoky flavor, or go for a milder sausage if you’re serving a crowd with varied tastes.
    • Use a Heavy Baking Sheet: A sturdy sheet pan ensures even roasting and prevents burning, especially at high temperatures.

    Variations & Dietary Swaps

    • Vegetarian Version: Swap the sausage for a plant-based alternative or roasted chickpeas. The hash remains just as satisfying and flavorful.
    • Spice-It-Up: Add a few dashes of hot sauce right before serving for those who crave extra heat.
    • Kids-Friendly Option: Tone down the spice by omitting the cayenne pepper and smoked paprika, and add a little more maple syrup for sweetness.

    What to Serve With It

    This spicy maple andouille sausage and sweet potato hash pairs beautifully with a crisp apple cider or a cold wheat beer, enhancing the dish’s sweet and smoky notes. For a lighter option, serve with a simple green salad dressed in lemon vinaigrette, or with a side of fluffy scrambled eggs for a complete breakfast spread.

    Storage & Meal Prep

    Store any leftovers in an airtight container in the fridge for up to three days. To reheat, spread the hash on a baking sheet and warm in a preheated oven at 350°F (175°C) until heated through, about 10-15 minutes. To freeze, portion the hash into freezer-safe bags, removing as much air as possible, and freeze for up to two months. Thaw in the refrigerator overnight before reheating.

    FAQ

    Can I make this dish ahead of time?

    Absolutely! You can prepare the vegetables and sausage a day in advance and store them separately in the fridge. Then, assemble and roast on the day you’re serving it. The glaze can also be made ahead and stored in the refrigerator.

    Is there a vegetarian substitute for andouille sausage?

    Yes, there are many plant-based sausages available that mimic the smoky flavor of andouille. Alternatively, roasted chickpeas can add a nice texture and protein to the dish.

    What’s the best way to get the potatoes crispy?

    Ensure your oven is fully preheated before roasting, and don’t overcrowd the baking sheet. This allows the potatoes to roast rather than steam, leading to a crisper texture.

    Can I use different types of peppers?

    Definitely! Feel free to use any combination of bell peppers you have on hand. Green bell peppers will add a slightly more bitter note, while orange or yellow ones will keep the dish sweet.

    How do I adjust the spice level?

    To make it less spicy, reduce or omit the cayenne pepper in the glaze. If you want to increase the heat, add more cayenne or even a pinch of red pepper flakes.

    Final Thoughts

    This Spicy Maple Andouille Sausage and Sweet Potato Hash is more than just a meal — it’s a celebration of flavors that come together in perfect harmony. Whether you’re making it for a weekend brunch or a cozy dinner, this dish is sure to impress and satisfy. I’d love to hear how it turned out for you! Feel free to leave a comment below or share your version on social media. Remember, the best meals are the ones shared with those we love. Happy cooking!

    Related update: Spicy Maple Andouille Sausage and Sweet Potato Hash

    Related update: Truffle-Infused Macaroni and Cheese with Crispy Pancetta Crumble

    Related update: Spiced Apple Cider Brioche with Maple-Cinnamon Glaze

  • Fluffy Buttermilk Pancakes with Vanilla-Cinnamon Swirl | Made by Meaghan Moineau

    Fluffy Buttermilk Pancakes with Vanilla-Cinnamon Swirl | Made by Meaghan Moineau

    Fluffy Buttermilk Pancakes with Vanilla-Cinnamon Swirl

    Picture this: a lazy Sunday morning, sunlight streaming through the kitchen window, and the irresistible aroma of pancakes sizzling on the griddle. These aren’t just any pancakes — these are Fluffy Buttermilk Pancakes with a Vanilla-Cinnamon Swirl. A breakfast classic elevated to pure comfort food bliss.

    Personal Story

    Growing up, pancakes were a Sunday morning staple in our household. I fondly remember the ritual: my mom in her apron, expertly flipping golden-brown pancakes while I eagerly watched, fork and knife in hand. Those moments were filled with laughter, warmth, and the delicious anticipation of that first bite.

    Fast forward a few years to when I first moved into my own apartment. Eager to recreate those cherished memories, I decided to whip up a batch of my childhood favorite. But as a novice cook, I underestimated the complexity of a seemingly simple pancake. My first attempt was a disaster; the pancakes were flat and tough, a far cry from the fluffy clouds I remembered. I was determined to master the perfect pancake.

    After much trial and error — and a few kitchen mishaps involving batter explosions — I discovered the magic ingredient: buttermilk. It was a game-changer, transforming my pancakes into the pillowy delights I craved. But I didn’t stop there. Inspired by a love for both vanilla and cinnamon, I experimented with adding them to the batter, creating a swirl of sweet and spicy goodness that took my pancakes to a whole new level.

    Now, these Fluffy Buttermilk Pancakes with Vanilla-Cinnamon Swirl are a staple in my kitchen, a beloved recipe that brings both nostalgia and newfound joy to my breakfast table.

    What Makes This Version Special

    The secret to these pancakes lies in the blissful blend of flavors and textures. By incorporating buttermilk into the batter, these pancakes achieve an unparalleled fluffiness and subtle tang that plain milk just can’t deliver. The addition of a vanilla-cinnamon swirl weaves an aromatic sweetness through each bite, elevating these pancakes from ordinary to extraordinary.

    While traditional pancakes are delightful, this version offers a deeply satisfying complexity that makes every mouthful a celebration. The warm, cozy notes of cinnamon paired with the rich, creamy vanilla create a symphony of flavors that dance on the palate. It’s like wrapping yourself in a comforting culinary hug.

    Flavor Profile

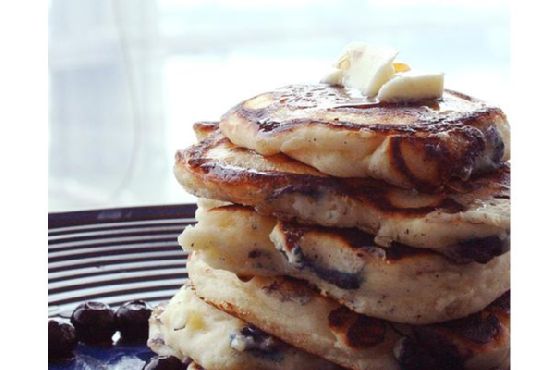
    The taste experience of these pancakes is nothing short of divine. Imagine biting into a stack of light and airy pancakes, each forkful melting in your mouth, with a lingering hint of buttermilk’s gentle tanginess. As you savor the bite, the swirl of vanilla and cinnamon reveals itself, offering a sweet, aromatic surprise that feels like a warm embrace. These pancakes are a perfect balance of soft, fluffy texture and rich, fragrant flavor — a delightful indulgence for any breakfast or brunch.

    Ingredients

    • 1 cup all-purpose flour
    • 2 tablespoons sugar
    • 1 teaspoon baking powder
    • 1/2 teaspoon salt
    • 1 egg, beaten until fluffy
    • 1 cup buttermilk
    • 2 tablespoons melted margarine
    • 1 teaspoon vanilla extract
    • 1 teaspoon ground cinnamon
    • 1 tablespoon honey

    Instructions

    1. In a large mixing bowl, combine the flour, sugar, baking powder, and salt. Stir to blend the dry ingredients evenly.
    2. In a separate bowl, beat the egg until fluffy. Add the buttermilk and melted margarine, whisking them together until well combined.
    3. Gently pour the wet ingredients into the dry ingredients, stirring just until the batter comes together. Be careful not to overmix; a few lumps are okay.
    4. In a small bowl, mix the vanilla extract, ground cinnamon, and honey to create the swirl mixture.
    5. Fold the cinnamon-vanilla mixture into the batter using a spatula, making sure to create a swirl rather than fully incorporating it into the batter.
    6. Heat a heavy griddle or fry pan over medium heat. Lightly grease with butter on a paper towel.
    7. Test the pan’s readiness by sprinkling a few drops of water on it. If the drops dance and sizzle, it’s hot enough for cooking.
    8. Pour approximately 1/4 cup of batter onto the griddle for each pancake. Use the back of a spoon to spread out the batter if needed.
    9. Cook until bubbles appear on the surface and begin to break, about 2-3 minutes. The edges should look set and slightly dry.
    10. Flip the pancake carefully and cook the other side until golden-brown, about 1-2 minutes more.
    11. Repeat with the remaining batter, adjusting heat as necessary to maintain consistent cooking.

    Pro Tips from Meaghan’s Kitchen

    • If you don’t have buttermilk on hand, make your own by adding a tablespoon of lemon juice or vinegar to one cup of milk. Let it sit for 5 minutes before using.
    • Avoid overmixing the batter to keep the pancakes tender and fluffy. Lumps are your friends in this case!
    • Use a non-stick griddle or well-seasoned cast iron skillet for even cooking and easy flipping.
    • For an extra cinnamon burst, dust the pancakes with a little cinnamon sugar before serving.
    • To keep pancakes warm while cooking the rest, place them on a baking sheet in a low oven (around 200°F).

    Variations & Dietary Swaps

    • Gluten-Free Option: Substitute the all-purpose flour with a gluten-free flour blend. Ensure the blend contains xanthan gum for structure.
    • Spice-It-Up Version: Add a pinch of cayenne pepper to the cinnamon swirl for a subtle kick.
    • Kids-Friendly Version: Top pancakes with a smiley face made from banana slices and chocolate chips for added fun.

    What to Serve With It

    These Fluffy Buttermilk Pancakes with Vanilla-Cinnamon Swirl pair beautifully with a tall glass of freshly squeezed orange juice or a hot chai latte. The citrusy freshness of the orange juice complements the warm notes of cinnamon, while a chai latte adds an extra layer of spice to your breakfast spread. For a hearty meal, consider serving with crispy bacon or a side of seasonal fruit.

    Storage & Meal Prep

    If you have leftovers (though it’s rare!), store the pancakes in an airtight container in the refrigerator for up to 3 days. For longer storage, stack pancakes with parchment paper between each layer and freeze in a zip-top bag for up to 3 months. Reheat in the oven at 350°F until warmed through or pop them in the toaster for a quick refresh.

    FAQ

    Can I make the batter the night before?

    Yes, you can prepare the batter in advance. Store it in the refrigerator and give it a gentle stir before cooking. The buttermilk may thicken the batter slightly overnight, so you might need to add a splash of milk to loosen it.

    Can I use whole wheat flour instead of all-purpose flour?

    Absolutely! Whole wheat flour will give the pancakes a nuttier flavor and denser texture. You might need to add a bit more buttermilk to achieve the desired batter consistency.

    What toppings go well with these pancakes?

    The possibilities are endless! Fresh berries, whipped cream, nuts, and maple syrup are classic choices. For a decadent treat, try a dollop of mascarpone cheese and a drizzle of warm caramel sauce.

    Why are my pancakes not fluffy?

    If your pancakes aren’t as fluffy as expected, check your baking powder’s expiration date — it might have lost its leavening power. Also, avoid overmixing the batter, as this can lead to dense pancakes.

    Final Thoughts

    These Fluffy Buttermilk Pancakes with Vanilla-Cinnamon Swirl are more than just breakfast; they’re a delightful way to start any day with a smile. I hope this recipe brings as much joy to your kitchen as it does to mine. If you give it a try, I’d love to hear how it turned out — feel free to leave a comment below or share your pancake creations on social media. Happy cooking, and may your mornings be full of warmth and deliciousness!

    Related update: Fluffy Buttermilk Pancakes with Vanilla-Cinnamon Swirl

    Related update: Spicy Maple Andouille Sausage and Sweet Potato Hash

  • Steak with lemon and capers | Made by Meaghan Moineau

    Steak with lemon and capers | Made by Meaghan Moineau

    Steak with Lemon and Capers

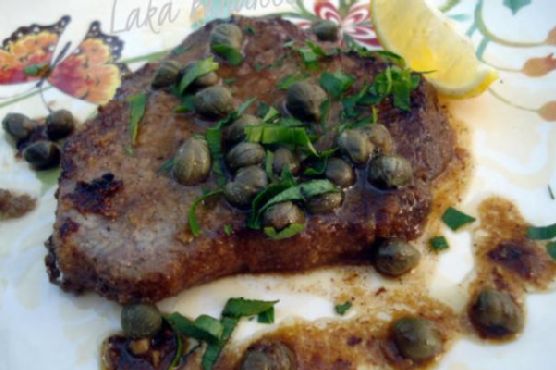
    There’s something truly magical about the aroma of sizzling steak mingling with the zesty freshness of lemon and the briny pop of capers. This recipe for Steak with Lemon and Capers not only delivers a mouthwatering dining experience but also carries with it a memory of warm family gatherings, where laughter and delicious food went hand in hand.

    Why You’ll Love It

    Imagine a tender, juicy steak infused with the tang of lemon and the unique flavor of capers. This recipe is a delightful blend of simplicity and sophistication. You’ll love how quickly it comes together, making it perfect for both weekday dinners and special occasions. The ingredients are straightforward, yet they combine to create a dish that feels both luxurious and comforting. Plus, the sauce is absolutely divine when drizzled over the steak—or anything else on your plate!

    Ingredients

    • Beef steak
    • Butter
    • Capers
    • Dry white wine
    • Flour
    • Garlic
    • Black ground pepper
    • Lemon juice
    • Lemon wedges
    • Olive oil
    • Parsley
    • Salt

    Instructions

    1. Flatten the steaks lightly with a meat mallet.
    2. In a shallow dish, combine flour, salt, and pepper. Dip the steaks into the mixture, ensuring both sides are well-coated.
    3. Heat a mixture of butter and olive oil in a pan over medium heat. Sauté the steaks for about 4 minutes on each side until they are browned to your liking. Remove from the pan and set aside.
    4. In the same pan, sauté the garlic for about 1 minute, stirring continuously to avoid burning.
    5. Add the wine and lemon juice to the pan, stir, and let it simmer for 5 minutes to slightly reduce the liquid.
    6. Add the capers and give everything a good stir.
    7. Return the steaks to the pan, cover, and simmer over low heat for 4 minutes to allow the flavors to meld.
    8. Garnish with chopped parsley and serve with lemon wedges on the side.

    Tips

    For the best results, make sure your steaks are at room temperature before cooking. This ensures even cooking throughout. When flattening the steaks, be gentle to maintain their structure. Lastly, don’t skip the resting part after cooking; it allows the juices to redistribute, making each bite as juicy as possible.

    Variations & Substitutions

    If you’re looking to switch things up, consider using chicken or pork cutlets instead of beef. Both proteins work wonderfully with the lemon and capers. For a bit of heat, add a pinch of red pepper flakes to the sauce. You can also substitute white wine with chicken broth if you prefer an alcohol-free version.

    Storage

    Leftovers can be a delightful treat. Store any remaining steak and sauce in an airtight container in the refrigerator for up to three days. To reheat, gently warm the steak in a pan over low heat until it’s heated through. Avoid microwaving as it can toughen the meat.

    FAQ

    What can I serve with Steak with Lemon and Capers?

    This dish pairs beautifully with a variety of sides. Consider serving it with creamy mashed potatoes, steamed asparagus, or a fresh arugula salad. The sauce is also fantastic when soaked up with crusty bread.

    Can I use a different type of steak?

    Absolutely! This recipe is quite versatile. Ribeye, sirloin, or even filet mignon would be excellent choices. Just be mindful of cooking times as they may vary depending on the thickness of the steak.

    Nutrition (if applicable)

    This dish is rich in protein and offers a good balance of flavors from healthy fats like olive oil and butter. If you’re mindful of sodium intake, consider rinsing the capers to reduce their saltiness. Adjusting the amount of butter and oil can also help manage caloric content.

    Final Thoughts

    Steak with Lemon and Capers is more than just a meal; it’s an experience. The bright, bold flavors are sure to impress family and guests alike. Whether it’s a casual dinner or a special celebration, this dish delivers a taste of elegance with every bite. Give it a try, and let it become a new favorite in your culinary repertoire!

    Related update: Steak with lemon and capers