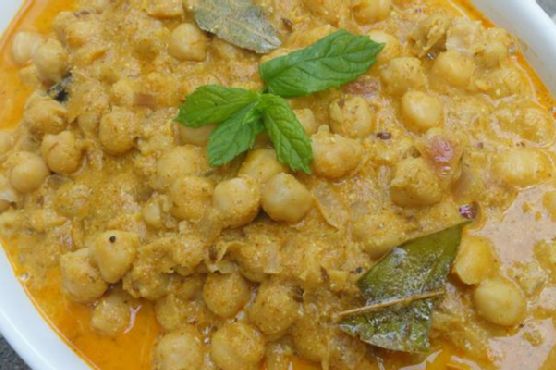
Smoky Cardamom-Infused Chicken Tikka Masala with Charred Peppers
The tantalizing aroma of cardamom wafting through the kitchen, mingling with the subtle smokiness of charred bell peppers, is enough to make anyone’s mouth water. Imagine a rich, creamy sauce enveloping tender pieces of chicken, each bite more aromatic and flavorful than the last. This Smoky Cardamom-Infused Chicken Tikka Masala with Charred Peppers transforms a beloved classic into a new and exciting culinary adventure.
Personal Story
I remember the first time I attempted to make Chicken Tikka Masala at home. It was a cold Saturday afternoon, and I was feeling adventurous, ready to tackle what I thought was a complex dish only meant for restaurant kitchens. My tiny kitchen was soon filled with the heady aroma of spices toasting in the pan, and despite a few initial mishaps—like accidentally using twice the amount of chili powder—the end result was a revelation.
Fast forward a few years and countless trials later, I’ve developed a version of Chicken Tikka Masala that not only satisfies my craving for this beloved dish but also elevates it with a personal twist. During one of my culinary escapades, I stumbled upon the magic of charring bell peppers. The slightly sweet, smoky flavor adds an unexpected depth to the traditional tikka masala, a discovery that was nothing short of a game-changer.
This dish became a hit in my household, a comfort meal with a hint of sophistication. Sharing the recipe with friends and family, I watched as it became a staple in their kitchens as well. Each time I serve this dish, it’s like revisiting a cherished memory, reminding me of the journey from kitchen mishaps to mastering a recipe that feels truly my own.
What Makes This Version Special
This version of Chicken Tikka Masala stands out for its distinct smoky flavor, achieved by charring red bell peppers over an open flame. This technique brings a subtle sweetness and complexity to the dish that pairs beautifully with the traditional spices. Additionally, blooming the cardamom and smoked paprika in butter before adding the garlic and jalapeno creates a deeply aromatic base that elevates the overall flavor profile. This recipe not only retains the comforting richness of the original dish but also introduces an exciting new layer of taste that makes it even more irresistible.
Flavor Profile
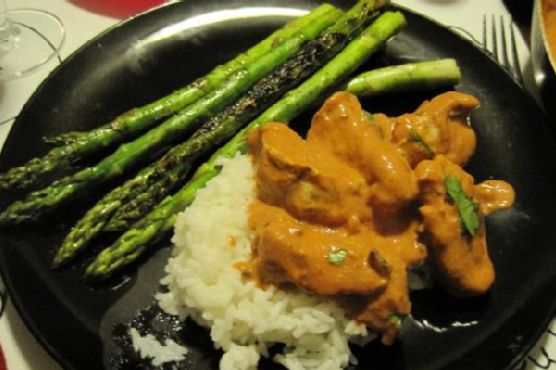
Imagine biting into a piece of tender chicken, enveloped in a rich, creamy sauce that bursts with smoky, aromatic flavors. The charred red bell peppers add a subtle sweet char that dances on your taste buds, while the layers of warm spices like cardamom, cumin, and cinnamon create a symphony of flavors. Each spoonful is a warm, comforting experience, with a hint of heat from the jalapeno, balanced perfectly by the creamy, tangy richness of the sauce.
Ingredients
- 1 cup yogurt
- 2 tablespoons lemon juice
- **2 teaspoons ground cumin**
- 1 teaspoon ground cinnamon
- 1 teaspoon cayenne pepper
- 1 teaspoon ground black pepper
- 1 tablespoon grated fresh ginger
- **4 teaspoons salt**
- 1 ½ pounds skinless, boneless chicken breasts, cut into bite-size pieces
- **1 red bell pepper**
- **2 tablespoons unsalted butter**
- 4 cloves garlic, minced
- 1 jalapeno pepper, finely chopped
- **2 teaspoons smoked paprika**
- 2 teaspoons ground cardamom
- 1 (15-ounce) can tomato sauce
- 1 cup heavy cream
- Fresh cilantro, chopped, for garnish
Instructions
- In a large bowl, combine the yogurt, lemon juice, 2 teaspoons of ground cumin, ground cinnamon, cayenne pepper, ground black pepper, grated fresh ginger, and 4 teaspoons of salt. Stir well, then add the chicken pieces. Ensure each piece is well-coated, cover, and refrigerate for at least 1 hour to marinate.
- Preheat a grill for high heat. Lightly oil the grill grate. Remove the chicken from the marinade and thread onto skewers, discarding the marinade. Grill the chicken until the juices run clear, approximately 5 minutes on each side. Set aside.
- Char the red bell pepper by placing it directly over an open flame or under a broiler. Turn occasionally until the skin is blackened all over. Once charred, place the bell pepper in a bowl and cover with a plate or plastic wrap. After cooling, peel, remove seeds, and dice the pepper.
- In a large heavy skillet over medium heat, melt the unsalted butter. Add the minced garlic and jalapeno, sautéing for about 1 minute until fragrant. Then, sprinkle in the smoked paprika and ground cardamom, allowing them to bloom in the butter for an additional minute.
- Stir in the canned tomato sauce and heavy cream, mixing well. Allow the sauce to simmer on low heat until it thickens slightly, about 20 minutes.
- Add the grilled chicken pieces and diced charred bell pepper to the sauce. Let it simmer together for 10 more minutes, allowing the flavors to meld.
- Transfer the Chicken Tikka Masala to a serving platter, garnishing generously with fresh cilantro. Serve hot and enjoy!
Pro Tips from Meaghan’s Kitchen
- For an even deeper smoky flavor, try using smoked salt instead of regular salt in the marinade.
- Always let the chicken come to room temperature before grilling to ensure even cooking.
- If you don’t have a grill, you can broil the chicken in the oven on a wire rack to achieve a similar charred effect.
- Blooming spices in butter is crucial for unlocking their full flavor potential. Do not skip this step!
- Use full-fat yogurt for the marinade; it not only tenderizes the chicken but also adds richness to the dish.
Variations & Dietary Swaps
- Vegetarian Version: Substitute chicken with paneer or tofu. Marinate and grill as directed for a delightful vegetarian twist.
- Spice-It-Up: Double the jalapeno and cayenne for those who love their tikka masala with extra heat.
- Kid-Friendly: Omit the jalapeno and reduce the cayenne pepper to make the dish milder for little taste buds.
What to Serve With It
This Smoky Cardamom-Infused Chicken Tikka Masala pairs beautifully with a chilled glass of mango lassi, providing a refreshing contrast to the rich, spicy flavors. Additionally, buttery naan bread or fragrant basmati rice makes for the perfect accompaniment, allowing you to savor every drop of the luscious sauce.
Storage & Meal Prep
To store leftovers, transfer the Chicken Tikka Masala to an airtight container and refrigerate for up to 3 days. For longer storage, freeze in a freezer-safe container for up to 3 months. To reheat, thaw overnight in the fridge if frozen, then warm gently in a saucepan over medium heat, stirring occasionally until heated through.
FAQ
Can I use chicken thighs instead of breasts?
Absolutely! Chicken thighs are juicier and stay tender during grilling. Just adjust the grilling time as they might take a bit longer to cook through.
Is it necessary to char the bell peppers?
While not strictly necessary, charring the bell peppers adds a depth of flavor that truly enhances the dish. It’s worth the extra step for the smoky sweetness it imparts.
Can I make this dish ahead of time?
Yes, you can prepare the sauce and the grilled chicken a day in advance. Store them separately in the fridge, and combine them when you’re ready to serve, reheating gently on the stove.
What if I don’t have an open flame for charring?
No worries! You can achieve a similar effect by broiling the peppers in the oven, turning them occasionally until the skin is blackened.
How can I make this dish dairy-free?
For a dairy-free version, substitute the yogurt with a coconut or almond milk-based yogurt, and replace the heavy cream with coconut cream.
Final Thoughts
There’s something magical about transforming classic recipes into something uniquely yours, and this Smoky Cardamom-Infused Chicken Tikka Masala with Charred Peppers does just that. Whether you’re serving it for a family dinner or impressing guests at a dinner party, this dish is sure to delight with its rich, smoky flavors and aromatic spices. I’d love to hear how this recipe turns out for you! Feel free to leave a comment below, and don’t forget to share your kitchen adventures with my recipe on social media. Happy cooking, friends!
Related update: Smoky Cardamom-Infused Chicken Tikka Masala with Charred Peppers