Tag: Summer

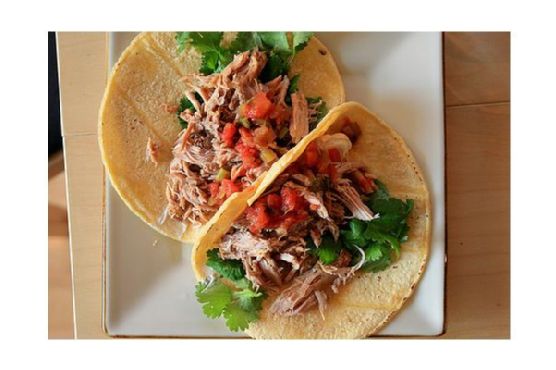
  • Zesty Citrus-Herb Pork Carnitas Tacos with Pineapple Salsa | Made by Meaghan Moineau

    Zesty Citrus-Herb Pork Carnitas Tacos with Pineapple Salsa | Made by Meaghan Moineau

    Zesty Citrus-Herb Pork Carnitas Tacos with Pineapple Salsa

    Imagine this: the sound of pork gently sizzling in a cast-iron pan, the aroma of rosemary wafting through the kitchen, and a splash of lime that transforms the ordinary into something extraordinary. This isn’t just any taco night; it’s an experience, a celebration of flavors with my Zesty Citrus-Herb Pork Carnitas Tacos with Pineapple Salsa.

    My love affair with carnitas began on a balmy summer night at a bustling food market in Oaxaca. The air was thick with the scent of spices, and I found myself drawn to a tiny stall nestled between colorful piñatas and fresh produce. The vendor, with twinkling eyes and a knowing smile, handed me a taco that was unlike any I’d ever tasted. It was the perfect balance of savory, zesty, and sweet. That evening, I vowed to bring that magic back home.

    Back in my kitchen, I was determined to recreate that unforgettable taste. I bought every cut of pork imaginable, tried every combination of spices, and even enlisted my friends as taste testers. It was a labor of love, filled with mishaps like the time I accidentally added too much salt and had to start over (I learned the hard way to taste as I go!). But through trial and error, I discovered my secret weapon: a hint of rosemary that adds an aromatic depth, and a pineapple salsa that gives a bright, tropical flair.

    Every time I serve these Zesty Citrus-Herb Pork Carnitas Tacos with Pineapple Salsa, I’m transported back to that enchanting night in Oaxaca. The laughter, the music, the vibrant flavors — all alive in every bite. It’s not just a meal; it’s a memory, a piece of my heart shared with you.

    What Makes This Version Special

    What sets this recipe apart from traditional carnitas is the surprising twist of pineapple salsa and rosemary infusion. By warming olive oil with fresh rosemary before browning the pork, the meat takes on an aromatic quality that’s both unexpected and delightful. Meanwhile, the pineapple salsa introduces a refreshing sweetness that balances the savory richness of the pork. Plus, adding a splash of lime juice and zest during the final browning stage elevates the flavors with a zesty brightness. This isn’t just a dish; it’s a flavor journey that transforms classic carnitas into something exceptionally vibrant and fresh.

    Flavor Profile

    Prepare to be wowed by the taste experience these tacos offer. Picture the juicy, tender pork, slightly crispy on the edges, infused with the fragrant essence of rosemary. The natural sweetness of pineapple salsa dances on your tongue, countering the savory depth of the carnitas. Add to that the zesty kick from lime juice and zest, and you’ve got a dynamic, multi-layered flavor profile that’s both invigorating and comforting. It’s a harmonious blend of zesty, savory, and sweet, with a delicate herbal note that lingers beautifully.

    Ingredients

    • 2 lbs lean pork butt, cut into large chunks
    • 4 cloves garlic, crushed
    • 1 tablespoon sea salt
    • 1 teaspoon ground pepper
    • **3 tablespoons olive oil**
    • **1 tablespoon fresh rosemary, finely chopped**
    • 1/2 cup orange juice
    • 1/4 cup milk
    • **1 lime, juiced and zested**
    • 12 corn tortillas
    • 1 cup **fresh pineapple, diced**
    • 1 small jalapeño, minced
    • 1/2 cup salsa fresca
    • 1 avocado, sliced
    • 1/4 cup cilantro, chopped
    • 1 small onion, chopped
    • 2 additional limes, sliced for serving

    Instructions

    1. In a large Dutch oven, combine the pork, garlic, sea salt, ground pepper, and enough water to cover the pork. Bring to a boil over medium-high heat, then reduce the heat, cover, and simmer over medium-low for 45 minutes to one hour, until the pork is tender and easy to shred.
    2. Drain the pork well and allow it to cool slightly. Once cool enough to handle, shred the meat using your hands or the tines of a fork. Remove and discard any remaining fat.
    3. Return the shredded pork to the Dutch oven. In a small pan, gently warm the olive oil with the rosemary for 2-3 minutes to infuse the flavors. Add the infused olive oil to the pot with the pork.
    4. Add the orange juice and milk to the pork, cooking over medium heat until the liquid has evaporated and the pork begins to brown, about 15 minutes. Stir occasionally to achieve an even golden-brown crispiness.
    5. During the final browning stage, add the lime juice and zest to the pork for a bright, citrusy finish. Season with additional salt and pepper to taste.
    6. While the pork is browning, prepare the pineapple salsa by combining the diced pineapple, minced jalapeño, and salsa fresca in a bowl. Set aside.
    7. Chop the onions and cilantro, and slice the avocado and limes. Place each in small individual bowls for serving.
    8. Heat the corn tortillas in a dry frying pan over medium heat until warm and pliable. Keep them warm by wrapping in a clean kitchen towel.
    9. To assemble the tacos, stack two tortillas, layer with warm carnitas, a spoonful of pineapple salsa, chopped cilantro, onion, and avocado slices. Finish with a squeeze of lime juice for an extra burst of flavor.

    Pro Tips from Meaghan’s Kitchen

    • Infuse the Oil: Infusing the olive oil with rosemary is key. Do it gently over low heat to avoid burning and maximize flavor transfer.
    • Crispy Edges: For those irresistible crispy edges, ensure the pork is in a single layer in the pan, allowing maximum contact with the heat.
    • Balance the Heat: If the jalapeño is too spicy for your taste, remove the seeds and veins to tone down the heat.
    • Tortilla Warmth: Warming the tortillas in a dry pan keeps them pliable and enhances their flavor, making the taco experience more enjoyable.
    • Juicy Pineapple Salsa: Let the pineapple salsa sit for a few minutes before serving to allow the flavors to meld beautifully.

    Variations & Dietary Swaps

    • Vegetarian Swap: Substitute the pork with jackfruit for a vegetarian-friendly version that still delivers that pulled texture.
    • Spice-It-Up Version: Add chipotle powder to the pork for a smoky, spicier kick that complements the pineapple salsa.
    • Kids-Friendly Version: Use sweet bell peppers instead of jalapeños in the salsa for a milder, kid-approved flavor.

    What to Serve With It

    Pair these vibrant Zesty Citrus-Herb Pork Carnitas Tacos with a chilled glass of hibiscus iced tea, which perfectly complements the tacos’ tropical flair. Alternatively, a light Mexican lager offers a refreshing balance to the zesty and savory notes of the carnitas, making it an ideal companion for this festive dish.

    Storage & Meal Prep

    Leftover carnitas can be stored in an airtight container in the fridge for up to 3 days. For longer storage, freeze the shredded pork in portions, ensuring they’re tightly sealed to prevent freezer burn, for up to 3 months. To reheat, thaw overnight in the fridge, then warm in a skillet over medium heat until hot and crispy. Pineapple salsa is best fresh but can be refrigerated for up to a day.

    FAQ

    Can I make this recipe in advance?

    Absolutely! You can prepare the carnitas a day ahead, allowing the flavors to develop further. Simply reheat in a skillet before serving to regain crispiness.

    Is there a substitute for milk in this recipe?

    Yes, you can use a non-dairy alternative like almond or coconut milk. Just be mindful of the flavor it might add to the dish.

    How can I adjust the spice level?

    To adjust the heat, simply modify the amount of jalapeño in the salsa. Removing the seeds and veins will also reduce the spiciness.

    What if I don’t have fresh pineapple?

    Canned pineapple can be used as a substitute. Just make sure to drain it well to avoid adding excess moisture to the salsa.

    Final Thoughts

    I hope these Zesty Citrus-Herb Pork Carnitas Tacos with Pineapple Salsa bring a bit of my kitchen to yours. They’re more than just a meal; they’re a celebration of flavors and memories. I’d love to hear how they turn out in your own kitchen. Feel free to leave a comment or share your experience on social media. Let’s keep the conversation going — after all, cooking is always better together!

    Related update: Zesty Citrus-Herb Pork Carnitas Tacos with Pineapple Salsa

    Related update: Spicy Stir-Fried Cabbage and Tomatoes with Ginger-Lime Zest

  • Zesty Lime-Infused Strawberry Yogurt Cake with Basil Glaze | Made by Meaghan Moineau

    Zesty Lime-Infused Strawberry Yogurt Cake with Basil Glaze | Made by Meaghan Moineau

    Zesty Lime-Infused Strawberry Yogurt Cake with Basil Glaze

    Picture this: The gentle hum of your oven warming the kitchen, the air thick with the scent of fresh strawberries and citrus, and a golden-brown Bundt cake cooling on the counter. This is the kind of moment that makes you slow down, savor the process, and anticipate that first bite. Welcome to the world of Zesty Lime-Infused Strawberry Yogurt Cake with Basil Glaze.

    Personal Story

    Every spring, as the first strawberries start appearing in the market, I’m reminded of my childhood summers spent at my grandmother’s house. Her garden was a small slice of heaven, bustling with the colors and scents of the season. Strawberries were always the crown jewels of her garden, and she would let me pick them fresh each morning, the dew still clinging to their vibrant red skins.

    My love for strawberries naturally found its way into my baking adventures. One memorable afternoon, I set out to recreate a simple strawberry cake recipe from my grandmother’s old cookbook. To my dismay, I realized I had run out of lemons. Panicking, I reached for limes instead and decided to add a bit of zest to the sugar. The outcome was unexpected but delightful, a revelation that led to the creation of this Zesty Lime-Infused Strawberry Yogurt Cake.

    Years later, I was inspired by a local chef who infused a dessert glaze with fresh herbs. That’s when it clicked: why not add a fragrant basil glaze to my lime-infused cake? It turned out to be the perfect twist — the basil’s subtle pepperiness played beautifully with the sweet strawberries and citrusy lime.

    Now, whenever I bake this cake, it feels like a gathering of old friends: the familiar sweetness of strawberries, the zing of lime, and the aromatic hug of basil. It’s a recipe that bridges my past with new culinary explorations, and I hope it becomes a staple in your kitchen too.

    What Makes This Version Special

    This isn’t just any strawberry cake. Our version adds a refreshing lime zest and a fragrant basil-infused glaze, creating a unique herbal twist that complements the sweet strawberries. The addition of Greek yogurt ensures a tender crumb, while the blooming of lime zest in sugar releases a vibrant citrus aroma that permeates the entire cake. The basil glaze is a subtle, yet sophisticated touch that elevates the cake from ordinary to extraordinary, offering a gentle herbal note that sets it apart from more traditional versions.

    Flavor Profile

    Each bite of this Zesty Lime-Infused Strawberry Yogurt Cake is a journey. Refreshing and herbaceous, the experience begins with a burst of lime and sweet ripe strawberries, followed by a vibrant citrus zing. The basil glaze adds a gentle, aromatic finish, marrying the flavors with a sweet, fruity conclusion. It’s a cake that dances on your palate, promising a delightful taste from start to finish.

    Ingredients

    • 2 cups all-purpose flour, plus an extra 1/4 cup for the strawberries
    • 1 teaspoon baking soda
    • 1/2 teaspoon salt
    • Zest of 1 lime (bloom in sugar)
    • 1 cup unsalted butter, softened (infused with basil)
    • 1 1/2 cups sugar
    • 3 large eggs
    • 1 tablespoon lime juice
    • 1 cup plain Greek yogurt
    • 2 cups diced fresh strawberries
    • 1 cup powdered sugar
    • 10 fresh basil leaves

    Instructions

    1. Preheat your oven to 325°F (160°C). Grease and flour a 10-inch Bundt pan to ensure the cake releases easily after baking.
    2. In a medium bowl, sift together 2 cups of flour, baking soda, and salt. Set aside.
    3. Bloom the lime zest by rubbing it into the sugar with your fingertips until the sugar becomes fragrant and lightly colored.
    4. In a small saucepan, melt the butter over low heat. Add the fresh basil leaves and let them infuse for about 10 minutes. Remove the leaves before using the butter.
    5. In a large mixing bowl, use an electric mixer to cream together the infused butter and sugar mixture until light and fluffy, about 3-4 minutes.
    6. Beat in the eggs one at a time, ensuring each is fully incorporated before adding the next. Stir in 1 tablespoon of lime juice.
    7. Alternate adding the flour mixture and Greek yogurt to the batter, starting and ending with the flour, mixing just until everything is incorporated.
    8. Toss the diced strawberries in the remaining 1/4 cup of flour. This helps prevent them from sinking to the bottom of the cake. Gently fold the strawberries into the batter.
    9. Pour the batter into the prepared Bundt pan, smoothing the top with a spatula.
    10. Bake in the preheated oven for about 60 minutes, or until a toothpick inserted into the center of the cake comes out clean.
    11. Allow the cake to cool in the pan for 10 minutes before turning it out onto a wire rack to cool completely.
    12. For the glaze, whisk together the powdered sugar and 2 tablespoons of lime juice until smooth. Drizzle over the cooled cake and let it set before serving.

    Pro Tips from Meaghan’s Kitchen

    • For the most flavor, make sure to rub the lime zest into the sugar before creaming it with the butter. This releases the zest’s natural oils.
    • Take your time infusing the butter with basil. Low and slow is the key to drawing out the basil’s aromatic qualities without burning the butter.
    • Ensure your strawberries are dry after washing; excess water can alter the cake’s texture.
    • Test for doneness by inserting a toothpick into the thickest part of the cake. A clean toothpick means it’s ready.
    • For best results, use fresh basil leaves rather than dried ones for the glaze. The fresh leaves impart a more vibrant flavor.

    Variations & Dietary Swaps

    • Vegetarian Swap: The recipe is already vegetarian-friendly, but for a vegan version, consider using a plant-based yogurt and flax eggs.
    • Spice-It-Up Version: Add a pinch of ground ginger or cardamom to the batter for a spiced twist.
    • Kids-Friendly Version: Omit the basil glaze and top with a simple vanilla glaze or a dusting of powdered sugar instead.

    What to Serve With It

    This Zesty Lime-Infused Strawberry Yogurt Cake pairs beautifully with a chilled glass of sparkling elderflower lemonade for a refreshing contrast. If you’re serving it as a dessert after dinner, consider a dollop of lightly whipped cream or a scoop of vanilla ice cream for an extra touch of indulgence.

    Storage & Meal Prep

    To store leftovers, wrap the cake tightly in plastic wrap or aluminum foil and keep it in the refrigerator for up to 5 days. For longer storage, you can freeze the cake for up to 3 months. To freeze, wrap the cooled cake in plastic wrap, then in foil, and place it in a resealable freezer bag. To reheat, let the cake thaw in the refrigerator overnight and bring it to room temperature before serving. If you prefer it warm, heat individual slices in the microwave for 15-20 seconds.

    FAQ

    Can I use frozen strawberries instead of fresh?

    Yes, you can use frozen strawberries, but be sure to thaw and drain them well to prevent excess moisture from affecting the cake’s texture.

    Can I substitute the Greek yogurt with regular yogurt?

    Absolutely! Regular yogurt works just fine, but Greek yogurt gives the cake a slightly richer texture due to its thickness.

    What if I don’t have a Bundt pan?

    No worries! You can use a 9×13 inch baking pan instead. Just keep an eye on the baking time, as it may vary slightly.

    How can I make the glaze thicker?

    If you prefer a thicker glaze, reduce the lime juice or add more powdered sugar until you reach your desired consistency.

    Is there a way to make this cake gluten-free?

    Yes, you can use a 1:1 gluten-free flour blend. Just make sure it’s suitable for baking for the best results.

    Final Thoughts

    Baking this Zesty Lime-Infused Strawberry Yogurt Cake with Basil Glaze is more than just a culinary endeavor — it’s a celebration of flavors and memories brought to life in your kitchen. I hope this cake brings as much joy and deliciousness to your table as it has to mine. If you give this recipe a try, I’d love to hear how it turned out for you! Feel free to drop a comment below or share your creations on social media. Happy baking, my dear friends!

    Related update: Zesty Lime-Infused Strawberry Yogurt Cake with Basil Glaze

    Related update: Zesty Lemon Poppy Seed Lava Cakes with Spiced Chocolate Ganache

  • Tropical Green Monster Smoothie with Coconut & Mango | Made by Meaghan Moineau

    Tropical Green Monster Smoothie with Coconut & Mango | Made by Meaghan Moineau

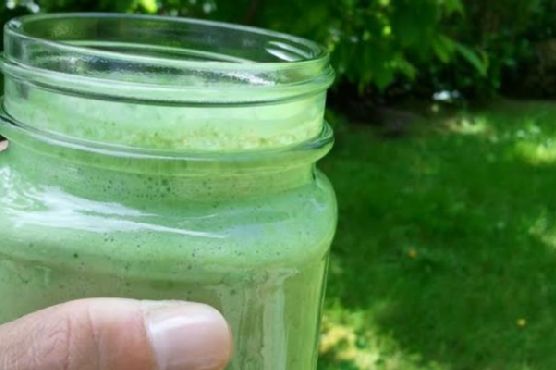
    Tropical Green Monster Smoothie with Coconut & Mango

    Imagine yourself lounging on a sun-kissed beach, the soft hum of waves providing a tranquil soundtrack. In your hand is a tall glass of something vibrant and refreshing, a taste of paradise in liquid form. That’s exactly what this Tropical Green Monster Smoothie with Coconut & Mango delivers — a tropical escape with every creamy, luscious sip.

    Personal Story

    My love affair with smoothies began during a summer in my teens, when my best friend and I concocted endless variations in her kitchen, each one more adventurous than the last. We were determined to outdo ourselves with each blend, our creations fueled by a mix of youthful curiosity and the sticky summer heat. Those carefree days tasted like an endless summer break, and the blender was our magic wand.

    Fast forward to a few years ago, I found myself in a tropical paradise — a long-dreamed-of vacation to Hawaii. The lush landscape, with its vibrant fruits and fragrant coconuts, made a lasting impression. One morning, after a sunrise yoga session overlooking the ocean, I was served a smoothie that took me right back to those endless summers, but with a sophisticated twist. Let me tell you, that smoothie was an epiphany.

    Back home, I was determined to recreate that magical blend. After a few delightful kitchen experiments, I perfected my own version: the Tropical Green Monster Smoothie with Coconut & Mango. This recipe is a tribute to those carefree teenage summers and my Hawaiian adventure, capturing the essence of both in a single glass.

    Now, each time I whip up this smoothie, I’m transported back to those sun-drenched mornings and the exhilaration of trying something new. It’s a reminder that adventures, big or small, can be found even in our own kitchens.

    What Makes This Version Special

    While the classic green monster smoothie is already a health lover’s dream, my version takes it up a notch by incorporating tropical fruits and a hint of coconut. This isn’t just a smoothie — it’s an escape to a sunny paradise with every sip. The frozen mango chunks add a burst of tropical sweetness, while the coconut water and toasted coconut flakes introduce a subtle yet irresistible creaminess and crunch. It’s like a beach vacation in a glass, with the added benefit of nutrient-packed spinach and fresh ginger for a zingy warmth.

    Flavor Profile

    The Tropical Green Monster Smoothie with Coconut & Mango is a delightful balance of creamy and tangy, with a tropical twist. Each sip starts with the vibrant sweetness of mango, complemented by the smooth, nutty undertones of peanut butter. The coconut water adds a refreshing lightness, while the grated fresh ginger brings a gentle warmth that lingers just enough to intrigue. The spinach is subtle, lending its vibrant color and a hint of earthiness. Finally, those toasted coconut flakes introduce a delightful crunch and a whisper of toasted aroma, making each sip a multi-sensory delight.

    Ingredients

    • 1 frozen banana
    • 1 cup baby spinach
    • 2 tablespoons peanut butter
    • 1 cup unsweetened vanilla almond milk
    • 1/2 cup fat-free plain Greek yogurt
    • 1 cup frozen mango chunks
    • 1/2 cup coconut water
    • 1 teaspoon grated fresh ginger
    • 2 tablespoons toasted coconut flakes

    Instructions

    1. Start by layering the ingredients in your blender. Begin with the liquids at the bottom: pour in the unsweetened vanilla almond milk and coconut water. This helps the blender blades move smoothly, ensuring a creamier smoothie.
    2. Add the frozen banana, baby spinach, peanut butter, fat-free plain Greek yogurt, and frozen mango chunks. These ingredients form the body of your smoothie, creating that thick, satisfying texture.
    3. Sprinkle in the grated fresh ginger for that warm, zesty kick. This little addition elevates the tropical flavors beautifully.
    4. Before blending, add a handful of ice cubes. This step is key for achieving that frosty texture that makes each sip so refreshing.
    5. Blend until smooth, about 1-2 minutes, depending on your blender’s power. Look for a vibrant green hue and a velvety texture with no visible chunks.
    6. Pour the smoothie into glasses and garnish with the toasted coconut flakes. This final touch not only adds a delightful crunch but also enhances the tropical aroma.

    Pro Tips from Meaghan’s Kitchen

    • For an extra creamy texture, use a high-powered blender. It makes a world of difference in achieving that perfectly smooth consistency.
    • If you’re a fan of thicker smoothies, consider freezing the almond milk in ice cube trays before using it in the recipe.
    • Toasting your coconut flakes at home is easy! Simply spread them on a baking sheet and bake at 350°F for about 5 minutes, keeping a close eye to prevent burning.
    • Always taste your smoothie before serving. If you prefer it sweeter, a drizzle of honey or a splash of orange juice can work wonders.

    Variations & Dietary Swaps

    • Vegan Version: Swap the Greek yogurt for a plant-based alternative like coconut yogurt or soy yogurt.
    • Spice-it-Up Version: Add a pinch of cayenne pepper for a subtle heat that complements the ginger and tropical flavors.
    • Kids-Friendly Version: Reduce the ginger to a pinch and add more frozen banana for extra sweetness. Kids will love the creamy texture and vibrant color!

    What to Serve With It

    This Tropical Green Monster Smoothie with Coconut & Mango is a perfect standalone treat, but if you’re looking to make it a complete meal, try pairing it with a side of fresh pineapple slices or a chilled glass of coconut water. The tropical flavors will harmonize beautifully, making for a truly refreshing experience. For a heartier option, consider serving it alongside a slice of whole-grain toast topped with avocado and a sprinkle of sea salt.

    Storage & Meal Prep

    If you want to make this smoothie ahead of time, you can store it in the fridge for up to 24 hours. However, it’s best enjoyed fresh to retain that vibrant color and flavor. To prepare in advance, consider assembling the dry ingredients in a zip-top bag and storing them in the freezer. When you’re ready to enjoy, just add the liquids and blend.

    For longer storage, pour the smoothie into ice cube trays and freeze. When you’re craving a quick smoothie, simply blend the frozen cubes with a splash of almond milk or coconut water.

    FAQ

    Can I use fresh mango instead of frozen?

    Absolutely! Fresh mango will work just fine, though you might want to add a few extra ice cubes to achieve the desired frosty texture.

    What if I don’t have coconut water?

    No worries! You can substitute it with more almond milk, or even plain water, though it might slightly alter the tropical flavor profile.

    How can I make the smoothie thicker?

    Try adding more frozen banana or reducing the amount of liquid slightly. You can also freeze your almond milk into ice cubes as mentioned in the pro tips.

    Is there a nut-free option?

    Yes, you can replace the peanut butter with sunflower seed butter or simply omit it for a lighter version.

    Can I use other leafy greens besides spinach?

    Definitely! Kale is a great alternative, though it might alter the taste slightly with its more pronounced flavor. Feel free to experiment with different greens to suit your taste.

    Final Thoughts

    I hope this Tropical Green Monster Smoothie with Coconut & Mango brings a little sunshine into your day, wherever you are. It’s a simple, delicious way to enjoy a taste of the tropics, packed with vibrant flavors and nourishing ingredients. If you try it, I’d love to hear how it turned out! Feel free to leave a comment below or share your smoothie photos on social media. Let’s spread the tropical love, one sip at a time!

    Related update: Tropical Green Monster Smoothie with Coconut & Mango

    Related update: Tropical Spiced Pina Colada with Coconut Cream Floater

  • Mediterranean Swiss Chard Wraps with Spicy Citrus Tahini | Made by Meaghan Moineau

    Mediterranean Swiss Chard Wraps with Spicy Citrus Tahini | Made by Meaghan Moineau

    Mediterranean Swiss Chard Wraps with Spicy Citrus Tahini

    Imagine biting into a wrap that bursts with the vibrant flavors of the Mediterranean — sun-dried tomatoes, tangy feta cheese, and a spicy citrus tahini dressing that dances on your taste buds. These Mediterranean Swiss Chard Wraps with Spicy Citrus Tahini aren’t just a meal; they’re an experience, a sunlit escape draped in emerald greens and golden hues.

    Personal Story

    It was a balmy Saturday afternoon when I first stumbled upon the idea of using swiss chard as a wrap. My weekly farmer’s market stroll had led me to a stand full of lush, leafy greens. As I held a bunch of swiss chard in my hands, a childhood memory of my grandmother’s garden rushed back — the way she’d pick fresh greens and infuse them with love and simple seasonings.

    Back in her cozy kitchen, she’d lovingly prepare dishes that were both nourishing and bursting with flavor. Though swiss chard wasn’t commonly on the menu, she always encouraged me to experiment with new ingredients. So, with a nostalgic nod to her adventurous spirit, I decided to embrace swiss chard as my wrap star.

    The first attempt was admittedly a kitchen disaster. I had underestimated the sheer size and unruliness of the leaves, which led to a messy yet delicious meal. But with each trial, I honed my technique, learning to balance the structural integrity of the leaves with the flavorful fillings inside.

    After several iterations, I crafted a version that not only held together beautifully but also packed a Mediterranean punch with sun-dried tomatoes, feta cheese, and a spicy citrus tahini dressing. My grandmother would be proud, I thought, as I took a triumphant bite of my creation.

    What Makes This Version Special

    What sets these Mediterranean Swiss Chard Wraps apart is the infusion of vibrant Mediterranean flavors. Instead of conventional fillings, I’ve opted for **sun-dried tomatoes** and **feta cheese**, which add a depth of flavor and a delightful tanginess. The **spicy citrus tahini dressing** is the heart of this dish, bringing together the nutty richness of tahini with the zesty punch of fresh lemon juice and a hint of cayenne pepper. It’s an invigorating twist that elevates the wraps from ordinary to extraordinary.

    Flavor Profile

    Imagine a savory blend of earthy greens meeting the zesty zing of citrus, all tied together with a nutty, spicy kick. The swiss chard brings a subtle bitterness, perfectly countered by the sweetness of **red bell pepper** and the creaminess of **avocado**. The **toasted pine nuts** add an aromatic crunch, while the **feta cheese** offers a briny tang. As you take a bite, the spicy citrus tahini dressing envelops your palate, leaving a lasting impression of vibrant flavors.

    Ingredients

    • 8 large swiss chard leaves
    • 1 small head of orange cauliflower
    • 2 tablespoons olive oil
    • 2 cloves of garlic, minced
    • Pinch of salt
    • 1/4 cup fresh basil, chopped
    • 1 zucchini, spiralized
    • 1 **red bell pepper**, thinly sliced
    • 1 **avocado**, sliced
    • 2 tablespoons Trader Joe’s spicy peanut vinaigrette
    • 1/4 cup **sun-dried tomatoes**, chopped
    • 1/4 cup **feta cheese**, crumbled
    • 2 tablespoons **fresh lemon juice**
    • 1/4 cup **tahini**
    • 1/2 teaspoon **cayenne pepper**
    • 1/4 cup **toasted pine nuts**

    Instructions

    1. Chop off the stems of the swiss chard at the point where it meets the leaf. You could stem the swiss chard entirely, but I like leaving a bit of stem with the leaves to give better structure to the wraps.
    2. Chop the cauliflower into small pieces and pulse them in a food processor until it looks like rice. I usually pulse the cauliflower florets and the stalk together.
    3. Place the olive oil in a sauté pan over medium-high heat. Once the pan is hot, add the garlic and let it fry for about a minute or two, or until the garlic starts to brown.
    4. Add the pulsed cauliflower rice and cook it for about 2-3 minutes. The cauliflower should turn into a vibrant yellow-orange color when it is cooked. Add a pinch of salt and chopped basil to the cauliflower and stir.
    5. Spiralize the zucchini with Blade B to create zucchini noodles. If you do not have a spiralizer, just create zucchini ribbons with a vegetable peeler.
    6. Toast the pine nuts in the pan until golden and aromatic before sautéing the garlic.
    7. Create a spicy citrus tahini dressing by blending tahini, fresh lemon juice, and cayenne pepper with a splash of water until smooth.
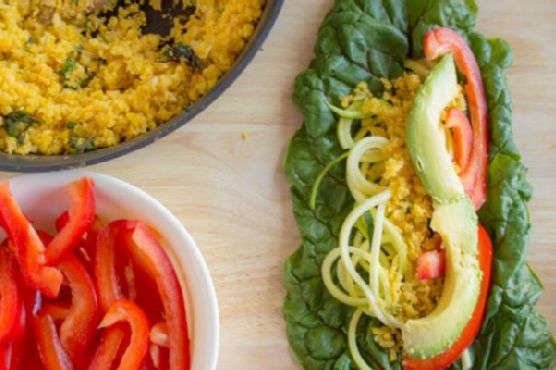
    8. To assemble the wraps, place a large leaf flat down. Add a bit of sautéed cauliflower, zucchini noodles, red pepper, and avocado along the swiss chard stalk. Drizzle a bit of vinaigrette on top of the vegetables and wrap everything up.
    9. Enjoy these wraps as a side to your favorite protein! Feel free to dip these wraps in more sauce.

    Pro Tips from Meaghan’s Kitchen

    • When selecting swiss chard, look for vibrant, crisp leaves with no signs of wilting.
    • If your swiss chard leaves are too stiff, blanch them quickly in boiling water for 20 seconds to make them more pliable.
    • To prevent your wraps from falling apart, don’t overfill them. Less is more!
    • For a smoother dressing, use a high-powered blender to combine the tahini, lemon juice, and cayenne pepper.
    • Try adding a splash of rice vinegar to the dressing for an extra tangy twist.

    Variations & Dietary Swaps

    • Vegetarian Swap: Replace the feta cheese with a vegan cheese or omit it altogether for a fully plant-based meal.
    • Spice-It-Up Version: Add a teaspoon of sriracha to the tahini dressing for an extra kick.
    • Kids-Friendly Version: Skip the cayenne pepper in the dressing and add a touch of honey for a sweeter flavor.

    What to Serve With It

    Pair these Mediterranean Swiss Chard Wraps with a chilled glass of Sauvignon Blanc or a side of tabbouleh salad. The light citrus notes in the wine complement the spicy citrus tahini dressing, while the tabbouleh adds a refreshing, herby contrast.

    Storage & Meal Prep

    These wraps are best consumed when they are freshly made. However, if you have leftovers, refrigerate them in an airtight container for up to two days. To reheat, unwrap the fillings and warm them in a pan before reassembling. If freezing, store the fillings separately and thaw in the fridge overnight before use.

    FAQ

    Can I use a different type of leaf for the wraps?

    Absolutely! Collard greens or large lettuce leaves can be a great alternative to swiss chard.

    How can I make these wraps more filling?

    Consider adding grilled chicken or chickpeas for added protein and satiety.

    Is there a substitute for tahini in the dressing?

    If you don’t have tahini, you can use almond butter or sunflower seed butter for a similar creamy texture.

    Can I make the dressing in advance?

    Yes, the dressing can be made up to three days in advance. Store it in the fridge in a sealed jar and shake well before using.

    What if I don’t have a food processor?

    You can finely chop the cauliflower by hand or use a box grater to achieve a similar rice-like texture.

    Final Thoughts

    These Mediterranean Swiss Chard Wraps with Spicy Citrus Tahini are a delightful way to savor the vibrant flavors of the Mediterranean right in your kitchen. I hope you enjoy making and eating them as much as I do. Please share your creations and any twists you add in the comments below. Let’s keep the conversation and inspiration flowing! Happy cooking!

    Related update: Mediterranean Swiss Chard Wraps with Spicy Citrus Tahini

    Related update: Zesty Citrus Crab Salad Stuffed Pita Pockets with Avocado Cream

  • Luscious Vegan Strawberry-Rose Shortcake with Coconut Cream | Made by Meaghan Moineau

    Luscious Vegan Strawberry-Rose Shortcake with Coconut Cream | Made by Meaghan Moineau

    Luscious Vegan Strawberry-Rose Shortcake with Coconut Cream

    Imagine biting into a dessert that feels like a sun-soaked summer afternoon. The sweetness of ripe strawberries mingles with a whisper of floral rose, all embraced by a rich, creamy cloud of coconut whipped cream. This isn’t just any strawberry shortcake; it’s a sensory journey that transforms your taste buds with every bite.

    Personal Story

    Strawberry shortcake has always been a staple at my family gatherings, a dessert that evokes memories of laughter and clinking glasses around a bustling dinner table. As a child, I remember eagerly watching my grandmother whip cream by hand, her movements rhythmic and full of purpose. The anticipation of sinking my teeth into layers of soft cake, fresh berries, and sweet cream made every minute of waiting worthwhile.

    Years later, during a particularly adventurous phase of my cooking journey, I found myself experimenting with flavors that intrigued me. That’s when I stumbled upon rose water. Its exotic aroma enchanted me, and I knew I had to incorporate it into a recipe that held a special place in my heart. The idea to elevate the classic strawberry shortcake with rose water and coconut cream was born out of this curiosity.

    Of course, not every attempt was successful. There was the time I accidentally overdid the rose water, resulting in a dessert that tasted more like a perfume bottle than a treat. But with each misstep, I learned, refined, and perfected, until I arrived at this version — a luscious vegan strawberry-rose shortcake with coconut cream that brings a unique twist to a beloved classic.

    The first time I served this version to my family, I watched their expressions shift from curious skepticism to delight. The subtle floral notes, the creamy coconut, and the juicy strawberries — it was a harmony of flavors that surprised and delighted even my traditionalist grandmother. It’s a recipe that bridges generations and culinary worlds, and I can’t wait to share it with you.

    What Makes This Version Special

    This strawberry shortcake isn’t your average dessert. By infusing the strawberries with a fragrant touch of rose water, we introduce a delicate floral note that elevates the classic fruit. Pair this with a rich coconut whipped cream, and you have a dessert that’s not only vegan-friendly but also a true taste sensation. The coconut cream adds a luscious texture that’s both light and indulgent, transforming the shortcake into a floral delight that stands out from the traditional version.

    Flavor Profile

    The experience of tasting this vegan strawberry-rose shortcake is akin to stepping into a fragrant garden. The first bite is a delicate balance — the sweetness of the strawberries, heightened by the floral essence of rose water, creates a symphony of flavors that dance on your palate. The coconut cream provides a velvety, rich counterpoint, making each mouthful creamy and refreshing. This isn’t just a dessert; it’s a taste of summer wrapped in a luxurious, aromatic package.

    Ingredients

    • 1 cup flour
    • 1/2 cup almond meal
    • 1/3 cup turbinado sugar
    • 1 teaspoon baking soda
    • 1/4 teaspoon salt
    • 3/4 cup almond milk
    • 1 tablespoon apple cider vinegar
    • 1/4 cup vegetable oil
    • 1 tiny drop of almond extract
    • 1 pound strawberries, sliced
    • 1 teaspoon rose water
    • 1 can full-fat coconut milk (chilled overnight)
    • 2 tablespoons maple syrup

    Instructions

    1. Preheat your oven to 400°F (200°C). Line two baking sheets with parchment paper for easy cleanup.
    2. In a glass bowl, combine the sliced strawberries with 1 teaspoon rose water. Cover and refrigerate to let the flavors meld.
    3. In a medium-sized bowl, whisk together 1 cup flour, 1/2 cup almond meal, 1 teaspoon baking soda, and 1/4 teaspoon salt.
    4. In a small bowl, dissolve 1/3 cup turbinado sugar in 1 teaspoon water.
    5. In a large bowl, combine 3/4 cup almond milk, 1 tablespoon apple cider vinegar, 1/4 cup vegetable oil, the sugar mixture, and 1 tiny drop of almond extract. Whisk until well blended.
    6. Create a well in the center of the dry ingredients and gradually pour in the wet mixture. Stir until just combined to avoid overmixing.
    7. Drop heaping tablespoons of batter onto the prepared baking sheets, leaving a few inches between each dollop. This should yield about 10 shortcakes.
    8. Bake for 10-12 minutes, or until the shortcakes are ever so slightly golden. Remove from oven and let them cool on a wire rack.
    9. While the shortcakes are cooling, prepare the coconut cream. Chill a mixing bowl and beaters in the freezer for 15 minutes to ensure a fluffier texture.
    10. Scoop the solidified coconut cream from the chilled can into the cold bowl. Add 2 tablespoons maple syrup and whip until peaks form.
    11. To assemble, slice each shortcake in half with a serrated knife. Generously dollop the coconut whipped cream onto the bottom half, add a spoonful of rose-infused strawberries, and cap with the top half. Garnish with more cream and strawberries, if desired.

    Pro Tips from Meaghan’s Kitchen

    • For a more pronounced rose flavor, increase the rose water by an additional 1/2 teaspoon. Just be cautious — a little goes a long way!
    • When making the coconut whipped cream, ensure your coconut milk is thoroughly chilled. This helps separate the cream from the liquid, giving you a thicker texture to work with.
    • If your strawberries aren’t at peak ripeness, sprinkle them with a touch more sugar to enhance their natural sweetness.
    • Use a serrated knife to slice the shortcakes; it cuts through the delicate crumb without squishing the layers.
    • Experiment with different almond extracts for subtle flavor variations — some brands can be milder or stronger than others.

    Variations & Dietary Swaps

    • Gluten-Free Version: Substitute the flour with a gluten-free all-purpose blend to make this dessert suitable for gluten sensitivities.
    • Spice-It-Up Version: Add a pinch of ground cardamom to the dry ingredients for a warm, spicy undertone that complements the floral notes.
    • Kid-Friendly Version: Omit the rose water for a more straightforward strawberry shortcake that appeals to younger palates.

    What to Serve With It

    This luscious vegan strawberry-rose shortcake pairs beautifully with a chilled glass of rosé wine, enhancing the floral notes and adding a sophisticated touch to your dessert experience. Alternatively, a scoop of dairy-free vanilla ice cream alongside the shortcake creates an indulgent treat perfect for warm evenings.

    Storage & Meal Prep

    To store leftovers, place the assembled shortcakes in an airtight container in the refrigerator for up to two days. The coconut cream may harden slightly, so allow the shortcakes to sit at room temperature for a few minutes before serving. For meal prep, bake the shortcakes and slice the strawberries a day ahead. Whip the coconut cream just before serving to maintain its fluffy texture.

    FAQ

    Can I use regular cream instead of coconut cream?

    Absolutely! If you’re not following a vegan diet, regular whipped cream can be a tasty substitute. Just whip it with a bit of sugar and vanilla extract for sweetness.

    How do I prevent the shortcakes from becoming soggy?

    To keep the shortcakes crisp, assemble them just before serving. The coconut cream and juicy strawberries can make them soggy if left too long.

    Is there a substitute for rose water?

    If you can’t find rose water or prefer a different flavor, try using a vanilla or almond extract, keeping in mind that the overall taste will change.

    Can I make this dessert ahead of time?

    You can prepare the shortcakes and strawberries in advance, but for best results, whip the coconut cream and assemble the shortcakes right before serving.

    What if I don’t have almond meal?

    No worries! You can pulse whole almonds in a food processor until finely ground to make your own almond meal at home.

    Final Thoughts

    Cooking, for me, is all about creating moments — moments that linger on your taste buds and in your memories. This luscious vegan strawberry-rose shortcake with coconut cream is a testament to the joy of experimenting and sharing love through food. I hope you’ll try this recipe and find the same delight in it as I have. I’d love to hear how it turns out for you, so please feel free to leave a comment or share your own twists on this floral, fragrant dessert. Happy cooking, dear friend!

    Related update: Luscious Vegan Strawberry-Rose Shortcake with Coconut Cream

    Related update: Zesty Lime-Infused Strawberry Yogurt Cake with Basil Glaze

  • Gourmet Turkey Burgers with Roasted Red Pepper and Feta | Made by Meaghan Moineau

    Gourmet Turkey Burgers with Roasted Red Pepper and Feta | Made by Meaghan Moineau

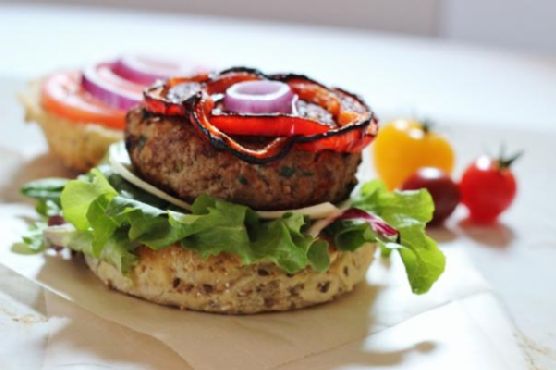
    Gourmet Turkey Burgers with Roasted Red Pepper and Feta

    The warm sizzle of turkey burgers hitting a hot pan, a hint of tangy feta cheese mingling with the fresh aroma of mint, and the smoky allure of roasted red pepper relish – this is not your average cookout fare. Welcome to a Mediterranean-inspired flavor journey that will transform your typical burger night into a gourmet dining experience.

    Personal Story

    Growing up, turkey burgers were a weeknight staple in our home. My mom, ever the culinary magician, would whip them up with whatever we had on hand. It was always a delicious surprise to bite into the latest creation. One summer evening, after a particularly adventurous attempt involving pineapple and a questionable spice mix, I decided it was time to craft my own signature turkey burger recipe.

    Fast forward a few years to a bustling Saturday morning at the local farmer’s market. As I browsed the vibrant stalls, the aroma of freshly roasted red peppers drew me in. That’s when inspiration struck. Why not combine the savory goodness of turkey with the zesty kick of feta and the aromatic freshness of mint? The result was nothing short of extraordinary.

    My first attempt at these gourmet turkey burgers was during a backyard gathering with friends. As the burgers sizzled on the grill, guests began to gather, drawn by the intoxicating smell. The roasted red pepper relish added a layer of depth, complimenting the juicy, herb-infused turkey patties perfectly. It was a hit, and I knew this recipe was a keeper.

    Now, this recipe has become my go-to when I want to impress or simply indulge in something a bit more sophisticated than your average burger night. It’s a dish that carries memories of family dinners and farmer’s market discoveries – a true testament to the beauty of elevating the everyday.

    What Makes This Version Special

    What sets these gourmet turkey burgers apart is the incorporation of **tangy feta cheese** and a hint of **fresh mint**. These ingredients elevate the flavor profile of traditional turkey burgers, transforming them into a Mediterranean delight. Add a rich, smoky **roasted red pepper relish**, and you’ve got a dish that’s bursting with complexity and flavor.

    Most turkey burger recipes stick to the basics, but this version dares to be different. The feta cheese adds a creamy tang that perfectly complements the lean ground turkey, while the fresh mint introduces a delightful contrast of brightness and flavor. The roasted red pepper relish, with its deep, smoky notes, ties everything together, creating a burger that’s anything but ordinary.

    Flavor Profile

    Prepare yourself for a taste sensation with these gourmet turkey burgers. The savory turkey, combined with the **tanginess of feta** and the **freshness of mint**, creates a harmonious balance that delights the palate. As you bite into the juicy patty, the subtle **smokiness from the roasted red pepper relish** adds a layer of depth, making each mouthful a truly memorable experience. It’s a dish that dances between savory, zesty, and slightly sweet – a perfect melody of flavors.

    Ingredients

    • 1 lb lean extra ground turkey
    • 1/2 cup shredded carrots
    • 1 egg, beaten
    • 2 cloves garlic, minced
    • 3 green onions, finely chopped
    • 1/2 cup panko breadcrumbs
    • 1/2 cup crumbled **feta cheese**
    • 1/4 cup finely chopped **fresh mint leaves**
    • 1/2 cup grated zucchini
    • 1/4 cup spinach, chopped
    • 1 tbsp tomato paste
    • 1 tsp smoked paprika
    • Salt and pepper to taste
    • 2 large **red bell peppers**
    • Olive oil for spritzing
    • **Roasted red pepper relish**

    Instructions

    1. Begin by preparing the roasted red peppers. Char the skins of the red bell peppers directly over an open flame until blackened. This step adds a deeper smoky flavor that will penetrate the relish. Once charred, slice the peppers, remove the seeds, and spritz with olive oil. Roast in the oven at 425°F (220°C) for 20 minutes until they become tender and aromatic.
    2. In a large mixing bowl, combine the ground turkey, shredded carrots, egg, minced garlic, green onions, panko breadcrumbs, crumbled **feta cheese**, and chopped **fresh mint leaves**. Add grated zucchini, chopped spinach, tomato paste, and smoked paprika. Season with salt and pepper.
    3. Gently fold the mixture together, being careful not to overwork it. You want all ingredients to be well combined but not overly compacted to ensure juicy burgers.
    4. Divide the mixture into 4-6 equal portions and shape each into a round patty. Aim for uniform thickness to ensure even cooking.
    5. Preheat a grill or skillet to medium-high heat. Cook the patties for about 4-5 minutes per side, or until they reach an internal temperature of 165°F (74°C) and are golden-brown on the outside.
    6. As the burgers cook, prepare the roasted red pepper relish by chopping the roasted peppers and combining them with a drizzle of olive oil, salt, and pepper. The relish should be slightly chunky, adding texture to the burgers.
    7. Serve your gourmet turkey burgers topped with the smoky roasted red pepper relish, and enjoy the symphony of flavors.

    Pro Tips from Meaghan’s Kitchen

    • When forming the patties, create a small indentation in the center of each burger. This helps them cook more evenly and prevents them from puffing up in the middle.
    • If you’re short on time, prepare the roasted red pepper relish a day ahead. It allows the flavors to meld beautifully, enhancing the overall taste.
    • Consider using a combination of fresh herbs such as parsley or cilantro for an added layer of flavor complexity.
    • Make sure your grill or skillet is properly preheated before adding the patties. This ensures a good sear and locks in the juices.
    • For extra flavor, toast the burger buns on the grill for a quick minute before serving.

    Variations & Dietary Swaps

    • Vegetarian Version: Swap out the turkey for a hearty mix of chickpeas and quinoa. Add extra breadcrumbs to bind the mixture.
    • Spice-It-Up: Add a pinch of cayenne pepper or a dash of sriracha sauce to the burger mix for a spicy kick.
    • Kids-Friendly: Skip the mint and smoked paprika, and add a touch of mild cheddar cheese to make the burgers more appealing to younger taste buds.

    What to Serve With It

    Pair these gourmet turkey burgers with a chilled glass of Sauvignon Blanc to complement the tangy feta and fresh mint. For a classic side, serve with crispy sweet potato fries, which naturally balance the savory notes of the burger. A light side salad with a lemon vinaigrette also works beautifully to refresh the palate between bites.

    Storage & Meal Prep

    These turkey burgers are perfect for meal prep. Once cooked, allow the patties to cool completely before storing them in an airtight container in the refrigerator for up to 3 days. To freeze, arrange the patties on a baking sheet lined with parchment paper and place them in the freezer until solid. Transfer to a freezer-safe bag or container and store for up to 3 months. Reheat in the oven at 350°F (175°C) until heated through, being careful not to dry them out.

    FAQ

    Can I use a different cheese instead of feta?

    Absolutely! Goat cheese or a mild blue cheese can make great substitutes, adding their own unique flavors to the mix.

    How can I make the burgers juicier?

    Incorporating ingredients like grated zucchini and carrots not only adds moisture but also boosts the nutritional profile of the burgers.

    What if I don’t have a grill?

    No problem! You can cook these burgers in a skillet on your stovetop. Just ensure it’s heated to medium-high for a good sear.

    Can I make the burgers ahead of time?

    Yes, you can prepare the patties and store them uncooked in the fridge for up to 24 hours. This makes it easy to simply cook them when you’re ready to eat.

    What’s the best way to reheat the burgers?

    For the best results, reheat the burgers in the oven to maintain their juiciness. Avoid microwaving as it can make them rubbery.

    Final Thoughts

    Embrace the flavors of the Mediterranean with these gourmet turkey burgers, a delightful dish that proves healthy eating doesn’t have to be boring. I hope you’ll give this recipe a try and make it your own. Whether you’re grilling for friends or enjoying a quiet night in, these burgers are sure to impress. I’d love to hear how yours turned out or any twists you added, so feel free to drop a comment or share your photos. Happy cooking!

    Related update: Gourmet Turkey Burgers with Roasted Red Pepper and Feta

    Related update: Zesty Citrus-Herb Baked Chicken Wings with Honey-Lime Glaze

  • Zesty Citrus-Infused Tabouleh with Pomegranate Seeds | Made by Meaghan Moineau

    Zesty Citrus-Infused Tabouleh with Pomegranate Seeds | Made by Meaghan Moineau

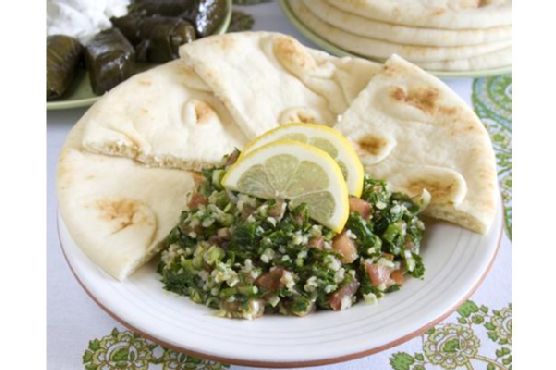
    Zesty Citrus-Infused Tabouleh with Pomegranate Seeds

    Imagine the sun-dappled kitchen, where a cool breeze carries the scent of fresh herbs, mingling with the tangy zest of lemons and the sweet allure of ripe pomegranates. This isn’t just any tabouleh; it’s a vibrant, citrus-infused delight that promises to transport your taste buds straight to the bustling markets of the Middle East.

    My Journey to the Perfect Tabouleh

    Tabouleh has long been a staple in my culinary repertoire, a dish I first fell in love with during a summer spent exploring the diverse flavors of Middle Eastern cuisine. I vividly remember the first bite I took at a tiny café in Beirut, where the salad was as bright and refreshing as the Mediterranean Sea itself. The balance of fresh herbs, juicy tomatoes, and the unexpected crunch of pomegranate seeds was a revelation.

    Back in my own kitchen, I was determined to recreate that magic — but with my own personal twist. After many delicious experiments, I discovered that the secret to capturing that vibrant essence lay in the citrus. By incorporating the zest and juice of fresh lemons, and adding a sprinkle of sumac for a subtle kick, I could elevate this classic dish to new heights.

    Of course, not every experiment was a success. There was that one time I mistook cumin for sumac — let’s just say it led to a very spicy surprise! But with each misstep came the invaluable lessons that have shaped my culinary journey.

    Now, this Zesty Citrus-Infused Tabouleh has become a beloved recipe, not just for its refreshing taste, but for the memories it evokes — of sunlit kitchens and the joy of discovery. I can’t wait to share it with you.

    What Makes This Version Special

    This tabouleh isn’t your standard salad. The addition of **pomegranate seeds** introduces a burst of sweetness that dances on the palate, while **sumac** lends a subtle, lemony spice that contrasts beautifully with the traditional flavors. The lemon zest, a simple but transformative upgrade, infuses the dish with a citrusy aroma that lingers long after the last bite. It’s a salad that’s not just fresh but full of surprises, making it a standout at any gathering.

    Flavor Profile

    When you savor a forkful of this tabouleh, you’re met with an orchestra of flavors: the refreshing, herbaceous notes of parsley and mint; the juicy, sun-ripened tomatoes; and the sweet, jewel-like pomegranate seeds that pop with every bite. The dish is tangy and invigorating, thanks to the fresh lemon juice, while the sumac provides a spicy, lemony warmth that ties everything together. It’s a flavor journey that’s both familiar and delightfully new.

    Ingredients

    • 1 cup cooked bulgur wheat
    • 1 cup flat leaf parsley, stems removed
    • 1/2 cup fresh mint, stems removed
    • 3 green onions, finely chopped
    • 2 roma tomatoes, diced
    • 1/2 cup **pomegranate seeds**
    • 1 teaspoon **sumac**
    • Zest of one **lemon**
    • Juice from 1 lemon
    • 1/4 cup olive oil
    • 1/2 cucumber, diced

    Instructions

    1. Begin by removing the stems from the parsley and mint. Rinse the leaves thoroughly in a colander to remove any dirt. Pat them dry with a paper towel.
    2. In a food processor, pulse the parsley and mint until finely chopped. This should only take a few quick pulses — be careful not to over-process into a paste.
    3. Transfer the chopped herbs to a large mixing bowl. Add the diced green onions, roma tomatoes, cucumber, and cooked bulgur wheat. Stir gently to combine, ensuring the ingredients are evenly distributed.
    4. In a small bowl, combine the lemon juice and olive oil. Remember to zest the lemon before juicing to release those essential oils, which enhance the citrus flavor.
    5. Pour the lemon and olive oil mixture over the salad. Toss everything together, making sure every ingredient is coated in the citrusy dressing.
    6. Refrigerate the tabouleh for at least an hour before serving. This allows the flavors to meld beautifully.
    7. Just before serving, sprinkle the sumac over the salad for that final spicy finish. Serve chilled or at room temperature, on its own or with warm pita bread.

    Pro Tips from Meaghan’s Kitchen

    • Use fresh herbs for the best flavor. Dry herbs won’t provide the same vibrant taste.
    • For a quicker prep, chop the herbs with a sharp knife if you don’t have a food processor. Just be sure to chop them finely.
    • If you can’t find bulgur, couscous or quinoa makes a great substitute.
    • Toast the bulgur wheat before cooking to bring out a nutty flavor that adds depth to the dish.
    • Adjust the amount of lemon juice to your taste. Some like it tangier, while others prefer a milder citrus zing.

    Variations & Dietary Swaps

    • Vegetarian Delight: This tabouleh is already vegetarian, but for a vegan version, ensure all your ingredients, like the olive oil, are certified vegan.
    • Spice-It-Up Version: Add a pinch of cayenne pepper for a fiery kick that complements the lemony notes.
    • Kid-Friendly Version: Reduce the sumac and add more pomegranate seeds for extra sweetness that kids love.

    What to Serve With It

    This Zesty Citrus-Infused Tabouleh pairs beautifully with a chilled glass of crisp Sauvignon Blanc, which complements the citrus notes perfectly. For a complete meal, serve it alongside grilled halloumi cheese for a delightful contrast in textures. It’s also a great side dish to roasted lamb or chicken kebabs, adding a refreshing balance to rich, savory meats.

    Storage & Meal Prep

    Store any leftover tabouleh in an airtight container in the refrigerator for up to three days. The flavors continue to develop, making it even more delicious the next day. While tabouleh doesn’t freeze well due to the fresh vegetable content, it’s quick to whip up as part of your weekly meal prep. For best results, keep the dressing separate until ready to serve.

    FAQ

    Can I make tabouleh ahead of time?

    Absolutely! In fact, making it a day ahead allows the flavors to meld, resulting in an even tastier dish.

    What can I use instead of bulgur wheat?

    If you’re out of bulgur wheat, couscous or cooked quinoa are great alternatives that maintain the dish’s texture.

    Is sumac essential to this recipe?

    While sumac adds a unique, tangy flavor, you can omit it if unavailable. Consider substituting with a bit of lemon zest for a similar effect.

    Can I add more vegetables to the tabouleh?

    Feel free to experiment! Diced bell peppers or radishes make excellent additions for extra crunch and flavor.

    Final Thoughts

    There you have it — a vibrant, Zesty Citrus-Infused Tabouleh with Pomegranate Seeds that is sure to impress both your palate and your guests. Whether you’re new to the kitchen or a seasoned cook, this dish is an easy yet impressive addition to your culinary repertoire. I’d love to hear how your tabouleh turns out, so feel free to share your experiences and any twists you might add in the comments below. Happy cooking!

    Related update: Zesty Citrus-Infused Tabouleh with Pomegranate Seeds

    Related update: Tropical Avocado Salad with Grilled Shrimp and Toasted Coconut

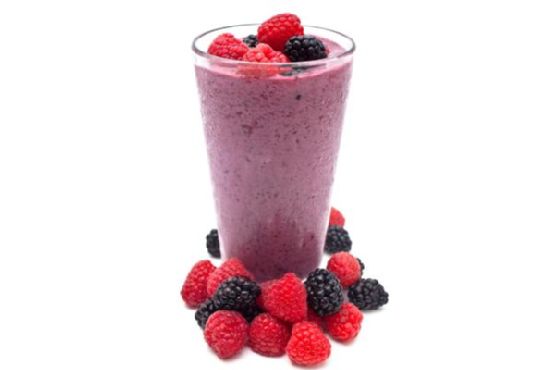
  • Tropical Berry Bliss Smoothie with Coconut and Lime | Made by Meaghan Moineau

    Tropical Berry Bliss Smoothie with Coconut and Lime | Made by Meaghan Moineau

    Tropical Berry Bliss Smoothie with Coconut and Lime

    Picture this: a sun-drenched morning, the air heavy with the scent of blooming flowers, and in your hand, a tall, frosty glass. It’s brimming with a vibrant, lush smoothie, the kind that tastes like a vacation in a sip. This is not just any smoothie; it’s a Tropical Berry Bliss Smoothie with Coconut and Lime, promising to take your taste buds on an island escape.

    Years ago, I stumbled upon this delightful concoction quite by accident. I was hosting a brunch for some dear friends and had ambitiously promised a spread reminiscent of a beachside retreat. In my enthusiasm, I went overboard with the berry stockpile and somehow ended up with an excess of coconut milk and limes. As I stood amidst the chaos of my kitchen, inspiration struck. Why not blend these ingredients into a refreshing smoothie? It was a serendipitous decision that changed my brunch game forever.

    The result was nothing short of magical. My friends raved about the unexpected combination: a tropical smoothie that wasn’t just sweet but had a sophisticated tang and creaminess that made it feel indulgent yet light. Since then, the Tropical Berry Bliss Smoothie with Coconut and Lime has become a staple in my home, a reminder of that memorable day and the joy of culinary creativity.

    Of course, there have been mishaps along the way. Like the time I forgot to zest the lime before juicing it, leading to a slightly less aromatic drink. Or the morning I accidentally used salted coconut milk, a lesson in reading labels carefully! Yet, every attempt brought me closer to perfecting this recipe, and now, I’m thrilled to share it with you.

    What Makes This Version Special

    This Tropical Berry Bliss Smoothie is not your average berry blend. What sets it apart is the use of creamy coconut milk and the zesty kick of fresh lime juice and zest. These ingredients introduce a tropical flair that elevates the traditional berry smoothie into something extraordinary. The coconut milk adds a lush creaminess that balances the tangy berries, while the lime infuses the drink with a refreshing zest. It’s like a beach vacation in a glass, making it a unique and delightful twist on a standard recipe.

    Flavor Profile

    Imagine the first sip: a burst of tropical and tangy flavors dance on your tongue, underscored by a creamy coconut undertone that soothes and delights. As the smoothie glides down, the refreshing lime finish leaves a lingering zest that keeps you coming back for more. This delightful fusion of flavors is what makes the Tropical Berry Bliss Smoothie with Coconut and Lime a must-try for any smoothie enthusiast.

    Ingredients

    • 1 cup frozen blackberries
    • 1 cup frozen blueberries
    • 1/2 cup lemonade concentrate
    • 1 cup frozen unsweetened raspberries
    • 1 cup frozen unsweetened strawberries
    • 2 tablespoons sugar
    • 1 teaspoon vanilla extract
    • 1 cup whole milk
    • 1 cup coconut milk
    • Juice of 1 fresh lime
    • Zest of 1 lime
    • Shredded coconut for garnish

    Instructions

    1. Zest the lime before juicing to infuse the smoothie with its fragrant oils. Set aside.
    2. In a blender, place the lemonade concentrate, whole milk, and coconut milk. Layering the ingredients starting with liquids ensures a smoother blending process.
    3. Add the frozen blackberries and blueberries. Pulse a few times until the mixture begins to break down.
    4. Add the frozen raspberries and strawberries. Pulse 2-3 times to help them incorporate.
    5. Sprinkle in the sugar and vanilla extract. Blend on high until the mixture is smooth and creamy, with no visible chunks of fruit.
    6. Pour in the fresh lime juice and add the lime zest. Blend briefly to combine.
    7. Pour into glasses and garnish with shredded coconut. Serve immediately for the best flavor and texture.

    Pro Tips from Meaghan’s Kitchen

    • Use frozen berries to avoid watering down the smoothie with ice. This keeps it thick and flavorful.
    • If you prefer a sweeter smoothie, add a tablespoon of honey or agave syrup.
    • Opt for unsweetened coconut milk to control the sweetness of the final product.
    • For an extra frosty texture, chill your glasses in the freezer before pouring the smoothie.
    • Experiment with different brands of coconut milk as they can vary significantly in creaminess and flavor.

    Variations & Dietary Swaps

    • Vegan Version: Swap the whole milk for almond or oat milk, and ensure your sugar is vegan.
    • Spice-It-Up Version: Add a pinch of cayenne pepper for a spicy kick that complements the sweetness of the berries.
    • Kids-Friendly Version: Blend in a banana for added sweetness and creaminess that kids love.

    What to Serve With It

    Pair your Tropical Berry Bliss Smoothie with a crunchy granola parfait for a delightful textural contrast. Alternatively, serve alongside coconut-lime scones for a decadent breakfast or brunch experience. These pairings enhance the tropical theme and make for a well-rounded meal.

    Storage & Meal Prep

    If you find yourself with leftover smoothie, store it in an airtight container in the fridge for up to 24 hours. Give it a good shake before serving. For longer storage, pour the smoothie into ice cube trays and freeze. When ready to enjoy, blend the cubes with a bit of coconut milk. This smoothie doesn’t reheat well due to its icy nature, so enjoy it cold.

    FAQ

    Can I use fresh berries instead of frozen?

    Yes, you can use fresh berries, but you may want to add a handful of ice to achieve the desired thickness and chill.

    Is there a substitute for lemonade concentrate?

    You can replace lemonade concentrate with freshly squeezed lemon juice mixed with a bit of honey or sugar to taste.

    What if I don’t have coconut milk?

    If you don’t have coconut milk, you can substitute with almond milk or more whole milk, though the tropical flavor will be less pronounced.

    Can I make this smoothie ahead of time?

    You can prepare the ingredients ahead but blend it fresh for the best flavor and texture. If needed, store in the fridge and give it a vigorous shake before serving.

    Is it possible to make this smoothie without a blender?

    Unfortunately, a blender is essential to achieve the smooth, creamy texture of this smoothie. A food processor might work in a pinch, but it won’t be as smooth.

    Final Thoughts

    I hope this Tropical Berry Bliss Smoothie with Coconut and Lime brings a splash of island magic into your days, just as it has mine. Whether you’re sipping it solo or sharing with friends, it’s a delightful reminder that sometimes the best culinary adventures come from a little creativity and a dash of serendipity. I’d love to hear how this recipe turns out for you, so please leave a comment or share your creations. Cheers to delicious, sun-kissed moments!

    Related update: Tropical Berry Bliss Smoothie with Coconut and Lime

    Related update: Tropical Green Monster Smoothie with Coconut & Mango

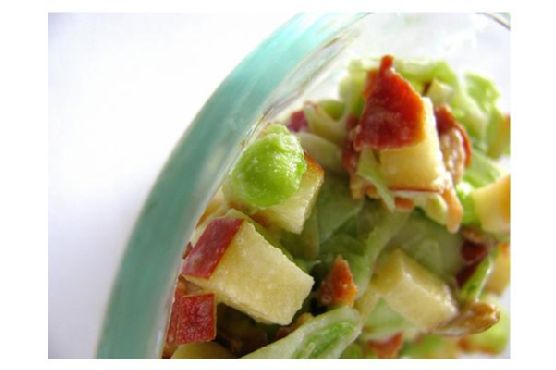
  • Zesty Kohlrabi and Apple Salad with Smoky Chipotle Bacon | Made by Meaghan Moineau

    Zesty Kohlrabi and Apple Salad with Smoky Chipotle Bacon | Made by Meaghan Moineau

    Zesty Kohlrabi and Apple Salad with Smoky Chipotle Bacon

    Imagine the crunch of freshly sliced kohlrabi meeting the sweet bite of Fuji apple, all dressed in a creamy, tangy dressing that whispers of lime and honey. Now, add crumbles of smoky chipotle bacon for a spicy twist and a sprinkle of fresh mint for a refreshing finish. This isn’t just a salad; it’s a flavor journey.

    Personal Story

    My love affair with kohlrabi began in my grandmother’s garden. As a child, I was always curious about the peculiar-looking green bulbs peeking through the soil, their leaves stretching out like open arms. My grandmother, an avid gardener and cook, would slice them paper-thin, sprinkle them with salt, and hand them to me as a snack. It was during these times that I developed a fondness for its subtle peppery taste and crisp texture.

    Fast forward a few years, and I found myself in my own kitchen, staring at a bulb of kohlrabi I impulsively bought at the farmer’s market. I wanted to recreate the magic of my childhood but with a twist that reflected my grown-up palate. That’s when the idea for this Zesty Kohlrabi and Apple Salad with Smoky Chipotle Bacon was born. The salad had to be more than just a nod to nostalgia; it had to be a celebration of flavors.

    One kitchen mishap almost derailed the entire endeavor. I was experimenting with bacon, trying to infuse it with a spicy kick, and went a bit too heavy-handed with the chipotle powder. The smoke alarm went off, the air was filled with spice, and my eyes watered. Yet, once the bacon cooled, the chipotle had infused perfectly, offering just the right amount of heat. It was a happy accident that became a defining feature of this dish.

    Ever since that serendipitous day, this salad has become a staple at my table, and each time I make it, I’m transported back to those sun-drenched afternoons in my grandmother’s garden, with a new twist that reflects my culinary journey.

    What Makes This Version Special

    This salad introduces a smoky chipotle kick in the bacon, elevating the flavor profile with a spicy twist. It’s not just about adding bacon; it’s about transforming it. By coating the bacon with chipotle powder before cooking, we add a depth of flavor that’s both smoky and spicy, creating a delicious contrast to the refreshing crunch of kohlrabi and apple.

    Additionally, a touch of fresh mint offers a refreshing contrast, completing the flavor symphony with its cool, aromatic presence. This version of the salad stands out because it harmoniously balances heat, sweet, and fresh, making it a vibrant addition to any meal.

    Flavor Profile

    The taste experience of the Zesty Kohlrabi and Apple Salad with Smoky Chipotle Bacon is an adventure in contrasts and complements. Smoky and spicy bacon crumbles introduce a bold heat, which is immediately cooled by the refreshing crunch of kohlrabi and apple. The dressing, infused with lime zest, provides a citrusy zing that brightens every bite, while the honey in the dressing offers a subtle sweetness that ties all the elements together. The sunflower seeds contribute an earthy nuttiness, and the fresh mint leaves add an aromatic lift, making each mouthful a complex, refreshing delight.

    Ingredients

    • 1 medium **kohlrabi bulb**, peeled and thinly sliced
    • 1 **Fuji apple**, cored and chopped
    • 1 cup snow peas, trimmed and shelled
    • 1/4 cup sunflower seeds
    • 6 strips of **bacon**, coated with chipotle powder
    • 1/2 cup heavy cream
    • 2 tablespoons apple cider vinegar
    • 1 tablespoon honey
    • 1 teaspoon **chipotle powder**
    • Handful of fresh **mint leaves**, roughly chopped
    • Zest of 1 **lime**
    • Salt and pepper to taste

    Instructions

    1. Preheat your oven to 400°F (200°C). Coat the bacon strips with chipotle powder and lay them on a baking sheet. Bake for 15-20 minutes or until the bacon is crispy and golden-brown. Let it cool before crumbling finely.
    2. While the bacon is cooking, use a mandolin to slice the kohlrabi paper-thin. This ensures a delicate crunch that blends seamlessly with the other ingredients.
    3. Mix the sliced kohlrabi with the chopped Fuji apple and shelled snow peas in a large bowl. Toss in the sunflower seeds for added texture.
    4. In a separate small bowl, combine the heavy cream and apple cider vinegar. Let this mixture sit out for about 10 minutes until it thickens slightly, resembling buttermilk.
    5. Once thickened, add the honey and lime zest to the cream mixture. Whisk until well combined, creating a smooth, aromatic dressing.
    6. Add the dressing to the kohlrabi, apple, and pea mixture a little at a time, tossing gently until the salad is thinly coated. Be careful not to overdress the salad; you want just enough to bind the flavors together.
    7. Add the crumbled bacon and freshly chopped mint leaves to the salad. Toss gently to combine, then season with salt and pepper to taste.
    8. For best results, refrigerate the salad for at least 30 minutes before serving. This allows the flavors to meld beautifully.

    Pro Tips from Meaghan’s Kitchen

    • Use a mandolin for ultra-thin, even slices of kohlrabi. This tool is a game-changer for achieving that perfect crunch.
    • Don’t skip the resting time for the cream and vinegar mixture. It’s essential for achieving the right consistency and tanginess.
    • Adjust the amount of chipotle powder based on your heat preference. A little goes a long way, so start small!
    • For an added layer of flavor, toast the sunflower seeds lightly before adding them to the salad. This enhances their nuttiness.
    • Prepare the salad a day in advance, if possible. It tastes even better the next day as the flavors continue to develop.

    Variations & Dietary Swaps

    • Vegetarian Swap: Replace the bacon with smoked tempeh or grilled portobello mushrooms seasoned with chipotle powder for that smoky, spicy kick.
    • Spice-It-Up Version: Add a finely diced jalapeño to the salad for an extra layer of heat, balancing with a touch more honey if needed.
    • Kids-Friendly Version: Reduce the chipotle powder in the bacon and add diced avocado for creaminess and a milder flavor profile.

    What to Serve With It

    This Zesty Kohlrabi and Apple Salad with Smoky Chipotle Bacon pairs beautifully with a crisp, cold glass of Riesling, whose slight sweetness complements the spicy bacon. Alternatively, serve it with a mint-infused sparkling water for a refreshing non-alcoholic option. This salad also makes a delightful side to grilled chicken or fish, enhancing the smoky flavors with its bright, fresh profile.

    Storage & Meal Prep

    Store any leftover salad in an airtight container in the fridge for up to 3 days. The flavors will continue to develop, but the kohlrabi and apple may lose some crunch after the first day. If you plan to make it ahead, keep the dressing separate and add it just before serving to maintain the salad’s freshness and texture. Unfortunately, this salad does not freeze well due to the fresh ingredients and cream-based dressing.

    FAQ

    Can I make this salad in advance?

    Yes! You can prepare the components in advance but keep the dressing and bacon separate until just before serving to maintain the salad’s texture and crispness.

    What’s the best substitute for kohlrabi?

    If you can’t find kohlrabi, jicama is an excellent substitute. It offers a similar crunch and mild flavor that works well in this salad.

    Is there a dairy-free option for the dressing?

    Absolutely! Substitute the heavy cream with coconut cream and use rice vinegar instead of apple cider vinegar for a dairy-free alternative.

    Can I use another type of apple?

    Sure! While Fuji apples provide a nice balance of sweetness and crunch, Honeycrisp or Gala apples would also work well in this recipe.

    How spicy is the chipotle bacon?

    The chipotle bacon has a moderate level of heat. If you’re sensitive to spice, start with less chipotle powder and adjust to your preference.

    Final Thoughts

    I hope this Zesty Kohlrabi and Apple Salad with Smoky Chipotle Bacon brings as much joy to your table as it does to mine. It’s a dish that celebrates the beauty of fresh, vibrant ingredients with a modern twist. I’d love to hear your thoughts and see your creations! Feel free to leave a comment, share your photos, or reach out with any questions. Happy cooking, friends!

    Related update: Zesty Kohlrabi and Apple Salad with Smoky Chipotle Bacon

    Related update: Zesty Citrus-Infused Tabouleh with Pomegranate Seeds

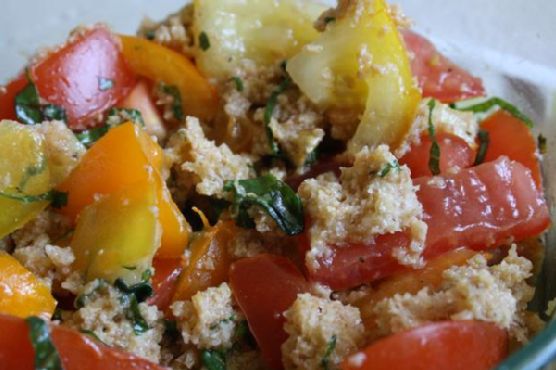
  • Truffle-Infused Panzanella with Burrata and Roasted Garlic | Made by Meaghan Moineau

    Truffle-Infused Panzanella with Burrata and Roasted Garlic | Made by Meaghan Moineau

    Truffle-Infused Panzanella with Burrata and Roasted Garlic

    The sun is setting, casting a golden hue across your kitchen, and the air is filled with the intoxicating scent of roasted garlic combined with an earthy, luxurious hit of truffle oil. Before you sits a Panzanella salad unlike any you’ve ever known — this is no ordinary Tuscan bread salad. It’s a symphony of flavors, each bite a melody of creamy burrata and the unexpected richness of roasted garlic.

    Personal Story

    I still remember the first time I tasted a traditional Panzanella. I was backpacking through Tuscany, a time in my life when adventure filled my days and food was my guide. I stumbled into a small trattoria, my feet weary and my appetite piqued. The waitress, a warm Italian grandmother type, recommended the Panzanella. It arrived at my table, a rustic dish that mirrored the simplicity and beauty of the Tuscan countryside.

    Its taste was transformative — ripe tomatoes, the basil’s fragrant kiss, and the bread soaking up every bit of the flavorful juices. I fell in love instantly, and that love followed me home, inspiring countless attempts in my own kitchen. Over the years, I’ve kept experimenting, each iteration a little bolder, a little more “me.”

    One memorable summer evening, I decided to elevate this humble dish. I had recently discovered truffle oil and was captivated by its aroma. Roasting garlic was another new obsession, its caramelized depth taking root in my culinary repertoire. The idea to marry these ingredients with Panzanella came like a lightning bolt — a way to honor the original while making it feel luxurious and indulgent.

    After a few trials — one mishap involving too much truffle oil (lesson learned!) — I landed on the perfect balance. Adding creamy burrata was the final stroke of genius. Now, every time I make this dish, I’m transported back to that little Tuscan trattoria, but with my own twist that makes it truly special.

    What Makes This Version Special

    This version of Truffle-Infused Panzanella with Burrata and Roasted Garlic takes the beloved classic and wraps it in a layer of opulence. The addition of truffle oil introduces an unmistakable earthy aroma that elevates the dish to gourmet status. Burrata cheese brings a creamy richness, contrasting beautifully with the vibrant, fresh ingredients. The roasted garlic, with its caramelized, umami depth, is mashed into the dressing, infusing every bite with a subtle, luxurious flavor. These elements come together to create a Panzanella that’s not just a salad, but an experience.

    Flavor Profile

    Picture this: each forkful of Panzanella offers a decadent and earthy journey. The creamy burrata melts in your mouth, mingling with the deep, garlicky undertones. The roasted garlic adds a sweet, caramelized complexity, while the truffle oil provides an aromatic finish that lingers delightfully. The tomatoes and basil offer freshness, while the red onion adds a hint of peppery spice. It’s a harmony of textures and flavors that tantalizes your senses with every bite.

    Ingredients

    • 6 slices day-old Tuscan bread
    • 1/4 cup extra virgin olive oil
    • 1 cup fresh basil leaves, chopped
    • 1/2 red onion, thinly sliced
    • 2 tablespoons red wine vinegar
    • Salt and pepper to taste
    • 2 cups ripe tomatoes, chopped
    • 2 tablespoons truffle oil
    • 1 ball of burrata cheese
    • 1 whole garlic bulb
    • 2 cups baby arugula

    Instructions

    1. Preheat your oven to 400°F. Slice the top off the garlic bulb to expose the cloves. Drizzle with a bit of olive oil, wrap in foil, and roast for 30-40 minutes until soft and caramelized. Once done, let it cool slightly, then squeeze the garlic out of its skin and mash into a smooth paste.
    2. In a large bowl, combine the Tuscan bread slices with water and let them stand for at least 20 minutes, or until the bread is softened. Drain the water and squeeze out as much moisture as possible. Crumble the softened bread into a serving bowl.
    3. Scatter the chopped tomatoes, sliced red onion, and chopped basil leaves over the crumbled bread.
    4. In a small bowl, mix the mashed roasted garlic with extra virgin olive oil and red wine vinegar. Season with salt and pepper. Pour this dressing over the bread and vegetable mixture, tossing well to combine.
    5. Before serving, gently tear the burrata and place it over the salad. Drizzle with truffle oil for that aromatic finish.
    6. Finally, add the baby arugula and give the salad a gentle toss. Let the Panzanella stand for 15 minutes to allow the flavors to meld. Serve at room temperature and enjoy!

    Pro Tips from Meaghan’s Kitchen

    • Choose the Right Bread: Use day-old bread that has a sturdy crumb to soak up the flavors without getting mushy.
    • Go Easy on the Truffle Oil: A little goes a long way! Too much can overwhelm the dish, so start with less and add more to taste.
    • Room Temperature Magic: Serve this salad at room temperature. It allows the flavors to shine and the burrata to soften slightly.
    • Season Generously: Don’t skimp on the salt and pepper. They enhance the overall taste and balance the acidity of the vinegar.
    • Experiment with Tomatoes: Use a mix of heirloom tomatoes for a variety of colors and flavors.

    Variations & Dietary Swaps

    • Vegetarian Delight: This recipe is already vegetarian, but to make it vegan, swap out the burrata for a plant-based cheese alternative.
    • Spice It Up: Add a pinch of red pepper flakes to the dressing for a subtle kick of heat.
    • Kid-Friendly Version: Omit the truffle oil and roasted garlic for a simpler version that kids will love.

    What to Serve With It

    This Truffle-Infused Panzanella pairs beautifully with a chilled glass of Sauvignon Blanc, which complements the earthy tones of the truffle oil and richness of the burrata. For a more robust meal, consider serving it alongside prosciutto-wrapped asparagus or a simple grilled chicken breast. The flavors of the salad will enhance the savory notes of these dishes without overpowering them.

    Storage & Meal Prep

    While this salad is best enjoyed fresh, you can store leftovers in an airtight container in the refrigerator for up to 2 days. The bread will continue to absorb flavors, so it might become softer over time. To refresh, add a touch more olive oil and vinegar before serving. Unfortunately, this dish is not suitable for freezing due to the fresh ingredients.

    FAQ

    Can I use a different type of cheese?

    Absolutely! While burrata adds a creamy texture, fresh mozzarella is a great alternative. If you like a tangy note, try adding crumbled goat cheese.

    What if I don’t have truffle oil?

    If truffle oil is unavailable, you can still make a delicious Panzanella. Simply increase the amount of olive oil and add a sprinkle of truffle salt for a similar effect.

    Can I use a different type of bread?

    Yes, you can use any rustic, crusty bread. Ciabatta or a sourdough loaf both work well, as they hold up to the dressing without becoming mushy.

    How do I know if the garlic is roasted properly?

    The garlic is ready when it’s soft and caramelized, with a rich, sweet aroma. It should mash easily into a paste when pressed.

    Is this dish gluten-free?

    As it stands, this dish is not gluten-free due to the bread. However, you can substitute with a gluten-free baguette or bread of your choice.

    Final Thoughts

    And there you have it — a Truffle-Infused Panzanella with Burrata and Roasted Garlic that promises to transport you to the sun-drenched hills of Tuscany, all from the comfort of your kitchen. I hope this dish inspires you to experiment and make it your own. Share your creations with me in the comments below or tag me on social media. Remember, cooking is an adventure best shared with others, so invite a friend over and enjoy this elevated classic together. Buon appetito!

    Related update: Truffle-Infused Panzanella with Burrata and Roasted Garlic

    Related update: Zesty Kohlrabi and Apple Salad with Smoky Chipotle Bacon