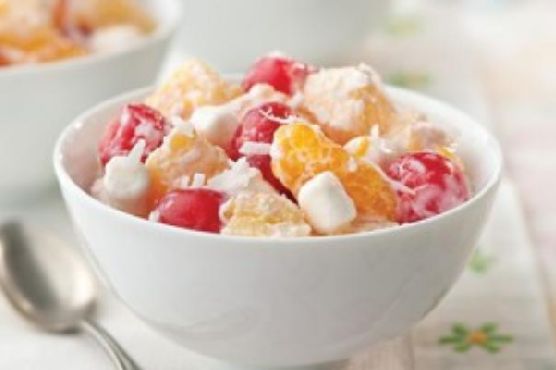
Tag: Party Food

  • Smoky Jalapeno Cheddar Cornbread with Honey Butter | Made by Meaghan Moineau

    Smoky Jalapeno Cheddar Cornbread with Honey Butter | Made by Meaghan Moineau

    Smoky Jalapeno Cheddar Cornbread with Honey Butter

    Imagine the aroma of freshly baked cornbread wafting through your kitchen, the air punctuated with the smoky warmth of paprika and the gentle sweetness of roasted corn. This is the kind of bread that demands to be shared, torn apart with friends over a boisterous dinner, or savored quietly with a good book and a cup of tea.

    There’s something magical about the combination of spicy jalapenos and creamy cheddar cheese, a dance of flavors that both excites and comforts in every bite. This is no ordinary cornbread; it’s a symphony of tastes and textures, enhanced by a luscious drizzle of honey butter that melts into every nook and cranny.

    Personal Story

    I remember the first time I discovered the joy of homemade cornbread. It was a chilly autumn day, the kind where the leaves rustle like whispers and the sky hangs heavy with the promise of rain. I was in my grandmother’s cozy kitchen, her worn recipe book open on the counter, pages yellowed with age and splattered with batter from years of use. She was a woman who cooked with her heart, her hands moving deftly as she mixed ingredients with a grace that only comes from years of practice.

    As a young girl, I watched in awe as she effortlessly turned simple, everyday ingredients into something extraordinary. On that particular day, it was cornbread—warm, golden, and enticingly fragrant. I was hooked after the first bite, the cornbread’s buttery crumb melting on my tongue, leaving a playful hint of sweetness.

    Fast forward a few years, and I found myself craving that same comforting flavor but with my personal twist. I wanted more depth, more complexity, and perhaps a bit of heat. That’s when I stumbled upon the idea of adding smoked paprika and roasted corn to the mix. It was an epiphany—a revelation that transformed a beloved classic into something new and exciting.

    This Smoky Jalapeno Cheddar Cornbread with Honey Butter became a staple in my home, a dish that brings together family and friends, evoking memories of warmth, laughter, and timeless tradition. And today, I’m thrilled to share this special recipe with you, hoping it brings the same joy to your table as it does to mine.

    What Makes This Version Special

    This isn’t your run-of-the-mill cornbread. Adding smoked paprika creates a smoky depth that tantalizes the taste buds, while the roasted corn kernels introduce a subtle sweetness and delightful texture. The diced pickled jalapenos provide a gentle kick, making each bite as exciting as the last. Finally, a drizzle of homemade honey butter elevates this dish to pure bliss, adding a touch of luxurious sweetness that balances the heat and smoke.

    Flavor Profile

    With each bite of this Smoky Jalapeno Cheddar Cornbread with Honey Butter, you’ll experience a complex flavor symphony. The initial bite is smoky and cheesy, thanks to the smoked paprika and cheddar. The warmth of the jalapenos follows, providing a subtle kick that awakens the senses. As you chew, the sweetness of the roasted corn and honey butter emerges, creating a perfect harmony that keeps you reaching for more. It’s a dish that dances on your palate, leaving you both satisfied and yearning for the next bite.

    Ingredients

    • 1 cup unbleached all-purpose flour
    • 1 cup whole-wheat flour
    • 1 tablespoon baking powder
    • 1 teaspoon salt
    • 1/4 cup light olive oil
    • 1 large egg
    • 1 cup non-fat milk
    • 1 cup light cheddar cheese, shredded
    • 1/2 cup diced pickled jalapenos
    • 1 teaspoon smoked paprika
    • 1 cup roasted corn kernels
    • 2 tablespoons honey
    • 1/4 cup unsalted butter

    Instructions

    1. Preheat your oven to 350°F (175°C). Lightly grease a 9x5x3-inch loaf pan or two mini muffin pans with cooking spray.
    2. In a small saucepan over low heat, warm the olive oil slightly, then add the smoked paprika. Bloom it gently for about 2 minutes to enhance its smoky flavor. Set aside to cool.
    3. In a medium bowl, whisk together the all-purpose flour, whole-wheat flour, baking powder, and salt.
    4. In a separate bowl, whisk the egg and milk until well combined. Stir in the cooled olive oil mixture.
    5. Pour the wet ingredients into the dry, stirring gently until just combined. Avoid over-mixing to keep the bread tender.
    6. Fold in the light cheddar cheese, roasted corn kernels, and diced pickled jalapenos, ensuring they are evenly distributed throughout the batter.
    7. Pour the batter into the prepared pan(s), smoothing the top with a spatula.
    8. Bake for 30 to 45 minutes, or until the top is golden-brown and a toothpick inserted into the center comes out clean.
    9. Let the cornbread cool in the pan for 5 minutes. Run a knife around the edges to loosen, then transfer to a wire rack to cool for at least 30 minutes before slicing.
    10. While the cornbread cools, make the honey butter by combining the honey and unsalted butter in a small bowl, stirring until smooth.
    11. Serve the cornbread warm, with a generous drizzle of honey butter over each slice. Enjoy!

    Pro Tips from Meaghan’s Kitchen

    • For an extra kick, substitute half of the light cheddar with pepper jack cheese.
    • If your jalapenos are particularly spicy, rinse them briefly under cold water to tone down the heat without losing flavor.
    • Use fresh corn kernels roasted in the oven or on a skillet for the best flavor and texture.
    • Letting the batter rest for 10 minutes before baking helps develop the flavors and results in a more tender crumb.
    • For a crispier crust, sprinkle a little coarse sea salt on top of the batter before baking.

    Variations & Dietary Swaps

    • Vegetarian Swap: Substitute the cheese with a plant-based alternative and use almond milk instead of non-fat milk for a delicious vegetarian version.
    • Spice-It-Up Version: Add a pinch of cayenne pepper to the batter for those who love extra heat.
    • Kids-Friendly Version: Skip the jalapenos and add a hint of vanilla extract for a sweeter, more kid-friendly cornbread.

    What to Serve With It

    This Smoky Jalapeno Cheddar Cornbread pairs beautifully with a chilled glass of sweet iced tea, offering a refreshing contrast to the bread’s earthy flavors. For a side, consider serving a creamy avocado salad, which complements the cornbread’s rich texture with its smooth, buttery goodness. Alternatively, enjoy it with a hearty bowl of chili for a cozy, satisfying meal.

    Storage & Meal Prep

    To store, wrap the cooled cornbread tightly in plastic wrap or aluminum foil. It will keep at room temperature for up to 2 days or in the refrigerator for up to a week. For longer storage, slice the cornbread and place it in a freezer-safe bag. It can be frozen for up to 3 months. To reheat, thaw overnight in the fridge if frozen, then warm in a 350°F oven for 10-15 minutes or until heated through. For a quick snack, microwave individual slices for 20-30 seconds.

    FAQ

    Can I use canned corn instead of roasted corn kernels?

    Yes, you can use canned corn, but make sure to drain and pat it dry before adding to the batter to avoid extra moisture. Roasting it briefly in a skillet can enhance its sweetness and flavor.

    What if I don’t have smoked paprika?

    If you’re out of smoked paprika, you can substitute regular paprika and add a dash of liquid smoke for a similar effect.

    How do I make the cornbread less spicy?

    To reduce the heat, use fewer jalapenos or opt for a milder pepper like Anaheim. You can also rinse the jalapenos under cold water to remove some of the heat.

    Can I make this cornbread gluten-free?

    Yes, simply substitute the all-purpose and whole-wheat flours with a gluten-free flour blend that includes xanthan gum for structure.

    What’s the best way to reheat leftover cornbread?

    For the best texture, reheat leftover cornbread in a 350°F oven until warm. Microwaving can make it soggy, but if you’re in a hurry, a quick 20-30 seconds on a low power setting can work.

    Final Thoughts

    I hope this Smoky Jalapeno Cheddar Cornbread with Honey Butter becomes as cherished in your home as it is in mine. It’s a dish that’s both nostalgic and novel, perfect for sharing with those you love. I’d love to hear how it turns out for you, so feel free to leave a comment, share your own twists, or simply enjoy this recipe with a smile. Happy cooking, dear friends!

  • Peruvian Lomo Saltado with Crispy Quinoa Crust and Citrus Avocado Salsa | Made by Meaghan Moineau

    Peruvian Lomo Saltado with Crispy Quinoa Crust and Citrus Avocado Salsa | Made by Meaghan Moineau

    Peruvian Lomo Saltado with Crispy Quinoa Crust and Citrus Avocado Salsa

    Imagine stepping into a bustling kitchen where vibrant aromas of sizzling beef and sautéed vegetables mingle with a hint of citrus. The air practically crackles with excitement as this new twist on a classic Peruvian dish, Lomo Saltado, takes center stage. Are you ready to experience a culinary journey enhanced by a crispy quinoa crust and brightened by a refreshing citrus avocado salsa?

    Personal Story

    When I first encountered Lomo Saltado, it was love at first bite. I still remember the lively family gathering at my best friend’s house, where her grandmother served this Peruvian classic. The savory beef, the tender vegetables, and those irresistible golden fries all served over a bed of fluffy rice – it was comfort on a plate. But what truly captivated me was the way each bite felt like a celebration of flavors dancing together.

    Fast forward a few years, and I’m in my own kitchen, a place where I’ve had my share of triumphs and, let’s be honest, some mishaps too. One such mishap came when I attempted to recreate Lomo Saltado for a dinner party. In my haste, I mistimed the fries, leaving them soggy and disappointing. I realized then that this dish, though seemingly simple, demanded respect and a touch of innovation to truly shine.

    Determined to elevate this beloved dish, I experimented with different techniques and ingredients. Inspiration struck during a trip to the local farmer’s market, where I stumbled upon vibrant avocados and fresh mint. The idea of adding a citrus avocado salsa was born, providing a refreshing counterpoint to the savory beef. Then, as I was preparing quinoa for another meal, it hit me – what if I could add a crispy quinoa crust to the beef? That extra texture was the missing piece of the puzzle.

    After a few tweaks and taste tests, my enhanced Lomo Saltado was ready for prime time. It was a hit, and I knew I had found a way to honor the traditional dish while making it uniquely mine. Now, I’m thrilled to share this recipe with you, inviting you to savor every bite and perhaps make it a cherished part of your own culinary repertoire.

    What Makes This Version Special

    This version of Lomo Saltado stands out with its crispy quinoa crust on the beef, adding an unexpected crunch that takes the texture to a new level. Quinoa, a staple grain in Peruvian cuisine, brings not just texture but also a nutty flavor that complements the savory beef. Paired with the citrus avocado salsa, which adds a refreshing burst of flavor, this dish is a true sensory delight. The salsa’s tangy lime and orange juices, combined with creamy avocado and fresh mint, brighten the entire plate, making each bite a journey of layered tastes.

    Flavor Profile

    Picture this: savory, juicy beef coated in a crispy quinoa and panko breadcrumb crust, sautéed to golden-brown perfection. The cumin and complete seasoning impart a warm, earthy note, while the soy sauce and red wine vinegar add an umami depth. The sautéed onions, bell peppers, and garlic bring a sweet and aromatic base, with a hint of heat from jalapeño. The citrus avocado salsa, with its tangy and fresh profile, balances the richness of the beef, leaving a lingering lightness on your palate. It’s a symphony of flavors that elevates each component into something truly special.

    Ingredients

    • 1 lb beef tenderloin, cut into chunks
    • **1/2 cup cooked quinoa**
    • **1/2 cup panko breadcrumbs**
    • 1 teaspoon cumin
    • 1 teaspoon complete seasoning
    • 1 green bell pepper, sliced
    • 1 red bell pepper, sliced
    • 1 yellow onion, sliced
    • 2 garlic cloves, minced
    • 1 jalapeño pepper, minced
    • 2 tablespoons red wine vinegar
    • 3 tablespoons soy sauce
    • 2 plum tomatoes, cut into wedges
    • 1 lb frozen french fries, prepared according to package instructions
    • 1 avocado, diced
    • **Juice of 1 lime**
    • **Juice of 1 orange**
    • **2 tablespoons freshly chopped mint**
    • **1 tablespoon olive oil**
    • **Sea salt to taste**
    • Cilantro, for garnish

    Instructions

    1. Prepare the frozen french fries according to the package directions. Set aside and keep warm.
    2. In a large bowl, combine the cooked quinoa and panko breadcrumbs. Coat the beef chunks in this mixture, pressing gently to ensure the crumbs adhere.
    3. Heat a large wok or skillet over medium-high heat. Add a tablespoon of olive oil, then sauté the onions and bell peppers until translucent, about 10 minutes.
    4. Add the garlic and jalapeño to the skillet, cooking for an additional minute until aromatic.
    5. Push the vegetables to the side of the skillet and add the crusted beef chunks. Cook until the beef is no longer pink and the crust is golden-brown, about 5 to 7 minutes.
    6. Stir in the cumin, complete seasoning, soy sauce, and red wine vinegar. Mix everything well and let it simmer for a minute.
    7. Add the tomato wedges, cover the skillet, and cook for an additional 5 minutes, allowing the tomatoes to soften and meld with the other ingredients.
    8. In a separate bowl, prepare the citrus avocado salsa by combining the diced avocado, lime juice, orange juice, chopped mint, and a pinch of sea salt. Mix gently.
    9. When ready to serve, add the prepared french fries to the skillet, tossing everything gently to combine.
    10. Serve the Lomo Saltado over a bed of white rice, garnished with freshly chopped cilantro and a generous helping of citrus avocado salsa on top. Enjoy with a side of aji sauce for extra heat, if desired.

    Pro Tips from Meaghan’s Kitchen

    • Ensure your quinoa is well-cooked and dry before mixing with the panko breadcrumbs for the crispiest crust.
    • For even more flavor, marinate the beef in soy sauce and a splash of lime juice for 30 minutes before coating.
    • Use a cast iron skillet for even heat distribution and to achieve that perfect golden-brown crust on the beef.
    • If your salsa is too tangy, add a pinch of sugar to balance the acidity.
    • Reheat the fries in a hot oven for a quick crisp if they start to soften.

    Variations & Dietary Swaps

    • Vegetarian Swap: Replace the beef with thick slices of portobello mushrooms. They soak up flavor beautifully and have a meaty texture.
    • Spice-It-Up Version: Add a pinch of cayenne pepper to the quinoa coating for an extra kick of heat.
    • Kids-Friendly Version: Offer the salsa as a side to let kids try it at their own pace, or swap it for a milder tomato and cucumber salad.

    What to Serve With It

    This Peruvian Lomo Saltado pairs beautifully with a chilled Pisco Sour, a traditional Peruvian cocktail that enhances the dish’s flavors. If you’re keeping it alcohol-free, a lime-infused sparkling water provides a refreshing balance. For a full meal experience, serve with a simple side salad of mixed greens and a light vinaigrette.

    Storage & Meal Prep

    Store any leftovers in an airtight container in the fridge for up to 3 days. For longer storage, place the beef and vegetables in one container and the salsa in another to maintain freshness. To reheat, warm the beef and vegetables on the stove over medium heat until heated through. The salsa is best enjoyed fresh but can be stored separately for a day.

    FAQ

    Can I prepare the quinoa coating in advance?

    Absolutely! You can make the quinoa and breadcrumb mixture up to a day ahead. Store it in an airtight container at room temperature until you’re ready to use it.

    What if I don’t have red wine vinegar?

    If you’re out of red wine vinegar, apple cider vinegar or balsamic vinegar can be used as substitutes. They will alter the flavor slightly but are both delicious alternatives.

    How can I make this dish gluten-free?

    To make this Lomo Saltado gluten-free, simply replace the panko breadcrumbs with gluten-free breadcrumbs and ensure your soy sauce is labeled gluten-free.

    Can I use fresh fries instead of frozen?

    Yes, fresh fries are a fantastic option! Just be sure to slice them evenly and fry or bake them until crispy before adding them to the dish.

    Final Thoughts

    I hope this unique twist on Peruvian Lomo Saltado with a crispy quinoa crust and citrus avocado salsa brings as much joy to your kitchen as it does to mine. Cooking is about exploration and making each recipe your own, so feel free to adjust flavors and ingredients to suit your taste. I’d love to hear how your Lomo Saltado adventure turns out, so leave a comment below or share your creation on social media. Happy cooking!

    Related update: Peruvian Lomo Saltado with Crispy Quinoa Crust and Citrus Avocado Salsa

    Related update: Maple-Glazed Bacon Wrapped Pork Tenderloin with Smoked Paprika

  • Za’atar-Spiced Simit with Pomegranate Molasses Glaze | Made by Meaghan Moineau

    Za’atar-Spiced Simit with Pomegranate Molasses Glaze | Made by Meaghan Moineau

    Za’atar-Spiced Simit with Pomegranate Molasses Glaze

    Imagine biting into a freshly baked simit, its crispy crust shattering under your teeth to reveal a soft, chewy interior. Now, imagine what happens when you elevate this Turkish classic with the earthy fragrance of za’atar spices and a decadent glaze of sweet-tart pomegranate molasses. It’s a sensory experience that will transport your taste buds straight to the bustling streets of the Middle East.

    Personal Story

    My love for simit began on a chilly morning in Istanbul. The sun hadn’t yet warmed the cobblestones, and the air was thick with the irresistible aroma of freshly baked bread. Street vendors lined the narrow lanes, their carts piled high with golden rings of simit, each one generously coated in sesame seeds. I was instantly captivated.

    It was during this trip that I first tasted the magic of za’atar. A local baker, seeing my curiosity, offered me a piece of warm bread, its surface speckled with the spice blend. The flavors danced on my palate—earthy thyme, nutty sesame, and a hint of sumac’s tang. I knew then that I wanted to bring this unique flavor back to my own kitchen.

    Back home, I began experimenting. I was determined to merge my newfound love of za’atar with the comforting familiarity of simit. It took several attempts and quite a few flour-covered mishaps, but the result was worth every flour-dusted countertop. The addition of pomegranate molasses—something I stumbled upon during a pantry raid—was the final touch. It added a depth and complexity that transformed the humble simit into something extraordinary.

    Now, whenever I bake a batch of these za’atar-spiced simits, I am transported back to that bustling street in Istanbul. Each bite is a reminder of my culinary adventure and the joy of blending traditions to create something truly special.

    What Makes This Version Special

    The secret to my Za’atar-Spiced Simit with Pomegranate Molasses Glaze lies in the harmonious blend of spices and sweet undertones. Infusing the dough with za’atar not only enhances its flavor but also gives it an aromatic complexity that elevates the traditional Turkish bread. Meanwhile, brushing the finished simits with a pomegranate molasses and honey glaze before baking imparts a glossy finish that is as visually stunning as it is delicious.

    This version is a celebration of Middle Eastern flavors, perfect for those looking to step up their bread game. The za’atar spices bloom in olive oil before being incorporated into the dough, ensuring that every bite is infused with their irresistible aroma. The pomegranate molasses glaze adds a layer of sophistication, balancing the earthy spices with a sweet-tart finish.

    Flavor Profile

    Prepare for a taste experience like no other. As you take your first bite, the earthiness of the za’atar hits you, followed by a subtle sweetness and a hint of tang from the pomegranate molasses. The sesame seeds add a nutty crunch, while the olive oil lends a richness that ties it all together. It’s a symphony of flavors, each note complementing the next, resulting in a bread that is both familiar and excitingly new.

    Ingredients

    • 500g all-purpose flour
    • 7g dry yeast
    • 1 tablespoon **pomegranate molasses**
    • 1 tablespoon molasses
    • 4 tablespoons **olive oil**
    • 1 tablespoon salt
    • 100g sesame seeds
    • 300ml lukewarm water
    • 2 tablespoons **za’atar spice blend**
    • 2 tablespoons **honey**

    Instructions

    1. In a small saucepan, heat the olive oil over medium heat. Add the za’atar spice blend and let it bloom for about 2 minutes, until fragrant. Set aside to cool slightly.
    2. In a medium bowl, combine the flour, dry yeast, and salt. Create a well in the center and pour in the bloomed za’atar oil and lukewarm water.
    3. Knead the dough with your hands for 5-10 minutes, until it becomes smooth and elastic. If the dough is too sticky, add a little more flour.
    4. Divide the dough into 16 equal pieces. Cover with a damp cloth to prevent drying.
    5. Take two pieces and roll each into a thin strip about 30-35 cm long. Place them side-by-side, pinch one end, then twist them together and pinch to join the ends, forming a ring.
    6. Place each ring on baking sheets lined with parchment paper. Let them rest in a warm place for 20-30 minutes, until slightly puffed.
    7. Meanwhile, preheat your oven to 200°C (392°F).
    8. In a dry pan over medium heat, toast the sesame seeds, stirring every 4-5 minutes until golden. Set aside.
    9. In a bowl large enough to fit the rings, whisk together the molasses and 100ml boiling water until completely dissolved.
    10. Dip each dough ring into the molasses mixture, drain excess moisture, then coat both sides in the toasted sesame seeds. Place back on the baking sheets.
    11. In a small bowl, mix pomegranate molasses and honey. Brush each simit generously with the glaze.
    12. Bake in the preheated oven for about 17 minutes, or until the simits are golden-brown and have a shiny crust.

    Pro Tips from Meaghan’s Kitchen

    • Use fresh za’atar spices for the best flavor. If possible, source them from a Middle Eastern market.
    • Ensure your water is lukewarm, not hot, to avoid killing the yeast.
    • When twisting the dough strips, keep even tension for a uniform look.
    • For a deeper flavor, let the dough rise overnight in the fridge before shaping.
    • If you love a crunchier crust, bake a little longer, but keep an eye to prevent burning.

    Variations & Dietary Swaps

    • Vegan Version: Replace honey with agave syrup for a plant-based alternative.
    • Spice-It-Up: Add a pinch of cayenne pepper to the za’atar spice blend for a spicy kick.
    • Kids-Friendly: Swap pomegranate molasses for chocolate syrup for a sweet treat kids will love.

    What to Serve With It

    This za’atar-spiced simit is a versatile bread that pairs beautifully with a variety of accompaniments. Serve it with a side of creamy labneh for a rich, tangy contrast. A glass of chilled mint tea complements the spices perfectly, making for an ideal afternoon snack or light lunch. Alternatively, pair it with a hearty bowl of lentil soup for a comforting meal.

    Storage & Meal Prep

    To keep your simits fresh, store them in an airtight container at room temperature for up to 3 days. For longer storage, freeze the baked simits in a resealable bag for up to a month. To reheat, simply pop them in a preheated oven at 180°C (350°F) for about 10 minutes, or until warmed through.

    FAQ

    Can I make the dough ahead of time?

    Yes, you can prepare the dough a day in advance. Let it rise in the fridge overnight, which will enhance the flavors.

    What if I can’t find pomegranate molasses?

    If pomegranate molasses is unavailable, you can substitute it with a mixture of balsamic vinegar and a bit more honey for a similar sweet-tart flavor.

    How do I prevent the simit dough from drying out?

    Always cover the dough with a damp cloth while shaping to retain moisture and ensure a soft texture.

    Can I use whole wheat flour instead of all-purpose?

    Yes, you can substitute with whole wheat flour, but the texture will be denser. You might need to adjust the water content slightly.

    Final Thoughts

    Baking these Za’atar-Spiced Simits with Pomegranate Molasses Glaze is not just about creating a delicious treat—it’s about transforming your kitchen into a culinary adventure. I hope you’ll find joy in their preparation and delight in their unique flavor as much as I do. I’d love to hear how your baking journey turns out, so feel free to leave a comment or share your experience with friends and family. Happy baking!

  • Luscious Vegan Strawberry-Rose Shortcake with Coconut Cream | Made by Meaghan Moineau

    Luscious Vegan Strawberry-Rose Shortcake with Coconut Cream | Made by Meaghan Moineau

    Luscious Vegan Strawberry-Rose Shortcake with Coconut Cream

    Imagine biting into a dessert that feels like a sun-soaked summer afternoon. The sweetness of ripe strawberries mingles with a whisper of floral rose, all embraced by a rich, creamy cloud of coconut whipped cream. This isn’t just any strawberry shortcake; it’s a sensory journey that transforms your taste buds with every bite.

    Personal Story

    Strawberry shortcake has always been a staple at my family gatherings, a dessert that evokes memories of laughter and clinking glasses around a bustling dinner table. As a child, I remember eagerly watching my grandmother whip cream by hand, her movements rhythmic and full of purpose. The anticipation of sinking my teeth into layers of soft cake, fresh berries, and sweet cream made every minute of waiting worthwhile.

    Years later, during a particularly adventurous phase of my cooking journey, I found myself experimenting with flavors that intrigued me. That’s when I stumbled upon rose water. Its exotic aroma enchanted me, and I knew I had to incorporate it into a recipe that held a special place in my heart. The idea to elevate the classic strawberry shortcake with rose water and coconut cream was born out of this curiosity.

    Of course, not every attempt was successful. There was the time I accidentally overdid the rose water, resulting in a dessert that tasted more like a perfume bottle than a treat. But with each misstep, I learned, refined, and perfected, until I arrived at this version — a luscious vegan strawberry-rose shortcake with coconut cream that brings a unique twist to a beloved classic.

    The first time I served this version to my family, I watched their expressions shift from curious skepticism to delight. The subtle floral notes, the creamy coconut, and the juicy strawberries — it was a harmony of flavors that surprised and delighted even my traditionalist grandmother. It’s a recipe that bridges generations and culinary worlds, and I can’t wait to share it with you.

    What Makes This Version Special

    This strawberry shortcake isn’t your average dessert. By infusing the strawberries with a fragrant touch of rose water, we introduce a delicate floral note that elevates the classic fruit. Pair this with a rich coconut whipped cream, and you have a dessert that’s not only vegan-friendly but also a true taste sensation. The coconut cream adds a luscious texture that’s both light and indulgent, transforming the shortcake into a floral delight that stands out from the traditional version.

    Flavor Profile

    The experience of tasting this vegan strawberry-rose shortcake is akin to stepping into a fragrant garden. The first bite is a delicate balance — the sweetness of the strawberries, heightened by the floral essence of rose water, creates a symphony of flavors that dance on your palate. The coconut cream provides a velvety, rich counterpoint, making each mouthful creamy and refreshing. This isn’t just a dessert; it’s a taste of summer wrapped in a luxurious, aromatic package.

    Ingredients

    • 1 cup flour
    • 1/2 cup almond meal
    • 1/3 cup turbinado sugar
    • 1 teaspoon baking soda
    • 1/4 teaspoon salt
    • 3/4 cup almond milk
    • 1 tablespoon apple cider vinegar
    • 1/4 cup vegetable oil
    • 1 tiny drop of almond extract
    • 1 pound strawberries, sliced
    • 1 teaspoon rose water
    • 1 can full-fat coconut milk (chilled overnight)
    • 2 tablespoons maple syrup

    Instructions

    1. Preheat your oven to 400°F (200°C). Line two baking sheets with parchment paper for easy cleanup.
    2. In a glass bowl, combine the sliced strawberries with 1 teaspoon rose water. Cover and refrigerate to let the flavors meld.
    3. In a medium-sized bowl, whisk together 1 cup flour, 1/2 cup almond meal, 1 teaspoon baking soda, and 1/4 teaspoon salt.
    4. In a small bowl, dissolve 1/3 cup turbinado sugar in 1 teaspoon water.
    5. In a large bowl, combine 3/4 cup almond milk, 1 tablespoon apple cider vinegar, 1/4 cup vegetable oil, the sugar mixture, and 1 tiny drop of almond extract. Whisk until well blended.
    6. Create a well in the center of the dry ingredients and gradually pour in the wet mixture. Stir until just combined to avoid overmixing.
    7. Drop heaping tablespoons of batter onto the prepared baking sheets, leaving a few inches between each dollop. This should yield about 10 shortcakes.
    8. Bake for 10-12 minutes, or until the shortcakes are ever so slightly golden. Remove from oven and let them cool on a wire rack.
    9. While the shortcakes are cooling, prepare the coconut cream. Chill a mixing bowl and beaters in the freezer for 15 minutes to ensure a fluffier texture.
    10. Scoop the solidified coconut cream from the chilled can into the cold bowl. Add 2 tablespoons maple syrup and whip until peaks form.
    11. To assemble, slice each shortcake in half with a serrated knife. Generously dollop the coconut whipped cream onto the bottom half, add a spoonful of rose-infused strawberries, and cap with the top half. Garnish with more cream and strawberries, if desired.

    Pro Tips from Meaghan’s Kitchen

    • For a more pronounced rose flavor, increase the rose water by an additional 1/2 teaspoon. Just be cautious — a little goes a long way!
    • When making the coconut whipped cream, ensure your coconut milk is thoroughly chilled. This helps separate the cream from the liquid, giving you a thicker texture to work with.
    • If your strawberries aren’t at peak ripeness, sprinkle them with a touch more sugar to enhance their natural sweetness.
    • Use a serrated knife to slice the shortcakes; it cuts through the delicate crumb without squishing the layers.
    • Experiment with different almond extracts for subtle flavor variations — some brands can be milder or stronger than others.

    Variations & Dietary Swaps

    • Gluten-Free Version: Substitute the flour with a gluten-free all-purpose blend to make this dessert suitable for gluten sensitivities.
    • Spice-It-Up Version: Add a pinch of ground cardamom to the dry ingredients for a warm, spicy undertone that complements the floral notes.
    • Kid-Friendly Version: Omit the rose water for a more straightforward strawberry shortcake that appeals to younger palates.

    What to Serve With It

    This luscious vegan strawberry-rose shortcake pairs beautifully with a chilled glass of rosé wine, enhancing the floral notes and adding a sophisticated touch to your dessert experience. Alternatively, a scoop of dairy-free vanilla ice cream alongside the shortcake creates an indulgent treat perfect for warm evenings.

    Storage & Meal Prep

    To store leftovers, place the assembled shortcakes in an airtight container in the refrigerator for up to two days. The coconut cream may harden slightly, so allow the shortcakes to sit at room temperature for a few minutes before serving. For meal prep, bake the shortcakes and slice the strawberries a day ahead. Whip the coconut cream just before serving to maintain its fluffy texture.

    FAQ

    Can I use regular cream instead of coconut cream?

    Absolutely! If you’re not following a vegan diet, regular whipped cream can be a tasty substitute. Just whip it with a bit of sugar and vanilla extract for sweetness.

    How do I prevent the shortcakes from becoming soggy?

    To keep the shortcakes crisp, assemble them just before serving. The coconut cream and juicy strawberries can make them soggy if left too long.

    Is there a substitute for rose water?

    If you can’t find rose water or prefer a different flavor, try using a vanilla or almond extract, keeping in mind that the overall taste will change.

    Can I make this dessert ahead of time?

    You can prepare the shortcakes and strawberries in advance, but for best results, whip the coconut cream and assemble the shortcakes right before serving.

    What if I don’t have almond meal?

    No worries! You can pulse whole almonds in a food processor until finely ground to make your own almond meal at home.

    Final Thoughts

    Cooking, for me, is all about creating moments — moments that linger on your taste buds and in your memories. This luscious vegan strawberry-rose shortcake with coconut cream is a testament to the joy of experimenting and sharing love through food. I hope you’ll try this recipe and find the same delight in it as I have. I’d love to hear how it turns out for you, so please feel free to leave a comment or share your own twists on this floral, fragrant dessert. Happy cooking, dear friend!

    Related update: Luscious Vegan Strawberry-Rose Shortcake with Coconut Cream

    Related update: Zesty Lime-Infused Strawberry Yogurt Cake with Basil Glaze

  • Zesty Citrus-Herb Baked Chicken Wings with Honey-Lime Glaze | Made by Meaghan Moineau

    Zesty Citrus-Herb Baked Chicken Wings with Honey-Lime Glaze | Made by Meaghan Moineau

    Zesty Citrus-Herb Baked Chicken Wings with Honey-Lime Glaze

    Imagine this: the sound of sizzling chicken wings in the oven, the kitchen enveloped in an aromatic symphony of citrus and herbs, and the anticipation of that first juicy bite. These are no ordinary wings — they are a vibrant explosion of sweet, tangy, and herbaceous flavors, perfectly sticky from a honey-lime glaze that beckons you back for more.

    Personal Story

    Growing up, chicken wings were a family favorite in our household, a weekend staple that brought us all together around the kitchen table. My earliest memories involve me standing on a stool next to my grandfather, watching as he expertly marinated the wings, adding just a splash of this and a pinch of that. The magic of his cooking wasn’t just in the ingredients but in the love and patience he poured into each dish.

    But it wasn’t always smooth sailing in my culinary journey with chicken wings. I recall a kitchen mishap in my early cooking days when, in a moment of overzealous ambition, I decided to improvise with a marinade that was more vinegar than anything else. The result was a batch of wings so tangy they made our mouths pucker more than smile. It was a humbling lesson in balance and restraint.

    Over the years, I’ve experimented and refined my approach, aiming to replicate the warmth and joy of those family gatherings in every bite. This current version, the Zesty Citrus-Herb Baked Chicken Wings with Honey-Lime Glaze, feels like the culmination of those lessons. It’s a dish that not only tantalizes the taste buds but also pays homage to the culinary memories that shaped my love for cooking.

    One evening, while preparing these wings for friends, I stumbled upon the magic of pairing citrus with herbs like fresh cilantro and mint. The result was a revelation, a perfect marriage of flavors that elevated the humble chicken wing to new heights. And the honey-lime glaze? Well, that was the sticky, sweet cherry on top.

    What Makes This Version Special

    This version of baked chicken wings is special because it infuses the wings with a vibrant citrus-herb marinade, accented with a honey-lime glaze for an irresistible sticky finish. Unlike traditional recipes that might rely solely on hot sauce or a simple barbecue glaze, this recipe brings in a medley of fresh herbs and citrus elements. The inclusion of **orange zest** adds a fragrant layer of citrus aroma, which, when combined with the **fresh cilantro** and **mint**, provides an herbaceous depth that traditional wing recipes often lack.

    The sweet, tangy, and herbaceous profile is enhanced by the **dark brown sugar** and **smoked paprika**, which introduce a subtle smokiness and sweetness that complements the natural flavors of the chicken. And then, finishing the wings under the broiler caramelizes the honey-lime glaze, offering that delightful sticky texture that everyone loves.

    Flavor Profile

    Prepare yourself for a taste experience like no other: these citrus-herb baked chicken wings are a harmonious blend of sweet, tangy, and herbaceous with a touch of smokiness. As you take your first bite, the initial sweetness of the honey-lime glaze hits your palate, quickly followed by the zesty brightness of the citrus. The herbs — parsley, cilantro, and mint — dance in the background, providing a refreshing counterpoint to the richness of the chicken. Finally, the smoked paprika leaves a gentle smoky finish, making each bite a multi-layered journey of flavors.

    Ingredients

    • 2 pounds chicken wings
    • **2 tablespoons lemon juice**
    • **2 tablespoons lime juice**
    • **1 tablespoon orange zest**
    • 2 cloves garlic, minced
    • **1/4 cup honey**
    • 2 tablespoons dark brown sugar
    • 2 tablespoons red wine
    • 1/4 cup chicken broth
    • 2 tablespoons vegetable oil
    • **1/4 cup fresh Italian parsley, chopped**
    • **1/4 cup fresh cilantro, chopped**
    • **2 tablespoons fresh mint, chopped**
    • 1 teaspoon smoked paprika
    • 1 teaspoon salt
    • 1/2 teaspoon freshly ground black pepper

    Instructions

    1. In a large mixing bowl, combine the lemon juice, lime juice, orange zest, garlic, honey, dark brown sugar, red wine, chicken broth, and vegetable oil. Whisk until the sugar has dissolved.
    2. Add the fresh parsley, cilantro, mint, smoked paprika, salt, and black pepper to the marinade, stirring until well incorporated.
    3. Place the chicken wings in a large resealable plastic bag or a shallow dish. Pour the marinade over the wings, ensuring they are well coated. Seal the bag or cover the dish and marinate in the refrigerator for at least 1 hour, or up to a few hours for maximum flavor infusion.
    4. Preheat your oven to 400°F (200°C). Line a baking sheet with aluminum foil and place a wire rack on top. Arrange the wings in a single layer on the rack, reserving the marinade.
    5. Bake the wings for 35-40 minutes, basting with the reserved marinade every 10 minutes, until the wings are cooked through and golden-brown.
    6. For an irresistible sticky finish, turn on the broiler and broil the wings for an additional 2-3 minutes, watching closely to ensure they don’t burn, until the honey-lime glaze is caramelized and sticky.
    7. Remove the wings from the oven and let them rest for a few minutes before serving. Garnish with additional fresh herbs if desired.

    Pro Tips from Meaghan’s Kitchen

    • If you’re short on time, a quick 30-minute marinade will still yield flavorful results, but for the best taste, go for at least a few hours.
    • Use a microplane to zest the orange; it’s the best tool for getting fine, fragrant zest without the bitter pith.
    • For extra crispy skin, pat the wings dry with paper towels before marinating. The less moisture, the crispier the skin will become.
    • Don’t overcrowd the baking rack. Ensuring space between the wings allows for even cooking and optimal crispiness.
    • Store leftover marinade in a sealed container in the fridge and use it to marinate other proteins like shrimp or pork for an easy meal later in the week.

    Variations & Dietary Swaps

    • Vegetarian Swap: Try this marinade on cauliflower florets or tofu. Both absorb the flavors wonderfully and make a great vegetarian alternative.
    • Spice-It-Up Version: Add a teaspoon of chili flakes or a dash of hot sauce to the marinade for some extra heat.
    • Kids-Friendly Version: Reduce the smoked paprika and skip the broiling step to keep the wings milder and less sticky, perfect for little ones.

    What to Serve With It

    These zesty wings pair beautifully with a chilled glass of Sauvignon Blanc, whose crispness complements the citrus notes perfectly. For a more substantial meal, serve with a zesty coleslaw tossed in a lime vinaigrette or alongside some roasted sweet potatoes for a delightful contrast of flavors.

    Storage & Meal Prep

    Leftover wings can be stored in an airtight container in the refrigerator for up to 3 days. To reheat, place them in a preheated 350°F (175°C) oven for about 10-12 minutes until heated through. For longer storage, freeze the wings in a single layer on a baking sheet; once frozen, transfer them to a freezer-safe bag or container. They can be frozen for up to 3 months. Reheat directly from frozen in a 375°F (190°C) oven for about 20-25 minutes.

    FAQ

    What if I don’t have fresh herbs?

    If fresh herbs are unavailable, you can substitute with dried herbs. Use a third of the quantity as dried herbs are more concentrated in flavor.

    Can I use chicken drumsticks instead of wings?

    Absolutely! Chicken drumsticks will work just as well, though you may need to adjust the cooking time, baking them for an additional 10-15 minutes to ensure they’re cooked through.

    Is there a non-alcoholic substitute for red wine?

    You can substitute the red wine with either red grape juice or additional chicken broth. Both will provide the necessary liquid and flavor.

    How can I make the wings crispier?

    For extra crispiness, consider adding a tablespoon of baking powder to the marinade. It raises the pH level of the skin, helping it crisp up beautifully in the oven.

    What’s the best way to zest an orange?

    Use a microplane or fine grater for zesting. Avoid the white pith as it can be bitter; focus on just the colorful outer layer of the orange peel.

    Final Thoughts

    There’s something deeply satisfying about crafting a dish that not only delights the senses but also carries the warmth of shared memories and culinary adventures. These Zesty Citrus-Herb Baked Chicken Wings with Honey-Lime Glaze are a testament to flavor exploration and a celebration of the simple joys of cooking. I hope you savor every bite as much as I do. If you give this recipe a try, I’d love to hear how it turned out for you. Share your thoughts in the comments below or tag me on social media with your delicious creations. Happy cooking, dear friends!

    Related update: Zesty Citrus-Herb Baked Chicken Wings with Honey-Lime Glaze

    Related update: Peruvian Lomo Saltado with Crispy Quinoa Crust and Citrus Avocado Salsa

  • Decadent Spiced Chocolate Mousse in Hazelnut Chocolate Shells | Made by Meaghan Moineau

    Decadent Spiced Chocolate Mousse in Hazelnut Chocolate Shells | Made by Meaghan Moineau

    Decadent Spiced Chocolate Mousse in Hazelnut Chocolate Shells

    Imagine the moment you break through a perfectly crisp chocolate shell, revealing a velvety, spiced chocolate mousse that caresses your taste buds with warmth and richness. The nutty aroma of toasted hazelnuts mingles with the sweet scent of cinnamon and cardamom, creating an unforgettable dessert experience. This is not just any chocolate mousse — it’s an indulgence that elevates the classic French dessert to new heights.

    Personal Story

    My first encounter with chocolate mousse was a revelation. I was a teenager on a family trip to Paris, where I experienced the magic of French pâtisserie for the first time. The mousse was served in a quaint café tucked away in a cobblestone alley, and it was love at first bite. The lightness, the richness — it was a delicate balance I had never tasted before. Fast forward a few years, and my love for this dessert led me to experiment in my own kitchen, determined to recreate that Parisian magic.

    But, as many of us know, not all kitchen experiments go according to plan. My first attempt was more of a chocolate soup than a mousse. Undeterred, I delved into research, learning about the chemistry of chocolate and the art of creating that perfect airy texture. It was during one of these trials that I accidentally added a pinch of cinnamon and cardamom into the mix. What might have been a mishap turned into a serendipitous discovery.

    Infused with warming spices and encased in a delightful hazelnut chocolate shell, my version of the chocolate mousse was born. It was a hit at family gatherings and quickly became a requested favorite. The spices added warmth and depth, while the hazelnut shell provided a delightful crunch — a combination that was both nostalgic and refreshingly new.

    What Makes This Version Special

    This isn’t your typical chocolate mousse. Infused with warming spices and encased in a delightful hazelnut chocolate shell, this mousse elevates the classic dessert with a nutty and aromatic touch. By blooming spices in melted butter, we release their essential oils, enhancing the depth of flavor. The crunchy hazelnut shell provides a delightful contrast to the rich, creamy mousse inside. It’s a dessert that’s both sophisticated and approachable — a tribute to the beloved classic with a modern twist.

    Flavor Profile

    The first thing you’ll notice with this decadent spiced chocolate mousse is the aroma — the hazelnuts toasted to perfection, mingling with the sweet, exotic scents of cinnamon and cardamom. Upon tasting, the mousse reveals its rich, chocolatey core, elevated by the subtle warmth of the spices. The nutty crunch of the hazelnut shell adds texture, while the chocolate melts luxuriously on the tongue. It’s a symphony of flavors and textures, each bite more indulgent than the last.

    Ingredients

    • 1 3/4 cups whipping cream, divided
    • 8 oz quality semi-sweet chocolate chips
    • 1/4 cup strong coffee
    • 2 tbsp dark rum
    • 2 tbsp butter
    • 1 tsp gelatin
    • 1/2 tsp ground cinnamon
    • 1/4 tsp ground cardamom
    • 1 tsp vanilla extract
    • 1/2 cup hazelnuts
    • 6 oz extra semi-sweet chocolate chips for shell

    Instructions

    1. Chill 1 1/2 cups of whipping cream in the refrigerator while placing a metal mixing bowl and mixer beaters in the freezer.
    2. In a dry skillet, toast the hazelnuts over medium heat until aromatic, about 5-7 minutes. Allow them to cool slightly before grinding them finely in a food processor.
    3. In a double boiler, combine the 8 oz of chocolate chips, coffee, rum, and butter. Melt over barely simmering water, stirring constantly, until smooth. Remove from heat while a couple of chunks are still visible to prevent scorching.
    4. Bloom the spices by melting butter in a small pan over low heat. Add the ground cinnamon and cardamom, stirring until fragrant, then mix this into the melted chocolate. Allow the mixture to cool to just above body temperature, stirring occasionally.
    5. Pour the remaining 1/4 cup of whipping cream into a metal measuring cup and sprinkle in the gelatin. Let it bloom for 10 minutes, then carefully heat by swirling the cup over a low flame until the gelatin dissolves. Avoid boiling.
    6. Stir the gelatin mixture into the cooled chocolate, then set aside.
    7. Beat the chilled cream in the prepared mixing bowl to medium peaks. Stir 1/4 of the whipped cream into the chocolate mixture to lighten it, then fold in the remaining whipped cream in two additions. It’s okay if there are streaks of whipped cream; do not overwork the mousse.
    8. For the chocolate shells, melt the extra semi-sweet chocolate chips over a double boiler, then stir in the finely ground hazelnuts. Use this mixture to coat the inside of molds or bowls, creating a shell. Allow to set.
    9. Spoon the mousse into the prepared chocolate shells and chill for at least 1 hour before serving. Garnish with fruit if desired.

    Pro Tips from Meaghan’s Kitchen

    • For ultra-smooth mousse, ensure your chocolate mixture is just above body temperature before adding the gelatin. If it’s too hot, it can deflate the whipped cream.
    • Toasting the hazelnuts is key. It intensifies their flavor and adds a wonderful depth to the chocolate shell.
    • When folding the whipped cream into the chocolate, use a gentle hand. This step requires patience to maintain the mousse’s airy texture.
    • If you don’t have a double boiler, a heatproof bowl over a pot of simmering water works just as well. Just make sure the bottom of the bowl doesn’t touch the water.
    • For a glossy finish on your chocolate shells, temper the chocolate by cooling it to 82°F after melting, then gently reheating it to 88°F before forming the shells.

    Variations & Dietary Swaps

    • Vegetarian Version: Substitute the gelatin with agar-agar in equal amounts to make this dessert vegetarian-friendly.
    • Spice-it-Up: For an extra kick, add a pinch of cayenne pepper to the spice mix for a chocolate mousse with a hint of heat.
    • Kids-Friendly Version: Omit the dark rum and substitute the coffee with milk or a milk alternative for a non-caffeinated version.

    What to Serve With It

    This decadent spiced chocolate mousse shines on its own, but it becomes an elevated experience when paired with a glass of tawny port or a shot of espresso. The port’s sweet, nutty flavors complement the mousse perfectly, while the espresso provides a delightful contrast to the dessert’s richness.

    Storage & Meal Prep

    Store any leftover mousse in the refrigerator, covered with plastic wrap to prevent the surface from drying out. It will keep for up to three days. If you wish to freeze it, transfer the mousse into an airtight container and freeze for up to a month. To enjoy, let the mousse thaw in the refrigerator overnight. When reheating the chocolate shells, do so gently over a double boiler to maintain their structure.

    FAQ

    Can I use milk chocolate instead of semi-sweet chocolate?

    Yes, but keep in mind that milk chocolate is sweeter and will alter the flavor profile of the mousse. You might want to reduce the amount of added sugar in other components to balance the sweetness.

    How can I tell if the mousse is properly set?

    When properly set, the mousse should hold its shape when scooped and have a light, airy texture. If it feels too liquid, it may need more chilling time.

    What if my chocolate seizes while melting?

    If your chocolate seizes, add a teaspoon of warm water at a time and stir gently until it becomes smooth again. Ensure that your equipment is completely dry before starting to avoid this issue.

    Can I make this mousse without alcohol?

    Absolutely! Simply omit the dark rum and replace it with additional coffee or a coffee-flavored syrup for added depth without the alcohol content.

    Are there alternatives to hazelnuts for the shell?

    Yes, you can use almonds or pecans as a substitute, though each will impart a slightly different flavor and texture to the shell.

    Final Thoughts

    As you savor this decadent spiced chocolate mousse encased in a hazelnut chocolate shell, I hope it brings you a moment of pure indulgence and joy. Whether you’re crafting it for a special occasion or enjoying it as a luxurious treat for yourself, this mousse is all about the experience. I invite you to share your creations and stories in the comments below — let’s keep the conversation (and the chocolate) flowing!

    Related update: Decadent Spiced Chocolate Mousse in Hazelnut Chocolate Shells

    Related update: Gourmet Candy Cane Cookies with Dark Chocolate Drizzle

  • Spicy Garlic-Curry Leaf Crunch Potatoes with Tamarind Chutney | Made by Meaghan Moineau

    Spicy Garlic-Curry Leaf Crunch Potatoes with Tamarind Chutney | Made by Meaghan Moineau

    Spicy Garlic-Curry Leaf Crunch Potatoes with Tamarind Chutney

    Imagine walking into a kitchen where the aromas of warm spices, crispy garlic, and a tangy tamarind chutney envelop you like a cozy culinary hug. The sizzle of potatoes frying to a perfect golden-brown is music to your ears, promising a dish that’s both familiar and exciting. Welcome to the world of Spicy Garlic-Curry Leaf Crunch Potatoes with Tamarind Chutney, where each bite is a journey through layers of flavor.

    Personal Story

    Let me take you back to a lazy Sunday afternoon in my childhood home, where the kitchen was always bustling with activity. My mother, the maestro of culinary artistry, would whip up dishes that could make anyone feel right at home. One of my fondest memories is of her preparing a version of these spicy potatoes, their aroma wafting through the house and drawing everyone towards the kitchen.

    However, it wasn’t always smooth sailing. I remember the day I first tried to recreate her masterpiece. I was a novice in the kitchen, eagerly tossing potatoes into hot oil, only to find them sticking to the pan and refusing to reach that coveted golden-brown hue. My mother, with her soft chuckle, stepped in to teach me the art of patience and the magic of the right heat. It was a lesson in humility and a pivotal moment in my culinary journey.

    Fast forward a few years, and those kitchen mishaps are now cherished memories. The dish evolved as I experimented with flavors and textures, especially after a trip to India where I discovered the transformative power of tamarind. That tangy delight became the perfect partner to my crispy potatoes, adding a refreshing twist that made the dish my own.

    And that’s how these Spicy Garlic-Curry Leaf Crunch Potatoes with Tamarind Chutney came into being — a harmonious blend of nostalgia, discovery, and innovation. Now, I’m thrilled to share this recipe with you, hoping it brings as much joy to your table as it has to mine.

    What Makes This Version Special

    This isn’t just any potato dish; it’s a symphony of flavors that dance on your palate. The addition of a tangy tamarind chutney and crispy garlic chips sets this version apart from traditional recipes. The chutney’s sweet and sour notes perfectly complement the spicy, aromatic potatoes, while the garlic chips add an irresistible crunch.

    Blooming the mustard and coriander seeds in oil amplifies their aroma, creating a foundation that elevates the dish from the first bite. This recipe is a testament to the power of thoughtful enhancements — each ingredient playing its role to perfection, making this version an experience rather than just a meal.

    Flavor Profile

    Prepare your taste buds for a vibrant flavor journey. The Spicy Garlic-Curry Leaf Crunch Potatoes with Tamarind Chutney offer a spicy and aromatic adventure with a tangy undertone. The hint of sweetness from the tamarind chutney balances the spice, while the fried garlic chips add a savory depth. As you enjoy this dish, the warmth of cinnamon and the freshness of cilantro will envelop you, leaving a lasting impression that beckons you to savor each bite.

    Ingredients

    • 2 lbs cooked par potatoes, cut into wedges
    • **Oil** for frying
    • 1 tsp mustard seeds
    • 1 tsp coriander seeds
    • 1 **cinnamon stick**
    • 15-20 **curry leaves**
    • 1 large onion, sliced
    • 1/2 tsp turmeric
    • 1 tsp salt (adjust to taste)
    • 1 tsp red dried chilli flakes
    • 4-5 garlic cloves, thinly sliced
    • 1/4 cup tamarind pulp
    • 2 tbsp jaggery
    • Fresh cilantro for garnish

    Instructions

    1. Begin by heating oil in a large pan over medium-high heat for deep frying. Once hot, carefully add the potato wedges. Fry them until they achieve a slight golden-brown color, about 5-7 minutes. Remove with a slotted spoon and set aside on paper towels to drain excess oil.
    2. In a separate non-stick pan, add 1 1/2 tablespoons of oil over medium heat. Once hot, add mustard seeds and coriander seeds, and let them bloom until the mustard seeds start to pop. This should take about 30 seconds.
    3. Add the cinnamon stick and curry leaves, stirring gently to release their aromas. This step should take another 30 seconds.
    4. Introduce the sliced onions to the pan, cooking for about 1 minute until they begin to soften.
    5. Return the fried potatoes to the pan, along with turmeric and salt. Stir everything together, letting the potatoes absorb the flavors for about 5 minutes on low heat. Keep an eye out for the onions turning a slightly golden-brown.
    6. Add the red dried chilli flakes and give it one final stir, cooking for an additional minute. Turn off the heat and transfer the potatoes to a serving dish.
    7. In the same pan, heat a bit more oil and fry the thinly sliced garlic until golden and crispy, about 2-3 minutes. Be careful not to burn them. Set aside.
    8. For the tamarind chutney, mix tamarind pulp and jaggery in a small saucepan over low heat until the jaggery dissolves completely. Let it simmer for a few minutes until slightly thickened. Drizzle over the potatoes.
    9. Top the dish with crispy garlic chips and a generous sprinkle of fresh cilantro. Serve warm and enjoy!

    Pro Tips from Meaghan’s Kitchen

    • To prevent the potatoes from sticking to the pan, make sure they’re completely dry before frying. Moisture on the surface can lead to sticking.
    • For an even more intense flavor, marinate the potatoes with turmeric and salt before frying. This allows the spices to penetrate deeper.
    • When frying the garlic, keep a close eye on it. Garlic turns from golden to burnt in seconds, and you want that perfect crispy texture.
    • If you find the tamarind chutney too tangy, adjust with more jaggery. It’s all about balancing the flavors to your liking.
    • Let the mustard seeds pop completely when blooming. If they don’t, they might add a bitter note to your dish.

    Variations & Dietary Swaps

    • Vegetarian Delight: This dish is already vegetarian, but for a vegan version, ensure your jaggery is plant-based, as some may contain animal by-products.
    • Spice-It-Up: For those who crave more heat, add finely chopped green chilies alongside the red dried chilli flakes.
    • Kids-Friendly: Tone down the spices by reducing the chilli flakes and skipping the green chilies. Serve with a side of ketchup if they prefer it a bit sweeter.

    What to Serve With It

    This dish pairs wonderfully with a chilled mango lassi, offering a cooling counterpoint to the spice. Alternatively, a side of cucumber raita can do wonders to mellow out the heat. If you’re looking for a fuller meal, serve these Spicy Garlic-Curry Leaf Crunch Potatoes with warm naan or freshly cooked basmati rice.

    Storage & Meal Prep

    These potatoes are best enjoyed fresh, but if you have leftovers, they can be stored in an airtight container in the fridge for up to three days. Reheat them in a dry pan over medium heat to revive their crispiness. For longer storage, freeze the fried potatoes without the chutney and garlic chips. When ready to enjoy, reheat in the oven and prepare the chutney and garlic fresh.

    FAQ

    Can I use sweet potatoes instead of regular potatoes?

    Absolutely! Sweet potatoes add a lovely sweetness that pairs well with the tangy chutney.

    What can I use as a substitute for jaggery?

    If you can’t find jaggery, brown sugar or palm sugar can work as substitutes, though the flavor profile will vary slightly.

    Why is my garlic burning before it gets crispy?

    Garlic burns quickly due to its high sugar content. Make sure the oil is not too hot and keep stirring constantly while frying.

    Can I make the tamarind chutney ahead of time?

    Yes, you can prepare the tamarind chutney up to a week in advance and store it in the fridge. It actually allows the flavors to meld and deepen over time.

    Is there a way to make this dish less spicy?

    To reduce the spice level, simply cut back on the red dried chilli flakes and avoid adding green chilies. You can also serve it with more cooling sides like raita.

    Final Thoughts

    I hope this Spicy Garlic-Curry Leaf Crunch Potatoes with Tamarind Chutney recipe becomes a favorite at your table. It’s a dish that embodies warmth, nostalgia, and a touch of adventure — perfect for sharing with loved ones or savoring alone on a quiet evening. I’d love to hear how it turned out for you. Feel free to leave a comment or share your version with me on social media. Bon appétit and happy cooking!

    Related update: Spicy Garlic-Curry Leaf Crunch Potatoes with Tamarind Chutney

    Related update: Smoky Maple Chipotle Grilled Sweet Potatoes

  • Decadent Dark Chocolate Raspberry S’mores Bars with Salted Caramel Drizzle | Made by Meaghan Moineau

    Decadent Dark Chocolate Raspberry S’mores Bars with Salted Caramel Drizzle | Made by Meaghan Moineau

    Decadent Dark Chocolate Raspberry S’mores Bars with Salted Caramel Drizzle

    Imagine biting into a decadent bar that brings together all the best parts of your favorite campfire treat — the gooey marshmallow, the sweet yet savory graham cracker, and of course, the rich chocolate. But wait, there’s a twist: a tart raspberry burst and a silky, salted caramel drizzle. These aren’t just any s’mores bars; they’re an elevated experience, a symphony of flavors that dance on your palate. Welcome to the world of Decadent Dark Chocolate Raspberry S’mores Bars with Salted Caramel Drizzle.

    Personal Story

    It was a crisp autumn evening when I first fell in love with the combination of chocolate and raspberry. I was at a small family gathering, and my aunt had brought along a rich chocolate cake sprinkled with fresh raspberries. The moment I took a bite, I was transported — the tartness of the raspberries cutting through the luscious chocolate was nothing short of perfection. That experience lingered with me, inspiring me to explore this magical pairing in other dishes.

    Fast forward a few years, and I found myself experimenting in my own kitchen, determined to recreate that flavor harmony. My goal was to bring a touch of sophistication to the classic s’mores, a dessert that has always held a nostalgic place in my heart. I wanted to craft a recipe that could be cherished at both campfires and dinner parties.

    The first batch of s’mores bars was good but lacked the depth I remembered. That’s when I decided to incorporate not just raspberries but dark chocolate chunks and a salted caramel drizzle. I had a vision of layers upon layers of flavor, each element enhancing the others.

    The result? A decadent dessert that not only takes you back to childhood memories of sticky fingers and melted marshmallows but also elevates your taste experience to new heights. Every bite is a journey through rich dark chocolate, tart raspberries, and the sophisticated sweetness of salted caramel.

    What Makes This Version Special

    What truly sets these Decadent Dark Chocolate Raspberry S’mores Bars with Salted Caramel Drizzle apart is the luxurious combination of flavors and textures. By incorporating **decadent dark chocolate** and a **luscious salted caramel drizzle**, this recipe adds a depth and complexity that takes the classic s’mores to an entirely new level. The dark chocolate chunks melt into the brownie, creating a moist, chocolaty experience, while the salted caramel plays brilliantly against the sweetness of the marshmallows and graham crackers. It’s a sophisticated twist that makes each bite a moment to savor.

    Flavor Profile

    Prepare for a taste adventure that starts with the rich, velvety embrace of dark chocolate. As you chew, you’ll encounter the vibrant pop of **tart raspberry notes**, a surprise element that cuts through the sweetness like a refreshing breeze. The salted caramel drizzle weaves throughout, providing a salty-sweet finish that lingers deliciously on your palate. These bars are a symphony of contrasting yet complementary flavors that will have your taste buds singing.

    Ingredients

    • 1 box cooked brownie mix
    • 1 large egg
    • 1 cup graham cracker crumbs
    • 2 whole graham crackers
    • 1 cup mini marshmallows
    • **1/2 cup fresh dried raspberries**
    • 1/4 cup sugar
    • 1/2 cup unsalted butter, melted
    • 1/4 cup vegetable oil
    • 1/4 cup water
    • **1 cup dark chocolate chunks**
    • **1/2 teaspoon sea salt**
    • **1/4 cup caramel sauce**

    Instructions

    1. Preheat your oven to 325 degrees F. Line an 8-inch-square baking pan with foil so that it hangs over the edges, and spray it with nonstick cooking spray for easy removal later.
    2. In a medium-sized bowl, mix together the melted butter, graham cracker crumbs, and sugar until the mixture has the texture of wet sand.
    3. Press the crumb mixture evenly on the bottom of the prepared pan. Bake until golden, or for about 20 minutes. The base should be set and slightly firm to the touch. Remove and set aside.
    4. Raise the oven temperature to 350 degrees F. Meanwhile, prepare the brownie mix according to package instructions in a medium-sized bowl. Gently fold in the fresh dried raspberries and dark chocolate chunks, being careful not to overmix.
    5. Pour the batter over the graham cracker crust, spreading it evenly. Bake the brownie mixture for about 25 minutes, or until a toothpick inserted in the middle of the brownie comes out clean. The top should be slightly cracked and the edges set.
    6. Remove the brownie from the oven and set your oven to broil. Be cautious, as the broiler can quickly burn your topping.
    7. Break the two graham crackers into small pieces and arrange them in a single layer on top of the brownie.
    8. Evenly arrange the mini marshmallows over the top of the graham crackers. Place the pan back in the oven for just a few minutes, watching closely, until the marshmallows are golden brown.
    9. Remove from the oven immediately and drizzle the salted caramel sauce over the marshmallows for an added layer of flavor. Allow the bars to cool completely in the pan.
    10. Once cool, use the overhanging foil to lift the bars from the pan and onto a cutting board. Cut into squares and serve.

    Pro Tips from Meaghan’s Kitchen

    • Use a high-quality dark chocolate for the best flavor payoff. Trust me, it makes a world of difference!
    • If your caramel sauce is too thick to drizzle, warm it gently in the microwave for about 10 seconds to make it more pourable.
    • For the best marshmallow topping, use a broiler-safe dish and keep an eye on the marshmallows as they can go from golden to burnt very quickly.
    • Let the bars cool completely before cutting to ensure clean slices. This patience pays off with picture-perfect bars!
    • To intensify the raspberry flavor, consider adding a teaspoon of raspberry extract to the brownie batter.

    Variations & Dietary Swaps

    • Vegetarian Swap: Use vegetarian marshmallows to make this recipe suitable for a vegetarian diet.
    • Extra Spicy Version: Add a pinch of cayenne pepper to the brownie mix for a spicy kick that pairs surprisingly well with the chocolate and raspberries.
    • Kid-Friendly Version: Omit the salted caramel drizzle and instead add a layer of milk chocolate chips for a sweeter treat that kids will love.

    What to Serve With It

    These Decadent Dark Chocolate Raspberry S’mores Bars with Salted Caramel Drizzle are incredibly rich, making them perfect for pairing with a chilled glass of milk to balance the flavors. Alternatively, serve them with a robust cup of coffee to enhance the chocolatey notes and offset the sweetness.

    Storage & Meal Prep

    Store these s’mores bars in an airtight container at room temperature for up to three days. If you prefer to keep them longer, they freeze beautifully — wrap each bar individually in plastic wrap, then place in a freezer-safe bag or container for up to three months. To enjoy, simply thaw at room temperature and, if desired, reheat in a warm oven for a few minutes to restore their gooey texture.

    FAQ

    Can I make these bars gluten-free?

    Absolutely! Simply swap the graham crackers and crumbs for your favorite gluten-free variety. Ensure all other ingredients are certified gluten-free as well.

    What if I don’t have fresh dried raspberries?

    No worries! You can substitute with fresh raspberries, though they might add a bit more moisture to the brownies. Alternatively, use raspberry preserves for a different texture and flavor profile.

    Can I use milk chocolate instead of dark chocolate?

    Yes, you can! However, keep in mind that milk chocolate will result in a sweeter bar, which might alter the balance of flavors with the raspberries and caramel.

    How do I keep the marshmallows from burning?

    The key is to watch them closely under the broiler and remove them as soon as they turn golden brown. If you’re worried, you can lower the broiler rack to give yourself a bit more control over the browning process.

    Can I make the caramel sauce from scratch?

    Of course! A homemade caramel sauce can add a personal touch to your bars. Just ensure it’s salted for that signature sweet-savory balance.

    Final Thoughts

    There you have it, my dear culinary adventurers: a deliciously elevated take on the beloved s’mores. These Decadent Dark Chocolate Raspberry S’mores Bars with Salted Caramel Drizzle are sure to impress at any gathering or satisfy a quiet night in. I’d love to hear how they turn out for you! Feel free to leave your comments and share your own twists on this recipe. Let’s keep the conversation going — because, as always, the best recipes are the ones we create together.

    Related update: Decadent Dark Chocolate Raspberry S’mores Bars with Salted Caramel Drizzle

    Related update: Decadent Spiced Chocolate Mousse in Hazelnut Chocolate Shells

  • Gourmet Turkey Burgers with Roasted Red Pepper and Feta | Made by Meaghan Moineau

    Gourmet Turkey Burgers with Roasted Red Pepper and Feta | Made by Meaghan Moineau

    Gourmet Turkey Burgers with Roasted Red Pepper and Feta

    The warm sizzle of turkey burgers hitting a hot pan, a hint of tangy feta cheese mingling with the fresh aroma of mint, and the smoky allure of roasted red pepper relish – this is not your average cookout fare. Welcome to a Mediterranean-inspired flavor journey that will transform your typical burger night into a gourmet dining experience.

    Personal Story

    Growing up, turkey burgers were a weeknight staple in our home. My mom, ever the culinary magician, would whip them up with whatever we had on hand. It was always a delicious surprise to bite into the latest creation. One summer evening, after a particularly adventurous attempt involving pineapple and a questionable spice mix, I decided it was time to craft my own signature turkey burger recipe.

    Fast forward a few years to a bustling Saturday morning at the local farmer’s market. As I browsed the vibrant stalls, the aroma of freshly roasted red peppers drew me in. That’s when inspiration struck. Why not combine the savory goodness of turkey with the zesty kick of feta and the aromatic freshness of mint? The result was nothing short of extraordinary.

    My first attempt at these gourmet turkey burgers was during a backyard gathering with friends. As the burgers sizzled on the grill, guests began to gather, drawn by the intoxicating smell. The roasted red pepper relish added a layer of depth, complimenting the juicy, herb-infused turkey patties perfectly. It was a hit, and I knew this recipe was a keeper.

    Now, this recipe has become my go-to when I want to impress or simply indulge in something a bit more sophisticated than your average burger night. It’s a dish that carries memories of family dinners and farmer’s market discoveries – a true testament to the beauty of elevating the everyday.

    What Makes This Version Special

    What sets these gourmet turkey burgers apart is the incorporation of **tangy feta cheese** and a hint of **fresh mint**. These ingredients elevate the flavor profile of traditional turkey burgers, transforming them into a Mediterranean delight. Add a rich, smoky **roasted red pepper relish**, and you’ve got a dish that’s bursting with complexity and flavor.

    Most turkey burger recipes stick to the basics, but this version dares to be different. The feta cheese adds a creamy tang that perfectly complements the lean ground turkey, while the fresh mint introduces a delightful contrast of brightness and flavor. The roasted red pepper relish, with its deep, smoky notes, ties everything together, creating a burger that’s anything but ordinary.

    Flavor Profile

    Prepare yourself for a taste sensation with these gourmet turkey burgers. The savory turkey, combined with the **tanginess of feta** and the **freshness of mint**, creates a harmonious balance that delights the palate. As you bite into the juicy patty, the subtle **smokiness from the roasted red pepper relish** adds a layer of depth, making each mouthful a truly memorable experience. It’s a dish that dances between savory, zesty, and slightly sweet – a perfect melody of flavors.

    Ingredients

    • 1 lb lean extra ground turkey
    • 1/2 cup shredded carrots
    • 1 egg, beaten
    • 2 cloves garlic, minced
    • 3 green onions, finely chopped
    • 1/2 cup panko breadcrumbs
    • 1/2 cup crumbled **feta cheese**
    • 1/4 cup finely chopped **fresh mint leaves**
    • 1/2 cup grated zucchini
    • 1/4 cup spinach, chopped
    • 1 tbsp tomato paste
    • 1 tsp smoked paprika
    • Salt and pepper to taste
    • 2 large **red bell peppers**
    • Olive oil for spritzing
    • **Roasted red pepper relish**

    Instructions

    1. Begin by preparing the roasted red peppers. Char the skins of the red bell peppers directly over an open flame until blackened. This step adds a deeper smoky flavor that will penetrate the relish. Once charred, slice the peppers, remove the seeds, and spritz with olive oil. Roast in the oven at 425°F (220°C) for 20 minutes until they become tender and aromatic.
    2. In a large mixing bowl, combine the ground turkey, shredded carrots, egg, minced garlic, green onions, panko breadcrumbs, crumbled **feta cheese**, and chopped **fresh mint leaves**. Add grated zucchini, chopped spinach, tomato paste, and smoked paprika. Season with salt and pepper.
    3. Gently fold the mixture together, being careful not to overwork it. You want all ingredients to be well combined but not overly compacted to ensure juicy burgers.
    4. Divide the mixture into 4-6 equal portions and shape each into a round patty. Aim for uniform thickness to ensure even cooking.
    5. Preheat a grill or skillet to medium-high heat. Cook the patties for about 4-5 minutes per side, or until they reach an internal temperature of 165°F (74°C) and are golden-brown on the outside.
    6. As the burgers cook, prepare the roasted red pepper relish by chopping the roasted peppers and combining them with a drizzle of olive oil, salt, and pepper. The relish should be slightly chunky, adding texture to the burgers.
    7. Serve your gourmet turkey burgers topped with the smoky roasted red pepper relish, and enjoy the symphony of flavors.

    Pro Tips from Meaghan’s Kitchen

    • When forming the patties, create a small indentation in the center of each burger. This helps them cook more evenly and prevents them from puffing up in the middle.
    • If you’re short on time, prepare the roasted red pepper relish a day ahead. It allows the flavors to meld beautifully, enhancing the overall taste.
    • Consider using a combination of fresh herbs such as parsley or cilantro for an added layer of flavor complexity.
    • Make sure your grill or skillet is properly preheated before adding the patties. This ensures a good sear and locks in the juices.
    • For extra flavor, toast the burger buns on the grill for a quick minute before serving.

    Variations & Dietary Swaps

    • Vegetarian Version: Swap out the turkey for a hearty mix of chickpeas and quinoa. Add extra breadcrumbs to bind the mixture.
    • Spice-It-Up: Add a pinch of cayenne pepper or a dash of sriracha sauce to the burger mix for a spicy kick.
    • Kids-Friendly: Skip the mint and smoked paprika, and add a touch of mild cheddar cheese to make the burgers more appealing to younger taste buds.

    What to Serve With It

    Pair these gourmet turkey burgers with a chilled glass of Sauvignon Blanc to complement the tangy feta and fresh mint. For a classic side, serve with crispy sweet potato fries, which naturally balance the savory notes of the burger. A light side salad with a lemon vinaigrette also works beautifully to refresh the palate between bites.

    Storage & Meal Prep

    These turkey burgers are perfect for meal prep. Once cooked, allow the patties to cool completely before storing them in an airtight container in the refrigerator for up to 3 days. To freeze, arrange the patties on a baking sheet lined with parchment paper and place them in the freezer until solid. Transfer to a freezer-safe bag or container and store for up to 3 months. Reheat in the oven at 350°F (175°C) until heated through, being careful not to dry them out.

    FAQ

    Can I use a different cheese instead of feta?

    Absolutely! Goat cheese or a mild blue cheese can make great substitutes, adding their own unique flavors to the mix.

    How can I make the burgers juicier?

    Incorporating ingredients like grated zucchini and carrots not only adds moisture but also boosts the nutritional profile of the burgers.

    What if I don’t have a grill?

    No problem! You can cook these burgers in a skillet on your stovetop. Just ensure it’s heated to medium-high for a good sear.

    Can I make the burgers ahead of time?

    Yes, you can prepare the patties and store them uncooked in the fridge for up to 24 hours. This makes it easy to simply cook them when you’re ready to eat.

    What’s the best way to reheat the burgers?

    For the best results, reheat the burgers in the oven to maintain their juiciness. Avoid microwaving as it can make them rubbery.

    Final Thoughts

    Embrace the flavors of the Mediterranean with these gourmet turkey burgers, a delightful dish that proves healthy eating doesn’t have to be boring. I hope you’ll give this recipe a try and make it your own. Whether you’re grilling for friends or enjoying a quiet night in, these burgers are sure to impress. I’d love to hear how yours turned out or any twists you added, so feel free to drop a comment or share your photos. Happy cooking!

    Related update: Gourmet Turkey Burgers with Roasted Red Pepper and Feta

    Related update: Zesty Citrus-Herb Baked Chicken Wings with Honey-Lime Glaze

  • Epic Smoky Pulled Pork Nachos with Chipotle Lime Crema | Made by Meaghan Moineau

    Epic Smoky Pulled Pork Nachos with Chipotle Lime Crema | Made by Meaghan Moineau

    Epic Smoky Pulled Pork Nachos with Chipotle Lime Crema

    Imagine the rich, tantalizing aroma of smoky pulled pork wafting through your kitchen, mingling with the vibrant scents of zesty lime and spicy chipotle. The sizzle of cheese melting over crispy nacho chips, topped with a drizzle of cool, creamy lime crema — it’s the kind of culinary magic that makes you want to gather around the table before the platter even hits it.

    My Journey to the Perfect Nacho

    I remember the first time I tried to make nachos for a family gathering. It was a disaster — soggy chips, bland toppings, and not a hint of the bold flavors that make nachos a crowd favorite. Determined to redeem myself, I embarked on a quest to craft the ultimate nacho experience. Every weekend became an experiment in flavor, texture, and creativity.

    It was during a trip to Mexico that I had an epiphany. I stumbled upon a street vendor selling the most incredible pulled pork tacos, infused with the deep, smoky heat of chipotle peppers. The combination of smoky, spicy, and tangy flavors was a revelation. That night, as I sat on a bustling patio with the sun setting over the ocean, I vowed to bring that unforgettable taste home with me.

    Back in my kitchen, I began recreating that magical flavor profile. Through trial and error, I discovered the secret to elevating my nachos from a simple snack to an epic culinary experience: a smoky pulled pork base amplified by chipotle peppers, all crowned with a refreshing drizzle of lime crema. Each bite was a testament to the journey and the flavors that inspired it.

    What Makes This Version Special

    This isn’t your typical nacho recipe. These Epic Smoky Pulled Pork Nachos with Chipotle Lime Crema have a unique twist that sets them apart: the addition of smoky chipotle peppers and a zesty lime crema. The standard nacho gets an upscale makeover with the complex, smoky heat of chipotle peppers blended into the broth, infusing the pulled pork with layers of flavor. The lime crema adds a tangy, cooling contrast that perfectly balances the spice. It’s a harmonious blend that takes this dish to a whole new level.

    Flavor Profile

    The first bite is a symphony of flavors: the robust smokiness of chipotle mingles with the tender, juicy pulled pork, creating an indulgent experience that dances on your taste buds. The refreshing citrus twist from the lime crema cuts through the richness, adding a bright, tangy note that lingers pleasantly. Flecks of fresh cilantro contribute a hint of herbal freshness, rounding out the dish with a fragrant finish. It’s a culinary adventure in every mouthful.

    Ingredients

    • 2 pounds boneless pork shoulder
    • 2 tablespoons pork rub
    • 1 cup vegetable broth
    • 2 chipotle peppers in adobo sauce, chopped
    • 1 bag nacho chips
    • 1 cup shredded cheese (cheddar or Monterey Jack)
    • 1 cup pico de gallo
    • 1 lime, zest and juice
    • 1/2 cup sour cream
    • 1/2 cup fresh cilantro, chopped
    • 1 avocado, diced
    • 1 jalapeño, sliced

    Instructions

    1. Clean the pork shoulder and pat it dry with paper towels. Generously rub the pork rub all over the pork shoulder, ensuring it’s evenly coated.
    2. Place the seasoned pork shoulder into a slow cooker. Set the temperature to low.
    3. In a blender, combine the vegetable broth with the chopped chipotle peppers and their adobo sauce. Blend until smooth to create a smoky spiced base.
    4. Pour the chipotle-blended broth over the pork in the slow cooker.
    5. Cover the slow cooker and let the pork cook on low for 8-10 hours, or until it can be easily shredded with a fork.
    6. Once cooked, remove the pork from the slow cooker and shred it using two forks. Set aside.
    7. Preheat your oven to 375°F (190°C). Spread the nacho chips on a large baking sheet or oven-safe platter.
    8. Top the nachos with the shredded pork, followed by the shredded cheese. Place in the oven and bake until the cheese is melted and bubbly, about 5-7 minutes.
    9. While the nachos are baking, prepare the lime crema. In a small bowl, mix the sour cream with the lime zest and juice until smooth and creamy.
    10. Once the nachos are done, remove them from the oven and sprinkle with pico de gallo, diced avocado, and sliced jalapeño.
    11. Drizzle the lime crema over the top and garnish with fresh cilantro.
    12. Serve immediately and enjoy the explosion of flavors!

    Pro Tips from Meaghan’s Kitchen

    • For an extra smoky flavor, try adding a splash of liquid smoke to the broth when blending the chipotle peppers.
    • Make sure the pork is fully dry before applying the rub — this helps the flavors penetrate better.
    • Use freshly shredded cheese rather than pre-shredded for a smoother melt and better flavor.
    • If you’re short on time, the pork can also be cooked on high for 4-6 hours — just keep an eye on it to avoid drying out.
    • Adjust the heat by adding more or fewer chipotle peppers, depending on your spice tolerance.

    Variations & Dietary Swaps

    • Vegetarian Swap: Replace the pulled pork with jackfruit for a plant-based version that’s just as satisfying.
    • Spice-It-Up Version: Add extra jalapeños or a sprinkle of cayenne pepper to the cheese for those who crave more heat.
    • Kids-Friendly Version: Tone down the spice by using only one chipotle pepper and serving the lime crema on the side.

    What to Serve With It

    These nachos pair beautifully with a cold Mexican lager, enhancing the smoky flavors, or try serving them with a refreshing margarita to complement the zesty lime crema. For a non-alcoholic option, a tall glass of lime-infused iced tea works wonders.

    Storage & Meal Prep

    Store any leftover pulled pork in an airtight container in the fridge for up to 3 days. It can also be frozen for up to 2 months. To reheat, gently warm the pulled pork in a skillet over low heat or in the microwave until heated through. Nacho chips are best enjoyed fresh to keep their crunch.

    FAQ

    Can I use a different type of meat?

    Absolutely! Chicken or beef can be great alternatives. Just make sure to adjust the cooking time as needed.

    What if I don’t have a slow cooker?

    No worries! You can use an oven. Cook the pork at 300°F (150°C) for 3-4 hours, using a roasting pan covered with foil.

    How can I make the nachos less spicy?

    Simply reduce the number of chipotle peppers or omit the jalapeños. You can also serve the lime crema on the side to allow guests to add as much or as little as they like.

    What’s the best way to keep nachos crispy?

    Serve them immediately after baking. Avoid letting them sit for too long with wet toppings, as this can make them soggy.

    Final Thoughts

    I hope these Epic Smoky Pulled Pork Nachos with Chipotle Lime Crema bring as much joy to your table as they do to mine. They’re a testament to the power of flavor and the beauty of sharing good food. If you give this recipe a try, I’d love to hear how it turned out! Drop a comment below or share your creations on social media. Happy cooking, my friends!

    Related update: Epic Smoky Pulled Pork Nachos with Chipotle Lime Crema

    Related update: Tex-Mex Polenta Rounds with Zesty Lime Corn Salsa and Avocado Crema