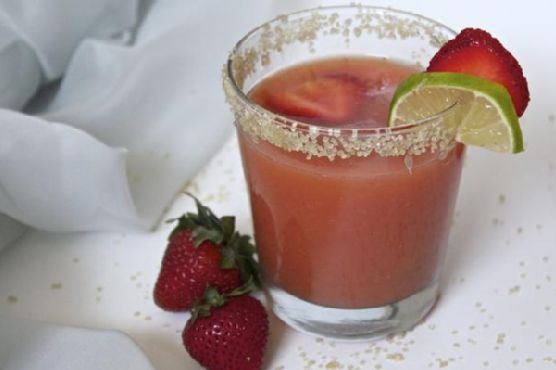
Tag: Easy

  • Tropical Almond Matcha Energy Smoothie with Coconut and Spirulina | Made by Meaghan Moineau

    Tropical Almond Matcha Energy Smoothie with Coconut and Spirulina | Made by Meaghan Moineau

    Tropical Almond Matcha Energy Smoothie with Coconut and Spirulina

    Imagine waking up to a sunrise that’s painting the sky with hues of gold and pink, the air filled with the scent of blooming flowers. Now, picture starting your day with a sip of something equally vibrant: a Tropical Almond Matcha Energy Smoothie with Coconut and Spirulina. This isn’t just any smoothie; it’s a vacation in a glass, with layers of flavor that transport you to a tropical island, one sip at a time.

    Personal Story

    Growing up, my mornings were less about leisurely sips of smoothies and more about grabbing a quick breakfast as I dashed out the door. It wasn’t until I took a summer trip to Maui that I discovered the blissful art of the smoothie. I vividly remember wandering into a little beachside café, the air salty with ocean spray, and ordering what would become a pivotal moment in my culinary journey.

    The café’s smoothie was a blend of fresh local fruits and exotic ingredients I had never tried before. The first sip was nothing short of a revelation. It was like tasting summer itself, bursting with flavors of ripe mango and creamy coconut, with a hint of something uniquely invigorating. That was the day I fell in love with tropical smoothies.

    Fast forward a few years, and I found myself experimenting in my kitchen, trying to recreate that magical experience. After much trial and delightful error, I came up with my own twist, adding nutrient powerhouses like spirulina and matcha to the mix. And so, the Tropical Almond Matcha Energy Smoothie with Coconut and Spirulina was born, becoming a staple in my morning routine and a favorite among friends and family.

    There was this one time I forgot to secure the lid on my blender properly. Let’s just say my kitchen walls got a surprise tropical splash that day! But every mistake led me to perfecting this recipe, ensuring each sip is as smooth and satisfying as the last.

    What Makes This Version Special

    This Tropical Almond Matcha Energy Smoothie with Coconut and Spirulina is more than just a blend of fruits and liquids; it’s an energizing start to your day. What sets this version apart from the standard superfood smoothie is its tropical twist with the addition of coconut and the vibrant green nutrient boost from spirulina. Coconut water and shredded coconut elevate the island vibe, while spirulina and matcha add a layer of earthiness and a boost of sustained energy. It’s perfect for busy mornings when you need a nutritious jumpstart that feels like a treat.

    Flavor Profile

    The flavor journey of this smoothie is nothing short of exhilarating. With each sip, you’re first greeted by the refreshing and bright notes of tropical fruits like mango and pineapple. This is followed by the creamy, nutty undertone of unsalted natural almond butter and shredded coconut, offering a luscious mouthfeel. The spirulina introduces a subtle earthiness that balances the sweetness, while a splash of fresh lime juice ties everything together with a zesty finish. It’s like a tropical getaway in a glass, right from your kitchen.

    Ingredients

    • 1 tablespoon **unsalted natural almond butter**
    • 1 cup **unsweetened almond milk**
    • 1 **frozen banana**
    • 1 tablespoon chia seeds
    • 1 handful baby kale
    • 1/2 cup **frozen mango pieces**
    • 1 teaspoon **green matcha tea powder**
    • 1/2 cup **frozen pineapple**
    • 1 teaspoon vanilla extract
    • 1/2 cup **coconut water**
    • 2 tablespoons **shredded coconut**
    • 1 teaspoon **spirulina powder**
    • 1 tablespoon fresh lime juice

    Instructions

    1. Start by adding the spirulina powder into a blender with a small amount of almond milk. Blend on low to ensure the spirulina dissolves completely, preventing any clumps and allowing the vibrant green color to integrate smoothly.
    2. Add the remaining almond milk, frozen banana, chia seeds, and baby kale. Blend until the kale is fully incorporated, and no green leaves are visible—just a smooth, emerald base.
    3. Introduce the frozen mango pieces, green matcha tea powder, frozen pineapple, vanilla extract, and coconut water. Blend on high until the mixture is silky and all the frozen fruit has broken down, creating a thick and creamy texture.
    4. Finally, add the shredded coconut. Pulse the blender a few times to mix in the coconut, adding a delightful texture without over-blending.
    5. Pour the smoothie into glasses, squeeze a touch of fresh lime juice on top, and serve immediately for the ultimate refreshing experience.

    Pro Tips from Meaghan’s Kitchen

    • For an extra creamy smoothie, freeze your almond milk in ice cube trays and use these instead of regular ice cubes.
    • Always add liquids to the blender first to help the blades move easily through the ingredients.
    • If you prefer a thicker smoothie, add more frozen banana or reduce the coconut water.
    • Spirulina can have a strong flavor—start with less if you’re new to it, and gradually increase as you become more accustomed to its taste.
    • Experiment with different brands of matcha powder to find one that suits your taste preferences and budget.

    Variations & Dietary Swaps

    • Nut-Free Version: Swap almond butter and almond milk for sunflower seed butter and oat milk.
    • Extra Protein Boost: Add a scoop of your favorite vanilla protein powder.
    • Kid-Friendly Version: Reduce spirulina to half a teaspoon and add a touch of honey or agave for extra sweetness.

    What to Serve With It

    This Tropical Almond Matcha Energy Smoothie with Coconut and Spirulina pairs beautifully with a side of freshly sliced papaya or mango for an extra tropical punch. For a more filling breakfast, serve it alongside a warm piece of whole grain toast topped with avocado and a sprinkle of salt.

    Storage & Meal Prep

    If you want to save time in the morning, pre-portion the frozen fruits and dry ingredients into individual baggies, then store them in the freezer. When you’re ready to make your smoothie, simply pour the contents of the bag into the blender, add your liquids, and blend.

    While this smoothie is best enjoyed fresh, you can refrigerate leftovers in an airtight container for up to 24 hours. Shake or stir well before drinking. For longer storage, freeze the smoothie in a mason jar with some space at the top for expansion. Thaw overnight in the fridge before enjoying.

    FAQ

    Can I use fresh fruit instead of frozen?

    Yes, you can use fresh fruit, but you might need to add ice cubes to achieve the same thick, cold consistency that frozen fruit provides.

    Is spirulina really necessary?

    While spirulina is a wonderful nutrient boost, you can leave it out if you’re not a fan of its flavor. The smoothie will still be delicious without it.

    Can I add additional sweeteners?

    Absolutely! If you have a sweet tooth, a touch of honey, agave syrup, or even a Medjool date can enhance the sweetness.

    How can I make this smoothie more filling?

    To make this smoothie heartier, consider adding a half-cup of rolled oats or a tablespoon of flaxseeds for extra fiber and satiety.

    Final Thoughts

    There you have it, my Tropical Almond Matcha Energy Smoothie with Coconut and Spirulina—a deliciously refreshing way to kick-start your morning with a burst of tropical flavors. I hope this recipe brings a little piece of paradise to your day, just as it has to mine. I’d love to hear how it turns out for you, so feel free to leave a comment or share your own unique twist on this smoothie. Cheers to vibrant mornings and happy blending!

    Related update: Tropical Almond Matcha Energy Smoothie with Coconut and Spirulina

  • Tropical Spiced Pina Colada with Coconut Cream Floater | Made by Meaghan Moineau

    Tropical Spiced Pina Colada with Coconut Cream Floater | Made by Meaghan Moineau

    Tropical Spiced Pina Colada with Coconut Cream Floater

    Imagine the gentle clinking of ice cubes against a glass, the air perfumed with a symphony of tropical scents, and the first sip of a drink that feels like a warm island breeze. Welcome to the world of the Tropical Spiced Pina Colada with Coconut Cream Floater — a lush, creamy escape from the everyday.

    For me, the journey to this exotic concoction began in the most unexpected of places: my grandmother’s kitchen. During our annual family reunion, she would whip up her famous pina coladas, using a simple blend of pineapple juice, coconut milk, and a splash of rum. It became a cherished tradition, a marker of summer’s peak when the sun seemed to linger a bit longer just to savor the taste.

    One summer, as I watched her deftly work her magic, I dared to suggest a twist. The idea was born from an impromptu trip to a Caribbean spice market where the air was thick with cinnamon and nutmeg. I was captivated by these aromas and couldn’t help but imagine them mingling with the creamy, sweet notes of our beloved pina colada.

    My grandmother, ever the culinary adventurer, gave me the green light. We decided to try our hands at a Tropical Spiced Pina Colada, infusing it with a dash of these heady spices. The result was nothing short of transformative. The addition of a luxurious coconut cream floater brought a new layer of indulgence, turning a beloved classic into something sophisticated and new.

    What Makes This Version Special

    This version of the Tropical Spiced Pina Colada stands out because it introduces a hint of tropical spices and a luxurious coconut cream floater. While traditional pina coladas are undeniably delightful, they can sometimes feel a bit too sweet or one-dimensional. By blooming cinnamon and nutmeg before blending, we unlock their full aromatic potential, giving the drink warm, inviting undertones. The coconut cream floater is the crowning glory, adding a velvety richness that elevates the experience from a simple cocktail to a decadent treat.

    Flavor Profile

    Close your eyes and imagine taking a sip. The first thing you notice is the creamy texture, instantly transporting you to a sandy beach. The pineapple juice brings a vibrant, tangy sweetness that dances with the mellow richness of the coconut milk. The spiced notes of cinnamon and nutmeg are subtle yet undeniably present, adding warmth and depth. And just when you think it couldn’t get any better, the coconut cream floater glides across your palate, leaving a lingering, luxurious finish.

    Ingredients

    • 2 cups ice
    • 1 cup pineapple juice
    • 1 cup coconut milk
    • 1/2 cup coconut rum
    • 1/2 teaspoon ground cinnamon
    • 1/4 teaspoon ground nutmeg
    • **2 tablespoons coconut cream**
    • 1 tablespoon toasted coconut flakes
    • Pineapple wedges, for garnish
    • Maraschino cherries, for garnish

    Instructions

    1. In a small pan over low heat, bloom the cinnamon and nutmeg until their aromas are released, about 2 minutes. This step enhances their flavors, so don’t rush it.
    2. Add the ice, pineapple juice, coconut milk, coconut rum, and the bloomed spices to a blender.
    3. Blend the mixture on high until smooth and creamy, about 1-2 minutes. You want everything well-combined and silky.
    4. Pour the blended drink into chilled glasses, leaving a bit of space at the top for the floater.
    5. Gently float a dollop of coconut cream on top of each glass, allowing it to slowly meld with the drink as you sip.
    6. Garnish with fresh pineapple wedges, maraschino cherries, and a sprinkle of toasted coconut flakes for that extra touch of elegance.

    Pro Tips from Meaghan’s Kitchen

    • Always use fresh pineapple juice, if possible. It makes a world of difference in the taste.
    • Blooming spices is crucial; it releases their oils and intensifies their flavor without adding bitterness.
    • For an extra frothy drink, blend for another minute on high speed.
    • If you like a thicker consistency, reduce the amount of ice or add a bit more coconut cream to the blend.
    • Don’t skip the toasted coconut flakes! They add a delightful crunch and aromatic finish.

    Variations & Dietary Swaps

    • Non-Alcoholic Version: Simply omit the coconut rum. The drink remains deliciously creamy and satisfying.
    • Spice-It-Up: Add a pinch of cayenne pepper to the blender for a subtle kick.
    • Kid-Friendly Version: Replace the rum with a splash of coconut water or additional pineapple juice, perfect for little ones.

    What to Serve With It

    The Tropical Spiced Pina Colada pairs beautifully with a light and crunchy coconut shrimp appetizer. The crispy texture and subtle sweetness of the shrimp complement the creamy, spiced notes of the drink. A fresh mango salsa on the side adds a tangy contrast that ties the flavors together perfectly.

    Storage & Meal Prep

    While pina coladas are best enjoyed fresh, you can prepare the blended components ahead of time. Store the mixture in an airtight container in the fridge for up to 24 hours. Before serving, give it a quick blend to refresh its texture. If you’re storing leftovers, keep the coconut cream separate and add it just before serving. For extended storage, freeze the blended mixture in ice cube trays and blend with a splash of pineapple juice when ready to enjoy.

    FAQ

    Can I use canned pineapple juice?

    Yes, you can, but fresh pineapple juice will provide a brighter, more vibrant flavor.

    What if I don’t have coconut cream?

    You can substitute with heavy cream or simply add extra coconut milk for a similar creamy effect.

    Is it okay to use sweetened coconut milk?

    I recommend unsweetened coconut milk to avoid making the drink overly sweet, but sweetened can be used if you prefer a dessert-like taste.

    How do I toast coconut flakes?

    Simply spread the flakes on a baking sheet and toast in a 350°F oven for 5-6 minutes until golden-brown, stirring once for even color.

    Can I make this drink without a blender?

    While a blender is ideal for achieving that smooth, creamy texture, you can shake the ingredients vigorously in a cocktail shaker as an alternative.

    Final Thoughts

    Creating this Tropical Spiced Pina Colada with Coconut Cream Floater has been a journey of flavors and memories. It’s a drink that invites you to sit back, relax, and savor each luxurious sip. I hope this recipe brings a touch of the exotic to your kitchen, and I can’t wait to hear how it turns out for you. Please share your thoughts, variations, and any special memories you create along the way. Here’s to new traditions and the joy of discovery in every glass. Cheers!

    Related update: Tropical Spiced Pina Colada with Coconut Cream Floater

    Related update: Tropical Almond Matcha Energy Smoothie with Coconut and Spirulina

  • Tropical Green Monster Smoothie with Coconut & Mango | Made by Meaghan Moineau

    Tropical Green Monster Smoothie with Coconut & Mango | Made by Meaghan Moineau

    Tropical Green Monster Smoothie with Coconut & Mango

    Imagine yourself lounging on a sun-kissed beach, the soft hum of waves providing a tranquil soundtrack. In your hand is a tall glass of something vibrant and refreshing, a taste of paradise in liquid form. That’s exactly what this Tropical Green Monster Smoothie with Coconut & Mango delivers — a tropical escape with every creamy, luscious sip.

    Personal Story

    My love affair with smoothies began during a summer in my teens, when my best friend and I concocted endless variations in her kitchen, each one more adventurous than the last. We were determined to outdo ourselves with each blend, our creations fueled by a mix of youthful curiosity and the sticky summer heat. Those carefree days tasted like an endless summer break, and the blender was our magic wand.

    Fast forward to a few years ago, I found myself in a tropical paradise — a long-dreamed-of vacation to Hawaii. The lush landscape, with its vibrant fruits and fragrant coconuts, made a lasting impression. One morning, after a sunrise yoga session overlooking the ocean, I was served a smoothie that took me right back to those endless summers, but with a sophisticated twist. Let me tell you, that smoothie was an epiphany.

    Back home, I was determined to recreate that magical blend. After a few delightful kitchen experiments, I perfected my own version: the Tropical Green Monster Smoothie with Coconut & Mango. This recipe is a tribute to those carefree teenage summers and my Hawaiian adventure, capturing the essence of both in a single glass.

    Now, each time I whip up this smoothie, I’m transported back to those sun-drenched mornings and the exhilaration of trying something new. It’s a reminder that adventures, big or small, can be found even in our own kitchens.

    What Makes This Version Special

    While the classic green monster smoothie is already a health lover’s dream, my version takes it up a notch by incorporating tropical fruits and a hint of coconut. This isn’t just a smoothie — it’s an escape to a sunny paradise with every sip. The frozen mango chunks add a burst of tropical sweetness, while the coconut water and toasted coconut flakes introduce a subtle yet irresistible creaminess and crunch. It’s like a beach vacation in a glass, with the added benefit of nutrient-packed spinach and fresh ginger for a zingy warmth.

    Flavor Profile

    The Tropical Green Monster Smoothie with Coconut & Mango is a delightful balance of creamy and tangy, with a tropical twist. Each sip starts with the vibrant sweetness of mango, complemented by the smooth, nutty undertones of peanut butter. The coconut water adds a refreshing lightness, while the grated fresh ginger brings a gentle warmth that lingers just enough to intrigue. The spinach is subtle, lending its vibrant color and a hint of earthiness. Finally, those toasted coconut flakes introduce a delightful crunch and a whisper of toasted aroma, making each sip a multi-sensory delight.

    Ingredients

    • 1 frozen banana
    • 1 cup baby spinach
    • 2 tablespoons peanut butter
    • 1 cup unsweetened vanilla almond milk
    • 1/2 cup fat-free plain Greek yogurt
    • 1 cup frozen mango chunks
    • 1/2 cup coconut water
    • 1 teaspoon grated fresh ginger
    • 2 tablespoons toasted coconut flakes

    Instructions

    1. Start by layering the ingredients in your blender. Begin with the liquids at the bottom: pour in the unsweetened vanilla almond milk and coconut water. This helps the blender blades move smoothly, ensuring a creamier smoothie.
    2. Add the frozen banana, baby spinach, peanut butter, fat-free plain Greek yogurt, and frozen mango chunks. These ingredients form the body of your smoothie, creating that thick, satisfying texture.
    3. Sprinkle in the grated fresh ginger for that warm, zesty kick. This little addition elevates the tropical flavors beautifully.
    4. Before blending, add a handful of ice cubes. This step is key for achieving that frosty texture that makes each sip so refreshing.
    5. Blend until smooth, about 1-2 minutes, depending on your blender’s power. Look for a vibrant green hue and a velvety texture with no visible chunks.
    6. Pour the smoothie into glasses and garnish with the toasted coconut flakes. This final touch not only adds a delightful crunch but also enhances the tropical aroma.

    Pro Tips from Meaghan’s Kitchen

    • For an extra creamy texture, use a high-powered blender. It makes a world of difference in achieving that perfectly smooth consistency.
    • If you’re a fan of thicker smoothies, consider freezing the almond milk in ice cube trays before using it in the recipe.
    • Toasting your coconut flakes at home is easy! Simply spread them on a baking sheet and bake at 350°F for about 5 minutes, keeping a close eye to prevent burning.
    • Always taste your smoothie before serving. If you prefer it sweeter, a drizzle of honey or a splash of orange juice can work wonders.

    Variations & Dietary Swaps

    • Vegan Version: Swap the Greek yogurt for a plant-based alternative like coconut yogurt or soy yogurt.
    • Spice-it-Up Version: Add a pinch of cayenne pepper for a subtle heat that complements the ginger and tropical flavors.
    • Kids-Friendly Version: Reduce the ginger to a pinch and add more frozen banana for extra sweetness. Kids will love the creamy texture and vibrant color!

    What to Serve With It

    This Tropical Green Monster Smoothie with Coconut & Mango is a perfect standalone treat, but if you’re looking to make it a complete meal, try pairing it with a side of fresh pineapple slices or a chilled glass of coconut water. The tropical flavors will harmonize beautifully, making for a truly refreshing experience. For a heartier option, consider serving it alongside a slice of whole-grain toast topped with avocado and a sprinkle of sea salt.

    Storage & Meal Prep

    If you want to make this smoothie ahead of time, you can store it in the fridge for up to 24 hours. However, it’s best enjoyed fresh to retain that vibrant color and flavor. To prepare in advance, consider assembling the dry ingredients in a zip-top bag and storing them in the freezer. When you’re ready to enjoy, just add the liquids and blend.

    For longer storage, pour the smoothie into ice cube trays and freeze. When you’re craving a quick smoothie, simply blend the frozen cubes with a splash of almond milk or coconut water.

    FAQ

    Can I use fresh mango instead of frozen?

    Absolutely! Fresh mango will work just fine, though you might want to add a few extra ice cubes to achieve the desired frosty texture.

    What if I don’t have coconut water?

    No worries! You can substitute it with more almond milk, or even plain water, though it might slightly alter the tropical flavor profile.

    How can I make the smoothie thicker?

    Try adding more frozen banana or reducing the amount of liquid slightly. You can also freeze your almond milk into ice cubes as mentioned in the pro tips.

    Is there a nut-free option?

    Yes, you can replace the peanut butter with sunflower seed butter or simply omit it for a lighter version.

    Can I use other leafy greens besides spinach?

    Definitely! Kale is a great alternative, though it might alter the taste slightly with its more pronounced flavor. Feel free to experiment with different greens to suit your taste.

    Final Thoughts

    I hope this Tropical Green Monster Smoothie with Coconut & Mango brings a little sunshine into your day, wherever you are. It’s a simple, delicious way to enjoy a taste of the tropics, packed with vibrant flavors and nourishing ingredients. If you try it, I’d love to hear how it turned out! Feel free to leave a comment below or share your smoothie photos on social media. Let’s spread the tropical love, one sip at a time!

    Related update: Tropical Green Monster Smoothie with Coconut & Mango

    Related update: Tropical Spiced Pina Colada with Coconut Cream Floater

  • Zesty Citrus-Infused Tabouleh with Pomegranate Seeds | Made by Meaghan Moineau

    Zesty Citrus-Infused Tabouleh with Pomegranate Seeds | Made by Meaghan Moineau

    Zesty Citrus-Infused Tabouleh with Pomegranate Seeds

    Imagine the sun-dappled kitchen, where a cool breeze carries the scent of fresh herbs, mingling with the tangy zest of lemons and the sweet allure of ripe pomegranates. This isn’t just any tabouleh; it’s a vibrant, citrus-infused delight that promises to transport your taste buds straight to the bustling markets of the Middle East.

    My Journey to the Perfect Tabouleh

    Tabouleh has long been a staple in my culinary repertoire, a dish I first fell in love with during a summer spent exploring the diverse flavors of Middle Eastern cuisine. I vividly remember the first bite I took at a tiny café in Beirut, where the salad was as bright and refreshing as the Mediterranean Sea itself. The balance of fresh herbs, juicy tomatoes, and the unexpected crunch of pomegranate seeds was a revelation.

    Back in my own kitchen, I was determined to recreate that magic — but with my own personal twist. After many delicious experiments, I discovered that the secret to capturing that vibrant essence lay in the citrus. By incorporating the zest and juice of fresh lemons, and adding a sprinkle of sumac for a subtle kick, I could elevate this classic dish to new heights.

    Of course, not every experiment was a success. There was that one time I mistook cumin for sumac — let’s just say it led to a very spicy surprise! But with each misstep came the invaluable lessons that have shaped my culinary journey.

    Now, this Zesty Citrus-Infused Tabouleh has become a beloved recipe, not just for its refreshing taste, but for the memories it evokes — of sunlit kitchens and the joy of discovery. I can’t wait to share it with you.

    What Makes This Version Special

    This tabouleh isn’t your standard salad. The addition of **pomegranate seeds** introduces a burst of sweetness that dances on the palate, while **sumac** lends a subtle, lemony spice that contrasts beautifully with the traditional flavors. The lemon zest, a simple but transformative upgrade, infuses the dish with a citrusy aroma that lingers long after the last bite. It’s a salad that’s not just fresh but full of surprises, making it a standout at any gathering.

    Flavor Profile

    When you savor a forkful of this tabouleh, you’re met with an orchestra of flavors: the refreshing, herbaceous notes of parsley and mint; the juicy, sun-ripened tomatoes; and the sweet, jewel-like pomegranate seeds that pop with every bite. The dish is tangy and invigorating, thanks to the fresh lemon juice, while the sumac provides a spicy, lemony warmth that ties everything together. It’s a flavor journey that’s both familiar and delightfully new.

    Ingredients

    • 1 cup cooked bulgur wheat
    • 1 cup flat leaf parsley, stems removed
    • 1/2 cup fresh mint, stems removed
    • 3 green onions, finely chopped
    • 2 roma tomatoes, diced
    • 1/2 cup **pomegranate seeds**
    • 1 teaspoon **sumac**
    • Zest of one **lemon**
    • Juice from 1 lemon
    • 1/4 cup olive oil
    • 1/2 cucumber, diced

    Instructions

    1. Begin by removing the stems from the parsley and mint. Rinse the leaves thoroughly in a colander to remove any dirt. Pat them dry with a paper towel.
    2. In a food processor, pulse the parsley and mint until finely chopped. This should only take a few quick pulses — be careful not to over-process into a paste.
    3. Transfer the chopped herbs to a large mixing bowl. Add the diced green onions, roma tomatoes, cucumber, and cooked bulgur wheat. Stir gently to combine, ensuring the ingredients are evenly distributed.
    4. In a small bowl, combine the lemon juice and olive oil. Remember to zest the lemon before juicing to release those essential oils, which enhance the citrus flavor.
    5. Pour the lemon and olive oil mixture over the salad. Toss everything together, making sure every ingredient is coated in the citrusy dressing.
    6. Refrigerate the tabouleh for at least an hour before serving. This allows the flavors to meld beautifully.
    7. Just before serving, sprinkle the sumac over the salad for that final spicy finish. Serve chilled or at room temperature, on its own or with warm pita bread.

    Pro Tips from Meaghan’s Kitchen

    • Use fresh herbs for the best flavor. Dry herbs won’t provide the same vibrant taste.
    • For a quicker prep, chop the herbs with a sharp knife if you don’t have a food processor. Just be sure to chop them finely.
    • If you can’t find bulgur, couscous or quinoa makes a great substitute.
    • Toast the bulgur wheat before cooking to bring out a nutty flavor that adds depth to the dish.
    • Adjust the amount of lemon juice to your taste. Some like it tangier, while others prefer a milder citrus zing.

    Variations & Dietary Swaps

    • Vegetarian Delight: This tabouleh is already vegetarian, but for a vegan version, ensure all your ingredients, like the olive oil, are certified vegan.
    • Spice-It-Up Version: Add a pinch of cayenne pepper for a fiery kick that complements the lemony notes.
    • Kid-Friendly Version: Reduce the sumac and add more pomegranate seeds for extra sweetness that kids love.

    What to Serve With It

    This Zesty Citrus-Infused Tabouleh pairs beautifully with a chilled glass of crisp Sauvignon Blanc, which complements the citrus notes perfectly. For a complete meal, serve it alongside grilled halloumi cheese for a delightful contrast in textures. It’s also a great side dish to roasted lamb or chicken kebabs, adding a refreshing balance to rich, savory meats.

    Storage & Meal Prep

    Store any leftover tabouleh in an airtight container in the refrigerator for up to three days. The flavors continue to develop, making it even more delicious the next day. While tabouleh doesn’t freeze well due to the fresh vegetable content, it’s quick to whip up as part of your weekly meal prep. For best results, keep the dressing separate until ready to serve.

    FAQ

    Can I make tabouleh ahead of time?

    Absolutely! In fact, making it a day ahead allows the flavors to meld, resulting in an even tastier dish.

    What can I use instead of bulgur wheat?

    If you’re out of bulgur wheat, couscous or cooked quinoa are great alternatives that maintain the dish’s texture.

    Is sumac essential to this recipe?

    While sumac adds a unique, tangy flavor, you can omit it if unavailable. Consider substituting with a bit of lemon zest for a similar effect.

    Can I add more vegetables to the tabouleh?

    Feel free to experiment! Diced bell peppers or radishes make excellent additions for extra crunch and flavor.

    Final Thoughts

    There you have it — a vibrant, Zesty Citrus-Infused Tabouleh with Pomegranate Seeds that is sure to impress both your palate and your guests. Whether you’re new to the kitchen or a seasoned cook, this dish is an easy yet impressive addition to your culinary repertoire. I’d love to hear how your tabouleh turns out, so feel free to share your experiences and any twists you might add in the comments below. Happy cooking!

    Related update: Zesty Citrus-Infused Tabouleh with Pomegranate Seeds

    Related update: Tropical Avocado Salad with Grilled Shrimp and Toasted Coconut

  • Tropical Berry Bliss Smoothie with Coconut and Lime | Made by Meaghan Moineau

    Tropical Berry Bliss Smoothie with Coconut and Lime | Made by Meaghan Moineau

    Tropical Berry Bliss Smoothie with Coconut and Lime

    Picture this: a sun-drenched morning, the air heavy with the scent of blooming flowers, and in your hand, a tall, frosty glass. It’s brimming with a vibrant, lush smoothie, the kind that tastes like a vacation in a sip. This is not just any smoothie; it’s a Tropical Berry Bliss Smoothie with Coconut and Lime, promising to take your taste buds on an island escape.

    Years ago, I stumbled upon this delightful concoction quite by accident. I was hosting a brunch for some dear friends and had ambitiously promised a spread reminiscent of a beachside retreat. In my enthusiasm, I went overboard with the berry stockpile and somehow ended up with an excess of coconut milk and limes. As I stood amidst the chaos of my kitchen, inspiration struck. Why not blend these ingredients into a refreshing smoothie? It was a serendipitous decision that changed my brunch game forever.

    The result was nothing short of magical. My friends raved about the unexpected combination: a tropical smoothie that wasn’t just sweet but had a sophisticated tang and creaminess that made it feel indulgent yet light. Since then, the Tropical Berry Bliss Smoothie with Coconut and Lime has become a staple in my home, a reminder of that memorable day and the joy of culinary creativity.

    Of course, there have been mishaps along the way. Like the time I forgot to zest the lime before juicing it, leading to a slightly less aromatic drink. Or the morning I accidentally used salted coconut milk, a lesson in reading labels carefully! Yet, every attempt brought me closer to perfecting this recipe, and now, I’m thrilled to share it with you.

    What Makes This Version Special

    This Tropical Berry Bliss Smoothie is not your average berry blend. What sets it apart is the use of creamy coconut milk and the zesty kick of fresh lime juice and zest. These ingredients introduce a tropical flair that elevates the traditional berry smoothie into something extraordinary. The coconut milk adds a lush creaminess that balances the tangy berries, while the lime infuses the drink with a refreshing zest. It’s like a beach vacation in a glass, making it a unique and delightful twist on a standard recipe.

    Flavor Profile

    Imagine the first sip: a burst of tropical and tangy flavors dance on your tongue, underscored by a creamy coconut undertone that soothes and delights. As the smoothie glides down, the refreshing lime finish leaves a lingering zest that keeps you coming back for more. This delightful fusion of flavors is what makes the Tropical Berry Bliss Smoothie with Coconut and Lime a must-try for any smoothie enthusiast.

    Ingredients

    • 1 cup frozen blackberries
    • 1 cup frozen blueberries
    • 1/2 cup lemonade concentrate
    • 1 cup frozen unsweetened raspberries
    • 1 cup frozen unsweetened strawberries
    • 2 tablespoons sugar
    • 1 teaspoon vanilla extract
    • 1 cup whole milk
    • 1 cup coconut milk
    • Juice of 1 fresh lime
    • Zest of 1 lime
    • Shredded coconut for garnish

    Instructions

    1. Zest the lime before juicing to infuse the smoothie with its fragrant oils. Set aside.
    2. In a blender, place the lemonade concentrate, whole milk, and coconut milk. Layering the ingredients starting with liquids ensures a smoother blending process.
    3. Add the frozen blackberries and blueberries. Pulse a few times until the mixture begins to break down.
    4. Add the frozen raspberries and strawberries. Pulse 2-3 times to help them incorporate.
    5. Sprinkle in the sugar and vanilla extract. Blend on high until the mixture is smooth and creamy, with no visible chunks of fruit.
    6. Pour in the fresh lime juice and add the lime zest. Blend briefly to combine.
    7. Pour into glasses and garnish with shredded coconut. Serve immediately for the best flavor and texture.

    Pro Tips from Meaghan’s Kitchen

    • Use frozen berries to avoid watering down the smoothie with ice. This keeps it thick and flavorful.
    • If you prefer a sweeter smoothie, add a tablespoon of honey or agave syrup.
    • Opt for unsweetened coconut milk to control the sweetness of the final product.
    • For an extra frosty texture, chill your glasses in the freezer before pouring the smoothie.
    • Experiment with different brands of coconut milk as they can vary significantly in creaminess and flavor.

    Variations & Dietary Swaps

    • Vegan Version: Swap the whole milk for almond or oat milk, and ensure your sugar is vegan.
    • Spice-It-Up Version: Add a pinch of cayenne pepper for a spicy kick that complements the sweetness of the berries.
    • Kids-Friendly Version: Blend in a banana for added sweetness and creaminess that kids love.

    What to Serve With It

    Pair your Tropical Berry Bliss Smoothie with a crunchy granola parfait for a delightful textural contrast. Alternatively, serve alongside coconut-lime scones for a decadent breakfast or brunch experience. These pairings enhance the tropical theme and make for a well-rounded meal.

    Storage & Meal Prep

    If you find yourself with leftover smoothie, store it in an airtight container in the fridge for up to 24 hours. Give it a good shake before serving. For longer storage, pour the smoothie into ice cube trays and freeze. When ready to enjoy, blend the cubes with a bit of coconut milk. This smoothie doesn’t reheat well due to its icy nature, so enjoy it cold.

    FAQ

    Can I use fresh berries instead of frozen?

    Yes, you can use fresh berries, but you may want to add a handful of ice to achieve the desired thickness and chill.

    Is there a substitute for lemonade concentrate?

    You can replace lemonade concentrate with freshly squeezed lemon juice mixed with a bit of honey or sugar to taste.

    What if I don’t have coconut milk?

    If you don’t have coconut milk, you can substitute with almond milk or more whole milk, though the tropical flavor will be less pronounced.

    Can I make this smoothie ahead of time?

    You can prepare the ingredients ahead but blend it fresh for the best flavor and texture. If needed, store in the fridge and give it a vigorous shake before serving.

    Is it possible to make this smoothie without a blender?

    Unfortunately, a blender is essential to achieve the smooth, creamy texture of this smoothie. A food processor might work in a pinch, but it won’t be as smooth.

    Final Thoughts

    I hope this Tropical Berry Bliss Smoothie with Coconut and Lime brings a splash of island magic into your days, just as it has mine. Whether you’re sipping it solo or sharing with friends, it’s a delightful reminder that sometimes the best culinary adventures come from a little creativity and a dash of serendipity. I’d love to hear how this recipe turns out for you, so please leave a comment or share your creations. Cheers to delicious, sun-kissed moments!

    Related update: Tropical Berry Bliss Smoothie with Coconut and Lime

    Related update: Tropical Green Monster Smoothie with Coconut & Mango

  • Maple Pecan Honey Cornbread with Orange Zest | Made by Meaghan Moineau

    Maple Pecan Honey Cornbread with Orange Zest | Made by Meaghan Moineau

    Maple Pecan Honey Cornbread with Orange Zest

    Imagine this: the golden crust of a freshly baked cornbread, still warm from the oven, with a sweet aroma that dances through your kitchen. A slice reveals a moist, sun-kissed interior dotted with crunchy pecans and hints of bright orange zest. This is not your grandmother’s cornbread — it’s something a little more magical.

    My Love Affair with Cornbread

    Growing up in the South, cornbread was more than just a side dish; it was a family staple, gracing our table during Sunday dinners, holiday feasts, and even simple weekday suppers. My earliest memory of this comforting dish is watching my grandmother expertly mix cornmeal and buttermilk in her old ceramic bowl, a routine she had perfected over decades. I vividly remember the scent of it baking, mingling with the savory tang of collard greens or the rich aroma of a beef stew.

    However, my journey to crafting the perfect cornbread was not without its hiccups. I recall a particularly chaotic Thanksgiving where, in my excitement to impress the family with my own take on the classic, I inadvertently forgot the baking powder. The result was a flat, sad disk that my family graciously ate with polite smiles. That little mishap taught me a valuable lesson about the science of baking and the importance of precision.

    Determined to redeem myself, I spent months experimenting with different ingredients and techniques, seeking to elevate the traditional recipe without losing its comforting soul. It was during a trip to a local farmer’s market that I stumbled upon fresh pecans and a basket of fragrant oranges, sparking an idea. What if I could infuse my cornbread with these vibrant flavors? Hence, the Maple Pecan Honey Cornbread with Orange Zest was born, a creation that has since become a beloved staple in my home.

    What Makes This Version Special

    This isn’t just any cornbread recipe, and here’s why: by infusing the batter with aromatic **orange zest** and crunchy **pecans**, I’ve added layers of texture and flavor that transform this humble side into a standout dish. The warm, earthy notes of **maple syrup** replace the usual vanilla, giving it a subtle sweetness that’s both comforting and sophisticated. Each element plays its part in creating a cornbread that is vibrant, complex, and utterly satisfying.

    Flavor Profile

    The Maple Pecan Honey Cornbread with Orange Zest bursts with a sweet and nutty profile, where each bite reveals a bright citrus aroma and a warm maple undertone. The cornmeal provides a heartiness, while the pecans add a delightful crunch. The orange zest weaves a thread of freshness throughout, ensuring a balanced bite that is both familiar and refreshingly new.

    Ingredients

    • 1 cup corn meal
    • 1 cup flour
    • 1 tablespoon baking powder
    • 1/2 cup white sugar
    • 1/2 teaspoon salt
    • 1/4 cup **honey**
    • 1/4 cup **maple syrup**
    • 1 large egg
    • 1 cup milk
    • 1/2 cup melted butter
    • 1 tablespoon grated **orange zest**
    • 1/2 cup chopped **pecans**

    Instructions

    1. Preheat your oven to 350°F (175°C) and grease a 9×9 inch baking pan.
    2. In a large bowl, combine the corn meal, flour, baking powder, sugar, and salt. Whisk these dry ingredients together until well mixed.
    3. In a separate bowl, whisk together the honey, maple syrup, egg, and milk. Ensure the mixture is smooth and the honey is fully integrated.
    4. Pour the wet ingredients into the dry ingredients and stir until just combined. Avoid over-mixing as this can lead to a dense cornbread.
    5. Gently fold in the melted butter, followed by the grated orange zest. Be careful to preserve the citrus aroma by folding lightly.
    6. Heat a dry skillet over medium heat and toast the pecans until they are fragrant and slightly golden, about 3-4 minutes. This step enhances their flavor and crunch.
    7. Fold the toasted pecans into the batter, distributing evenly.
    8. Pour the batter into the prepared pan and smooth the top with a spatula. Bake in the preheated oven for 25-30 minutes, or until the top is golden-brown and a toothpick inserted into the center comes out clean.
    9. Allow the cornbread to cool in the pan for at least 10 minutes before slicing. Serve warm.

    Pro Tips from Meaghan’s Kitchen

    • Use fresh orange zest for maximum flavor. Store-bought zest can sometimes be dry and lack vibrancy.
    • To ensure even mixing, bring your egg and milk to room temperature before combining with other ingredients.
    • If you prefer a slightly sweeter cornbread, try drizzling a bit of maple syrup over the top before serving.
    • For a more robust flavor, use dark maple syrup instead of the regular one.
    • Letting the cornbread cool slightly before cutting will make it easier to get clean slices.

    Variations & Dietary Swaps

    • Vegetarian Swap: Substitute the butter with a plant-based alternative like coconut oil or vegan butter for a vegetarian-friendly version.
    • Spice-It-Up Version: Add a teaspoon of cinnamon or nutmeg to the dry ingredients for a warm, spiced version.
    • Kids-Friendly Version: Reduce the orange zest to a teaspoon and add in a handful of mini chocolate chips for a sweeter, kid-approved treat.

    What to Serve With It

    Pair this Maple Pecan Honey Cornbread with a refreshing glass of iced green tea or a light citrus salad to complement its flavors. It’s also a fantastic side for hearty soups or chili, where its sweet nuttiness can shine against savory, spicy notes.

    Storage & Meal Prep

    Store any leftover cornbread in an airtight container at room temperature for up to 3 days. For longer storage, wrap individual slices in plastic wrap and place them in a zip-top freezer bag. Freeze for up to 3 months. To reheat, simply thaw at room temperature and warm in a 350°F oven for about 10 minutes.

    FAQ

    Can I use whole wheat flour instead of all-purpose flour?

    Yes, you can substitute whole wheat flour, but it may result in a denser texture. Consider using half whole wheat and half all-purpose to maintain a lighter crumb.

    How can I make this cornbread gluten-free?

    To make it gluten-free, you can use a 1:1 gluten-free baking flour blend in place of the all-purpose flour. Ensure your cornmeal is also certified gluten-free.

    What if I don’t have fresh oranges?

    If fresh oranges aren’t available, you can use store-bought orange juice and a teaspoon of orange extract as a substitute. However, fresh zest is recommended for the best flavor.

    Can I add other nuts or seeds?

    Absolutely! Feel free to swap the pecans for walnuts or even add sunflower seeds for extra crunch.

    How do I know when the cornbread is done?

    The cornbread is done when the top is golden-brown and a toothpick inserted into the center comes out clean. If the top browns too quickly, cover it with foil and continue baking.

    Final Thoughts

    There you have it, my dear kitchen adventurers, a Maple Pecan Honey Cornbread with Orange Zest that is sure to become a favorite in your baking repertoire. I hope this recipe brings warmth and joy to your table, just as it has to mine. Please feel free to leave comments about how your cornbread turned out or any tweaks you made. Sharing is caring, after all — let’s spread the cornbread love!

    Related update: Maple Pecan Honey Cornbread with Orange Zest

    Related update: Spicy Maple-Roasted Autumn Vegetables with Herbed Goat Cheese Drizzle

  • Chocolate Chip Coconut Muffins | Made by Meaghan Moineau

    Chocolate Chip Coconut Muffins | Made by Meaghan Moineau

    Chocolate Chip Coconut Muffins

    There’s something utterly magical about the combination of chocolate and coconut. It takes me back to my childhood, where weekend mornings meant waking up to the smell of freshly baked goods. My mom would often whip up a batch of her famous muffins, the aroma wafting through the house and luring sleepy-eyed kids to the kitchen. These Chocolate Chip Coconut Muffins capture that essence perfectly, offering a delightful blend of flavors that are both comforting and indulgent.

    Why You’ll Love It

    These muffins are designed to be loved by everyone, from kids to adults. The combination of dark chocolate chips and coconut flakes provides a rich and decadent taste, while the coconut butter adds a moistness that can’t be beaten. They’re gluten-free, using almond milk and a delicate blend of gluten-free flour, making them suitable for those with dietary restrictions without sacrificing flavor or texture. Plus, they are surprisingly easy to whip up, making them perfect for a quick morning treat or an afternoon snack.

    Ingredients

    • Coconut butter
    • Eggs
    • Almond milk
    • Vanilla extract
    • Gluten-free flour
    • Sucanat
    • Baking powder
    • Sea salt
    • Dark chocolate chips
    • Coconut flakes

    Instructions

    1. Preheat your oven to 350°F (175°C) and line a muffin tin with paper liners.
    2. In a large bowl, mix coconut butter and sucanat until smooth.
    3. Add eggs, almond milk, and vanilla extract, and beat until well combined.
    4. In another bowl, whisk gluten-free flour, baking powder, and sea salt.
    5. Gradually add the dry ingredients to the wet mixture, stirring until just combined.
    6. Fold in the dark chocolate chips and coconut flakes.
    7. Spoon the batter into the prepared muffin tin, filling each cup about two-thirds full.
    8. Bake for 18-22 minutes or until a toothpick inserted into the center of a muffin comes out clean.
    9. Let the muffins cool in the tin for a few minutes, then transfer to a wire rack to cool completely.

    For detailed step-by-step instructions, visit my blog.

    Tips

    For the best results, make sure your coconut butter is at room temperature. This will help it blend more easily with the other ingredients. If you want a more intense coconut flavor, lightly toast the coconut flakes before folding them into the batter. Additionally, using high-quality dark chocolate chips will enhance the overall flavor of the muffins.

    Variations & Substitutions

    If you’re looking to mix things up, try adding a handful of chopped nuts, like almonds or pecans, for added crunch. For a lower sugar option, you can replace sucanat with your preferred sugar alternative, such as coconut sugar or a sugar-free sweetener. If you don’t have almond milk, any other plant-based milk will work just as well.

    Storage

    These muffins are best enjoyed fresh, but they can be stored in an airtight container at room temperature for up to three days. For longer storage, you can freeze them for up to three months. To defrost, simply leave them at room temperature or warm them up in the oven for a few minutes.

    FAQ

    Can I use regular flour instead of gluten-free flour?

    Yes, you can substitute all-purpose flour for gluten-free flour in this recipe if gluten is not a concern for you. The muffins will still turn out delicious!

    Is there an egg substitute for this recipe?

    If you’re looking for an egg-free version, you can try using flax eggs. Mix one tablespoon of ground flaxseed with three tablespoons of water for each egg, let it sit until it becomes gelatinous, and use it as a direct substitute for the eggs in the recipe.

    Can I use sweetened coconut flakes?

    While you can use sweetened coconut flakes, it will make the muffins sweeter. If you prefer a less sweet muffin, stick with unsweetened coconut flakes or adjust the amount of sucanat used in the batter.

    Nutrition

    These muffins are a delightful treat with a healthy twist. They are packed with healthy fats from the coconut butter and almond milk, and they provide a good dose of fiber and antioxidants from the dark chocolate. Each muffin offers a balance of carbohydrates, protein, and fat, making it a satisfying snack or breakfast option.

    Final Thoughts

    Chocolate Chip Coconut Muffins are a testament to how simple ingredients can create something truly special. Whether you’re making them for a family gathering, a casual brunch, or just because, these muffins are sure to bring smiles and a bit of nostalgia to your table. I hope this recipe brings you as much joy as it has brought me and my family. Happy baking!

    Related update: Chocolate Chip Coconut Muffins

    Related update: Bourbon-Infused Mini Cherry Pies with Pecan Streusel

    Related update: Banana Blueberry Pancakes with Lemon Ricotta and Almond Crunch

  • Mangolicious Upside Down Cake | Made by Meaghan Moineau

    Mangolicious Upside Down Cake | Made by Meaghan Moineau

    Mangolicious Upside Down Cake

    Welcome to the delightful world of tropical flavors with our Mangolicious Upside Down Cake. This recipe holds a special place in my heart as it brings back memories of summer vacations spent at my grandmother’s house, where mango trees were aplenty. The sweet aroma of ripe mangos combined with the buttery goodness of cake wafting through her kitchen was nothing short of magical. Today, I’m thrilled to share this cherished recipe with you, hoping to bring a slice of that sunshine into your home.

    Why You’ll Love It

    This Mangolicious Upside Down Cake is a tropical twist on the classic upside-down cake, featuring juicy mangos that caramelize beautifully, creating a luscious topping. The cake itself is tender and moist, with a hint of cinnamon that complements the sweet mango perfectly. Whether you’re a seasoned baker or a beginner, you’ll find this recipe approachable and rewarding. It’s perfect for celebrations, family gatherings, or simply as a treat to indulge in at home.

    Ingredients

    • 1 1/2 teaspoons baking powder
    • 1 cup brown sugar
    • 3/4 cup butter, divided
    • 1 teaspoon cinnamon
    • 3 eggs
    • 2 cups flour
    • 1 cup granulated sugar
    • 2-3 ripe mangos
    • 1/4 teaspoon salt
    • 1 teaspoon vanilla extract

    Instructions

    1. Preheat your oven to 350°F (175°C).
    2. Butter a 9×2-inch round cake pan thoroughly.
    3. Pat slices of mango dry with paper towels to remove excess moisture.
    4. In a small bowl, stir together 1/4 cup of butter and the brown sugar, then spread this mixture evenly in the prepared pan.
    5. Arrange mango pieces from two mangos on the sugar mixture in the pan. Reserve the rest for mango puree and set aside.
    6. In a food processor, puree the remaining mangos to make 1 cup of puree.
    7. In a small bowl, sift together the flour, baking powder, salt, and cinnamon.
    8. In another bowl, use an electric mixer to cream the remaining 1/2 cup of butter and granulated sugar until the mixture is light and fluffy.
    9. Add the eggs, one at a time, beating well after each addition, followed by the vanilla extract.
    10. Add the flour mixture alternately in batches with the pureed mangos, beginning and ending with the flour mixture, and beating well after each addition.
    11. Pour the batter into the prepared pan, spreading it evenly over the mangos.
    12. Bake the cake in the middle of the oven for 45 to 55 minutes, or until it tests done with a toothpick inserted in the center coming out clean.
    13. Let the cake cool in the pan on a rack for 15 minutes.
    14. Run a thin knife around the edge and carefully invert the cake onto a platter.

    Tips

    For the best results, use ripe mangos that are slightly soft to the touch. This will ensure they are sweet and flavorful. When arranging the mango slices in the pan, try to create an even layer to ensure the cake has a beautiful top when inverted. If you find your mangos are too juicy, pat them dry again after slicing to avoid adding excess moisture to the cake.

    Variations & Substitutions

    If mangos aren’t in season or you want to experiment with different flavors, try using pineapples, peaches, or even pears for a different fruity twist. You can substitute whole wheat flour for all-purpose flour for a nuttier flavor, but keep in mind this may change the texture slightly. For a dairy-free version, use a plant-based butter substitute.

    Storage

    This cake can be stored at room temperature for up to 2 days, covered loosely with plastic wrap. For longer storage, keep it in the refrigerator for up to 5 days. To enjoy the cake warm, reheat slices in the microwave for 15-20 seconds.

    FAQ

    Can I use frozen mangos for this recipe?

    Yes, you can use frozen mangos if fresh ones are not available. Be sure to thaw them completely and pat them dry before using to remove excess moisture.

    How can I tell when the cake is done baking?

    The cake is done when a toothpick inserted into the center comes out clean or with a few moist crumbs. The top should be golden brown, and the edges will start to pull away from the sides of the pan.

    Nutrition

    This cake is a delightful treat, and while it is indulgent, it’s also a great way to enjoy the natural sweetness of mangos. Each slice is rich in flavor, offering a modest amount of dietary fiber and vitamin C from the mangos.

    Final Thoughts

    Our Mangolicious Upside Down Cake is more than just a dessert; it’s an invitation to savor the lusciousness of mangos in every bite. Whether you’re reminiscing about sunlit afternoons or creating new memories, this cake is sure to delight your taste buds and warm your heart. I hope you enjoy making and sharing this recipe with your loved ones as much as I have over the years. Happy baking!

    Related update: Mangolicious Upside Down Cake

  • Guacamole | Made by Meaghan Moineau

    Guacamole | Made by Meaghan Moineau

    Deliciously Fresh Guacamole Recipe

    Growing up, guacamole was a staple at our family gatherings. I vividly remember those sun-drenched afternoons where laughter filled the air, and everyone was gathered around the table, eagerly scooping fresh guacamole onto their plates. My grandmother would always say that the secret to the best guacamole is not just about the freshest ingredients but also the love and care you put into making it. Now, I’m excited to share this cherished recipe with you, so you can create your own delicious memories.

    Why You’ll Love It

    This guacamole recipe is a crowd-pleaser for several reasons:

    • Simple and Fresh: With just a few fresh ingredients, this guacamole comes together quickly and packs a punch of flavor.
    • Customizable: You can easily tweak the recipe to suit your taste, making it as mild or as spicy as you like.
    • Healthy and Nutritious: Avocados are rich in healthy fats, fiber, and a variety of vitamins, making this a guilt-free snack or appetizer.

    Ingredients

    • 3 ripe Haas avocados
    • 1/4 cup finely chopped onion
    • 1 jalapeño pepper, seeded and finely chopped
    • 2 tablespoons chopped fresh cilantro
    • Salt to taste
    • Black pepper to taste
    • Juice of 1 fresh lime
    • 1 tablespoon chopped fresh basil
    • 1 tablespoon chopped fresh oregano

    Instructions

    1. Cut the avocados in half lengthwise. Carefully drive a chef’s knife into the large pit, twist to remove, and discard the pit.
    2. Scoop the avocado flesh out from the skin into a mixing bowl.
    3. Using a fork, mash the avocado to your desired consistency—smooth or chunky.
    4. Add the finely chopped onion, jalapeño, cilantro, basil, and oregano to the mashed avocados. Mix to combine.
    5. Season the mix to taste with salt, black pepper, and fresh lime juice.
    6. Serve immediately for the freshest flavor or chill in the refrigerator if serving later.
    7. If storing, press plastic film wrap directly onto the surface of the guacamole to prevent browning and refrigerate.

    Tips

    • Ensure your avocados are ripe by giving them a gentle squeeze; they should yield slightly under pressure.
    • For a spicier kick, leave some of the jalapeño seeds in the mix.
    • To prevent browning, keep the avocado pits in the guacamole when storing, in addition to using plastic film wrap.

    Variations & Substitutions

    • Tomato Addition: Add diced tomatoes for extra flavor and color. Be sure to remove the seeds to keep the guacamole from becoming watery.
    • Garlic Twist: Add a clove of minced garlic for an extra layer of flavor.
    • Mango Mix: For a sweet touch, add diced mango, which pairs beautifully with the creamy avocado.

    Storage

    To keep your guacamole fresh, store it in an airtight container with plastic film wrap pressed directly onto the surface to minimize exposure to air. It will keep in the refrigerator for up to two days. However, for the best taste and texture, it’s recommended to enjoy it as fresh as possible.

    FAQ

    Can I make guacamole ahead of time?

    Yes, you can make guacamole a few hours in advance. Just be sure to store it properly with plastic wrap pressed directly onto the surface to prevent browning.

    How can I make my guacamole spicier?

    To increase the heat level, you can add more jalapeño peppers or include some of the seeds. Alternatively, try adding a pinch of cayenne pepper for an extra kick.

    What can I serve with guacamole?

    Guacamole pairs well with tortilla chips, veggie sticks, tacos, burritos, or as a topping for grilled meats. It’s a versatile dip that complements many dishes.

    Nutrition

    This guacamole recipe is not only delicious but also packed with nutritional benefits. Avocados are high in heart-healthy monounsaturated fats, fiber, and various vitamins and minerals. The added herbs and lime juice provide extra antioxidants and a boost of vitamin C. Enjoy this guacamole as part of a balanced diet.

    Final Thoughts

    Guacamole is more than just a dip; it’s a dish that brings people together and creates lasting memories. Whether you’re hosting a party, having a quiet family dinner, or simply enjoying a snack, this guacamole recipe is sure to delight. With its fresh ingredients and customizable nature, it’s easy to see why this classic dish is loved by so many. So gather your ingredients, and let’s make some guacamole that’s as rich in flavor as it is in tradition.

    Related update: Guacamole

    Related update: Gourmet Blue Cheese Tartlets with Lavender-Infused Fig Jam and Candied Walnuts

  • Bacon & Egg Toast Cups | Made by Meaghan Moineau

    Bacon & Egg Toast Cups | Made by Meaghan Moineau

    Bacon & Egg Toast Cups

    Introduction

    There’s something undeniably comforting about the combination of bacon and eggs, wrapped snugly in a cup of crispy bread. It takes me back to those lazy Sunday mornings at my grandmother’s house, where the aroma of sizzling bacon would gently nudge me awake. We’d gather around the table, and she’d serve her famous bacon and egg toast cups, each one a little parcel of breakfast joy. If you’re looking for a dish that brings warmth and nostalgia to your morning routine, these Bacon & Egg Toast Cups will do just the trick.

    Why You’ll Love It

    This recipe is a delightful twist on the classic bacon and eggs breakfast. It’s perfect for impressing guests at brunch, or for a cozy breakfast in bed. Here are a few reasons you’ll fall in love with this dish:

    • Easy to make: With simple ingredients and straightforward steps, this recipe is accessible even for beginner cooks.
    • Customizable: You can easily adjust the ingredients to suit your taste, making it a versatile addition to your breakfast repertoire.
    • Perfect for meal prep: These cups can be made in advance, saving you time on busy mornings.
    • Kid-friendly: The fun presentation makes it a hit with kids, and they can even help make them!

    Ingredients

    • Unsalted butter
    • 6 slices of sandwich bread
    • 6 slices of bacon
    • 6 eggs
    • Salt & pepper to taste

    Instructions

    1. Preheat your oven to 375°F (190°C).
    2. Lightly butter six standard muffin cups.
    3. Flatten the bread slices slightly with a rolling pin, and with a 4.5-inch cookie cutter, cut into four rounds. Cut each round in half, then press the two halves into each muffin cup, overlapping slightly and making sure bread comes up to the edges. Use extra bread and crusts to patch any holes if necessary. Brush with remaining butter.
    4. In a large skillet, cook the bacon until almost crisp, about four minutes, flipping once. Lay one bacon slice in each bread cup.
    5. Crack an egg over each bacon slice. Season with salt & pepper.
    6. Bake until egg whites are just set, about 25 minutes. The bacon will continue to cook in the oven.
    7. Run a small knife around cups to loosen toast cups before serving.

    Tips

    • Make sure to pre-cook the bacon just until it’s almost crispy; it will continue to cook in the oven.
    • For even cooking, crack the eggs gently to avoid breaking the yolks.
    • For easier removal, allow the cups to cool slightly before running a knife around the edges.

    Variations & Substitutions

    These Bacon & Egg Toast Cups are flexible and can be tailored to suit your preferences:

    • Cheese: Add a sprinkle of shredded cheese on top of the eggs before baking for a cheesy twist.
    • Vegetarian: Omit the bacon and add sautéed spinach or mushrooms for a vegetarian version.
    • Spicy: Sprinkle some red pepper flakes or drizzle a bit of hot sauce for a spicy kick.
    • Bread: Use whole grain or gluten-free bread to cater to dietary needs.

    Storage

    These toast cups can be stored in an airtight container in the refrigerator for up to three days. To reheat, place them in a preheated oven at 350°F (175°C) for about 10 minutes or until warmed through. Avoid microwaving, as it can make the bread soggy.

    FAQ

    Can I make these ahead of time?

    Yes, you can prepare the bread cups and bacon the night before and store them in the refrigerator. In the morning, simply add the eggs and bake.

    Can I freeze Bacon & Egg Toast Cups?

    It’s best to enjoy these fresh or refrigerated. Freezing can alter the texture of the bread and eggs, leading to a less desirable outcome.

    What can I serve with these toast cups?

    These cups are quite filling on their own, but you can pair them with a fresh fruit salad or a side of roasted potatoes for a hearty breakfast.

    Nutrition

    Each Bacon & Egg Toast Cup contains approximately 250 calories, 14g of protein, 18g of fat, and 12g of carbohydrates. This makes them a balanced option for a nutritious start to your day.

    Final Thoughts

    Bacon & Egg Toast Cups are more than just a meal; they’re a comforting reminder of mornings filled with love and warmth. Whether you’re enjoying them solo or sharing with family and friends, they’re sure to bring a smile to your face and a delicious start to your day. Give this recipe a try, and perhaps you’ll find your own nostalgic moment wrapped in these delightful little cups.

    Related update: Bacon & Egg Toast Cups

    Related update: Madras Beef Curry

    Related update: Chocolate Chip Coconut Muffins