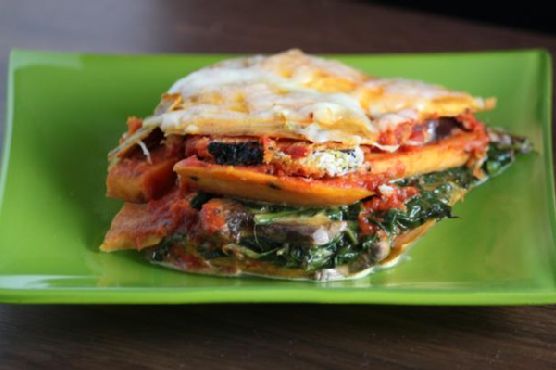
How Sweet It Is Sweet Potato Lasagne
There’s something truly magical about the combination of sweet and savory, and this Sweet Potato Lasagne is a delightful testament to that. This dish takes me back to chilly autumn evenings spent in my grandmother’s kitchen, where the warmth of the oven and the rich aroma of spices filled the air. It’s a comforting, hearty meal that brings people together, just like those cherished family dinners of my childhood.
Why You’ll Love It
This Sweet Potato Lasagne is not just another lasagne; it’s a celebration of flavors and textures. The sweetness of the potatoes perfectly balances with the savory notes of the mushrooms and spinach. The hint of curry powder adds a unique twist, making this dish an exciting adventure for your taste buds. It’s a fantastic vegetarian option that’s both satisfying and nutritious, making it a perfect choice for family dinners or potlucks.
Ingredients
- Baby portabella mushrooms
- Dry curry powder
- Dried basil leaves
- Eggplants
- Frozen spinach
- Heavy cream
- Monterey Jack & cheddar cheese mix
- Jalapenos
- Marinara sauce
- Salt & pepper
- Sweet potatoes
- Vegetable cooking oil
Instructions
- Slice the sweet potatoes into 1/4 inch thick slices. Boil them until semi-cooked, which should take about 10 minutes.
- Mix dry curry powder with olive oil (1 cup) and rub this mixture over the sweet potato slices. Set aside and let marinate for at least 10 minutes.
- Slice eggplants into 1/4 inch thick slices and rub all over with an olive oil (1 cup), dried basil, salt, and pepper mix. Set aside and let marinate for at least 15 minutes.
- In a pan, pour canola or vegetable cooking oil and sauté spinach and mushrooms for about 3-5 minutes. Add jalapenos and salt & pepper to taste.
- Reduce the heat and add heavy cream and about half of the Monterey Jack & cheddar cheese mix until the mixture is creamy but not watery.
- Start layering the lasagne in the following order: sweet potatoes, spinach/mushroom mix, eggplants, marinara sauce, sweet potatoes, spinach/mushroom mix, eggplants.
- Finally, sprinkle the remaining Monterey Jack & cheddar cheese blend on top.
- Bake at 350-375°F for about 35-45 minutes, depending on your oven. You’ll know it’s ready when you can easily pass a fork through all the layers.
- Devour with passion!
Tips
To ensure the sweet potato slices cook evenly, cut them as uniformly as possible. If you prefer a spicier kick, feel free to add more jalapenos or even a sprinkle of red pepper flakes. Allow the lasagne to cool slightly before serving; this will make it easier to cut and serve intact slices.
Variations & Substitutions
If you’re a fan of heat, consider adding some crushed red pepper flakes to the marinara sauce. For a vegan version, substitute the heavy cream with coconut cream and use a dairy-free cheese alternative. If eggplants aren’t your favorite, zucchini makes a great substitute in this recipe.
Storage
This Sweet Potato Lasagne stores beautifully. Place any leftovers in an airtight container and refrigerate for up to 3 days. You can also freeze portions for up to 2 months. To reheat, simply thaw overnight in the fridge and bake at 350°F until heated through.
FAQ
Can I make this lasagne ahead of time?
Absolutely! You can prepare the lasagne a day in advance. Just assemble it, cover it tightly, and refrigerate. When you’re ready to enjoy, bake it as instructed.
What can I serve with Sweet Potato Lasagne?
This dish pairs wonderfully with a fresh green salad or some crusty garlic bread. A glass of red wine would complement the flavors beautifully as well.
Nutrition
While the exact nutritional values will depend on the specific brands and quantities of ingredients used, this Sweet Potato Lasagne is a good source of vitamins A and C from the sweet potatoes, iron from the spinach, and calcium from the cheese.
Final Thoughts
Whether you’re looking to try something new or searching for a tasty vegetarian dish, this Sweet Potato Lasagne is a must-try. It’s a dish that embodies warmth, love, and nostalgia, much like the family gatherings it reminds me of. I hope it brings as much joy to your table as it does to mine. Happy cooking!
Related update: How Sweet It Is Sweet Potato Lasagne