Category: dessert

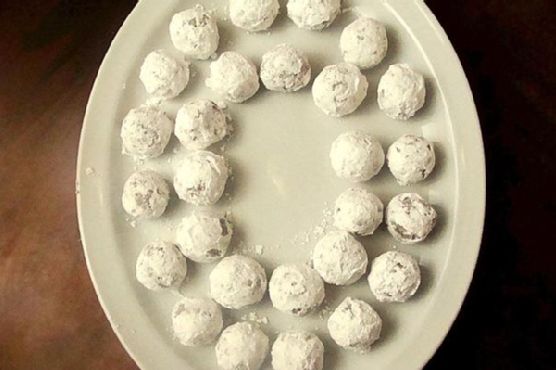
  • Authentic Kentucky Bourbon Balls | Made by Meaghan Moineau

    Authentic Kentucky Bourbon Balls | Made by Meaghan Moineau

    Authentic Kentucky Bourbon Balls Recipe

    Welcome to my kitchen! Today, we’re diving into a classic Southern treat that holds a special place in my heart: Authentic Kentucky Bourbon Balls. These delightful confections are not only bursting with rich, nutty flavors but also carry a hint of nostalgia for me. I remember as a child, sneaking into my grandmother’s kitchen during the holidays. The air was thick with the aroma of bourbon and chocolate, and I was always eager to steal a taste from her stash of bourbon balls. Now, I’m excited to share this cherished recipe with you.

    Why You’ll Love It

    There are countless reasons to fall in love with these Authentic Kentucky Bourbon Balls:

    • Rich Flavor: The combination of bourbon and cocoa creates a depth of flavor that’s both indulgent and satisfying.
    • Simple to Make: With just a few ingredients, these treats are incredibly easy to prepare.
    • Perfect for Gifting: These make thoughtful, homemade gifts, perfect for the holiday season.
    • Make-Ahead Friendly: They actually taste better when made in advance, allowing the flavors to meld beautifully.

    Ingredients

    • 1 cup crushed vanilla wafer crumbs
    • 1 cup chopped pecans
    • 1 cup powdered sugar, plus more for rolling
    • 2 tablespoons unsweetened cocoa powder
    • 1/4 cup bourbon
    • 2 tablespoons light corn syrup

    Instructions

    1. In a deep bowl, combine crushed vanilla wafer crumbs, chopped pecans, powdered sugar, and the cocoa.
    2. In a separate bowl, blend the bourbon and corn syrup.
    3. Pour the bourbon mixture into the dry mixture; blend well.
    4. Cover and chill for 3 hours.
    5. Shape small bits of the dough into balls and roll them in the powdered sugar.
    6. Store in the refrigerator overnight in tightly covered containers. You can also make these a few days in advance for the best flavor.

    Tips

    • Use Quality Bourbon: The bourbon you choose will greatly affect the flavor, so opt for a quality brand you enjoy sipping.
    • Chilling is Key: Don’t skip the chilling step. It makes the mixture easier to handle and enhances the flavor.
    • Consistent Size: Use a small cookie scoop to ensure uniform ball sizes for even chilling and a professional look.

    Variations & Substitutions

    While the classic recipe is divine, there are a few tweaks you can make:

    • Nut Swap: Walnuts or almonds can be used instead of pecans for a different twist.
    • Flavored Liqueur: Replace bourbon with a flavored liqueur like amaretto or hazelnut for a unique taste.
    • Dark Chocolate: Substitute cocoa powder with dark chocolate cocoa for a richer chocolate flavor.

    Storage

    Store your bourbon balls in an airtight container in the refrigerator. They can last for up to two weeks, making them ideal for holiday prep. For longer storage, place them in the freezer for up to two months. Just let them thaw in the refrigerator before serving.

    FAQ

    Can I make bourbon balls without alcohol?

    Absolutely! You can substitute the bourbon with apple juice or a non-alcoholic vanilla extract. While the flavor will be different, they’ll still be delicious!

    Is it possible to use dark syrup instead of light corn syrup?

    Yes, but keep in mind that dark syrup will impart a stronger flavor, and it might slightly alter the color of the finished product. If you enjoy a deeper molasses flavor, feel free to experiment.

    Nutrition

    While I don’t have precise nutritional data, these treats are definitely a special indulgence. They are rich and dense, with a good amount of sugar and fat from the pecans and bourbon. Enjoy them in moderation as part of a balanced diet.

    Final Thoughts

    Authentic Kentucky Bourbon Balls are a delightful treat that combines the warmth of bourbon with the sweet richness of cocoa and pecans. Whether you’re making them for a holiday gathering, a special gift, or simply to indulge yourself, these bourbon balls are sure to impress. I hope this recipe brings as much joy to your kitchen as it has to mine. Remember to enjoy the process, savor each bite, and perhaps share a little nostalgia with your loved ones as you make them together. Happy baking!

    Related update: Authentic Kentucky Bourbon Balls

    Related update: Bacon Brownie Cupcakes
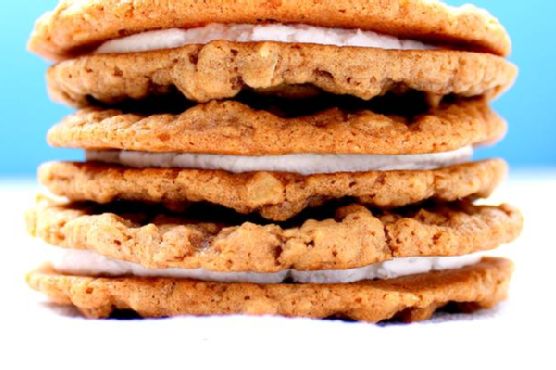
  • Homemade Oatmeal Cream Pies | Made by Meaghan Moineau

    Homemade Oatmeal Cream Pies | Made by Meaghan Moineau

    Homemade Oatmeal Cream Pies

    There’s something truly magical about recreating childhood favorites in your own kitchen. For me, oatmeal cream pies bring back memories of school lunchboxes, family picnics, and that delightful anticipation of opening a sweet treat after a long day. These homemade oatmeal cream pies offer all the nostalgic flavors with the added benefit of fresh, quality ingredients. Let’s dive into the process of making these delightful treats that are sure to become a family favorite in your home.

    Why You’ll Love It

    These homemade oatmeal cream pies are a revelation. They offer the perfect balance of chewy oatmeal cookies and sweet, fluffy filling. When you make them at home, you can control the quality of ingredients, ensuring a wholesome treat. Plus, the nostalgia factor makes them a delightful dessert option for both kids and adults. They are perfect for lunchboxes, after-school snacks, or a comforting dessert with your evening tea.

    Ingredients

    • 1 teaspoon baking powder
    • 1/2 teaspoon baking soda
    • 1 cup brown sugar
    • 1/2 cup butter, softened
    • 1/2 teaspoon cinnamon
    • 1 tablespoon cocoa powder
    • 1 egg
    • 1 1/2 cups flour
    • 1 cup marshmallow fluff
    • 1 cup powdered sugar
    • 2 cups rolled oats
    • 1/4 teaspoon salt
    • 1 teaspoon vanilla extract
    • 1/2 cup vegetable shortening

    Instructions

    1. Preheat the oven to 350 degrees F. Line cookie sheets with parchment paper to prevent sticking.
    2. Sift the baking powder, baking soda, cinnamon, cocoa powder, flour, and salt into a medium bowl and set aside.
    3. In a large bowl, use an electric mixer to cream together the brown sugar, butter, egg, and vanilla until smooth and creamy.
    4. Gradually add the dry mixture to the wet ingredients, mixing until well combined.
    5. Stir in the rolled oats until evenly distributed throughout the dough.
    6. Using a tablespoon-sized scoop, form equal-sized dough balls and place them on the prepared cookie sheets, allowing plenty of space for spreading.
    7. Bake in the preheated oven for 7-9 minutes, or until the edges are golden brown. Allow the cookies to cool completely on the parchment paper.
    8. For the filling, cream the shortening, powdered sugar, and vanilla together in a bowl until smooth. Then mix in the marshmallow fluff until well combined.
    9. To assemble, match up two cookies of equal size and shape. Turn the bottom cookies over and use a piping bag (or a zip-bag with a corner cut off) to pipe the filling onto the bottom cookie. Add the top cookie and press down gently.

    Tips

    The key to perfect oatmeal cream pies is in the baking time. Keep a close eye on the cookies as they bake to prevent over-browning. For the filling, I find using a piping bag makes the process much easier and results in a cleaner look. If you prefer a thicker layer of cream, feel free to be generous with the filling.

    Variations & Substitutions

    Feel free to tweak this recipe to suit your taste or dietary needs. For a nutty twist, consider adding chopped walnuts or pecans to the dough. If you’re looking for a gluten-free option, substitute the flour with a gluten-free baking blend. You can also experiment with different flavored extracts in the filling, such as almond or maple, to give these pies a unique twist.

    Storage

    These oatmeal cream pies are best enjoyed fresh, but they can be stored in an airtight container at room temperature for up to three days. For longer storage, consider wrapping each pie individually in plastic wrap and freezing them. They can be thawed at room temperature when you’re ready to enjoy them again.

    FAQ

    Can I use quick oats instead of rolled oats?

    While quick oats can be used in a pinch, rolled oats are preferable as they give the cookies a better texture and chewiness. Quick oats tend to make the cookies more cake-like.

    What can I use instead of vegetable shortening?

    If you prefer not to use vegetable shortening, you can substitute it with an equal amount of butter. Keep in mind that the filling may have a slightly different texture but will still be delicious.

    Nutrition

    Each oatmeal cream pie contains approximately 320 calories, 16g of fat, 42g of carbohydrates, and 3g of protein. These values may vary depending on the specific brands of ingredients used.

    Final Thoughts

    Homemade oatmeal cream pies are a delightful, nostalgic treat that brings the comfort of childhood memories to your kitchen. With their chewy texture and sweet, creamy filling, these pies are sure to become a beloved staple in your baking repertoire. Whether enjoyed with a glass of milk or shared with loved ones, they are a testament to the joy of homemade goodness. So go ahead, bake a batch, and relish in the simple pleasures of life.

    Related update: Homemade Oatmeal Cream Pies

    Related update: Authentic Kentucky Bourbon Balls

    Related update: Creamsicle Cookies

  • Almond Ricotta Cake | Made by Meaghan Moineau

    Almond Ricotta Cake | Made by Meaghan Moineau

    Almond Ricotta Cake

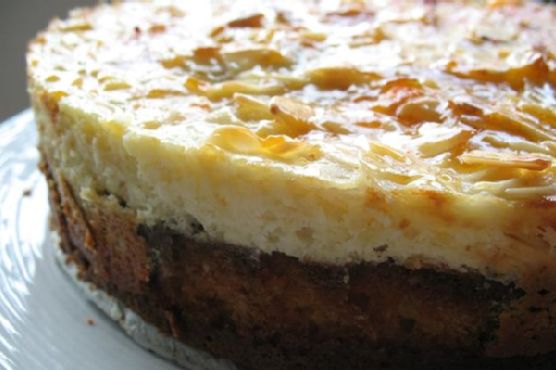
    There’s something deeply comforting about baking a cake that fills your home with the warm, inviting aroma of almonds and citrus. This Almond Ricotta Cake is a cherished recipe passed down through generations in my family. I remember watching my grandmother whip up this cake in her cozy kitchen, her hands moving with the kind of practiced ease that only comes from years of baking. She would always let me lick the spoon, and to this day, the taste of this cake brings back the fondest memories of those afternoons spent in her sunlit kitchen. I’m thrilled to share this recipe with you, and I hope it becomes a treasured part of your family traditions as well.

    Why You’ll Love It

    This Almond Ricotta Cake is the perfect blend of moist, tender crumb and rich flavors. The ricotta cheese adds an incredible creaminess, while the almond extract and zest of fresh lemon bring a bright, aromatic profile. With a delightful topping of almonds and a sweet apricot glaze, this cake is both elegant and delicious. Whether you’re serving it for a special occasion or simply enjoying a slice with your afternoon tea, this cake is sure to impress.

    Ingredients

    • 1 cup all-purpose flour
    • 1 teaspoon almond extract
    • 1 cup ground almonds
    • 1/4 cup apricot jam
    • 1 teaspoon baking powder
    • 1/2 cup canola oil
    • 1 large egg
    • 3 large eggs
    • 2 tablespoons lemon juice
    • Zest of 1 lemon
    • 1/4 cup milk
    • 2 tablespoons orange liqueur
    • 3/4 cup 2% ricotta cheese, plus 3/4 cup for topping
    • 1 tablespoon rum
    • 1/4 teaspoon salt
    • 2 tablespoons sugar, plus 1/4 cup for topping
    • 1 cup sugar
    • 1 teaspoon vanilla extract
    • 1/2 cup sliced almonds

    Instructions

    1. Cake: In a large mixing bowl, beat the eggs, sugar, and oil on high speed until thick and pale, about 8 minutes. Add the ricotta, lemon juice, zest, rum, vanilla, and almond extract. Mix until blended.
    2. In a separate bowl, sift together the ground almonds, flour, baking powder, and salt. Whisk into the ricotta mixture in 3 additions.
    3. Pour the batter into a 10″ springform pan that has been buttered and the bottom lined with parchment paper. Bake in a preheated 350°F oven for 45-50 minutes. The cake is done when a wooden skewer inserted in the center comes out clean.
    4. Topping: Increase your oven temperature to 375°F. Heat the milk and stir in 2 tablespoons of sugar. Toss in the almonds, ensuring they are coated.
    5. In a separate bowl, blend together 3/4 cup ricotta, the egg, 1/4 cup sugar, zest, and vanilla. Spread the ricotta mixture topping over the baked cake and sprinkle with the almond slices.
    6. Return to the oven and continue baking for 15 minutes, until the almonds are golden brown.
    7. Remove from the oven and spread the glaze over the almonds. Allow the cake to cool before removing from the cake pan.
    8. Glaze: In the microwave or in a small pan, heat the apricot jam until it starts to liquefy, about 1-2 minutes. Stir to ensure it doesn’t burn. Strain the jam if there is a large amount of pulp. Brush gently on the baked cake.

    Tips

    • Ensure all ingredients are at room temperature before beginning to mix for a smoother batter.
    • Use fresh lemon for the best flavor; the zest adds a lovely aromatic quality to the cake.
    • Allow the cake to cool completely before glazing to prevent the glaze from soaking into the cake.

    Variations & Substitutions

    • Dairy-Free: Substitute the ricotta cheese with a plant-based ricotta alternative and use almond milk instead of regular milk.
    • Gluten-Free: Replace the all-purpose flour with a gluten-free flour blend suitable for baking.
    • Flavor Twist: Try using different citrus zests, like orange or lime, for a unique twist on the original recipe.

    Storage

    This cake can be stored in an airtight container at room temperature for up to 3 days. If you wish to keep it longer, place it in the refrigerator for up to a week. For even longer storage, wrap it tightly in plastic wrap and freeze for up to a month. Thaw overnight in the refrigerator before serving.

    FAQ

    Can I use a different type of nut for the topping?

    Yes, you can experiment with other nuts like pistachios or walnuts for the topping. Just ensure they are sliced thinly for even baking.

    What can I use instead of apricot jam for the glaze?

    If you don’t have apricot jam, you can substitute it with peach or orange marmalade for a similar sweet and tangy flavor.

    Nutrition

    While this cake is a delightful treat, it’s important to enjoy it in moderation. Each slice contains approximately:

    • Calories: 320
    • Fat: 18g
    • Carbohydrates: 34g
    • Protein: 7g
    • Sugar: 21g

    Final Thoughts

    This Almond Ricotta Cake is more than just a dessert; it’s a delicious reminder of the love and care that goes into home baking. Whether you’re enjoying it with family or sharing it with friends, this cake is sure to warm hearts and create lasting memories. I hope this recipe becomes a beloved part of your baking repertoire, just as it has in mine. Happy baking!

    Related update: Almond Ricotta Cake

  • Chocolate Almond Bark | Made by Meaghan Moineau

    Chocolate Almond Bark | Made by Meaghan Moineau

    Chocolate Almond Bark

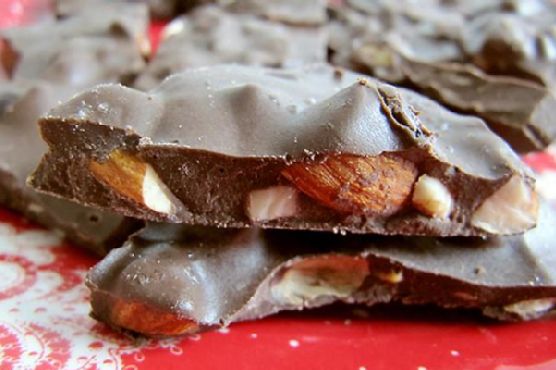
    Chocolate Almond Bark is a delightful treat that combines the rich, smooth flavor of chocolate with the crunchy, savory goodness of almonds. This recipe is a favorite in my family, especially around the holidays. I remember my grandmother making a similar version of this bark every Christmas. The aroma of roasted almonds mingling with chocolate would fill the house, and it was the ultimate signal that the festive season had truly begun. Now, I carry on the tradition, adding a few modern twists to the classic recipe.

    Why You’ll Love It

    Chocolate Almond Bark is incredibly easy to make and requires only a handful of ingredients. It’s a perfect balance of sweet and savory, with a hint of spice from the cayenne pepper. This treat makes for a great homemade gift or a delightful snack to enjoy anytime. Plus, it’s a wonderful recipe to make with kids or friends, as it doesn’t require any special culinary skills.

    Ingredients

    • 1 cup raw almonds, chopped
    • 1/4 teaspoon cayenne pepper
    • 12 ounces candy making chocolate
    • 1/2 teaspoon sea salt
    • 1 tablespoon Worcestershire sauce

    Instructions

    1. Preheat your oven to 160 degrees.
    2. In a medium bowl, combine the chopped almonds with the Worcestershire sauce, cayenne pepper, and half of the sea salt. Mix well to ensure the almonds are evenly coated.
    3. Spread the almond mixture onto a baking sheet in a single layer. Roast in the preheated oven for 20 minutes, stirring halfway through to ensure even roasting. Let the almonds cool completely.
    4. While the almonds are cooling, melt the candy making chocolate using a double boiler or in the microwave. If using a microwave, heat the chocolate on low power, stirring every 30 seconds, until smooth.
    5. Once the almonds have cooled, mix them into the melted chocolate until thoroughly combined.
    6. Line an 8 x 8 inch baking pan with wax paper. Pour the chocolate almond mixture into the pan and spread it evenly.
    7. Sprinkle a pinch of the remaining sea salt on top of the chocolate mixture.
    8. Let the chocolate cool and harden at room temperature or in the refrigerator for faster results.
    9. Once set, break the chocolate almond bark into bite-size pieces and enjoy!

    Tips

    To ensure the best results, use high-quality candy making chocolate, as it will melt smoother and provide a richer flavor. When roasting the almonds, keep a close eye on them to prevent burning. If you don’t have a double boiler, a heatproof bowl over a saucepan of simmering water works just as well for melting chocolate.

    Variations & Substitutions

    Feel free to customize this chocolate almond bark to suit your taste preferences. You can substitute the raw almonds with your favorite nuts, such as pecans or walnuts. If you’re not a fan of cayenne pepper, you can omit it, or replace it with a milder spice like cinnamon. For a more indulgent treat, consider adding dried fruits like cranberries or raisins to the mix.

    Storage

    Store your chocolate almond bark in an airtight container at room temperature for up to two weeks. If you prefer your chocolate to be on the firmer side, you can keep it in the refrigerator. Just be sure to let it come to room temperature before serving for the best texture and flavor.

    FAQ

    Can I use dark chocolate instead of candy making chocolate?

    Absolutely! Dark chocolate is a great alternative and will provide a more intense chocolate flavor. Just make sure to use high-quality chocolate for the best results.

    Is it possible to make this recipe vegan?

    Yes, you can make this recipe vegan by substituting the Worcestershire sauce with a vegan version and using a dairy-free chocolate. Ensure that all other ingredients are vegan-friendly as well.

    Nutrition

    While I don’t have the exact nutritional breakdown for this recipe, it’s important to note that almonds are a great source of healthy fats, fiber, and protein. Chocolate, especially dark chocolate, contains antioxidants. However, this is a treat and should be enjoyed in moderation as part of a balanced diet.

    Final Thoughts

    Chocolate Almond Bark is a versatile and delectable treat that’s sure to impress anyone who tries it. With its simple ingredients and straightforward instructions, it’s an easy recipe to whip up for any occasion. Whether you’re indulging on your own or sharing with loved ones, this bark is a delightful way to satisfy your sweet tooth. I hope you enjoy making and tasting this recipe as much as my family and I do. Happy cooking!

    Related update: Chocolate Almond Bark

    Related update: Smokey Rainbow Chili

  • Meyer Lemon Cheesecake | Made by Meaghan Moineau

    Meyer Lemon Cheesecake | Made by Meaghan Moineau

    Meyer Lemon Cheesecake: A Zesty Delight

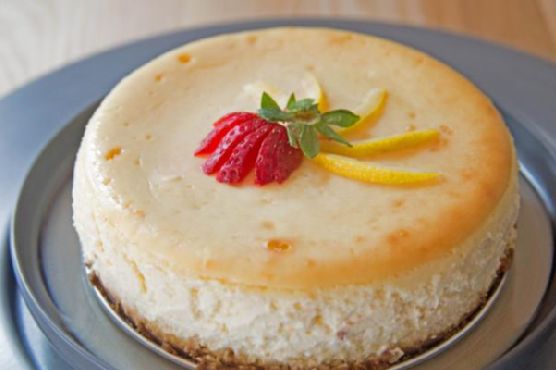
    There’s something magical about a cheesecake that perfectly balances creamy richness and zesty freshness. Meyer Lemon Cheesecake does just that, offering a delightful dance of flavors that transport you to sunlit lemon orchards with every bite. This recipe holds a special place in my heart, reminding me of summer afternoons spent at my grandmother’s house, where we’d bake together, the scent of lemon filling the air.

    Why You’ll Love It

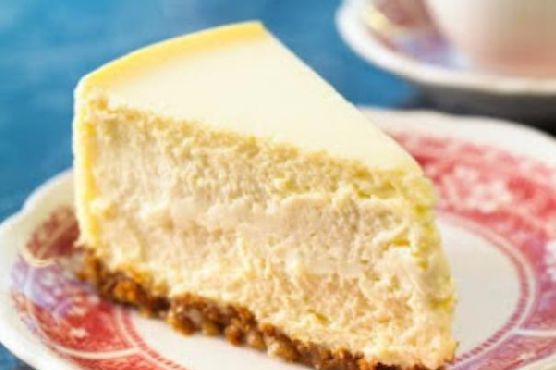
    Meyer Lemon Cheesecake is not only a feast for the taste buds but also a joy to create. Whether you’re a seasoned baker or a novice in the kitchen, this recipe is approachable and rewarding. The gingersnap crust adds a spicy twist that complements the tangy lemon filling beautifully. It’s a perfect dessert for special occasions or whenever you need a little sunshine in your life.

    Ingredients

    • 2 cups gingersnaps, crushed
    • 1/2 cup unsalted butter, melted
    • 24 oz cream cheese, softened
    • 1 cup sugar
    • 1/4 teaspoon salt
    • 3 large eggs
    • 1 cup sour cream
    • 1/2 cup Meyer lemon juice (about 4-5 lemons)
    • 2 tablespoons Meyer lemon zest
    • Cooking spray

    Instructions

    1. Preheat your oven to 300°F (150°C).
    2. In a Ninja Blender or food processor, combine the gingersnaps and melted butter until the gingersnaps are crumbly.
    3. Press the mixture firmly into the bottom of two 6-inch Springform pans coated with cooking spray. Bake for 15 minutes, then cool on a wire rack.
    4. Using an electric mixer, beat the cream cheese until smooth. Gradually add the sugar and salt, mixing well.
    5. Add the eggs one at a time, beating after each addition. Then incorporate the sour cream, lemon juice, and zest, mixing until thoroughly combined. Ensure all cream cheese from the bottom of the mixing bowl is integrated.
    6. Pour the filling into the prepared pans, leaving some space at the top as the mixture will expand slightly.
    7. If there is extra filling, bake it in a small baking dish.
    8. Place an 11×13-inch pan filled with water on a lower oven rack. Position the Springform pans on the middle rack above the water pan.
    9. Bake for 1 hour and 10 minutes. After 35 minutes, switch the positions of the pans if necessary to ensure even baking.
    10. Turn off the oven and allow the cheesecakes to rest inside for another hour.
    11. Remove from the oven and cool to room temperature on a wire rack.
    12. Refrigerate for 8 hours or overnight.
    13. Before serving, run a knife around the edges of the pans to loosen the cheesecakes. Release the Springform clasp and transfer the cheesecakes to a serving plate.

    Tips

    For the best results, use room temperature ingredients, especially the cream cheese, which ensures a smooth and creamy filling. Also, make sure to mix the batter thoroughly to avoid lumps. If you find your cheesecake cracking, don’t fret; a little sour cream or lemon curd can be a delightful topping to cover any imperfections.

    Variations & Substitutions

    If Meyer lemons are unavailable, regular lemons can be used, though the flavor will be slightly more tart. For a different crust experience, try using graham crackers or digestive biscuits instead of gingersnaps. You can also add a teaspoon of vanilla extract for a subtle flavor enhancement.

    Storage

    Store any leftovers in an airtight container in the refrigerator for up to 5 days. You can also freeze the cheesecake for up to 2 months. To freeze, wrap the cheesecake tightly in plastic wrap and foil, then place it in a freezer-safe container.

    FAQ

    Can I use low-fat cream cheese?

    While you can use low-fat cream cheese, the texture and richness of the cheesecake may be affected. For the best results, I recommend using full-fat cream cheese.

    How do I prevent my cheesecake from cracking?

    To avoid cracks, ensure the ingredients are at room temperature for smooth mixing. Baking the cheesecake in a water bath and allowing it to cool gradually in the oven also help prevent cracking.

    Can I make this cheesecake ahead of time?

    Absolutely! This cheesecake is perfect for making ahead. Prepare it a day in advance and store it in the refrigerator until you’re ready to serve.

    Nutrition

    This cheesecake is an indulgent dessert, so it’s best enjoyed in moderation. Each slice (based on 12 servings) contains approximately 350 calories, with 25 grams of fat, 28 grams of carbohydrates, and 6 grams of protein.

    Final Thoughts

    Meyer Lemon Cheesecake is a testament to the beauty of combining classic flavors with a modern twist. Whether you’re an ardent lemon lover or simply searching for a dessert that impresses, this cheesecake is sure to delight. I hope it brings as much joy to your table as it does to mine, evoking cherished memories and creating new ones with every bite.

    Related update: Meyer Lemon Cheesecake

    Related update: Chocolate Almond Bark

  • Noodle Kugel with Pineapple-Gluten free, Dairy Free | Made by Meaghan Moineau

    Noodle Kugel with Pineapple-Gluten free, Dairy Free | Made by Meaghan Moineau

    Noodle Kugel with Pineapple: Gluten-Free, Dairy-Free Delight

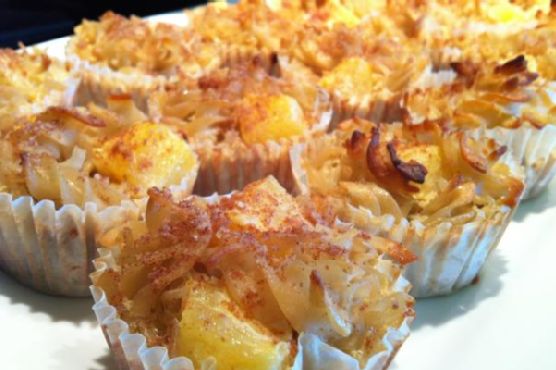
    There are few things as comforting as a warm noodle kugel, and this version brings a delightful twist with the addition of pineapple, all while being gluten-free and dairy-free. Growing up, noodle kugel was a staple at family gatherings, a dish that brought everyone to the table with eager anticipation. The sweet, cinnamon-spiced aroma would fill the house, creating an inviting atmosphere that promised delicious memories. This recipe is my gluten-free, dairy-free adaptation, perfect for those who want to indulge in nostalgic flavors without compromising on dietary needs.

    Why You’ll Love It

    This Noodle Kugel with Pineapple is a unique blend of sweet and savory, perfect for any occasion. Here’s why this dish will become a favorite in your home:

    • It’s gluten-free and dairy-free, making it suitable for those with dietary restrictions.
    • The pineapple adds a refreshing twist that brightens the classic kugel flavor.
    • Made in cupcake form, it’s perfect for portion control and easy serving.
    • It’s a versatile dish that works as a side, dessert, or even a breakfast treat!

    Ingredients

    • Gluten-free spiral rice pasta
    • Canned pineapple chunks
    • Unsweetened vanilla coconut milk or coconut creamer
    • Sunflower oil
    • Egg yolks
    • Xylitol or sugar
    • Evaporated cane sugar
    • Ground cinnamon
    • Ground nutmeg
    • Kosher salt
    • Cupcake liners
    • Cinnamon
    • Evaporated cane sugar
    • Earth Balance soy-free margarine
    • Red brown rice flour

    Instructions

    1. Preheat your oven to 350 degrees F.
    2. Fill a medium stockpot with water and set it over high heat. Once the water boils, add 2 tablespoons of kosher salt, then the pasta. Stir well to prevent sticking.
    3. Stir occasionally and cook the pasta for 8-10 minutes. Let it sit in the water for a few minutes before transferring it to a large glass or heatproof bowl to cool slightly.
    4. While the pasta cools, prepare the other ingredients. In a large mixing bowl, combine the coconut milk, creamer, pineapple, sugar, xylitol, cinnamon, nutmeg, and sunflower oil. Mix well.
    5. Add the egg yolks to the mixture and stir to combine thoroughly.
    6. Prepare the crumble topping by mixing together a small amount of cinnamon and evaporated cane sugar with the red brown rice flour and margarine.
    7. Line two cupcake pans with cupcake liners.
    8. Using a dry 1/4 cup measuring spoon, fill each cupcake liner with the noodle mixture, filling over the top. Distribute any remaining liquid to each kugel that looks dry.
    9. Sprinkle the crumble over each kugel, using about 1/2 teaspoon per cupcake.
    10. Bake for 40-45 minutes, until golden brown.
    11. Cool for 10 minutes before removing from the cupcake pans. Serve hot or warm, with or without the liners.

    Tips

    • Ensure the pasta is cooked al dente to maintain a pleasant texture.
    • Feel free to adjust the sweetness by adding more or less sugar according to your taste.
    • Using cupcake liners makes cleanup easy and helps the kugel hold its shape.

    Variations & Substitutions

    • Fruit Variations: Swap the pineapple for apples or pears for a different fruity twist.
    • Nutty Additions: Add chopped nuts such as pecans or walnuts to the crumble for added crunch.
    • Sugar Alternatives: Substitute xylitol with maple syrup or agave nectar for a different sweetness profile.

    Storage

    Store leftover kugels in an airtight container in the refrigerator for up to 4 days. To reheat, simply place them in the oven at 300 degrees F for about 10 minutes or until warmed through. These kugels can also be frozen for up to 2 months; thaw in the refrigerator overnight before reheating.

    FAQ

    Can I make this recipe ahead of time?

    Yes, you can prepare the noodle mixture and fill the cupcake liners a day in advance. Cover and store them in the refrigerator, then bake the next day.

    Is there a substitute for coconut milk or creamer?

    If coconut milk isn’t available, almond milk or soy milk can be used as alternatives, although it may slightly alter the flavor.

    Nutrition

    This noodle kugel offers a balanced treat with a touch of sweetness and fruit, making it a delightful addition to any meal. It’s a gluten-free and dairy-free option that can fit into many dietary plans. Always check specific brands for nutritional content, especially regarding sugar and calorie counts.

    Final Thoughts

    This Noodle Kugel with Pineapple brings a modern twist to a beloved classic. The tropical notes of pineapple paired with the warm spices of cinnamon and nutmeg create a delightful harmony of flavors. Whether it’s for a holiday gathering or a weekend brunch, this dish is sure to impress. Enjoy the comfort and nostalgia of noodle kugel, reimagined for today’s dietary preferences, without sacrificing any of the flavors that make it a favorite. Happy cooking!

    Related update: Noodle Kugel with Pineapple-Gluten free, Dairy Free

    Related update: Meyer Lemon Cheesecake

    Related update: Damn Good Corn Pudding ~from 12 Bones Smokehouse

    Related update: Vegetable Cheddar Quiche

  • Almond Cookie Bar | Made by Meaghan Moineau

    Almond Cookie Bar | Made by Meaghan Moineau

    Almond Cookie Bar

    Welcome to the delightful world of homemade almond cookie bars! These delectable treats have been a family favorite for generations. I vividly remember my grandmother preparing these bars during the festive seasons, the kitchen filled with the warm, inviting aroma of baking dough and sweet apricot jam. Today, I’m excited to share this cherished recipe with you, hoping it brings as much joy to your home as it has to ours.

    Why You’ll Love It

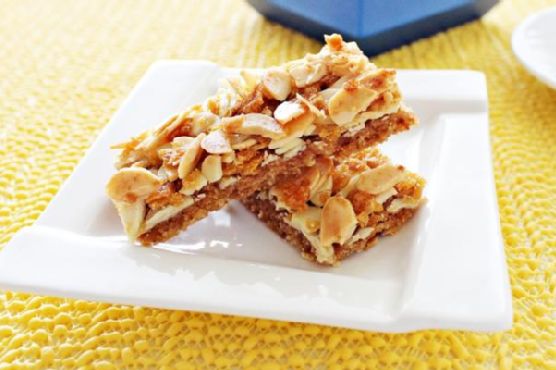
    These almond cookie bars are a perfect blend of texture and flavor. The crunchy base is complemented by a luscious apricot layer, topped with a nutty, sweet almond and oatmeal mixture. They’re not only delicious but also incredibly satisfying, making them a hit at parties or as an afternoon snack. Plus, with ingredients like wholemeal flour and oatmeal cornflakes, you can feel a bit better about indulging in these treats.

    Ingredients

    • Almond flakes
    • Apricot gel/jam
    • Brown sugar
    • Butter
    • Cookie base
    • Fresh milk
    • Oatmeal cornflakes
    • Plain flour
    • Wholemeal flour

    Instructions

    1. Beat butter and sugar until light and fluffy.
    2. In a bowl, combine wholemeal flour and plain flour together, then mix in the butter mixture with a rubber spatula and knead gently to form a soft dough.
    3. Turn out the dough onto a floured surface or line with a plastic sheet below and with another plastic sheet on top. Then roll into a square. Chill for at least 1 hour.
    4. Transfer the dough onto non-grease paper and cover with a plastic sheet on top, then roll the dough to about 3mm thick.
    5. Prick the dough with a fork and bake for about 15-18 minutes until brown in a preheated oven at 180°C. Leave the biscuit to cool.
    6. Spread the apricot jam over the top of the biscuit and set aside.
    7. Mix topping ingredients and spread evenly on the biscuit with a palette knife.
    8. Bake for 15 minutes until golden.
    9. Remove the cooked biscuit from the oven and leave to cool completely, then cut into bars.

    Tips

    To ensure the dough is easy to work with, make sure the butter is at room temperature before you start. Chilling the dough is crucial as it helps in maintaining the shape while baking. When spreading the apricot jam, ensure the base has cooled completely to prevent the jam from melting and becoming runny.

    Variations & Substitutions

    These almond cookie bars are quite versatile. If you’re not a fan of apricot, try substituting with raspberry or strawberry jam for a different twist. For a healthier version, you can replace brown sugar with coconut sugar or a sugar substitute of your choice. If you prefer, add a sprinkle of cinnamon to the almond mixture for a warm, spicy note.

    Storage

    Store your almond cookie bars in an airtight container at room temperature for up to a week. For longer storage, you can freeze them for up to three months. Just ensure they are well wrapped to prevent freezer burn.

    FAQ

    Can I make these bars gluten-free?

    Yes, you can substitute the plain and wholemeal flours with a gluten-free baking blend. Make sure it contains xanthan gum to help bind the dough.

    What if I don’t have oatmeal cornflakes?

    If oatmeal cornflakes are not available, you can use regular rolled oats or crushed cornflakes as an alternative. They will provide a similar texture to the topping.

    Nutrition

    Each almond cookie bar contains approximately 150 calories, with a balance of carbohydrates, fats, and protein. The wholemeal flour and oatmeal add dietary fiber, making this a more wholesome treat.

    Final Thoughts

    These almond cookie bars are more than just a treat; they’re a piece of nostalgia and comfort. Whether you’re enjoying them with a cup of tea or sharing them with loved ones, they’re sure to bring a smile to your face. I hope this recipe becomes a beloved part of your baking repertoire, just as it has been in my family for years. Happy baking!

    Related update: Almond Cookie Bar

  • Rugelach | Made by Meaghan Moineau

    Rugelach | Made by Meaghan Moineau

    Delightful Rugelach: A Comforting Classic

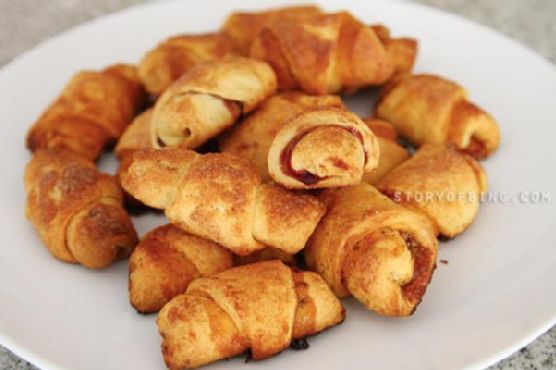
    There’s something magical about the aroma of freshly baked rugelach wafting through the house. It takes me back to my grandmother’s cozy kitchen, where I first learned how to roll these delicate pastries. I remember the way she would hum softly, her hands expertly folding the dough around sweet preserves and crunchy walnuts. These moments, filled with warmth and love, are the essence of why I adore baking rugelach. Now, I’m excited to share this beloved recipe with you, hoping it brings the same joy and comfort to your home.

    Why You’ll Love It

    Rugelach is a delightful pastry that combines a tender, buttery dough with a sweet and nutty filling. It’s perfect for any occasion, whether you’re hosting a tea party, celebrating a holiday, or simply enjoying a quiet moment with a cup of coffee. Here’s why you’ll fall in love with this recipe:

    • Easy to make: With simple ingredients and clear instructions, this recipe is accessible for bakers of all levels.
    • Irresistible flavor: The combination of buttery dough, fruity preserves, and spiced cinnamon-sugar is simply divine.
    • Versatile: You can easily adapt the filling to suit your preferences or what you have on hand.

    Ingredients

    • Salted butter
    • Block of cream cheese
    • Salt
    • Plain flour
    • Egg yolks
    • Vanilla extract
    • Caster sugar
    • Fruit preserves
    • Walnuts
    • Butter (for brushing)
    • Ground cinnamon

    Instructions

    1. Leave butter and cream cheese in a warm place for a couple of hours to soften. They have to be soft and cannot be used straight out of the fridge.
    2. Pre-heat oven to 180°C.
    3. Place softened butter in a large mixing bowl. Add a block of cream cheese. Use block cream cheese, not cream cheese in a tub.
    4. Set the beater to medium speed and beat the butter and cream cheese until combined and light and fluffy.
    5. Add 2 large egg yolks, 1 teaspoon of vanilla extract, 1/2 cup of caster sugar, a pinch of salt, and 2.5 cups of plain flour. Mix all the ingredients together in the mixer on medium speed until the dough comes together.
    6. While the dough is being mixed, chop 1/2 cup of walnuts into fine pieces and set aside.
    7. When the dough is ready, scatter some flour on the table or countertop. Knead the dough and gently form it into a large block. Add more flour if the dough is too sticky. The dough should be a nice elastic block.
    8. Cut the dough into 4 equal pieces. Set 3 pieces of dough aside, covering them with a slightly damp cloth to prevent them from drying out.
    9. Roll the 4th piece of dough into a ball. Using a floured rolling pin, roll out the ball of dough into a flat circle about 2 to 3 mm thick.
    10. Cut the rolled dough into 8 triangles.
    11. Prepare some fruit preserves. If the preserves are thick and difficult to spread, whisk them with a fork for a minute.
    12. Place one teaspoon of preserves on the long end of each triangular piece of dough. Lightly spread it towards the other end, keeping most of the preserves on the long end.
    13. Scatter some chopped walnuts on the preserves at the long end.
    14. To roll the rugelach, tuck in the sides of the triangle slightly to hold the preserves and nuts in. Roll towards the third corner of the triangle.
    15. Repeat for all the blocks of dough until the rugelach are prepared.
    16. Place all the prepared rugelach on a sheet of baking paper on a baking tray.
    17. Mix 1/4 cup of caster sugar and 1 teaspoon of ground cinnamon in a small bowl.
    18. Melt 50g of butter. Gently brush each rugelach with melted butter and sprinkle with the cinnamon-sugar mixture. You can also roll the rugelach in the mixture.
    19. Place the rugelach in the pre-heated oven and bake at 180°C for about 35 minutes or until they are a dark golden brown.
    20. Leave the rugelach to cool before storing them.

    Tips

    • Softening: Make sure the butter and cream cheese are softened before you start. This ensures a smooth, cohesive dough.
    • Rolling: Keep your rolling pin and surface lightly floured to prevent sticking.
    • Filling: Be generous with the preserves and walnuts for a more flavorful pastry.

    Variations & Substitutions

    Rugelach is wonderfully adaptable, so feel free to experiment with different flavors:

    • Preserves: Try raspberry, apricot, or fig preserves for a different twist.
    • Nuts: Substitute pecans or almonds for walnuts if you prefer.
    • Spices: Add a pinch of nutmeg or cardamom to the cinnamon-sugar mix for an extra layer of flavor.

    Storage

    Store your rugelach in an airtight container at room temperature for up to a week. For longer storage, place them in a freezer-safe bag and freeze for up to three months. Just thaw them at room temperature before serving.

    FAQ

    Can I prepare the dough in advance?

    Absolutely! You can prepare the dough up to two days in advance. Just wrap it tightly in plastic wrap and store it in the refrigerator. Let it come to room temperature before rolling it out.

    Is it possible to use low-fat cream cheese?

    While you can use low-fat cream cheese, the texture and flavor may not be as rich. For the best results, I recommend using full-fat block cream cheese.

    Nutrition

    Each rugelach contains approximately 150 calories, 10g of fat, 15g of carbohydrates, and 2g of protein. Keep in mind that these values can vary based on the specific ingredients and portion sizes you use.

    Final Thoughts

    Baking rugelach is a beautiful way to connect with tradition while creating new memories with loved ones. Whether you’re savoring them fresh from the oven or sharing them with friends over tea, these delightful pastries are sure to bring happiness and warmth to your table. I hope this recipe becomes a cherished part of your baking repertoire, just as it has been for me.

    Related update: Rugelach

    Related update: Almond Cookie Bar

  • Mascarpone & Ricotta Cheese Cake | Made by Meaghan Moineau

    Mascarpone & Ricotta Cheese Cake | Made by Meaghan Moineau

    Decadent Mascarpone & Ricotta Cheese Cake

    There’s something magical about the aroma of a cheesecake baking in the oven. I remember the first time I made this Mascarpone & Ricotta Cheese Cake. It was a chilly Sunday afternoon, and the kitchen was filled with warmth and laughter as my grandmother guided me through the recipe, her hands deftly working the ingredients into something extraordinary. This recipe has since become a cherished tradition, a sweet reminder of those cozy afternoons spent together. Now, I’m excited to share this delightful recipe with you, so you too can experience the joy it brings.

    Why You’ll Love It

    This Mascarpone & Ricotta Cheese Cake is a slice of heaven, combining the creamy richness of mascarpone and ricotta cheeses with the perfect hint of lemon and vanilla. The nutty crunch of the almond-infused graham cracker crust complements the smooth, luscious filling. It’s a sophisticated dessert that’s surprisingly easy to make, perfect for celebrations or as a special treat for yourself. Whether you’re a seasoned baker or a novice, this cheesecake will impress everyone with its luxurious texture and delightful flavor.

    Ingredients

    • 1 cup almonds
    • 1/2 cup butter, melted
    • 1 cup whipped cream cheese
    • 4 large eggs
    • 1/4 cup flour
    • 1 1/2 cups graham crackers
    • 2 tablespoons lemon juice
    • 1 cup mascarpone cheese
    • 1 cup ricotta cheese
    • 1/4 teaspoon salt
    • 1 cup sugar
    • 1 teaspoon vanilla extract

    Instructions

    1. Preheat your oven to 325°F (160°C).
    2. Crust: Grind the graham crackers and almonds using a food processor or a mortar and pestle until they form fine crumbs. Add the melted butter and salt, mixing until combined. Press this mixture into the bottom of a greased springform pan or deep dish pie pan. Bake for 10 minutes, then let cool.
    3. Mix the sugar and flour together and sprinkle over the top of the cooled crust. This step helps prevent the crust from becoming soggy.
    4. Filling: In a large bowl, beat together the cream cheese, mascarpone cheese, ricotta cheese, and sugar until smooth.
    5. Beat in the lemon juice and vanilla extract until well combined.
    6. Add the eggs one at a time, beating well after each addition.
    7. Pour the cheese mixture over the prepared crust in the pan.
    8. Bake in the preheated oven until the center of the cheesecake is wobbly when shaken, about 1 hour and 5 minutes.
    9. Let the cheesecake cool completely, then refrigerate, preferably overnight, to allow it to set fully.

    Tips

    For best results, ensure that all your ingredients are at room temperature before starting. This helps in achieving a smooth and creamy cheesecake filling. Also, avoid over-mixing the batter as it can incorporate too much air, leading to cracks on the surface of your cheesecake.

    Variations & Substitutions

    If you prefer a gluten-free version, simply replace the graham crackers with your favorite gluten-free cookies. For a different flavor profile, try adding a teaspoon of almond extract to the filling. You can also top the cheesecake with fresh berries or a drizzle of chocolate sauce before serving for an added layer of indulgence.

    Storage

    This cheesecake can be stored in the refrigerator for up to 5 days. Make sure to cover it with plastic wrap or store it in an airtight container to keep it fresh. If you need to store it longer, slice the cheesecake and wrap each piece individually in plastic wrap, then place in a freezer-safe container for up to 2 months. Thaw in the refrigerator before serving.

    FAQ

    Can I use low-fat cheeses for this recipe?

    While you can use low-fat versions of the cheeses, the texture and flavor of the cheesecake may be slightly different. Full-fat cheeses provide the best creamy texture and rich flavor.

    What if my cheesecake cracks?

    If your cheesecake happens to crack, don’t worry! It’s just a cosmetic issue and doesn’t affect the taste. You can easily cover any cracks with toppings such as whipped cream, fruit, or ganache.

    Nutrition

    This Mascarpone & Ricotta Cheese Cake is an indulgent treat, so it’s best enjoyed in moderation. Each slice contains approximately 450 calories, with 30g of fat, 40g of carbohydrates, and 9g of protein. These values can vary based on portion size and any variations or substitutions you choose.

    Final Thoughts

    This Mascarpone & Ricotta Cheese Cake is truly a dessert to savor and share. It’s an elegant addition to any dessert table and a wonderful way to celebrate special occasions or simply indulge in a sweet treat. I hope this recipe brings as much joy to your kitchen as it has to mine. Enjoy every creamy, dreamy bite!

    Related update: Mascarpone & Ricotta Cheese Cake

    Related update: Almond Ricotta Cake

  • Eggless Blueberry and White Chocolate Baked Cheesecake | Made by Meaghan Moineau

    Eggless Blueberry and White Chocolate Baked Cheesecake | Made by Meaghan Moineau

    Eggless Blueberry and White Chocolate Baked Cheesecake

    There are few things more comforting than a slice of cheesecake, and this Eggless Blueberry and White Chocolate Baked Cheesecake is no exception. I remember the first time I tried cheesecake. It was a chilly autumn day, and my grandmother had just pulled a golden, creamy cheesecake out of the oven. The smell alone was enough to make my mouth water. This recipe is inspired by those cherished moments, blending the tangy taste of blueberries with the decadent richness of white chocolate—all without eggs.

    Why You’ll Love It

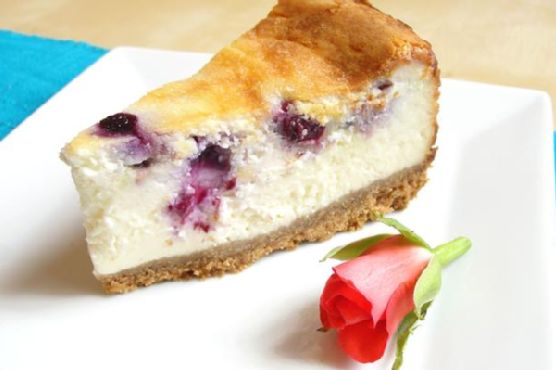
    This cheesecake is a delightful fusion of flavors and textures. The buttery biscuit crust provides a perfect foundation for the creamy filling, while the blueberries add a burst of freshness, and the white chocolate enhances the dessert’s richness. Whether you’re catering to those with egg allergies or simply looking for a unique twist on the classic cheesecake, this recipe is sure to become a favorite.

    Ingredients

    • 200g digestive biscuits, crushed
    • 100g butter, melted
    • 200g white chocolate, melted
    • 500g cream cheese
    • 250g ricotta cheese
    • 200ml double cream
    • 150g granulated sugar
    • 2 tablespoons cornflour
    • 1 teaspoon vanilla extract
    • 1 tablespoon lemon juice
    • 200g plain blueberries

    Instructions

    1. Preheat your oven to 180 degrees Celsius.
    2. Combine the crushed digestive biscuits with the melted butter. Mix thoroughly to ensure the butter is evenly distributed.
    3. Firmly press the mixture into the base of a greased 10-inch springform tin, creating an even crust.
    4. In a large mixing bowl, beat together the cream cheese, ricotta cheese, double cream, granulated sugar, cornflour, vanilla extract, lemon juice, and melted white chocolate until the mixture is smooth and thickened. Avoid overmixing.
    5. Pour half of the cheese mixture over the prepared crust.
    6. Scatter the blueberries evenly over the cheese mixture.
    7. Pour the remaining cheese mixture over the blueberries, gently spreading it to cover all the berries.
    8. Bake the cheesecake in the oven for 1 to 1 1/4 hours until set. Adjust the time if using a fan oven.
    9. Allow the cheesecake to cool at room temperature, then refrigerate for at least 8 hours or overnight for best results.
    10. Cut into large wedges and serve chilled.

    Tips

    For the best texture, ensure all ingredients are at room temperature before mixing. This will help everything blend smoothly and create a creamier cheesecake. When pressing the crust into the tin, use the bottom of a glass to get an even, compact layer.

    Variations & Substitutions

    If you prefer a gluten-free version, swap the digestive biscuits for a gluten-free alternative. You can also experiment with different berries if blueberries aren’t in season—raspberries or blackberries make excellent substitutes. For a dairy-free twist, use a plant-based cream cheese and coconut cream in place of double cream.

    Storage

    Store the cheesecake in an airtight container in the refrigerator for up to five days. You can also freeze individual slices wrapped in cling film and foil for up to three months. Defrost in the fridge overnight before serving.

    FAQ

    Can I make this cheesecake in advance?

    Absolutely! This cheesecake actually tastes better after it’s had time to set, making it perfect for preparing a day or two ahead of serving.

    How can I tell when the cheesecake is done baking?

    You’ll know the cheesecake is ready when the edges are set, but the center still has a slight wobble. It will firm up as it cools.

    What can I use instead of a springform tin?

    If you don’t have a springform tin, a regular cake tin will work. Just line it with parchment paper for easy removal.

    Nutrition

    This cheesecake is a rich and indulgent dessert, perfect for special occasions. While exact nutritional values can vary, each slice is estimated to contain around 450 calories, 30g of fat, and 35g of sugar, depending on portion size and specific ingredients used.

    Final Thoughts

    Baking can be a beautiful journey of creativity and nostalgia, and this Eggless Blueberry and White Chocolate Baked Cheesecake is a testament to that. Whether you’re baking for loved ones or treating yourself, this recipe is a comforting reminder of how food can be both a sensory delight and a heartfelt hug. Enjoy every bite, and maybe even share a slice with someone special.

    Related update: Eggless Blueberry and White Chocolate Baked Cheesecake

    Related update: Mascarpone & Ricotta Cheese Cake