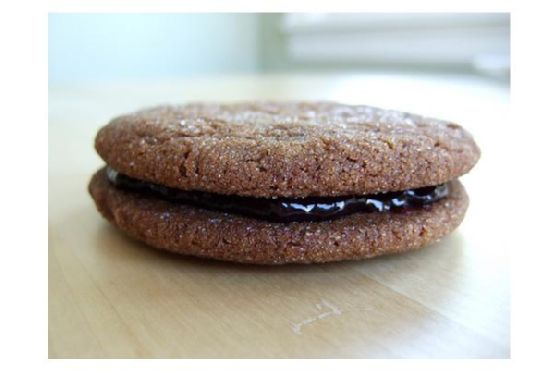
Category: dessert

  • Tropical Gluten-Free Coconut Lime Cake with Pineapple Frosting | Made by Meaghan Moineau

    Tropical Gluten-Free Coconut Lime Cake with Pineapple Frosting | Made by Meaghan Moineau

    Tropical Gluten-Free Coconut Lime Cake with Pineapple Frosting

    The aroma of fresh lime zest mingling with the sweet scent of coconut cream wafts through my kitchen, transporting me to a sun-drenched island paradise. This isn’t just any dessert; it’s an oasis of flavor, a Tropical Gluten-Free Coconut Lime Cake with Pineapple Frosting that promises to be a standout at any gathering.

    Personal Story

    My love affair with tropical flavors began on a family vacation to Hawaii. I remember the vibrant hues of tropical flowers, the warmth of the sun on my skin, and the refreshing taste of exotic fruits. It was there, amidst palm trees and ocean breezes, that I first tasted a cake infused with the sweet and tangy essence of limes and pineapples. The memory of that delightful cake lingered long after the vacation ended, sparking my desire to recreate it in my own kitchen.

    Back home, I embarked on a mission to capture that tropical magic. But it wasn’t without its mishaps. My first attempt at a coconut cake ended in disaster when I accidentally added salt instead of sugar — a rookie mistake! Despite the setback, I was undeterred. Each attempt brought me closer to the perfect balance of flavors that I remembered from Hawaii.

    One rainy afternoon, as I watched the droplets glide down my kitchen window, I had an epiphany. What if I infused the cake with lime and topped it with a pineapple frosting? The idea excited me, and I hurried to gather my ingredients. The result was a revelation — a Tropical Gluten-Free Coconut Lime Cake with Pineapple Frosting that brought a burst of sunshine into the dreariest of days.

    What Makes This Version Special

    This cake is not your run-of-the-mill coconut cake. The infusion of zesty lime essence in the batter and the creamy, tangy pineapple frosting elevate it to a new level of tropical delight. Where a standard recipe might rely on sugar for sweetness, this version uses the natural brightness of citrus and the sweetness of pineapple to create a more dynamic flavor profile. It’s a cake that celebrates the best of tropical ingredients while remaining gluten-free and approachable for those who appreciate a little island flair in their desserts.

    Flavor Profile

    Imagine a bite of cake that is both bright and tropical, each mouthful bursting with a citrusy zing followed by a sweet pineapple finish. The coconut adds a subtle nuttiness, harmonizing with the lime and pineapple to create a symphony of flavors that dance on your palate. The cake itself is moist and tender, thanks to the careful balance of coconut flour and tapioca flour, while the pineapple frosting is light and airy, providing a creamy contrast that will have you reaching for seconds.

    Ingredients

    • 1/2 cup coconut flour
    • 1/4 cup tapioca flour
    • 1/4 teaspoon salt
    • 1/2 teaspoon baking soda
    • 1/2 teaspoon baking powder
    • 1/2 teaspoon xanthan gum
    • 4 whole eggs
    • 1 cup sugar
    • 1/2 cup **Vegenaise**
    • 3/4 cup milk alternative
    • 1 teaspoon vanilla extract
    • 1/2 cup Earth Balance butter
    • 1/2 cup dairy-free chocolate chips (optional)
    • 1/4 teaspoon salt
    • 1 cup powdered sugar
    • 1 tablespoon **lime zest**
    • 1 tablespoon lime juice
    • 1/2 cup crushed pineapple (drained)
    • 1 cup **coconut cream**

    Instructions

    1. Preheat your oven to 350°F. Grease two 8 or 9-inch round cake pans and sprinkle with tapioca flour, or line a muffin tin with baking cups for cupcakes.
    2. In a medium bowl, mix together the coconut flour, tapioca flour, salt, xanthan gum, baking soda, and baking powder. Set aside.
    3. In a large mixing bowl, beat the eggs, sugar, and Vegenaise until fluffy. Slowly add the vanilla extract.
    4. Gradually incorporate the flour mixture and milk alternative into the egg mixture, alternating between the two. Aim for a consistency that’s smooth and airy, using just under 3/4 cup of milk for a light batter.
    5. Fold in the lime zest gently, ensuring it is evenly distributed to release a vibrant citrus aroma through the batter.
    6. Pour the batter into the prepared cake pans or fill the baking cups 3/4 full. Bake for 20-25 minutes for the cakes or 12-15 minutes for the cupcakes. The cakes are done when they are golden-brown and spring back when touched lightly, or when a toothpick inserted in the center comes out clean.
    7. While the cakes cool, whip the coconut cream with the powdered sugar and crushed pineapple until light and fluffy. This will be your luscious pineapple frosting.
    8. Once the cakes are completely cooled, frost them generously with the pineapple frosting. If desired, sprinkle with additional lime zest for an extra pop of color and flavor.

    Pro Tips from Meaghan’s Kitchen

    • Use fresh lime zest for the best flavor — it makes all the difference in the cake’s brightness.
    • For a thicker frosting, refrigerate the coconut cream before whipping. It helps the frosting hold its shape better.
    • To avoid a dry cake, measure the coconut flour precisely — it absorbs more liquid than traditional flour.
    • Don’t rush the cooling process before frosting; it ensures the frosting won’t melt and slide off.
    • If you crave texture, add a handful of shredded coconut or chopped nuts to the batter for some crunch.

    Variations & Dietary Swaps

    • Vegetarian Swap: Use regular mayonnaise instead of Vegenaise if dietary restrictions allow.
    • Spice-It-Up Version: Add a teaspoon of ground ginger to the batter for a warm spice note that complements the tropical flavors.
    • Kids-Friendly Version: Top the frosted cake with colorful sprinkles or a drizzle of dairy-free chocolate for an extra fun twist.

    What to Serve With It

    This tropical cake pairs wonderfully with a refreshing iced herbal tea infused with mint and lime. The cooling tea complements the cake’s flavors, enhancing the citrus notes and providing a soothing balance to the sweetness of the frosting. Alternatively, a scoop of dairy-free vanilla ice cream would add a creamy contrast to the cake’s texture.

    Storage & Meal Prep

    To store leftovers, cover the cake tightly with plastic wrap or place it in an airtight container. It will keep in the fridge for up to 5 days. For longer storage, freeze individual slices wrapped in plastic wrap and placed in a freezer-safe bag for up to 3 months. When you’re ready to enjoy, thaw the slices at room temperature or warm them in the oven at a low temperature.

    FAQ

    Can I use regular flour instead of coconut and tapioca flour?

    Yes, but it will no longer be gluten-free. Substitute with equal parts all-purpose flour for a similar texture.

    What milk alternative works best for this recipe?

    Almond milk or coconut milk both work beautifully, enhancing the tropical flavors of the cake.

    How do I make the coconut cream?

    Refrigerate a can of full-fat coconut milk overnight, then scoop out the solid cream that rises to the top for whipping.

    Can I use fresh pineapple instead of canned?

    Absolutely! Just make sure to drain it well to avoid adding excess moisture to the frosting.

    Why is my cake too dense?

    Overmixing the batter or not measuring the flour accurately can result in a dense cake. Be sure to fold gently and measure precisely.

    Final Thoughts

    As you embark on your culinary journey to create this Tropical Gluten-Free Coconut Lime Cake with Pineapple Frosting, remember that baking is as much about the process as it is about the final product. Enjoy the aromatic dance of citrus and tropical sweetness as you mix, bake, and savor each bite. I’d love to hear about your experiences and see your creations, so please leave a comment below or share this recipe with friends who crave a taste of the tropics!

    Related update: Tropical Gluten-Free Coconut Lime Cake with Pineapple Frosting

  • Pumpkin Spice Cookie Ice Cream with Spiced Caramel Swirl | Made by Meaghan Moineau

    Pumpkin Spice Cookie Ice Cream with Spiced Caramel Swirl | Made by Meaghan Moineau

    Pumpkin Spice Cookie Ice Cream with Spiced Caramel Swirl

    Imagine the creamy, dreamy fusion of your favorite pumpkin spice cookie with a luscious, velvety ice cream. Now add a spiced caramel swirl that dances on your taste buds like falling leaves in a crisp autumn breeze. That’s exactly what awaits you with my Pumpkin Spice Cookie Ice Cream with Spiced Caramel Swirl.

    Personal Story

    Every fall, as the leaves begin to paint the world in hues of orange and gold, I find myself irresistibly drawn to the kitchen, eager to capture the essence of autumn in a single bite. This particular recipe was born out of a serendipitous kitchen mishap. I had ambitiously decided to bake a batch of pumpkin spice cookies while simultaneously attempting a caramel sauce for a separate dessert. The chaos of juggling both led to an unexpected merger of flavors.

    As I absentmindedly stirred the caramel, the intoxicating aroma of butter and sugar mingled with the warm spices from the cookie dough across the counter. It was an olfactory revelation, a moment of pure culinary serendipity. I knew then that these two components belonged together, not just side-by-side but intertwined in a harmonious dance of flavors and textures.

    After a few experimental batches, each more promising than the last, I landed on what has become one of my most requested desserts. Friends and family now eagerly anticipate the first frost of fall, not just for the seasonal shift, but for the first batch of my pumpkin spice cookie ice cream. It’s a treat that embodies the comfort and coziness of autumn, capturing the nostalgia of childhood pumpkin patches and the warmth of family gatherings.

    Creating this ice cream has taught me the beauty of embracing the unexpected and the magic of letting flavors lead the way. This recipe doesn’t just satisfy a sweet tooth; it tells a story of adventure, mishaps, and ultimately, delicious discoveries.

    What Makes This Version Special

    What sets my Pumpkin Spice Cookie Ice Cream with Spiced Caramel Swirl apart is the addition of a rich, spiced caramel swirl. This isn’t just any caramel; it’s a carefully crafted blend of brown sugar, butter, heavy cream, and a medley of spices like cinnamon, nutmeg, and cloves. When swirled into the creamy ice cream base, it creates a ribbon of flavor that complements the earthy warmth of the pumpkin spice cookies.

    The caramel swirl adds an extra layer of flavor and texture, making each bite an indulgent experience. The traditional cookie ice cream might offer a pleasant crunch, but the spiced caramel elevates the taste profile to new heights. It’s a symphony of sweet, spicy, and creamy that feels like a warm hug in a bowl.

    Flavor Profile

    The first spoonful of this ice cream delivers a creamy and sweet embrace, with warm autumn spices tickling your palate. The cinnamon, nutmeg, and cloves provide a cozy warmth that perfectly complements the sweet, buttery richness of the spiced caramel swirl. The pumpkin spice cookies add a delightful texture, offering a satisfying crunch amidst the velvety ice cream. With each bite, you’ll discover layers of flavor that unfold like the pages of a cherished novel, transporting you to a world of autumnal bliss.

    Ingredients

    • 2 cups heavy cream
    • 1 cup whole milk
    • **1 cup pumpkin spice cookies**, crushed
    • 1/2 cup sugar
    • 1/2 teaspoon salt
    • 1 teaspoon vanilla extract
    • 1 teaspoon cinnamon
    • 1/2 teaspoon nutmeg
    • 1/4 teaspoon cloves
    • **1/2 cup brown sugar** (for caramel swirl)
    • **1/4 cup butter** (for caramel swirl)
    • **1/4 cup heavy cream** (for caramel swirl)

    Instructions

    1. In a medium saucepan, melt 1/4 cup of butter over medium heat. Add the cinnamon, nutmeg, and cloves, stirring to bloom the spices until fragrant, about 1 minute.
    2. Add 2 cups of heavy cream, 1 cup of whole milk, 1/2 cup of sugar, and 1/2 teaspoon of salt to the saucepan. Whisk continuously until the sugar dissolves and the mixture is just heated through, ensuring the cream doesn’t boil.
    3. Remove the mixture from the heat and stir in 1 teaspoon of vanilla extract. Allow it to cool to room temperature, then refrigerate for at least 2 hours, or until completely chilled.
    4. While the ice cream base chills, prepare the spiced caramel swirl. In a separate saucepan, combine 1/2 cup of brown sugar and 1/4 cup of butter over medium heat. Stir continuously until the butter melts and the sugar dissolves, achieving a smooth consistency.
    5. Slowly whisk in 1/4 cup of heavy cream and a sprinkle of cinnamon, nutmeg, and cloves. Continue to stir until the mixture thickens slightly, about 3-5 minutes. Remove from heat and let it cool completely.
    6. Once the ice cream base is chilled, pour it into your ice cream machine and churn according to the manufacturer’s instructions. During the last few minutes of churning, gradually add the crushed pumpkin spice cookies, allowing them to mix evenly.
    7. Transfer the churned ice cream into a freezer-safe container. Gently swirl in the cooled spiced caramel using a knife or spatula, creating a marbled effect.
    8. Cover the container and freeze the ice cream for at least 4 hours, or until firm. Serve garnished with a pumpkin spice cookie for that extra touch of indulgence.

    Pro Tips from Meaghan’s Kitchen

    • Bloom the spices: Don’t skip the step of blooming the spices in butter. This technique enhances their flavors and prevents any raw spice taste in the final product.
    • Chill thoroughly: Ensure the ice cream base is completely chilled before churning. This step is crucial for achieving a creamy texture.
    • Caramel consistency: For a perfectly smooth caramel swirl, be patient and let it cool completely before swirling into the ice cream. This prevents it from melting into the base.
    • Layer the caramel: When swirling the caramel, try creating layers for a more pronounced visual and taste effect. You can do this by adding a layer of ice cream, then caramel, and repeating.
    • Cookie texture: Crush the cookies just enough for a good mix of chunks and crumbs. This will give your ice cream a delightful texture contrast.

    Variations & Dietary Swaps

    • Vegetarian swap: This recipe is already vegetarian-friendly as it utilizes dairy products and does not involve any gelatin or animal-based thickeners.
    • Spice-it-up version: Add a pinch of cayenne pepper or ginger to the caramel for a bit of a kick that enhances the spicy flavor profile.
    • Kids-friendly version: For a milder taste, reduce the amount of cloves, and use chocolate chip cookies instead of pumpkin spice cookies to cater to a child’s palate.

    What to Serve With It

    The Pumpkin Spice Cookie Ice Cream with Spiced Caramel Swirl pairs beautifully with a warm mug of spiced chai tea, which further complements the autumnal spices in the dessert. Alternatively, serve it with a slice of freshly baked apple pie or a dollop of whipped cream for an extra layer of indulgence. A handful of toasted pecans or walnuts can also add a nice nutty crunch that contrasts with the creamy texture of the ice cream.

    Storage & Meal Prep

    Store the ice cream in an airtight container in the freezer for up to two weeks. To prevent ice crystals from forming, place a piece of plastic wrap directly on the surface of the ice cream before sealing the container. When ready to serve, let the ice cream sit at room temperature for a few minutes to soften slightly, making it easier to scoop. Avoid reheating in a microwave as it can alter the texture of the ice cream.

    FAQ

    Can I make this ice cream without an ice cream maker?

    Yes, you can! Simply pour the chilled ice cream base into a shallow dish and freeze, stirring every 30 minutes until it reaches the desired consistency. Swirl in the caramel once it starts to thicken.

    How can I prevent my ice cream from becoming too icy?

    Ensuring your ice cream base is thoroughly chilled before churning is key. Also, using the right ratio of cream to milk helps maintain a creamy texture.

    What if my caramel hardens before I swirl it into the ice cream?

    If the caramel becomes too firm, gently reheat it over low heat until it loosens up, then let it cool again before swirling it into the ice cream.

    Can I use store-bought caramel instead of making my own?

    Absolutely! However, making your own caramel allows you to infuse it with spices, adding a personalized touch to the ice cream.

    How do I crush the cookies without making a mess?

    Place the cookies in a resealable plastic bag and use a rolling pin to crush them. This method keeps crumbs contained and allows you to control the size of the pieces.

    Final Thoughts

    Crafting this Pumpkin Spice Cookie Ice Cream with Spiced Caramel Swirl is more than just making a dessert; it’s about creating a moment, a memory, and a little piece of autumn magic. Whether you’re enjoying it on a cool evening or sharing it with friends, this ice cream is sure to bring smiles and warm hearts. I’d love to hear how your version turns out or any creative twists you add! Don’t forget to leave a comment below or share your delicious creations using #MeaghansKitchen. Happy scooping!

    Related update: Pumpkin Spice Cookie Ice Cream with Spiced Caramel Swirl

    Related update: Tropical Gluten-Free Coconut Lime Cake with Pineapple Frosting

  • Luscious Almond Ricotta Cake with Lavender-Honey Glaze | Made by Meaghan Moineau

    Luscious Almond Ricotta Cake with Lavender-Honey Glaze | Made by Meaghan Moineau

    Luscious Almond Ricotta Cake with Lavender-Honey Glaze

    Picture this: The intoxicating aroma of almonds toasting in your oven, mingling with the warm sweetness of honey and the gentle floral notes of lavender. Now imagine slicing into a cake that’s as tender as a whisper, with a glossy glaze that catches the light just so. Let me take you on a culinary journey to Italy with my Luscious Almond Ricotta Cake, uniquely elevated with a Lavender-Honey Glaze.

    My Italian Kitchen Adventure

    It was a sun-drenched afternoon in Tuscany, where my love affair with almond ricotta cake truly began. I was on a cooking retreat, nestled amidst rolling vineyards and olive groves. Our instructor, a spirited Nonna with a penchant for storytelling, shared her family’s cherished recipes. But it was her almond ricotta cake that captivated my senses. The cake was simple yet divine, a perfect marriage of flavors and textures.

    Back home, I couldn’t shake the memory of that cake. It beckoned me to experiment in my own kitchen, to create a version that not only paid homage to Nonna’s artistry but also infused a touch of my own culinary flair. My first attempt was a classic rendition, but my heart yearned for something more exciting — something that danced on the palate.

    After several trials (and a few hilarious mishaps involving overly ambitious experiments with local wildflowers), I stumbled upon the magic of lavender-honey. The idea came to me during a quiet moment in my garden, where the lavender bushes swayed gently in the breeze. I imagined their subtle aroma blending seamlessly into the cake’s glaze, adding a whisper of elegance.

    With each iteration, I inched closer to perfection. As I combined the ingredients, the kitchen came alive with the heady scent of lavender intertwining with honey, transporting me back to Tuscany with every whiff. This version, I knew, was ready to be shared.

    What Makes This Version Special

    What truly sets this Almond Ricotta Cake apart is the infusion of aromatic lavender and luscious honey into the glaze. This addition introduces a floral sweetness that harmonizes beautifully with the nutty, creamy base of the cake. While traditional almond ricotta cakes are deliciously satisfying, the lavender-honey glaze elevates this dessert to a new level of sophistication and intrigue.

    The glaze is not merely an afterthought; it’s an integral part of the experience. Each bite offers a delicate balance, the kind that makes you pause, close your eyes, and savor the moment. This version captures the essence of a classic Italian dessert while adding a delightful twist that surprises and delights.

    Flavor Profile

    The flavor profile of this Luscious Almond Ricotta Cake is an ode to subtlety and richness. As you take your first bite, the delicate floral notes of lavender gently unfold, bringing a hint of springtime fields to your palate. This is followed by a mellow, sweet embrace from the honey, which complements the cake’s natural sweetness without overpowering it.

    The cake itself is a symphony of textures and tastes. Its base is creamy and nutty, thanks to the rich ricotta and ground almonds. The citrusy whispers of lemon zest add brightness, while the vanilla and almond extracts weave a comforting familiarity throughout each bite. Paired with the glaze, every mouthful is an experience — a testament to the harmony of flavors crafted with care.

    Ingredients

    • 1 cup **all-purpose flour**
    • 1 teaspoon baking powder
    • 1/4 teaspoon salt
    • 3/4 cup sugar
    • 3 large eggs
    • 1/2 cup canola oil
    • 1 cup **2% ricotta cheese**
    • 2 tablespoons lemon juice
    • 1 tablespoon lemon zest
    • 1 teaspoon vanilla extract
    • 1/2 teaspoon **almond extract**
    • 2 tablespoons **orange liqueur**
    • 1 tablespoon rum
    • 1/2 cup ground almonds
    • 1/4 cup **milk**
    • 1/4 cup apricot jam
    • 1/4 cup sliced almonds
    • 1/4 cup **honey**
    • 1 tablespoon **dried lavender**
    • 1 teaspoon **fresh thyme**
    • 1 tablespoon sugar (for thyme)

    Instructions

    1. Preheat your oven to 350°F (175°C) and prepare a 10-inch springform pan by buttering it and lining the bottom with parchment paper.
    2. In a large mixing bowl, beat the eggs, sugar, and canola oil on high speed until the mixture becomes thick and pale, about 8 minutes.
    3. Add the ricotta cheese, lemon juice, lemon zest, vanilla extract, almond extract, orange liqueur, and rum to the egg mixture. Mix until well blended.
    4. In a separate bowl, sift together the ground almonds, flour, baking powder, and salt. Gradually whisk this dry mixture into the ricotta mixture in three additions, ensuring each incorporation is smooth.
    5. Pour the batter into the prepared springform pan. Bake in the preheated oven for 45-50 minutes, or until a wooden skewer inserted into the center comes out clean.
    6. While the cake is baking, prepare the glaze by gently heating the honey and dried lavender in a small saucepan. Allow it to infuse for a few minutes before straining out the lavender.
    7. Once the cake is done, increase the oven temperature to 375°F (190°C).
    8. Heat the milk and stir in 2 tablespoons of sugar. Toss in the sliced almonds, ensuring they are well coated.
    9. In another bowl, blend together 3/4 cup ricotta, 1 egg, 1/4 cup sugar, lemon zest, and vanilla extract. Spread this ricotta mixture over the baked cake and sprinkle with the sugared almonds.
    10. Return the cake to the oven and bake for an additional 15 minutes, until the almonds are a golden brown.
    11. Remove from the oven and brush the strained lavender-honey glaze gently over the almonds.
    12. Allow the cake to cool before removing it from the springform pan.

    Pro Tips from Meaghan’s Kitchen

    • For a more intense lavender flavor, let the lavender steep in the honey for a longer period, but avoid overheating which can turn it bitter.
    • Use a mortar and pestle to crush fresh thyme with sugar for the batter, releasing aromatic oils that infuse the cake with subtle herbal notes.
    • Ensure your eggs are at room temperature for better volume and a lighter cake texture.
    • Toasting the almonds before adding them as a topping enhances their nuttiness and adds a delightful crunch.
    • For a clean release, lightly grease your parchment paper lining in the pan.

    Variations & Dietary Swaps

    • Gluten-Free Version: Substitute the all-purpose flour with almond flour for a completely gluten-free delight.
    • Extra Citrus Zest: For a zingier profile, add an extra tablespoon of orange zest to the batter.
    • Nut-Free Option: Omit the almonds and use a nut-free crumb topping for those with nut allergies.

    What to Serve With It

    This Luscious Almond Ricotta Cake pairs beautifully with a glass of chilled Moscato, its sweetness complementing the cake’s subtle floral notes. For a cozy pairing, enjoy a hot cup of chamomile tea, which echoes the gentle herbal undertones of the lavender. Either choice will elevate your cake experience to a new level of enjoyment.

    Storage & Meal Prep

    To store, wrap the cake tightly in plastic wrap and keep it in the refrigerator for up to 4 days. For longer storage, freeze individual slices wrapped in parchment paper and placed in a freezer-safe container. Thaw overnight in the fridge. To reheat, warm slices in the oven at 300°F (150°C) for about 10 minutes, or until just heated through.

    FAQ

    Can I use fresh lavender instead of dried?

    Yes, you can, but use about double the amount of fresh lavender, as dried lavender is more concentrated in flavor.

    What if I don’t have a springform pan?

    You can use a regular 10-inch cake pan, but line it well with parchment paper for easy removal.

    Is there an alternative to orange liqueur?

    Feel free to substitute with extra lemon juice or a splash of amaretto for a different twist.

    Can I make this cake ahead of time?

    Absolutely! This cake actually tastes even better the next day as the flavors have more time to meld.

    How do I prevent the cake from getting too brown on top?

    If you notice the top browning too quickly, cover it loosely with aluminum foil halfway through baking.

    Final Thoughts

    Creating this Luscious Almond Ricotta Cake with Lavender-Honey Glaze has been a journey of culinary exploration and love. I hope you feel the same joy and satisfaction in your kitchen as I do in mine when baking this delightful dessert. I would love to hear about your own baking adventures, so please leave a comment or share your creation with me on social media. Happy baking, dear friends!

    Related update: Luscious Almond Ricotta Cake with Lavender-Honey Glaze

    Related update: Pumpkin Spice Cookie Ice Cream with Spiced Caramel Swirl

  • Caramelized Fig and Walnut Upside-Down Cake with Rosemary-Honey Drizzle | Made by Meaghan Moineau

    Caramelized Fig and Walnut Upside-Down Cake with Rosemary-Honey Drizzle | Made by Meaghan Moineau

    Caramelized Fig and Walnut Upside-Down Cake with Rosemary-Honey Drizzle

    Imagine the smell of a cake baking, its sweet aroma wrapping around you like a warm hug. Now add a hint of rosemary, the sweet, earthy fragrance mingling with the caramelized figs and toasted walnuts. This cake is not just a dessert; it’s an experience, a story told through flavors and textures.

    Personal Story

    The first time I encountered figs was in my grandmother’s garden. She had a modest fig tree that bore the juiciest fruits during late summer. I remember sneaking out with a basket, picking the ripest figs until my hands were sticky with their syrupy sweetness. Those sun-warmed figs, eaten under the shade of the tree, became the inspiration for this Caramelized Fig and Walnut Upside-Down Cake.

    Years later, while hosting a dinner party, I wanted to serve something that would surprise my guests. I remembered those figs and decided to create a cake that would capture their essence. My first attempt was a disaster; the figs stuck to the pan and the cake was unevenly baked. However, each failure taught me something new. I experimented with different techniques, tweaking the recipe until it became what it is today—a beautifully balanced cake with layers of flavor.

    One fine summer evening, when I finally perfected the recipe, I served it to my friends. Their eyes lit up with each bite, the compliments flowed, and I knew this cake was special. It was more than just a cake; it was a piece of my past, a shared experience, and a new tradition. Now, it’s a staple at my gatherings, always bringing back those sweet, sticky memories of summers past.

    What Makes This Version Special

    This version of the Caramelized Fig and Walnut Upside-Down Cake is unique because of the rosemary-infused honey drizzle that elevates the dessert to a whole new level. The infusion process adds a fragrant finish that perfectly complements the caramelized figs. The rosemary’s woody aroma mingles with the honey’s sweetness, creating a sophisticated yet comforting flavor profile. It’s this attention to detail, these small touches, that make this cake stand out from the typical upside-down cakes you might encounter.

    Flavor Profile

    The flavor journey of this cake begins with the sweet, caramelized figs that provide a luscious, jam-like texture. The walnuts add a nutty crunch, creating a delightful contrast. But the true magic lies in the rosemary-infused honey drizzle that ties everything together. This drizzle imparts a subtle herbal fragrance that lingers, while the added fresh orange zest in the batter lifts the cake with citrusy brightness. It’s a harmonious blend of sweet, nutty, herbal, and citrusy notes—a symphony for your taste buds.

    Ingredients

    • 1/2 cup unsalted butter
    • 3/4 cup light brown sugar
    • **1 pound fresh figs, halved**
    • **2 teaspoons fresh rosemary, chopped**
    • 3/4 cup walnut pieces
    • 1 1/2 cups all-purpose flour
    • 2 teaspoons baking powder
    • 1/2 teaspoon salt
    • 3 large eggs
    • 1 cup granulated sugar
    • **1 tablespoon fresh lemon juice**
    • 1 teaspoon lemon extract
    • 1 tablespoon citron vodka
    • **1 tablespoon fresh lemon zest**
    • 1 teaspoon vanilla extract
    • **1/4 cup honey**
    • **1 teaspoon fresh orange zest**

    Instructions

    1. Position a rack in the center of the oven and preheat it to 350 degrees Fahrenheit.
    2. Add the butter to a 9-inch round baking pan and place it inside the warm oven until melted, about 5 minutes. Remove from the oven and sprinkle the brown sugar evenly over the butter.
    3. Arrange the figs, flesh side up, over the sugar layer. Sprinkle with 1 teaspoon of the rosemary, then fill in the nooks and crannies with walnut pieces.
    4. In a medium bowl, sift together the flour, baking powder, and salt. This step ensures that your cake has a light, airy texture.
    5. In a separate bowl, beat the eggs with the granulated sugar at medium speed until creamy. Because I love a light, fluffy texture, I beat the eggs and sugar for an additional 3 minutes until frothy with small bubbles forming.
    6. Add the flour mixture to the creamed mixture and beat until well combined. Gently fold in the fresh lemon juice, lemon extract, citron vodka, and lemon zest. Don’t forget the fresh orange zest—it adds a burst of citrusy brightness!
    7. Pour the cake batter evenly over the fruit and smooth it with a spatula. Bake for 35 to 40 minutes or until the cake is golden and a toothpick inserted into the center comes out clean.
    8. While the cake bakes, prepare the rosemary-infused honey drizzle. Gently heat the honey with the remaining teaspoon of rosemary in a small saucepan over low heat, allowing the flavors to meld.
    9. Once baked, place the cake on a wire rack to cool for 10 minutes. Run a blunt knife around the edges of the pan to loosen the cake, then carefully invert it onto a plate.
    10. Drizzle the rosemary-infused honey over the warm cake before serving. Enjoy the cake warm or at room temperature.

    Pro Tips from Meaghan’s Kitchen

    • Make sure your figs are ripe and sweet for the best flavor. Unripe figs can be too firm and less sweet.
    • When inverting the cake, use a large plate or platter to catch any extra syrup that might run off.
    • For an extra nutty flavor, toast the walnut pieces before adding them to the pan.
    • If you’re short on time, prepare the rosemary-infused honey drizzle a day in advance and store it in a sealed container.
    • Use room temperature ingredients for the batter to ensure even mixing and a smoother texture.

    Variations & Dietary Swaps

    • Vegetarian Swap: This cake is naturally vegetarian-friendly, but you can make it vegan by replacing the butter with a vegan alternative and using flax eggs instead of regular eggs.
    • Spice-It-Up Version: Add a pinch of cardamom to the batter for a warm, exotic twist.
    • Kids-Friendly Version: Skip the citron vodka and increase the vanilla extract to 2 teaspoons for a more family-friendly flavor.

    What to Serve With It

    This Caramelized Fig and Walnut Upside-Down Cake pairs beautifully with a glass of sparkling Prosecco, which complements the cake’s sweetness with its crisp bubbles. Alternatively, serve it with a scoop of vanilla ice cream for a classic, creamy contrast. For a drink pairing, a bold cup of coffee or a cool glass of Edna Valley 2010 Paragon Chardonnay, with its crisp, citrusy notes and hint of peach, make a delightful accompaniment.

    Storage & Meal Prep

    Store any leftover cake in an airtight container in the refrigerator for up to 3 days. To freeze, wrap individual slices in plastic wrap and place them in a freezer bag for up to 1 month. To reheat, simply warm slices in the microwave for about 15 seconds or until heated through. If reheating from frozen, allow slices to thaw overnight in the refrigerator before warming.

    FAQ

    Can I use dried figs instead of fresh ones?

    While fresh figs are ideal for this recipe, you can use dried figs in a pinch. Just soak them in warm water for about 15 minutes to soften before using.

    What if I don’t have citron vodka?

    You can substitute citron vodka with regular vodka or omit it altogether. The lemon extract and zest will still provide plenty of citrus flavor.

    Can I make this cake gluten-free?

    Yes, you can substitute the all-purpose flour with a gluten-free flour blend. Make sure it’s a 1:1 substitute for best results.

    How do I prevent the cake from sticking to the pan?

    Ensure your pan is well-greased with melted butter and that the sugar is evenly distributed. Running a knife around the edges before inverting will also help.

    Is there a substitute for fresh rosemary?

    If you don’t have fresh rosemary, you can use dried rosemary. However, use only half the amount as dried herbs are more concentrated.

    Final Thoughts

    Thank you for joining me in my kitchen to explore this delightful Caramelized Fig and Walnut Upside-Down Cake with Rosemary-Honey Drizzle. It’s a cake that’s as much about the experience of making it as it is about enjoying it. I hope this recipe becomes a cherished part of your dessert repertoire, perhaps creating sweet memories of your own. I’d love to hear how it turns out for you, so please leave a comment or share your creation on social media. Happy baking, my friends!

    Related update: Caramelized Fig and Walnut Upside-Down Cake with Rosemary-Honey Drizzle

    Related update: Luscious Almond Ricotta Cake with Lavender-Honey Glaze

  • Decadent Chai Rice Pudding with Rosewater and Pistachio Crunch | Made by Meaghan Moineau

    Decadent Chai Rice Pudding with Rosewater and Pistachio Crunch | Made by Meaghan Moineau

    Decadent Chai Rice Pudding with Rosewater and Pistachio Crunch

    Imagine the heady aroma of chai spices curling around you as you take a spoonful of creamy rice pudding that feels like a warm hug on a chilly evening. Each bite is a dance of floral and nutty notes, thanks to the luxurious touch of rosewater and a crunchy pistachio topping. This isn’t just any rice pudding—it’s an invitation to indulge in something truly special.

    Personal Story

    Growing up, rice pudding was a staple in our household, a humble dessert that evoked comfort and a sense of home. My grandmother, the matriarch of our kitchen, would stand over the stove, patiently stirring the pot, with the sweet fragrance of vanilla and cinnamon wafting through the air. This simple dish was her way of bringing the family together, sharing stories and laughter around the table.

    One chilly autumn afternoon, craving the nostalgia of those family gatherings, I attempted to recreate her classic rice pudding. It was then I had my first kitchen mishap—spilling a jar of cardamom pods into the simmering milk. Rather than a disaster, it turned into a delightful discovery. The unexpected spice added a new depth to the dish, and I was inspired to experiment further.

    That’s how I stumbled upon the idea of infusing the rice pudding with chai spices. By adding rosewater and a pistachio crunch, I created a dish that pays homage to my roots while offering a new, luxurious twist. This Decadent Chai Rice Pudding with Rosewater and Pistachio Crunch is a testament to how sometimes, a little kitchen accident can lead to culinary magic.

    What Makes This Version Special

    This version of rice pudding is an elevated take on the beloved classic, transformed by the infusion of **aromatic rosewater** and topped with a **pistachio crunch**. The rosewater adds a fragrant, floral note that perfectly complements the warm chai spices, making each bite an experience. The pistachios, toasted to perfection, provide a delightful contrast to the creamy texture of the pudding. It’s a dessert that feels both familiar and indulgently exotic, offering the best of both worlds.

    Flavor Profile

    The flavor profile of this Decadent Chai Rice Pudding with Rosewater and Pistachio Crunch is a celebration of contrasts. The richness of the creamy rice is beautifully balanced by the floral sweetness of the rosewater. The chai spices—cinnamon, cardamom, ginger, and cloves—infuse the pudding with a warm, comforting aroma. The crunchy pistachio topping adds a nutty depth, making every bite a symphony of flavors that lingers on the palate.

    Ingredients

    • 1 cup long grain rice
    • 4 cups whole milk
    • 2 bags English breakfast tea
    • 1 teaspoon cinnamon powder
    • 1 teaspoon ginger powder
    • 4 whole cardamom pods
    • 1 whole star anise
    • 3 large cloves
    • 1 teaspoon vanilla essence
    • 1/2 cup brown sugar
    • 1 tablespoon **rosewater**
    • 1/2 cup **pistachios**, crushed
    • 1 tablespoon honey
    • Pinch of salt

    Instructions

    1. In a small saucepan, combine the milk, tea bags, rice, and all the spices: cinnamon, ginger, cardamom, star anise, and cloves. Bring the mixture to a gentle boil over medium heat.
    2. Once boiling, lower the heat and let it simmer for about 20 minutes, stirring occasionally. This allows the rice to absorb the spice-infused milk.
    3. While the pudding simmers, toast the pistachios in a dry pan over medium heat with a pinch of salt. Stir frequently until they are lightly golden and aromatic, about 5 minutes. Remove from heat and crush coarsely.
    4. After 20 minutes, remove the tea bags from the pudding, and stir in the brown sugar. Increase the heat to high and cook for another 3-4 minutes, stirring continuously until the pudding thickens and turns creamy.
    5. Stir in the vanilla essence and rosewater, ensuring they are evenly distributed. Remove from heat.
    6. Spoon the rice pudding into individual serving bowls. Drizzle with honey and sprinkle the toasted pistachios on top before serving.

    Pro Tips from Meaghan’s Kitchen

    • Rinse the rice in cold water before cooking to remove excess starch and prevent clumping.
    • For a creamier texture, use a combination of whole milk and half-and-half.
    • If you prefer a thicker pudding, let it cool slightly before serving; it will continue to thicken as it cools.
    • Adjust the sweetness to your liking by tasting the pudding before adding the full amount of sugar.
    • For a burst of color and extra flavor, garnish with a sprinkle of edible dried rose petals.

    Variations & Dietary Swaps

    • Vegan Swap: Replace whole milk with coconut milk or almond milk for a dairy-free version.
    • Spice-It-Up Version: Add a pinch of cayenne pepper to the pistachio topping for a subtle heat contrast.
    • Kids-Friendly Version: Reduce the amount of chai spices and serve with a drizzle of chocolate syrup to appeal to younger palates.

    What to Serve With It

    This Decadent Chai Rice Pudding pairs wonderfully with a glass of chilled sweet dessert wine, like a late harvest Riesling, which complements the floral and nutty notes. Alternatively, for a warm beverage pairing, a steaming cup of masala chai enhances the spice profile and rounds out the meal beautifully.

    Storage & Meal Prep

    Leftover rice pudding can be stored in an airtight container in the refrigerator for up to 3 days. To reheat, gently warm on the stovetop over low heat, stirring in a splash of milk to restore its creamy consistency. While it’s best enjoyed fresh, the pudding can also be frozen for up to a month. Thaw overnight in the refrigerator before reheating.

    FAQ

    Can I use a different type of rice?

    Yes, you can use short grain rice for a creamier texture, but adjust the cooking time as it may cook faster than long grain rice.

    Is it possible to make this dessert ahead of time?

    Absolutely! Prepare the pudding a day in advance and store it in the fridge. Add the rosewater and pistachio topping just before serving to maintain freshness.

    What if I don’t have rosewater?

    If rosewater isn’t available, you can substitute it with a few drops of orange blossom water or simply omit it for a classic chai rice pudding experience.

    How do I know when the pudding is ready?

    The pudding is ready when the rice is tender and the mixture has thickened to a creamy consistency. It should coat the back of a spoon without being too runny.

    Final Thoughts

    I hope this Decadent Chai Rice Pudding with Rosewater and Pistachio Crunch becomes a new favorite in your dessert repertoire. It’s a dish that brings warmth and a touch of luxury to any occasion, whether you’re serving it at a family dinner or enjoying a quiet moment for yourself. I’d love to hear how it turns out for you, so feel free to leave a comment below or share your creation on social media. Remember, the kitchen is a place of exploration and joy—happy cooking!

    Related update: Decadent Chai Rice Pudding with Rosewater and Pistachio Crunch

    Related update: Caramelized Fig and Walnut Upside-Down Cake with Rosemary-Honey Drizzle

  • Orange Blossom Amaretto Almond Cookies with Dark Chocolate Drizzle | Made by Meaghan Moineau

    Orange Blossom Amaretto Almond Cookies with Dark Chocolate Drizzle | Made by Meaghan Moineau

    Orange Blossom Amaretto Almond Cookies with Dark Chocolate Drizzle

    The moment the cookies hit the oven, the kitchen fills with a warm, nutty aroma, hinting at the rich, complex flavors to come. Imagine biting into a delicate almond cookie, its soft center revealing a whisper of citrus and the bold embrace of dark chocolate.

    These Orange Blossom Amaretto Almond Cookies with Dark Chocolate Drizzle are not just a treat — they’re an experience.

    Personal Story

    There’s something about the combination of almonds and amaretto that instantly transports me back to my grandmother’s sunlit kitchen in Tuscany. I remember being a little girl, watching her expertly toss ingredients together, turning the mundane into the magical. Her hands moved with rhythmic precision, each motion a testament to years of practice and love.

    On one particularly memorable afternoon, I stood at her side, flour dusted on my cheek, my small fingers attempting to mimic her grace. She caught my eye and handed me a spoon, “Try this,” she urged, as she slid a bowl of her famous almond cookie dough my way. The taste was sublime — nutty, sweet, with a hint of something floral I couldn’t quite place. It was a moment that marked the beginning of my love affair with baking.

    Years later, while flipping through her recipes, I found a scribbled note at the corner of the page, suggesting the addition of orange blossom water. Curiosity piqued, I set out to recreate and elevate her classic cookie. Thus, these Orange Blossom Amaretto Almond Cookies with Dark Chocolate Drizzle were born, a tribute to her timeless recipe with a modern twist that I hope she would’ve loved.

    And as for the dark chocolate drizzle? That was an accident, a kitchen mishap that turned into a stroke of genius. One day, while reaching for the amaretto, I accidentally knocked over a bar of dark chocolate into the cookie dough. Fate, it seems, had a delicious plan in mind.

    What Makes This Version Special

    These cookies are enhanced with the delicate aroma of orange blossom water and topped with a decadent dark chocolate drizzle, offering a sophisticated twist on a classic treat. The orange blossom water infuses the cookies with a subtle floral note that elevates the traditional almond flavor profile. The addition of dark chocolate adds a luxurious, bittersweet contrast that complements the sweetness of the cookies perfectly. This version is a refined take on the standard recipe, offering a complexity and depth of flavor that’s sure to impress.

    Flavor Profile

    Prepare your taste buds for a journey through layers of flavor. The first bite reveals a nutty, aromatic base, thanks to the ground almonds and almond extract. As you savor the cookie, hints of citrus from the orange blossom water and lemon rind begin to unfold, adding a refreshing brightness to the rich, buttery dough. Finally, the dark chocolate drizzle finishes the experience with its silky, bittersweet touch. It’s a symphony of flavors that dance on your palate with every bite.

    Ingredients

    • 1 cup unsalted butter
    • 1/2 cup molasses
    • 2 large eggs
    • 2 cups ground almonds
    • 1 teaspoon almond extract
    • Zest of 1 lemon
    • 1/4 cup Amaretto
    • 2 cups whole wheat pastry flour
    • **2 teaspoons orange blossom water**
    • **1/2 cup dark chocolate, melted**

    Instructions

    1. Preheat your oven to 350°F (175°C). Line your cookie sheets, although these cookies won’t stick, it’s always safer to use parchment paper.
    2. In a small saucepan, gently warm the butter and **orange blossom water** together over low heat until just combined. This infusion step will allow the floral notes to meld beautifully with the butter. Remove from heat and cool slightly.
    3. In a large mixing bowl, cream together the infused butter and molasses until light and fluffy. This should take about 3-4 minutes. The mixture should be smooth with a rich, caramel hue.
    4. Add the eggs, one at a time, mixing well after each addition. Then, incorporate the ground almonds, lemon rind, and almond extract, stirring until just combined.
    5. Slowly add the **Amaretto**, alternating with the whole wheat pastry flour. Mix until the dough is smooth and holds together, but be careful not to overmix.
    6. Drop the dough by teaspoonsful onto the prepared cookie sheets, leaving about 2 inches between each cookie to allow for spreading.
    7. Bake in the preheated oven for 12-15 minutes, or until the edges are golden brown. Your kitchen will smell divine, a sure sign they’re nearly done.
    8. Once baked, let the cookies cool on the sheets for 5 minutes before transferring them to a wire rack to cool completely.
    9. Once cooled, drizzle the **melted dark chocolate** over the cookies. Use a spoon or a piping bag with a fine tip for an elegant finish. Allow the chocolate to set before serving.

    Pro Tips from Meaghan’s Kitchen

    • If you don’t have a piping bag, a zip-top bag with a small corner cut off works perfectly for drizzling the chocolate.
    • For an enhanced citrus punch, you can add a little extra lemon zest to the dough.
    • Want a chewier cookie? Slightly underbake them, removing from the oven when the centers are just set.
    • Use a quality **dark chocolate** with at least 70% cocoa for a rich, flavorful drizzle.
    • Store your orange blossom water in the fridge to extend its shelf life and keep its aroma vibrant.

    Variations & Dietary Swaps

    • Gluten-Free Version: Replace the whole wheat pastry flour with a gluten-free all-purpose flour blend. The texture will remain wonderfully chewy.
    • Nut-Free Alternative: Swap the ground almonds for sunflower seed flour and use vanilla extract instead of almond extract. The flavor will differ but still be delightful.
    • Spice-It-Up Version: Add a teaspoon of cinnamon and a pinch of nutmeg to the dough for a warm, spiced twist.

    What to Serve With It

    These cookies pair beautifully with a glass of sparkling Prosecco, the bubbles perfectly complementing the cookie’s texture and flavors. For a non-alcoholic option, a cup of Earl Grey tea, with its own subtle notes of citrus and bergamot, makes for a calming match.

    Storage & Meal Prep

    To keep your cookies fresh, store them in an airtight container at room temperature for up to a week. For longer storage, you can freeze the cookies in a freezer-safe bag or container for up to three months. When you’re ready to enjoy them, let them come to room temperature or warm them in a 300°F (150°C) oven for about 5 minutes. The drizzled chocolate will hold up beautifully even after freezing.

    FAQ

    Can I substitute orange blossom water with something else?

    Yes, if you can’t find orange blossom water, you can use a teaspoon of vanilla extract for a different, yet still delicious, flavor.

    What type of molasses should I use?

    For a milder flavor, use light molasses. If you prefer a stronger, more robust flavor, dark molasses is the way to go.

    Can I make these cookies without alcohol?

    Absolutely! Simply omit the Amaretto or replace it with a non-alcoholic almond syrup for a similar flavor without the alcohol.

    Why are my cookies spreading too much?

    Ensure your butter isn’t too warm when mixing the dough, and chill the dough for 30 minutes before baking if your kitchen is particularly warm.

    How do I know when the cookies are done?

    The cookies should be golden brown around the edges and slightly soft in the center. They will continue to firm up as they cool.

    Final Thoughts

    Baking these Orange Blossom Amaretto Almond Cookies with Dark Chocolate Drizzle is like giving a warm hug to your taste buds. Each batch is a small celebration of flavor, nostalgia, and a touch of culinary adventure. I hope you find as much joy in baking and sharing these cookies as I have. I’d love to hear about your experience, so please leave a comment or share your thoughts on social media. Happy baking, my friends!

    Related update: Orange Blossom Amaretto Almond Cookies with Dark Chocolate Drizzle

    Related update: Decadent Chai Rice Pudding with Rosewater and Pistachio Crunch

  • Decadent Honey-Roasted Peanut Butter Ice Cream with Dark Chocolate Shards | Made by Meaghan Moineau

    Decadent Honey-Roasted Peanut Butter Ice Cream with Dark Chocolate Shards | Made by Meaghan Moineau

    Decadent Honey-Roasted Peanut Butter Ice Cream with Dark Chocolate Shards

    Imagine the creamy, nutty goodness of peanut butter ice cream taken to new heights with a luxurious swirl of homemade chocolate ganache and the crunch of honey-roasted peanuts. The first spoonful is a revelation, a dance of caramelized sweetness and rich chocolate undertones that lingers long after the last bite.

    Personal Story

    Growing up, peanut butter ice cream was a rare treat, reserved for special Sunday afternoons when my family would pile into our sun-faded station wagon and head to the local ice cream parlor. I remember the thrill of watching the server scoop out my favorite flavor, the peanut butter ribbons weaving through the creamy concoction like golden streams through a lush forest. It was pure joy in a cone.

    Fast forward a few years to my first tiny apartment kitchen, where I decided to recreate this childhood favorite. My initial attempts were, well, let’s just say, more of a learning experience than a triumph. I quickly discovered that achieving the right balance of flavors in homemade ice cream is both an art and a science, one that requires patience—and a bit of courage.

    One day, as I was experimenting with a batch, I decided to add a handful of honey-roasted peanuts that were hiding at the back of my pantry. The resulting flavor was a revelation. The caramelized crunch paired perfectly with the silky peanut butter base, and I knew I had stumbled upon something special. From there, the addition of dark chocolate shards seemed only natural, enhancing the peanut butter’s richness with a sophisticated depth.

    Now, this decadent honey-roasted peanut butter ice cream with dark chocolate shards holds a cherished spot not only in my recipe book but also in my heart. It’s a sweet reminder that sometimes the best things come from unexpected twists and a little bit of kitchen serendipity.

    What Makes This Version Special

    This isn’t your average peanut butter ice cream. What sets this recipe apart is the thoughtful addition of honey-roasted peanuts and a swirl of homemade chocolate ganache. The peanuts are roasted with honey to enhance their natural sweetness, adding a layer of caramelized flavor that complements the rich, nutty base. The chocolate ganache, made by melting dark chocolate with butter and cocoa powder, is carefully swirled into the ice cream during the final stages of churning. This technique creates deep, chocolatey undertones that elevate the classic peanut butter ice cream to something truly extraordinary.

    Flavor Profile

    The taste of this ice cream is a symphony of rich, nutty notes with a hint of caramel sweetness from the honey-roasted peanuts. Each bite delivers a creamy texture that’s punctuated by the satisfying crunch of the peanuts. The chocolate ganache adds a luxurious depth, with its bittersweet flavor cutting through the sweetness and providing a sophisticated twist. It’s a harmonious blend that dances on your palate, leaving a lingering, delectable aftertaste.

    Ingredients

    • 2 cups whole milk
    • 1 cup sugar
    • 1/4 teaspoon salt
    • 2 large eggs
    • 1 cup smooth peanut butter
    • 1 cup heavy cream
    • 1 teaspoon vanilla extract
    • 1 cup unsalted peanuts, roasted with honey
    • 1/2 cup bits of bitter chocolate
    • 1/4 cup honey
    • 1/4 cup cocoa powder
    • 4 ounces dark chocolate (70% cacao)
    • 2 tablespoons butter

    Instructions

    1. Preheat your oven to 350°F (175°C). Spread the unsalted peanuts on a baking sheet and drizzle with honey. Toss to coat, then roast in the oven for 10-15 minutes, or until golden-brown and fragrant. Allow to cool.
    2. In a medium saucepan, combine the milk, sugar, and salt. Cook over medium heat, stirring occasionally, until the mixture is just about to boil. Reduce the heat to low.
    3. In a separate bowl, beat the eggs with a hand mixer or whisk until frothy, about 2 minutes. Gradually stir about 1 cup of the hot milk mixture into the beaten eggs to temper them.
    4. Return the egg mixture to the saucepan with the remaining milk mixture. Cook over low heat, stirring constantly, until the mixture thickens slightly, about 2-3 minutes. Remove from heat.
    5. Whisk in the smooth peanut butter until fully incorporated. Transfer the mixture to a bowl, cover, and refrigerate for at least 3 hours.
    6. To make the chocolate ganache, melt the dark chocolate and butter together in a small saucepan over low heat. Stir in the cocoa powder until smooth and set aside.
    7. In a large bowl, combine the chilled peanut butter mixture with the heavy cream and vanilla extract, stirring with a whisk.
    8. Pour the mixture into an ice cream maker and churn according to the manufacturer’s instructions. In the last few minutes of churning, drizzle in the chocolate ganache to create swirls.
    9. Once churned, fold in the honey-roasted peanuts and chocolate bits. Transfer the ice cream to a plastic container and freeze for at least an hour before serving.
    10. When ready to serve, let the ice cream sit at room temperature for 5-10 minutes before scooping. Enjoy your decadent treat with an extra sprinkle of chopped peanuts and chocolate bits if desired.

    Pro Tips from Meaghan’s Kitchen

    • For the best texture, ensure your ice cream base is thoroughly chilled before churning. This helps achieve that perfect creamy consistency.
    • When roasting the peanuts, keep a close eye on them. The honey can quickly go from caramelized to burnt if left unattended.
    • If you don’t have an ice cream maker, no worries! Pour the mixture into a shallow dish and place it in the freezer. Stir every 30 minutes until it reaches your desired consistency.
    • For neat swirls, pour the ganache into the ice cream maker just moments before finishing the churn. This will create beautiful ribbons of chocolate throughout.
    • Always use high-quality dark chocolate for the ganache. It makes a significant difference in flavor.

    Variations & Dietary Swaps

    • Vegetarian option: Replace the eggs with a plant-based egg substitute, and use coconut cream instead of heavy cream for a vegan-friendly version.
    • Spice-it-up version: Add a pinch of cayenne pepper or a swirl of chili chocolate for an unexpected kick.
    • Kids-friendly version: Substitute the dark chocolate with milk chocolate and reduce the amount of cocoa powder for a sweeter, milder taste.

    What to Serve With It

    This decadent treat pairs beautifully with a glass of cold brew coffee or espresso, which provides a complementary bitter contrast to the ice cream’s rich sweetness. Alternatively, serve it alongside a warm brownie or a slice of banana bread for an indulgent dessert experience.

    Storage & Meal Prep

    Store your homemade ice cream in an airtight container in the freezer for up to two weeks. When ready to enjoy, let it sit at room temperature for 5-10 minutes before scooping to ensure it’s at the perfect creamy consistency. If the ice cream hardens too much in the freezer, a brief zap in the microwave (10-15 seconds) can soften it up for easier scooping.

    FAQ

    How do I prevent my ice cream from becoming too icy?

    Ensuring that your ice cream base is completely chilled before churning and using an ice cream maker will help prevent ice crystals from forming. Additionally, incorporating enough sugar helps achieve a smoother texture.

    Can I use crunchy peanut butter instead of smooth?

    Absolutely! Crunchy peanut butter will add extra texture and peanut bits, enhancing the nutty experience. Just ensure it’s well incorporated into the mixture.

    Is there an alternative to honey for roasting the peanuts?

    Yes, you can use maple syrup or agave nectar as a substitute for honey if you prefer a different flavor or are avoiding honey.

    Can I add more chocolate?

    Of course! Feel free to increase the amount of dark chocolate or add extra chocolate bits on top for an even richer chocolate experience.

    Final Thoughts

    Creating this decadent honey-roasted peanut butter ice cream with dark chocolate shards is a delightful culinary adventure, one that’s sure to impress family and friends. I hope you find as much joy in making and tasting this ice cream as I did in creating it. I’d love to hear about your own twists on this recipe, so feel free to share your comments and experiences below. Happy scooping!

    Related update: Decadent Honey-Roasted Peanut Butter Ice Cream with Dark Chocolate Shards

    Related update: Orange Blossom Amaretto Almond Cookies with Dark Chocolate Drizzle

  • Zesty Lemon Poppy Seed Lava Cakes with Spiced Chocolate Ganache | Made by Meaghan Moineau

    Zesty Lemon Poppy Seed Lava Cakes with Spiced Chocolate Ganache | Made by Meaghan Moineau

    Zesty Lemon Poppy Seed Lava Cakes with Spiced Chocolate Ganache

    Imagine this: a warm, golden-brown cake with a delicate crust, cradling a pool of molten chocolate that spills onto your plate with the first forkful. The aroma of fresh lemon zest mingles with the warm, spiced scent of cardamom and ginger, creating a sensory symphony that dances around your kitchen. Welcome to the world of Zesty Lemon Poppy Seed Lava Cakes with Spiced Chocolate Ganache — a dessert that tantalizes both your taste buds and your imagination.

    Personal Story

    When I was a little girl, my grandmother would often bake her famous lemon poppy seed cake. It was a simple yet decadent treat, and I can still recall the scent wafting through the house, mingling with the laughter of family gatherings. That cake was a staple at our family celebrations, a beloved tradition that brought everyone together around the dining table.

    Fast forward to a few years ago when I found myself in Paris, walking through a bustling market. I stumbled upon a quaint patisserie where I experienced my first taste of molten chocolate lava cake. The intense richness of the chocolate was perfectly balanced by a hint of spice, an unexpected twist that left me dreaming of recreating the experience back home.

    Inspired by those memories, I embarked on a culinary journey to merge these two beloved desserts into one perfect fusion. The result? Zesty Lemon Poppy Seed Lava Cakes with Spiced Chocolate Ganache. Each bite is a nostalgic nod to my past, while the rich, spiced ganache adds a bold and contemporary twist.

    Not only does this recipe marry two beloved flavors, but it also embodies the essence of my culinary philosophy: to honor tradition while embracing innovation. This dish is a testament to the joys of experimentation and the magic that happens when you bring together unexpected ingredients.

    What Makes This Version Special

    This isn’t just any lemon poppy seed cake or molten chocolate lava cake — it’s a delightful fusion that brings together the best of both worlds. By incorporating a hint of cardamom and ginger into the chocolate ganache, this version creates a warm, spiced flavor that perfectly complements the zesty lemon cake. The result is a harmonious blend that elevates the traditional dessert to new heights, offering a sophisticated twist that’s both surprising and satisfying.

    Why settle for a standard recipe when you can indulge in a dessert that tantalizes the senses and surprises the palate? This version is not only a feast for your taste buds but also an experience that your guests will remember and rave about.

    Flavor Profile

    Imagine a bite that begins with the fresh, zingy pop of lemon and the nutty crunch of poppy seeds. As you reach the center, the warm, spiced chocolate ganache spills out in a silky cascade, enveloping your senses in a rich and aromatic embrace. The balance of sweetness and spice is delicate yet pronounced, creating a flavor experience that lingers beautifully on the palate.

    Every element of this dish works in harmony: the zesty brightness of the lemon cake, the subtle warmth of the spices, and the deep, rich chocolate — all coming together in a symphony of flavors that feels both nostalgic and novel.

    Ingredients

    • 1 cup all-purpose flour
    • 1 tablespoon grated lemon rind
    • 2 tablespoons poppy seeds
    • 3 large egg yolks
    • 3/4 cup granulated sugar
    • 1/2 cup unsalted butter, melted
    • 3 large egg whites
    • 6 ounces bittersweet chocolate, chopped
    • 1 teaspoon ground cardamom
    • 1/2 teaspoon ground ginger
    • 1 teaspoon vanilla extract
    • Pinch of salt

    Instructions

    1. Position a rack in the center of the oven and preheat to 400 degrees F. Lightly butter six 6-ounce ramekins, dust with sugar, and place on a baking sheet.
    2. In a small bowl, whisk together the flour, lemon rind, and poppy seeds; set aside.
    3. In the 4-1/2 quart bowl of a heavy-duty electric mixer using the wire whip attachment, whip the egg yolks and sugar until the mixture is pale and forms a ribbon when the whip is lifted. Add the vanilla extract and a pinch of salt for enhanced depth of flavor.
    4. Place the egg whites in a medium grease-free bowl and using a hand-held electric mixer, whip the whites to soft peaks.
    5. Fold the flour mixture into the yolk/sugar mixture, then add the melted butter and gently mix until combined. Fold in the egg whites until combined.
    6. In a small saucepan, melt the chocolate over low heat. Once melted, remove from heat and stir in the ground cardamom and ground ginger for a spiced kick.
    7. Fill each of the prepared ramekins 3/4 full with the cake batter and place a 1-ounce piece of the spiced chocolate ganache in the center of the batter.
    8. Bake for 15 minutes or until the cakes are firm yet have a slight jiggle in the center. Allow to cool on a wire rack for 5 minutes.
    9. Gently invert each cake onto a dessert plate and serve warm, letting the spiced chocolate ganache ooze out enticingly.

    Pro Tips from Meaghan’s Kitchen

    • For a more intense lemon flavor, consider adding a bit of freshly squeezed lemon juice to the batter.
    • Ensure your egg whites are at room temperature before whipping for maximum volume.
    • Gently fold the egg whites into the batter to maintain airiness — overmixing can result in dense cakes.
    • If you’re short on time, you can prepare the spiced chocolate ganache in advance and refrigerate it until needed.
    • Use a serrated knife to chop the chocolate; it will prevent the chocolate from flying everywhere.

    Variations & Dietary Swaps

    • For a gluten-free version, substitute the all-purpose flour with a gluten-free flour blend.
    • Spice it up by adding a pinch of cayenne pepper to the ganache for an extra kick.
    • Make it kid-friendly by omitting the spices and using milk chocolate instead of bittersweet chocolate.

    What to Serve With It

    These Zesty Lemon Poppy Seed Lava Cakes with Spiced Chocolate Ganache are a show-stopping dessert on their own, but for a truly indulgent experience, pair them with a chilled glass of sparkling Moscato. The effervescence and sweetness of the wine complement the rich flavors perfectly. Alternatively, a scoop of vanilla bean ice cream adds a creamy contrast to the warm, gooey center.

    Storage & Meal Prep

    These lava cakes are best enjoyed fresh from the oven, but if you have leftovers, you can store them in an airtight container in the refrigerator for up to 2 days. To reheat, place them in a preheated oven at 350 degrees F for about 5-7 minutes or until warmed through. If freezing, wrap each cake tightly in plastic wrap and then aluminum foil. They can be frozen for up to 1 month. Thaw in the refrigerator overnight before reheating.

    FAQ

    Can I use milk chocolate instead of bittersweet chocolate?

    Yes, you can substitute milk chocolate for a sweeter, creamier ganache. Keep in mind that it will be less intense than bittersweet chocolate.

    What if I don’t have cardamom at home?

    No worries! You can substitute with cinnamon, though the flavor profile will be slightly different. The warmth of cinnamon pairs well with ginger and chocolate.

    How do I know when the cakes are done baking?

    The cakes should be firm around the edges but have a slight jiggle in the center. This indicates that the chocolate core remains gooey.

    Can I make the batter ahead of time?

    It’s best to prepare and bake the batter immediately for optimal texture. However, you can prepare the dry and wet ingredients separately a day in advance and combine them right before baking.

    What if I don’t have ramekins?

    If you don’t have ramekins, you can use muffin tins as an alternative. Just be sure to adjust the baking time slightly as they may cook faster.

    Final Thoughts

    Thank you for joining me on this delicious journey of creating Zesty Lemon Poppy Seed Lava Cakes with Spiced Chocolate Ganache. I hope this recipe brings as much joy and warmth to your kitchen as it does to mine. I encourage you to experiment and adapt as you see fit — after all, cooking is as much about personal expression as it is about flavor. Don’t hesitate to share your culinary creations and experiences in the comments below. Happy baking, my dear friends!

    Related update: Zesty Lemon Poppy Seed Lava Cakes with Spiced Chocolate Ganache

    Related update: Decadent Honey-Roasted Peanut Butter Ice Cream with Dark Chocolate Shards

  • Zesty Lime-Infused Strawberry Yogurt Cake with Basil Glaze | Made by Meaghan Moineau

    Zesty Lime-Infused Strawberry Yogurt Cake with Basil Glaze | Made by Meaghan Moineau

    Zesty Lime-Infused Strawberry Yogurt Cake with Basil Glaze

    Picture this: The gentle hum of your oven warming the kitchen, the air thick with the scent of fresh strawberries and citrus, and a golden-brown Bundt cake cooling on the counter. This is the kind of moment that makes you slow down, savor the process, and anticipate that first bite. Welcome to the world of Zesty Lime-Infused Strawberry Yogurt Cake with Basil Glaze.

    Personal Story

    Every spring, as the first strawberries start appearing in the market, I’m reminded of my childhood summers spent at my grandmother’s house. Her garden was a small slice of heaven, bustling with the colors and scents of the season. Strawberries were always the crown jewels of her garden, and she would let me pick them fresh each morning, the dew still clinging to their vibrant red skins.

    My love for strawberries naturally found its way into my baking adventures. One memorable afternoon, I set out to recreate a simple strawberry cake recipe from my grandmother’s old cookbook. To my dismay, I realized I had run out of lemons. Panicking, I reached for limes instead and decided to add a bit of zest to the sugar. The outcome was unexpected but delightful, a revelation that led to the creation of this Zesty Lime-Infused Strawberry Yogurt Cake.

    Years later, I was inspired by a local chef who infused a dessert glaze with fresh herbs. That’s when it clicked: why not add a fragrant basil glaze to my lime-infused cake? It turned out to be the perfect twist — the basil’s subtle pepperiness played beautifully with the sweet strawberries and citrusy lime.

    Now, whenever I bake this cake, it feels like a gathering of old friends: the familiar sweetness of strawberries, the zing of lime, and the aromatic hug of basil. It’s a recipe that bridges my past with new culinary explorations, and I hope it becomes a staple in your kitchen too.

    What Makes This Version Special

    This isn’t just any strawberry cake. Our version adds a refreshing lime zest and a fragrant basil-infused glaze, creating a unique herbal twist that complements the sweet strawberries. The addition of Greek yogurt ensures a tender crumb, while the blooming of lime zest in sugar releases a vibrant citrus aroma that permeates the entire cake. The basil glaze is a subtle, yet sophisticated touch that elevates the cake from ordinary to extraordinary, offering a gentle herbal note that sets it apart from more traditional versions.

    Flavor Profile

    Each bite of this Zesty Lime-Infused Strawberry Yogurt Cake is a journey. Refreshing and herbaceous, the experience begins with a burst of lime and sweet ripe strawberries, followed by a vibrant citrus zing. The basil glaze adds a gentle, aromatic finish, marrying the flavors with a sweet, fruity conclusion. It’s a cake that dances on your palate, promising a delightful taste from start to finish.

    Ingredients

    • 2 cups all-purpose flour, plus an extra 1/4 cup for the strawberries
    • 1 teaspoon baking soda
    • 1/2 teaspoon salt
    • Zest of 1 lime (bloom in sugar)
    • 1 cup unsalted butter, softened (infused with basil)
    • 1 1/2 cups sugar
    • 3 large eggs
    • 1 tablespoon lime juice
    • 1 cup plain Greek yogurt
    • 2 cups diced fresh strawberries
    • 1 cup powdered sugar
    • 10 fresh basil leaves

    Instructions

    1. Preheat your oven to 325°F (160°C). Grease and flour a 10-inch Bundt pan to ensure the cake releases easily after baking.
    2. In a medium bowl, sift together 2 cups of flour, baking soda, and salt. Set aside.
    3. Bloom the lime zest by rubbing it into the sugar with your fingertips until the sugar becomes fragrant and lightly colored.
    4. In a small saucepan, melt the butter over low heat. Add the fresh basil leaves and let them infuse for about 10 minutes. Remove the leaves before using the butter.
    5. In a large mixing bowl, use an electric mixer to cream together the infused butter and sugar mixture until light and fluffy, about 3-4 minutes.
    6. Beat in the eggs one at a time, ensuring each is fully incorporated before adding the next. Stir in 1 tablespoon of lime juice.
    7. Alternate adding the flour mixture and Greek yogurt to the batter, starting and ending with the flour, mixing just until everything is incorporated.
    8. Toss the diced strawberries in the remaining 1/4 cup of flour. This helps prevent them from sinking to the bottom of the cake. Gently fold the strawberries into the batter.
    9. Pour the batter into the prepared Bundt pan, smoothing the top with a spatula.
    10. Bake in the preheated oven for about 60 minutes, or until a toothpick inserted into the center of the cake comes out clean.
    11. Allow the cake to cool in the pan for 10 minutes before turning it out onto a wire rack to cool completely.
    12. For the glaze, whisk together the powdered sugar and 2 tablespoons of lime juice until smooth. Drizzle over the cooled cake and let it set before serving.

    Pro Tips from Meaghan’s Kitchen

    • For the most flavor, make sure to rub the lime zest into the sugar before creaming it with the butter. This releases the zest’s natural oils.
    • Take your time infusing the butter with basil. Low and slow is the key to drawing out the basil’s aromatic qualities without burning the butter.
    • Ensure your strawberries are dry after washing; excess water can alter the cake’s texture.
    • Test for doneness by inserting a toothpick into the thickest part of the cake. A clean toothpick means it’s ready.
    • For best results, use fresh basil leaves rather than dried ones for the glaze. The fresh leaves impart a more vibrant flavor.

    Variations & Dietary Swaps

    • Vegetarian Swap: The recipe is already vegetarian-friendly, but for a vegan version, consider using a plant-based yogurt and flax eggs.
    • Spice-It-Up Version: Add a pinch of ground ginger or cardamom to the batter for a spiced twist.
    • Kids-Friendly Version: Omit the basil glaze and top with a simple vanilla glaze or a dusting of powdered sugar instead.

    What to Serve With It

    This Zesty Lime-Infused Strawberry Yogurt Cake pairs beautifully with a chilled glass of sparkling elderflower lemonade for a refreshing contrast. If you’re serving it as a dessert after dinner, consider a dollop of lightly whipped cream or a scoop of vanilla ice cream for an extra touch of indulgence.

    Storage & Meal Prep

    To store leftovers, wrap the cake tightly in plastic wrap or aluminum foil and keep it in the refrigerator for up to 5 days. For longer storage, you can freeze the cake for up to 3 months. To freeze, wrap the cooled cake in plastic wrap, then in foil, and place it in a resealable freezer bag. To reheat, let the cake thaw in the refrigerator overnight and bring it to room temperature before serving. If you prefer it warm, heat individual slices in the microwave for 15-20 seconds.

    FAQ

    Can I use frozen strawberries instead of fresh?

    Yes, you can use frozen strawberries, but be sure to thaw and drain them well to prevent excess moisture from affecting the cake’s texture.

    Can I substitute the Greek yogurt with regular yogurt?

    Absolutely! Regular yogurt works just fine, but Greek yogurt gives the cake a slightly richer texture due to its thickness.

    What if I don’t have a Bundt pan?

    No worries! You can use a 9×13 inch baking pan instead. Just keep an eye on the baking time, as it may vary slightly.

    How can I make the glaze thicker?

    If you prefer a thicker glaze, reduce the lime juice or add more powdered sugar until you reach your desired consistency.

    Is there a way to make this cake gluten-free?

    Yes, you can use a 1:1 gluten-free flour blend. Just make sure it’s suitable for baking for the best results.

    Final Thoughts

    Baking this Zesty Lime-Infused Strawberry Yogurt Cake with Basil Glaze is more than just a culinary endeavor — it’s a celebration of flavors and memories brought to life in your kitchen. I hope this cake brings as much joy and deliciousness to your table as it has to mine. If you give this recipe a try, I’d love to hear how it turned out for you! Feel free to drop a comment below or share your creations on social media. Happy baking, my dear friends!

    Related update: Zesty Lime-Infused Strawberry Yogurt Cake with Basil Glaze

    Related update: Zesty Lemon Poppy Seed Lava Cakes with Spiced Chocolate Ganache

  • Luscious Vegan Strawberry-Rose Shortcake with Coconut Cream | Made by Meaghan Moineau

    Luscious Vegan Strawberry-Rose Shortcake with Coconut Cream | Made by Meaghan Moineau

    Luscious Vegan Strawberry-Rose Shortcake with Coconut Cream

    Imagine biting into a dessert that feels like a sun-soaked summer afternoon. The sweetness of ripe strawberries mingles with a whisper of floral rose, all embraced by a rich, creamy cloud of coconut whipped cream. This isn’t just any strawberry shortcake; it’s a sensory journey that transforms your taste buds with every bite.

    Personal Story

    Strawberry shortcake has always been a staple at my family gatherings, a dessert that evokes memories of laughter and clinking glasses around a bustling dinner table. As a child, I remember eagerly watching my grandmother whip cream by hand, her movements rhythmic and full of purpose. The anticipation of sinking my teeth into layers of soft cake, fresh berries, and sweet cream made every minute of waiting worthwhile.

    Years later, during a particularly adventurous phase of my cooking journey, I found myself experimenting with flavors that intrigued me. That’s when I stumbled upon rose water. Its exotic aroma enchanted me, and I knew I had to incorporate it into a recipe that held a special place in my heart. The idea to elevate the classic strawberry shortcake with rose water and coconut cream was born out of this curiosity.

    Of course, not every attempt was successful. There was the time I accidentally overdid the rose water, resulting in a dessert that tasted more like a perfume bottle than a treat. But with each misstep, I learned, refined, and perfected, until I arrived at this version — a luscious vegan strawberry-rose shortcake with coconut cream that brings a unique twist to a beloved classic.

    The first time I served this version to my family, I watched their expressions shift from curious skepticism to delight. The subtle floral notes, the creamy coconut, and the juicy strawberries — it was a harmony of flavors that surprised and delighted even my traditionalist grandmother. It’s a recipe that bridges generations and culinary worlds, and I can’t wait to share it with you.

    What Makes This Version Special

    This strawberry shortcake isn’t your average dessert. By infusing the strawberries with a fragrant touch of rose water, we introduce a delicate floral note that elevates the classic fruit. Pair this with a rich coconut whipped cream, and you have a dessert that’s not only vegan-friendly but also a true taste sensation. The coconut cream adds a luscious texture that’s both light and indulgent, transforming the shortcake into a floral delight that stands out from the traditional version.

    Flavor Profile

    The experience of tasting this vegan strawberry-rose shortcake is akin to stepping into a fragrant garden. The first bite is a delicate balance — the sweetness of the strawberries, heightened by the floral essence of rose water, creates a symphony of flavors that dance on your palate. The coconut cream provides a velvety, rich counterpoint, making each mouthful creamy and refreshing. This isn’t just a dessert; it’s a taste of summer wrapped in a luxurious, aromatic package.

    Ingredients

    • 1 cup flour
    • 1/2 cup almond meal
    • 1/3 cup turbinado sugar
    • 1 teaspoon baking soda
    • 1/4 teaspoon salt
    • 3/4 cup almond milk
    • 1 tablespoon apple cider vinegar
    • 1/4 cup vegetable oil
    • 1 tiny drop of almond extract
    • 1 pound strawberries, sliced
    • 1 teaspoon rose water
    • 1 can full-fat coconut milk (chilled overnight)
    • 2 tablespoons maple syrup

    Instructions

    1. Preheat your oven to 400°F (200°C). Line two baking sheets with parchment paper for easy cleanup.
    2. In a glass bowl, combine the sliced strawberries with 1 teaspoon rose water. Cover and refrigerate to let the flavors meld.
    3. In a medium-sized bowl, whisk together 1 cup flour, 1/2 cup almond meal, 1 teaspoon baking soda, and 1/4 teaspoon salt.
    4. In a small bowl, dissolve 1/3 cup turbinado sugar in 1 teaspoon water.
    5. In a large bowl, combine 3/4 cup almond milk, 1 tablespoon apple cider vinegar, 1/4 cup vegetable oil, the sugar mixture, and 1 tiny drop of almond extract. Whisk until well blended.
    6. Create a well in the center of the dry ingredients and gradually pour in the wet mixture. Stir until just combined to avoid overmixing.
    7. Drop heaping tablespoons of batter onto the prepared baking sheets, leaving a few inches between each dollop. This should yield about 10 shortcakes.
    8. Bake for 10-12 minutes, or until the shortcakes are ever so slightly golden. Remove from oven and let them cool on a wire rack.
    9. While the shortcakes are cooling, prepare the coconut cream. Chill a mixing bowl and beaters in the freezer for 15 minutes to ensure a fluffier texture.
    10. Scoop the solidified coconut cream from the chilled can into the cold bowl. Add 2 tablespoons maple syrup and whip until peaks form.
    11. To assemble, slice each shortcake in half with a serrated knife. Generously dollop the coconut whipped cream onto the bottom half, add a spoonful of rose-infused strawberries, and cap with the top half. Garnish with more cream and strawberries, if desired.

    Pro Tips from Meaghan’s Kitchen

    • For a more pronounced rose flavor, increase the rose water by an additional 1/2 teaspoon. Just be cautious — a little goes a long way!
    • When making the coconut whipped cream, ensure your coconut milk is thoroughly chilled. This helps separate the cream from the liquid, giving you a thicker texture to work with.
    • If your strawberries aren’t at peak ripeness, sprinkle them with a touch more sugar to enhance their natural sweetness.
    • Use a serrated knife to slice the shortcakes; it cuts through the delicate crumb without squishing the layers.
    • Experiment with different almond extracts for subtle flavor variations — some brands can be milder or stronger than others.

    Variations & Dietary Swaps

    • Gluten-Free Version: Substitute the flour with a gluten-free all-purpose blend to make this dessert suitable for gluten sensitivities.
    • Spice-It-Up Version: Add a pinch of ground cardamom to the dry ingredients for a warm, spicy undertone that complements the floral notes.
    • Kid-Friendly Version: Omit the rose water for a more straightforward strawberry shortcake that appeals to younger palates.

    What to Serve With It

    This luscious vegan strawberry-rose shortcake pairs beautifully with a chilled glass of rosé wine, enhancing the floral notes and adding a sophisticated touch to your dessert experience. Alternatively, a scoop of dairy-free vanilla ice cream alongside the shortcake creates an indulgent treat perfect for warm evenings.

    Storage & Meal Prep

    To store leftovers, place the assembled shortcakes in an airtight container in the refrigerator for up to two days. The coconut cream may harden slightly, so allow the shortcakes to sit at room temperature for a few minutes before serving. For meal prep, bake the shortcakes and slice the strawberries a day ahead. Whip the coconut cream just before serving to maintain its fluffy texture.

    FAQ

    Can I use regular cream instead of coconut cream?

    Absolutely! If you’re not following a vegan diet, regular whipped cream can be a tasty substitute. Just whip it with a bit of sugar and vanilla extract for sweetness.

    How do I prevent the shortcakes from becoming soggy?

    To keep the shortcakes crisp, assemble them just before serving. The coconut cream and juicy strawberries can make them soggy if left too long.

    Is there a substitute for rose water?

    If you can’t find rose water or prefer a different flavor, try using a vanilla or almond extract, keeping in mind that the overall taste will change.

    Can I make this dessert ahead of time?

    You can prepare the shortcakes and strawberries in advance, but for best results, whip the coconut cream and assemble the shortcakes right before serving.

    What if I don’t have almond meal?

    No worries! You can pulse whole almonds in a food processor until finely ground to make your own almond meal at home.

    Final Thoughts

    Cooking, for me, is all about creating moments — moments that linger on your taste buds and in your memories. This luscious vegan strawberry-rose shortcake with coconut cream is a testament to the joy of experimenting and sharing love through food. I hope you’ll try this recipe and find the same delight in it as I have. I’d love to hear how it turns out for you, so please feel free to leave a comment or share your own twists on this floral, fragrant dessert. Happy cooking, dear friend!

    Related update: Luscious Vegan Strawberry-Rose Shortcake with Coconut Cream

    Related update: Zesty Lime-Infused Strawberry Yogurt Cake with Basil Glaze