Author: Meaghan Moineau

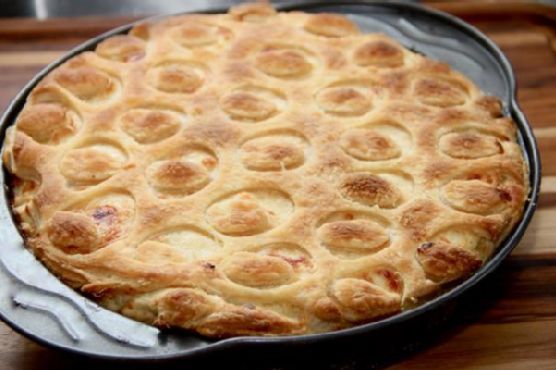
  • Savory White Onion and Herb Tuna Tart with Truffle Essence | Made by Meaghan Moineau

    Savory White Onion and Herb Tuna Tart with Truffle Essence | Made by Meaghan Moineau

    Savory White Onion and Herb Tuna Tart with Truffle Essence

    Imagine the comforting aroma of sizzling butter and fresh herbs enveloping your kitchen, while the golden-brown puff pastry rises to a flaky perfection. This is more than just a meal; it’s a savory escape to the French countryside with every bite.

    The first time I stumbled upon the idea of a savory tart, I was wandering through the cobblestone streets of a quaint French village. The local bakery had a lineup of tarts so inviting, I could almost taste the buttery crust and rich fillings through the shop window. But one stood out above the rest — a simple onion tart with an aroma that pulled you in like a warm hug. I knew I had to recreate it in my own kitchen.

    Back home, I was determined to elevate this classic French dish by incorporating my unique twist. It wasn’t just about the savory flavor; I wanted to add a layer of sophistication that would make this tart truly special. After several kitchen experiments, I landed on the perfect combination: a hint of truffle oil and fresh herbs. The first bite was magical — the earthy, luxurious taste was exactly what I had envisioned.

    Of course, my first attempt wasn’t without its challenges. I faced a minor kitchen mishap when I accidentally burnt the initial batch of onions. But like any great cook knows, sometimes those little mistakes lead to the best discoveries. With a few adjustments, I perfected the technique, ensuring the onions were sweet and caramelized without a hint of bitterness.

    Now, every time I make this Savory White Onion and Herb Tuna Tart with Truffle Essence, I’m transported back to that little bakery, yet with a personalized twist that makes it distinctly mine.

    What Makes This Version Special

    This version of the classic white onion tart is infused with aromatic herbs and a hint of truffle oil, adding a luxurious depth of flavor to the dish. By blooming the herbs in butter before adding the onions, their flavors are enhanced, bringing a fragrant complexity that elevates the tart far beyond the traditional recipe. The drizzle of truffle oil brushed over the top crust before baking ensures an aromatic finish that lingers as you savor each bite. It’s the perfect balance of comfort and elegance that makes this tart a stand-out centerpiece at any gathering.

    Flavor Profile

    Rich, earthy, and with a hint of smokiness, this tart is a symphony of flavors. The truffle oil weaves through the dish with its luxurious aroma, while the combination of fresh thyme and dill provides a fragrant, herbaceous note. The white onions offer a subtle sweetness that complements the tender, savory tuna fillets, all encased in a flaky, golden-brown puff pastry. It’s a dish that envelops you in warmth and indulgence with every bite.

    Ingredients

    • 1 sheet frozen ready-made puff pastry, thawed
    • 2 tablespoons butter
    • 4 large white onions, thinly sliced
    • 3 eggs
    • 1 cup cream
    • Salt and fresh ground black pepper, to taste
    • Pinch of nutmeg
    • 1 cup fresh ground mild cheese
    • **8 ounces wild mild fish fillets**, cut into 1/2 inch slices
    • **2 tablespoons fresh thyme**, chopped
    • **2 tablespoons fresh dill**, chopped
    • **Truffle oil**, for brushing
    • 1 teaspoon lemon zest
    • 1/2 teaspoon smoked paprika (optional)

    Instructions

    1. Preheat your oven to 425°F (220°C). Prepare your baking pan by lightly flouring your work surface and rolling out the puff pastry to be slightly larger than your pan (a 10-inch pie pan works well).
    2. Cut the fish into 1/2 inch thick slices if it’s not already prepared. Season them liberally with salt and fresh ground black pepper, then set aside.
    3. In a Dutch oven over medium heat, melt the butter. Add the sliced onions, then reduce the heat to low and cover the pot tightly. Cook the onions for approximately 20 minutes, stirring occasionally, until they are soft and translucent but not browned.
    4. While the onions are cooking, whisk together the eggs and cream in a separate bowl. Set aside.
    5. Remove the onions from the heat once they are cooked. Stir in the egg and cream mixture, ensuring everything is well combined and creamy. Season with additional salt, pepper, and a pinch of nutmeg.
    6. Fold in the ground cheese and stir gently to distribute evenly throughout the onion mixture. Add smoked paprika if desired.
    7. Line the prepared baking pan with the puff pastry, pressing it gently into the sides to form a pie shell. Pierce the pastry all over with a fork to prevent bubbling.
    8. Spread half of the onion and egg mixture into the pie shell. Arrange the seasoned fish slices over this layer in a single, even layer.
    9. Top with the remaining onion mixture, spreading it evenly over the fish. If you’re feeling creative, use a small bottle cap to cut decorative patterns into the top layer of puff pastry.
    10. Carefully place the top pie crust over the tart. Use a rolling pin to seal the edges to the rim of the baking pan, trimming any excess pastry. Brush the top with truffle oil for that aromatic finish.
    11. Bake in the preheated oven for about 30 minutes, or until the crust is golden and flaky, and the filling is set in the center. Serve hot, and enjoy the delightful aroma and flavors.

    Pro Tips from Meaghan’s Kitchen

    • For an extra flaky crust, chill your puff pastry in the freezer for about 15 minutes before baking.
    • If you find your onions are browning too quickly, add a splash of water to the pan to help them soften without burning.
    • Don’t skip the step of piercing the pastry with a fork — it’s crucial for preventing bubbles and ensuring an even bake.
    • For a deeper flavor, let the onion mixture cool for a few minutes before adding the egg and cream, preventing the eggs from cooking too quickly.
    • When brushing the truffle oil, use a light hand to avoid overpowering the other flavors in the tart.

    Variations & Dietary Swaps

    • Vegetarian Swap: Replace the fish with sautéed mushrooms or roasted bell peppers for a vegetarian delight.
    • Spice-it-up Version: Add a pinch of cayenne pepper to the onion mixture for a subtle kick of heat.
    • Kids-Friendly Version: Substitute the truffle oil with a mild garlic-infused oil, and reduce the herbs for a simpler flavor profile.

    What to Serve With It

    This savory tart pairs beautifully with a light, crisp salad of mixed greens and a tangy vinaigrette. For a more indulgent pairing, serve it alongside creamy mashed potatoes. And don’t forget the wine — a chilled glass of Sauvignon Blanc complements the dish perfectly, highlighting the rich, earthy flavors with its refreshing acidity.

    Storage & Meal Prep

    Leftovers of this tart can be stored in an airtight container in the refrigerator for up to three days. To reheat, place slices in a preheated oven at 350°F (175°C) for about 10-15 minutes, until warmed through. For longer storage, wrap the tart securely in plastic wrap and foil, then freeze for up to two months. Thaw in the fridge overnight before reheating.

    FAQ

    Can I make this tart ahead of time?

    Absolutely! You can prepare the tart up to a day in advance and bake it right before serving. Just keep it covered in the fridge until you’re ready to bake.

    What type of cheese works best?

    A mild, creamy cheese like Gruyère or Emmental complements the flavors without overpowering them. Feel free to experiment with your favorites!

    Can I use red onions instead of white?

    Yes, red onions can add a slightly sweeter and more colorful twist to the tart, though the flavor will be subtly different.

    Is there a non-dairy alternative for the cream?

    You can substitute the cream with coconut cream or a non-dairy creamer for a similar texture and flavor. Just be sure to choose a non-dairy option that isn’t overly sweet.

    What if I don’t have a Dutch oven?

    No worries! You can use any heavy-bottomed pan with a tight-fitting lid to achieve similar results when cooking the onions.

    Final Thoughts

    There you have it, my friends! This Savory White Onion and Herb Tuna Tart with Truffle Essence is more than just a recipe; it’s an invitation to explore and enjoy the comforting elegance of French cuisine in your own home. I’d love to hear how your tart turns out and any unique twists you’ve discovered along the way. Don’t forget to share your delicious creations and leave a comment below. Bon appétit!

    Related update: Savory White Onion and Herb Tuna Tart with Truffle Essence

    Related update: Honey-Lime Glazed Baked Salmon with Crispy Ginger Garlic Topping
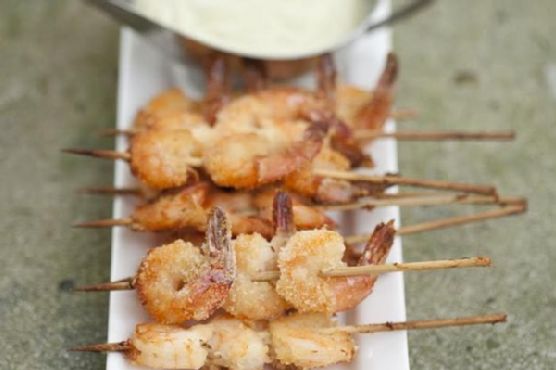
  • Spicy Crunchy Prawn Skewers with Zesty Lime-Avocado Cream | Made by Meaghan Moineau

    Spicy Crunchy Prawn Skewers with Zesty Lime-Avocado Cream | Made by Meaghan Moineau

    Spicy Crunchy Prawn Skewers with Zesty Lime-Avocado Cream

    Imagine the sizzle of plump prawns on a hot grill, the air filled with the smoky scent of paprika and cayenne, while a refreshing lime-avocado cream quietly chills in the background, waiting to steal the show. This isn’t just dinner; it’s a culinary adventure right in your kitchen, and you’re invited to join me!

    Personal Story

    There was a time during a family barbecue when I decided to impress my relatives with a seafood dish that was a bit out of my comfort zone. I had always loved prawns for their delicate sweetness, but I wanted to elevate them beyond the typical garlic butter route. On a whim, I tossed them with spices, skewered them, and sent them onto the grill. The result? A smoky, spicy masterpiece that had everyone reaching for seconds. It was a moment of culinary triumph I won’t soon forget.

    However, this wasn’t my first attempt. Oh no, before this success, there was a rather spectacular failure involving prawns, an overly ambitious amount of chili, and a grill that was too hot to handle. Let’s just say, the prawns were more reminiscent of charcoal than a culinary delight. But every mishap is a learning opportunity, and I took notes. That’s when I discovered the art of blooming spices to draw out their full potential and the transformative power of letting flavors meld.

    Fast forward a few months, and I found myself at a local farmer’s market, inspired by the array of fresh produce and fragrant herbs. That’s where I stumbled upon the idea of pairing my spicy prawns with a creamy, zesty avocado dip. The lime zest added a pop of brightness that balanced the heat and richness perfectly. It was a revelation! Since then, this dish has become a beloved staple in my home, perfect for impressing guests or treating myself to something special.

    What Makes This Version Special

    This isn’t your average prawn skewer recipe—oh no, it’s a flavor explosion with a twist. By infusing the breadcrumbs with smoked paprika and cayenne, we create a coating that’s smoky and spicy, offering a true sensory experience with every bite. But the magic doesn’t stop there. The avocado dip is elevated with a hint of fresh lime zest, adding an unexpected layer of zesty flavor that brightens the dish and complements the heat. This combination of flavors and textures makes this version of prawn skewers stand out from the crowd.

    Flavor Profile

    Imagine biting into these prawn skewers: the crispy coating gives way to tender, juicy prawns, while the smoky and spicy notes from the paprika and cayenne leave a lingering warmth on your palate. The accompanying lime-avocado cream is a refreshing oasis, with its silky texture and vibrant citrus finish that dances on your tongue. Each element works in harmony, creating a dish that’s as complex as it is delicious.

    Ingredients

    • 1 ripe avocado, flesh scooped out
    • 1/4 cup crème fraiche
    • 2 tablespoons fresh lemon juice
    • **Zest of 1 lime**
    • 1 teaspoon **smoked paprika**
    • 1/2 teaspoon **cayenne pepper**
    • 1 cup **breadcrumbs**
    • 1 pound large prawns, peeled and deveined
    • 3 tablespoons olive oil
    • 8-10 bamboo skewers, soaked in water
    • Salt and pepper, to taste

    Instructions

    1. Start with the avocado dip. In a food processor, combine the avocado flesh, crème fraiche, and lemon juice. Blend until smooth and creamy. Season with salt and pepper to taste. Stir in the lime zest. Transfer to a bowl and chill in the refrigerator for at least 30 minutes to let the flavors meld.
    2. In a small pan, heat the olive oil over medium heat. Add the smoked paprika and cayenne pepper, stirring constantly for about 1 minute until fragrant. This blooming technique enhances the spices’ flavors.
    3. In a large bowl, combine the breadcrumbs with the bloomed spices, mixing well. Season the mixture with salt and pepper.
    4. Pat the prawns dry with paper towels to ensure the coating sticks. Toss them in the spiced breadcrumbs, pressing gently to adhere.
    5. Thread three prawns onto each soaked skewer, pressing them together to ensure even cooking.
    6. Preheat your grill to medium-high heat. Place the prawn skewers on the grill and cook for about 2 minutes on each side, or until the prawns are crisp and golden brown.
    7. Serve immediately with the chilled lime-avocado cream on the side. Enjoy the delightful contrast of flavors!

    Pro Tips from Meaghan’s Kitchen

    • Always soak your bamboo skewers in cold water for at least an hour before use to prevent them from burning on the grill.
    • For an extra layer of flavor, add a few sprigs of fresh herbs like cilantro or parsley to the breadcrumb mixture.
    • If you’re short on time, the avocado dip can be made a day ahead. Just give it a good stir before serving.
    • For perfectly cooked prawns, make sure your grill is preheated to the right temperature and avoid overcooking, which makes them tough.

    Variations & Dietary Swaps

    • Vegetarian Swap: Replace prawns with firm tofu cubes marinated in the same spice mix for a delightful vegetarian option.
    • Spice-It-Up Version: Add a pinch more cayenne or a dash of chili flakes to the breadcrumb mixture for extra heat.
    • Kids-Friendly Version: Reduce the cayenne pepper by half and serve the prawn skewers with a side of sweet ketchup instead of the lime-avocado cream.

    What to Serve With It

    This Mediterranean-inspired dish pairs beautifully with a chilled glass of Sauvignon Blanc, which complements the spicy, smoky flavors with its crispness. For a more filling meal, serve the prawn skewers alongside a side of cilantro-lime rice, bringing a cohesive and refreshing element to your dining experience.

    Storage & Meal Prep

    If you have leftovers, store the prawn skewers and avocado dip separately in airtight containers. The prawns will keep in the refrigerator for up to 2 days, while the avocado dip should be consumed within a day to ensure freshness. To reheat the prawns, place them on a baking sheet and warm in a preheated 350°F oven for about 5 minutes. Do not freeze, as the texture of the prawns and dip will change.

    FAQ

    Can I use frozen prawns for this recipe?

    Yes, you can use frozen prawns. Just make sure they are completely thawed and dried before coating them with the breadcrumb mixture.

    What can I use instead of crème fraiche?

    If you don’t have crème fraiche, Greek yogurt or sour cream are great substitutes that will maintain the creamy texture of the dip.

    Is there a way to make this dish less spicy?

    Absolutely! Simply reduce the amount of cayenne pepper in the breadcrumb mixture to tone down the heat.

    Can I bake the prawns instead of grilling?

    Yes, you can bake the prawns in a 400°F oven for 8-10 minutes, or until golden brown. Just make sure to turn them halfway through for even cooking.

    How can I prevent the avocado dip from browning?

    The lime juice helps prevent browning, but for extra protection, cover the surface directly with plastic wrap before sealing the container.

    Final Thoughts

    I hope this Spicy Crunchy Prawn Skewers with Zesty Lime-Avocado Cream recipe brings a bit of zest and excitement to your kitchen, just as it has in mine. It’s a dish that’s sure to impress, whether you’re entertaining guests or simply treating yourself. I’d love to hear how this recipe turns out for you, so please leave a comment or share your own twist on it. Happy cooking, and remember, the best meals are made with love!

    Related update: Spicy Crunchy Prawn Skewers with Zesty Lime-Avocado Cream

    Related update: Savory White Onion and Herb Tuna Tart with Truffle Essence

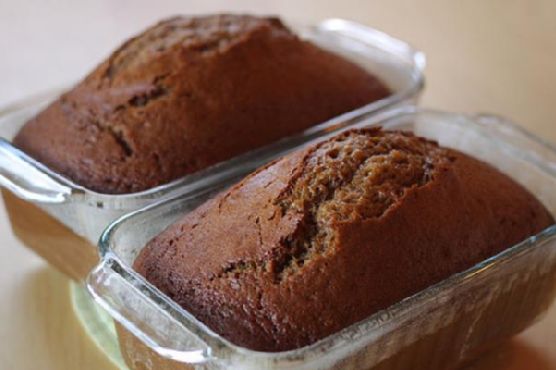
  • Chai-Spiced Pumpkin Bread with Maple Pecan Swirl | Made by Meaghan Moineau

    Chai-Spiced Pumpkin Bread with Maple Pecan Swirl | Made by Meaghan Moineau

    Chai-Spiced Pumpkin Bread with Maple Pecan Swirl

    Imagine a warm kitchen filled with the heady scent of cinnamon, cardamom, and cloves. The air is sweet and nutty, and there’s the promise of something delightful emerging from the oven. This isn’t just any pumpkin bread — it’s a Chai-Spiced Pumpkin Bread with Maple Pecan Swirl, and it’s about to become your new favorite fall treat.

    Personal Story

    I remember the first time I discovered the magic of chai spices. It was a chilly autumn afternoon, and I was wandering through a bustling spice market in Seattle. The vibrant colors and intoxicating aromas were like nothing I’d ever experienced. A kind vendor handed me a cup of chai tea, and with one sip, I was transported to another world — one where warmth and comfort wrapped around me like a cozy blanket.

    That memory stayed with me, and years later, as I was experimenting in my kitchen, I had a sudden flash of inspiration. Why not take those same enchanting spices and infuse them into my beloved pumpkin bread recipe? The idea of combining chai spices with the earthy sweetness of pumpkin seemed almost too good to be true.

    Of course, my first few attempts weren’t perfect. I learned the hard way that too much clove can overpower the subtler spices, and that finding the right balance of sweetness was key. But with each iteration, the bread became more magical, more aromatic, more…well, perfect.

    Finally, I added a maple pecan swirl for that extra touch of indulgence. This addition transformed the bread from a simple treat to a showstopper, creating a marbled effect that was as beautiful as it was delicious. Now, every autumn, I make this Chai-Spiced Pumpkin Bread with Maple Pecan Swirl as a tribute to that first sip of chai and the journey of discovery it inspired.

    What Makes This Version Special

    This pumpkin bread isn’t just another seasonal loaf. My unique twist incorporates a warm chai spice mix and a luscious maple pecan swirl, adding a comforting and aromatic dimension to the classic pumpkin bread. The chai spices — cinnamon, cardamom, cloves, nutmeg, and ginger — are bloomed in oil to fully release their flavors, infusing the bread with a rich, spicy warmth. The maple pecan swirl elevates the experience, offering a sweet, nutty counterpoint to the spiced bread. This version is not only more complex in flavor but also visually stunning, making it a standout at any gathering.

    Flavor Profile

    Every bite of this Chai-Spiced Pumpkin Bread with Maple Pecan Swirl is a journey through layers of warm spices and earthy pumpkin. The aromatic chai spices create a rich, warming flavor, while the sweet maple pecan swirl adds a delightful crunch and nuttiness. The combination of these elements results in a bread that is both comforting and exhilarating, with the sweet and spicy notes perfectly complementing the natural earthiness of the pumpkin. It’s a symphony of flavors that dances on your palate, leaving you craving just one more slice.

    Ingredients

    • 1/2 cup oil
    • 1 cup light firmly brown sugar
    • 1 tablespoon molasses
    • 2 large eggs
    • 1 cup canned pumpkin
    • 1 cup all-purpose flour
    • 1 cup whole wheat flour
    • 1/2 cup oat bran
    • 1/2 cup wheat bran
    • 1/4 cup wheat germ
    • 1 teaspoon baking soda
    • 1 teaspoon salt
    • 1 teaspoon **ground cinnamon**
    • 1/2 teaspoon **ground cardamom**
    • 1/2 teaspoon **ground cloves**
    • 1/2 teaspoon **ground nutmeg**
    • 1/2 teaspoon **ground ginger**
    • 1 cup chopped **pecans**
    • 1/4 cup **maple syrup**
    • 1 teaspoon vanilla extract

    Instructions

    1. Preheat your oven to 375 degrees Fahrenheit. Grease two loaf pans and set them aside.
    2. In a small saucepan, heat the oil over medium heat. Add the **cinnamon, cardamom, cloves, nutmeg, and ginger**, and stir for about 1 minute until the spices are fragrant. This step blooms the spices, releasing their full flavors.
    3. In a large mixing bowl, combine the spiced oil, brown sugar, and molasses. Beat until well blended and smooth.
    4. Add the eggs and canned pumpkin to the mixture, and blend until fully incorporated.
    5. In a separate bowl, whisk together the all-purpose flour, whole wheat flour, oat bran, wheat bran, wheat germ, baking soda, and salt.
    6. Gradually stir the dry ingredients into the wet ingredients, mixing just until everything is moistened. Be careful not to overmix!
    7. In another small bowl, combine the chopped pecans and maple syrup. Gently swirl this mixture into the batter, creating a marbled effect.
    8. Divide the batter evenly between the prepared loaf pans.
    9. Bake for approximately 1 hour, or until a toothpick inserted into the center comes out clean. The top should be golden-brown.
    10. Cool the loaves in the pans for about 10 minutes, then transfer to a wire rack to cool completely.

    Pro Tips from Meaghan’s Kitchen

    • Blooming the spices in oil is crucial for releasing their full potential. Don’t skip this step!
    • Use fresh spices for the best flavor. Ground spices lose their potency over time.
    • Let the bread cool completely before slicing. This allows the flavors to meld together beautifully.
    • For a more pronounced maple flavor, consider drizzling additional maple syrup over the baked loaves.
    • Store your pecans in the freezer to keep them fresh and prevent rancidity.

    Variations & Dietary Swaps

    • Gluten-Free Version: Replace all-purpose and whole wheat flours with a gluten-free flour blend.
    • Vegan Version: Substitute eggs with flax eggs (1 tablespoon flaxseed meal mixed with 2.5 tablespoons water per egg) and use a plant-based oil.
    • Spice-It-Up Version: Add a pinch of cayenne pepper to the chai spice blend for a subtle heat.

    What to Serve With It

    This Chai-Spiced Pumpkin Bread with Maple Pecan Swirl pairs beautifully with a hot chai latte, enhancing the spice profile of the bread. For something a little different, try a glass of spiced apple cider — the apple notes will complement the pumpkin and spices perfectly. And if you’re feeling indulgent, a dollop of whipped cream or a scoop of vanilla ice cream transforms this bread into a delightful dessert!

    Storage & Meal Prep

    To store your bread, wrap it tightly in plastic wrap or aluminum foil and keep it at room temperature for up to 3 days. For longer storage, wrap the bread and place it in a resealable freezer bag; it will keep in the freezer for up to 3 months.

    To reheat, let the bread thaw at room temperature, then warm slices in a low oven or toaster oven. This will bring back the fresh-baked texture and aroma.

    FAQ

    Can I make this recipe without a stand mixer?

    Absolutely! A hand mixer or even a sturdy whisk and some elbow grease will work just fine for this recipe.

    Can I substitute fresh pumpkin for canned?

    Yes, you can use fresh pumpkin puree if you have it on hand. Just ensure it’s well-drained to avoid excess moisture in the batter.

    How do I prevent the bread from becoming too dense?

    Be careful not to overmix the batter. Mixing just until the ingredients are combined will keep the bread light and tender.

    What can I do if my bread doesn’t rise well?

    Check your baking soda’s freshness. It’s crucial for the bread’s rise, so if it’s been sitting in your pantry for a while, it might be time to replace it.

    Final Thoughts

    There you have it — a loaf of Chai-Spiced Pumpkin Bread with Maple Pecan Swirl that’s sure to impress. Whether you’re enjoying it with a warm beverage or sharing it with friends and family, this bread is bound to become a staple in your fall baking repertoire. I would love to hear how your version turns out, so feel free to leave a comment below or share your creations on social media. Happy baking, my friends!

  • Decadent Mocha Almond Dark Chocolate Truffles | Made by Meaghan Moineau

    Decadent Mocha Almond Dark Chocolate Truffles | Made by Meaghan Moineau

    Decadent Mocha Almond Dark Chocolate Truffles

    Imagine biting into a truffle so rich it feels like velvet on your tongue, bursting with the intense flavors of chocolate and espresso, and a delicate hint of almond. These decadent mocha almond dark chocolate truffles are my go-to indulgence when I crave something deeply satisfying yet sophisticated.

    Personal Story

    One winter evening, I found myself snowed in, craving something sweet yet luxurious. The pantry revealed a modest selection of ingredients: cocoa powder, almonds, and a lingering bottle of almond liqueur from my last holiday bash. I was inspired by a memory of visiting a quaint chocolatier in Brussels, where the air was perfumed with the intoxicating scent of roasting cocoa beans and freshly brewed espresso. That visit left me in awe of how a simple truffle could transport you to another world.

    Driven by the memory, I decided to recreate that experience right in my cozy kitchen. I began experimenting, infusing my truffle mixture with espresso and almond liqueur. As the mixture came together, the aroma enveloped the kitchen—a perfect blend of chocolate and coffee, with a flirtatious whisper of almond.

    My first batch was a revelation. Each truffle was a tiny bomb of flavor, instantly transporting me back to that Belgian chocolatier. My husband, a self-proclaimed chocoholic, declared them the best thing I’d ever made. And so, my version of mocha almond dark chocolate truffles was born, becoming a staple in my dessert repertoire.

    Since then, these truffles have been my go-to gift for friends and family, never failing to impress with their complex yet harmonious flavors. They are a testament to how a few humble ingredients can be transformed into something truly extraordinary.

    What Makes This Version Special

    What sets these mocha almond dark chocolate truffles apart is their luxurious depth of flavor, achieved by infusing the classic treat with a hint of espresso and a touch of almond liqueur. This combination enhances the cocoa’s natural richness, while the almond liqueur adds a sophisticated nutty undertone. The result is a gourmet experience that elevates the classic chocolate truffle to new heights.

    Flavor Profile

    Each bite of these truffles delivers a rich, intense chocolate-espresso flavor, enveloped in a smooth, velvety texture. The nutty undertones from the almonds and almond liqueur create a beautifully balanced finish that lingers on your palate. It’s a sensory delight that makes every morsel feel indulgent and special.

    Ingredients

    • 1 cup dried dates, pitted
    • 1 cup slivered almonds
    • 1/2 cup pecans
    • 1/4 cup cocoa powder
    • 1 teaspoon vanilla extract
    • 2 tablespoons agave nectar
    • 1/4 teaspoon sea salt
    • 1 tablespoon **instant espresso powder**
    • 2 tablespoons hot water
    • 1 tablespoon **almond liqueur**
    • 1/4 cup roasted almond pieces
    • 1/4 cup dark chocolate shavings

    Instructions

    1. Soak the dates in hot water for about 5 minutes. The water should be hot to the touch but not scorching. This will soften the dates, making them easier to blend.
    2. In a small bowl, bloom the **instant espresso powder** by mixing it with 2 tablespoons of hot water. Let it sit for a minute to enhance the aroma.
    3. Process the slivered almonds in a food processor until a coarse almond meal is formed.
    4. Add the pecans to the processor and continue until they are ground into a coarse meal as well.
    5. Drain the dates and squeeze out any excess water using your hands. Add the dates, cocoa powder, vanilla extract, agave nectar, sea salt, and the bloomed espresso to the food processor. Process until a smooth paste forms.
    6. Incorporate a splash of **almond liqueur** into the mixture for a subtle, sophisticated flavor boost.
    7. Use a tablespoon measure to form the truffles. Pack a heaping tablespoon of the mixture into the measure, then slide it out and form a tightly packed ball with your hands. Be gentle, as they can fall apart if over-handled.
    8. Roll each truffle in roasted almond pieces or dark chocolate shavings for added texture and flavor.

    Pro Tips from Meaghan’s Kitchen

    • Ensure the dates are adequately hydrated by soaking them in warm, not boiling, water. This ensures a smooth texture.
    • When forming the truffles, keep your hands slightly damp to prevent sticking and achieve a smooth finish.
    • For a creamier texture, briefly refrigerate the mixture before forming the truffles; this helps the ingredients bind together better.
    • Experiment with different coatings, such as finely crushed pistachios or freeze-dried raspberries, for a burst of color and flavor.
    • If you find the mixture too sticky, a light dusting of cocoa powder on your hands will make it easier to work with.

    Variations & Dietary Swaps

    • Vegan Version: Substitute almond liqueur with almond extract and ensure all ingredients are certified vegan.
    • Spice-It-Up Version: Add a pinch of cayenne pepper to the mixture for a subtle heat that complements the chocolate.
    • Kids-Friendly Version: Omit the almond liqueur and add a teaspoon of orange zest for a bright, fruity twist.

    What to Serve With It

    These truffles pair beautifully with a fresh shot of espresso, echoing the rich coffee notes within. For a more leisurely, indulgent experience, serve with a glass of tawny port, which complements the chocolate’s depth and enhances the overall tasting experience.

    Storage & Meal Prep

    Store the truffles in an airtight container in the fridge for up to a week. For longer storage, freeze them in a single layer on a baking sheet, then transfer to a freezer-safe bag. Thaw in the fridge before serving. To enjoy them at their best, bring to room temperature before indulging.

    FAQ

    Can I use fresh dates instead of dried?

    Yes, but you’ll need to reduce the soaking time. Fresh dates are softer and may not require soaking at all.

    What if I don’t have a food processor?

    A high-powered blender can work as a substitute, but you may need to process in smaller batches to achieve the right consistency.

    Can I skip the almond liqueur?

    Absolutely! You can replace it with a teaspoon of almond or vanilla extract for a non-alcoholic version.

    Is there a substitute for pecans?

    Walnuts or hazelnuts make excellent substitutes, providing a similar texture and flavor profile.

    How do I prevent the truffles from sticking?

    Keep your hands slightly damp when rolling the truffles, and use cocoa powder or chopped nuts to coat them if needed.

    Final Thoughts

    These decadent mocha almond dark chocolate truffles are more than just a treat—they’re an experience, a little piece of luxury in every bite. Whether you’re sharing them with loved ones or savoring them solo, they promise to delight with their complex flavors and creamy texture. I’d love to hear how they turn out for you, so feel free to share your creations or any twists you make. After all, the best recipes are those that are shared and savored together. Happy truffle-making!

    Related update: Decadent Mocha Almond Dark Chocolate Truffles

    Related update: Lavender-Infused Upside-Down Blueberry Puffs with Honey-Citrus Drizzle

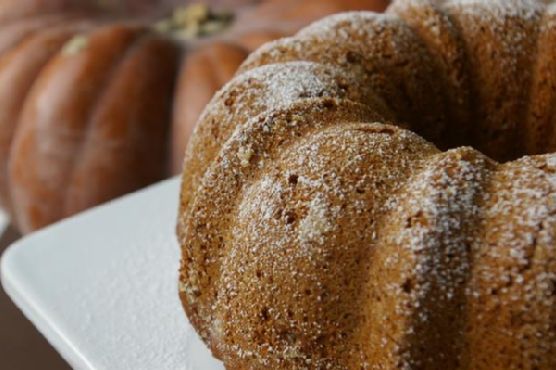
  • Spiced Vegan Pumpkin Bundt Cake with Brown Sugar Pecan Glaze | Made by Meaghan Moineau

    Spiced Vegan Pumpkin Bundt Cake with Brown Sugar Pecan Glaze | Made by Meaghan Moineau

    Spiced Vegan Pumpkin Bundt Cake with Brown Sugar Pecan Glaze

    Imagine the aroma of a spiced, freshly baked cake wafting through your kitchen, the scent of pumpkin, cinnamon, and ginger mingling in the air. With each slice revealing a moist, tender crumb, this Spiced Vegan Pumpkin Bundt Cake with Brown Sugar Pecan Glaze is a treat that captures the essence of autumn in every bite.

    The first time I attempted baking a bundt cake, it was a comical disaster right out of a sitcom. I was just out of college, and my tiny apartment kitchen didn’t exactly scream “gourmet chef.” But there I was, determined to impress my friends with a homemade dessert for our weekly dinner party. The cake was supposed to be a simple vanilla bundt, but instead, I ended up with a lumpy mess that barely qualified as cake. However, it was that experience that taught me the importance of patience and precision in baking.

    Fast forward a few years, and my love for baking has grown exponentially. The Spiced Vegan Pumpkin Bundt Cake is a personal favorite, born out of a desire to embrace the comforting flavors of fall while keeping things plant-based. I remember the moment when I first tasted a bite of this cake, sitting on my porch with a cozy blanket wrapped around me. It was like wrapping myself in a warm hug, the spices dancing on my tongue, and the sweet, nutty glaze adding the perfect touch of indulgence.

    Over time, this pumpkin bundt cake became a staple in my seasonal repertoire, shared with family and friends during our autumn gatherings. Its unique twist? A luscious brown sugar pecan glaze that elevates the entire experience, making each bite a delightful symphony of flavors.

    What Makes This Version Special

    What sets this Spiced Vegan Pumpkin Bundt Cake apart from the rest is its luxurious, **brown sugar pecan glaze**. While the cake itself is a delightful blend of warm spices and pumpkin puree, the glaze introduces a whole new dimension. By simmering brown sugar with creamy coconut cream, it transforms into a rich, nutty topping that complements the cake’s spiced undertones perfectly. The addition of toasted pecans, with their slight crunch and buttery flavor, seals the deal, making this cake a standout at any gathering.

    This version not only captures the essence of fall with each bite but also caters to those looking for a plant-based dessert option that doesn’t compromise on flavor. The combination of barley flour and **date sugar** adds a wholesome touch, ensuring that every slice is as nourishing as it is delicious.

    Flavor Profile

    With every forkful, you’ll experience a warm, spiced pumpkin base that’s perfectly moist and comforting. The flavors of **ground cinnamon**, allspice, nutmeg, and clove intertwine to create a rich, aromatic cake. As you savor the sweetness, the **brown sugar pecan glaze** makes its presence known, offering a caramel-like richness paired with the nutty crunch of pecans. It’s a delightful play of textures and tastes, each bite more irresistible than the last.

    Ingredients

    • 2 cups **barley flour**
    • 1 1/2 cups **pumpkin puree**
    • 1 cup **date sugar**
    • 1/2 cup **canola oil**
    • 1/2 cup **maple syrup**
    • 1/2 cup **soymilk**
    • 1 tbsp **apple cider vinegar**
    • 1 tsp **vanilla extract**
    • 1 tsp **baking soda**
    • 1 tsp **baking powder**
    • 1 tsp **ground cinnamon**
    • 1/2 tsp **ground ginger**
    • 1/4 tsp **ground cloves**
    • 1/4 tsp **nutmeg**
    • 1/4 tsp **ground allspice**
    • 1/2 tsp **salt**
    • 1 cup **pecans**, toasted and chopped
    • 1/2 cup **golden raisins**
    • 1/2 cup **brown sugar**
    • 1/4 cup **coconut cream**
    • Additional **pecans** for topping
    • **Powdered sugar** for dusting

    Instructions

    1. Preheat your oven to 350°F (175°C). Grease a bundt pan with oil and lightly dust it with flour to prevent sticking.
    2. Spread the pecans on a baking sheet and toast in the oven for 10 minutes. Once toasted, allow them to cool completely before roughly chopping.
    3. In a small bowl, cover the golden raisins with boiling water and let them soak for 25 minutes. Drain and set aside.
    4. In a large mixing bowl, whisk together the **pumpkin puree**, **canola oil**, **maple syrup**, **soymilk**, **apple cider vinegar**, and **vanilla extract** until smooth.
    5. In another bowl, combine the **date sugar**, **barley flour**, **baking soda**, **baking powder**, spices, and **salt**. Use a clean whisk to mix thoroughly.
    6. Gradually fold the wet pumpkin mixture into the dry ingredients using a rubber spatula. Be gentle to avoid overmixing.
    7. When the dry ingredients are about halfway incorporated, add the soaked raisins and chopped pecans. Continue folding until just combined.
    8. Pour the batter into the prepared bundt pan, smoothing the top with a spatula.
    9. Bake for 45 minutes, rotating the cake from front to back after 20 minutes, or until a toothpick inserted into the center comes out clean.
    10. Let the cake cool in the pan for 15 minutes, then invert it onto a wire rack to finish cooling. Transfer to a serving plate and dust with powdered sugar.
    11. For the glaze, simmer the **brown sugar** and **coconut cream** in a saucepan over medium heat until thickened. Drizzle over the cooled cake and top with additional toasted pecans.
    12. Serve this delightful bundt cake warm or at room temperature to enjoy its full range of flavors.

    Pro Tips from Meaghan’s Kitchen

    • To prevent the cake from sticking, ensure your bundt pan is well-greased and floured, getting into all the nooks and crannies.
    • For an extra flavor boost, toast pecans with a pinch of salt before adding them to the batter. The salt enhances their nuttiness.
    • Allow the cake to cool completely before glazing to ensure the glaze sets nicely on top rather than soaking into the cake.
    • Use a toothpick to test the cake’s doneness. If it comes out clean or with a few crumbs, the cake is ready.
    • To achieve the best texture, avoid overmixing the batter. Stop as soon as the dry ingredients are incorporated.

    Variations & Dietary Swaps

    • For a gluten-free version, substitute the **barley flour** with a gluten-free all-purpose flour blend.
    • If you’re not a fan of pecans, try using walnuts or almonds for a different nutty flavor.
    • For a kid-friendly version, reduce the amount of spices to make the flavors milder and add mini chocolate chips to the batter.

    What to Serve With It

    This spiced cake pairs beautifully with a warm chai tea latte, which enhances the cake’s aromatic spices and adds a cozy touch to your dessert spread. A scoop of coconut ice cream or a dollop of whipped coconut cream also makes for a delightful addition.

    Storage & Meal Prep

    Store any leftover cake in an airtight container at room temperature for up to 3 days. For longer storage, wrap the cake tightly in plastic wrap and freeze for up to 2 months. To reheat, allow it to thaw at room temperature and warm individual slices in the microwave for about 15-20 seconds.

    FAQ

    Can I use fresh pumpkin instead of canned pumpkin puree?

    Absolutely! If you’re using fresh pumpkin, roast it until tender, then blend it into a smooth puree. It might require slightly more liquid, so adjust the soymilk accordingly.

    How can I make the glaze thicker?

    To make a thicker glaze, simply simmer the **brown sugar** and **coconut cream** mixture for a few extra minutes until it reaches your desired consistency.

    What can I use instead of coconut cream for the glaze?

    If coconut cream isn’t available, try using full-fat coconut milk or even a plant-based heavy cream alternative for a similar richness.

    Why is my cake dense and not fluffy?

    A dense cake might result from overmixing the batter or not incorporating enough air during the mixing process. Make sure to gently fold the ingredients and avoid overmixing once the flour is added.

    Final Thoughts

    This Spiced Vegan Pumpkin Bundt Cake with Brown Sugar Pecan Glaze is more than just a dessert; it’s a celebration of fall flavors and the joy of baking with a plant-based twist. I hope this recipe brings as much warmth and delight to your table as it does to mine. I’d love to hear how it turns out for you, so please leave a comment below and share your creation with friends and family. Happy baking!

    Related update: Spiced Vegan Pumpkin Bundt Cake with Brown Sugar Pecan Glaze

    Related update: Decadent Mocha Almond Dark Chocolate Truffles

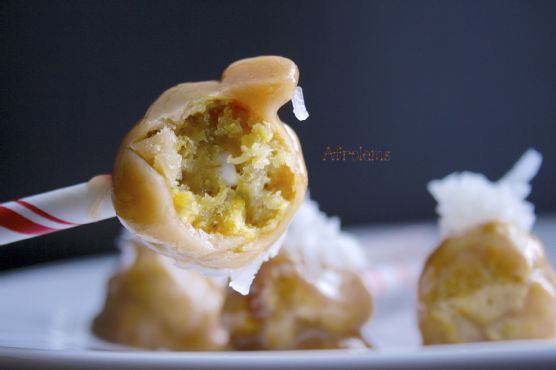
  • Caribbean Spiced Plantain Toffee Balls with Spiced Rum Glaze | Made by Meaghan Moineau

    Caribbean Spiced Plantain Toffee Balls with Spiced Rum Glaze | Made by Meaghan Moineau

    Caribbean Spiced Plantain Toffee Balls with Spiced Rum Glaze

    Imagine the aroma of ripe plantains warming in your kitchen, mingling with the sweet, earthy scent of caramelized sugar and the exotic whisper of spiced rum. This is not just any dessert; it’s a journey to the Caribbean in every bite, where sweet and spice dance together in perfect harmony. Let’s embark on this culinary adventure together and transform a simple plantain into an unforgettable gourmet experience.

    My Plantain Love Story

    There’s something deeply nostalgic about the humble plantain for me. Growing up, plantains were a staple in our household, a versatile ingredient that often appeared at the dinner table as a side dish, fried to golden perfection. They were comfort food on hectic weekdays, a reminder of home when far away, and a sweet treat when money was tight and creativity was necessary.

    I remember the first time I tried to elevate the classic plantain. It was a rainy Saturday afternoon, the kind where you want to cozy up with a warm kitchen project. I was determined to create something special, something that spoke to the rich flavors of the Caribbean while adding my own touch. After a few trials and errors, I stumbled upon the idea of making plantain into something more than just a side. That’s how these Caribbean Spiced Plantain Toffee Balls with Spiced Rum Glaze were born.

    The journey was not without its mishaps. I vividly recall the first batch where I forgot to infuse the coconut milk with spices. It was a lesson learned in patience and how the smallest details can elevate a dish from good to extraordinary. Now, with each successful batch, I’m transported back to those early days of experimentation, where mistakes turned into mastery.

    Fast forward to today, and these plantain toffee balls have become a beloved dessert in my arsenal, often requested by friends and family. They are a true testament to the power of blending tradition with innovation, capturing the essence of the Caribbean while offering something refreshingly new.

    What Makes This Version Special

    So, what sets these Caribbean Spiced Plantain Toffee Balls with Spiced Rum Glaze apart from your typical plantain dessert? The secret lies in the nuances of Caribbean spices and the luxurious spiced rum glaze. Infusing coconut milk with ground cinnamon, nutmeg, and allspice transforms the toffee sauce into a symphony of warm, comforting flavors. And let’s not forget the rum glaze—brushing the freshly baked plantain balls with dark spiced rum adds a refined depth of flavor that marries beautifully with the sweet, caramelized plantain.

    This version isn’t just about satisfying a sweet tooth; it’s about creating a layered taste experience. Each bite unveils a new flavor note, making it a dish worthy of both casual gatherings and elegant dinner parties. Plus, the addition of coconut flakes as a finishing touch brings a delightful crunch that contrasts perfectly with the tender plantain.

    Flavor Profile

    Dive into these plantain toffee balls, and you’ll be greeted with a symphony of sweet and caramelized bliss. The plantains turn golden-brown in the oven, developing a rich, molasses-like sweetness that becomes the heart of the dish. As you bite into them, the warmth of cinnamon, nutmeg, and allspice envelops your senses, while the spiced rum glaze lingers on your palate, leaving a delicate hint of exotic rum notes.

    The coconut flakes scattered on top add a tropical touch, offering a subtle nuttiness and a hint of chewiness that makes each bite more exciting than the last. It’s a dessert that feels like a warm embrace, drawing you in with its intoxicating aroma and holding you captive with its complex, layered flavors.

    Ingredients

    • 1 large finger of plantain, ripe
    • 1 cup flour
    • 1 tablespoon butter
    • 1 cup sugar
    • 1 teaspoon vanilla extract
    • 1 cup coconut milk
    • 1/2 cup water
    • 1 teaspoon ground cinnamon
    • 1 teaspoon nutmeg
    • 1/2 teaspoon allspice
    • 1/4 cup dark spiced rum
    • Coconut flakes for topping
    • Pinch of sea salt
    • Olive oil for drizzling

    Instructions

    1. Preheat your oven to 375°F (190°C). Peel and mash the plantain until smooth and creamy. Mix it with the flour to form a soft, slightly sticky dough.
    2. Using a spoon, scoop out small portions of the plantain mixture and form them into mini balls. If the dough is too sticky, use a bit of oil on your hands or spoon.
    3. Line a baking sheet with parchment paper and drizzle it with olive oil to prevent sticking. Arrange the plantain balls on the sheet and bake for 20-25 minutes, or until they’re golden-brown and slightly crisp on the outside.
    4. While the plantain balls are baking, infuse the coconut milk. In a small saucepan, combine the coconut milk with ground cinnamon, nutmeg, and allspice. Heat gently over low heat, allowing the spices to meld with the milk for about 10 minutes.
    5. In a separate pot, melt the butter over low heat. Add the sugar, vanilla extract, infused coconut milk, and water. Stir continuously as the mixture heats, allowing it to reach a caramel-like, light brown color. If you have a candy thermometer, aim for 240°F (115°C).
    6. Once the plantain balls are out of the oven, brush them immediately with dark spiced rum. This step is key to infusing them with that refined depth of flavor.
    7. Dip each plantain ball into the toffee sauce, swirling to coat evenly. Place them on a plate to cool slightly, then sprinkle with coconut flakes while the toffee is still tacky.
    8. Allow the toffee to set, then serve and enjoy your Caribbean treat!

    Pro Tips from Meaghan’s Kitchen

    • Choose ripe plantains with blackened skin for maximum sweetness and caramelization.
    • Infuse the coconut milk with spices ahead of time for a deeper flavor profile.
    • If your toffee sauce gets too thick, add a splash more coconut milk to thin it out.
    • For an extra rum kick, you can also add a teaspoon of dark spiced rum to the toffee sauce.
    • Let the plantain balls cool slightly before dipping them in the toffee to ensure a thick, even coating.

    Variations & Dietary Swaps

    • For a vegetarian-friendly version, substitute butter with coconut oil.
    • To spice it up, add a pinch of cayenne pepper to the plantain mixture for a subtle heat.
    • For a kids-friendly version, omit the spiced rum glaze and serve the toffee balls with a scoop of vanilla ice cream.

    What to Serve With It

    These Caribbean Spiced Plantain Toffee Balls are a tropical delight that pairs beautifully with a light coconut rum cocktail or a refreshing tropical fruit punch. The cocktail accentuates the rum glaze, while the fruit punch enhances the natural sweetness of the plantain. For a non-alcoholic option, try serving with a chilled glass of coconut water.

    Storage & Meal Prep

    Store any leftover plantain toffee balls in an airtight container in the fridge for up to three days. To reheat, place them in a warm oven (about 300°F or 150°C) for a few minutes until warmed through. For longer storage, freeze the plantain balls before dipping them in toffee. Thaw overnight in the fridge and follow the toffee dipping instructions when ready to serve.

    FAQ

    Can I use green plantains instead of ripe ones?

    It’s best to use ripe plantains, as green ones won’t provide the sweetness and caramelization needed for this recipe.

    What if I don’t have an oven?

    You can fry the plantain balls instead. Just ensure to dab off excess oil to maintain their texture.

    Is there a substitute for dark spiced rum?

    If you prefer a non-alcoholic version, you can use rum extract or simply omit the rum glaze.

    Can I make these in advance?

    Yes, you can prepare the plantain balls a day ahead. Store them in the fridge and complete the toffee dipping and rum glaze step just before serving.

    How can I prevent the toffee from sticking to the plate?

    Ensure the toffee is slightly cool before placing the balls on the plate. You can also lightly grease the plate with oil.

    Final Thoughts

    These Caribbean Spiced Plantain Toffee Balls with Spiced Rum Glaze are more than just a sweet treat; they’re a celebration of flavors and a nod to the rich culinary traditions of the Caribbean. Whether you’re sharing them at a festive gathering or savoring them on a quiet evening at home, I hope they bring as much joy to your kitchen as they do to mine. Don’t forget to leave a comment below sharing your experience or any creative twists you added. Happy cooking!

    Related update: Caribbean Spiced Plantain Toffee Balls with Spiced Rum Glaze

    Related update: Spiced Vegan Pumpkin Bundt Cake with Brown Sugar Pecan Glaze

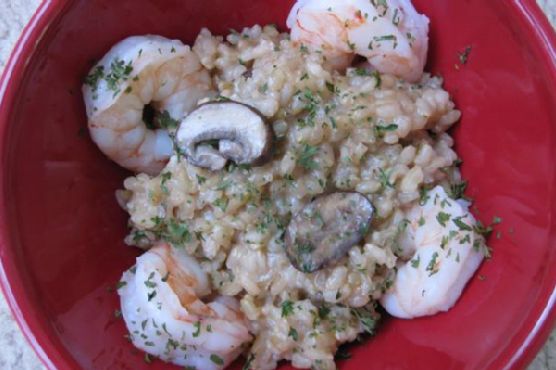
  • Umami-Truffle Infused Mushroom Parmesan Brown Rice Risotto | Made by Meaghan Moineau

    Umami-Truffle Infused Mushroom Parmesan Brown Rice Risotto | Made by Meaghan Moineau

    Umami-Truffle Infused Mushroom Parmesan Brown Rice Risotto

    Imagine stepping into a kitchen filled with the heady aroma of sautéed mushrooms and garlic mingling with the subtle, earthy fragrance of white truffle oil. As you stir the creamy risotto, a waft of rich, nutty Parmesan cheese envelops the air. This is not just any risotto; it’s an Umami-Truffle Infused Mushroom Parmesan Brown Rice Risotto, a dish that promises indulgence and satisfaction in every bite.

    Personal Story

    I can still recall the first time I attempted a risotto. It was a rainy Sunday, and I was determined to master this Italian classic. I had heard whispers of its complexity and the precision it required. The gentle pouring of stock, the constant stirring — it all felt like a culinary dance. But as I stood there, wooden spoon in hand, I realized I had left the rice unattended a bit too long, and my first attempt was more mush than magic.

    Determined to redeem myself, I sought guidance from my grandmother’s old cookbook — a treasure trove of wisdom and flavor. Page after page, I discovered tips that had seen generations through many a kitchen mishap. It was in those pages that I stumbled upon the idea of adding dried porcini mushrooms to the mix. The thought of elevating a simple dish with an umami twist intrigued me.

    The next weekend, armed with new knowledge and a touch of courage, I ventured back into the kitchen. As the porcini mushrooms soaked, their earthy aroma filled my senses, setting the stage for what was to come. This time, I was prepared. With each stir, the risotto transformed, and the promise of something extraordinary grew stronger.

    When I finally served the dish, the dining table was filled with smiles and nods of approval. The Umami-Truffle Infused Mushroom Parmesan Brown Rice Risotto had become a staple in our home, a dish that turned a simple meal into a celebration.

    What Makes This Version Special

    This version of mushroom risotto is not your typical recipe. While traditional recipes rely on simple ingredients like arborio rice and white mushrooms, my twist elevates the dish with a hint of white truffle oil and dried porcini mushrooms for an umami kick. These two ingredients make each bite decadently aromatic and rich in flavor. The truffle oil adds a luxurious note that complements the earthiness of the cremini and porcini mushrooms. This Umami-Truffle Infused Mushroom Parmesan Brown Rice Risotto is a testament to how a few unique ingredients can transform a classic into something truly remarkable.

    Flavor Profile

    The taste experience of this risotto is nothing short of divine. It’s rich and earthy, thanks to the cremini and porcini mushrooms, and the white truffle oil adds a luxurious aromatic note. The texture is silky, with each grain of short-grain brown rice perfectly cooked. The Parmesan cheese introduces a nutty, savory richness, while the fresh thyme and parsley bring a refreshing herbal balance. Every mouthful offers a complex yet harmonious medley of flavors that linger long after the last bite.

    Ingredients

    • 2 tablespoons olive oil
    • 2 tablespoons butter
    • 1 cup diced onion
    • 2 cloves garlic, minced
    • 1 cup short grain brown rice
    • 1/2 cup dry white wine
    • 4 cups vegetable stock
    • 1 cup cremini mushrooms, sliced
    • ***1/4 cup dried porcini mushrooms***
    • 1/2 cup grated parmesan cheese
    • ***1 tablespoon white truffle oil***
    • 1 teaspoon fresh thyme
    • 1 tablespoon chopped parsley
    • Salt and black pepper, to taste
    • Zest of 1 lemon

    Instructions

    1. Soak the dried porcini mushrooms in warm water for about 15 minutes to rehydrate. Once rehydrated, drain and chop them finely.
    2. In a large saucepan, heat the olive oil and butter over medium heat until the butter melts and begins to sizzle.
    3. Add the diced onion and sauté until translucent, about 5 minutes.
    4. Add the sliced cremini and chopped porcini mushrooms to the pan. Stir and cook for about 2 minutes, allowing the mushrooms to release their juices.
    5. Add the minced garlic and sauté, stirring constantly, until fragrant, about 1 minute.
    6. Stir in the short grain brown rice and cook for 1-2 minutes, ensuring each grain is coated with the aromatic mixture.
    7. Pour in the dry white wine, stirring to deglaze the pan. Allow the wine to simmer until it has almost completely evaporated, enhancing the risotto’s complexity.
    8. Add the vegetable stock, one cup at a time, stirring continuously and allowing each addition to be absorbed before adding the next. This should take about 35-40 minutes until the rice is tender and creamy.
    9. Stir in the grated Parmesan cheese, fresh thyme, and chopped parsley until the cheese melts and the herbs are well incorporated.
    10. Drizzle the white truffle oil over the risotto and season with salt, black pepper, and lemon zest to taste. Serve immediately, garnished with additional parsley if desired.

    Pro Tips from Meaghan’s Kitchen

    • For the best texture, use short grain brown rice, which holds its shape while delivering creaminess.
    • Maintaining a gentle simmer is crucial when adding stock to prevent the rice from cooking too quickly or unevenly.
    • Always taste your risotto before serving to adjust seasoning, as the saltiness of your stock and Parmesan may vary.
    • Do not rush the process; the slow addition of stock and constant stirring are what give risotto its creamy texture.
    • Finish with a splash of lemon zest to brighten and balance the dish’s richness.

    Variations & Dietary Swaps

    • Vegetarian Swap: Use nutritional yeast in place of Parmesan cheese for a vegan version without losing savory depth.
    • Spice-It-Up Version: Add a pinch of red pepper flakes when sautéing the garlic for a hint of heat.
    • Kids-Friendly Version: Reduce the amount of truffle oil for a milder flavor that’s more appealing to little ones.

    What to Serve With It

    This Umami-Truffle Infused Mushroom Parmesan Brown Rice Risotto pairs beautifully with a crisp glass of Sauvignon Blanc, which complements the dish’s earthy flavors. For a side, consider roasted asparagus or a simple green salad with a lemon vinaigrette to add a fresh contrast to the creamy risotto.

    Storage & Meal Prep

    Any leftovers can be stored in an airtight container in the fridge for up to 3 days. To reheat, add a splash of vegetable stock or water to restore the creamy consistency and warm gently over low heat, stirring frequently. For longer storage, freeze the risotto in individual portions for up to a month — just be aware that the texture may change slightly upon thawing.

    FAQ

    Can I use arborio rice instead of brown rice?

    Yes, arborio rice can be used, though it will yield a different texture. Arborio is traditional for risotto and will cook faster than brown rice, so adjust the cooking time accordingly.

    What can I use instead of white truffle oil?

    If you don’t have white truffle oil, a drizzle of high-quality extra virgin olive oil or a small knob of truffle butter can provide a similar luxurious finish.

    Is it necessary to use both cremini and porcini mushrooms?

    While using both types of mushrooms adds depth, you can use just one variety if preferred. Cremini mushrooms offer a milder flavor, while porcini provides a more intense umami hit.

    Can I make this dish ahead of time?

    Risotto is best served fresh, but you can prepare the mushroom mixture in advance and store it separately. Then, cook the rice and combine when ready to serve for optimal texture and flavor.

    Final Thoughts

    There you have it, my friends — a dish that transforms a classic into a culinary masterpiece. I hope this Umami-Truffle Infused Mushroom Parmesan Brown Rice Risotto becomes a favorite in your kitchen, just as it has in mine. I’d love to hear how your version turns out, so please leave a comment below or share your creation on social media. Happy cooking!

    Related update: Umami-Truffle Infused Mushroom Parmesan Brown Rice Risotto

    Related update: Spicy Crunchy Prawn Skewers with Zesty Lime-Avocado Cream

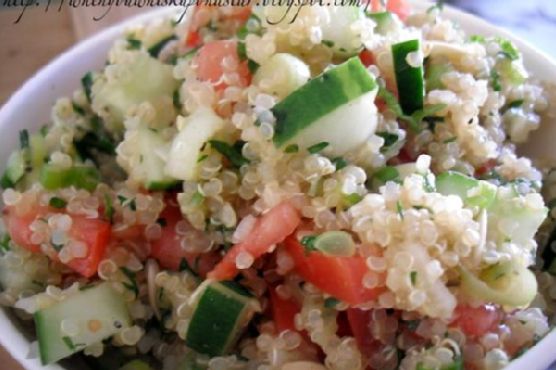
  • Zesty Quinoa Tabbouleh with Pomegranate and Toasted Almonds | Made by Meaghan Moineau

    Zesty Quinoa Tabbouleh with Pomegranate and Toasted Almonds | Made by Meaghan Moineau

    Zesty Quinoa Tabbouleh with Pomegranate and Toasted Almonds

    Imagine a sunlit kitchen where fresh herbs release their fragrant oils into the air as you gently massage them with a pinch of salt. The nutty aroma of toasted quinoa mingles with the sweet-tart burst of pomegranate arils, promising a dish that delights every sense. Welcome to my take on the classic tabbouleh — a zesty quinoa version that’s not just a salad, but an experience.

    Personal Story

    It was a crisp autumn afternoon when I first stumbled upon the concept of quinoa tabbouleh, a serendipitous discovery borne out of necessity. I was hosting a small gathering for friends, and as fate would have it, my pantry was devoid of the traditional bulgur. I looked around, eyes landing on a jar of quinoa that had been sitting on the shelf, almost forgotten. There was a moment of hesitation, a silent conversation with myself — could this really work?

    Driven by both curiosity and the urge to impress my guests, I toasted the quinoa in a dry pan, the grains transforming into tiny, golden beads, their nutty aroma filling the kitchen. As I began to assemble the salad, adding vibrant green herbs and juicy tomatoes, I decided to experiment further. A bowl of pomegranate arils, their deep red hue catching the light, was too tempting to resist. In they went, along with a handful of toasted almonds for a bit of crunch.

    That evening, as we gathered around the table, the tabbouleh was met with curious eyes and hesitant forks. But just one bite was enough to win everyone over. The bright, layered flavors, the unexpected crunch, the sweetness from the pomegranate — it was a revelation. And just like that, a new favorite was born, one that has since become a staple at my table.

    Over the years, this zesty quinoa tabbouleh with pomegranate and toasted almonds has become more than just a dish; it’s a testament to culinary creativity and the joy of discovery in the kitchen. Each time I prepare it, I’m reminded of that first delightful surprise, and I eagerly anticipate the smiles it brings to those who taste it.

    What Makes This Version Special

    This version of tabbouleh is a vibrant twist on the classic Middle Eastern salad, elevating it to new heights with unique ingredients and techniques. By replacing bulgur with quinoa, we introduce a nutty depth that is enhanced by toasting the grains until they are golden and aromatic. The addition of juicy pomegranate arils brings a pop of sweetness and a hint of tartness, creating a beautiful contrast to the fresh herbs and vegetables.

    Toasted almonds add a satisfying crunch, making each bite a delightful texture adventure. The use of sumac, a tangy spice that complements the lemony dressing, ties all the flavors together into a cohesive and exciting dish. This tabbouleh is not just a side salad; it’s a centerpiece, a conversation starter, and a celebration of flavors and textures.

    Flavor Profile

    The taste experience of this zesty quinoa tabbouleh is nothing short of a flavor journey. Imagine a forkful that starts with a burst of bright, citrusy notes from freshly squeezed lemon juice, perfectly balanced by the earthy, nutty undertones of toasted quinoa. The fresh herbs — mint and parsley — add a cool, aromatic lift, while the green onions provide a subtle zing.

    As you chew, the pomegranate arils burst with a sweet-tart juiciness that dances on your palate, immediately followed by the satisfying crunch of toasted almonds. Together, these elements create a dynamic harmony, each ingredient playing its own role while complementing the others beautifully. It’s a dish that surprises and delights with every mouthful.

    Ingredients

    • 1 cup quinoa
    • 2 cups water
    • 4 green onions, chopped
    • 1 cup diced tomato
    • 1 cup diced cucumber
    • 1/2 cup fresh mint, chopped
    • 1 cup fresh parsley, chopped
    • 1/4 cup olive oil
    • Juice of 2 lemons
    • 1 teaspoon garlic powder
    • 1/2 teaspoon freshly cracked black pepper
    • 1 cup pomegranate arils
    • 1/2 cup toasted almonds, chopped
    • 1 teaspoon sumac
    • 1/2 cup crumbled feta cheese

    Instructions

    1. Bring the water to a boil in a medium saucepan. Add the quinoa and stir. Cover and reduce the heat, allowing the quinoa to simmer on medium-low heat until all the water is absorbed, about 20 minutes. Stir occasionally to prevent burning. Once cooked, fluff with a fork and let it cool.
    2. While the quinoa is cooling, toast the almonds in a dry pan over medium heat until they are golden and fragrant, about 5 minutes. Set aside.
    3. In a large bowl, combine the chopped green onions, diced tomato, and cucumber. Add the fresh mint and parsley, gently massaging them with a pinch of salt to release their essential oils and fragrance.
    4. Once the quinoa has cooled, add it to the bowl of vegetables and herbs. Drizzle with olive oil and lemon juice, then sprinkle in the garlic powder, black pepper, and sumac. Gently stir to combine.
    5. Fold in the pomegranate arils, toasted almonds, and crumbled feta cheese, mixing until everything is evenly distributed.
    6. Cover the bowl and refrigerate the tabbouleh for at least an hour to allow the flavors to meld. Give it a good stir before serving.
    7. This dish is best enjoyed fresh but can be stored in the refrigerator for two to three days. Serve chilled and savor the symphony of flavors and textures!

    Pro Tips from Meaghan’s Kitchen

    • Toasting the quinoa before boiling is a game-changer. It adds a layer of complexity to the flavor that’s well worth the extra step.
    • For an extra burst of freshness, add a pinch of lemon zest to the dressing. It enhances the citrusy notes beautifully.
    • Don’t skip the resting time in the fridge. Letting the tabbouleh sit allows the flavors to develop and the salad to reach its full potential.
    • If you’re preparing the dish ahead, keep the pomegranate arils separate until just before serving to maintain their juicy texture.
    • Use a sharp knife to chop the herbs to prevent bruising and to keep the flavors vibrant.

    Variations & Dietary Swaps

    • Vegetarian Delight: Omit the feta cheese for a vegan version, or swap it with a plant-based feta alternative.
    • Spice It Up: Add a finely chopped red chili or a dash of cayenne pepper for a spicy kick.
    • Kid-Friendly Version: Reduce the amount of herbs and introduce small cubes of mild cheese, like mozzarella, to make it more appealing to younger palates.

    What to Serve With It

    This zesty quinoa tabbouleh is a versatile companion to many dishes. It pairs wonderfully with grilled meats such as lamb or chicken, offering a refreshing contrast. For a vegetarian meal, serve it alongside roasted vegetables or a savory chickpea stew. Don’t forget to enjoy it with a chilled glass of Sauvignon Blanc or a refreshing mint lemonade to enhance the flavors.

    Storage & Meal Prep

    Store any leftovers in an airtight container in the refrigerator for up to three days. The veggies will maintain their crispness best within the first day. For meal prepping, prepare all the components separately and combine them just before serving for maximum freshness. Unfortunately, this dish doesn’t freeze well due to the fresh vegetables, but it’s easy to prepare fresh when needed.

    FAQ

    Can I use another grain instead of quinoa?

    Absolutely! While quinoa offers a unique nutty flavor and texture, you can substitute it with bulgur, couscous, or farro for a different twist.

    What can I use instead of pomegranate arils?

    If pomegranates aren’t in season, try using dried cranberries or chopped dried apricots for a similar sweet-tart addition.

    How do I keep the herbs looking fresh?

    Ensure your herbs are completely dry before chopping, and use a sharp knife to prevent bruising. Adding them to the salad just before serving also helps maintain their vibrant color.

    Can this dish be made gluten-free?

    Yes, it already is! Quinoa is naturally gluten-free, making this dish a great option for those with gluten sensitivities.

    Is there a substitute for sumac?

    If you can’t find sumac, a mix of lemon zest and a bit of ground cumin can provide a similar tangy, earthy flavor.

    Final Thoughts

    Thank you for joining me on this culinary journey to create Zesty Quinoa Tabbouleh with Pomegranate and Toasted Almonds. I hope this recipe brings as much joy to your table as it has to mine. Remember, the kitchen is a place for experimentation and creativity, so feel free to make this dish your own. I’d love to hear how your tabbouleh turns out, so please leave a comment or share your experience on social media. Here’s to delicious adventures in cooking!

    Related update: Zesty Quinoa Tabbouleh with Pomegranate and Toasted Almonds

    Related update: Smoky Maple-Glazed Salmon Caesar Salad with Toasted Pepitas

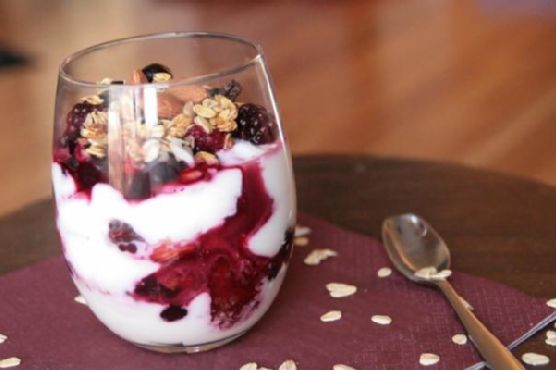
  • Balsamic Glazed Mixed Berry Yogurt Parfait with Toasted Almond Crumble | Made by Meaghan Moineau

    Balsamic Glazed Mixed Berry Yogurt Parfait with Toasted Almond Crumble | Made by Meaghan Moineau

    Balsamic Glazed Mixed Berry Yogurt Parfait with Toasted Almond Crumble

    Imagine the first spoonful of a parfait that seamlessly blends the sweetness of mixed berries, the rich depth of balsamic glaze, and the warm, nutty crunch of toasted almonds. It’s a symphony of flavors that transforms an ordinary yogurt parfait into a culinary masterpiece. Welcome to a breakfast experience that’s as elegant as it is delicious.

    Personal Story

    When I was a child, Sunday mornings were sacred. My family would gather around the breakfast table for what felt like an elaborate feast. While my siblings and I eagerly anticipated my mother’s fluffy pancakes, she would often surprise us with a bowl of fresh berries and yogurt on the side. I remember the burst of berry sweetness and the cool, creamy yogurt melding in my mouth—a simple pleasure that marked the beginning of a relaxed day spent with family.

    Years later, during a culinary journey through Italy, I discovered the magic of balsamic vinegar. It was love at first taste, as the vinegar’s complex, tangy notes struck a harmonious chord with my palate. One evening, at a small trattoria in Modena, I was served a dessert featuring strawberries drizzled with balsamic glaze. The unexpected pairing was transformative, and I knew immediately that I had to recreate this experience at home.

    Back in my kitchen, I began experimenting with ways to incorporate balsamic glaze into one of my favorite childhood breakfasts: the mixed berry yogurt parfait. By simmering frozen mixed berries with balsamic vinegar and maple syrup, I crafted a glossy, aromatic glaze that elevated the dish to new heights. Adding a hint of cinnamon-infused toasted almonds brought everything together, creating a balanced parfait that feels both luxurious and comforting.

    Now, this Balsamic Glazed Mixed Berry Yogurt Parfait with Toasted Almond Crumble has become a staple in my home, a recipe that bridges my childhood memories with my passion for bold, exciting flavors. It’s my way of honoring the past while embracing the future of breakfast indulgence.

    What Makes This Version Special

    Traditional mixed berry yogurt parfaits are delightful on their own, but my version takes this classic dish to the next level. The addition of a balsamic glaze infused with maple syrup and a hint of ground cinnamon adds an elegant touch and heightens the flavor complexity. The glaze complements the sweetness of the berries with a tangy depth, while the toasted almond crumble adds a warm, nutty flavor that contrasts beautifully with the creamy yogurt.

    The balsamic glaze not only enhances the taste but also adds a visual appeal with its rich, dark sheen that drapes elegantly over the berries. This version is perfect for those who seek a breakfast that feels special enough for entertaining, yet simple enough to enjoy on a leisurely weekend morning.

    Flavor Profile

    The Balsamic Glazed Mixed Berry Yogurt Parfait with Toasted Almond Crumble offers a taste experience that’s both sweet and tangy, with a warm, nutty undertone. The berries, simmered to perfection, release their natural sweetness which is beautifully balanced by the balsamic vinegar’s acidity. A hint of spiced depth comes through with the cinnamon, adding an unexpected layer of flavor complexity. The creamy, tangy yogurt serves as the perfect backdrop, while the toasted almonds provide a satisfying crunch with every bite.

    Ingredients

    • 2 cups of frozen mixed berries
    • 1/4 cup balsamic vinegar
    • 2 tablespoons maple syrup
    • 1 teaspoon vanilla extract
    • 2 cups plain Greek yogurt
    • 1 cup of whole oats
    • 1/2 cup whole almonds
    • 1/2 teaspoon ground cinnamon
    • 2 tablespoons honey

    Instructions

    1. In a medium saucepan, combine the frozen mixed berries, balsamic vinegar, and maple syrup. Bring to a simmer over medium heat. Stir occasionally and let the mixture cook until the berries are soft and the glaze is glossy and slightly thickened, about 10-12 minutes.
    2. Meanwhile, preheat a skillet over medium heat. Add the whole almonds and toast them, stirring frequently, until they are golden-brown and aromatic, about 5-7 minutes. Sprinkle in the ground cinnamon during the last minute of toasting to intensify the nutty aroma and flavor.
    3. Transfer the toasted almonds to a cutting board and allow them to cool slightly. Roughly chop them into small pieces and mix with the whole oats.
    4. In a bowl, combine the plain Greek yogurt and vanilla extract until smooth and creamy.
    5. To assemble the parfaits, layer a spoonful of the yogurt mixture into the bottom of a glass cup or bowl. Add a layer of the balsamic-glazed berries, followed by a sprinkle of the almond-oat crumble.
    6. Repeat the layers until all ingredients are used, finishing with a drizzle of honey on top for added sweetness.
    7. Serve immediately, and savor the medley of flavors and textures.

    Pro Tips from Meaghan’s Kitchen

    • For an even more intense flavor, let the balsamic berry glaze cool and thicken before assembling the parfaits. This will create a more concentrated taste.
    • To prevent the yogurt from becoming too watery, make sure to drain any excess liquid from the berries after simmering.
    • If you prefer a creamier texture, you can substitute the Greek yogurt with a full-fat version, or even experiment with a touch of mascarpone cheese.
    • For a touch of luxury, sprinkle a pinch of flaky sea salt over the top layer to enhance the sweetness and add a subtle, savory edge.
    • If you’re short on time, prepare the balsamic glaze and toasted almonds ahead of time. They can be stored in airtight containers, ready to be layered into your parfaits whenever you’re ready.

    Variations & Dietary Swaps

    This breakfast parfait lends itself to endless variations, allowing you to personalize it to your tastes and dietary needs:

    • **Vegan Version**: Swap the Greek yogurt for a plant-based alternative like coconut or almond yogurt, and use agave syrup instead of honey.
    • **Nut-Free Option**: If you’re allergic to nuts, replace the almonds with toasted pumpkin seeds or sunflower seeds for crunch.
    • **Berry Swap**: If you don’t have mixed berries on hand, this recipe works beautifully with just about any fruit. Consider trying it with poached pears or caramelized bananas for a seasonal twist.

    What to Serve With It

    The Balsamic Glazed Mixed Berry Yogurt Parfait with Toasted Almond Crumble pairs wonderfully with a glass of chilled Prosecco for a brunch gathering or a soothing cup of Earl Grey tea for a cozy morning at home. Its versatility makes it an ideal choice for both leisurely breakfasts and sophisticated brunches. Complement the parfait with a side of freshly baked croissants or a simple green salad to round out your meal.

    Storage & Meal Prep

    While the parfaits are best enjoyed fresh, you can certainly prepare certain elements in advance. Store the balsamic glaze and toasted almond crumble in separate airtight containers in the refrigerator for up to four days. To assemble, simply layer them with fresh yogurt and berries when you’re ready to serve.

    For meal prep, consider layering the parfaits in mason jars for an easy grab-and-go breakfast. Just add the almond crumble right before eating to ensure it stays crisp. If you must freeze, note that the texture of the yogurt and berries will change, so it’s best to consume them fresh.

    FAQ

    Can I use fresh berries instead of frozen ones?

    Absolutely! Fresh berries can be used and will bring a vibrant, juicy quality to the parfait. However, you may need to adjust the cooking time slightly as fresh berries release less liquid than frozen.

    What if I don’t like the taste of balsamic vinegar?

    If balsamic vinegar isn’t your favorite, you can reduce its quantity or substitute it with a milder option like apple cider vinegar or omit it altogether, focusing on the sweet maple glaze instead.

    How can I make this parfait more kid-friendly?

    To make this recipe more appealing to children, consider using sweeter fruits like bananas or strawberries. You can also add a layer of granola for extra crunch and a drizzle of chocolate syrup for a special treat.

    Is there a way to make this parfait gluten-free?

    Yes! Simply use certified gluten-free oats to ensure your parfait is gluten-free. Most other ingredients in this recipe are naturally free of gluten.

    Can I prepare the parfaits the night before?

    While you can prepare the parfaits in advance, it’s best to keep the components separate and assemble them just before serving to maintain the texture and freshness, especially for the almond crumble.

    Final Thoughts

    Thank you for joining me on this culinary adventure, where a simple yogurt parfait transforms into an elegant breakfast delight with a balsamic twist. I hope this recipe inspires you to explore new flavors and bring a touch of sophistication to your morning routine. I’d love to hear how your parfaits turn out, so please feel free to leave a comment below or share your creations on social media. Remember, cooking is a journey—enjoy every delicious step!

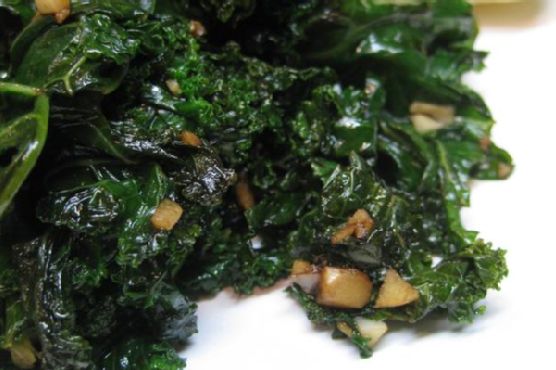
  • Garlicky Kale with Toasted Pine Nuts and Sun-Dried Tomatoes | Made by Meaghan Moineau

    Garlicky Kale with Toasted Pine Nuts and Sun-Dried Tomatoes | Made by Meaghan Moineau

    Garlicky Kale with Toasted Pine Nuts and Sun-Dried Tomatoes

    Imagine this: a kitchen filled with the warm, nutty aroma of toasted pine nuts, the sweetness of sun-dried tomatoes rehydrated to their juicy best, and the unmistakable, heady scent of garlic sizzling in olive oil. This isn’t just any side dish; it’s a Mediterranean masterpiece that tantalizes every sense and elevates your meal to something truly memorable.

    Personal Story

    Let me take you back to a time when my love affair with Mediterranean flavors truly began. It was a sun-dappled afternoon at my grandmother’s house on the French Riviera. I was a young, curious cook, spending summers in her cozy kitchen, where the air was always filled with the fragrance of fresh herbs and the laughter of family. One afternoon, she pulled out a bunch of curly kale from her garden, and with a wink, promised to show me something magical. She tossed it with garlic and olive oil, added a splash of balsamic vinegar, and transformed it into a dish that danced on my taste buds. It was simple yet profoundly delicious.

    Fast forward a few years, and I found myself in my own kitchen, yearning to recreate that beloved dish but with a Meaghan twist. I remembered a dinner party where I had a salad sprinkled with toasted pine nuts and thought, “Why not add them to my grandmother’s kale?” The result was a revelation. The crunch and warmth of the nuts contrasted beautifully with the tender greens.

    Then, one day, as I was rifling through my pantry, my eyes landed on a jar of sun-dried tomatoes. The deep, sweet-tart flavor they offer seemed like the perfect companion to the garlicky kale. I soaked them in hot water to plump them up, sliced them thinly, and tossed them in. The kale was transformed once again, this time into a symphony of textures and flavors that made my heart sing.

    Every time I make this dish, I’m transported back to my grandmother’s kitchen and those sunlit days of culinary discovery. It’s more than just a recipe to me; it’s a reminder of the joy of cooking with love and creativity.

    What Makes This Version Special

    Why settle for ordinary when you can have extraordinary? By adding toasted pine nuts and sun-dried tomatoes, this garlicky kale goes from a humble side dish to a show-stopping centerpiece. Toasting the pine nuts brings out a rich, nutty depth that complements the earthy kale, while the sun-dried tomatoes introduce a sweet-tart contrast that keeps each bite exciting. It’s these small yet significant upgrades that make this version a standout in the world of Mediterranean cuisine.

    Flavor Profile

    Prepare your palate for a delightful journey. This dish is nutty and savory, with a subtle sweetness from the sun-dried tomatoes that lingers pleasantly. The garlic adds a warm, aromatic foundation, while a hint of red pepper flakes provides a gentle heat that warms the back of your throat. Every bite is a harmonious blend of flavors and textures, from the tender kale to the crunchy pine nuts.

    Ingredients

    • 2 tablespoons olive oil
    • 1 large bunch of curly kale, washed and coarsely chopped
    • 3 cloves garlic, minced
    • 1/4 cup balsamic vinegar
    • 1/4 cup pine nuts
    • 1/4 cup sun-dried tomatoes, soaked in hot water and sliced
    • 1/4 cup grated Parmesan cheese
    • 1/2 teaspoon red pepper flakes
    • Salt and pepper, to taste

    Instructions

    1. Start by toasting the pine nuts in a dry pan over medium heat. Stir frequently and watch closely until they turn golden brown, releasing a fragrant aroma. Remove from the pan and set aside.
    2. Soak the sun-dried tomatoes in hot water for about 10 minutes to plump them up. Once softened, drain and slice thinly.
    3. In a large pot, heat the olive oil over medium heat. Add the chopped kale and cover the pot. Cook, stirring occasionally, until the kale has reduced by half its volume, about 5-7 minutes.
    4. Uncover the pot and add the minced garlic and balsamic vinegar. Stir well, cooking for an additional 30 seconds to 1 minute, ensuring the garlic and vinegar are well distributed.
    5. Toss in the toasted pine nuts, sliced sun-dried tomatoes, and red pepper flakes. Stir to combine and heat through.
    6. Remove from heat and sprinkle with grated Parmesan cheese. Season with salt and pepper to taste.
    7. Serve hot, allowing the flavors to meld beautifully.

    Pro Tips from Meaghan’s Kitchen

    • Don’t skip toasting the pine nuts. It intensifies their flavor and adds a delightful crunch to the dish.
    • If your garlic starts to brown too quickly, lower the heat to maintain its sweet, aromatic essence without bitterness.
    • Use a slotted spoon to transfer the sun-dried tomatoes from the soaking water to the pot. This way, you control the moisture added to the dish.
    • For an extra depth of flavor, try using a high-quality aged balsamic vinegar.
    • Leftover kale can be repurposed into a fantastic frittata filling or a topping for a grain bowl.

    Variations & Dietary Swaps

    • Vegetarian Swap: This dish is already vegetarian. To make it vegan, simply omit the Parmesan or substitute with nutritional yeast for a cheesy flavor.
    • Spice-it-up Version: Add extra red pepper flakes or a dash of smoked paprika for a fiery kick.
    • Kid-Friendly Version: Reduce the garlic and omit the red pepper flakes for a milder flavor that kids will enjoy.

    What to Serve With It

    This garlicky kale with toasted pine nuts and sun-dried tomatoes pairs beautifully with a crisp Sauvignon Blanc, enhancing the dish’s brightness. If you prefer non-alcoholic options, a light, refreshing lemon iced tea will balance the flavors perfectly. Serve as a side to grilled chicken or as part of a Mediterranean spread with hummus and pita.

    Storage & Meal Prep

    Store leftover kale in an airtight container in the refrigerator for up to three days. To reheat, gently warm in a skillet over low heat to retain the texture and flavor. While this dish is best enjoyed fresh, you can freeze it for up to a month if needed. Thaw in the fridge overnight and reheat as directed.

    FAQ

    Can I use a different type of kale?

    Absolutely! Lacinato kale (also known as dinosaur kale) works well too. It has a slightly different texture but will absorb the flavors beautifully.

    What if I don’t have pine nuts?

    No worries! You can substitute with slivered almonds or even chopped walnuts for a different nutty profile.

    How do I prevent the kale from becoming too soggy?

    Be sure not to overcook the kale. It should be tender yet still have a slight bite. Also, uncover the pot after the initial wilting to allow excess moisture to evaporate.

    Can I make this dish ahead of time?

    Yes, you can prepare it a day in advance and store it in the fridge. Reheat gently to enjoy the flavors at their best.

    How can I add protein to this dish?

    Consider adding chickpeas or sliced grilled chicken for an extra protein boost. Both options complement the flavors wonderfully.

    Final Thoughts

    There you have it: a garlicky kale dish that’s as vibrant and satisfying as it is simple. I hope you’ll try this recipe and feel the love and creativity that goes into every bite. Please let me know how it turns out for you — I’d love to hear your variations and experiences. And if you’re as enchanted by it as I am, don’t hesitate to share it with your friends and family. Here’s to joyful cooking and delicious memories!

    Related update: Garlicky Kale with Toasted Pine Nuts and Sun-Dried Tomatoes