Tag: Vegetarian

  • Eggless Blueberry and White Chocolate Baked Cheesecake | Made by Meaghan Moineau

    Eggless Blueberry and White Chocolate Baked Cheesecake | Made by Meaghan Moineau

    Eggless Blueberry and White Chocolate Baked Cheesecake

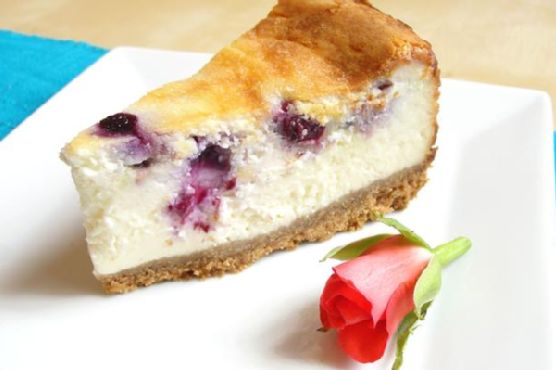
    There are few things more comforting than a slice of cheesecake, and this Eggless Blueberry and White Chocolate Baked Cheesecake is no exception. I remember the first time I tried cheesecake. It was a chilly autumn day, and my grandmother had just pulled a golden, creamy cheesecake out of the oven. The smell alone was enough to make my mouth water. This recipe is inspired by those cherished moments, blending the tangy taste of blueberries with the decadent richness of white chocolate—all without eggs.

    Why You’ll Love It

    This cheesecake is a delightful fusion of flavors and textures. The buttery biscuit crust provides a perfect foundation for the creamy filling, while the blueberries add a burst of freshness, and the white chocolate enhances the dessert’s richness. Whether you’re catering to those with egg allergies or simply looking for a unique twist on the classic cheesecake, this recipe is sure to become a favorite.

    Ingredients

    • 200g digestive biscuits, crushed
    • 100g butter, melted
    • 200g white chocolate, melted
    • 500g cream cheese
    • 250g ricotta cheese
    • 200ml double cream
    • 150g granulated sugar
    • 2 tablespoons cornflour
    • 1 teaspoon vanilla extract
    • 1 tablespoon lemon juice
    • 200g plain blueberries

    Instructions

    1. Preheat your oven to 180 degrees Celsius.
    2. Combine the crushed digestive biscuits with the melted butter. Mix thoroughly to ensure the butter is evenly distributed.
    3. Firmly press the mixture into the base of a greased 10-inch springform tin, creating an even crust.
    4. In a large mixing bowl, beat together the cream cheese, ricotta cheese, double cream, granulated sugar, cornflour, vanilla extract, lemon juice, and melted white chocolate until the mixture is smooth and thickened. Avoid overmixing.
    5. Pour half of the cheese mixture over the prepared crust.
    6. Scatter the blueberries evenly over the cheese mixture.
    7. Pour the remaining cheese mixture over the blueberries, gently spreading it to cover all the berries.
    8. Bake the cheesecake in the oven for 1 to 1 1/4 hours until set. Adjust the time if using a fan oven.
    9. Allow the cheesecake to cool at room temperature, then refrigerate for at least 8 hours or overnight for best results.
    10. Cut into large wedges and serve chilled.

    Tips

    For the best texture, ensure all ingredients are at room temperature before mixing. This will help everything blend smoothly and create a creamier cheesecake. When pressing the crust into the tin, use the bottom of a glass to get an even, compact layer.

    Variations & Substitutions

    If you prefer a gluten-free version, swap the digestive biscuits for a gluten-free alternative. You can also experiment with different berries if blueberries aren’t in season—raspberries or blackberries make excellent substitutes. For a dairy-free twist, use a plant-based cream cheese and coconut cream in place of double cream.

    Storage

    Store the cheesecake in an airtight container in the refrigerator for up to five days. You can also freeze individual slices wrapped in cling film and foil for up to three months. Defrost in the fridge overnight before serving.

    FAQ

    Can I make this cheesecake in advance?

    Absolutely! This cheesecake actually tastes better after it’s had time to set, making it perfect for preparing a day or two ahead of serving.

    How can I tell when the cheesecake is done baking?

    You’ll know the cheesecake is ready when the edges are set, but the center still has a slight wobble. It will firm up as it cools.

    What can I use instead of a springform tin?

    If you don’t have a springform tin, a regular cake tin will work. Just line it with parchment paper for easy removal.

    Nutrition

    This cheesecake is a rich and indulgent dessert, perfect for special occasions. While exact nutritional values can vary, each slice is estimated to contain around 450 calories, 30g of fat, and 35g of sugar, depending on portion size and specific ingredients used.

    Final Thoughts

    Baking can be a beautiful journey of creativity and nostalgia, and this Eggless Blueberry and White Chocolate Baked Cheesecake is a testament to that. Whether you’re baking for loved ones or treating yourself, this recipe is a comforting reminder of how food can be both a sensory delight and a heartfelt hug. Enjoy every bite, and maybe even share a slice with someone special.

    Related update: Eggless Blueberry and White Chocolate Baked Cheesecake

    Related update: Mascarpone & Ricotta Cheese Cake
  • Tuscan White Bean Soup with Olive Oil and Rosemary | Made by Meaghan Moineau

    Tuscan White Bean Soup with Olive Oil and Rosemary | Made by Meaghan Moineau

    Tuscan White Bean Soup with Olive Oil and Rosemary

    Introduction

    As the leaves start to change and the air becomes crisp, my kitchen transforms into a haven of warmth and comfort. One of my fondest memories is coming home on a chilly autumn day to the soothing aroma of my grandmother’s Tuscan White Bean Soup simmering on the stove. This recipe, passed down through generations, is not just a meal; it’s a heartfelt embrace, a reminder of home and love. Today, I’m sharing this cherished recipe with you, hoping it brings as much joy and warmth to your home as it does to mine.

    Why You’ll Love It

    This Tuscan White Bean Soup is a celebration of simplicity and flavor. Here’s why you’ll fall in love with it:

    • Easy to Make: With minimal ingredients and hands-off cooking in a slow cooker, this recipe is perfect for busy days.
    • Comforting and Nutritious: Packed with protein and fiber from the beans, this soup is both satisfying and nourishing.
    • Rich in Flavor: The olive oil and rosemary add a delightful fragrance and depth of flavor that elevates this humble soup.
    • Versatile: It can easily be adapted to suit your preferences or dietary needs.

    Ingredients

    • 1 bay leaf
    • 1 sprig of fresh rosemary
    • 3 cloves of garlic, minced
    • 2 tablespoons of olive oil
    • 1 large onion, chopped
    • 1 teaspoon of salt, or to taste
    • 8 cups of water
    • 2 cups of dried white beans, rinsed

    Instructions

    1. Rinse the beans thoroughly and place them in a 7-quart slow cooker.
    2. Add the water, onion, garlic, and bay leaf to the slow cooker.
    3. Cover and cook on LOW for about 8 hours, or until the beans are tender.
    4. Remove the bay leaf.
    5. Using a handheld immersion blender, puree the remaining ingredients to the desired texture.
    6. Add salt to taste.
    7. Ladle the soup into bowls.
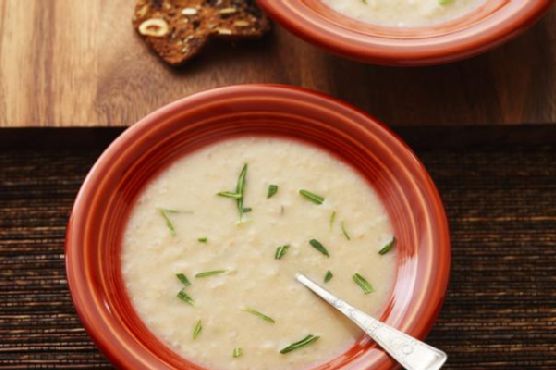
    8. Drizzle with olive oil, sprinkle with rosemary, and serve.

    Tips

    • Soak the Beans: For even cooking, consider soaking the beans overnight. This can also reduce cooking time slightly.
    • Adjust Consistency: If you prefer a chunkier soup, blend just half of the beans and leave the rest whole.
    • Fresh Is Best: Use fresh rosemary and high-quality olive oil for the best flavor.

    Variations & Substitutions

    This soup is wonderfully adaptable:

    • Meat Lovers: Add cooked Italian sausage or pancetta for a heartier version.
    • Vegetables: Incorporate chopped spinach or kale for added greens.
    • Herb Substitutions: If rosemary isn’t your favorite, try thyme or sage for a different flavor profile.
    • Vegan Option: Ensure your toppings are vegan-friendly by skipping any cheese garnishes.

    Storage

    This soup stores beautifully, making it perfect for meal prep:

    • Refrigerator: Store in an airtight container for up to 5 days.
    • Freezer: Freeze in individual portions for up to 3 months. Thaw in the refrigerator overnight before reheating.

    FAQ

    Can I use canned beans instead of dried beans?

    Yes, you can use canned beans to save time. Use about 4 cups of drained and rinsed canned beans, and reduce the cooking time to about 2 hours on LOW. Adjust the liquid accordingly, as canned beans are already cooked.

    What can I use if I don’t have an immersion blender?

    If you don’t have an immersion blender, you can transfer the soup in batches to a regular blender. Be sure to hold the lid down with a kitchen towel to prevent hot splashes.

    Nutrition

    Each serving of this Tuscan White Bean Soup is packed with nutrients:

    • Calories: Approximately 220
    • Protein: 12g
    • Fiber: 8g
    • Fat: 6g (primarily from healthy olive oil)
    • Sodium: Varies based on the amount of salt added

    Final Thoughts

    There’s something truly magical about a bowl of homemade soup. This Tuscan White Bean Soup is more than just a recipe; it’s a connection to cherished memories and a testament to the power of simple ingredients. Whether you’re gathering around the table with family or enjoying a quiet moment to yourself, this soup promises warmth and contentment. I hope it becomes a beloved staple in your household, just as it has in mine. Enjoy!

    Related update: Tuscan White Bean Soup with Olive Oil and Rosemary

    Related update: Spare Ribs

    Related update: Minestrone

  • Green Monster Ice Pops | Made by Meaghan Moineau

    Green Monster Ice Pops | Made by Meaghan Moineau

    Green Monster Ice Pops

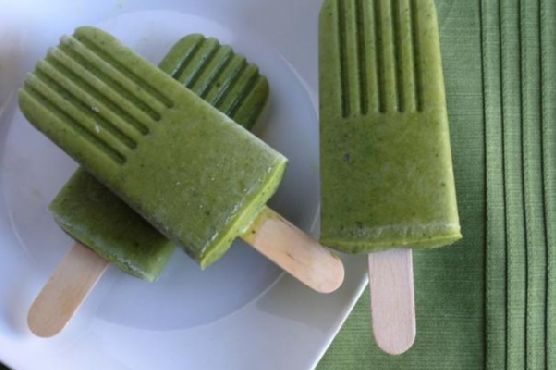
    There’s something magical about the refreshing taste of a homemade ice pop on a warm summer day. Growing up, I fondly remember the excitement of racing to the freezer, eagerly anticipating the moment when the ice pops would be ready. Those childhood memories inspired this recipe for Green Monster Ice Pops—a healthy twist on a classic treat that the whole family can enjoy. Packed with wholesome ingredients, these ice pops are not only delicious but also nutrient-rich, perfect for a guilt-free indulgence.

    Why You’ll Love It

    These Green Monster Ice Pops are the perfect blend of creamy and refreshing. You’ll love them because:

    • They’re incredibly easy to make, requiring just a few simple steps.
    • The combination of avocado and banana provides a natural creaminess without the need for dairy.
    • They’re packed with nutrients from spinach and mango, making them a healthy snack option.
    • They’re naturally sweetened with banana and honey, with the option to add more sweetness if desired.
    • Kids love the fun green color and delicious taste!

    Ingredients

    • 1 cup unsweetened almond milk
    • 1 ripe avocado
    • 1 cup baby spinach
    • 1 ripe banana
    • 2 tablespoons honey
    • 1 cup fresh mango, chopped

    Instructions

    1. Place all ingredients into a blender and mix well until smooth.
    2. Taste the smoothie. If it’s not sweet enough, add 1 to 2 tablespoons of maple syrup or additional honey and blend again.
    3. Pour the smoothie mixture into ice pop molds.
    4. Insert a wooden popsicle stick into each mold, leaving about a quarter of the stick above the mold.
    5. Place the molds into the freezer for 2-3 hours until fully frozen.
    6. Once frozen, remove the ice pops from the molds and enjoy!

    Tips

    • Ensure the avocado is ripe to achieve the best creamy texture.
    • For easier removal, run the molds under warm water for a few seconds to loosen the ice pops.
    • Use silicone molds for easy removal and less mess.

    Variations & Substitutions

    One of the best things about this recipe is its versatility. Here are some ideas to mix it up:

    • Substitute the almond milk: Use coconut milk for a tropical twist or regular milk if you prefer dairy.
    • Add-ins: Try adding chia seeds or flaxseeds for an extra nutritional boost.
    • Fruit swaps: Swap mango for pineapple or berries for a different flavor profile.

    Storage

    Once the ice pops are fully frozen, you can store them in the molds or remove them and place them in a freezer-safe bag or container. They will keep well for up to 1 month in the freezer. Just be sure to keep them well-sealed to prevent freezer burn.

    FAQ

    Can I make these ice pops without a blender?

    While a blender is recommended for achieving a smooth consistency, you could use a food processor or mash the ingredients by hand. However, the texture might not be as creamy.

    Are these ice pops suitable for children?

    Absolutely! These ice pops are packed with fruits and spinach, making them a fun and healthy treat for kids. The sweet taste of banana and mango masks the spinach, so it’s a clever way to sneak in some greens.

    Can I use frozen fruits instead of fresh ones?

    Yes, frozen fruits can be used in place of fresh ones. Just ensure they’re fully thawed before blending to achieve a smooth mixture.

    Nutrition

    These Green Monster Ice Pops are not only delicious but also provide a good source of vitamins and minerals:

    • Avocado: Rich in healthy fats and fiber.
    • Spinach: A powerful source of iron, calcium, and vitamins A and C.
    • Mango: High in vitamin C and antioxidants.
    • Banana: Provides potassium and natural sweetness.

    Final Thoughts

    Green Monster Ice Pops are a delightful way to enjoy a healthy treat that’s both satisfying and nourishing. Whether you’re looking to cool down on a hot day or simply want a nutritious snack, these ice pops are a fantastic choice. Try them out, and don’t be afraid to experiment with different variations to find your perfect flavor combination. Enjoy the vibrant taste and the joy of a homemade treat that brings back those cherished childhood memories.

    Related update: Green Monster Ice Pops

    Related update: Ginger Snap and Pumpkin Ice Cream Sandwiches

  • Amaranth and Roast Veggie Salad | Made by Meaghan Moineau

    Amaranth and Roast Veggie Salad | Made by Meaghan Moineau

    Amaranth and Roast Veggie Salad

    Intro

    There’s something magical about the aroma of vegetables roasting in the oven, the warmth of the kitchen embracing you as you anticipate the delightful meal ahead. I remember my grandmother’s kitchen, where every Sunday, she would prepare a hearty roast that filled the house with comforting scents. Her kitchen was a haven, a place where the worries of the world would melt away with each delicious bite. Inspired by those cherished moments, I’ve created a dish that combines the wholesome goodness of roasted vegetables with the unique texture of amaranth. This Amaranth and Roast Veggie Salad is my homage to those Sundays, and I’m thrilled to share it with you.

    Why You’ll Love It

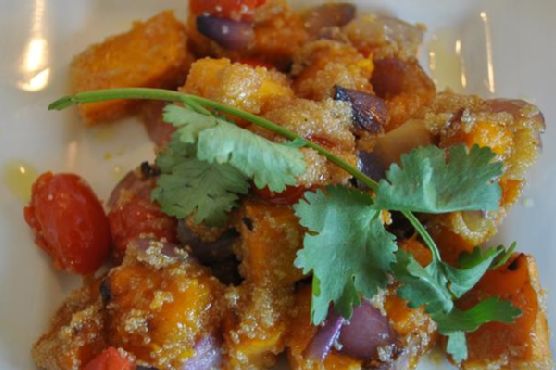
    This Amaranth and Roast Veggie Salad is a delightful blend of flavors and textures. The nutty, slightly crunchy amaranth pairs perfectly with the tender, caramelized roasted vegetables. The basil-infused olive oil adds a fragrant touch, while the herbal salt enhances the natural sweetness of the vegetables. It’s a dish that’s not only delicious but also packed with nutrients, making it a perfect addition to any meal. Whether you’re a seasoned cook or a kitchen novice, you’ll find this salad both easy to prepare and deeply satisfying.

    Ingredients

    • 1 cup amaranth
    • 2 tablespoons basil-infused olive oil
    • 1 bell pepper, sliced
    • 1 cup diced pumpkin
    • 1 red onion, roughly chopped
    • A handful of rocket leaves
    • Herbal salt, to taste
    • 1 punnet baby tomatoes

    Instructions

    1. Cook the amaranth with about a cup of water. Bring it to a boil, then reduce the heat and simmer until it reaches a sticky consistency. This should take around 15-20 minutes.
    2. While the amaranth is cooking, preheat your oven to 400°F (200°C).
    3. Cut the red onion roughly into chunks and dice the pumpkin into bite-sized pieces.
    4. Add the onion and diced pumpkin to a tinfoil-lined baking tray.
    5. Drizzle the vegetables with basil-infused olive oil and sprinkle with herbal salt and pepper.
    6. Place the tray in the hot oven and roast for about 25-30 minutes, or until the edges of the pumpkin become crispy.
    7. Just before the veggies are done roasting, add the baby tomatoes to the tray and return to the oven for an additional 5 minutes.
    8. Once the vegetables are roasted, remove them from the oven and coat them with the cooked amaranth.
    9. Tear a few rocket leaves and add them to the mixture.
    10. Toss everything together gently, serve warm, and enjoy your unusual roast veggie salad!

    Tips

    For the best results, use fresh, seasonal vegetables. If you’re in a hurry, you can prepare the amaranth in advance and simply reheat it when you’re ready to assemble the salad. Don’t hesitate to adjust the seasoning to your taste—more herbal salt can bring out the flavors even more.

    Variations & Substitutions

    If you can’t find amaranth, quinoa is a great substitute that will give you a similar texture. For a bit of heat, consider adding a pinch of chili flakes to the roasted vegetables. You can also vary the veggies based on what you have on hand; zucchini or sweet potatoes would be excellent additions.

    Storage

    This salad is best enjoyed fresh, but any leftovers can be stored in an airtight container in the refrigerator for up to 2 days. When reheating, try to do so gently to maintain the texture of the vegetables.

    FAQ

    Can I make this salad in advance?

    Yes, you can prepare the components of the salad ahead of time. Cook the amaranth and roast the vegetables, then store them separately in the refrigerator. When you’re ready to serve, warm them slightly and toss everything together with the rocket leaves.

    Is this salad gluten-free?

    Absolutely! Amaranth is a naturally gluten-free grain, making this salad a perfect option for those with gluten sensitivities.

    What can I serve with this salad?

    This salad is versatile and pairs well with grilled chicken, fish, or even a simple lentil soup for a complete meal. It’s also an excellent side dish for a larger dinner spread.

    Nutrition

    This Amaranth and Roast Veggie Salad is not only flavorful but also nutritious. Amaranth is a great source of protein and fiber, while the roasted vegetables provide essential vitamins and minerals. The addition of olive oil offers healthy fats, making this a well-rounded, wholesome dish.

    Conclusion

    Creating this Amaranth and Roast Veggie Salad is like taking a comforting journey back to simpler times, where the kitchen was filled with warmth and love. It’s a dish that brings together the best of both worlds: a touch of nostalgia and a healthy, modern twist. I hope this salad finds a cherished place at your table, just as it has in mine. Enjoy every bite!

    Related update: Amaranth and Roast Veggie Salad

    Related update: Pasta with Peas and Italian Sausage

    Related update: Dairy Free Chicken Salad