Tag: Vegetarian

  • Fava Crostini | Made by Meaghan Moineau

    Fava Crostini | Made by Meaghan Moineau

    Fava Crostini: A Delicious and Simple Appetizer

    There’s something truly magical about sitting around a rustic wooden table with friends, sharing stories and laughter over a spread of homemade delicacies. One such memorable moment for me was on a sun-drenched afternoon in Tuscany, where I first discovered the delightful simplicity of Fava Crostini. The creamy texture of the fava beans paired with the crunch of toasted bread left an indelible mark on my taste buds and my heart. This recipe, inspired by that unforgettable day, brings a piece of Tuscany to your home and is perfect for any gathering.

    Why You’ll Love It

    Fava Crostini is not just an appetizer; it’s an experience. Here’s why you and your guests will fall in love with this dish:

    • Simple Ingredients: With just a handful of basic ingredients, you can create a dish that bursts with flavor.
    • Quick and Easy: This recipe is straightforward and can be prepared in under 30 minutes.
    • Versatile: Whether you’re hosting a formal dinner or a casual get-together, Fava Crostini fits right in.
    • Nutritious: Packed with protein and fiber, fava beans are a healthy addition to any meal.

    Ingredients

    • Fresh broad beans (fava beans)
    • Glugs of olive oil
    • Whole garlic clove
    • Lemon, for squeezing
    • Water
    • Parmesan, for shaving
    • Salt & pepper to taste
    • Crusty bread (sliced)

    Instructions

    1. Throw the fava in a pan and cover with water and a little salt. Bring to a boil and then lower to a simmer.
    2. Cook for a couple of minutes until the fava beans are tender. Drain them thoroughly.
    3. Return the pan to the heat and pour in a couple of glugs of olive oil along with the whole garlic clove.
    4. Fry the garlic until it is browned and aromatic, then discard the garlic.
    5. Toss the fava beans into the pan and sauté for a minute or two.
    6. Begin mashing the fava beans with the back of a wooden spoon until you form a paste. Add a bit of water if necessary for consistency.
    7. Remove the fava paste from heat and season with salt, pepper, and a squeeze of lemon.
    8. Toast slices of good crusty bread.
    9. Rub the warm fava mixture onto the toasted bread and top with shaved parmesan.
    10. Optionally, drizzle a little extra virgin olive oil over the top for added richness.

    Tips

    • Quality Olive Oil: Use the best quality olive oil you can find, as it adds depth and richness to the dish.
    • Garlic Flavor: If you love garlic, feel free to mince it and incorporate it into the fava paste instead of discarding after frying.
    • Perfect Toast: Make sure your bread is toasted to golden perfection to provide the perfect crunch against the creamy fava spread.

    Variations & Substitutions

    Here are some creative ways to make this dish your own:

    • Add Herbs: Incorporate fresh herbs like mint or basil into the fava paste for a burst of flavor.
    • Cheese Options: Instead of parmesan, try using pecorino romano or even a creamy goat cheese for a different taste.
    • Gluten-Free: Use gluten-free bread or crackers to make this dish suitable for gluten-sensitive guests.

    Storage

    If you have leftovers, store the fava paste in an airtight container in the refrigerator for up to three days. Reheat gently on the stove before serving again. It’s best to toast fresh bread when ready to serve, as the texture can change if stored.

    FAQ

    Can I use frozen fava beans?

    Yes, you can use frozen fava beans if fresh ones are not available. Just make sure they are fully thawed before you start cooking, and adjust the cooking time as needed since they may already be partially cooked.

    What can I use instead of fava beans?

    If fava beans are hard to come by, you can substitute with edamame or even peas for a slightly different flavor profile but similar texture.

    Is this dish vegan?

    To make this dish vegan, simply omit the parmesan or replace it with a vegan cheese alternative that you enjoy.

    Nutrition

    Fava beans are rich in vitamins and minerals, particularly folate and magnesium. They are also a great source of plant-based protein and fiber, making this dish both delicious and nutritious. Just be mindful of the olive oil and cheese if you are watching your calorie intake.

    Final Thoughts

    Fava Crostini is a testament to the beauty of uncomplicated cooking. With each bite, you’ll be transported to a sunlit afternoon in the Italian countryside, sharing good food and good company. Whether you’re a seasoned chef or a kitchen novice, this recipe is sure to impress. Enjoy creating and savoring this delightful dish with those you love.

    Related update: Fava Crostini

    Related update: Chicken and Mango Skewer
  • Kale and Chickpea Soup with Lemon | Made by Meaghan Moineau

    Kale and Chickpea Soup with Lemon | Made by Meaghan Moineau

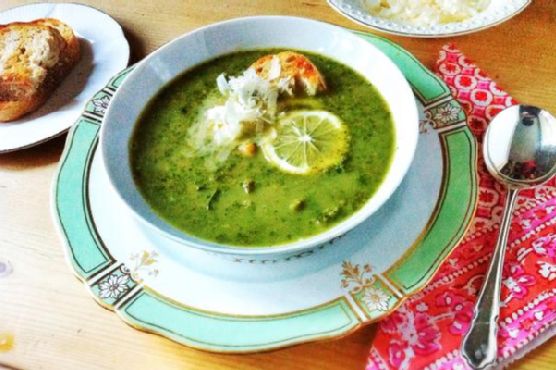
    Kale and Chickpea Soup with Lemon

    As the weather turns colder, there’s nothing more comforting than a bowl of homemade soup. This Kale and Chickpea Soup with Lemon is one of my favorites, reminding me of the cozy evenings spent in my grandmother’s kitchen. The aroma of the soup simmering on the stove, mingling with the scent of crusty bread toasting in the oven, transports me back to those cherished moments. This recipe is not only delicious but also packed with nutritious ingredients that make it a hearty and healthy option for any meal.

    Why You’ll Love It

    This soup is a delightful blend of flavors and textures that will warm your soul and nourish your body. The combination of kale and chickpeas provides a hearty base, while the lemon adds a refreshing zing. It’s an easy recipe to make, perfect for both weeknight dinners and special occasions. Whether you’re a seasoned chef or a kitchen novice, you’ll appreciate the simplicity and depth of flavor in this dish.

    Ingredients

    • 2 banana shallots, finely diced
    • 1 bay leaf
    • 1 can of chickpeas, drained and rinsed
    • 2 celery stalks, diced
    • 1/2 teaspoon chili flakes
    • Crusty bread, for serving
    • 1 garlic clove, peeled and crushed
    • Juice of 1 lemon
    • 2 cups of chopped kale
    • 1 lemon, sliced for garnish
    • 2 tablespoons olive oil
    • Parmesan cheese, for serving
    • 1 sprig of rosemary, finely chopped
    • Salt, to taste
    • 4 cups of vegetable or chicken stock

    Instructions

    1. Set a dutch oven or large saucepan over medium heat; pour in the olive oil.
    2. Add the finely diced shallots to the pan, stirring to coat with the oil.
    3. Make 4 or 5 long horizontal slices in the celery stalk and dice. Add this to the pan and stir.
    4. Finely chop the rosemary leaves and stir into the pan together with the bay leaf and the chili flakes.
    5. Peel the garlic clove and using the flat of your knife and the heel of your hand, crush so that it is still whole and add to the pan.
    6. Add the chickpeas and the kale and stir.
    7. Pour in the hot stock, let it come to a boil, and then turn down the heat. Let it simmer for 20 minutes until the kale is tender.
    8. Squeeze in the juice of half a lemon. Check the seasoning and adjust to taste. You might want more lemon or salt, depending on your stock.
    9. Working in batches or in the pan itself if you have a stick blender, blitz until you have the texture you like. I like mine to still have a few chickpeas and pieces of kale through it, so I set aside a couple of ladlefuls and used a stick blender to blitz the rest.
    10. Serve hot, floating a couple of slices of lemon on top of each serving and pass around the parmesan cheese for everyone to help themselves. Lovely with toasted crusty bread.

    Tips

    For the best results, use fresh kale and high-quality stock. If you prefer a thicker soup, reduce the amount of stock or simmer the soup longer. If you like a bit more heat, feel free to increase the amount of chili flakes.

    Variations & Substitutions

    If you’re looking to switch things up, you can substitute spinach or Swiss chard for kale. For a vegan version, skip the parmesan cheese or use a plant-based alternative. You can also add a handful of cooked quinoa or rice for added texture and nutrition.

    Storage

    This soup can be stored in an airtight container in the refrigerator for up to three days. It can also be frozen for up to three months. To reheat, simply thaw in the refrigerator overnight and warm on the stovetop over medium heat until hot.

    FAQ

    Can I make this soup in advance?

    Absolutely! This soup is perfect for meal prep and tastes even better the next day as the flavors meld together. Simply store it in the refrigerator and reheat before serving.

    What can I serve with this soup?

    This soup pairs wonderfully with a slice of crusty bread or a side salad. For a heartier meal, consider serving it alongside a grilled cheese sandwich.

    Nutrition

    This soup is a nutritious option, rich in fiber and vitamins A and C from the kale, as well as protein from the chickpeas. It’s a wholesome meal that will keep you full and satisfied.

    Final Thoughts

    This Kale and Chickpea Soup with Lemon is a comforting and healthy dish that’s perfect for any occasion. Whether you’re looking to warm up on a chilly day or enjoy a light and refreshing meal, this soup is sure to hit the spot. I hope you enjoy making and sharing this recipe with your loved ones, creating your own cherished memories around the table.

    Related update: Kale and Chickpea Soup with Lemon

    Related update: Make Olive Garden’s Delicious Pasta Fagioli At Home

  • Masala-Tofu Burger | Made by Meaghan Moineau

    Masala-Tofu Burger | Made by Meaghan Moineau

    Masala-Tofu Burger

    Introduction

    Imagine a family gathering on a warm summer evening, the aroma of spices wafting through the air as laughter echoes in the backyard. This memory always takes me back to the first time I tasted a Masala-Tofu Burger, a delightful fusion of Indian spices and a beloved Western classic. Growing up in a multicultural family, food was always a bridge that connected us, blending flavors and traditions into something special. Today, I’m excited to share this delicious recipe with you, hoping it brings warmth and joy to your own family gatherings.

    Why You’ll Love It

    This Masala-Tofu Burger is a game-changer for anyone looking to add a flavorful twist to their burger repertoire. The combination of aromatic spices, crunchy veggies, and creamy tofu creates a mouthwatering experience that’s both satisfying and healthy. Whether you’re a vegetarian or simply exploring new flavors, this burger is a fantastic option. It’s easy to make, customizable, and perfect for any occasion.

    Ingredients

    • 1 white onion, diced
    • 1 red, orange, or green bell pepper, diced
    • 1 cup frozen peas-carrots mix
    • 2 green chillies, chopped
    • 1 block of tofu, cubed
    • 1 potato, boiled and diced
    • 3 cloves garlic, minced
    • 1 teaspoon black mustard seeds
    • 1 sprig curry leaves
    • A pinch of hing (asafoetida)
    • 1 teaspoon cumin powder
    • 1/2 teaspoon turmeric
    • 1 lemon, juiced
    • Salt to taste
    • 1/4 cup cilantro, finely chopped
    • 1/2 cup Indian breadcrumbs
    • Vegetable oil
    • PAM Original Flavor Spray
    • 1 red or white onion, thickly sliced
    • 2 beefsteak tomatoes, sliced
    • Mint-cilantro chutney spread
    • 4 Portuguese rolls

    Instructions

    1. In a large skillet over medium-high heat, spray a generous amount of PAM and add some oil. Add mustard seeds and saute for 30 seconds until you hear popping noises.
    2. Add the curry leaves carefully as they may pop in hot oil. Then add the onions and peppers, and sweat for about 30 seconds.
    3. Stir in the minced garlic, chopped chilies, and turmeric. Saute for 5-7 minutes until the onions and peppers are soft.
    4. Add the peas-carrots mix, cumin powder, and salt. Continue to saute for 7-10 minutes until all the veggies are cooked through.
    5. In a small bowl, mix cubed tofu with a pinch of turmeric, cumin powder, coarse black pepper, and optional cayenne pepper. Set aside to marinate briefly.
    6. Add the marinated tofu to the skillet and saute until it is slightly browned and crumbly.
    7. Add juice from half a lemon and half of the chopped cilantro. Mix well, then add the diced, boiled potato and toss until everything is coated. Adjust salt and spices to taste.
    8. Mash the mixture with a masher until mushy and the veggies are small. Set aside to cool.
    9. Once cooled, mix in some breadcrumbs with your hands. Form the mixture into four thick patties. Add more breadcrumbs if needed.
    10. Place the patties on a plate, cover with plastic wrap, and refrigerate until ready to cook.
    11. In a small skillet sprayed with PAM over medium-high heat, cook each patty for about 2 minutes on each side until browned and crispy.
    12. Simultaneously, saute the thick onion slices until charred and slightly soft.
    13. Spread a generous amount of mint-cilantro chutney on each side of the Portuguese rolls, then assemble the burger with the patty, onions, tomatoes, and cilantro leaves.
    14. Serve with a slice of lemon and reduced-fat chips on the side.

    Tips

    • Make sure to press the tofu well before marinating to remove excess moisture for a better texture.
    • If you like it spicy, feel free to add more green chilies or cayenne pepper to the mix.
    • For a gluten-free option, use gluten-free breadcrumbs or crushed cornflakes.

    Variations & Substitutions

    Feel free to get creative with this recipe by adding your favorite veggies to the mix, such as mushrooms or spinach. You can also swap tofu for paneer or chickpeas for a different protein source. If you prefer a different type of bread, whole-grain buns or lettuce wraps are excellent alternatives.

    Storage

    These Masala-Tofu Patties can be made ahead of time and stored in the refrigerator for up to 3 days. Alternatively, you can freeze them for up to a month. When ready to enjoy, simply thaw and reheat them in a skillet or oven.

    FAQ

    Can I make these burgers vegan?

    Absolutely! This recipe is already vegan as it uses tofu as the main protein source and skips any dairy or eggs. Just ensure your chutney spread is also vegan-friendly.

    Can I grill these patties instead of pan-frying?

    Yes, you can grill the patties for a smokier flavor. Just make sure to brush them with some oil to prevent sticking and handle them carefully as they can be more delicate than regular meat patties.

    What can I serve with these burgers?

    A fresh green salad, sweet potato fries, or roasted vegetables make excellent sides. You can also pair it with a refreshing yogurt dip or mango chutney for an extra burst of flavor.

    Nutrition

    While I don’t have exact nutritional information for this recipe, it’s packed with healthy ingredients. Tofu provides protein, while the variety of vegetables offers vitamins and minerals. Using a whole-grain bun can increase the fiber content, making this meal as nutritious as it is delicious.

    Final Thoughts

    The Masala-Tofu Burger is a wonderful way to explore new flavors while enjoying a comforting classic. It’s a tribute to the fusion of cultures and the joy of shared meals. I hope this recipe becomes a favorite in your home, bringing smiles and satisfaction to your table. Happy cooking!

    Related update: Masala-Tofu Burger

    Related update: Indian Butter Chicken

  • Smokey Rainbow Chili | Made by Meaghan Moineau

    Smokey Rainbow Chili | Made by Meaghan Moineau

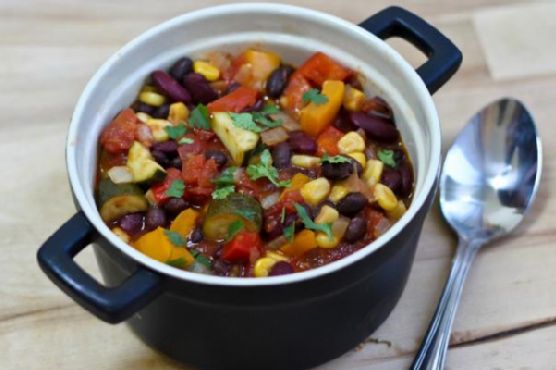
    Smokey Rainbow Chili

    Welcome to a warming bowl of Smokey Rainbow Chili, a dish that brings together the vibrant hues of a rainbow with the comforting smokiness of paprika. Whether you’re new to cooking or a seasoned chef, this chili is bound to become a staple in your culinary repertoire. Let me take you through why you’ll love it, and how you can make it your own.

    Why You’ll Love It

    Growing up, chili was the dish my family turned to on cool autumn evenings. I still vividly remember the aroma wafting through the house, enticing everyone to gather around the table. This Smokey Rainbow Chili captures the essence of those heartwarming moments, but with a modern twist. The addition of smoked paprika and an array of colorful vegetables makes this dish not only visually appealing but also incredibly flavorful.

    You’ll love this recipe because it’s:

    • Colorful: The vibrant mix of vegetables creates a feast for the eyes.
    • Flavorful: Smoked paprika and chili powder add depth and warmth.
    • Flexible: Easily adapted for meat lovers or kept vegetarian.
    • Nutritious: Packed with fiber and protein, it’s a wholesome meal in a bowl.

    Ingredients

    • Olive oil
    • Zucchini
    • Red bell pepper
    • Orange bell pepper
    • Diced fresh jalapeno pepper
    • Garlic
    • Onion
    • Canned stewed tomatoes
    • Canned tomato paste
    • Canned black beans
    • Canned whole kernel corn
    • Canned red kidney beans
    • Smoked paprika
    • Chili powder
    • Dried oregano
    • Black ground pepper
    • Cayenne pepper

    Instructions

    1. If using meat, brown the meat really well in the heated oil, remove and set aside. Add the meat after sautéing the veggies.
    2. Heat oil in a large pot over medium-high heat.
    3. Stir in zucchini, red bell pepper, orange bell pepper, jalapeno, garlic, and onion. Cook for 5 minutes, just until tender.
    4. Add tomatoes with liquid, tomato paste, black beans, corn, and kidney beans into the pot.
    5. Season with smoked paprika, chili powder, oregano, black pepper, and cayenne pepper.
    6. Bring to a boil. Reduce heat to low and simmer for 1 hour, stirring occasionally. Depending on how big you cut the veggies, you may want to let it simmer a little longer.

    Tips

    Here are some tips to ensure your Smokey Rainbow Chili turns out perfect every time:

    • Prep Ahead: Chop all your vegetables beforehand to make the cooking process smoother.
    • Adjust Spice Level: Control the heat by adjusting the amount of jalapeno and cayenne pepper.
    • Simmer Longer: If you have time, let the chili simmer longer for an even richer flavor.

    Variations & Substitutions

    This recipe is incredibly adaptable. Here are some ideas for variations and substitutions:

    • Add Meat: Include browned ground beef or turkey for a meatier version.
    • Go Vegan: Ensure ingredients like tomato paste are vegan-friendly, and add more vegetables like mushrooms or carrots.
    • Swap Beans: Use chickpeas or pinto beans if you prefer.
    • Extra Smokiness: Add a pinch of liquid smoke for an intensified smokey flavor.

    Storage

    Store your Smokey Rainbow Chili in an airtight container in the fridge for up to 4 days. It also freezes well; just portion it into freezer-safe containers and freeze for up to 3 months. Reheat gently on the stove or in the microwave until piping hot throughout.

    FAQ

    Can I make this chili in advance?

    Absolutely! In fact, chili often tastes better the next day as the flavors meld together. Simply reheat it on the stove or in the microwave before serving.

    What can I serve with Smokey Rainbow Chili?

    This chili pairs wonderfully with crusty bread, over rice, or topped with avocado and cheese for extra creaminess.

    Is this recipe suitable for meal prep?

    Yes, it’s perfect for meal prep. Divide into portions and store in the fridge or freezer for quick, nutritious meals throughout the week.

    Nutrition

    This Smokey Rainbow Chili is a nutritious powerhouse. Each serving is rich in fiber and protein, thanks to the variety of vegetables and beans. It’s a great choice for those seeking a balanced, wholesome meal.

    Final Thoughts

    Smokey Rainbow Chili is more than just a dish; it’s a comforting embrace in a bowl, filled with vibrant colors and rich flavors. Whether you’re sharing it with family or enjoying it solo, this chili is sure to bring warmth to your table. I hope this recipe becomes a beloved part of your culinary adventures just as it has in mine. Enjoy the journey of cooking and savoring each spoonful!

    Related update: Smokey Rainbow Chili

  • Salsa Verde By Mommie Cooks | Made by Meaghan Moineau

    Salsa Verde By Mommie Cooks | Made by Meaghan Moineau

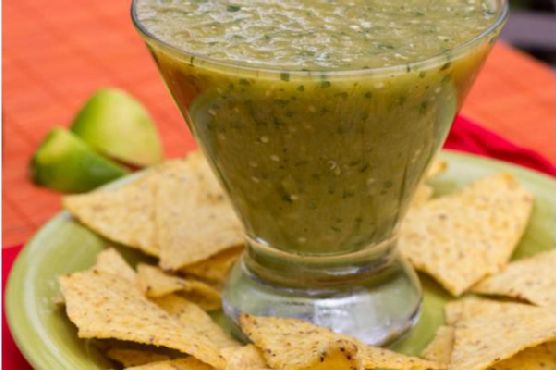
    Salsa Verde By Mommie Cooks

    Why You’ll Love It

    There’s something magical about the zesty taste of homemade salsa verde. This recipe, handed down from my dear mother, has been a family favorite for as long as I can remember. Growing up, I would watch her expertly blend the ingredients, filling our kitchen with the fresh, invigorating aroma of tomatillos and cilantro. Each time I make it, I’m transported back to those sun-drenched afternoons in the kitchen, eagerly awaiting a taste of the vibrant green salsa. This is more than just a condiment; it’s a cherished memory, and I’m delighted to share it with you.

    You’ll love this salsa because it’s incredibly versatile, bursting with flavor, and simple to prepare. Whether you’re a seasoned cook or a kitchen novice, this recipe will quickly become a staple in your culinary repertoire. Perfect for dipping, drizzling over tacos, or topping grilled meats, this salsa verde is a refreshing addition to any meal.

    Ingredients

    • 1 pound of tomatillos, husked
    • 1/2 cup vegetable broth
    • 1 teaspoon cumin
    • 1 teaspoon coriander
    • Juice of one lime
    • 2 garlic cloves
    • 1 can of green diced chiles
    • 1 small onion, chopped
    • 1/2 cup fresh cilantro
    • 1/2 teaspoon pepper
    • Salt to taste

    Instructions

    1. Remove the husks from the tomatillos and rinse them under warm water to remove any sticky residue.
    2. Place the tomatillos in a pot of boiling water and cook for about 5-7 minutes until they are tender.
    3. Carefully remove the tomatillos from the pot and transfer them to a blender.
    4. To the blender, add the vegetable broth, cumin, coriander, lime juice, garlic cloves, green diced chiles, chopped onion, fresh cilantro, and pepper.
    5. Blend the ingredients until smooth and well combined.
    6. Taste the salsa and add salt as needed.
    7. Transfer the salsa to a bowl and chill in the fridge until you’re ready to serve.

    Tips

    For the best flavor, use fresh tomatillos that are firm and vibrant green. When selecting cilantro, look for bright, unwilted leaves. If you like your salsa with a bit more heat, consider adding a jalapeño or two to the mix. Be sure to taste your salsa as you go and adjust the seasonings to fit your preference. Remember, the key to a great salsa is balancing the acidity, heat, and saltiness to create a harmonious blend of flavors.

    Variations & Substitutions

    If you’re looking to switch things up, here are a few variations you might enjoy:

    • Roasted Tomatillos: For a deeper, smokier flavor, try roasting the tomatillos under a broiler until they are charred before blending.
    • Avocado Salsa Verde: Add a ripe avocado to the blender for a creamy twist that pairs beautifully with the tangy tomatillos.
    • Herb Substitutions: If cilantro isn’t your favorite, you can substitute with parsley or a mix of parsley and mint for a different herbal note.

    Storage

    This salsa verde can be stored in an airtight container in the refrigerator for up to a week. If you find yourself with extra, you can also freeze it. Pour the salsa into a freezer-safe container, leaving a bit of space at the top to allow for expansion, and freeze for up to three months. Thaw in the refrigerator before serving.

    FAQ

    Can I use canned tomatillos?

    While fresh tomatillos yield the best flavor and texture, you can use canned tomatillos in a pinch. Be sure to drain them well before blending.

    Is salsa verde spicy?

    This salsa verde has a mild heat thanks to the green chiles. If you prefer a spicier salsa, feel free to add more chiles or include a jalapeño or serrano pepper.

    What dishes pair well with salsa verde?

    Salsa verde is incredibly versatile and pairs well with a variety of dishes. Try it over grilled chicken, fish, or pork. It’s also delicious as a topping for tacos, enchiladas, or nachos.

    Nutrition

    This recipe is not only delicious but also a healthy choice. Packed with vitamins from the tomatillos and cilantro, and low in calories, it’s a guilt-free addition to any meal. Each serving is rich in antioxidants and offers a good dose of vitamin C, making it a nutritious and flavorful option.

    Final Thoughts

    There’s a certain joy in crafting a recipe that has been passed down through generations. This salsa verde is more than just a condiment; it’s a connection to the past, a reminder of family gatherings, and a celebration of fresh, vibrant flavors. I hope you enjoy making and sharing this recipe as much as I do. Whether you’re scooping it with a crispy tortilla chip or drizzling it over your favorite dish, may it bring you as much joy and satisfaction as it has brought to my family for years. Bon appétit!

    Related update: Salsa Verde By Mommie Cooks

  • Chocolate Almond Bark | Made by Meaghan Moineau

    Chocolate Almond Bark | Made by Meaghan Moineau

    Chocolate Almond Bark

    Chocolate Almond Bark is a delightful treat that combines the rich, smooth flavor of chocolate with the crunchy, savory goodness of almonds. This recipe is a favorite in my family, especially around the holidays. I remember my grandmother making a similar version of this bark every Christmas. The aroma of roasted almonds mingling with chocolate would fill the house, and it was the ultimate signal that the festive season had truly begun. Now, I carry on the tradition, adding a few modern twists to the classic recipe.

    Why You’ll Love It

    Chocolate Almond Bark is incredibly easy to make and requires only a handful of ingredients. It’s a perfect balance of sweet and savory, with a hint of spice from the cayenne pepper. This treat makes for a great homemade gift or a delightful snack to enjoy anytime. Plus, it’s a wonderful recipe to make with kids or friends, as it doesn’t require any special culinary skills.

    Ingredients

    • 1 cup raw almonds, chopped
    • 1/4 teaspoon cayenne pepper
    • 12 ounces candy making chocolate
    • 1/2 teaspoon sea salt
    • 1 tablespoon Worcestershire sauce

    Instructions

    1. Preheat your oven to 160 degrees.
    2. In a medium bowl, combine the chopped almonds with the Worcestershire sauce, cayenne pepper, and half of the sea salt. Mix well to ensure the almonds are evenly coated.
    3. Spread the almond mixture onto a baking sheet in a single layer. Roast in the preheated oven for 20 minutes, stirring halfway through to ensure even roasting. Let the almonds cool completely.
    4. While the almonds are cooling, melt the candy making chocolate using a double boiler or in the microwave. If using a microwave, heat the chocolate on low power, stirring every 30 seconds, until smooth.
    5. Once the almonds have cooled, mix them into the melted chocolate until thoroughly combined.
    6. Line an 8 x 8 inch baking pan with wax paper. Pour the chocolate almond mixture into the pan and spread it evenly.
    7. Sprinkle a pinch of the remaining sea salt on top of the chocolate mixture.
    8. Let the chocolate cool and harden at room temperature or in the refrigerator for faster results.
    9. Once set, break the chocolate almond bark into bite-size pieces and enjoy!

    Tips

    To ensure the best results, use high-quality candy making chocolate, as it will melt smoother and provide a richer flavor. When roasting the almonds, keep a close eye on them to prevent burning. If you don’t have a double boiler, a heatproof bowl over a saucepan of simmering water works just as well for melting chocolate.

    Variations & Substitutions

    Feel free to customize this chocolate almond bark to suit your taste preferences. You can substitute the raw almonds with your favorite nuts, such as pecans or walnuts. If you’re not a fan of cayenne pepper, you can omit it, or replace it with a milder spice like cinnamon. For a more indulgent treat, consider adding dried fruits like cranberries or raisins to the mix.

    Storage

    Store your chocolate almond bark in an airtight container at room temperature for up to two weeks. If you prefer your chocolate to be on the firmer side, you can keep it in the refrigerator. Just be sure to let it come to room temperature before serving for the best texture and flavor.

    FAQ

    Can I use dark chocolate instead of candy making chocolate?

    Absolutely! Dark chocolate is a great alternative and will provide a more intense chocolate flavor. Just make sure to use high-quality chocolate for the best results.

    Is it possible to make this recipe vegan?

    Yes, you can make this recipe vegan by substituting the Worcestershire sauce with a vegan version and using a dairy-free chocolate. Ensure that all other ingredients are vegan-friendly as well.

    Nutrition

    While I don’t have the exact nutritional breakdown for this recipe, it’s important to note that almonds are a great source of healthy fats, fiber, and protein. Chocolate, especially dark chocolate, contains antioxidants. However, this is a treat and should be enjoyed in moderation as part of a balanced diet.

    Final Thoughts

    Chocolate Almond Bark is a versatile and delectable treat that’s sure to impress anyone who tries it. With its simple ingredients and straightforward instructions, it’s an easy recipe to whip up for any occasion. Whether you’re indulging on your own or sharing with loved ones, this bark is a delightful way to satisfy your sweet tooth. I hope you enjoy making and tasting this recipe as much as my family and I do. Happy cooking!

    Related update: Chocolate Almond Bark

    Related update: Smokey Rainbow Chili

  • Minestrone | Made by Meaghan Moineau

    Minestrone | Made by Meaghan Moineau

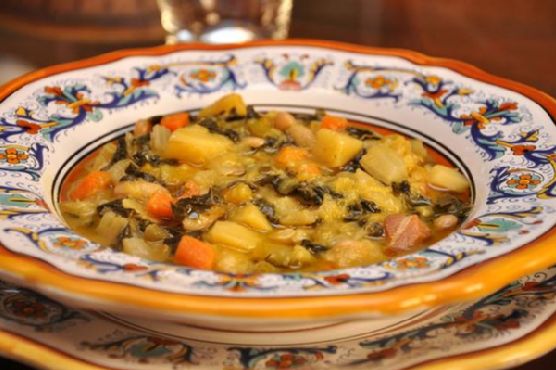
    Minestrone: A Comforting Bowl of Italian Tradition

    There’s something magical about a steaming bowl of minestrone soup that’s hard to put into words. It’s more than just a meal; it’s a nostalgic embrace on a chilly evening, a celebration of fresh vegetables in every spoonful, and a testament to the simplicity of good cooking. I remember my grandmother simmering this hearty soup on the stove, her kitchen filled with the rich aroma of herbs and simmering tomatoes. Those memories of gathering around her table, slurping the warm broth alongside chunks of crusty bread, are treasured moments of comfort and joy.

    Why You’ll Love It

    Minestrone is a versatile and comforting dish that warms the soul. It’s packed with nutritious vegetables, making it not only delicious but also healthy. This recipe is perfect for those who love to experiment with flavors and textures, as it is easily adaptable to whatever ingredients you have on hand. Whether you’re a veteran cook or a kitchen novice, you’ll appreciate how straightforward and rewarding this dish is to make.

    • Nutritious and Filling: Packed with a variety of vegetables, it’s a nutrient-dense meal.
    • Comfort in a Bowl: Perfect for chilly days or when you need a comforting meal.
    • Customizable: You can easily adjust the ingredients to suit your taste or dietary needs.
    • Easy to Make: Simple steps lead to a delicious result, making it perfect for weeknight dinners.

    Ingredients

    • 2 tablespoons butter
    • 2 cups carrots, diced
    • 2 cups celery, diced
    • 2 cups onions, chopped
    • 4 cloves garlic, minced
    • 2 cups cabbage, shredded
    • 1 can (28 ounces) canned tomatoes
    • 6 cups water
    • 1 cup brown rice
    • 2 teaspoons salt
    • 1 teaspoon Worcestershire sauce
    • 1 tablespoon Italian mixed seasoning
    • 1/2 teaspoon pepper
    • 2 cups potatoes, diced
    • 2 beef bouillon cubes
    • 2 cups zucchini, sliced
    • 1 can (15 ounces) canned kidney beans, drained and rinsed
    • 1 cup frozen spinach
    • 1/2 cup Parmesan cheese, grated

    Instructions

    1. Melt butter in a large soup kettle over medium heat.
    2. Add carrots, celery, onions, garlic, and cabbage. Sauté for about 20 minutes, stirring often, until the vegetables are tender.
    3. Stir in canned tomatoes, water, brown rice, salt, Worcestershire sauce, Italian seasoning, pepper, potatoes, bouillon cubes, and zucchini.
    4. Bring the mixture to a boil, then reduce the heat and simmer covered for at least 30 minutes.
    5. Add the kidney beans and frozen spinach. Return the soup to a boil and cook over medium heat until the spinach is cooked through. Add more water if needed to reach your desired consistency.
    6. Serve hot, garnished with grated Parmesan cheese. Enjoy!

    Tips

    • Prep Ahead: Chop your vegetables in advance to make the cooking process quicker and smoother.
    • Consistent Size: Dice your vegetables to a similar size to ensure even cooking.
    • Stir Often: Stir the pot frequently, especially during the initial sauté step, to prevent sticking.

    Variations & Substitutions

    This minestrone soup is highly adaptable. Here are a few ideas to make it your own:

    • Vegetable Substitutions: Feel free to swap in other vegetables such as green beans, peas, or bell peppers.
    • Grain Alternatives: If you’re not a fan of brown rice, try using pasta, quinoa, or barley.
    • Protein Boost: Add cooked chicken or sausage for extra protein.
    • Vegan Version: Use vegetable bouillon cubes and omit the Parmesan cheese.

    Storage

    Minestrone soup stores exceptionally well, making it perfect for meal prep:

    • Refrigerator: Store in an airtight container for up to 5 days.
    • Freezer: Freeze in portioned containers for up to 3 months. Thaw overnight in the refrigerator before reheating.
    • Reheating: Gently reheat on the stovetop over medium heat, adding a splash of water if the soup has thickened too much.

    FAQ

    Can I make this soup in a slow cooker?

    Yes, you can! Simply add all the ingredients except for the kidney beans, spinach, and Parmesan cheese to your slow cooker. Cook on low for 6-8 hours or on high for 3-4 hours. Stir in the beans and spinach in the last 30 minutes of cooking, and garnish with Parmesan before serving.

    What can I serve with minestrone?

    Minestrone is delightful on its own but pairs beautifully with a side of crusty bread, a fresh green salad, or even a cheesy garlic bread for a bit of indulgence.

    Nutrition

    This minestrone soup is not only tasty but also nutritious, packed with vitamins, minerals, and fiber from a variety of vegetables. Each serving (without Parmesan cheese) contains approximately:

    • Calories: 150
    • Protein: 6g
    • Carbohydrates: 30g
    • Fat: 3g
    • Fiber: 7g

    Final Thoughts

    Minestrone is more than just a soup; it’s a warm hug in a bowl. Whether you’re cooking for family, friends, or just yourself, this recipe is sure to bring comfort and satisfaction. Its adaptability and ease of preparation make it a staple in any kitchen, and its rich flavors are bound to make it a favorite in your household. So, gather around the table and enjoy the simple pleasure of a homemade meal that speaks to the heart and soul.

    Related update: Minestrone

    Related update: Kale and Chickpea Soup with Lemon

  • Noodle Kugel with Pineapple-Gluten free, Dairy Free | Made by Meaghan Moineau

    Noodle Kugel with Pineapple-Gluten free, Dairy Free | Made by Meaghan Moineau

    Noodle Kugel with Pineapple: Gluten-Free, Dairy-Free Delight

    There are few things as comforting as a warm noodle kugel, and this version brings a delightful twist with the addition of pineapple, all while being gluten-free and dairy-free. Growing up, noodle kugel was a staple at family gatherings, a dish that brought everyone to the table with eager anticipation. The sweet, cinnamon-spiced aroma would fill the house, creating an inviting atmosphere that promised delicious memories. This recipe is my gluten-free, dairy-free adaptation, perfect for those who want to indulge in nostalgic flavors without compromising on dietary needs.

    Why You’ll Love It

    This Noodle Kugel with Pineapple is a unique blend of sweet and savory, perfect for any occasion. Here’s why this dish will become a favorite in your home:

    • It’s gluten-free and dairy-free, making it suitable for those with dietary restrictions.
    • The pineapple adds a refreshing twist that brightens the classic kugel flavor.
    • Made in cupcake form, it’s perfect for portion control and easy serving.
    • It’s a versatile dish that works as a side, dessert, or even a breakfast treat!

    Ingredients

    • Gluten-free spiral rice pasta
    • Canned pineapple chunks
    • Unsweetened vanilla coconut milk or coconut creamer
    • Sunflower oil
    • Egg yolks
    • Xylitol or sugar
    • Evaporated cane sugar
    • Ground cinnamon
    • Ground nutmeg
    • Kosher salt
    • Cupcake liners
    • Cinnamon
    • Evaporated cane sugar
    • Earth Balance soy-free margarine
    • Red brown rice flour

    Instructions

    1. Preheat your oven to 350 degrees F.
    2. Fill a medium stockpot with water and set it over high heat. Once the water boils, add 2 tablespoons of kosher salt, then the pasta. Stir well to prevent sticking.
    3. Stir occasionally and cook the pasta for 8-10 minutes. Let it sit in the water for a few minutes before transferring it to a large glass or heatproof bowl to cool slightly.
    4. While the pasta cools, prepare the other ingredients. In a large mixing bowl, combine the coconut milk, creamer, pineapple, sugar, xylitol, cinnamon, nutmeg, and sunflower oil. Mix well.
    5. Add the egg yolks to the mixture and stir to combine thoroughly.
    6. Prepare the crumble topping by mixing together a small amount of cinnamon and evaporated cane sugar with the red brown rice flour and margarine.
    7. Line two cupcake pans with cupcake liners.
    8. Using a dry 1/4 cup measuring spoon, fill each cupcake liner with the noodle mixture, filling over the top. Distribute any remaining liquid to each kugel that looks dry.
    9. Sprinkle the crumble over each kugel, using about 1/2 teaspoon per cupcake.
    10. Bake for 40-45 minutes, until golden brown.
    11. Cool for 10 minutes before removing from the cupcake pans. Serve hot or warm, with or without the liners.

    Tips

    • Ensure the pasta is cooked al dente to maintain a pleasant texture.
    • Feel free to adjust the sweetness by adding more or less sugar according to your taste.
    • Using cupcake liners makes cleanup easy and helps the kugel hold its shape.

    Variations & Substitutions

    • Fruit Variations: Swap the pineapple for apples or pears for a different fruity twist.
    • Nutty Additions: Add chopped nuts such as pecans or walnuts to the crumble for added crunch.
    • Sugar Alternatives: Substitute xylitol with maple syrup or agave nectar for a different sweetness profile.

    Storage

    Store leftover kugels in an airtight container in the refrigerator for up to 4 days. To reheat, simply place them in the oven at 300 degrees F for about 10 minutes or until warmed through. These kugels can also be frozen for up to 2 months; thaw in the refrigerator overnight before reheating.

    FAQ

    Can I make this recipe ahead of time?

    Yes, you can prepare the noodle mixture and fill the cupcake liners a day in advance. Cover and store them in the refrigerator, then bake the next day.

    Is there a substitute for coconut milk or creamer?

    If coconut milk isn’t available, almond milk or soy milk can be used as alternatives, although it may slightly alter the flavor.

    Nutrition

    This noodle kugel offers a balanced treat with a touch of sweetness and fruit, making it a delightful addition to any meal. It’s a gluten-free and dairy-free option that can fit into many dietary plans. Always check specific brands for nutritional content, especially regarding sugar and calorie counts.

    Final Thoughts

    This Noodle Kugel with Pineapple brings a modern twist to a beloved classic. The tropical notes of pineapple paired with the warm spices of cinnamon and nutmeg create a delightful harmony of flavors. Whether it’s for a holiday gathering or a weekend brunch, this dish is sure to impress. Enjoy the comfort and nostalgia of noodle kugel, reimagined for today’s dietary preferences, without sacrificing any of the flavors that make it a favorite. Happy cooking!

    Related update: Noodle Kugel with Pineapple-Gluten free, Dairy Free

    Related update: Meyer Lemon Cheesecake

    Related update: Damn Good Corn Pudding ~from 12 Bones Smokehouse

    Related update: Vegetable Cheddar Quiche

  • Almond Cookie Bar | Made by Meaghan Moineau

    Almond Cookie Bar | Made by Meaghan Moineau

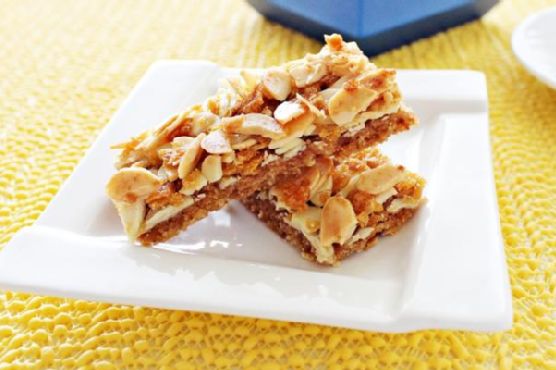
    Almond Cookie Bar

    Welcome to the delightful world of homemade almond cookie bars! These delectable treats have been a family favorite for generations. I vividly remember my grandmother preparing these bars during the festive seasons, the kitchen filled with the warm, inviting aroma of baking dough and sweet apricot jam. Today, I’m excited to share this cherished recipe with you, hoping it brings as much joy to your home as it has to ours.

    Why You’ll Love It

    These almond cookie bars are a perfect blend of texture and flavor. The crunchy base is complemented by a luscious apricot layer, topped with a nutty, sweet almond and oatmeal mixture. They’re not only delicious but also incredibly satisfying, making them a hit at parties or as an afternoon snack. Plus, with ingredients like wholemeal flour and oatmeal cornflakes, you can feel a bit better about indulging in these treats.

    Ingredients

    • Almond flakes
    • Apricot gel/jam
    • Brown sugar
    • Butter
    • Cookie base
    • Fresh milk
    • Oatmeal cornflakes
    • Plain flour
    • Wholemeal flour

    Instructions

    1. Beat butter and sugar until light and fluffy.
    2. In a bowl, combine wholemeal flour and plain flour together, then mix in the butter mixture with a rubber spatula and knead gently to form a soft dough.
    3. Turn out the dough onto a floured surface or line with a plastic sheet below and with another plastic sheet on top. Then roll into a square. Chill for at least 1 hour.
    4. Transfer the dough onto non-grease paper and cover with a plastic sheet on top, then roll the dough to about 3mm thick.
    5. Prick the dough with a fork and bake for about 15-18 minutes until brown in a preheated oven at 180°C. Leave the biscuit to cool.
    6. Spread the apricot jam over the top of the biscuit and set aside.
    7. Mix topping ingredients and spread evenly on the biscuit with a palette knife.
    8. Bake for 15 minutes until golden.
    9. Remove the cooked biscuit from the oven and leave to cool completely, then cut into bars.

    Tips

    To ensure the dough is easy to work with, make sure the butter is at room temperature before you start. Chilling the dough is crucial as it helps in maintaining the shape while baking. When spreading the apricot jam, ensure the base has cooled completely to prevent the jam from melting and becoming runny.

    Variations & Substitutions

    These almond cookie bars are quite versatile. If you’re not a fan of apricot, try substituting with raspberry or strawberry jam for a different twist. For a healthier version, you can replace brown sugar with coconut sugar or a sugar substitute of your choice. If you prefer, add a sprinkle of cinnamon to the almond mixture for a warm, spicy note.

    Storage

    Store your almond cookie bars in an airtight container at room temperature for up to a week. For longer storage, you can freeze them for up to three months. Just ensure they are well wrapped to prevent freezer burn.

    FAQ

    Can I make these bars gluten-free?

    Yes, you can substitute the plain and wholemeal flours with a gluten-free baking blend. Make sure it contains xanthan gum to help bind the dough.

    What if I don’t have oatmeal cornflakes?

    If oatmeal cornflakes are not available, you can use regular rolled oats or crushed cornflakes as an alternative. They will provide a similar texture to the topping.

    Nutrition

    Each almond cookie bar contains approximately 150 calories, with a balance of carbohydrates, fats, and protein. The wholemeal flour and oatmeal add dietary fiber, making this a more wholesome treat.

    Final Thoughts

    These almond cookie bars are more than just a treat; they’re a piece of nostalgia and comfort. Whether you’re enjoying them with a cup of tea or sharing them with loved ones, they’re sure to bring a smile to your face. I hope this recipe becomes a beloved part of your baking repertoire, just as it has been in my family for years. Happy baking!

    Related update: Almond Cookie Bar

  • avarakkai paruppu curry recipe | Made by Meaghan Moineau

    avarakkai paruppu curry recipe | Made by Meaghan Moineau

    Avarakkai Paruppu Curry Recipe

    There’s something truly magical about recipes that have been passed down through generations. One such cherished dish is the Avarakkai Paruppu Curry, a delightful South Indian curry made with broad beans, toor dal, and a unique blend of spices. This recipe is not just a dish; it’s a story of family gatherings, laughter echoing in the kitchen, and the warm aroma that signals home.

    Why You’ll Love It

    This Avarakkai Paruppu Curry is a beloved favorite for several reasons:

    • Flavorful and Nutritious: The combination of protein-rich toor dal and fiber-packed broad beans makes this curry both delicious and nutritious.
    • Quick and Easy: With just a few simple steps, you can whip up this wholesome meal in no time.
    • Versatile: Enjoy it with rice, roti, or even as a comforting soup.
    • Perfect for All Ages: Its mild spice level makes it a hit with both kids and adults.

    Ingredients

    • 1 cup avarakkai (broad beans)
    • 2-3 green chillies
    • 1 tbsp coriander seeds
    • 1 tsp cumin seeds
    • 1 tbsp jaggery
    • Tamarind – lemon size
    • 1 tsp mustard seeds
    • 2 tbsp oil
    • 1 tsp peppercorns
    • Salt, to taste
    • 2 tomatoes
    • 1/2 cup toor dal
    • 1/4 tsp turmeric powder
    • Chopped coriander leaves for garnish

    Instructions

    1. Wash the avarakkai (broad beans). Remove the strings on both sides and cut into medium long pieces.
    2. Cook the avarakkai on the stovetop or pressure cook for three whistles. Once done, drain the water and set the cooked avarakkai aside. Keep the water to use in kuzhambu or for soaking the tamarind.
    3. Pressure cook the toor dal and keep aside.
    4. Heat a pan and add 1 tsp of oil. Roast the ingredients given under “to roast and grind”. Let the tomatoes cook completely.
    5. Once cooled, process the roasted ingredients and tomatoes in a mixer, adding enough water to form a fine paste.
    6. In a pan, heat the remaining oil. Once heated, add mustard seeds, and then add the tamarind water.
    7. After it starts boiling, add the cooked dal, jaggery, salt, turmeric powder, and the ground masala. Allow it to cook on a medium-low flame for 5 minutes.
    8. Now add the cooked broad beans to the mixture. Let it boil for 4 minutes.
    9. Turn off the flame and add chopped coriander leaves before serving.

    Tips

    • Adjust the number of green chillies according to your spice preference.
    • For a richer flavor, consider adding a spoonful of ghee at the end.
    • Ensure that the tamarind is well soaked to extract maximum flavor.

    Variations & Substitutions

    If you’re looking to switch things up, consider these variations:

    • Vegetable Variation: Add other vegetables like carrots or potatoes for added texture and nutrition.
    • Lentil Substitution: Substitute toor dal with moong dal for a different taste.
    • Spice Adjustment: For a spicier version, add a pinch of red chili powder.

    Storage

    This curry stores well in the refrigerator for up to three days. Ensure it is cooled completely before transferring to an airtight container. Reheat gently on the stovetop or in a microwave before serving.

    FAQ

    Can I use canned beans instead of fresh avarakkai?

    Yes, you can use canned broad beans, but the flavor and texture will differ slightly. Ensure to rinse them well before use.

    Is it necessary to use jaggery in this recipe?

    Jaggery adds a subtle sweetness that balances the spices. However, you can omit it or substitute it with sugar if you prefer.

    What can I serve with Avarakkai Paruppu Curry?

    This curry pairs beautifully with steamed rice, roti, or even quinoa for a healthy twist.

    Nutrition

    This dish is a wholesome combination of protein and fiber, providing approximately:

    • Calories: 250 per serving
    • Protein: 10g
    • Carbohydrates: 30g
    • Fat: 10g
    • Fiber: 7g

    Final Thoughts

    Avarakkai Paruppu Curry is not just a dish, but a connection to heritage and family memories. The simplicity of its preparation combined with its heartwarming flavor makes it a must-try for anyone looking to explore South Indian cuisine. Whether you’re a novice cook or a seasoned chef, this curry is sure to bring joy to your table and warmth to your heart. Enjoy the journey of flavors and happy cooking!

    Related update: avarakkai paruppu curry recipe

    Related update: Curry and Sage Roast Chicken