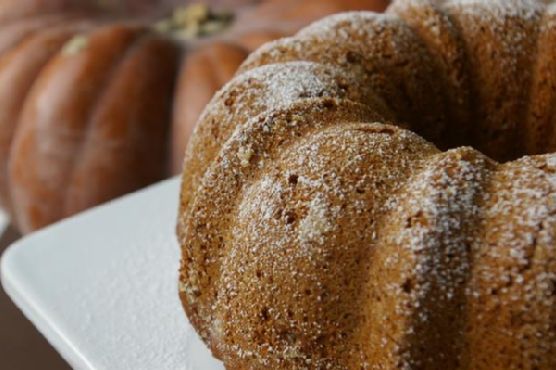
Tag: Vegan Option

  • Tropical Gluten-Free Coconut Lime Cake with Pineapple Frosting | Made by Meaghan Moineau

    Tropical Gluten-Free Coconut Lime Cake with Pineapple Frosting | Made by Meaghan Moineau

    Tropical Gluten-Free Coconut Lime Cake with Pineapple Frosting

    The aroma of fresh lime zest mingling with the sweet scent of coconut cream wafts through my kitchen, transporting me to a sun-drenched island paradise. This isn’t just any dessert; it’s an oasis of flavor, a Tropical Gluten-Free Coconut Lime Cake with Pineapple Frosting that promises to be a standout at any gathering.

    Personal Story

    My love affair with tropical flavors began on a family vacation to Hawaii. I remember the vibrant hues of tropical flowers, the warmth of the sun on my skin, and the refreshing taste of exotic fruits. It was there, amidst palm trees and ocean breezes, that I first tasted a cake infused with the sweet and tangy essence of limes and pineapples. The memory of that delightful cake lingered long after the vacation ended, sparking my desire to recreate it in my own kitchen.

    Back home, I embarked on a mission to capture that tropical magic. But it wasn’t without its mishaps. My first attempt at a coconut cake ended in disaster when I accidentally added salt instead of sugar — a rookie mistake! Despite the setback, I was undeterred. Each attempt brought me closer to the perfect balance of flavors that I remembered from Hawaii.

    One rainy afternoon, as I watched the droplets glide down my kitchen window, I had an epiphany. What if I infused the cake with lime and topped it with a pineapple frosting? The idea excited me, and I hurried to gather my ingredients. The result was a revelation — a Tropical Gluten-Free Coconut Lime Cake with Pineapple Frosting that brought a burst of sunshine into the dreariest of days.

    What Makes This Version Special

    This cake is not your run-of-the-mill coconut cake. The infusion of zesty lime essence in the batter and the creamy, tangy pineapple frosting elevate it to a new level of tropical delight. Where a standard recipe might rely on sugar for sweetness, this version uses the natural brightness of citrus and the sweetness of pineapple to create a more dynamic flavor profile. It’s a cake that celebrates the best of tropical ingredients while remaining gluten-free and approachable for those who appreciate a little island flair in their desserts.

    Flavor Profile

    Imagine a bite of cake that is both bright and tropical, each mouthful bursting with a citrusy zing followed by a sweet pineapple finish. The coconut adds a subtle nuttiness, harmonizing with the lime and pineapple to create a symphony of flavors that dance on your palate. The cake itself is moist and tender, thanks to the careful balance of coconut flour and tapioca flour, while the pineapple frosting is light and airy, providing a creamy contrast that will have you reaching for seconds.

    Ingredients

    • 1/2 cup coconut flour
    • 1/4 cup tapioca flour
    • 1/4 teaspoon salt
    • 1/2 teaspoon baking soda
    • 1/2 teaspoon baking powder
    • 1/2 teaspoon xanthan gum
    • 4 whole eggs
    • 1 cup sugar
    • 1/2 cup **Vegenaise**
    • 3/4 cup milk alternative
    • 1 teaspoon vanilla extract
    • 1/2 cup Earth Balance butter
    • 1/2 cup dairy-free chocolate chips (optional)
    • 1/4 teaspoon salt
    • 1 cup powdered sugar
    • 1 tablespoon **lime zest**
    • 1 tablespoon lime juice
    • 1/2 cup crushed pineapple (drained)
    • 1 cup **coconut cream**

    Instructions

    1. Preheat your oven to 350°F. Grease two 8 or 9-inch round cake pans and sprinkle with tapioca flour, or line a muffin tin with baking cups for cupcakes.
    2. In a medium bowl, mix together the coconut flour, tapioca flour, salt, xanthan gum, baking soda, and baking powder. Set aside.
    3. In a large mixing bowl, beat the eggs, sugar, and Vegenaise until fluffy. Slowly add the vanilla extract.
    4. Gradually incorporate the flour mixture and milk alternative into the egg mixture, alternating between the two. Aim for a consistency that’s smooth and airy, using just under 3/4 cup of milk for a light batter.
    5. Fold in the lime zest gently, ensuring it is evenly distributed to release a vibrant citrus aroma through the batter.
    6. Pour the batter into the prepared cake pans or fill the baking cups 3/4 full. Bake for 20-25 minutes for the cakes or 12-15 minutes for the cupcakes. The cakes are done when they are golden-brown and spring back when touched lightly, or when a toothpick inserted in the center comes out clean.
    7. While the cakes cool, whip the coconut cream with the powdered sugar and crushed pineapple until light and fluffy. This will be your luscious pineapple frosting.
    8. Once the cakes are completely cooled, frost them generously with the pineapple frosting. If desired, sprinkle with additional lime zest for an extra pop of color and flavor.

    Pro Tips from Meaghan’s Kitchen

    • Use fresh lime zest for the best flavor — it makes all the difference in the cake’s brightness.
    • For a thicker frosting, refrigerate the coconut cream before whipping. It helps the frosting hold its shape better.
    • To avoid a dry cake, measure the coconut flour precisely — it absorbs more liquid than traditional flour.
    • Don’t rush the cooling process before frosting; it ensures the frosting won’t melt and slide off.
    • If you crave texture, add a handful of shredded coconut or chopped nuts to the batter for some crunch.

    Variations & Dietary Swaps

    • Vegetarian Swap: Use regular mayonnaise instead of Vegenaise if dietary restrictions allow.
    • Spice-It-Up Version: Add a teaspoon of ground ginger to the batter for a warm spice note that complements the tropical flavors.
    • Kids-Friendly Version: Top the frosted cake with colorful sprinkles or a drizzle of dairy-free chocolate for an extra fun twist.

    What to Serve With It

    This tropical cake pairs wonderfully with a refreshing iced herbal tea infused with mint and lime. The cooling tea complements the cake’s flavors, enhancing the citrus notes and providing a soothing balance to the sweetness of the frosting. Alternatively, a scoop of dairy-free vanilla ice cream would add a creamy contrast to the cake’s texture.

    Storage & Meal Prep

    To store leftovers, cover the cake tightly with plastic wrap or place it in an airtight container. It will keep in the fridge for up to 5 days. For longer storage, freeze individual slices wrapped in plastic wrap and placed in a freezer-safe bag for up to 3 months. When you’re ready to enjoy, thaw the slices at room temperature or warm them in the oven at a low temperature.

    FAQ

    Can I use regular flour instead of coconut and tapioca flour?

    Yes, but it will no longer be gluten-free. Substitute with equal parts all-purpose flour for a similar texture.

    What milk alternative works best for this recipe?

    Almond milk or coconut milk both work beautifully, enhancing the tropical flavors of the cake.

    How do I make the coconut cream?

    Refrigerate a can of full-fat coconut milk overnight, then scoop out the solid cream that rises to the top for whipping.

    Can I use fresh pineapple instead of canned?

    Absolutely! Just make sure to drain it well to avoid adding excess moisture to the frosting.

    Why is my cake too dense?

    Overmixing the batter or not measuring the flour accurately can result in a dense cake. Be sure to fold gently and measure precisely.

    Final Thoughts

    As you embark on your culinary journey to create this Tropical Gluten-Free Coconut Lime Cake with Pineapple Frosting, remember that baking is as much about the process as it is about the final product. Enjoy the aromatic dance of citrus and tropical sweetness as you mix, bake, and savor each bite. I’d love to hear about your experiences and see your creations, so please leave a comment below or share this recipe with friends who crave a taste of the tropics!

    Related update: Tropical Gluten-Free Coconut Lime Cake with Pineapple Frosting

  • Tropical Almond Matcha Energy Smoothie with Coconut and Spirulina | Made by Meaghan Moineau

    Tropical Almond Matcha Energy Smoothie with Coconut and Spirulina | Made by Meaghan Moineau

    Tropical Almond Matcha Energy Smoothie with Coconut and Spirulina

    Imagine waking up to a sunrise that’s painting the sky with hues of gold and pink, the air filled with the scent of blooming flowers. Now, picture starting your day with a sip of something equally vibrant: a Tropical Almond Matcha Energy Smoothie with Coconut and Spirulina. This isn’t just any smoothie; it’s a vacation in a glass, with layers of flavor that transport you to a tropical island, one sip at a time.

    Personal Story

    Growing up, my mornings were less about leisurely sips of smoothies and more about grabbing a quick breakfast as I dashed out the door. It wasn’t until I took a summer trip to Maui that I discovered the blissful art of the smoothie. I vividly remember wandering into a little beachside café, the air salty with ocean spray, and ordering what would become a pivotal moment in my culinary journey.

    The café’s smoothie was a blend of fresh local fruits and exotic ingredients I had never tried before. The first sip was nothing short of a revelation. It was like tasting summer itself, bursting with flavors of ripe mango and creamy coconut, with a hint of something uniquely invigorating. That was the day I fell in love with tropical smoothies.

    Fast forward a few years, and I found myself experimenting in my kitchen, trying to recreate that magical experience. After much trial and delightful error, I came up with my own twist, adding nutrient powerhouses like spirulina and matcha to the mix. And so, the Tropical Almond Matcha Energy Smoothie with Coconut and Spirulina was born, becoming a staple in my morning routine and a favorite among friends and family.

    There was this one time I forgot to secure the lid on my blender properly. Let’s just say my kitchen walls got a surprise tropical splash that day! But every mistake led me to perfecting this recipe, ensuring each sip is as smooth and satisfying as the last.

    What Makes This Version Special

    This Tropical Almond Matcha Energy Smoothie with Coconut and Spirulina is more than just a blend of fruits and liquids; it’s an energizing start to your day. What sets this version apart from the standard superfood smoothie is its tropical twist with the addition of coconut and the vibrant green nutrient boost from spirulina. Coconut water and shredded coconut elevate the island vibe, while spirulina and matcha add a layer of earthiness and a boost of sustained energy. It’s perfect for busy mornings when you need a nutritious jumpstart that feels like a treat.

    Flavor Profile

    The flavor journey of this smoothie is nothing short of exhilarating. With each sip, you’re first greeted by the refreshing and bright notes of tropical fruits like mango and pineapple. This is followed by the creamy, nutty undertone of unsalted natural almond butter and shredded coconut, offering a luscious mouthfeel. The spirulina introduces a subtle earthiness that balances the sweetness, while a splash of fresh lime juice ties everything together with a zesty finish. It’s like a tropical getaway in a glass, right from your kitchen.

    Ingredients

    • 1 tablespoon **unsalted natural almond butter**
    • 1 cup **unsweetened almond milk**
    • 1 **frozen banana**
    • 1 tablespoon chia seeds
    • 1 handful baby kale
    • 1/2 cup **frozen mango pieces**
    • 1 teaspoon **green matcha tea powder**
    • 1/2 cup **frozen pineapple**
    • 1 teaspoon vanilla extract
    • 1/2 cup **coconut water**
    • 2 tablespoons **shredded coconut**
    • 1 teaspoon **spirulina powder**
    • 1 tablespoon fresh lime juice

    Instructions

    1. Start by adding the spirulina powder into a blender with a small amount of almond milk. Blend on low to ensure the spirulina dissolves completely, preventing any clumps and allowing the vibrant green color to integrate smoothly.
    2. Add the remaining almond milk, frozen banana, chia seeds, and baby kale. Blend until the kale is fully incorporated, and no green leaves are visible—just a smooth, emerald base.
    3. Introduce the frozen mango pieces, green matcha tea powder, frozen pineapple, vanilla extract, and coconut water. Blend on high until the mixture is silky and all the frozen fruit has broken down, creating a thick and creamy texture.
    4. Finally, add the shredded coconut. Pulse the blender a few times to mix in the coconut, adding a delightful texture without over-blending.
    5. Pour the smoothie into glasses, squeeze a touch of fresh lime juice on top, and serve immediately for the ultimate refreshing experience.

    Pro Tips from Meaghan’s Kitchen

    • For an extra creamy smoothie, freeze your almond milk in ice cube trays and use these instead of regular ice cubes.
    • Always add liquids to the blender first to help the blades move easily through the ingredients.
    • If you prefer a thicker smoothie, add more frozen banana or reduce the coconut water.
    • Spirulina can have a strong flavor—start with less if you’re new to it, and gradually increase as you become more accustomed to its taste.
    • Experiment with different brands of matcha powder to find one that suits your taste preferences and budget.

    Variations & Dietary Swaps

    • Nut-Free Version: Swap almond butter and almond milk for sunflower seed butter and oat milk.
    • Extra Protein Boost: Add a scoop of your favorite vanilla protein powder.
    • Kid-Friendly Version: Reduce spirulina to half a teaspoon and add a touch of honey or agave for extra sweetness.

    What to Serve With It

    This Tropical Almond Matcha Energy Smoothie with Coconut and Spirulina pairs beautifully with a side of freshly sliced papaya or mango for an extra tropical punch. For a more filling breakfast, serve it alongside a warm piece of whole grain toast topped with avocado and a sprinkle of salt.

    Storage & Meal Prep

    If you want to save time in the morning, pre-portion the frozen fruits and dry ingredients into individual baggies, then store them in the freezer. When you’re ready to make your smoothie, simply pour the contents of the bag into the blender, add your liquids, and blend.

    While this smoothie is best enjoyed fresh, you can refrigerate leftovers in an airtight container for up to 24 hours. Shake or stir well before drinking. For longer storage, freeze the smoothie in a mason jar with some space at the top for expansion. Thaw overnight in the fridge before enjoying.

    FAQ

    Can I use fresh fruit instead of frozen?

    Yes, you can use fresh fruit, but you might need to add ice cubes to achieve the same thick, cold consistency that frozen fruit provides.

    Is spirulina really necessary?

    While spirulina is a wonderful nutrient boost, you can leave it out if you’re not a fan of its flavor. The smoothie will still be delicious without it.

    Can I add additional sweeteners?

    Absolutely! If you have a sweet tooth, a touch of honey, agave syrup, or even a Medjool date can enhance the sweetness.

    How can I make this smoothie more filling?

    To make this smoothie heartier, consider adding a half-cup of rolled oats or a tablespoon of flaxseeds for extra fiber and satiety.

    Final Thoughts

    There you have it, my Tropical Almond Matcha Energy Smoothie with Coconut and Spirulina—a deliciously refreshing way to kick-start your morning with a burst of tropical flavors. I hope this recipe brings a little piece of paradise to your day, just as it has to mine. I’d love to hear how it turns out for you, so feel free to leave a comment or share your own unique twist on this smoothie. Cheers to vibrant mornings and happy blending!

    Related update: Tropical Almond Matcha Energy Smoothie with Coconut and Spirulina

  • Tropical Green Monster Smoothie with Coconut & Mango | Made by Meaghan Moineau

    Tropical Green Monster Smoothie with Coconut & Mango | Made by Meaghan Moineau

    Tropical Green Monster Smoothie with Coconut & Mango

    Imagine yourself lounging on a sun-kissed beach, the soft hum of waves providing a tranquil soundtrack. In your hand is a tall glass of something vibrant and refreshing, a taste of paradise in liquid form. That’s exactly what this Tropical Green Monster Smoothie with Coconut & Mango delivers — a tropical escape with every creamy, luscious sip.

    Personal Story

    My love affair with smoothies began during a summer in my teens, when my best friend and I concocted endless variations in her kitchen, each one more adventurous than the last. We were determined to outdo ourselves with each blend, our creations fueled by a mix of youthful curiosity and the sticky summer heat. Those carefree days tasted like an endless summer break, and the blender was our magic wand.

    Fast forward to a few years ago, I found myself in a tropical paradise — a long-dreamed-of vacation to Hawaii. The lush landscape, with its vibrant fruits and fragrant coconuts, made a lasting impression. One morning, after a sunrise yoga session overlooking the ocean, I was served a smoothie that took me right back to those endless summers, but with a sophisticated twist. Let me tell you, that smoothie was an epiphany.

    Back home, I was determined to recreate that magical blend. After a few delightful kitchen experiments, I perfected my own version: the Tropical Green Monster Smoothie with Coconut & Mango. This recipe is a tribute to those carefree teenage summers and my Hawaiian adventure, capturing the essence of both in a single glass.

    Now, each time I whip up this smoothie, I’m transported back to those sun-drenched mornings and the exhilaration of trying something new. It’s a reminder that adventures, big or small, can be found even in our own kitchens.

    What Makes This Version Special

    While the classic green monster smoothie is already a health lover’s dream, my version takes it up a notch by incorporating tropical fruits and a hint of coconut. This isn’t just a smoothie — it’s an escape to a sunny paradise with every sip. The frozen mango chunks add a burst of tropical sweetness, while the coconut water and toasted coconut flakes introduce a subtle yet irresistible creaminess and crunch. It’s like a beach vacation in a glass, with the added benefit of nutrient-packed spinach and fresh ginger for a zingy warmth.

    Flavor Profile

    The Tropical Green Monster Smoothie with Coconut & Mango is a delightful balance of creamy and tangy, with a tropical twist. Each sip starts with the vibrant sweetness of mango, complemented by the smooth, nutty undertones of peanut butter. The coconut water adds a refreshing lightness, while the grated fresh ginger brings a gentle warmth that lingers just enough to intrigue. The spinach is subtle, lending its vibrant color and a hint of earthiness. Finally, those toasted coconut flakes introduce a delightful crunch and a whisper of toasted aroma, making each sip a multi-sensory delight.

    Ingredients

    • 1 frozen banana
    • 1 cup baby spinach
    • 2 tablespoons peanut butter
    • 1 cup unsweetened vanilla almond milk
    • 1/2 cup fat-free plain Greek yogurt
    • 1 cup frozen mango chunks
    • 1/2 cup coconut water
    • 1 teaspoon grated fresh ginger
    • 2 tablespoons toasted coconut flakes

    Instructions

    1. Start by layering the ingredients in your blender. Begin with the liquids at the bottom: pour in the unsweetened vanilla almond milk and coconut water. This helps the blender blades move smoothly, ensuring a creamier smoothie.
    2. Add the frozen banana, baby spinach, peanut butter, fat-free plain Greek yogurt, and frozen mango chunks. These ingredients form the body of your smoothie, creating that thick, satisfying texture.
    3. Sprinkle in the grated fresh ginger for that warm, zesty kick. This little addition elevates the tropical flavors beautifully.
    4. Before blending, add a handful of ice cubes. This step is key for achieving that frosty texture that makes each sip so refreshing.
    5. Blend until smooth, about 1-2 minutes, depending on your blender’s power. Look for a vibrant green hue and a velvety texture with no visible chunks.
    6. Pour the smoothie into glasses and garnish with the toasted coconut flakes. This final touch not only adds a delightful crunch but also enhances the tropical aroma.

    Pro Tips from Meaghan’s Kitchen

    • For an extra creamy texture, use a high-powered blender. It makes a world of difference in achieving that perfectly smooth consistency.
    • If you’re a fan of thicker smoothies, consider freezing the almond milk in ice cube trays before using it in the recipe.
    • Toasting your coconut flakes at home is easy! Simply spread them on a baking sheet and bake at 350°F for about 5 minutes, keeping a close eye to prevent burning.
    • Always taste your smoothie before serving. If you prefer it sweeter, a drizzle of honey or a splash of orange juice can work wonders.

    Variations & Dietary Swaps

    • Vegan Version: Swap the Greek yogurt for a plant-based alternative like coconut yogurt or soy yogurt.
    • Spice-it-Up Version: Add a pinch of cayenne pepper for a subtle heat that complements the ginger and tropical flavors.
    • Kids-Friendly Version: Reduce the ginger to a pinch and add more frozen banana for extra sweetness. Kids will love the creamy texture and vibrant color!

    What to Serve With It

    This Tropical Green Monster Smoothie with Coconut & Mango is a perfect standalone treat, but if you’re looking to make it a complete meal, try pairing it with a side of fresh pineapple slices or a chilled glass of coconut water. The tropical flavors will harmonize beautifully, making for a truly refreshing experience. For a heartier option, consider serving it alongside a slice of whole-grain toast topped with avocado and a sprinkle of sea salt.

    Storage & Meal Prep

    If you want to make this smoothie ahead of time, you can store it in the fridge for up to 24 hours. However, it’s best enjoyed fresh to retain that vibrant color and flavor. To prepare in advance, consider assembling the dry ingredients in a zip-top bag and storing them in the freezer. When you’re ready to enjoy, just add the liquids and blend.

    For longer storage, pour the smoothie into ice cube trays and freeze. When you’re craving a quick smoothie, simply blend the frozen cubes with a splash of almond milk or coconut water.

    FAQ

    Can I use fresh mango instead of frozen?

    Absolutely! Fresh mango will work just fine, though you might want to add a few extra ice cubes to achieve the desired frosty texture.

    What if I don’t have coconut water?

    No worries! You can substitute it with more almond milk, or even plain water, though it might slightly alter the tropical flavor profile.

    How can I make the smoothie thicker?

    Try adding more frozen banana or reducing the amount of liquid slightly. You can also freeze your almond milk into ice cubes as mentioned in the pro tips.

    Is there a nut-free option?

    Yes, you can replace the peanut butter with sunflower seed butter or simply omit it for a lighter version.

    Can I use other leafy greens besides spinach?

    Definitely! Kale is a great alternative, though it might alter the taste slightly with its more pronounced flavor. Feel free to experiment with different greens to suit your taste.

    Final Thoughts

    I hope this Tropical Green Monster Smoothie with Coconut & Mango brings a little sunshine into your day, wherever you are. It’s a simple, delicious way to enjoy a taste of the tropics, packed with vibrant flavors and nourishing ingredients. If you try it, I’d love to hear how it turned out! Feel free to leave a comment below or share your smoothie photos on social media. Let’s spread the tropical love, one sip at a time!

    Related update: Tropical Green Monster Smoothie with Coconut & Mango

    Related update: Tropical Spiced Pina Colada with Coconut Cream Floater

  • Mediterranean Swiss Chard Wraps with Spicy Citrus Tahini | Made by Meaghan Moineau

    Mediterranean Swiss Chard Wraps with Spicy Citrus Tahini | Made by Meaghan Moineau

    Mediterranean Swiss Chard Wraps with Spicy Citrus Tahini

    Imagine biting into a wrap that bursts with the vibrant flavors of the Mediterranean — sun-dried tomatoes, tangy feta cheese, and a spicy citrus tahini dressing that dances on your taste buds. These Mediterranean Swiss Chard Wraps with Spicy Citrus Tahini aren’t just a meal; they’re an experience, a sunlit escape draped in emerald greens and golden hues.

    Personal Story

    It was a balmy Saturday afternoon when I first stumbled upon the idea of using swiss chard as a wrap. My weekly farmer’s market stroll had led me to a stand full of lush, leafy greens. As I held a bunch of swiss chard in my hands, a childhood memory of my grandmother’s garden rushed back — the way she’d pick fresh greens and infuse them with love and simple seasonings.

    Back in her cozy kitchen, she’d lovingly prepare dishes that were both nourishing and bursting with flavor. Though swiss chard wasn’t commonly on the menu, she always encouraged me to experiment with new ingredients. So, with a nostalgic nod to her adventurous spirit, I decided to embrace swiss chard as my wrap star.

    The first attempt was admittedly a kitchen disaster. I had underestimated the sheer size and unruliness of the leaves, which led to a messy yet delicious meal. But with each trial, I honed my technique, learning to balance the structural integrity of the leaves with the flavorful fillings inside.

    After several iterations, I crafted a version that not only held together beautifully but also packed a Mediterranean punch with sun-dried tomatoes, feta cheese, and a spicy citrus tahini dressing. My grandmother would be proud, I thought, as I took a triumphant bite of my creation.

    What Makes This Version Special

    What sets these Mediterranean Swiss Chard Wraps apart is the infusion of vibrant Mediterranean flavors. Instead of conventional fillings, I’ve opted for **sun-dried tomatoes** and **feta cheese**, which add a depth of flavor and a delightful tanginess. The **spicy citrus tahini dressing** is the heart of this dish, bringing together the nutty richness of tahini with the zesty punch of fresh lemon juice and a hint of cayenne pepper. It’s an invigorating twist that elevates the wraps from ordinary to extraordinary.

    Flavor Profile

    Imagine a savory blend of earthy greens meeting the zesty zing of citrus, all tied together with a nutty, spicy kick. The swiss chard brings a subtle bitterness, perfectly countered by the sweetness of **red bell pepper** and the creaminess of **avocado**. The **toasted pine nuts** add an aromatic crunch, while the **feta cheese** offers a briny tang. As you take a bite, the spicy citrus tahini dressing envelops your palate, leaving a lasting impression of vibrant flavors.

    Ingredients

    • 8 large swiss chard leaves
    • 1 small head of orange cauliflower
    • 2 tablespoons olive oil
    • 2 cloves of garlic, minced
    • Pinch of salt
    • 1/4 cup fresh basil, chopped
    • 1 zucchini, spiralized
    • 1 **red bell pepper**, thinly sliced
    • 1 **avocado**, sliced
    • 2 tablespoons Trader Joe’s spicy peanut vinaigrette
    • 1/4 cup **sun-dried tomatoes**, chopped
    • 1/4 cup **feta cheese**, crumbled
    • 2 tablespoons **fresh lemon juice**
    • 1/4 cup **tahini**
    • 1/2 teaspoon **cayenne pepper**
    • 1/4 cup **toasted pine nuts**

    Instructions

    1. Chop off the stems of the swiss chard at the point where it meets the leaf. You could stem the swiss chard entirely, but I like leaving a bit of stem with the leaves to give better structure to the wraps.
    2. Chop the cauliflower into small pieces and pulse them in a food processor until it looks like rice. I usually pulse the cauliflower florets and the stalk together.
    3. Place the olive oil in a sauté pan over medium-high heat. Once the pan is hot, add the garlic and let it fry for about a minute or two, or until the garlic starts to brown.
    4. Add the pulsed cauliflower rice and cook it for about 2-3 minutes. The cauliflower should turn into a vibrant yellow-orange color when it is cooked. Add a pinch of salt and chopped basil to the cauliflower and stir.
    5. Spiralize the zucchini with Blade B to create zucchini noodles. If you do not have a spiralizer, just create zucchini ribbons with a vegetable peeler.
    6. Toast the pine nuts in the pan until golden and aromatic before sautéing the garlic.
    7. Create a spicy citrus tahini dressing by blending tahini, fresh lemon juice, and cayenne pepper with a splash of water until smooth.
    8. To assemble the wraps, place a large leaf flat down. Add a bit of sautéed cauliflower, zucchini noodles, red pepper, and avocado along the swiss chard stalk. Drizzle a bit of vinaigrette on top of the vegetables and wrap everything up.
    9. Enjoy these wraps as a side to your favorite protein! Feel free to dip these wraps in more sauce.

    Pro Tips from Meaghan’s Kitchen

    • When selecting swiss chard, look for vibrant, crisp leaves with no signs of wilting.
    • If your swiss chard leaves are too stiff, blanch them quickly in boiling water for 20 seconds to make them more pliable.
    • To prevent your wraps from falling apart, don’t overfill them. Less is more!
    • For a smoother dressing, use a high-powered blender to combine the tahini, lemon juice, and cayenne pepper.
    • Try adding a splash of rice vinegar to the dressing for an extra tangy twist.

    Variations & Dietary Swaps

    • Vegetarian Swap: Replace the feta cheese with a vegan cheese or omit it altogether for a fully plant-based meal.
    • Spice-It-Up Version: Add a teaspoon of sriracha to the tahini dressing for an extra kick.
    • Kids-Friendly Version: Skip the cayenne pepper in the dressing and add a touch of honey for a sweeter flavor.

    What to Serve With It

    Pair these Mediterranean Swiss Chard Wraps with a chilled glass of Sauvignon Blanc or a side of tabbouleh salad. The light citrus notes in the wine complement the spicy citrus tahini dressing, while the tabbouleh adds a refreshing, herby contrast.

    Storage & Meal Prep

    These wraps are best consumed when they are freshly made. However, if you have leftovers, refrigerate them in an airtight container for up to two days. To reheat, unwrap the fillings and warm them in a pan before reassembling. If freezing, store the fillings separately and thaw in the fridge overnight before use.

    FAQ

    Can I use a different type of leaf for the wraps?

    Absolutely! Collard greens or large lettuce leaves can be a great alternative to swiss chard.

    How can I make these wraps more filling?

    Consider adding grilled chicken or chickpeas for added protein and satiety.

    Is there a substitute for tahini in the dressing?

    If you don’t have tahini, you can use almond butter or sunflower seed butter for a similar creamy texture.

    Can I make the dressing in advance?

    Yes, the dressing can be made up to three days in advance. Store it in the fridge in a sealed jar and shake well before using.

    What if I don’t have a food processor?

    You can finely chop the cauliflower by hand or use a box grater to achieve a similar rice-like texture.

    Final Thoughts

    These Mediterranean Swiss Chard Wraps with Spicy Citrus Tahini are a delightful way to savor the vibrant flavors of the Mediterranean right in your kitchen. I hope you enjoy making and eating them as much as I do. Please share your creations and any twists you add in the comments below. Let’s keep the conversation and inspiration flowing! Happy cooking!

    Related update: Mediterranean Swiss Chard Wraps with Spicy Citrus Tahini

  • Luscious Vegan Strawberry-Rose Shortcake with Coconut Cream | Made by Meaghan Moineau

    Luscious Vegan Strawberry-Rose Shortcake with Coconut Cream | Made by Meaghan Moineau

    Luscious Vegan Strawberry-Rose Shortcake with Coconut Cream

    Imagine biting into a dessert that feels like a sun-soaked summer afternoon. The sweetness of ripe strawberries mingles with a whisper of floral rose, all embraced by a rich, creamy cloud of coconut whipped cream. This isn’t just any strawberry shortcake; it’s a sensory journey that transforms your taste buds with every bite.

    Personal Story

    Strawberry shortcake has always been a staple at my family gatherings, a dessert that evokes memories of laughter and clinking glasses around a bustling dinner table. As a child, I remember eagerly watching my grandmother whip cream by hand, her movements rhythmic and full of purpose. The anticipation of sinking my teeth into layers of soft cake, fresh berries, and sweet cream made every minute of waiting worthwhile.

    Years later, during a particularly adventurous phase of my cooking journey, I found myself experimenting with flavors that intrigued me. That’s when I stumbled upon rose water. Its exotic aroma enchanted me, and I knew I had to incorporate it into a recipe that held a special place in my heart. The idea to elevate the classic strawberry shortcake with rose water and coconut cream was born out of this curiosity.

    Of course, not every attempt was successful. There was the time I accidentally overdid the rose water, resulting in a dessert that tasted more like a perfume bottle than a treat. But with each misstep, I learned, refined, and perfected, until I arrived at this version — a luscious vegan strawberry-rose shortcake with coconut cream that brings a unique twist to a beloved classic.

    The first time I served this version to my family, I watched their expressions shift from curious skepticism to delight. The subtle floral notes, the creamy coconut, and the juicy strawberries — it was a harmony of flavors that surprised and delighted even my traditionalist grandmother. It’s a recipe that bridges generations and culinary worlds, and I can’t wait to share it with you.

    What Makes This Version Special

    This strawberry shortcake isn’t your average dessert. By infusing the strawberries with a fragrant touch of rose water, we introduce a delicate floral note that elevates the classic fruit. Pair this with a rich coconut whipped cream, and you have a dessert that’s not only vegan-friendly but also a true taste sensation. The coconut cream adds a luscious texture that’s both light and indulgent, transforming the shortcake into a floral delight that stands out from the traditional version.

    Flavor Profile

    The experience of tasting this vegan strawberry-rose shortcake is akin to stepping into a fragrant garden. The first bite is a delicate balance — the sweetness of the strawberries, heightened by the floral essence of rose water, creates a symphony of flavors that dance on your palate. The coconut cream provides a velvety, rich counterpoint, making each mouthful creamy and refreshing. This isn’t just a dessert; it’s a taste of summer wrapped in a luxurious, aromatic package.

    Ingredients

    • 1 cup flour
    • 1/2 cup almond meal
    • 1/3 cup turbinado sugar
    • 1 teaspoon baking soda
    • 1/4 teaspoon salt
    • 3/4 cup almond milk
    • 1 tablespoon apple cider vinegar
    • 1/4 cup vegetable oil
    • 1 tiny drop of almond extract
    • 1 pound strawberries, sliced
    • 1 teaspoon rose water
    • 1 can full-fat coconut milk (chilled overnight)
    • 2 tablespoons maple syrup

    Instructions

    1. Preheat your oven to 400°F (200°C). Line two baking sheets with parchment paper for easy cleanup.
    2. In a glass bowl, combine the sliced strawberries with 1 teaspoon rose water. Cover and refrigerate to let the flavors meld.
    3. In a medium-sized bowl, whisk together 1 cup flour, 1/2 cup almond meal, 1 teaspoon baking soda, and 1/4 teaspoon salt.
    4. In a small bowl, dissolve 1/3 cup turbinado sugar in 1 teaspoon water.
    5. In a large bowl, combine 3/4 cup almond milk, 1 tablespoon apple cider vinegar, 1/4 cup vegetable oil, the sugar mixture, and 1 tiny drop of almond extract. Whisk until well blended.
    6. Create a well in the center of the dry ingredients and gradually pour in the wet mixture. Stir until just combined to avoid overmixing.
    7. Drop heaping tablespoons of batter onto the prepared baking sheets, leaving a few inches between each dollop. This should yield about 10 shortcakes.
    8. Bake for 10-12 minutes, or until the shortcakes are ever so slightly golden. Remove from oven and let them cool on a wire rack.
    9. While the shortcakes are cooling, prepare the coconut cream. Chill a mixing bowl and beaters in the freezer for 15 minutes to ensure a fluffier texture.
    10. Scoop the solidified coconut cream from the chilled can into the cold bowl. Add 2 tablespoons maple syrup and whip until peaks form.
    11. To assemble, slice each shortcake in half with a serrated knife. Generously dollop the coconut whipped cream onto the bottom half, add a spoonful of rose-infused strawberries, and cap with the top half. Garnish with more cream and strawberries, if desired.

    Pro Tips from Meaghan’s Kitchen

    • For a more pronounced rose flavor, increase the rose water by an additional 1/2 teaspoon. Just be cautious — a little goes a long way!
    • When making the coconut whipped cream, ensure your coconut milk is thoroughly chilled. This helps separate the cream from the liquid, giving you a thicker texture to work with.
    • If your strawberries aren’t at peak ripeness, sprinkle them with a touch more sugar to enhance their natural sweetness.
    • Use a serrated knife to slice the shortcakes; it cuts through the delicate crumb without squishing the layers.
    • Experiment with different almond extracts for subtle flavor variations — some brands can be milder or stronger than others.

    Variations & Dietary Swaps

    • Gluten-Free Version: Substitute the flour with a gluten-free all-purpose blend to make this dessert suitable for gluten sensitivities.
    • Spice-It-Up Version: Add a pinch of ground cardamom to the dry ingredients for a warm, spicy undertone that complements the floral notes.
    • Kid-Friendly Version: Omit the rose water for a more straightforward strawberry shortcake that appeals to younger palates.

    What to Serve With It

    This luscious vegan strawberry-rose shortcake pairs beautifully with a chilled glass of rosé wine, enhancing the floral notes and adding a sophisticated touch to your dessert experience. Alternatively, a scoop of dairy-free vanilla ice cream alongside the shortcake creates an indulgent treat perfect for warm evenings.

    Storage & Meal Prep

    To store leftovers, place the assembled shortcakes in an airtight container in the refrigerator for up to two days. The coconut cream may harden slightly, so allow the shortcakes to sit at room temperature for a few minutes before serving. For meal prep, bake the shortcakes and slice the strawberries a day ahead. Whip the coconut cream just before serving to maintain its fluffy texture.

    FAQ

    Can I use regular cream instead of coconut cream?

    Absolutely! If you’re not following a vegan diet, regular whipped cream can be a tasty substitute. Just whip it with a bit of sugar and vanilla extract for sweetness.

    How do I prevent the shortcakes from becoming soggy?

    To keep the shortcakes crisp, assemble them just before serving. The coconut cream and juicy strawberries can make them soggy if left too long.

    Is there a substitute for rose water?

    If you can’t find rose water or prefer a different flavor, try using a vanilla or almond extract, keeping in mind that the overall taste will change.

    Can I make this dessert ahead of time?

    You can prepare the shortcakes and strawberries in advance, but for best results, whip the coconut cream and assemble the shortcakes right before serving.

    What if I don’t have almond meal?

    No worries! You can pulse whole almonds in a food processor until finely ground to make your own almond meal at home.

    Final Thoughts

    Cooking, for me, is all about creating moments — moments that linger on your taste buds and in your memories. This luscious vegan strawberry-rose shortcake with coconut cream is a testament to the joy of experimenting and sharing love through food. I hope you’ll try this recipe and find the same delight in it as I have. I’d love to hear how it turns out for you, so please feel free to leave a comment or share your own twists on this floral, fragrant dessert. Happy cooking, dear friend!

    Related update: Luscious Vegan Strawberry-Rose Shortcake with Coconut Cream

    Related update: Zesty Lime-Infused Strawberry Yogurt Cake with Basil Glaze

  • Tropical Berry Bliss Smoothie with Coconut and Lime | Made by Meaghan Moineau

    Tropical Berry Bliss Smoothie with Coconut and Lime | Made by Meaghan Moineau

    Tropical Berry Bliss Smoothie with Coconut and Lime

    Picture this: a sun-drenched morning, the air heavy with the scent of blooming flowers, and in your hand, a tall, frosty glass. It’s brimming with a vibrant, lush smoothie, the kind that tastes like a vacation in a sip. This is not just any smoothie; it’s a Tropical Berry Bliss Smoothie with Coconut and Lime, promising to take your taste buds on an island escape.

    Years ago, I stumbled upon this delightful concoction quite by accident. I was hosting a brunch for some dear friends and had ambitiously promised a spread reminiscent of a beachside retreat. In my enthusiasm, I went overboard with the berry stockpile and somehow ended up with an excess of coconut milk and limes. As I stood amidst the chaos of my kitchen, inspiration struck. Why not blend these ingredients into a refreshing smoothie? It was a serendipitous decision that changed my brunch game forever.

    The result was nothing short of magical. My friends raved about the unexpected combination: a tropical smoothie that wasn’t just sweet but had a sophisticated tang and creaminess that made it feel indulgent yet light. Since then, the Tropical Berry Bliss Smoothie with Coconut and Lime has become a staple in my home, a reminder of that memorable day and the joy of culinary creativity.

    Of course, there have been mishaps along the way. Like the time I forgot to zest the lime before juicing it, leading to a slightly less aromatic drink. Or the morning I accidentally used salted coconut milk, a lesson in reading labels carefully! Yet, every attempt brought me closer to perfecting this recipe, and now, I’m thrilled to share it with you.

    What Makes This Version Special

    This Tropical Berry Bliss Smoothie is not your average berry blend. What sets it apart is the use of creamy coconut milk and the zesty kick of fresh lime juice and zest. These ingredients introduce a tropical flair that elevates the traditional berry smoothie into something extraordinary. The coconut milk adds a lush creaminess that balances the tangy berries, while the lime infuses the drink with a refreshing zest. It’s like a beach vacation in a glass, making it a unique and delightful twist on a standard recipe.

    Flavor Profile

    Imagine the first sip: a burst of tropical and tangy flavors dance on your tongue, underscored by a creamy coconut undertone that soothes and delights. As the smoothie glides down, the refreshing lime finish leaves a lingering zest that keeps you coming back for more. This delightful fusion of flavors is what makes the Tropical Berry Bliss Smoothie with Coconut and Lime a must-try for any smoothie enthusiast.

    Ingredients

    • 1 cup frozen blackberries
    • 1 cup frozen blueberries
    • 1/2 cup lemonade concentrate
    • 1 cup frozen unsweetened raspberries
    • 1 cup frozen unsweetened strawberries
    • 2 tablespoons sugar
    • 1 teaspoon vanilla extract
    • 1 cup whole milk
    • 1 cup coconut milk
    • Juice of 1 fresh lime
    • Zest of 1 lime
    • Shredded coconut for garnish

    Instructions

    1. Zest the lime before juicing to infuse the smoothie with its fragrant oils. Set aside.
    2. In a blender, place the lemonade concentrate, whole milk, and coconut milk. Layering the ingredients starting with liquids ensures a smoother blending process.
    3. Add the frozen blackberries and blueberries. Pulse a few times until the mixture begins to break down.
    4. Add the frozen raspberries and strawberries. Pulse 2-3 times to help them incorporate.
    5. Sprinkle in the sugar and vanilla extract. Blend on high until the mixture is smooth and creamy, with no visible chunks of fruit.
    6. Pour in the fresh lime juice and add the lime zest. Blend briefly to combine.
    7. Pour into glasses and garnish with shredded coconut. Serve immediately for the best flavor and texture.

    Pro Tips from Meaghan’s Kitchen

    • Use frozen berries to avoid watering down the smoothie with ice. This keeps it thick and flavorful.
    • If you prefer a sweeter smoothie, add a tablespoon of honey or agave syrup.
    • Opt for unsweetened coconut milk to control the sweetness of the final product.
    • For an extra frosty texture, chill your glasses in the freezer before pouring the smoothie.
    • Experiment with different brands of coconut milk as they can vary significantly in creaminess and flavor.

    Variations & Dietary Swaps

    • Vegan Version: Swap the whole milk for almond or oat milk, and ensure your sugar is vegan.
    • Spice-It-Up Version: Add a pinch of cayenne pepper for a spicy kick that complements the sweetness of the berries.
    • Kids-Friendly Version: Blend in a banana for added sweetness and creaminess that kids love.

    What to Serve With It

    Pair your Tropical Berry Bliss Smoothie with a crunchy granola parfait for a delightful textural contrast. Alternatively, serve alongside coconut-lime scones for a decadent breakfast or brunch experience. These pairings enhance the tropical theme and make for a well-rounded meal.

    Storage & Meal Prep

    If you find yourself with leftover smoothie, store it in an airtight container in the fridge for up to 24 hours. Give it a good shake before serving. For longer storage, pour the smoothie into ice cube trays and freeze. When ready to enjoy, blend the cubes with a bit of coconut milk. This smoothie doesn’t reheat well due to its icy nature, so enjoy it cold.

    FAQ

    Can I use fresh berries instead of frozen?

    Yes, you can use fresh berries, but you may want to add a handful of ice to achieve the desired thickness and chill.

    Is there a substitute for lemonade concentrate?

    You can replace lemonade concentrate with freshly squeezed lemon juice mixed with a bit of honey or sugar to taste.

    What if I don’t have coconut milk?

    If you don’t have coconut milk, you can substitute with almond milk or more whole milk, though the tropical flavor will be less pronounced.

    Can I make this smoothie ahead of time?

    You can prepare the ingredients ahead but blend it fresh for the best flavor and texture. If needed, store in the fridge and give it a vigorous shake before serving.

    Is it possible to make this smoothie without a blender?

    Unfortunately, a blender is essential to achieve the smooth, creamy texture of this smoothie. A food processor might work in a pinch, but it won’t be as smooth.

    Final Thoughts

    I hope this Tropical Berry Bliss Smoothie with Coconut and Lime brings a splash of island magic into your days, just as it has mine. Whether you’re sipping it solo or sharing with friends, it’s a delightful reminder that sometimes the best culinary adventures come from a little creativity and a dash of serendipity. I’d love to hear how this recipe turns out for you, so please leave a comment or share your creations. Cheers to delicious, sun-kissed moments!

    Related update: Tropical Berry Bliss Smoothie with Coconut and Lime

    Related update: Tropical Green Monster Smoothie with Coconut & Mango

  • Lentil Salad With Vegetables | Made by Meaghan Moineau

    Lentil Salad With Vegetables | Made by Meaghan Moineau

    Lentil Salad With Vegetables

    Welcome to our kitchen! Today, we’re diving into a dish that not only satisfies the taste buds but also brings a delightful burst of nutrition to your table. Lentil Salad with Vegetables is a recipe that has been passed down in our family for generations, and I’m thrilled to share it with you today. I still remember the warm summer evenings spent at my grandmother’s house, where this salad was a staple. The vibrant colors and fresh flavors were always a highlight of our meals, and now I hope it becomes a cherished part of your family dinners too.

    Why You’ll Love It

    This Lentil Salad with Vegetables is a delightful medley of flavors and textures that will elevate any meal. Whether you’re looking for a refreshing side dish, a nutritious lunch, or a light dinner, this salad fits the bill. Here’s why you’ll fall in love with this recipe:

    • Nutritious: Packed with protein-rich lentils and a variety of vegetables, this salad is a nutrient powerhouse.
    • Flavorful: The combination of balsamic and red wine vinegar gives a tangy kick, while rosemary adds a fragrant touch.
    • Versatile: Perfect for summer picnics, potlucks, or a cozy dinner at home.
    • Easy to Make: With simple ingredients and straightforward steps, this salad is quick to prepare.

    Ingredients

    • 2 tablespoons balsamic vinegar
    • 3 tablespoons extra virgin olive oil
    • 2 green onions, chopped
    • 1 cup lentils
    • 1 bell pepper, diced
    • 1 red bell pepper, diced
    • 1 tablespoon red wine vinegar
    • 1 teaspoon fresh rosemary, chopped
    • Salt, to taste
    • 2 tomatoes, diced
    • 1 white onion, diced

    Instructions

    1. Heat the extra virgin olive oil in a saucepan over medium-high heat and add the diced white onion.
    2. Cook the onion until just translucent, stirring occasionally to ensure even cooking.
    3. Add the lentils to the saucepan and pour in enough water to cover them. Cook according to the package directions until tender.
    4. Once cooked, drain the lentils and let them cool to room temperature.
    5. In a large mixing bowl, combine the cooled lentils with the diced tomatoes, bell peppers, and green onions.
    6. Add the chopped rosemary, balsamic vinegar, and red wine vinegar to the vegetable mixture.
    7. Season with salt to taste. You can also add more olive oil or vinegar according to your preference.
    8. Toss everything together until well combined.
    9. Serve the salad cold or at room temperature, and enjoy!

    Tips

    To make the most out of your Lentil Salad with Vegetables, here are some tips to keep in mind:

    • Choose Fresh Ingredients: Fresh vegetables make a big difference in flavor and texture.
    • Cook Lentils Properly: Ensure the lentils are cooked just right – they should be tender but not mushy.
    • Adjust Seasoning: Feel free to adjust the amount of vinegar and olive oil based on your taste preferences.

    Variations & Substitutions

    This salad is incredibly adaptable. Here are a few variations and substitutions you might consider:

    • Add Cheese: Crumble some feta or goat cheese on top for added creaminess.
    • Include Nuts: Toss in some toasted walnuts or almonds for extra crunch.
    • Use Different Vinegars: Try apple cider vinegar or white wine vinegar for a different flavor profile.
    • Herbs: Swap rosemary with thyme or parsley for a different herbal touch.

    Storage

    This salad can be stored in an airtight container in the refrigerator for up to 3 days. It’s a great make-ahead dish for busy weeks, and the flavors only deepen over time. Just give it a good toss before serving to redistribute the dressing.

    FAQ

    Can I use canned lentils for this recipe?

    Yes, you can use canned lentils to save time. Just make sure to rinse and drain them well before adding them to the salad.

    Is this salad vegan?

    Yes, this Lentil Salad with Vegetables is completely vegan, making it a great option for those following a plant-based diet.

    What can I serve with this salad?

    This salad pairs well with grilled chicken, fish, or tofu. It also makes a great accompaniment to hearty soups or stews.

    Nutrition

    This salad is not only delicious but also nutritious. Packed with protein, fiber, and vitamins, it’s a wholesome addition to any meal. Lentils are an excellent source of plant-based protein, while the assortment of vegetables provides a rainbow of nutrients.

    Final Thoughts

    I hope this Lentil Salad with Vegetables becomes as beloved in your home as it is in ours. It’s a simple yet flavorful dish that brings people together around the table. Whether you’re enjoying it as a light lunch or serving it as a side at a family gathering, it’s sure to bring smiles and satisfaction. Don’t forget to share your own twists and experiences with this recipe in the comments below. Happy cooking!

    Related update: Lentil Salad With Vegetables

    Related update: Pennsylvania Dutch Pickled Eggs

    Related update: Strawberry Pretzel Salad

  • Thai Savory Brown Fried Rice | Made by Meaghan Moineau

    Thai Savory Brown Fried Rice | Made by Meaghan Moineau

    Thai Savory Brown Fried Rice

    There’s something comforting about the aroma of garlic and chili sizzling in a hot pan, transporting me back to my childhood kitchen where my grandmother often prepared her special fried rice. Her infectious laughter and the clinking of her bangles as she cooked made the experience truly unforgettable. It’s from her that I learned the beauty of combining simple, wholesome ingredients to create a dish brimming with flavors. Today, I’m excited to share a recipe that echoes those cherished memories with a modern twist: Thai Savory Brown Fried Rice.

    Why You’ll Love It

    This dish is not only a delightful amalgamation of flavors but also a nutritional powerhouse. The nuttiness of brown rice complements the rich, savory notes of garlic and soy, while the spicy kick from fresh chili peppers wakes up your taste buds. Cashew nuts add a satisfying crunch, and the coconut lends a sweet, tropical aroma. Whether you’re a seasoned cook or a beginner, this recipe is straightforward and rewarding, perfect for a quick weeknight meal or a weekend indulgence.

    Ingredients

    • 2 tablespoons extra virgin olive oil
    • 3 garlic cloves, minced
    • 2 red fresh chili peppers, sliced
    • 1 cup raw cashew nuts
    • 1/2 cup dry unsweetened shredded coconut
    • 1 teaspoon stevia powder
    • 2 tablespoons Bragg Liquid Aminos
    • 1 tablespoon apple cider vinegar
    • 1 flax egg (1 tablespoon flaxseed meal + 3 tablespoons water)
    • 1 cup fresh green beans, trimmed
    • 2 cups shredded regular bok choy
    • 3 cups cooked brown rice
    • Lime wedges for serving

    Instructions

    1. Prepare the brown rice using my Perfect Brown Rice recipe. In a saucepan, cook 1 cup of uncooked brown rice in 1 teaspoon of olive oil until lightly browned. Place 2 basil leaves on top, add 2 cups of filtered water, cover, and bring to a boil. Reduce heat to a simmer and cook until all the water has evaporated, about 40 minutes.
    2. While the rice is cooking, heat the remaining olive oil in a wok or large frying pan over medium heat. Add minced garlic and cook until lightly golden, being careful not to burn it.
    3. Add the sliced red chili peppers, raw cashew nuts, and shredded coconut to the pan. Stir and cook for about 2 minutes.
    4. In a small bowl, mix together the stevia powder, Bragg Liquid Aminos, and apple cider vinegar. Pour this mixture into the pan and cook for another minute.
    5. Push the stir-fry to one side of the pan and pour in the flax egg on the opposite side. Cook and stir the flax egg for about a minute, then incorporate it into the stir-fry mixture.
    6. Add the fresh green beans, shredded bok choy, and cooked brown rice to the pan. Cook and stir for another minute until the bok choy is wilted but the green beans remain slightly crunchy.
    7. Spoon the stir-fry into a serving dish and serve with lime wedges on the side for squeezing over the rice.

    Tips

    For a more robust flavor, consider toasting the shredded coconut before adding it to the stir-fry. Keep a close eye on the garlic as it cooks to prevent it from burning, which can result in a bitter taste. If you prefer a milder dish, reduce the amount of chili peppers, or remove the seeds.

    Variations & Substitutions

    Feel free to customize this recipe to suit your dietary needs or preferences. Substitute Bragg Liquid Aminos with soy sauce or tamari. Swap green beans with sugar snap peas or bell peppers for a different texture. For a nut-free version, replace cashews with sunflower seeds. If you’re not a fan of flax eggs, a regular egg can be used instead.

    Storage

    Store any leftovers in an airtight container in the refrigerator for up to 3 days. Reheat in a pan over medium heat for best results. Avoid microwaving as it can change the texture of the ingredients.

    FAQ

    Can I use white rice instead of brown rice?

    Yes, you can substitute white rice for brown rice, but keep in mind that brown rice offers more fiber and nutrients. If using white rice, adjust the cooking time accordingly as it cooks faster than brown rice.

    Is there a way to make this dish spicier?

    To increase the spice level, you can add more chili peppers or include a dash of cayenne pepper. Alternatively, serve the dish with a side of chili sauce for those who prefer extra heat.

    How do I make a flax egg?

    A flax egg is a vegan substitute for a regular egg. To make one, mix 1 tablespoon of flaxseed meal with 3 tablespoons of water. Let it sit for about 5 minutes until it thickens and becomes gelatinous.

    Nutrition

    This recipe is packed with nutrients. Brown rice provides complex carbohydrates and fiber, while bok choy and green beans add vitamins and minerals. Cashew nuts offer healthy fats and protein, making this dish both satisfying and nutritious. Each serving is approximately 350 calories, depending on portion size and specific ingredient brands used.

    Final Thoughts

    Thai Savory Brown Fried Rice is more than just a meal; it’s a delightful blend of flavors and textures that brings the essence of Thai cuisine into your home. Whether you’re reminiscing about the past or creating new memories, this dish is sure to bring warmth and satisfaction to your table. Enjoy the vibrant taste and the joy it brings, just as it did for me in my grandmother’s kitchen.

    Related update: Thai Savory Brown Fried Rice

    Related update: Jambalaya Stew

    Related update: Yorkshire Pudding

  • Masala-Tofu Burger | Made by Meaghan Moineau

    Masala-Tofu Burger | Made by Meaghan Moineau

    Masala-Tofu Burger

    Introduction

    Imagine a family gathering on a warm summer evening, the aroma of spices wafting through the air as laughter echoes in the backyard. This memory always takes me back to the first time I tasted a Masala-Tofu Burger, a delightful fusion of Indian spices and a beloved Western classic. Growing up in a multicultural family, food was always a bridge that connected us, blending flavors and traditions into something special. Today, I’m excited to share this delicious recipe with you, hoping it brings warmth and joy to your own family gatherings.

    Why You’ll Love It

    This Masala-Tofu Burger is a game-changer for anyone looking to add a flavorful twist to their burger repertoire. The combination of aromatic spices, crunchy veggies, and creamy tofu creates a mouthwatering experience that’s both satisfying and healthy. Whether you’re a vegetarian or simply exploring new flavors, this burger is a fantastic option. It’s easy to make, customizable, and perfect for any occasion.

    Ingredients

    • 1 white onion, diced
    • 1 red, orange, or green bell pepper, diced
    • 1 cup frozen peas-carrots mix
    • 2 green chillies, chopped
    • 1 block of tofu, cubed
    • 1 potato, boiled and diced
    • 3 cloves garlic, minced
    • 1 teaspoon black mustard seeds
    • 1 sprig curry leaves
    • A pinch of hing (asafoetida)
    • 1 teaspoon cumin powder
    • 1/2 teaspoon turmeric
    • 1 lemon, juiced
    • Salt to taste
    • 1/4 cup cilantro, finely chopped
    • 1/2 cup Indian breadcrumbs
    • Vegetable oil
    • PAM Original Flavor Spray
    • 1 red or white onion, thickly sliced
    • 2 beefsteak tomatoes, sliced
    • Mint-cilantro chutney spread
    • 4 Portuguese rolls

    Instructions

    1. In a large skillet over medium-high heat, spray a generous amount of PAM and add some oil. Add mustard seeds and saute for 30 seconds until you hear popping noises.
    2. Add the curry leaves carefully as they may pop in hot oil. Then add the onions and peppers, and sweat for about 30 seconds.
    3. Stir in the minced garlic, chopped chilies, and turmeric. Saute for 5-7 minutes until the onions and peppers are soft.
    4. Add the peas-carrots mix, cumin powder, and salt. Continue to saute for 7-10 minutes until all the veggies are cooked through.
    5. In a small bowl, mix cubed tofu with a pinch of turmeric, cumin powder, coarse black pepper, and optional cayenne pepper. Set aside to marinate briefly.
    6. Add the marinated tofu to the skillet and saute until it is slightly browned and crumbly.
    7. Add juice from half a lemon and half of the chopped cilantro. Mix well, then add the diced, boiled potato and toss until everything is coated. Adjust salt and spices to taste.
    8. Mash the mixture with a masher until mushy and the veggies are small. Set aside to cool.
    9. Once cooled, mix in some breadcrumbs with your hands. Form the mixture into four thick patties. Add more breadcrumbs if needed.
    10. Place the patties on a plate, cover with plastic wrap, and refrigerate until ready to cook.
    11. In a small skillet sprayed with PAM over medium-high heat, cook each patty for about 2 minutes on each side until browned and crispy.
    12. Simultaneously, saute the thick onion slices until charred and slightly soft.
    13. Spread a generous amount of mint-cilantro chutney on each side of the Portuguese rolls, then assemble the burger with the patty, onions, tomatoes, and cilantro leaves.
    14. Serve with a slice of lemon and reduced-fat chips on the side.

    Tips

    • Make sure to press the tofu well before marinating to remove excess moisture for a better texture.
    • If you like it spicy, feel free to add more green chilies or cayenne pepper to the mix.
    • For a gluten-free option, use gluten-free breadcrumbs or crushed cornflakes.

    Variations & Substitutions

    Feel free to get creative with this recipe by adding your favorite veggies to the mix, such as mushrooms or spinach. You can also swap tofu for paneer or chickpeas for a different protein source. If you prefer a different type of bread, whole-grain buns or lettuce wraps are excellent alternatives.

    Storage

    These Masala-Tofu Patties can be made ahead of time and stored in the refrigerator for up to 3 days. Alternatively, you can freeze them for up to a month. When ready to enjoy, simply thaw and reheat them in a skillet or oven.

    FAQ

    Can I make these burgers vegan?

    Absolutely! This recipe is already vegan as it uses tofu as the main protein source and skips any dairy or eggs. Just ensure your chutney spread is also vegan-friendly.

    Can I grill these patties instead of pan-frying?

    Yes, you can grill the patties for a smokier flavor. Just make sure to brush them with some oil to prevent sticking and handle them carefully as they can be more delicate than regular meat patties.

    What can I serve with these burgers?

    A fresh green salad, sweet potato fries, or roasted vegetables make excellent sides. You can also pair it with a refreshing yogurt dip or mango chutney for an extra burst of flavor.

    Nutrition

    While I don’t have exact nutritional information for this recipe, it’s packed with healthy ingredients. Tofu provides protein, while the variety of vegetables offers vitamins and minerals. Using a whole-grain bun can increase the fiber content, making this meal as nutritious as it is delicious.

    Final Thoughts

    The Masala-Tofu Burger is a wonderful way to explore new flavors while enjoying a comforting classic. It’s a tribute to the fusion of cultures and the joy of shared meals. I hope this recipe becomes a favorite in your home, bringing smiles and satisfaction to your table. Happy cooking!

    Related update: Masala-Tofu Burger

    Related update: Indian Butter Chicken

  • Tuscan White Bean Soup with Olive Oil and Rosemary | Made by Meaghan Moineau

    Tuscan White Bean Soup with Olive Oil and Rosemary | Made by Meaghan Moineau

    Tuscan White Bean Soup with Olive Oil and Rosemary

    Introduction

    As the leaves start to change and the air becomes crisp, my kitchen transforms into a haven of warmth and comfort. One of my fondest memories is coming home on a chilly autumn day to the soothing aroma of my grandmother’s Tuscan White Bean Soup simmering on the stove. This recipe, passed down through generations, is not just a meal; it’s a heartfelt embrace, a reminder of home and love. Today, I’m sharing this cherished recipe with you, hoping it brings as much joy and warmth to your home as it does to mine.

    Why You’ll Love It

    This Tuscan White Bean Soup is a celebration of simplicity and flavor. Here’s why you’ll fall in love with it:

    • Easy to Make: With minimal ingredients and hands-off cooking in a slow cooker, this recipe is perfect for busy days.
    • Comforting and Nutritious: Packed with protein and fiber from the beans, this soup is both satisfying and nourishing.
    • Rich in Flavor: The olive oil and rosemary add a delightful fragrance and depth of flavor that elevates this humble soup.
    • Versatile: It can easily be adapted to suit your preferences or dietary needs.

    Ingredients

    • 1 bay leaf
    • 1 sprig of fresh rosemary
    • 3 cloves of garlic, minced
    • 2 tablespoons of olive oil
    • 1 large onion, chopped
    • 1 teaspoon of salt, or to taste
    • 8 cups of water
    • 2 cups of dried white beans, rinsed

    Instructions

    1. Rinse the beans thoroughly and place them in a 7-quart slow cooker.
    2. Add the water, onion, garlic, and bay leaf to the slow cooker.
    3. Cover and cook on LOW for about 8 hours, or until the beans are tender.
    4. Remove the bay leaf.
    5. Using a handheld immersion blender, puree the remaining ingredients to the desired texture.
    6. Add salt to taste.
    7. Ladle the soup into bowls.
    8. Drizzle with olive oil, sprinkle with rosemary, and serve.

    Tips

    • Soak the Beans: For even cooking, consider soaking the beans overnight. This can also reduce cooking time slightly.
    • Adjust Consistency: If you prefer a chunkier soup, blend just half of the beans and leave the rest whole.
    • Fresh Is Best: Use fresh rosemary and high-quality olive oil for the best flavor.

    Variations & Substitutions

    This soup is wonderfully adaptable:

    • Meat Lovers: Add cooked Italian sausage or pancetta for a heartier version.
    • Vegetables: Incorporate chopped spinach or kale for added greens.
    • Herb Substitutions: If rosemary isn’t your favorite, try thyme or sage for a different flavor profile.
    • Vegan Option: Ensure your toppings are vegan-friendly by skipping any cheese garnishes.

    Storage

    This soup stores beautifully, making it perfect for meal prep:

    • Refrigerator: Store in an airtight container for up to 5 days.
    • Freezer: Freeze in individual portions for up to 3 months. Thaw in the refrigerator overnight before reheating.

    FAQ

    Can I use canned beans instead of dried beans?

    Yes, you can use canned beans to save time. Use about 4 cups of drained and rinsed canned beans, and reduce the cooking time to about 2 hours on LOW. Adjust the liquid accordingly, as canned beans are already cooked.

    What can I use if I don’t have an immersion blender?

    If you don’t have an immersion blender, you can transfer the soup in batches to a regular blender. Be sure to hold the lid down with a kitchen towel to prevent hot splashes.

    Nutrition

    Each serving of this Tuscan White Bean Soup is packed with nutrients:

    • Calories: Approximately 220
    • Protein: 12g
    • Fiber: 8g
    • Fat: 6g (primarily from healthy olive oil)
    • Sodium: Varies based on the amount of salt added

    Final Thoughts

    There’s something truly magical about a bowl of homemade soup. This Tuscan White Bean Soup is more than just a recipe; it’s a connection to cherished memories and a testament to the power of simple ingredients. Whether you’re gathering around the table with family or enjoying a quiet moment to yourself, this soup promises warmth and contentment. I hope it becomes a beloved staple in your household, just as it has in mine. Enjoy!

    Related update: Tuscan White Bean Soup with Olive Oil and Rosemary

    Related update: Spare Ribs

    Related update: Minestrone