Tag: Spicy

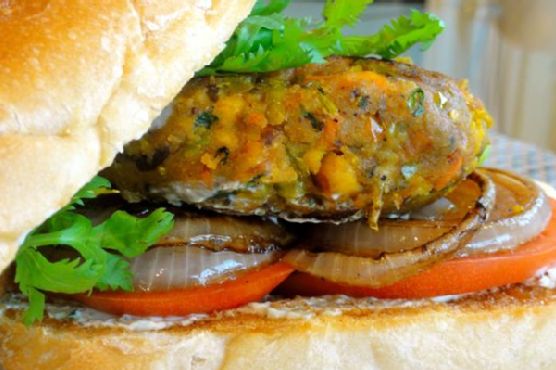
  • Masala-Tofu Burger | Made by Meaghan Moineau

    Masala-Tofu Burger | Made by Meaghan Moineau

    Masala-Tofu Burger

    Introduction

    Imagine a family gathering on a warm summer evening, the aroma of spices wafting through the air as laughter echoes in the backyard. This memory always takes me back to the first time I tasted a Masala-Tofu Burger, a delightful fusion of Indian spices and a beloved Western classic. Growing up in a multicultural family, food was always a bridge that connected us, blending flavors and traditions into something special. Today, I’m excited to share this delicious recipe with you, hoping it brings warmth and joy to your own family gatherings.

    Why You’ll Love It

    This Masala-Tofu Burger is a game-changer for anyone looking to add a flavorful twist to their burger repertoire. The combination of aromatic spices, crunchy veggies, and creamy tofu creates a mouthwatering experience that’s both satisfying and healthy. Whether you’re a vegetarian or simply exploring new flavors, this burger is a fantastic option. It’s easy to make, customizable, and perfect for any occasion.

    Ingredients

    • 1 white onion, diced
    • 1 red, orange, or green bell pepper, diced
    • 1 cup frozen peas-carrots mix
    • 2 green chillies, chopped
    • 1 block of tofu, cubed
    • 1 potato, boiled and diced
    • 3 cloves garlic, minced
    • 1 teaspoon black mustard seeds
    • 1 sprig curry leaves
    • A pinch of hing (asafoetida)
    • 1 teaspoon cumin powder
    • 1/2 teaspoon turmeric
    • 1 lemon, juiced
    • Salt to taste
    • 1/4 cup cilantro, finely chopped
    • 1/2 cup Indian breadcrumbs
    • Vegetable oil
    • PAM Original Flavor Spray
    • 1 red or white onion, thickly sliced
    • 2 beefsteak tomatoes, sliced
    • Mint-cilantro chutney spread
    • 4 Portuguese rolls

    Instructions

    1. In a large skillet over medium-high heat, spray a generous amount of PAM and add some oil. Add mustard seeds and saute for 30 seconds until you hear popping noises.
    2. Add the curry leaves carefully as they may pop in hot oil. Then add the onions and peppers, and sweat for about 30 seconds.
    3. Stir in the minced garlic, chopped chilies, and turmeric. Saute for 5-7 minutes until the onions and peppers are soft.
    4. Add the peas-carrots mix, cumin powder, and salt. Continue to saute for 7-10 minutes until all the veggies are cooked through.
    5. In a small bowl, mix cubed tofu with a pinch of turmeric, cumin powder, coarse black pepper, and optional cayenne pepper. Set aside to marinate briefly.
    6. Add the marinated tofu to the skillet and saute until it is slightly browned and crumbly.
    7. Add juice from half a lemon and half of the chopped cilantro. Mix well, then add the diced, boiled potato and toss until everything is coated. Adjust salt and spices to taste.
    8. Mash the mixture with a masher until mushy and the veggies are small. Set aside to cool.
    9. Once cooled, mix in some breadcrumbs with your hands. Form the mixture into four thick patties. Add more breadcrumbs if needed.
    10. Place the patties on a plate, cover with plastic wrap, and refrigerate until ready to cook.
    11. In a small skillet sprayed with PAM over medium-high heat, cook each patty for about 2 minutes on each side until browned and crispy.
    12. Simultaneously, saute the thick onion slices until charred and slightly soft.
    13. Spread a generous amount of mint-cilantro chutney on each side of the Portuguese rolls, then assemble the burger with the patty, onions, tomatoes, and cilantro leaves.
    14. Serve with a slice of lemon and reduced-fat chips on the side.

    Tips

    • Make sure to press the tofu well before marinating to remove excess moisture for a better texture.
    • If you like it spicy, feel free to add more green chilies or cayenne pepper to the mix.
    • For a gluten-free option, use gluten-free breadcrumbs or crushed cornflakes.

    Variations & Substitutions

    Feel free to get creative with this recipe by adding your favorite veggies to the mix, such as mushrooms or spinach. You can also swap tofu for paneer or chickpeas for a different protein source. If you prefer a different type of bread, whole-grain buns or lettuce wraps are excellent alternatives.

    Storage

    These Masala-Tofu Patties can be made ahead of time and stored in the refrigerator for up to 3 days. Alternatively, you can freeze them for up to a month. When ready to enjoy, simply thaw and reheat them in a skillet or oven.

    FAQ

    Can I make these burgers vegan?

    Absolutely! This recipe is already vegan as it uses tofu as the main protein source and skips any dairy or eggs. Just ensure your chutney spread is also vegan-friendly.

    Can I grill these patties instead of pan-frying?

    Yes, you can grill the patties for a smokier flavor. Just make sure to brush them with some oil to prevent sticking and handle them carefully as they can be more delicate than regular meat patties.

    What can I serve with these burgers?

    A fresh green salad, sweet potato fries, or roasted vegetables make excellent sides. You can also pair it with a refreshing yogurt dip or mango chutney for an extra burst of flavor.

    Nutrition

    While I don’t have exact nutritional information for this recipe, it’s packed with healthy ingredients. Tofu provides protein, while the variety of vegetables offers vitamins and minerals. Using a whole-grain bun can increase the fiber content, making this meal as nutritious as it is delicious.

    Final Thoughts

    The Masala-Tofu Burger is a wonderful way to explore new flavors while enjoying a comforting classic. It’s a tribute to the fusion of cultures and the joy of shared meals. I hope this recipe becomes a favorite in your home, bringing smiles and satisfaction to your table. Happy cooking!

    Related update: Masala-Tofu Burger

    Related update: Indian Butter Chicken
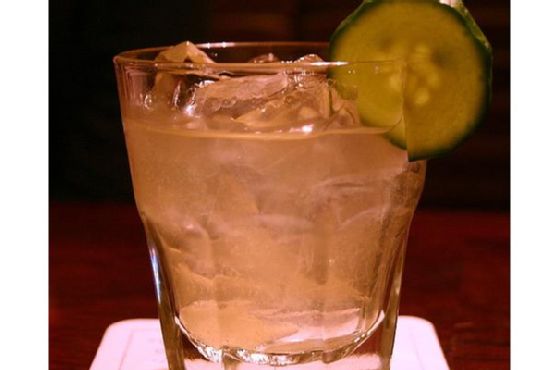
  • Hot Charlotte Cocktail | Made by Meaghan Moineau

    Hot Charlotte Cocktail | Made by Meaghan Moineau

    Hot Charlotte Cocktail

    Why You’ll Love It

    There’s something undeniably charming about the Hot Charlotte Cocktail. It’s a delightful blend of refreshing cucumber and a hint of heat, perfect for those who appreciate a cocktail with a bit of character. Whether you’re hosting a summer barbecue or enjoying a cozy evening by yourself, this drink is sure to become a favorite. I remember the first time I tried this cocktail at a small bar tucked away in a bustling city. It was a warm summer evening, and the mix of cucumber and Tobasco was both unexpected and refreshing, leaving a lasting impression. Now, I’m thrilled to share this recipe with you, hoping it brings as much joy to your gatherings as it has to mine.

    Ingredients

    • 2 oz Hendrick’s Gin
    • 0.5 oz St. Germain
    • 0.75 oz Lemon Juice
    • 3 slices Cucumber
    • 2 dashes Tobasco

    Instructions

    1. In a cocktail glass, muddle the cucumber slices with Tobasco until the cucumber is well broken down and the flavors meld together.
    2. Add Hendrick’s Gin, St. Germain, and lemon juice to the glass.
    3. Shake well until the mixture is chilled and properly blended.
    4. Strain the mixture over ice in a fresh cocktail glass.
    5. Garnish with a cucumber wheel.

    Tips

    To bring out the best flavors in your Hot Charlotte Cocktail, use fresh, high-quality cucumbers and lemons. The freshness of these ingredients will enhance the overall taste and aroma of your drink. Don’t be afraid to adjust the amount of Tobasco to suit your heat preference. Remember, the goal is to balance the heat and the refreshing elements.

    Variations & Substitutions

    If you’re looking to experiment, consider substituting the Hendrick’s Gin with another floral gin to see how the flavors change. You might also try adding a splash of soda water for a fizzy twist or using lime juice instead of lemon juice for a slightly different citrusy zing. For those who prefer a milder version, reduce the Tobasco to one dash or substitute it with a milder hot sauce.

    Storage

    The Hot Charlotte Cocktail is best enjoyed fresh. However, if you must prepare it in advance, you can mix the gin, St. Germain, and lemon juice ahead of time and store in the refrigerator. Just remember to add the muddled cucumber and Tobasco fresh when you’re ready to serve.

    FAQ

    Can I make this cocktail non-alcoholic?

    Absolutely! To make a non-alcoholic version, substitute the gin with a non-alcoholic spirit and the St. Germain with an elderflower cordial. The drink will still have the same refreshing and spicy notes.

    What can I use as a garnish if I don’t have cucumber?

    If you’re out of cucumbers, consider using a lemon wheel or a sprig of mint as an alternative garnish. Both will complement the cocktail’s flavors beautifully.

    Nutrition

    While cocktails aren’t typically consumed for their nutritional value, the Hot Charlotte brings some freshness with cucumber, which is low in calories and contains a lot of water, helping with hydration. Be mindful, though, that alcohol can contribute to your daily calorie intake.

    Final Thoughts

    The Hot Charlotte Cocktail is a delightful blend of spice and refreshment, perfect for any occasion. Its unique combination of flavors offers something a bit different from the usual cocktail repertoire, making it a standout choice for adventurous cocktail lovers. Whether you’re reminiscing about a summer evening or creating new memories, this cocktail is sure to become a beloved staple in your drink rotation. Enjoy the process of making it, and feel free to tweak the recipe to suit your personal taste. Cheers to good company and great cocktails!

    Related update: Hot Charlotte Cocktail

    Related update: Fresh Peach Margarita With Lime Sugar

  • Ginger Snap and Pumpkin Ice Cream Sandwiches | Made by Meaghan Moineau

    Ginger Snap and Pumpkin Ice Cream Sandwiches

    There’s something enchantingly nostalgic about ice cream sandwiches. They remind me of warm summer evenings spent on my grandmother’s porch, where the world seemed to pause for a moment. With a gentle breeze and the laughter of family in the background, we would savor every bite, letting the creamy goodness melt away the day’s worries. As autumn rolls in, I find myself craving that same delightful treat, reimagined with the rich, spicy flavors of the season. Enter Ginger Snap and Pumpkin Ice Cream Sandwiches—a perfect fusion of summer nostalgia and autumn warmth.

    Why You’ll Love It

    This recipe is the epitome of seasonal indulgence, combining the creamy richness of homemade pumpkin ice cream with the spicy crunch of ginger snap cookies. It’s the best of both worlds: a cool treat for those sunny fall days and a comforting spice for the crisp evenings. Each bite is a sensory delight, offering a harmonious blend of flavors and textures that will leave you and your loved ones reaching for seconds.

    Ingredients

    • Whole milk
    • Heavy cream
    • Granulated sugar
    • Ground cinnamon
    • Nutmeg
    • Ground ginger
    • Whole cinnamon stick
    • Kosher salt
    • Egg yolks
    • Canned pumpkin puree
    • Vanilla
    • All-purpose flour
    • Baking soda
    • Ground pepper
    • Unsalted butter
    • Molasses
    • Egg

    Instructions

    1. In a medium saucepan over medium heat, combine the milk, cream, granulated sugar, ginger, ground cinnamon, cinnamon stick, nutmeg, and salt. Heat the mixture until steaming and it begins to foam. Remove from the heat.
    2. In a small bowl, whisk the egg yolks until pale yellow. Gradually whisk in one cup of the warm cream mixture, whisking constantly.
    3. Pour the yolks and cream mixture back into the saucepan and cook over low heat, stirring constantly. Continue cooking until the mixture thickens and coats the back of a spoon.
    4. Place some ice and water into a large bowl and place a smaller bowl inside. Pour the cream mixture through a mesh strainer into the bowl. Stir in the pumpkin and vanilla, add the cinnamon stick back to the mixture. Chill thoroughly, preferably overnight.
    5. Pour the mixture into the freezer can of an electric ice cream maker and freeze according to the manufacturer’s instructions.
    6. In a small bowl, whisk together the dry ingredients for the cookies.
    7. In the bowl of an electric mixer, beat the butter until soft. Add the sugar and continue beating until smooth and creamy, occasionally scraping down the sides of the bowl.
    8. Stir in the vanilla, molasses, and egg; combine thoroughly. Mix in the dry ingredients gradually until the dough is smooth.
    9. Turn the dough out onto a lightly floured surface and divide in half. Roll each half into a log about 2 inches around. Wrap each log in plastic wrap and roll them lightly to smooth them out. Refrigerate or freeze until firm.
    10. Preheat the oven to 350 degrees and line two baking sheets with parchment.
    11. Slice the dough into 1/4 inch rounds with a serrated knife, being careful to keep their shape. Place the rounds on the baking sheet and sprinkle with granulated or coarse sugar.
    12. Bake for 10-13 minutes, rotating the pans halfway through. Let the cookies cool in the pan for about 2 minutes and then transfer to a wire cooling rack. Dough can be refrigerated for up to five days or frozen for up to three months. Baked cookies can be stored in an air-tight container for approximately a week.

    Tips

    For best results, make sure all your ingredients are at room temperature before starting. This helps everything blend smoothly and evenly. If you’re short on time, the cookies can be prepared ahead and stored, as mentioned, which will make assembling the sandwiches a breeze when your ice cream is ready!

    Variations & Substitutions

    If you’re not a fan of ginger, you can substitute the ginger snap cookies with chocolate chip cookies for a different but equally delightful flavor combination. For a dairy-free version, substitute coconut milk and cream for the whole milk and heavy cream, and use a dairy-free butter alternative for the cookies.

    Storage

    Store any leftover ice cream sandwiches in an airtight container in the freezer. If you want to avoid them sticking together, place a small piece of parchment paper between each sandwich. They should keep well for up to a month, though they’re so delicious they probably won’t last that long!

    FAQ

    Can I make the ice cream without an ice cream maker?

    Yes, you can! Simply pour the chilled mixture into a shallow dish and freeze. Stir the mixture every 30 minutes to break up ice crystals until it’s fully frozen. This method might result in a slightly less creamy texture, but it’s still delicious!

    What can I use instead of canned pumpkin puree?

    If you prefer fresh, you can roast and puree your own pumpkin. Make sure it’s well-drained to avoid excess moisture, which can affect the texture of the ice cream.

    Nutrition

    While these indulgent treats are meant to be enjoyed without too much concern for calories, it’s good to know that they contain wholesome ingredients. Each sandwich offers a balanced mix of carbohydrates, fats, and proteins, along with a dose of dietary fiber from the pumpkin. Plus, the spices bring antioxidants, aiding in overall health. Enjoy them as an occasional treat and savor each delightful bite!

    Final Thoughts

    Ginger Snap and Pumpkin Ice Cream Sandwiches are more than just a dessert; they’re a tribute to cherished memories and the comforting flavors of fall. Whether you’re sharing them with family on a cozy evening or surprising guests at a festive gathering, these sandwiches are sure to bring smiles and spark joy. So, gather your ingredients, embrace the process, and enjoy the delicious rewards of your labor. Happy indulging!

    Related update: Ginger Snap and Pumpkin Ice Cream Sandwiches

    Related update: Apple Dumplings In Fanta Sauce

  • Salmon In Banana Leaf | Made by Meaghan Moineau

    Salmon In Banana Leaf: A Flavorful Island Experience

    Intro

    Salmon in banana leaf is a dish that transports me back to my childhood summers spent on the tropical islands of Southeast Asia. I remember the vibrant markets filled with the aroma of freshly caught fish and the earthy scent of banana leaves. My grandmother would lovingly prepare this dish, infusing each bite with flavors that spoke of her heritage and our family’s history. Today, I’m thrilled to share this recipe with you, so you can create your own flavorful memories around the dinner table.

    Why You’ll Love It

    This dish is a culinary adventure wrapped in the simplicity of banana leaves. The salmon is marinated to perfection, absorbing the savory, sweet, and slightly spicy flavors of the marinade. Steaming in banana leaves adds an earthy aroma and keeps the fish perfectly moist. It’s a healthy, gluten-free meal that’s also visually stunning, perfect for impressing guests or treating yourself to an exotic dinner at home.

    Ingredients

    • Banana leaves
    • 1 teaspoon cinnamon
    • 1 teaspoon fennel seed
    • 2 tablespoons fish sauce
    • 2 cloves garlic, minced
    • 1 tablespoon ginger, minced
    • 3 tablespoons peach preserves
    • 2 red chiles, sliced
    • 1 cup rice
    • 1/4 cup rice wine vinegar
    • 2 salmon steaks
    • 2 scallions, chopped
    • 1 tablespoon sesame oil
    • 2 tablespoons soy sauce
    • 1 star anise
    • 2 tablespoons tahini
    • 2 tablespoons vegetable oil

    Instructions

    1. Mix all marinade ingredients: fish sauce, garlic, ginger, peach preserves, red chiles, rice wine vinegar, sesame oil, soy sauce, and tahini in a bowl.
    2. Place salmon steaks in a large resealable bag or container and pour the marinade over them. Seal and refrigerate for at least 30 minutes, up to 2 hours.
    3. Meanwhile, prepare your scented rice powder by grinding rice, cinnamon, fennel seed, and star anise in a spice grinder until coarsely ground. Leave some larger crumbles for texture.
    4. Remove salmon from the marinade (discard any leftover marinade) and coat each fillet with the scented rice powder. Reserve some powder for future use.
    5. Lay banana leaves flat. Place one salmon fillet in the center of each leaf. Fold one side over the salmon, then the opposite side, followed by folding both ends to create a package.
    6. Place the salmon packets in a steamer basket over boiling water. Steam for about 10-13 minutes until the salmon is cooked through.
    7. For the dipping sauce, heat the remaining marinade ingredients in a small saucepot or microwave-safe dish. Whisk together until warm and blended.
    8. To serve, make a slit in the banana leaves to reveal the salmon. Serve with steamed rice or noodles, corn, and the dipping sauce on the side.

    Tips

    Ensure your banana leaves are pliable by briefly passing them over an open flame or soaking them in hot water. This prevents them from cracking when folding. If you can’t find fresh banana leaves, parchment paper can be a substitute, though it won’t provide the same aromatic quality.

    Variations & Substitutions

    If you prefer a milder flavor, omit the red chiles or reduce the amount. For a different twist, substitute the salmon with your favorite fish, such as tilapia or cod. Vegetarians can replace the fish with thick slices of tofu, adjusting the marinating time to allow the flavors to penetrate fully. For a nutty flavor, add a sprinkle of ground peanuts to the marinade.

    Storage

    Leftover salmon can be stored in the refrigerator for up to 2 days. Keep it wrapped in the banana leaf to retain moisture and flavor. Reheat gently in a steamer or microwave to prevent drying out. The scented rice powder can be stored in an airtight container for up to a month, ready to use for your next culinary creation.

    FAQ

    Can I use frozen salmon for this recipe?

    Yes, frozen salmon can be used, but make sure it is fully thawed before marinating to ensure the flavors are absorbed properly.

    Where can I find banana leaves?

    Banana leaves are often available at Asian grocery stores or specialty markets. They are typically sold fresh or frozen. If using frozen, allow them to thaw before use.

    How can I tell when the salmon is fully cooked?

    The salmon is done when it flakes easily with a fork and has a light pink color throughout. Cooking times may vary slightly depending on the thickness of the fillets.

    Nutrition

    This dish is rich in omega-3 fatty acids, thanks to the salmon, and it offers a balanced profile of protein and healthy fats. The aromatic spices add flavor without the need for excessive salt or sugars, making it a heart-healthy choice. Adjust the oil and soy sauce quantities if you are monitoring your sodium or fat intake.

    Conclusion

    Salmon in banana leaf is more than just a meal—it’s an experience. With its rich flavors and aromatic presentation, it brings a touch of tropical paradise to your dining table. Whether you’re reminiscing about past travels or dreaming of future adventures, this dish is sure to delight your senses and warm your heart. Enjoy preparing and savoring this special recipe, and don’t forget to share it with those you love, creating new memories one delicious bite at a time.

    Related update: Salmon In Banana Leaf

    Related update: Wild Salmon Cakes