Tag: Meaghan Moineau

  • Ginger Snap and Pumpkin Ice Cream Sandwiches | Made by Meaghan Moineau

    Ginger Snap and Pumpkin Ice Cream Sandwiches

    There’s something enchantingly nostalgic about ice cream sandwiches. They remind me of warm summer evenings spent on my grandmother’s porch, where the world seemed to pause for a moment. With a gentle breeze and the laughter of family in the background, we would savor every bite, letting the creamy goodness melt away the day’s worries. As autumn rolls in, I find myself craving that same delightful treat, reimagined with the rich, spicy flavors of the season. Enter Ginger Snap and Pumpkin Ice Cream Sandwiches—a perfect fusion of summer nostalgia and autumn warmth.

    Why You’ll Love It

    This recipe is the epitome of seasonal indulgence, combining the creamy richness of homemade pumpkin ice cream with the spicy crunch of ginger snap cookies. It’s the best of both worlds: a cool treat for those sunny fall days and a comforting spice for the crisp evenings. Each bite is a sensory delight, offering a harmonious blend of flavors and textures that will leave you and your loved ones reaching for seconds.

    Ingredients

    • Whole milk
    • Heavy cream
    • Granulated sugar
    • Ground cinnamon
    • Nutmeg
    • Ground ginger
    • Whole cinnamon stick
    • Kosher salt
    • Egg yolks
    • Canned pumpkin puree
    • Vanilla
    • All-purpose flour
    • Baking soda
    • Ground pepper
    • Unsalted butter
    • Molasses
    • Egg

    Instructions

    1. In a medium saucepan over medium heat, combine the milk, cream, granulated sugar, ginger, ground cinnamon, cinnamon stick, nutmeg, and salt. Heat the mixture until steaming and it begins to foam. Remove from the heat.
    2. In a small bowl, whisk the egg yolks until pale yellow. Gradually whisk in one cup of the warm cream mixture, whisking constantly.
    3. Pour the yolks and cream mixture back into the saucepan and cook over low heat, stirring constantly. Continue cooking until the mixture thickens and coats the back of a spoon.
    4. Place some ice and water into a large bowl and place a smaller bowl inside. Pour the cream mixture through a mesh strainer into the bowl. Stir in the pumpkin and vanilla, add the cinnamon stick back to the mixture. Chill thoroughly, preferably overnight.
    5. Pour the mixture into the freezer can of an electric ice cream maker and freeze according to the manufacturer’s instructions.
    6. In a small bowl, whisk together the dry ingredients for the cookies.
    7. In the bowl of an electric mixer, beat the butter until soft. Add the sugar and continue beating until smooth and creamy, occasionally scraping down the sides of the bowl.
    8. Stir in the vanilla, molasses, and egg; combine thoroughly. Mix in the dry ingredients gradually until the dough is smooth.
    9. Turn the dough out onto a lightly floured surface and divide in half. Roll each half into a log about 2 inches around. Wrap each log in plastic wrap and roll them lightly to smooth them out. Refrigerate or freeze until firm.
    10. Preheat the oven to 350 degrees and line two baking sheets with parchment.
    11. Slice the dough into 1/4 inch rounds with a serrated knife, being careful to keep their shape. Place the rounds on the baking sheet and sprinkle with granulated or coarse sugar.
    12. Bake for 10-13 minutes, rotating the pans halfway through. Let the cookies cool in the pan for about 2 minutes and then transfer to a wire cooling rack. Dough can be refrigerated for up to five days or frozen for up to three months. Baked cookies can be stored in an air-tight container for approximately a week.

    Tips

    For best results, make sure all your ingredients are at room temperature before starting. This helps everything blend smoothly and evenly. If you’re short on time, the cookies can be prepared ahead and stored, as mentioned, which will make assembling the sandwiches a breeze when your ice cream is ready!

    Variations & Substitutions

    If you’re not a fan of ginger, you can substitute the ginger snap cookies with chocolate chip cookies for a different but equally delightful flavor combination. For a dairy-free version, substitute coconut milk and cream for the whole milk and heavy cream, and use a dairy-free butter alternative for the cookies.

    Storage

    Store any leftover ice cream sandwiches in an airtight container in the freezer. If you want to avoid them sticking together, place a small piece of parchment paper between each sandwich. They should keep well for up to a month, though they’re so delicious they probably won’t last that long!

    FAQ

    Can I make the ice cream without an ice cream maker?

    Yes, you can! Simply pour the chilled mixture into a shallow dish and freeze. Stir the mixture every 30 minutes to break up ice crystals until it’s fully frozen. This method might result in a slightly less creamy texture, but it’s still delicious!

    What can I use instead of canned pumpkin puree?

    If you prefer fresh, you can roast and puree your own pumpkin. Make sure it’s well-drained to avoid excess moisture, which can affect the texture of the ice cream.

    Nutrition

    While these indulgent treats are meant to be enjoyed without too much concern for calories, it’s good to know that they contain wholesome ingredients. Each sandwich offers a balanced mix of carbohydrates, fats, and proteins, along with a dose of dietary fiber from the pumpkin. Plus, the spices bring antioxidants, aiding in overall health. Enjoy them as an occasional treat and savor each delightful bite!

    Final Thoughts

    Ginger Snap and Pumpkin Ice Cream Sandwiches are more than just a dessert; they’re a tribute to cherished memories and the comforting flavors of fall. Whether you’re sharing them with family on a cozy evening or surprising guests at a festive gathering, these sandwiches are sure to bring smiles and spark joy. So, gather your ingredients, embrace the process, and enjoy the delicious rewards of your labor. Happy indulging!

    Related update: Ginger Snap and Pumpkin Ice Cream Sandwiches

    Related update: Apple Dumplings In Fanta Sauce

  • Tuscan White Bean Soup with Olive Oil and Rosemary | Made by Meaghan Moineau

    Tuscan White Bean Soup with Olive Oil and Rosemary | Made by Meaghan Moineau

    Tuscan White Bean Soup with Olive Oil and Rosemary

    Introduction

    As the leaves start to change and the air becomes crisp, my kitchen transforms into a haven of warmth and comfort. One of my fondest memories is coming home on a chilly autumn day to the soothing aroma of my grandmother’s Tuscan White Bean Soup simmering on the stove. This recipe, passed down through generations, is not just a meal; it’s a heartfelt embrace, a reminder of home and love. Today, I’m sharing this cherished recipe with you, hoping it brings as much joy and warmth to your home as it does to mine.

    Why You’ll Love It

    This Tuscan White Bean Soup is a celebration of simplicity and flavor. Here’s why you’ll fall in love with it:

    • Easy to Make: With minimal ingredients and hands-off cooking in a slow cooker, this recipe is perfect for busy days.
    • Comforting and Nutritious: Packed with protein and fiber from the beans, this soup is both satisfying and nourishing.
    • Rich in Flavor: The olive oil and rosemary add a delightful fragrance and depth of flavor that elevates this humble soup.
    • Versatile: It can easily be adapted to suit your preferences or dietary needs.

    Ingredients

    • 1 bay leaf
    • 1 sprig of fresh rosemary
    • 3 cloves of garlic, minced
    • 2 tablespoons of olive oil
    • 1 large onion, chopped
    • 1 teaspoon of salt, or to taste
    • 8 cups of water
    • 2 cups of dried white beans, rinsed

    Instructions

    1. Rinse the beans thoroughly and place them in a 7-quart slow cooker.
    2. Add the water, onion, garlic, and bay leaf to the slow cooker.
    3. Cover and cook on LOW for about 8 hours, or until the beans are tender.
    4. Remove the bay leaf.
    5. Using a handheld immersion blender, puree the remaining ingredients to the desired texture.
    6. Add salt to taste.
    7. Ladle the soup into bowls.
    8. Drizzle with olive oil, sprinkle with rosemary, and serve.

    Tips

    • Soak the Beans: For even cooking, consider soaking the beans overnight. This can also reduce cooking time slightly.
    • Adjust Consistency: If you prefer a chunkier soup, blend just half of the beans and leave the rest whole.
    • Fresh Is Best: Use fresh rosemary and high-quality olive oil for the best flavor.

    Variations & Substitutions

    This soup is wonderfully adaptable:

    • Meat Lovers: Add cooked Italian sausage or pancetta for a heartier version.
    • Vegetables: Incorporate chopped spinach or kale for added greens.
    • Herb Substitutions: If rosemary isn’t your favorite, try thyme or sage for a different flavor profile.
    • Vegan Option: Ensure your toppings are vegan-friendly by skipping any cheese garnishes.

    Storage

    This soup stores beautifully, making it perfect for meal prep:

    • Refrigerator: Store in an airtight container for up to 5 days.
    • Freezer: Freeze in individual portions for up to 3 months. Thaw in the refrigerator overnight before reheating.

    FAQ

    Can I use canned beans instead of dried beans?

    Yes, you can use canned beans to save time. Use about 4 cups of drained and rinsed canned beans, and reduce the cooking time to about 2 hours on LOW. Adjust the liquid accordingly, as canned beans are already cooked.

    What can I use if I don’t have an immersion blender?

    If you don’t have an immersion blender, you can transfer the soup in batches to a regular blender. Be sure to hold the lid down with a kitchen towel to prevent hot splashes.

    Nutrition

    Each serving of this Tuscan White Bean Soup is packed with nutrients:

    • Calories: Approximately 220
    • Protein: 12g
    • Fiber: 8g
    • Fat: 6g (primarily from healthy olive oil)
    • Sodium: Varies based on the amount of salt added

    Final Thoughts

    There’s something truly magical about a bowl of homemade soup. This Tuscan White Bean Soup is more than just a recipe; it’s a connection to cherished memories and a testament to the power of simple ingredients. Whether you’re gathering around the table with family or enjoying a quiet moment to yourself, this soup promises warmth and contentment. I hope it becomes a beloved staple in your household, just as it has in mine. Enjoy!

    Related update: Tuscan White Bean Soup with Olive Oil and Rosemary

    Related update: Spare Ribs

    Related update: Minestrone

  • Cavatappi pasta with salmon crab surimi | Made by Meaghan Moineau

    Cavatappi pasta with salmon crab surimi | Made by Meaghan Moineau

    Cavatappi Pasta with Salmon Crab Surimi

    Introduction

    There’s something truly comforting about a bowl of pasta, especially when it’s combined with the flavors of the sea. Growing up, I fondly remember Sunday dinners at my grandmother’s house where seafood was a staple. The aromatic blend of garlic, fresh herbs, and the briny essence of seafood would fill the kitchen, inviting everyone to gather around the table. This Cavatappi pasta with salmon crab surimi is a modern twist on those cherished meals, bringing together the heartiness of pasta and the delicate flavors of seafood. It’s a dish that feels like a warm hug – perfect for any occasion.

    Why You’ll Love It

    This recipe is a delightful fusion of flavors and textures that will captivate your taste buds. Here’s why you’ll fall in love with this dish:

    • Quick and Easy: Despite its sophisticated taste, this dish can be whipped up in less than 30 minutes, making it perfect for busy weeknights.
    • Flavorful: The combination of garlic, fresh herbs, and seafood creates a rich and satisfying flavor profile.
    • Nutritious: Packed with protein from salmon and surimi, this dish also offers the goodness of tomatoes and fresh herbs.
    • Versatile: Easily adaptable with different types of pasta or seafood depending on your preference or what you have on hand.

    Ingredients

    • Surimi crab sticks
    • Dried basil
    • Fresh basil
    • Fresh parsley
    • Garlic
    • Olive oil
    • Parmesan cheese
    • Cavatappi pasta
    • Pepper
    • Plum tomatoes
    • Red wine
    • Canned salmon fillets
    • Salt
    • Sugar
    • Tomato puree

    Instructions

    1. Heat olive oil in a large pan over medium heat. Sauté the garlic for about 1 minute, being careful not to burn it.
    2. Add the canned salmon fillets and surimi crab sticks to the pan. Stir and let them simmer briefly to meld the flavors.
    3. Chop the plum tomatoes and add them to the pan along with the tomato puree, dried basil, fresh parsley, and a splash of red wine. Mix well to combine.
    4. Sprinkle in a pinch of sugar, then season with salt and pepper to taste. Stir everything together and let it simmer for 2-3 minutes to allow the flavors to develop.
    5. While the sauce is simmering, cook the Cavatappi pasta according to the package instructions. Once cooked, drain the pasta, reserving a little of the cooking water.
    6. Combine the cooked pasta with the sauce, tossing gently to coat. If the sauce is too thick, add a spoonful of the reserved pasta cooking water to adjust the consistency.
    7. Serve the pasta immediately, sprinkled with Parmesan cheese and fresh, chopped basil for a burst of flavor.

    Tips

    • For a deeper flavor, use a good quality red wine for the sauce. It adds richness and depth.
    • Be sure not to overcook the garlic to avoid a bitter taste. It should be fragrant and golden.
    • Reserve some pasta water; its starch content helps the sauce adhere to the pasta better.

    Variations & Substitutions

    • If you prefer, you can substitute the Cavatappi pasta with any other pasta shape you have on hand, such as penne or fusilli.
    • Feel free to use fresh salmon if available. Simply cook it alongside the garlic before adding the surimi.
    • For a vegetarian option, replace the seafood with sautéed mushrooms or zucchini for a hearty, earthy flavor.

    Storage

    Leftover pasta can be stored in an airtight container in the refrigerator for up to 3 days. To reheat, add a splash of water or broth to the pasta and warm it gently on the stove or in the microwave. This will help retain the sauce’s creamy texture.

    FAQ

    Can I use a different type of seafood?

    Absolutely! This recipe is versatile and works well with various seafood options. Shrimp, scallops, or even clams can be excellent substitutes or additions.

    What can I use instead of red wine?

    If you prefer not to use wine, you can substitute it with vegetable or seafood broth for added flavor. A splash of balsamic vinegar can also mimic the acidity of wine.

    Nutrition

    This dish is a good source of protein and healthy fats, thanks to the salmon and olive oil. It’s also rich in vitamins from the fresh herbs and tomatoes, making it a balanced meal option.

    Final Thoughts

    Cavatappi pasta with salmon crab surimi is a delightful dish that combines the comforting nature of pasta with the fresh, vibrant flavors of the sea. It’s a recipe that offers both nostalgia and innovation, perfect for sharing with family and friends. Whether you’re a seasoned chef or a home cook looking to try something new, this recipe is sure to become a favorite in your repertoire. Enjoy every bite and the memories it creates around your table.

    Related update: Cavatappi pasta with salmon crab surimi

    Related update: Kohlrabi Salad With Apple, Bacon, and Snow Peas

  • Venison Stew | Made by Meaghan Moineau

    Venison Stew | Made by Meaghan Moineau

    Hearty Venison Stew

    Welcome to a journey of flavor and warmth with this classic Venison Stew recipe. As the weather turns crisp and the leaves begin to fall, there’s nothing quite like a stew simmering on the stove to bring comfort and joy. This recipe is not just a dish; it’s a memory. I remember, as a child, visiting my grandparents’ cabin nestled in the woods. My grandfather would often return from a morning hunt with venison, and my grandmother would transform it into the most delicious stew. The aroma would fill the cabin, mingling with the scent of pine and the crackling wood fire. It’s a memory that has stayed with me, and I’m thrilled to share this special recipe with you.

    Why You’ll Love It

    This venison stew is a celebration of rich, earthy flavors and tender meat. Here’s why you’ll fall head over heels for it:

    • Flavorful and Hearty: Each bite is packed with the robust flavors of venison and vegetables, simmered to perfection.
    • Nutritious: Venison is a lean protein source that’s rich in vitamins and minerals.
    • Perfect for Any Occasion: Whether it’s a family dinner or a cozy night in, this stew is a crowd-pleaser.
    • Memorable: It’s a dish that brings people together, creating cherished memories around the table.

    Ingredients

    • 2 pounds venison stew meat
    • 1 cup flour, plus 3 tablespoons for thickening
    • 2 tablespoons vegetable oil
    • 4 cups water
    • 2 beef bouillon cubes
    • 4 large potatoes, peeled and diced
    • 1 large onion, chopped
    • 1 cup baby carrots, sliced
    • 4 stalks celery, sliced
    • 1 can mushrooms, drained
    • 1 green bell pepper, chopped
    • Salt and pepper to taste

    Instructions

    1. Cut the venison, potatoes, onion, baby carrots, celery, mushrooms, and green bell pepper into 1-inch pieces.
    2. In a large bowl, mix the venison with 1 cup of flour, salt, and pepper to coat evenly.
    3. In a large pot, heat the vegetable oil over medium-high heat. Brown the venison on all sides.
    4. Add the water and beef bouillon cubes to the pot. Bring to a boil, then reduce the heat and let it simmer for 2 hours.
    5. After 2 hours, add the potatoes, onion, carrots, celery, mushrooms, and green bell pepper to the pot. Simmer for an additional 30 minutes.
    6. In a small bowl, mix the remaining 3 tablespoons of flour with 1 cup of cold water. Stir this mixture into the stew to thicken.
    7. Continue to simmer for another 5-10 minutes until the stew has thickened to your desired consistency. Adjust seasoning with salt and pepper if needed.

    Tips

    • Be Patient: Allowing the venison to slowly cook over a couple of hours ensures it becomes tender and flavorful.
    • Consistent Cuts: Cutting the vegetables and meat into uniform sizes ensures even cooking.
    • Thickening Tips: If you prefer a thicker stew, add an additional tablespoon of flour to the thickening mixture.

    Variations & Substitutions

    • Meat Alternatives: If venison is not available, you can substitute it with beef or lamb for a different but equally delicious experience.
    • Vegetables: Feel free to add or substitute other vegetables such as parsnips or turnips for added depth and flavor.
    • Spices: Enhance the flavor with herbs like thyme, rosemary, or bay leaves.

    Storage

    Leftover venison stew can be stored in an airtight container in the refrigerator for up to 3 days. It also freezes well; simply place it in a freezer-safe container, where it can be stored for up to 3 months. To reheat, thaw overnight in the refrigerator and warm on the stove over medium heat until heated through.

    FAQ

    Can I use a slow cooker for this recipe?

    Absolutely! After browning the venison, transfer it along with all the other ingredients into a slow cooker. Cook on low for 6-8 hours or until the meat is tender.

    What can I serve with venison stew?

    This stew pairs wonderfully with crusty bread or a side of mashed potatoes. A fresh green salad also complements the hearty flavors beautifully.

    Nutrition

    Venison is a lean protein source that’s low in fat and calories, making this stew a nutritious option. It provides essential nutrients such as iron, zinc, and B vitamins. Combined with a medley of vegetables, this dish is both satisfying and wholesome.

    Final Thoughts

    This venison stew is more than just a meal; it’s an experience of warmth, nostalgia, and community. Whether you’re reminiscing about family gatherings or creating new memories, this stew is sure to become a treasured recipe in your collection. I hope you enjoy making and sharing it as much as I do. Bon appétit!

    Related update: Venison Stew

    Related update: Cavatappi pasta with salmon crab surimi

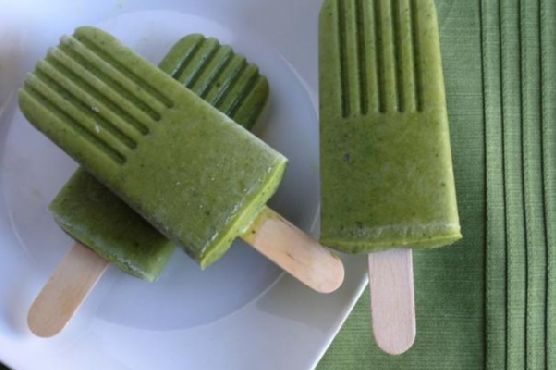
  • Green Monster Ice Pops | Made by Meaghan Moineau

    Green Monster Ice Pops | Made by Meaghan Moineau

    Green Monster Ice Pops

    There’s something magical about the refreshing taste of a homemade ice pop on a warm summer day. Growing up, I fondly remember the excitement of racing to the freezer, eagerly anticipating the moment when the ice pops would be ready. Those childhood memories inspired this recipe for Green Monster Ice Pops—a healthy twist on a classic treat that the whole family can enjoy. Packed with wholesome ingredients, these ice pops are not only delicious but also nutrient-rich, perfect for a guilt-free indulgence.

    Why You’ll Love It

    These Green Monster Ice Pops are the perfect blend of creamy and refreshing. You’ll love them because:

    • They’re incredibly easy to make, requiring just a few simple steps.
    • The combination of avocado and banana provides a natural creaminess without the need for dairy.
    • They’re packed with nutrients from spinach and mango, making them a healthy snack option.
    • They’re naturally sweetened with banana and honey, with the option to add more sweetness if desired.
    • Kids love the fun green color and delicious taste!

    Ingredients

    • 1 cup unsweetened almond milk
    • 1 ripe avocado
    • 1 cup baby spinach
    • 1 ripe banana
    • 2 tablespoons honey
    • 1 cup fresh mango, chopped

    Instructions

    1. Place all ingredients into a blender and mix well until smooth.
    2. Taste the smoothie. If it’s not sweet enough, add 1 to 2 tablespoons of maple syrup or additional honey and blend again.
    3. Pour the smoothie mixture into ice pop molds.
    4. Insert a wooden popsicle stick into each mold, leaving about a quarter of the stick above the mold.
    5. Place the molds into the freezer for 2-3 hours until fully frozen.
    6. Once frozen, remove the ice pops from the molds and enjoy!

    Tips

    • Ensure the avocado is ripe to achieve the best creamy texture.
    • For easier removal, run the molds under warm water for a few seconds to loosen the ice pops.
    • Use silicone molds for easy removal and less mess.

    Variations & Substitutions

    One of the best things about this recipe is its versatility. Here are some ideas to mix it up:

    • Substitute the almond milk: Use coconut milk for a tropical twist or regular milk if you prefer dairy.
    • Add-ins: Try adding chia seeds or flaxseeds for an extra nutritional boost.
    • Fruit swaps: Swap mango for pineapple or berries for a different flavor profile.

    Storage

    Once the ice pops are fully frozen, you can store them in the molds or remove them and place them in a freezer-safe bag or container. They will keep well for up to 1 month in the freezer. Just be sure to keep them well-sealed to prevent freezer burn.

    FAQ

    Can I make these ice pops without a blender?

    While a blender is recommended for achieving a smooth consistency, you could use a food processor or mash the ingredients by hand. However, the texture might not be as creamy.

    Are these ice pops suitable for children?

    Absolutely! These ice pops are packed with fruits and spinach, making them a fun and healthy treat for kids. The sweet taste of banana and mango masks the spinach, so it’s a clever way to sneak in some greens.

    Can I use frozen fruits instead of fresh ones?

    Yes, frozen fruits can be used in place of fresh ones. Just ensure they’re fully thawed before blending to achieve a smooth mixture.

    Nutrition

    These Green Monster Ice Pops are not only delicious but also provide a good source of vitamins and minerals:

    • Avocado: Rich in healthy fats and fiber.
    • Spinach: A powerful source of iron, calcium, and vitamins A and C.
    • Mango: High in vitamin C and antioxidants.
    • Banana: Provides potassium and natural sweetness.

    Final Thoughts

    Green Monster Ice Pops are a delightful way to enjoy a healthy treat that’s both satisfying and nourishing. Whether you’re looking to cool down on a hot day or simply want a nutritious snack, these ice pops are a fantastic choice. Try them out, and don’t be afraid to experiment with different variations to find your perfect flavor combination. Enjoy the vibrant taste and the joy of a homemade treat that brings back those cherished childhood memories.

    Related update: Green Monster Ice Pops

    Related update: Ginger Snap and Pumpkin Ice Cream Sandwiches

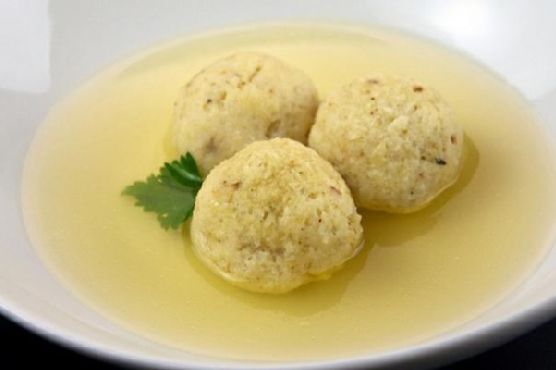
  • Classic Matzo Ball Soup | Made by Meaghan Moineau

    Classic Matzo Ball Soup | Made by Meaghan Moineau

    Classic Matzo Ball Soup

    Why You’ll Love It

    There’s something truly magical about a steaming bowl of matzo ball soup, a dish that’s not just a meal but also a comforting hug in a bowl. This classic recipe has been a staple in my family for generations. As a child, I remember sitting at my grandmother’s table, eagerly waiting for her to serve her famous matzo ball soup. The aroma filled the house, teasing the senses and wrapping us in warmth. It’s not just the taste that makes this soup special; it’s the tradition, the love, and the memories that come with every spoonful.

    Ingredients

    • 1 whole chicken
    • 2 celery stalks, chopped
    • 3 carrots, peeled and chopped
    • 1 onion, peeled and quartered
    • Fresh dill (optional)
    • Fresh parsley
    • Salt and pepper, to taste
    • 4 eggs
    • 4 tablespoons chicken fat (or vegetable oil)
    • 1 cup matzo meal
    • 1/4 cup seltzer water

    Instructions

    1. Wash the chicken with cold water and place it in a large pot. Cover with water and bring to a simmer. Avoid boiling to ensure a clear broth.
    2. Skim off any bubbling foam that forms on the surface.
    3. Add the celery, carrots, onion, fresh herbs, salt, and pepper. Continue to simmer for about 45 minutes.
    4. Pour the soup through a strainer and let it cool. Once the broth has completely cooled, remove the chicken meat and skim off the fat. Save this fat for the matzo balls.
    5. In a mixing bowl, beat together 4 eggs and 4 tablespoons of chicken fat (or vegetable oil).
    6. Stir in the matzo meal and a pinch of salt. Add the seltzer water and mix until combined. Cover and refrigerate the mixture for at least 1 hour.
    7. Form the matzo dough into teaspoon-sized balls.
    8. Bring the chicken broth to a boil. Add the matzo balls, cover, and cook for 20 minutes.
    9. Serve immediately, garnished with fresh dill or parsley.

    Tips

    For perfectly fluffy matzo balls, it’s crucial to let the matzo meal mixture rest in the refrigerator. This resting period allows the matzo meal to absorb the liquid and helps the balls hold their shape. Additionally, using seltzer water is a little secret that adds lightness to the matzo balls, ensuring they are tender and airy.

    Variations & Substitutions

    If you’re looking to mix things up, you can add a variety of vegetables to the broth, such as parsnips or turnips, for additional flavor. For those who prefer a vegetarian version, replace the chicken and chicken fat with vegetable broth and olive oil. You can also experiment with different herbs, like thyme or rosemary, to create a unique taste profile that suits your palate.

    Storage

    Leftover soup can be stored in an airtight container in the refrigerator for up to 3 days. If you want to keep it longer, it freezes beautifully. Just make sure to store the matzo balls separately from the broth to maintain their texture. When ready to enjoy, simply defrost the soup and matzo balls in the refrigerator overnight and reheat gently on the stove.

    FAQ

    Can I make matzo ball soup ahead of time?

    Absolutely! Matzo ball soup is a fantastic make-ahead meal. Prepare the broth and matzo balls separately and store them in the refrigerator. When you’re ready to serve, reheat the broth and add the matzo balls to warm through before serving.

    Why is my matzo ball soup cloudy?

    A cloudy broth is often the result of boiling the soup too vigorously. To ensure a clear broth, keep the soup at a gentle simmer and avoid stirring too much. Skimming off the foam as it forms will also help maintain clarity.

    Nutrition

    While the exact nutritional content can vary based on specific ingredients and portion sizes, a serving of matzo ball soup is generally rich in protein and fiber, thanks to the chicken and vegetables. It’s a hearty, nourishing dish that’s also relatively low in calories, making it a comforting yet healthy option for any meal.

    Final Thoughts

    Classic matzo ball soup is more than just a recipe; it’s a cherished tradition that brings people together. Whether you’re seeking comfort on a chilly evening or sharing a meal with family and friends, this beloved dish offers warmth and solace with every spoonful. I hope this recipe brings as much joy and comfort to your table as it has to mine. Happy cooking!

    Related update: Classic Matzo Ball Soup

    Related update: Venison Stew

    Related update: Tuscan White Bean Soup with Olive Oil and Rosemary

  • Dairy Free Chicken Salad | Made by Meaghan Moineau

    Dairy Free Chicken Salad | Made by Meaghan Moineau

    Dairy Free Chicken Salad

    Welcome to a delightful culinary journey with our Dairy Free Chicken Salad! This dish is a nostalgic nod to family picnics in the park. I remember those sunny days when my mom would whip up this comforting salad, and we’d enjoy it under the sprawling oak tree in our local park. The savory aroma of seasoned chicken mixed with the tangy zest of pickles and lemon would tantalize our senses, making each bite a moment to cherish. Now, I’m excited to share this recipe with you, hoping it brings as much joy to your table as it did to ours.

    Why You’ll Love It

    This Dairy Free Chicken Salad is a perfect blend of flavors and textures, making it a crowd-pleaser for any occasion. Whether you’re looking for a quick lunch, a picnic staple, or a dish for a potluck, this recipe has got you covered. It’s not only delicious and satisfying but also healthy, as it’s dairy-free and packed with protein. The combination of tender chicken with crunchy pickles and creamy Veganaise creates a perfect harmony that will leave your taste buds dancing. Plus, it’s incredibly easy to make, requiring minimal prep time so you can spend more time enjoying the company of your loved ones.

    Ingredients

    • 2 tablespoons olive oil
    • 1 pound skinless boneless chicken tenderloins
    • 1 teaspoon pepper
    • 1 teaspoon salt
    • 1 teaspoon paprika
    • 3 cooked whole eggs
    • 1/2 cup chopped dill pickles
    • 1/2 cup Veganaise
    • 1 tablespoon lemon juice
    • 1 teaspoon seasoned salt

    Instructions

    1. Thaw the chicken if needed.
    2. Add the olive oil to a large skillet and bring to medium heat.
    3. Add the chicken to the skillet and season with paprika, salt, and pepper.
    4. Turn every few minutes and cook until chicken is cooked through and juices run clear.
    5. Remove the chicken and place on a large cutting board.
    6. Using two forks, shred the chicken and place in a large bowl.
    7. If you haven’t already, boil the eggs. Cover the eggs with cold water in a large pot. Place pot over medium-high heat. As soon as it starts boiling, set your timer for 7 minutes. Done!
    8. Peel and chop up your eggs, then place them in the bowl with your shredded chicken.
    9. Chop up your dill pickles and add them to the bowl.
    10. Add the Veganaise, lemon juice, and seasoned salt.
    11. Toss to combine. Serve with your favorite bread.

    Tips

    For the best results, use fresh chicken tenderloins and cook them just until done to ensure they stay juicy. When shredding the chicken, don’t worry about making the pieces too small, as a bit of texture adds to the salad’s appeal. If you’re in a hurry, you can use pre-cooked rotisserie chicken as a time-saving alternative. And remember, the key to a perfect salad is tasting as you go, so feel free to adjust the seasoning to your liking.

    Variations & Substitutions

    This recipe is wonderfully adaptable. If you prefer a bit of sweetness, try adding a handful of dried cranberries or grapes. For a touch of crunch, toss in some chopped celery or nuts such as almonds or walnuts. If you don’t have Veganaise, regular mayonnaise or Greek yogurt can be used as substitutes, keeping in mind the latter will add dairy. For a spicier kick, a dash of hot sauce or a sprinkle of cayenne pepper works wonders.

    Storage

    Store any leftover chicken salad in an airtight container in the refrigerator. It will keep well for up to three days, making it a convenient option for meal prep. When ready to eat, give it a good stir and adjust the seasoning if necessary. Unfortunately, this dish doesn’t freeze well due to the mayonnaise-based dressing, so it’s best enjoyed fresh.

    FAQ

    Can I make this salad in advance?

    Absolutely! In fact, making it a day ahead allows the flavors to meld together beautifully. Just store it in the fridge and give it a good stir before serving.

    Is this recipe gluten-free?

    Yes, the salad itself is gluten-free. However, if you’re serving it with bread, make sure to choose a gluten-free variety if needed.

    Can I add fruits to this salad?

    Yes, adding fruits like grapes or diced apples can add a nice sweetness and additional texture to the salad. Just be sure to add them right before serving to maintain their freshness.

    Nutrition

    This Dairy Free Chicken Salad is a nutritious choice, packed with protein from the chicken and eggs. It’s also a good source of healthy fats from the olive oil and Veganaise. While exact nutritional values will vary based on portion sizes, you can rest assured that this dish is both satisfying and nourishing.

    Final thoughts

    Our Dairy Free Chicken Salad is a versatile dish that fits seamlessly into any meal plan. Its delightful combination of flavors and textures is sure to please even the pickiest eaters. Whether you’re making it for a family gathering, a picnic, or just a quick meal, it’s bound to become a household favorite. So gather your ingredients, follow the simple steps, and enjoy a taste of nostalgia with every bite. Happy cooking!

    Related update: Dairy Free Chicken Salad

    Related update: Lentil Salad With Vegetables

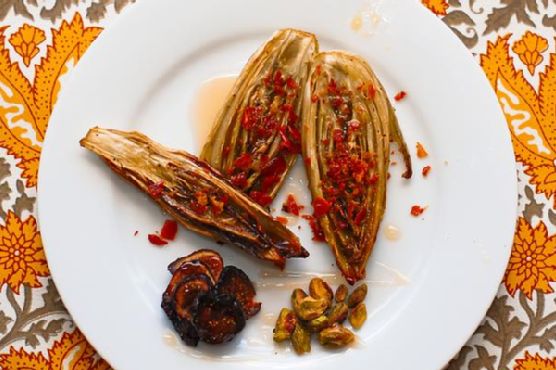
  • Roasted Endive Salad With Prosciutto, Figs and Pistachios | Made by Meaghan Moineau

    Roasted Endive Salad With Prosciutto, Figs and Pistachios | Made by Meaghan Moineau

    Roasted Endive Salad With Prosciutto, Figs and Pistachios

    Why You’ll Love It

    As the leaves begin to fall and the air turns crisp, there’s nothing quite like a warm salad to bring comfort and elegance to your table. This Roasted Endive Salad with Prosciutto, Figs, and Pistachios is one of those dishes that combines simplicity with sophistication, making it perfect for both weeknight dinners and special occasions. The combination of roasted endive’s slightly bitter taste with the sweetness of figs, the salty crunch of prosciutto, and the nutty flavor of pistachios creates a symphony of flavors that will have you coming back for more.

    Growing up, my grandmother would often prepare a similar salad during the holiday season. The aroma of roasting endive would fill the kitchen, and I remember sneaking crispy bits of prosciutto off the counter when she wasn’t looking. It was a dish that brought the family together, a recipe filled with love and joy, and one that I am now excited to share with you.

    Ingredients

    • 4 heads of red or green endive
    • 2 tablespoons olive oil
    • 4 slices prosciutto
    • 1/2 cup dried figs, sliced
    • 1/4 cup pistachio nuts, shelled
    • 2 tablespoons honey

    Instructions

    1. Preheat your oven to 350°F (this is a great toaster oven candidate for smaller batches). Line a rimmed baking sheet with aluminum foil.
    2. Wash the endive thoroughly and remove any unsightly outer leaves. Slice each endive head in half lengthwise, from the stem to the tip.
    3. Arrange the endive cut side up on the foil-lined baking sheet. Generously coat each piece with olive oil.
    4. Bake in the oven for 30 minutes, or until the outer edges of the endive are golden brown.
    5. While the endive is roasting, fry the prosciutto slices in a skillet over medium heat until crispy. Drain them on paper towels, then crumble and set aside.
    6. Once the endive is done roasting, arrange three pieces on each plate. Add a handful of sliced dried figs and pistachio nuts.
    7. Drizzle a spoonful of honey over each plate, then sprinkle with about 1/4 of the crumbled prosciutto.

    Tips

    For the best results, choose endives that are fresh and crisp. When selecting figs, opt for those that are slightly soft but not mushy. If you’re short on time, you can roast the endive and fry the prosciutto a day ahead, then assemble the salad just before serving.

    Variations & Substitutions

    If you’re looking to mix things up, consider swapping out the dried figs for fresh figs when they’re in season. You can also try using a different type of nut, such as walnuts or almonds, for a different texture and flavor. For a vegetarian version, omit the prosciutto and add a sprinkle of feta cheese for a salty kick.

    Storage

    This salad is best enjoyed fresh, but if you have leftovers, store them in an airtight container in the refrigerator for up to two days. Reheat the endive gently in the oven to retain its texture before serving again.

    FAQ

    Can I make this salad ahead of time?

    Yes, you can prepare the components ahead of time. Roast the endive and fry the prosciutto in advance, then store them separately in the refrigerator. Assemble the salad just before serving for the best taste and texture.

    What can I serve with this salad?

    This salad pairs wonderfully with a light protein like grilled chicken or fish. It also works as a delicious starter for a multi-course meal or as part of a larger spread for a festive gathering.

    Nutrition

    While this salad is a treat for the taste buds, it is also packed with nutrients. Endive is a great source of vitamins A and K, while figs provide dietary fiber and antioxidants. Prosciutto adds protein, and pistachios offer healthy fats and additional fiber. A drizzle of honey rounds out the dish with a natural sweetness, making this salad both nutritious and satisfying.

    Final Thoughts

    Roasted Endive Salad with Prosciutto, Figs, and Pistachios is more than just a dish; it’s a celebration of flavors that come together beautifully. Whether you’re hosting a dinner party or looking for a cozy meal to enjoy with your family, this salad is sure to impress. I hope it becomes a cherished part of your recipe repertoire, just as it has been in mine. Bon appétit!

    Related update: Roasted Endive Salad With Prosciutto, Figs and Pistachios

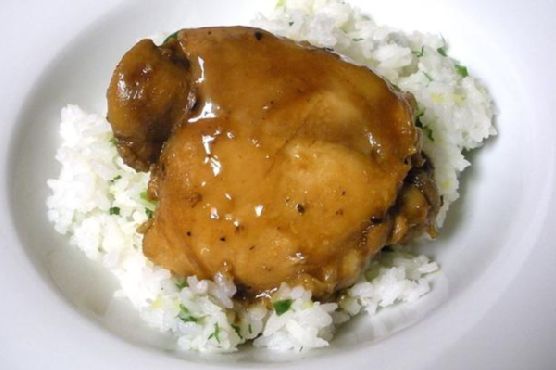
  • Chicken Adobo & Coconut Ginger Rice | Made by Meaghan Moineau

    Chicken Adobo & Coconut Ginger Rice | Made by Meaghan Moineau

    Chicken Adobo & Coconut Ginger Rice

    There’s something truly comforting about the rich aroma of Chicken Adobo wafting through the kitchen. This dish takes me back to my childhood, where Sundays meant gathering around the table with family, sharing stories as the flavors of soy sauce, vinegar, and bay leaves worked their magic on tender chicken thighs. Today, I hope to bring a little piece of that nostalgia into your home with this delightful recipe for Chicken Adobo & Coconut Ginger Rice.

    Why You’ll Love It

    This Chicken Adobo & Coconut Ginger Rice recipe is a heartwarming blend of savory, sweet, and tangy flavors that come together in a truly satisfying meal. The tender chicken, marinated in a rich adobo sauce, is perfectly complemented by the fragrant coconut ginger rice. It’s a dish that feels like a warm hug, perfect for cozy dinners or entertaining guests. Whether you’re new to Filipino cuisine or a seasoned fan, this recipe is sure to become a staple in your kitchen.

    Ingredients

    • 1/2 cup low sodium soy sauce
    • 1/2 cup apple cider vinegar
    • 4 cloves garlic, minced
    • 1 tablespoon whole peppercorns
    • 2 tablespoons brown sugar
    • 3 bay leaves
    • 6 bone-in chicken thighs
    • 1 tablespoon grapeseed oil
    • 1 cup chicken broth
    • 1 tablespoon cornstarch
    • 1/4 cup water
    • 3 cups water (for rice)
    • 1 1/2 cups rice
    • 1 tablespoon fresh ginger, grated
    • 1/2 cup sweetened shredded coconut
    • 2 scallions, chopped
    • 2 tablespoons fresh parsley, chopped
    • Kosher salt, to taste

    Instructions

    1. In a large bowl or flat dish, combine soy sauce, vinegar, garlic, peppercorns, brown sugar, and bay leaves with the chicken. Marinate for at least an hour or overnight.
    2. When ready to cook, heat grapeseed oil in a pan over medium-high heat. Lay the chicken thighs down, leaving the marinade in the dish. Brown the chicken on both sides, approximately 2-3 minutes per side, then remove from the pan and set aside.
    3. Pour the marinade and chicken broth into the pan and bring to a boil. Once boiling, return the chicken to the pan, cover, and cook for about 10 minutes.
    4. In a small bowl, whisk 1/4 cup water with the cornstarch, then add to the pan. Turn the chicken pieces over, cover again, and cook until the juices run clear, approximately 6-9 minutes.
    5. For the rice, bring 3 cups of water to a boil in a saucepan. Add a pinch of salt, then add the rice and cook according to package instructions. Once the rice is done, toss with scallions, parsley, ginger, and coconut.
    6. Serve the chicken over the coconut ginger rice and drizzle with a bit of the sauce from the pan.

    Tips

    For the best results, marinate the chicken overnight. This allows the flavors to penetrate deeply, resulting in more flavorful and tender chicken. When browning the chicken, make sure your pan is hot enough to give it a nice sear; this adds depth to the flavor.

    Variations & Substitutions

    If you prefer, you can use boneless chicken thighs or even chicken breasts for a leaner option. For those who enjoy a little heat, add a sliced chili or a dash of chili flakes to the marinade. If you’re avoiding soy, tamari or coconut aminos can be substituted for soy sauce.

    Storage

    Leftover Chicken Adobo can be stored in an airtight container in the refrigerator for up to 3 days. The rice can be stored separately in the refrigerator for up to 2 days. To reheat, add a splash of water to the chicken and warm it on the stove over low heat until heated through.

    FAQ

    Can I make this dish ahead of time?

    Absolutely! Chicken Adobo often tastes even better the next day as the flavors continue to develop. Feel free to make it a day ahead for a quick and easy meal.

    What can I serve with Chicken Adobo & Coconut Ginger Rice?

    This dish pairs wonderfully with a simple green salad or steamed vegetables such as broccoli or bok choy. The freshness of the greens complements the rich flavors of the adobo.

    Nutrition

    Each serving of Chicken Adobo & Coconut Ginger Rice provides a balanced meal of protein, carbohydrates, and healthy fats. It’s a great source of vitamins and minerals, particularly from the fresh herbs and ginger. For those watching their sodium intake, using low sodium soy sauce helps keep the levels in check.

    Final Thoughts

    Chicken Adobo & Coconut Ginger Rice is a dish that brings warmth and comfort with each bite. It’s perfect for family dinners or when you want to impress your guests with something both exotic and homey. I hope this recipe fills your home with the same joy and delicious smells it brings to mine. Enjoy every moment of cooking and savoring this delightful meal!

    Related update: Chicken Adobo & Coconut Ginger Rice

  • Monte Cristo Egg Rolls | Made by Meaghan Moineau

    Monte Cristo Egg Rolls | Made by Meaghan Moineau

    Monte Cristo Egg Rolls

    Welcome to the delightful world of Monte Cristo Egg Rolls! This unique twist on the classic Monte Cristo sandwich brings together the savory goodness of deli meats and cheese, all wrapped up in a crispy, golden egg roll. Whether you’re a fan of fusion cuisine or just love a good finger food, this recipe is sure to become a favorite in your household.

    Why You’ll Love It

    Imagine biting into a warm, crispy egg roll only to be met with the delightful flavors of ham, turkey, and Swiss cheese melded together with a hint of strawberry sweetness. These Monte Cristo Egg Rolls are perfect for those who enjoy both savory and sweet flavors in one bite. They make for an excellent appetizer at parties, a fun twist for brunch, or a delicious snack to enjoy while watching your favorite movie.

    In addition, these egg rolls are easy to make and require minimal ingredients. You can prepare them ahead of time and fry them just before serving to impress your guests with your culinary creativity. Plus, each bite is a nostalgic reminder of the classic Monte Cristo sandwich, reinvented for modern taste buds.

    Ingredients

    • 1/2 lb black deli forest ham
    • 1/2 lb deli honey ham
    • 1/2 lb smoked deli turkey
    • 12 egg roll wraps
    • 1/2 cup strawberry jam
    • 1/2 lb deli baby Swiss cheese

    Instructions

    1. Chop the black deli forest ham, honey ham, smoked turkey, and baby Swiss cheese into small pieces and place them into a mixing bowl.
    2. Add the strawberry jam to the bowl and stir until the ingredients are well combined.
    3. Lay out one egg roll wrap with one corner facing you.
    4. Place about 2 tablespoons of the filling just above the bottom corner of the wrap.
    5. Fold the bottom corner up over the filling, then fold in each side of the egg roll wrap.
    6. Roll the wrap up toward the other corner, using a little water on your finger to seal the roll and corner together.
    7. Preheat a deep fryer to 320 degrees Fahrenheit.
    8. Deep fry the egg rolls for about 3 minutes or until they are crispy and golden brown.
    9. Serve warm as is or sprinkle with powdered sugar for an extra touch of sweetness.

    Tips

    To ensure your egg rolls come out perfectly every time, here are a few tips:

    • Don’t overfill the egg rolls, as this can cause them to burst while frying.
    • Seal the egg rolls tightly to prevent the filling from leaking out.
    • If you don’t have a deep fryer, you can use a pot with enough oil to submerge the egg rolls.
    • Try using a thermometer to ensure the oil is at the right temperature for frying.

    Variations & Substitutions

    Feel free to get creative with this recipe! Here are some variations and substitutions you can try:

    • Swap out the meats for your favorites, such as roasted chicken or roast beef.
    • Use apricot or raspberry jam instead of strawberry for a different flavor profile.
    • Add a teaspoon of Dijon mustard to the filling for a tangy kick.
    • For a vegetarian version, use roasted vegetables and a variety of cheeses.

    Storage

    If you have any leftover egg rolls, store them in an airtight container in the refrigerator for up to 3 days. To reheat, place them in an oven at 350 degrees Fahrenheit for about 10 minutes or until warm and crispy.

    FAQ

    Can I make these egg rolls ahead of time?

    Yes, you can prepare the egg rolls in advance and freeze them before frying. When you’re ready to serve, fry them directly from frozen, adding an extra minute or two to the frying time.

    What can I serve with Monte Cristo Egg Rolls?

    Monte Cristo Egg Rolls pair well with a side of fresh fruit or a simple green salad. You can also serve them with a variety of dipping sauces, such as honey mustard, raspberry sauce, or even maple syrup.

    Nutrition

    Each Monte Cristo Egg Roll contains approximately:

    • Calories: 200
    • Protein: 12g
    • Fat: 10g
    • Carbohydrates: 18g
    • Sugar: 5g
    • Sodium: 500mg

    Please note that these values are approximate and can vary based on the specific ingredients used.

    Final Thoughts

    Monte Cristo Egg Rolls offer a fun and delicious way to enjoy the classic flavors of a Monte Cristo sandwich in a convenient and crispy package. Whether you’re making them for a special occasion or just as a treat for yourself, these egg rolls are sure to delight your taste buds and bring a smile to your face. Give them a try and enjoy the perfect blend of savory and sweet in every bite!

    Related update: Monte Cristo Egg Rolls

    Related update: Roasted Endive Salad With Prosciutto, Figs and Pistachios

    Related update: Green Monster Ice Pops