Tag: Meaghan Moineau

  • Delicious Sausage & Peppers | Made by Meaghan Moineau

    Delicious Sausage & Peppers | Made by Meaghan Moineau

    Delicious Sausage & Peppers

    Why You’ll Love It

    There’s something magical about the combination of savory sausages and vibrant bell peppers, a dish that has been a beloved part of my family’s culinary tradition for generations. I remember waking up on Sunday mornings to the enticing aroma of sausages sizzling in the kitchen, mingling with the sweet scent of sautéed peppers and onions. This dish was a staple at our family gatherings, and it never failed to bring smiles to our faces. It’s a simple yet flavorful meal that warms the heart and satisfies the soul, and I’m thrilled to share it with you.

    You’ll love this recipe because it’s easy to make, requiring just a few simple ingredients that come together to create a symphony of flavors. Whether you’re looking for a quick weeknight dinner or a dish to impress your guests, this Sausage & Peppers recipe is a surefire hit. It’s hearty, comforting, and versatile, allowing you to customize it to your taste. Plus, the leftovers (if there are any!) are just as delightful the next day.

    Ingredients

    • 4 bell peppers, sliced
    • 2 cloves garlic, crushed
    • Black fresh ground pepper, to taste
    • 4 Italian sausages
    • 4 Italian sweet sausages
    • 1 jalapeño, sliced
    • 2 tablespoons olive oil
    • 2 tablespoons Italian fresh parsley, chopped
    • 2 tablespoons salsa
    • Sea salt, to taste
    • 1 sweet onion, sliced

    Instructions

    1. Preheat your oven to 375°F (190°C). Place the sausages on a baking sheet and bake for 20-25 minutes or until they are fully cooked. Once done, remove them from the oven and set aside.
    2. In a large frying pan, heat a drizzle of olive oil over medium heat. Add the bell peppers and jalapeño to the pan and sauté for about 5 minutes, or until they begin to soften.
    3. Add the sweet onion, crushed garlic, and chopped parsley to the pan. Continue to sauté for another 3-4 minutes, allowing the flavors to meld together.
    4. Slice the cooked sausages lengthwise and add them to the pan with the pepper mixture.
    5. Add the salsa to the pan and toss everything together to ensure the sausages and vegetables are evenly coated.
    6. Season with sea salt and black fresh ground pepper to taste. Let the mixture cook for another 2-3 minutes until heated through.
    7. Serve hot and enjoy your delicious Sausage & Peppers!

    Tips

    • For a bolder flavor, consider using spicy Italian sausages in place of sweet ones.
    • Ensure the sausages are cooked thoroughly by checking that they reach an internal temperature of 160°F (71°C).
    • If you prefer a milder dish, you can omit the jalapeño or use a milder pepper variety.

    Variations & Substitutions

    If you’re looking to switch things up, here are a few variations and substitutions you can try:

    • Vegetarian Option: Replace the sausages with plant-based sausage alternatives.
    • Different Peppers: Use a mix of red, yellow, and orange bell peppers for a colorful dish.
    • Cheesy Twist: Top the finished dish with grated Parmesan or mozzarella cheese.
    • Extra Heat: Add a pinch of red pepper flakes for an extra kick.

    Storage

    This Sausage & Peppers dish stores beautifully. Simply place any leftovers in an airtight container and refrigerate for up to 3 days. To reheat, warm in a frying pan over medium heat until the sausages and peppers are heated through. You can also freeze the dish for up to 2 months. Thaw it in the refrigerator overnight before reheating.

    FAQ

    Can I use different types of sausages?

    Absolutely! Feel free to experiment with different types of sausages such as turkey, chicken, or even chorizo. Each will add its own unique flavor to the dish.

    Is this dish spicy?

    The heat level depends on the type of sausages and peppers you use. Sweet Italian sausages and bell peppers make for a milder dish, while adding jalapeños and spicy sausages will increase the heat. Adjust the ingredients to suit your spice preference.

    Can I make this dish ahead of time?

    Yes, you can prepare the sausages and pepper mixture in advance and store it in the refrigerator. Reheat it in a pan before serving to maintain the best texture and flavor.

    Nutrition

    While the nutritional content will vary based on the specific brands and quantities used, a typical serving of Sausage & Peppers contains:

    • Calories: 400
    • Protein: 20g
    • Carbohydrates: 15g
    • Fat: 30g
    • Fiber: 3g

    Final Thoughts

    This Delicious Sausage & Peppers recipe is a celebration of simple ingredients coming together to create a hearty and flavorful meal. It’s a dish that brings people together, evokes cherished memories, and makes new ones. Whether you’re enjoying it with family, friends, or savoring a quiet dinner at home, this recipe is sure to become a cherished favorite. I hope you enjoy making and sharing this dish as much as I do. Happy cooking!

    Related update: Delicious Sausage & Peppers

    Related update: Thai Savory Brown Fried Rice

  • Bacon Brownie Cupcakes | Made by Meaghan Moineau

    Bacon Brownie Cupcakes | Made by Meaghan Moineau

    Bacon Brownie Cupcakes

    Why You’ll Love It

    Picture this: a cozy Sunday afternoon where the enticing aroma of chocolate intermingles with the savory scent of bacon wafting through your home. This is the magic of Bacon Brownie Cupcakes. They are the perfect fusion of two beloved American classics: brownies and bacon. The rich, fudgy texture of the brownie, combined with the salty, crispy bits of bacon, creates a unique treat that hits all the right notes. These cupcakes are a delightful surprise for anyone who thinks they’ve tasted it all. Perfect for potlucks, family gatherings, or just a scrumptious indulgence, these cupcakes will quickly become a favorite.

    When I was a child, my grandmother had a knack for creating the most unexpected yet delightful combinations in her little kitchen. One of my fondest memories is of her introducing me to the combination of chocolate and bacon. It seemed peculiar at first, but the taste was unforgettable. Inspired by her culinary adventures, I’ve taken her concept and turned it into these Bacon Brownie Cupcakes, ensuring that each bite is a nod to her creative spirit and love for family gatherings.

    Ingredients

    • 4 ounces unsweetened chocolate
    • 8 ounces sweetened chocolate
    • 1 cup butter
    • 2 cups sugar
    • 1/2 teaspoon salt
    • 4 large eggs
    • 1 cup all-purpose flour
    • 1/4 cup cocoa powder
    • 6 strips bacon, cooked and crumbled

    Instructions

    1. Preheat your oven to 350°F (175°C). Grease a standard muffin pan. We recommend using a standard size rather than mini or jumbo, as they bake to the perfect consistency in this size.
    2. Fry the bacon until crispy, but avoid letting it char. Once cooked, let it cool on a paper towel to absorb excess grease. Discard any large white chunks of fat.
    3. In a double boiler, melt the unsweetened chocolate and butter together until smooth. Remove from heat and allow to cool slightly.
    4. Whisk in the sugar and salt into the chocolate mixture. Then add the eggs, one at a time, ensuring each is fully incorporated before adding the next.
    5. Sift the all-purpose flour and cocoa powder together to remove any lumps.
    6. Gently fold the flour mixture into the chocolate mixture until just combined. Be careful not to overmix.
    7. Stir in the crumbled bacon and sweetened chocolate pieces, distributing them evenly throughout the batter.
    8. Fill each cup of the muffin pan about two-thirds full with batter.
    9. Bake in the preheated oven for approximately 30 minutes, or until a toothpick inserted into the center comes out with a few moist crumbs.
    10. Allow the brownie cupcakes to cool in the pan for 10 minutes before transferring them to a wire rack to cool completely.

    Tips

    For best results, use high-quality chocolate and bacon. The quality of these ingredients will significantly affect the flavor of your cupcakes. Additionally, make sure to thoroughly cool the melted chocolate mixture before adding the eggs to prevent them from cooking.

    Variations & Substitutions

    Feel free to experiment with different types of bacon, such as maple-glazed or peppered bacon, to add another layer of flavor. For those who prefer a less sweet treat, you can reduce the amount of sweetened chocolate or use dark chocolate instead. If you’re looking to add a bit of crunch, consider folding in a handful of chopped nuts, such as pecans or walnuts.

    Storage

    Store any leftover cupcakes in an airtight container at room temperature for up to three days. For longer storage, you can refrigerate them for up to a week, although they may lose some of their fudginess. Alternatively, freeze the cupcakes for up to three months, and thaw them at room temperature before serving.

    FAQ

    Can I use turkey bacon instead of regular bacon?

    Yes, you can substitute turkey bacon for pork bacon. However, keep in mind that turkey bacon tends to be leaner and may not have the same crispy texture and rich flavor as pork bacon. Adjust the cooking time accordingly to ensure it’s crispy but not overcooked.

    Can I make these cupcakes gluten-free?

    Absolutely! Simply replace the all-purpose flour with a gluten-free flour blend that is suitable for baking. Ensure that the blend contains xanthan gum or another binder to maintain the texture of the cupcakes.

    Can I make this recipe without eggs?

    Yes, you can use egg substitutes such as flaxseed meal or applesauce in equal amounts to replace the eggs. The texture might be slightly different, but it will still be delicious!

    Nutrition

    While indulgent, each Bacon Brownie Cupcake is approximately 250 calories. They also contain an estimated 15g of fat, 25g of carbohydrates, and 5g of protein. Keep in mind these values can vary depending on the specific brands and types of ingredients used.

    Final Thoughts

    Bacon Brownie Cupcakes are a testament to the magic that happens when sweet and savory collide. These cupcakes are sure to be a conversation starter and a delightful surprise for your friends and family. Whether you’re reminiscing about fond childhood memories or creating new ones, this recipe is bound to become a beloved favorite. Remember, the heart of baking lies in experimentation and joy, so don’t hesitate to make this recipe your own. Happy baking!

    Related update: Bacon Brownie Cupcakes

    Related update: Delicious Sausage & Peppers

    Related update: Cyndee’s Neiman Marcus Cake

  • Kale and Chickpea Soup with Lemon | Made by Meaghan Moineau

    Kale and Chickpea Soup with Lemon | Made by Meaghan Moineau

    Kale and Chickpea Soup with Lemon

    As the weather turns colder, there’s nothing more comforting than a bowl of homemade soup. This Kale and Chickpea Soup with Lemon is one of my favorites, reminding me of the cozy evenings spent in my grandmother’s kitchen. The aroma of the soup simmering on the stove, mingling with the scent of crusty bread toasting in the oven, transports me back to those cherished moments. This recipe is not only delicious but also packed with nutritious ingredients that make it a hearty and healthy option for any meal.

    Why You’ll Love It

    This soup is a delightful blend of flavors and textures that will warm your soul and nourish your body. The combination of kale and chickpeas provides a hearty base, while the lemon adds a refreshing zing. It’s an easy recipe to make, perfect for both weeknight dinners and special occasions. Whether you’re a seasoned chef or a kitchen novice, you’ll appreciate the simplicity and depth of flavor in this dish.

    Ingredients

    • 2 banana shallots, finely diced
    • 1 bay leaf
    • 1 can of chickpeas, drained and rinsed
    • 2 celery stalks, diced
    • 1/2 teaspoon chili flakes
    • Crusty bread, for serving
    • 1 garlic clove, peeled and crushed
    • Juice of 1 lemon
    • 2 cups of chopped kale
    • 1 lemon, sliced for garnish
    • 2 tablespoons olive oil
    • Parmesan cheese, for serving
    • 1 sprig of rosemary, finely chopped
    • Salt, to taste
    • 4 cups of vegetable or chicken stock

    Instructions

    1. Set a dutch oven or large saucepan over medium heat; pour in the olive oil.
    2. Add the finely diced shallots to the pan, stirring to coat with the oil.
    3. Make 4 or 5 long horizontal slices in the celery stalk and dice. Add this to the pan and stir.
    4. Finely chop the rosemary leaves and stir into the pan together with the bay leaf and the chili flakes.
    5. Peel the garlic clove and using the flat of your knife and the heel of your hand, crush so that it is still whole and add to the pan.
    6. Add the chickpeas and the kale and stir.
    7. Pour in the hot stock, let it come to a boil, and then turn down the heat. Let it simmer for 20 minutes until the kale is tender.
    8. Squeeze in the juice of half a lemon. Check the seasoning and adjust to taste. You might want more lemon or salt, depending on your stock.
    9. Working in batches or in the pan itself if you have a stick blender, blitz until you have the texture you like. I like mine to still have a few chickpeas and pieces of kale through it, so I set aside a couple of ladlefuls and used a stick blender to blitz the rest.
    10. Serve hot, floating a couple of slices of lemon on top of each serving and pass around the parmesan cheese for everyone to help themselves. Lovely with toasted crusty bread.

    Tips

    For the best results, use fresh kale and high-quality stock. If you prefer a thicker soup, reduce the amount of stock or simmer the soup longer. If you like a bit more heat, feel free to increase the amount of chili flakes.

    Variations & Substitutions

    If you’re looking to switch things up, you can substitute spinach or Swiss chard for kale. For a vegan version, skip the parmesan cheese or use a plant-based alternative. You can also add a handful of cooked quinoa or rice for added texture and nutrition.

    Storage

    This soup can be stored in an airtight container in the refrigerator for up to three days. It can also be frozen for up to three months. To reheat, simply thaw in the refrigerator overnight and warm on the stovetop over medium heat until hot.

    FAQ

    Can I make this soup in advance?

    Absolutely! This soup is perfect for meal prep and tastes even better the next day as the flavors meld together. Simply store it in the refrigerator and reheat before serving.

    What can I serve with this soup?

    This soup pairs wonderfully with a slice of crusty bread or a side salad. For a heartier meal, consider serving it alongside a grilled cheese sandwich.

    Nutrition

    This soup is a nutritious option, rich in fiber and vitamins A and C from the kale, as well as protein from the chickpeas. It’s a wholesome meal that will keep you full and satisfied.

    Final Thoughts

    This Kale and Chickpea Soup with Lemon is a comforting and healthy dish that’s perfect for any occasion. Whether you’re looking to warm up on a chilly day or enjoy a light and refreshing meal, this soup is sure to hit the spot. I hope you enjoy making and sharing this recipe with your loved ones, creating your own cherished memories around the table.

    Related update: Kale and Chickpea Soup with Lemon

    Related update: Make Olive Garden’s Delicious Pasta Fagioli At Home

  • Fresh Peach Margarita With Lime Sugar | Made by Meaghan Moineau

    Fresh Peach Margarita With Lime Sugar | Made by Meaghan Moineau

    Fresh Peach Margarita With Lime Sugar

    Welcome to a delightful journey of taste and nostalgia with our Fresh Peach Margarita With Lime Sugar. This refreshing cocktail is perfect for those warm summer evenings or any time you want to bring a taste of summer into your life. Let me take you back to a sun-drenched afternoon at my grandmother’s house, where the scent of peaches filled the air and laughter was as plentiful as the fruit on her trees. Inspired by those cherished moments, this margarita combines the sweet juiciness of peaches with the zing of lime, creating a drink that’s as delightful as a memory and as vibrant as the season itself.

    Why You’ll Love It

    This Fresh Peach Margarita With Lime Sugar is a celebration of flavors. The sweetness of ripe peaches blends effortlessly with the tang of lime, enhanced by a touch of orange liqueur and the subtle warmth of silver tequila. The lime sugar rim adds an extra layer of citrusy sweetness that perfectly complements the cocktail. It’s the ideal drink for gatherings or a quiet evening on the porch, offering a refreshing escape in every sip.

    Ingredients

    • Ice
    • Lime (juice)
    • Lime sugar
    • Orange liqueur
    • Peach
    • Peach schnapps
    • Sugar
    • Silver tequila

    Instructions

    1. Add 1/2 teaspoon of finely minced lime zest to 1/4 cup granulated sugar and set aside for about 30 minutes, stirring occasionally.
    2. For a pretty presentation, coat the rims of the glasses you are using with lime sugar. Do this by rubbing the rim with a lime wedge and then placing the rim into a plate that has the sugar in it until the rim is coated with sugar.
    3. Place all ingredients into the blender and puree. Add a little cold water if it is too thick.
    4. Either chill all ingredients before making or add some ice cubes after you have made the margarita and stir it until it is as cold as you like.
    5. Strain it into your glasses or serve on the rocks.

    Tips

    For the best flavor, use ripe, juicy peaches. If fresh peaches aren’t available, frozen peaches can be a great substitute. Always taste your margarita before serving and adjust the sweetness or citrus to your liking. If you prefer a stronger lime flavor, feel free to add more lime juice.

    Variations & Substitutions

    If you want to try something different, consider using other fruits like mangoes or strawberries for a unique twist on this classic drink. For a lower-calorie version, you can substitute the sugar with a natural sweetener like agave syrup. If you’re not a fan of tequila, vodka can be used as an alternative, though it will alter the flavor profile.

    Storage

    This margarita is best enjoyed fresh, but if you have leftovers, store them in an airtight container in the refrigerator for up to 24 hours. Be sure to give it a good stir before serving. The lime sugar can be prepared in advance and stored in a cool, dry place for a week.

    FAQ

    Can I make this margarita ahead of time?

    Yes, you can prepare the margarita a few hours in advance and store it in the refrigerator. However, we recommend waiting to blend the ice until right before serving to maintain the best texture.

    What is lime sugar and how do I use it?

    Lime sugar is a simple mixture of lime zest and granulated sugar. It’s used to coat the rim of the glass to add a sweet and tangy finish to your margarita. Simply rub a lime wedge around the rim of your glass, then dip the glass into the lime sugar to coat.

    Nutrition

    While a peach margarita is a treat, it’s always good to be mindful of what you’re consuming. This cocktail, when prepared as directed, offers a delightful balance of sweetness and acidity. It’s relatively low in calories, especially if you opt for a natural sweetener, and provides a small amount of vitamin C from the lime and peach.

    Final Thoughts

    The Fresh Peach Margarita With Lime Sugar is not just a drink; it’s an experience that brings back fond memories of sunlit days and cherished family moments. Its combination of flavors is sure to impress your guests and delight your senses. Whether you’re enjoying a solo evening on the patio or hosting a summer gathering, this margarita is sure to be a hit. So go ahead, raise your glass to good times, wonderful memories, and the sweet taste of summer!

    Related update: Fresh Peach Margarita With Lime Sugar

    Related update: Detox Orange Carrot Juice

  • Authentic Kentucky Bourbon Balls | Made by Meaghan Moineau

    Authentic Kentucky Bourbon Balls | Made by Meaghan Moineau

    Authentic Kentucky Bourbon Balls Recipe

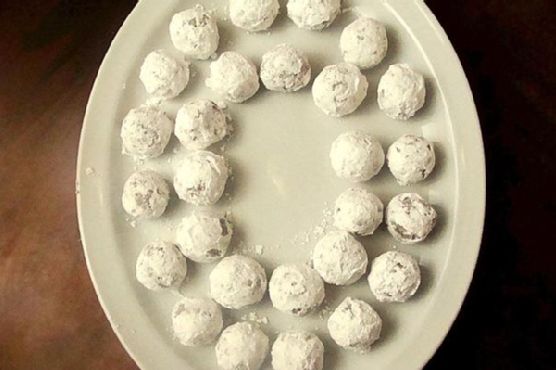
    Welcome to my kitchen! Today, we’re diving into a classic Southern treat that holds a special place in my heart: Authentic Kentucky Bourbon Balls. These delightful confections are not only bursting with rich, nutty flavors but also carry a hint of nostalgia for me. I remember as a child, sneaking into my grandmother’s kitchen during the holidays. The air was thick with the aroma of bourbon and chocolate, and I was always eager to steal a taste from her stash of bourbon balls. Now, I’m excited to share this cherished recipe with you.

    Why You’ll Love It

    There are countless reasons to fall in love with these Authentic Kentucky Bourbon Balls:

    • Rich Flavor: The combination of bourbon and cocoa creates a depth of flavor that’s both indulgent and satisfying.
    • Simple to Make: With just a few ingredients, these treats are incredibly easy to prepare.
    • Perfect for Gifting: These make thoughtful, homemade gifts, perfect for the holiday season.
    • Make-Ahead Friendly: They actually taste better when made in advance, allowing the flavors to meld beautifully.

    Ingredients

    • 1 cup crushed vanilla wafer crumbs
    • 1 cup chopped pecans
    • 1 cup powdered sugar, plus more for rolling
    • 2 tablespoons unsweetened cocoa powder
    • 1/4 cup bourbon
    • 2 tablespoons light corn syrup

    Instructions

    1. In a deep bowl, combine crushed vanilla wafer crumbs, chopped pecans, powdered sugar, and the cocoa.
    2. In a separate bowl, blend the bourbon and corn syrup.
    3. Pour the bourbon mixture into the dry mixture; blend well.
    4. Cover and chill for 3 hours.
    5. Shape small bits of the dough into balls and roll them in the powdered sugar.
    6. Store in the refrigerator overnight in tightly covered containers. You can also make these a few days in advance for the best flavor.

    Tips

    • Use Quality Bourbon: The bourbon you choose will greatly affect the flavor, so opt for a quality brand you enjoy sipping.
    • Chilling is Key: Don’t skip the chilling step. It makes the mixture easier to handle and enhances the flavor.
    • Consistent Size: Use a small cookie scoop to ensure uniform ball sizes for even chilling and a professional look.

    Variations & Substitutions

    While the classic recipe is divine, there are a few tweaks you can make:

    • Nut Swap: Walnuts or almonds can be used instead of pecans for a different twist.
    • Flavored Liqueur: Replace bourbon with a flavored liqueur like amaretto or hazelnut for a unique taste.
    • Dark Chocolate: Substitute cocoa powder with dark chocolate cocoa for a richer chocolate flavor.

    Storage

    Store your bourbon balls in an airtight container in the refrigerator. They can last for up to two weeks, making them ideal for holiday prep. For longer storage, place them in the freezer for up to two months. Just let them thaw in the refrigerator before serving.

    FAQ

    Can I make bourbon balls without alcohol?

    Absolutely! You can substitute the bourbon with apple juice or a non-alcoholic vanilla extract. While the flavor will be different, they’ll still be delicious!

    Is it possible to use dark syrup instead of light corn syrup?

    Yes, but keep in mind that dark syrup will impart a stronger flavor, and it might slightly alter the color of the finished product. If you enjoy a deeper molasses flavor, feel free to experiment.

    Nutrition

    While I don’t have precise nutritional data, these treats are definitely a special indulgence. They are rich and dense, with a good amount of sugar and fat from the pecans and bourbon. Enjoy them in moderation as part of a balanced diet.

    Final Thoughts

    Authentic Kentucky Bourbon Balls are a delightful treat that combines the warmth of bourbon with the sweet richness of cocoa and pecans. Whether you’re making them for a holiday gathering, a special gift, or simply to indulge yourself, these bourbon balls are sure to impress. I hope this recipe brings as much joy to your kitchen as it has to mine. Remember to enjoy the process, savor each bite, and perhaps share a little nostalgia with your loved ones as you make them together. Happy baking!

    Related update: Authentic Kentucky Bourbon Balls

    Related update: Bacon Brownie Cupcakes

  • Indian Butter Chicken | Made by Meaghan Moineau

    Indian Butter Chicken | Made by Meaghan Moineau

    Indian Butter Chicken

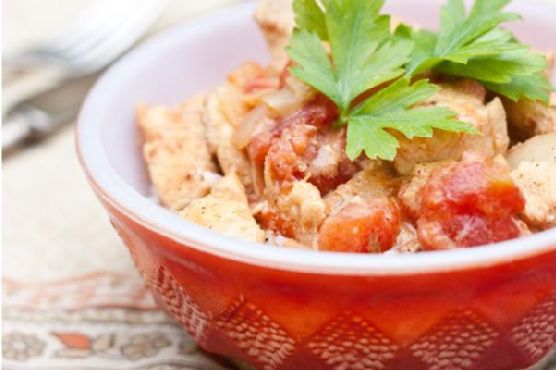
    There’s something about the rich, creamy flavors of Indian Butter Chicken that transports me back to my childhood. I remember the sweet aroma that would fill our kitchen as my mother prepared this delightful dish. It was a staple for our family dinners, and its warmth and comforting flavors always brought us together. Now, I’m thrilled to share this cherished recipe with you, hoping it becomes a part of your family gatherings too.

    Why You’ll Love It

    Indian Butter Chicken is a dish that’s sure to win over even the pickiest eaters. Its luscious, creamy sauce envelops tender pieces of chicken, creating a harmonious blend of spices that’s both bold and soothing. Whether you’re a fan of spicy food or prefer something milder, this recipe can be adapted to suit your taste. It’s perfect for a cozy night in, a family dinner, or even a special occasion. Plus, it’s surprisingly easy to make, allowing you to enjoy the taste of a restaurant-quality meal right at home.

    Ingredients

    • 2 tablespoons oil
    • 1 pound chicken breasts, chopped
    • 3 cloves garlic, minced
    • 2 tablespoons garam masala
    • 1 onion, chopped
    • 1 tablespoon ginger, grated
    • Juice of 1 lemon
    • 2 tablespoons butter
    • 1 cup diced tomatoes
    • 1 cup chicken broth
    • 1/2 cup plain yogurt
    • 1/2 cup sour cream
    • Salt and pepper to taste

    Instructions

    1. Start out by adding the oil to your pan and heating it up on medium-high heat.
    2. Add in your chopped chicken, garlic, and garam masala. Swirl it together and cook for about two to three minutes.
    3. Next, add in your onion and ginger. Continue cooking until the chicken is cooked through.
    4. Turn your heat down to medium and add in your lemon juice and butter.
    5. Let the butter melt completely, then add in the tomatoes and broth.
    6. Give the dish a minute or two to heat back up, then stir in the yogurt and sour cream.
    7. Mix it all together and add salt and pepper to taste.
    8. Serve over rice.

    Tips

    For the best results, marinate your chicken in yogurt and spices overnight. This will enhance the flavors and make the chicken even more tender. Additionally, if you prefer a spicier dish, consider adding a pinch of cayenne pepper or a small chopped chili to the recipe.

    Variations & Substitutions

    If you’re looking to switch things up, try using chicken thighs instead of breasts for a richer flavor. You can also substitute coconut milk for sour cream if you prefer a dairy-free version. For a vegetarian option, replace the chicken with paneer or tofu, and use vegetable broth instead of chicken broth.

    Storage

    Leftovers can be stored in an airtight container in the refrigerator for up to 3 days. To reheat, simply warm it on the stove over low heat, stirring occasionally. You can also freeze the dish for up to 2 months. Just make sure to thaw it in the refrigerator overnight before reheating.

    FAQ

    Can I use pre-cooked chicken?

    Yes, you can use pre-cooked chicken. Simply add it to the pan when you add the lemon juice and butter. This will save you some time and still give you the delicious flavor you’re looking for.

    Is this dish very spicy?

    Indian Butter Chicken is typically mild, but you can adjust the heat level to your preference. If you want it spicier, add more garam masala or a pinch of cayenne pepper. For a milder taste, reduce the amount of spices used.

    Nutrition

    This dish is rich in protein, thanks to the chicken and yogurt, and offers a good balance of carbohydrates when served with rice. It’s a hearty meal that provides essential nutrients, but keep in mind that it can be high in calories due to the butter and sour cream. For a lighter version, consider using reduced-fat yogurt and sour cream.

    Final Thoughts

    Indian Butter Chicken is more than just a meal; it’s an experience. It’s a dish that embodies warmth, flavor, and tradition, making it perfect for creating lasting memories with your loved ones. I hope this recipe brings as much joy to your home as it has to mine. So, gather your ingredients, embrace the aromas, and indulge in the delightful taste of Indian Butter Chicken.

    Related update: Indian Butter Chicken

  • Homemade Oatmeal Cream Pies | Made by Meaghan Moineau

    Homemade Oatmeal Cream Pies | Made by Meaghan Moineau

    Homemade Oatmeal Cream Pies

    There’s something truly magical about recreating childhood favorites in your own kitchen. For me, oatmeal cream pies bring back memories of school lunchboxes, family picnics, and that delightful anticipation of opening a sweet treat after a long day. These homemade oatmeal cream pies offer all the nostalgic flavors with the added benefit of fresh, quality ingredients. Let’s dive into the process of making these delightful treats that are sure to become a family favorite in your home.

    Why You’ll Love It

    These homemade oatmeal cream pies are a revelation. They offer the perfect balance of chewy oatmeal cookies and sweet, fluffy filling. When you make them at home, you can control the quality of ingredients, ensuring a wholesome treat. Plus, the nostalgia factor makes them a delightful dessert option for both kids and adults. They are perfect for lunchboxes, after-school snacks, or a comforting dessert with your evening tea.

    Ingredients

    • 1 teaspoon baking powder
    • 1/2 teaspoon baking soda
    • 1 cup brown sugar
    • 1/2 cup butter, softened
    • 1/2 teaspoon cinnamon
    • 1 tablespoon cocoa powder
    • 1 egg
    • 1 1/2 cups flour
    • 1 cup marshmallow fluff
    • 1 cup powdered sugar
    • 2 cups rolled oats
    • 1/4 teaspoon salt
    • 1 teaspoon vanilla extract
    • 1/2 cup vegetable shortening

    Instructions

    1. Preheat the oven to 350 degrees F. Line cookie sheets with parchment paper to prevent sticking.
    2. Sift the baking powder, baking soda, cinnamon, cocoa powder, flour, and salt into a medium bowl and set aside.
    3. In a large bowl, use an electric mixer to cream together the brown sugar, butter, egg, and vanilla until smooth and creamy.
    4. Gradually add the dry mixture to the wet ingredients, mixing until well combined.
    5. Stir in the rolled oats until evenly distributed throughout the dough.
    6. Using a tablespoon-sized scoop, form equal-sized dough balls and place them on the prepared cookie sheets, allowing plenty of space for spreading.
    7. Bake in the preheated oven for 7-9 minutes, or until the edges are golden brown. Allow the cookies to cool completely on the parchment paper.
    8. For the filling, cream the shortening, powdered sugar, and vanilla together in a bowl until smooth. Then mix in the marshmallow fluff until well combined.
    9. To assemble, match up two cookies of equal size and shape. Turn the bottom cookies over and use a piping bag (or a zip-bag with a corner cut off) to pipe the filling onto the bottom cookie. Add the top cookie and press down gently.

    Tips

    The key to perfect oatmeal cream pies is in the baking time. Keep a close eye on the cookies as they bake to prevent over-browning. For the filling, I find using a piping bag makes the process much easier and results in a cleaner look. If you prefer a thicker layer of cream, feel free to be generous with the filling.

    Variations & Substitutions

    Feel free to tweak this recipe to suit your taste or dietary needs. For a nutty twist, consider adding chopped walnuts or pecans to the dough. If you’re looking for a gluten-free option, substitute the flour with a gluten-free baking blend. You can also experiment with different flavored extracts in the filling, such as almond or maple, to give these pies a unique twist.

    Storage

    These oatmeal cream pies are best enjoyed fresh, but they can be stored in an airtight container at room temperature for up to three days. For longer storage, consider wrapping each pie individually in plastic wrap and freezing them. They can be thawed at room temperature when you’re ready to enjoy them again.

    FAQ

    Can I use quick oats instead of rolled oats?

    While quick oats can be used in a pinch, rolled oats are preferable as they give the cookies a better texture and chewiness. Quick oats tend to make the cookies more cake-like.

    What can I use instead of vegetable shortening?

    If you prefer not to use vegetable shortening, you can substitute it with an equal amount of butter. Keep in mind that the filling may have a slightly different texture but will still be delicious.

    Nutrition

    Each oatmeal cream pie contains approximately 320 calories, 16g of fat, 42g of carbohydrates, and 3g of protein. These values may vary depending on the specific brands of ingredients used.

    Final Thoughts

    Homemade oatmeal cream pies are a delightful, nostalgic treat that brings the comfort of childhood memories to your kitchen. With their chewy texture and sweet, creamy filling, these pies are sure to become a beloved staple in your baking repertoire. Whether enjoyed with a glass of milk or shared with loved ones, they are a testament to the joy of homemade goodness. So go ahead, bake a batch, and relish in the simple pleasures of life.

    Related update: Homemade Oatmeal Cream Pies

    Related update: Authentic Kentucky Bourbon Balls

    Related update: Creamsicle Cookies

  • Masala-Tofu Burger | Made by Meaghan Moineau

    Masala-Tofu Burger | Made by Meaghan Moineau

    Masala-Tofu Burger

    Introduction

    Imagine a family gathering on a warm summer evening, the aroma of spices wafting through the air as laughter echoes in the backyard. This memory always takes me back to the first time I tasted a Masala-Tofu Burger, a delightful fusion of Indian spices and a beloved Western classic. Growing up in a multicultural family, food was always a bridge that connected us, blending flavors and traditions into something special. Today, I’m excited to share this delicious recipe with you, hoping it brings warmth and joy to your own family gatherings.

    Why You’ll Love It

    This Masala-Tofu Burger is a game-changer for anyone looking to add a flavorful twist to their burger repertoire. The combination of aromatic spices, crunchy veggies, and creamy tofu creates a mouthwatering experience that’s both satisfying and healthy. Whether you’re a vegetarian or simply exploring new flavors, this burger is a fantastic option. It’s easy to make, customizable, and perfect for any occasion.

    Ingredients

    • 1 white onion, diced
    • 1 red, orange, or green bell pepper, diced
    • 1 cup frozen peas-carrots mix
    • 2 green chillies, chopped
    • 1 block of tofu, cubed
    • 1 potato, boiled and diced
    • 3 cloves garlic, minced
    • 1 teaspoon black mustard seeds
    • 1 sprig curry leaves
    • A pinch of hing (asafoetida)
    • 1 teaspoon cumin powder
    • 1/2 teaspoon turmeric
    • 1 lemon, juiced
    • Salt to taste
    • 1/4 cup cilantro, finely chopped
    • 1/2 cup Indian breadcrumbs
    • Vegetable oil
    • PAM Original Flavor Spray
    • 1 red or white onion, thickly sliced
    • 2 beefsteak tomatoes, sliced
    • Mint-cilantro chutney spread
    • 4 Portuguese rolls

    Instructions

    1. In a large skillet over medium-high heat, spray a generous amount of PAM and add some oil. Add mustard seeds and saute for 30 seconds until you hear popping noises.
    2. Add the curry leaves carefully as they may pop in hot oil. Then add the onions and peppers, and sweat for about 30 seconds.
    3. Stir in the minced garlic, chopped chilies, and turmeric. Saute for 5-7 minutes until the onions and peppers are soft.
    4. Add the peas-carrots mix, cumin powder, and salt. Continue to saute for 7-10 minutes until all the veggies are cooked through.
    5. In a small bowl, mix cubed tofu with a pinch of turmeric, cumin powder, coarse black pepper, and optional cayenne pepper. Set aside to marinate briefly.
    6. Add the marinated tofu to the skillet and saute until it is slightly browned and crumbly.
    7. Add juice from half a lemon and half of the chopped cilantro. Mix well, then add the diced, boiled potato and toss until everything is coated. Adjust salt and spices to taste.
    8. Mash the mixture with a masher until mushy and the veggies are small. Set aside to cool.
    9. Once cooled, mix in some breadcrumbs with your hands. Form the mixture into four thick patties. Add more breadcrumbs if needed.
    10. Place the patties on a plate, cover with plastic wrap, and refrigerate until ready to cook.
    11. In a small skillet sprayed with PAM over medium-high heat, cook each patty for about 2 minutes on each side until browned and crispy.
    12. Simultaneously, saute the thick onion slices until charred and slightly soft.
    13. Spread a generous amount of mint-cilantro chutney on each side of the Portuguese rolls, then assemble the burger with the patty, onions, tomatoes, and cilantro leaves.
    14. Serve with a slice of lemon and reduced-fat chips on the side.

    Tips

    • Make sure to press the tofu well before marinating to remove excess moisture for a better texture.
    • If you like it spicy, feel free to add more green chilies or cayenne pepper to the mix.
    • For a gluten-free option, use gluten-free breadcrumbs or crushed cornflakes.

    Variations & Substitutions

    Feel free to get creative with this recipe by adding your favorite veggies to the mix, such as mushrooms or spinach. You can also swap tofu for paneer or chickpeas for a different protein source. If you prefer a different type of bread, whole-grain buns or lettuce wraps are excellent alternatives.

    Storage

    These Masala-Tofu Patties can be made ahead of time and stored in the refrigerator for up to 3 days. Alternatively, you can freeze them for up to a month. When ready to enjoy, simply thaw and reheat them in a skillet or oven.

    FAQ

    Can I make these burgers vegan?

    Absolutely! This recipe is already vegan as it uses tofu as the main protein source and skips any dairy or eggs. Just ensure your chutney spread is also vegan-friendly.

    Can I grill these patties instead of pan-frying?

    Yes, you can grill the patties for a smokier flavor. Just make sure to brush them with some oil to prevent sticking and handle them carefully as they can be more delicate than regular meat patties.

    What can I serve with these burgers?

    A fresh green salad, sweet potato fries, or roasted vegetables make excellent sides. You can also pair it with a refreshing yogurt dip or mango chutney for an extra burst of flavor.

    Nutrition

    While I don’t have exact nutritional information for this recipe, it’s packed with healthy ingredients. Tofu provides protein, while the variety of vegetables offers vitamins and minerals. Using a whole-grain bun can increase the fiber content, making this meal as nutritious as it is delicious.

    Final Thoughts

    The Masala-Tofu Burger is a wonderful way to explore new flavors while enjoying a comforting classic. It’s a tribute to the fusion of cultures and the joy of shared meals. I hope this recipe becomes a favorite in your home, bringing smiles and satisfaction to your table. Happy cooking!

    Related update: Masala-Tofu Burger

    Related update: Indian Butter Chicken

  • Almond Ricotta Cake | Made by Meaghan Moineau

    Almond Ricotta Cake | Made by Meaghan Moineau

    Almond Ricotta Cake

    There’s something deeply comforting about baking a cake that fills your home with the warm, inviting aroma of almonds and citrus. This Almond Ricotta Cake is a cherished recipe passed down through generations in my family. I remember watching my grandmother whip up this cake in her cozy kitchen, her hands moving with the kind of practiced ease that only comes from years of baking. She would always let me lick the spoon, and to this day, the taste of this cake brings back the fondest memories of those afternoons spent in her sunlit kitchen. I’m thrilled to share this recipe with you, and I hope it becomes a treasured part of your family traditions as well.

    Why You’ll Love It

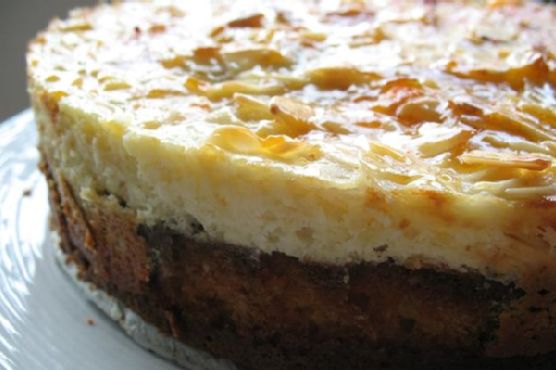
    This Almond Ricotta Cake is the perfect blend of moist, tender crumb and rich flavors. The ricotta cheese adds an incredible creaminess, while the almond extract and zest of fresh lemon bring a bright, aromatic profile. With a delightful topping of almonds and a sweet apricot glaze, this cake is both elegant and delicious. Whether you’re serving it for a special occasion or simply enjoying a slice with your afternoon tea, this cake is sure to impress.

    Ingredients

    • 1 cup all-purpose flour
    • 1 teaspoon almond extract
    • 1 cup ground almonds
    • 1/4 cup apricot jam
    • 1 teaspoon baking powder
    • 1/2 cup canola oil
    • 1 large egg
    • 3 large eggs
    • 2 tablespoons lemon juice
    • Zest of 1 lemon
    • 1/4 cup milk
    • 2 tablespoons orange liqueur
    • 3/4 cup 2% ricotta cheese, plus 3/4 cup for topping
    • 1 tablespoon rum
    • 1/4 teaspoon salt
    • 2 tablespoons sugar, plus 1/4 cup for topping
    • 1 cup sugar
    • 1 teaspoon vanilla extract
    • 1/2 cup sliced almonds

    Instructions

    1. Cake: In a large mixing bowl, beat the eggs, sugar, and oil on high speed until thick and pale, about 8 minutes. Add the ricotta, lemon juice, zest, rum, vanilla, and almond extract. Mix until blended.
    2. In a separate bowl, sift together the ground almonds, flour, baking powder, and salt. Whisk into the ricotta mixture in 3 additions.
    3. Pour the batter into a 10″ springform pan that has been buttered and the bottom lined with parchment paper. Bake in a preheated 350°F oven for 45-50 minutes. The cake is done when a wooden skewer inserted in the center comes out clean.
    4. Topping: Increase your oven temperature to 375°F. Heat the milk and stir in 2 tablespoons of sugar. Toss in the almonds, ensuring they are coated.
    5. In a separate bowl, blend together 3/4 cup ricotta, the egg, 1/4 cup sugar, zest, and vanilla. Spread the ricotta mixture topping over the baked cake and sprinkle with the almond slices.
    6. Return to the oven and continue baking for 15 minutes, until the almonds are golden brown.
    7. Remove from the oven and spread the glaze over the almonds. Allow the cake to cool before removing from the cake pan.
    8. Glaze: In the microwave or in a small pan, heat the apricot jam until it starts to liquefy, about 1-2 minutes. Stir to ensure it doesn’t burn. Strain the jam if there is a large amount of pulp. Brush gently on the baked cake.

    Tips

    • Ensure all ingredients are at room temperature before beginning to mix for a smoother batter.
    • Use fresh lemon for the best flavor; the zest adds a lovely aromatic quality to the cake.
    • Allow the cake to cool completely before glazing to prevent the glaze from soaking into the cake.

    Variations & Substitutions

    • Dairy-Free: Substitute the ricotta cheese with a plant-based ricotta alternative and use almond milk instead of regular milk.
    • Gluten-Free: Replace the all-purpose flour with a gluten-free flour blend suitable for baking.
    • Flavor Twist: Try using different citrus zests, like orange or lime, for a unique twist on the original recipe.

    Storage

    This cake can be stored in an airtight container at room temperature for up to 3 days. If you wish to keep it longer, place it in the refrigerator for up to a week. For even longer storage, wrap it tightly in plastic wrap and freeze for up to a month. Thaw overnight in the refrigerator before serving.

    FAQ

    Can I use a different type of nut for the topping?

    Yes, you can experiment with other nuts like pistachios or walnuts for the topping. Just ensure they are sliced thinly for even baking.

    What can I use instead of apricot jam for the glaze?

    If you don’t have apricot jam, you can substitute it with peach or orange marmalade for a similar sweet and tangy flavor.

    Nutrition

    While this cake is a delightful treat, it’s important to enjoy it in moderation. Each slice contains approximately:

    • Calories: 320
    • Fat: 18g
    • Carbohydrates: 34g
    • Protein: 7g
    • Sugar: 21g

    Final Thoughts

    This Almond Ricotta Cake is more than just a dessert; it’s a delicious reminder of the love and care that goes into home baking. Whether you’re enjoying it with family or sharing it with friends, this cake is sure to warm hearts and create lasting memories. I hope this recipe becomes a beloved part of your baking repertoire, just as it has in mine. Happy baking!

    Related update: Almond Ricotta Cake

  • Flax, Quinoa, and Almond Meal Bread | Made by Meaghan Moineau

    Flax, Quinoa, and Almond Meal Bread | Made by Meaghan Moineau

    Flax, Quinoa, and Almond Meal Bread

    Why You’ll Love It

    There’s something incredibly heartwarming about the aroma of freshly baked bread wafting through your home. This Flax, Quinoa, and Almond Meal Bread is a perfect blend of wholesome ingredients that not only fills your kitchen with a delightful scent but also fills your heart with nostalgia. I remember my grandmother’s kitchen, where baking was a weekend ritual. The sound of her soft humming and the flour dust that seemed to settle everywhere in the room bring back memories each time I bake this bread. Not only is this recipe gluten-free and nutritious, but it also captures the essence of family traditions and warmth.

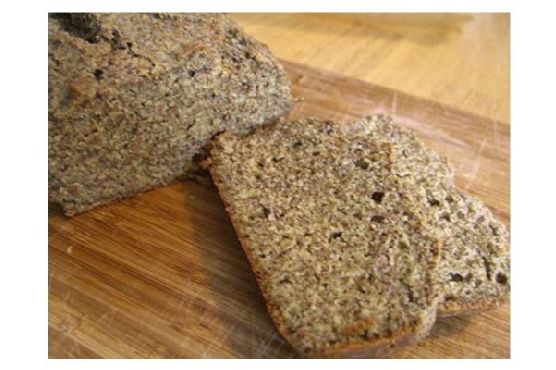
    You’ll love this bread because it’s incredibly versatile and can be paired with both sweet and savory toppings. Its nutty flavor and slightly crumbly texture make it a delightful companion for your morning coffee or your evening tea. Plus, with its simple preparation, you don’t need to be a seasoned baker to pull this off beautifully.

    Ingredients

    • 1 cup milled flax seed
    • 1 cup blanched almond meal
    • 1 cup quinoa flour
    • 2 teaspoons baking powder
    • 1/2 teaspoon salt
    • 1/2 teaspoon baking soda
    • 1/4 cup olive oil
    • 3 large eggs
    • Water, as needed for desired texture

    Instructions

    1. Preheat your oven to 375°F (190°C).
    2. In a large mixing bowl, combine the milled flax seed, almond meal, quinoa flour, baking powder, salt, and baking soda.
    3. In a separate bowl, gently beat the eggs together. This will make it easier to incorporate them into the dry mixture.
    4. Gradually add the beaten eggs to the dry ingredients, stirring continuously to form a cohesive mixture.
    5. Add the olive oil to the mixture. Be cautious if your eggs are cold, as it may cause the oil to solidify. If this happens, gently warm the mixture until the oil liquefies.
    6. Slowly add water to the mixture, a little at a time, until you achieve a thick batter consistency that can be poured into a loaf pan.
    7. Line a Pyrex bread pan with parchment paper and pour the batter in. Smooth the top with a spatula.
    8. Bake in the preheated oven for 40 minutes. If using a metal pan, you may need to adjust the baking time slightly.
    9. Once baked, remove from the oven and let the bread cool in the pan for about 10 minutes before transferring it to a wire rack to cool completely.

    Tips

    For best results, ensure all your ingredients are at room temperature before you begin mixing. This helps in achieving a smoother batter. If you find that the batter is too thick, add water a teaspoon at a time to avoid making it too runny. Also, lining your loaf pan with parchment paper ensures that the bread doesn’t stick and makes cleanup a breeze.

    Variations & Substitutions

    This bread is a canvas for your creativity. You can substitute the quinoa flour with oat flour for a different flavor profile. To add some sweetness, consider incorporating a tablespoon of honey or maple syrup into the batter. For an extra crunch, toss in a handful of your favorite nuts or seeds like sunflower seeds or chopped walnuts.

    Storage

    Once completely cooled, store your flax, quinoa, and almond meal bread in an airtight container. It will keep well at room temperature for up to three days. For longer storage, wrap the loaf tightly in plastic wrap and freeze for up to a month. To enjoy, simply thaw at room temperature or warm it up in the oven for a fresh-baked taste.

    FAQ

    Can I make this bread vegan?

    Yes, you can make this recipe vegan by replacing the eggs with flax eggs. To make flax eggs, mix 3 tablespoons of milled flax seed with 9 tablespoons of water and let it sit for a few minutes until it forms a gel-like consistency.

    What can I use instead of almond meal?

    If you have a nut allergy or simply prefer a different flavor, sunflower seed flour or coconut flour can be used as a substitute. Keep in mind that coconut flour is highly absorbent, so you may need to adjust the amount of liquid in the recipe.

    Can I add spices to this bread?

    Absolutely! Adding spices can elevate the flavor of your bread. Try incorporating a teaspoon of cinnamon or nutmeg for a warm, aromatic touch. For a savory twist, consider adding herbs like rosemary or thyme.

    Nutrition

    This bread is a nutrient-dense option, rich in fiber and healthy fats from the flax seed and almond meal. It’s a great source of plant-based protein thanks to the quinoa flour, making it an excellent choice for those looking to maintain a balanced diet.

    Final Thoughts

    Baking this Flax, Quinoa, and Almond Meal Bread is more than just a culinary endeavor—it’s a journey into the comforting world of homemade goodness. Whether you’re embracing a gluten-free lifestyle or simply looking for a wholesome, delicious bread to enjoy, this recipe is sure to become a staple in your home. Remember, the best part about baking is making it your own, so don’t hesitate to experiment with flavors and ingredients. Happy baking!

    Related update: Flax, Quinoa, and Almond Meal Bread