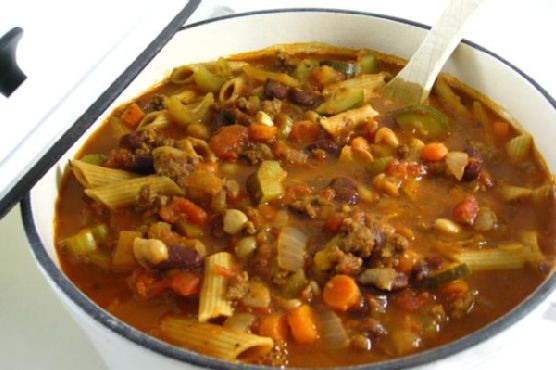
Tag: Lemon

  • Tuscan White Bean & Kale Pasta Fagioli with Lemon Zest | Made by Meaghan Moineau

    Tuscan White Bean & Kale Pasta Fagioli with Lemon Zest | Made by Meaghan Moineau

    Tuscan White Bean & Kale Pasta Fagioli with Lemon Zest

    Picture this: a chilly autumn evening, the kind where a crisp breeze carries the scent of fireplace smoke and golden leaves crunch underfoot. Inside, the kitchen is warm and inviting, filled with the rich aroma of simmering herbs and the intoxicating scent of garlic sautéing in olive oil. This is the moment when a bowl of Tuscan White Bean & Kale Pasta Fagioli with Lemon Zest becomes more than just dinner — it’s a comforting embrace from the inside out.

    Personal Story

    My love affair with Pasta Fagioli began in a small trattoria in Florence, where the owner, an affable man with a hearty laugh, dished up bowls of this soul-satisfying dish to locals and tourists alike. It was a chilly evening, and I was seated at a rustic wooden table, warmed by the glow of a flickering candle and the hearty flavors of this classic Italian soup. Each spoonful was a revelation — a symphony of tender beans, al dente pasta, and an aromatic broth that spoke of time-honored traditions.

    Back home, I tried countless times to recreate that culinary magic in my own kitchen. My early attempts were valiant yet lacking that certain je ne sais quoi. A near kitchen disaster, when I accidentally added twice the amount of garlic, led to an unexpected discovery: the depth and warmth that an extra punch of garlic could bring to the dish. It was a happy accident that opened my eyes to the possibilities of tweaking a classic.

    Over time, I began to experiment with my own variations, each pot simmering with the promise of something new. Kale found its way into the mix on a day when I was short on spinach, and it brought a vibrant, nutrient-rich twist that felt like it had always belonged. The final flourish of lemon zest came on a whim, inspired by a sun-drenched lemon grove visit during a Tuscan tour. This bright addition elevated the dish to new heights, creating a balance of hearty and fresh that quickly became my signature version.

    Now, every time I make this dish, I’m reminded of that little trattoria and the joy of discovery that a simple bowl of soup can bring.

    What Makes This Version Special

    This version of Tuscan White Bean & Kale Pasta Fagioli includes nutrient-rich kale and a hint of lemon zest to brighten up the classic flavors, offering a fresh take on a hearty Italian staple. The kale introduces a robust, earthy note that complements the beans and pasta beautifully, while the lemon zest adds a zesty brightness that cuts through the richness of the dish. By incorporating these elements, the soup becomes not only a comforting classic but also a vibrant and healthful meal that feels both indulgent and nourishing.

    Flavor Profile

    Imagine a bowl of this Pasta Fagioli: it’s rich and hearty, with the creamy texture of white beans and the slight chew of whole wheat penne pasta. The kale brings an herbaceous lift, mingling with the aromatic garlic and Italian seasoning blend. As you savor each spoonful, a refreshing citrus note from the lemon zest emerges, dancing on your palate and leaving a fragrant finish. It’s a delightful balance of warmth and brightness, with a touch of spice from the red pepper flakes, rounding out a truly memorable taste experience.

    Ingredients

    • 1 pound lean ground turkey
    • 2 tablespoons olive oil
    • 1 large onion, diced
    • 2 carrots, diced
    • 2 celery stalks, diced
    • 4 garlic cloves, minced
    • 1 can (14.5 ounces) diced tomatoes
    • 1 can (15 ounces) red kidney beans, rinsed and drained
    • 1 can (15 ounces) white kidney beans, rinsed and drained
    • 1 can (15 ounces) great northern beans, rinsed and drained
    • 5 cups beef broth
    • 1 cup pasta sauce
    • 1 zucchini, diced
    • 1 tablespoon Italian seasoning blend
    • Fresh ground pepper, to taste
    • 2 cups whole wheat penne pasta
    • Grated Parmesan cheese, for serving
    • 2 cups fresh kale, chopped
    • Zest of 1 lemon
    • 1/2 teaspoon red pepper flakes
    • Fresh basil leaves, for garnish

    Instructions

    1. In a large soup pot, brown the lean ground turkey over medium-high heat, breaking it up with a wooden spoon, until it’s no longer pink. This should take about 5-7 minutes. Drain the meat in a colander and set aside.
    2. In the same pot, heat the olive oil over medium heat. Add the diced onions, carrots, celery, and minced garlic. Sauté the mixture for about 5 minutes, stirring often, until the vegetables are just beginning to soften and the garlic is fragrant.
    3. Return the turkey to the pot, stirring to combine. Pour in the diced tomatoes, red kidney beans, white kidney beans, great northern beans, beef broth, and pasta sauce. Stir in the diced zucchini, Italian seasoning blend, and fresh ground pepper.
    4. Bring the soup to a boil, then reduce the heat to low. Cover the pot and let it simmer for 50 minutes, allowing the flavors to meld together beautifully.
    5. Meanwhile, in a separate skillet, sauté the chopped kale and minced garlic over medium heat with a touch of olive oil. Cook until the kale is bright green and slightly wilted, about 3-4 minutes. This step ensures the kale retains its vibrant color and adds a delightful texture to the soup.
    6. Add the sautéed kale to the soup, followed by the whole wheat penne pasta. Stir well, cover, and let the soup continue to simmer for another 10 minutes, or until the pasta is tender but still has a nice bite.
    7. Finish the dish by stirring in the lemon zest and a sprinkle of red pepper flakes to taste. Garnish with fresh basil leaves and a generous grating of Parmesan cheese before serving.

    Pro Tips from Meaghan’s Kitchen

    • For an extra depth of flavor, try browning the turkey with a splash of balsamic vinegar. It adds a subtle sweetness that complements the tomatoes beautifully.
    • Keep the kale bright by sautéing it separately. This prevents it from overcooking in the soup, maintaining its vibrant color and texture.
    • Adjust the seasoning at the end. As the soup simmers, flavors can intensify, so taste and tweak the salt and pepper as needed before serving.
    • Don’t skimp on the lemon zest. It’s the secret ingredient that elevates the dish, adding a fresh, zesty aroma that ties all the flavors together.
    • If you like a bit more heat, feel free to increase the red pepper flakes or add a dash of hot sauce for an extra kick.

    Variations & Dietary Swaps

    • Vegetarian Version: Omit the turkey and use vegetable broth instead of beef broth. Add extra beans or a can of chickpeas for added protein.
    • Spice-It-Up Version: For those who love heat, add a chopped jalapeño or a sprinkle of cayenne pepper along with the red pepper flakes.
    • Kids-Friendly Version: Reduce the amount of garlic and red pepper flakes. Use orzo or small pasta shapes to make it more fun and approachable for little ones.

    What to Serve With It

    This Tuscan White Bean & Kale Pasta Fagioli pairs beautifully with a chilled glass of Pinot Grigio, which complements the citrus notes and balances the hearty flavors of the soup. Alternatively, a side of crusty garlic bread is perfect for soaking up every last drop of the delicious broth. For a lighter side, consider a simple mixed green salad with a lemon vinaigrette to enhance the zesty notes in the dish.

    Storage & Meal Prep

    Store leftovers of your Pasta Fagioli in an airtight container in the refrigerator for up to 4 days. For longer storage, freeze the soup in individual portions — it keeps well for up to 3 months. When reheating, gently warm the soup on the stovetop over medium heat, adding a splash of broth or water if needed to reach your desired consistency. Avoid reheating in the microwave if possible, as it may overcook the pasta and kale, diminishing their texture.

    FAQ

    Can I use fresh tomatoes instead of canned?

    Yes, you can use fresh tomatoes if you prefer. Simply blanch and peel them, then chop and use in place of the canned tomatoes. Keep in mind that canned tomatoes have a more concentrated flavor, so you may want to adjust the seasoning.

    Can I make this soup in a slow cooker?

    Absolutely! Brown the turkey and sauté the vegetables as directed, then transfer everything to a slow cooker. Cook on low for 6-7 hours or on high for 3-4 hours, adding the pasta and kale in the last 30 minutes of cooking.

    Is it possible to make this dish gluten-free?

    Yes, simply substitute the whole wheat penne with your favorite gluten-free pasta. Be mindful of cooking times, as gluten-free pasta tends to cook faster and may become mushy if overcooked.

    What other types of beans can I use?

    You can experiment with different beans based on your preference or what you have on hand. Cannellini beans or chickpeas make great substitutes, offering a creamy texture and a hearty bite.

    How can I thicken the soup?

    If you prefer a thicker soup, mash some of the beans before adding them to the pot. This will release their natural starches, creating a creamier consistency.

    Final Thoughts

    Embarking on the culinary adventure of making Tuscan White Bean & Kale Pasta Fagioli with Lemon Zest is a delicious way to bring a taste of Italy into your home. Whether you’re cooking for family, entertaining friends, or simply savoring a quiet meal alone, this dish is sure to impress with its hearty yet fresh flavors. I hope you find joy in every spoonful as I do, and I invite you to share your own twists and experiences in the comments below. Happy cooking, and remember, the kitchen is your canvas!

    Related update: Tuscan White Bean & Kale Pasta Fagioli with Lemon Zest

    Related update: Zesty Chana Masala with Charred Lime and Mint Yogurt Drizzle

  • Zesty Lemon-Honey Glazed Chicken with Ginger-Infused Mashed Potatoes | Made by Meaghan Moineau

    Zesty Lemon-Honey Glazed Chicken with Ginger-Infused Mashed Potatoes | Made by Meaghan Moineau

    Zesty Lemon-Honey Glazed Chicken with Ginger-Infused Mashed Potatoes

    Imagine your kitchen filled with the enticing aroma of zesty lemon and sweet honey caramelizing into a perfect glaze, while the gentle hum of bubbling potatoes promises a creamy, aromatic side dish. This dish is a celebration of bold flavors and comforting textures, ready to elevate any dinner gathering or a cozy night in.

    Personal Story

    Growing up, Sunday dinners were a sacred affair in our household. My grandmother would somehow transform a humble chicken into something magical, her secret always a mystery. It wasn’t until years later, when I attempted to replicate her magic, that I stumbled upon my own secret twist: a hint of ginger and turmeric to the mashed potatoes.

    I remember the first time I made this dish vividly. It was a rainy afternoon, the kind that beckons you to stay indoors and embrace the warmth of your kitchen. As I stood there, garlic sizzling in olive oil, I felt a connection to my grandmother’s kitchen, the same comforting symphony of flavors filling the air.

    Of course, there was a mishap or two. Like when I accidentally used too much turmeric, turning my potatoes an alarming shade of yellow. But with each attempt, the recipe became a comforting ritual. The zing of lemon, the sweetness of honey, and the earthy warmth of ginger and turmeric became my signature touch.

    Sharing this recipe with friends and family, I found it brought the same joy to others as it did to me. It’s not just a meal; it’s a shared experience, a conversation starter, and a tribute to culinary creativity.

    What Makes This Version Special

    This version of Zesty Lemon-Honey Glazed Chicken with Ginger-Infused Mashed Potatoes stands out because it introduces a subtle complexity to the classic combination. The addition of fresh ginger and ground turmeric to the mashed potatoes not only adds a burst of color but also a depth of flavor that harmonizes beautifully with the citrusy glaze of the chicken. It’s a fusion of comfort and sophistication, offering a delightful twist that surprises and delights.

    Unlike traditional mashed potatoes, this version boasts a hint of spice and fragrance from the ginger and turmeric, which are bloomed in butter before being mixed into the sweet potatoes. This technique elevates the dish, transforming it from a simple side into a star on your plate. Accompanied by the sweet and tart glaze on the chicken, this meal becomes a symphony of flavors, each bite more intriguing than the last.

    Flavor Profile

    Sink your teeth into the sweet and tangy chicken, where a citrusy glaze envelops each piece in a delightful, sticky hug. The garlic and thyme infuse the meat with a savory depth, while the honey and lemon slices caramelize into a glossy finish. Paired with the warm, earthy notes of ginger and turmeric in the creamy mashed potatoes, this dish offers a balanced flavor journey. The potatoes are rich and velvety, with a pop of freshness from scallions and a slight nuttiness from the buttermilk.

    Ingredients

    • 8 chicken thighs
    • 2 teaspoons black sea salt
    • 1 teaspoon pepper
    • 2 tablespoons olive oil
    • 4 cloves garlic, minced
    • 4 sprigs thyme
    • 1 splash red wine vinegar
    • 2 tablespoons dark soy sauce
    • 3 tablespoons honey
    • 1 lemon, thinly sliced
    • 2 tablespoons flat leaf parsley, chopped
    • 1 inch fresh ginger, grated
    • 1 teaspoon ground turmeric
    • 1 cup buttermilk
    • 4 large sweet potatoes, peeled and cubed
    • 2 scallions, sliced

    Instructions

    1. Season the chicken thighs with salt and pepper. Heat olive oil in a large sauté pan over medium-high heat. Add the chicken, skin-side down, in a single layer. Brown the chicken pieces (in batches if necessary) along with the garlic and thyme for 2-3 minutes on each side until golden brown. Remove and set aside.
    2. Return all the chicken to the pan. Add a splash of red wine vinegar and let it bubble until reduced by half. Drizzle the soy sauce and honey over the chicken, then shake the pan to mix all ingredients thoroughly.
    3. Pour 1/2 cup of hot water into the pan and add the lemon slices. Let the liquid bubble and reduce down until syrupy, which will take about 10 minutes or so. By now, the chicken should be cooked through. Transfer the chicken to a platter and sprinkle over the chopped parsley.
    4. Meanwhile, boil the sweet potatoes in salted water until tender, about 15-20 minutes. Drain and set aside.
    5. In a small pan, melt a tablespoon of butter over low heat. Add the grated ginger and turmeric, and bloom them in the butter for about 1-2 minutes until fragrant.
    6. In a large bowl, mash the sweet potatoes with the buttermilk and the spiced butter mixture until smooth and creamy. Stir in the scallions for a fresh finish.
    7. Serve the chicken hot, accompanied by the ginger-infused mashed sweet potatoes.

    Pro Tips from Meaghan’s Kitchen

    • Bloom spices: Always bloom your ginger and turmeric in butter before adding them to the mashed potatoes. This step releases their essential oils, enhancing the fragrance and flavor.
    • Use the right soy sauce: Dark soy sauce adds a richer color and deeper flavor to the glaze. Don’t substitute with regular soy sauce if you want that deep umami.
    • Caramelize your lemons: Allow the lemon slices to caramelize slightly in the pan for an extra depth of flavor that complements the sweet and savory notes of the glaze.
    • Adjust sweetness: If you prefer a slightly less sweet glaze, reduce the honey by one tablespoon and add a touch more vinegar for balance.
    • Rest the chicken: Let the chicken rest for a few minutes after cooking to reabsorb juices, ensuring moist and flavorful meat.

    Variations & Dietary Swaps

    • Vegetarian Swap: Replace chicken with tofu. Use the same glaze ingredients and method for a plant-based alternative.
    • Spice-it-up Version: Add a pinch of cayenne pepper to the glaze for a spicy kick that pairs beautifully with the sweetness of the honey.
    • Kids-Friendly Version: Substitute sweet potatoes with regular potatoes for a milder flavor and skip the turmeric if your little ones aren’t fan of the color or taste.

    What to Serve With It

    This dish pairs beautifully with a chilled Riesling, whose crispness complements the sweet and tart glaze of the chicken. Alternatively, a lightly sparkling elderflower soda is a refreshing, non-alcoholic option that enhances the floral notes of the dish. For a complete meal, consider serving with a side of lightly sautéed green beans or a simple arugula salad tossed in lemon vinaigrette.

    Storage & Meal Prep

    Store any leftovers in an airtight container in the fridge for up to 3 days. To reheat, place in a 350°F oven until warmed through, about 15 minutes. Alternatively, you can freeze the chicken and mashed potatoes separately for up to 2 months. Thaw overnight in the fridge before reheating.

    FAQ

    Can I use chicken breasts instead of thighs?

    Yes, you can use boneless chicken breasts. Keep in mind they cook faster, so monitor them closely to avoid drying out.

    Can I make this dish ahead of time?

    Absolutely! Prepare the chicken and mashed potatoes in advance, then reheat before serving. The flavors meld beautifully, making it an ideal make-ahead dish.

    What if I don’t have fresh ginger?

    You can substitute with 1/2 teaspoon of ground ginger, but the flavor might not be as vibrant as fresh ginger.

    Is there a non-dairy substitute for buttermilk?

    Yes, use almond milk with a teaspoon of apple cider vinegar or lemon juice. Let it sit for a few minutes to curdle slightly before using.

    How can I thicken the glaze if it’s too runny?

    If the glaze is too runny, let it simmer longer to reduce or add a cornstarch slurry (1 teaspoon cornstarch mixed with 1 tablespoon cold water) to thicken it quickly.

    Final Thoughts

    There you have it, a dish that combines tradition with a twist, bringing warmth and flavor to your table. I hope you find as much joy in making Zesty Lemon-Honey Glazed Chicken with Ginger-Infused Mashed Potatoes as I do. I’d love to hear about your experiences and any creative spins you might add. Don’t forget to share your culinary adventures and spread the love of cooking!

    Related update: Zesty Lemon-Honey Glazed Chicken with Ginger-Infused Mashed Potatoes

  • Zesty Lemon-Lavender Bundt Cake with Vanilla Bean Glaze | Made by Meaghan Moineau

    Zesty Lemon-Lavender Bundt Cake with Vanilla Bean Glaze | Made by Meaghan Moineau

    Zesty Lemon-Lavender Bundt Cake with Vanilla Bean Glaze

    Imagine a late afternoon when golden sunlight spills across your kitchen counter, the air filled with the scent of fresh lemons and a hint of lavender. That’s the moment I knew — a classic lemon bundt cake could be so much more than just a simple citrus delight. Today, I’m sharing my secret to transforming this traditional dessert into something truly remarkable: the Zesty Lemon-Lavender Bundt Cake with a luscious Vanilla Bean Glaze.

    Personal Story

    My love affair with bundt cakes began in my grandmother’s cozy kitchen, a place where the walls seemed to echo with laughter and the smell of baked goods always lingered. I remember one winter afternoon, with the world outside blanketed in snow, she handed me a lemon bundt cake recipe, saying, “This is a recipe for any season.” It was simple, yet its tartness and subtle sweetness were enough to lift anyone’s spirits.

    Years later, I found myself craving that same comforting cake but with a bit of a twist. My culinary journey took me to Provence, where fields of lavender swayed gently in the breeze. The idea struck me like a bolt of inspiration: why not infuse my grandmother’s beloved lemon bundt cake with the elegant aroma of lavender? On my return home, I spent countless afternoons experimenting in my kitchen, a place now filled with the fragrant blend of citrus and flowers.

    There were mishaps, of course — too much lavender, and the cake tasted like soap; too little, and it barely registered against the lemon. But eventually, I struck the right balance, yielding a cake that was not only beautiful to behold but also a delight to the senses. The addition of a vanilla bean glaze was the final touch, creating a dessert that feels both luxurious and homemade.

    Every time I bake this Zesty Lemon-Lavender Bundt Cake, I am transported back to those fields in Provence and my grandmother’s kitchen, both places of simple, profound joy.

    What Makes This Version Special

    This isn’t your average lemon bundt cake. By infusing it with aromatic lavender and topping it with a rich vanilla bean glaze, this version offers an elegant floral note that elevates the classic citrusy treat. The lavender adds a subtle but impressive depth, while the vanilla bean glaze brings a creamy sweetness that complements the cake’s tartness. It’s a harmonious blend of flavors that dances on your palate, making this cake a standout at any gathering.

    Flavor Profile

    Biting into this cake is like taking a sensory journey. First, the vibrant taste of lemon dances across your tongue, bright and refreshing. Then, the floral undertones of lavender emerge, adding a soft, aromatic note that intrigues and delights. The vanilla bean glaze, speckled and aromatic, wraps everything in a sweet, creamy finish. This Zesty Lemon-Lavender Bundt Cake is a delightful balance of citrus and floral notes with a creamy, vanilla-infused sweetness.

    Ingredients

    • 1 package lemon cake mix
    • 1 package lemon pudding mix
    • 4 large eggs
    • 1 cup sour cream
    • 1/2 cup vegetable oil
    • 1/2 cup water
    • 1 tablespoon **dried culinary lavender**
    • 1/4 cup frozen lemonade concentrate, thawed
    • 2 cups powdered sugar
    • 1 **vanilla bean**
    • 2 tablespoons fresh lemon zest

    Instructions

    1. Preheat your oven to 350 degrees Fahrenheit. Grease and flour a 10-inch bundt pan thoroughly, ensuring every nook is covered to prevent sticking.
    2. In a small pot, bring 1/4 cup of water to a boil. Add the dried lavender and let it steep for about 10 minutes. Strain the lavender, reserving the infused water.
    3. In a large mixing bowl, combine the lemon cake mix, lemon pudding mix, eggs, sour cream, vegetable oil, and the lavender-infused water. Mix until the batter is smooth and creamy.
    4. Gently fold in the fresh lemon zest, ensuring it is evenly distributed throughout the batter.
    5. Pour the batter into the prepared bundt pan, smoothing the top with a spatula. Bake for 50-60 minutes, or until a toothpick inserted into the center comes out clean.
    6. Allow the cake to cool in the pan for 10-15 minutes. Then, invert it onto a wire rack to cool completely.
    7. For the glaze, halve the vanilla bean and scrape out the seeds into a mixing bowl. Add the lemonade concentrate and 1 cup of powdered sugar, stirring until smooth.
    8. Gradually add the remaining powdered sugar, mixing until the glaze reaches your desired consistency. It should be thick but pourable.
    9. Spoon the glaze over the cooled cake, letting it drip down the sides. Dust with additional powdered sugar, if desired.

    Pro Tips from Meaghan’s Kitchen

    • For a more pronounced lavender flavor, you can add a drop of food-grade lavender essential oil to the batter.
    • Ensure your bundt pan is well-greased and floured; otherwise, the intricate details can cause the cake to stick.
    • Use a fine-mesh sieve to strain the lavender infusion, ensuring no bits of flower remain in the water.
    • When scraping the vanilla bean, use the back of a knife for easier handling and maximum seed extraction.
    • Let the cake cool slightly before glazing to avoid the glaze melting and sliding off completely.

    Variations & Dietary Swaps

    • Vegetarian Swap: Replace eggs with a plant-based egg substitute like aquafaba or flaxseed meal mixed with water.
    • Spice-it-Up Version: Add a teaspoon of cardamom to the cake batter for a warm, spicy note.
    • Kids-Friendly Version: Omit the lavender and add a swirl of blueberry jam to the batter before baking for a fruity twist.

    What to Serve With It

    This cake pairs beautifully with a cup of Earl Grey tea, its bergamot notes playing off the lavender beautifully. For a more celebratory feel, serve with a chilled glass of sparkling wine, which highlights the cake’s citrusy brightness.

    Storage & Meal Prep

    Store any leftovers in an airtight container at room temperature for up to three days. For longer storage, wrap slices individually in plastic wrap and freeze for up to a month. To reheat, let the cake thaw at room temperature, then warm slices in a microwave for 10-15 seconds or in an oven at 300 degrees Fahrenheit for a few minutes.

    FAQ

    Can I use fresh lavender instead of dried?

    While fresh lavender can be used, it’s more potent, so use sparingly. Dried lavender is recommended for a more controlled flavor infusion.

    What if I don’t have a bundt pan?

    You can use a regular cake pan, but adjust the baking time accordingly. Check for doneness around the 40-minute mark.

    How do I prevent the cake from sticking to the pan?

    Ensure your bundt pan is greased and floured thoroughly, and allow the cake to cool before attempting to remove it.

    Can I prepare the batter ahead of time?

    It’s best to bake the batter immediately for optimal rise. However, you can prepare the dry ingredients in advance to save time.

    Is there a substitute for the vanilla bean?

    If you don’t have a vanilla bean, use a teaspoon of pure vanilla extract in the glaze.

    Final Thoughts

    I hope this Zesty Lemon-Lavender Bundt Cake with Vanilla Bean Glaze brings a touch of elegance and delight to your next gathering. Its harmonious flavors are sure to impress, making it a memorable addition to any occasion. I’d love to hear how it turns out for you, so feel free to leave a comment or share your baking adventures on social media. Happy baking, friends!

    Related update: Zesty Lemon-Lavender Bundt Cake with Vanilla Bean Glaze

    Related update: Spiced Double-Layered Peanut Butter Cups with Sea Salt Crystals

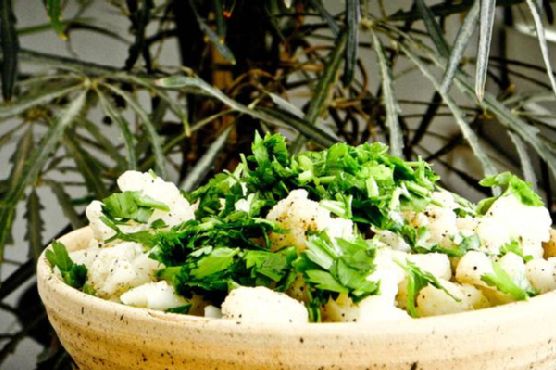
  • Spiced Egyptian Roasted Cauliflower Salad with Tahini Drizzle | Made by Meaghan Moineau

    Spiced Egyptian Roasted Cauliflower Salad with Tahini Drizzle | Made by Meaghan Moineau

    Spiced Egyptian Roasted Cauliflower Salad with Tahini Drizzle

    Imagine the sizzle of cauliflower roasting to a perfect golden-brown, enveloped in a fragrant cloud of smoky paprika and garlic. The anticipation builds as the creamy tahini drizzle awaits its turn to dance on top, promising a meal that’s as visually stunning as it is delicious.

    Personal Story

    Ah, cauliflower. It’s one of those humble vegetables that I used to overlook in my kitchen adventures. That is, until a trip to Cairo a few years back changed everything. I remember meandering through the bustling streets, where the air was filled with exotic spices and the scent of roasting vegetables from roadside stalls. I stumbled upon a small eatery tucked away in an alley, offering a simple yet transformative dish: a roasted cauliflower salad that was a revelation.

    Back home, I couldn’t shake the memory of that salad. The cauliflower was roasted to perfection, with a smoky depth that I couldn’t quite replicate with just plain ol’ steaming. So, I began experimenting in my kitchen, determined to recreate that unforgettable flavor. My first attempts were a bit of a kitchen mishap—too much spice here, not enough there—but eventually, I found my groove. The secret lay in a careful balance of smoked paprika, garlic powder, and the creamy tang of tahini.

    Now, whenever I prepare my Spiced Egyptian Roasted Cauliflower Salad, I’m transported back to that vibrant Cairo street corner. It’s a dish steeped in personal discovery and culinary triumph, and I’m thrilled to share it with you.

    What Makes This Version Special

    This isn’t your average roasted cauliflower salad. My version elevates the humble vegetable by roasting it with a medley of spices that imbue a smoky depth, then topping it with a luxurious creamy tahini drizzle. The magic happens in the roasting process, where the spices create a caramelized crust that’s simply irresistible. What sets this recipe apart is the interplay of textures and flavors: the silky tahini meets the nutty crunch of toasted pine nuts, and everything is brightened with a squeeze of fresh lemon juice.

    Flavor Profile

    Prepare for a taste journey that is smoky, nutty, and oh-so satisfying. The smoked paprika and garlic powder give the cauliflower a bold, earthy flavor, while the tahini drizzle adds a creamy, tangy finish. The roasted bell peppers bring a touch of sweetness, contrasting beautifully with the savory notes. Each bite is an experience, from the warm spices to the cool, refreshing mint that finishes the dish.

    Ingredients

    • 1 large cauliflower, cut into medium-sized florets
    • 2 tablespoons olive oil
    • 1 teaspoon smoked paprika
    • 1 teaspoon garlic powder
    • 1 teaspoon cumin
    • Salt, to taste
    • Freshly ground black pepper, to taste
    • 1 red bell pepper, diced
    • 2 tablespoons lemon juice
    • 1/4 cup tahini
    • 2 tablespoons water (to thin the tahini)
    • 1/4 cup toasted pine nuts
    • 1/4 cup chopped fresh parsley
    • 1/4 cup fresh mint leaves, torn

    Instructions

    1. Preheat your oven to 425°F (220°C). While the oven heats, separate the cauliflower into medium-sized florets. If you have a steamer, steam the cauliflower for 5 minutes until slightly tender. If not, you can boil the whole cauliflower for 5 minutes, then cut it into pieces once it cools slightly.
    2. In a large mixing bowl, toss the steamed cauliflower with olive oil, smoked paprika, garlic powder, cumin, and a generous pinch of salt and pepper. Spread the cauliflower in a single layer on a baking sheet lined with parchment paper.
    3. Roast in the oven for 20-25 minutes, or until the cauliflower is golden-brown and slightly crisp around the edges. The aroma will be irresistible!
    4. While the cauliflower is roasting, dice the bell pepper and toast the pine nuts in a dry skillet over medium heat until they are golden and fragrant. Be sure to stir frequently to prevent burning.
    5. In a small bowl, mix the tahini with lemon juice and water until smooth and slightly runny. Adjust the water amount if necessary to reach your desired consistency.
    6. Once the cauliflower is done, remove it from the oven and let it cool for a few minutes. Combine it with the diced bell pepper in a serving bowl.
    7. Drizzle the tahini mixture over the cauliflower and bell pepper. Sprinkle with toasted pine nuts, chopped parsley, and fresh mint leaves for a burst of flavor and color.

    Pro Tips from Meaghan’s Kitchen

    • Spice it up: Add a pinch of cayenne pepper to the spice mix for a touch of heat.
    • Crispy Cauliflower: Make sure the cauliflower is well-drained before roasting to achieve the perfect crispiness.
    • Tahini Tips: If your tahini is too thick, warm it slightly in the microwave to make it easier to mix.
    • Extra Crunch: Don’t skip the toasting step for the pine nuts; it enhances their flavor and adds an irresistible crunch.
    • Herbaceous Finish: Add a sprinkle of sumac for a tangy, lemony finish.

    Variations & Dietary Swaps

    • Vegetarian Delight: Add roasted chickpeas for added protein and texture.
    • Spice-it-up Version: Incorporate a teaspoon of harissa paste into the tahini drizzle for an extra kick.
    • Kids-Friendly Version: Swap smoked paprika with sweet paprika and omit the cumin for a milder flavor.

    What to Serve With It

    This Spiced Egyptian Roasted Cauliflower Salad pairs beautifully with a chilled glass of Sauvignon Blanc or a side of warm pita bread. For a heartier meal, serve it alongside grilled chicken or lamb kebabs. The salad’s vibrant flavors and textures also complement a simple bowl of couscous or quinoa, allowing the dish to shine as a centerpiece.

    Storage & Meal Prep

    This salad is best enjoyed fresh, but it can be stored in the refrigerator for up to 2 days in an airtight container. If you plan to make it ahead, keep the tahini drizzle and pine nuts separate until just before serving to maintain their texture. Reheat the salad gently in the oven at a low temperature, or enjoy it cold as a refreshing lunch option.

    FAQ

    Can I use frozen cauliflower?

    Yes, you can use frozen cauliflower. Just be sure to thaw and drain it well before roasting to prevent sogginess.

    What’s the best way to toast pine nuts?

    Toast pine nuts in a dry skillet over medium heat, stirring frequently, until they are golden and fragrant. This usually takes about 3-5 minutes.

    Is there a substitute for tahini?

    If tahini isn’t available, you can use almond butter or sunflower seed butter for a similar creamy texture, though the flavor will be different.

    Can I make this salad vegan?

    Absolutely! This recipe is already vegan-friendly as it is free from animal products.

    How can I add more protein to the salad?

    Consider adding roasted chickpeas or grilled tofu for an added protein boost.

    Final Thoughts

    I hope this Spiced Egyptian Roasted Cauliflower Salad with Tahini Drizzle finds its way into your kitchen and becomes a beloved part of your culinary repertoire. Its unique combination of flavors and textures is sure to impress at any gathering or simply elevate a weekday dinner. I’d love to hear how it turns out for you, so please share your thoughts or variations in the comments below. Happy cooking, my friends!

    Related update: Spiced Egyptian Roasted Cauliflower Salad with Tahini Drizzle

    Related update: Garlicky Kale with Toasted Pine Nuts and Sun-Dried Tomatoes

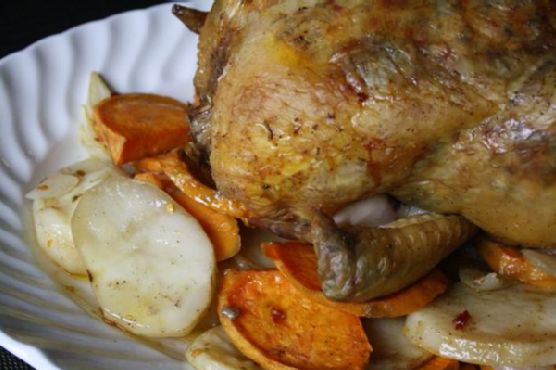
  • Herb-Crusted Lemon Roast Chicken with Truffle-Infused Potatoes | Made by Meaghan Moineau

    Herb-Crusted Lemon Roast Chicken with Truffle-Infused Potatoes | Made by Meaghan Moineau

    Herb-Crusted Lemon Roast Chicken with Truffle-Infused Potatoes

    The moment your kitchen fills with the aroma of roasting chicken mingling with fresh herbs and a whisper of citrus, you know dinner is going to be special. Picture this: crispy, golden-brown skin enveloping juicy, savory meat, with herbaceous notes dancing around your taste buds, all complemented by the earthy allure of truffle-oil-kissed potatoes. This is not just any roast chicken—it’s an experience.

    Personal Story

    My love affair with roast chicken started in my grandmother’s cozy kitchen, where Sundays were synonymous with her iconic roast dinners. I’d spend the mornings eagerly peeling potatoes, mesmerized by the alchemy of simple ingredients transforming into something extraordinary. Her secret, she whispered, was all about the seasoning—and a little bit of love.

    Years later, I found myself in a tiny Parisian bistro with the smell of rotisserie chicken wafting through the air, reigniting those cherished memories. The French, I discovered, had perfected the art of marrying simplicity with sophistication, creating dishes that were both comforting and refined. Inspired, I returned home determined to recreate that magic.

    After countless experiments (and a few crispy mishaps), I crafted my version of the perfect roast chicken. By adding a fragrant herb crust and finishing my potatoes with a touch of truffle oil, I found that I could evoke those nostalgic flavors while bringing a modern twist to the table. Every time I make this dish, I’m reminded that cooking is a delicious journey, full of stories waiting to be told.

    What Makes This Version Special

    This Herb-Crusted Lemon Roast Chicken with Truffle-Infused Potatoes takes the classic roast chicken to new heights. The herb crust—composed of fresh rosemary, thyme, parsley, and a sprinkle of grated parmesan cheese—adds layers of savory goodness that permeate the chicken skin, making it irresistibly crispy and flavorful. The truffle oil drizzled over the potatoes in the last ten minutes of roasting infuses them with a luxurious earthiness, elevating this dish to gourmet status. Unlike the usual roast chicken recipes, this version doesn’t just satisfy; it wows.

    Flavor Profile

    Imagine biting into a piece of chicken where the skin crackles with a herby, crunchy crust, releasing the fragrant oils of rosemary and thyme. The juicy meat underneath is subtly infused with lemony notes, creating a delicate balance of tang and warmth. Now, pair this with Yukon gold and sweet potatoes that are roasted to perfection, their creamy interiors contrasting with a crispy exterior. The final touch of truffle oil adds an earthy aroma that lingers, turning every bite into a sensory delight.

    Ingredients

    • 1 whole chicken, washed and patted dry
    • 2 tablespoons butter, softened
    • 3 cloves garlic, minced
    • Zest of 2 lemons
    • 1 teaspoon chili flakes
    • Salt and pepper to taste
    • 1 lemon, halved
    • 2 pounds Yukon gold potatoes, diced
    • 2 pounds sweet potatoes, diced
    • 1 teaspoon chili flakes
    • 2 tablespoons olive oil
    • **1 tablespoon truffle oil**
    • **2 tablespoons fresh rosemary, finely chopped**
    • **2 tablespoons fresh thyme, finely chopped**
    • **2 tablespoons parsley, finely chopped**
    • **1/2 cup grated parmesan cheese**

    Instructions

    1. Preheat your oven to 400°F (200°C). Ensure the chicken is thoroughly washed and patted dry, as a dry surface ensures crispy skin.
    2. Generously season the chicken inside, outside, and under the skin with salt and pepper. This is crucial for flavor.
    3. In a small bowl, mix softened butter with minced garlic, chili flakes, and lemon zest. Add a pinch of salt and pepper to taste.
    4. Gently lift the skin of the chicken and stuff the flavored butter underneath, spreading it over the breast, legs, and back for maximum flavor.
    5. Stuff half a lemon into the chicken cavity to infuse the meat with citrusy zest as it roasts.
    6. In a large baking pan, toss the diced Yukon gold and sweet potatoes with chili flakes, a pinch of salt and pepper, and olive oil. Spread them evenly across the bottom of the pan.
    7. Place a roasting rack over the potatoes and position the chicken breast-side up on the rack. This allows the potatoes to soak up the delicious drippings.
    8. Roast for the first 15 minutes at 400°F, then reduce the oven temperature to 300°F. Continue roasting for about an hour, basting occasionally with the pan juices.
    9. Halfway through, turn the chicken breast-side down. This helps even cooking and keeps the breast moist.
    10. In the last 10 minutes of roasting, drizzle a small amount of truffle oil over the potatoes for an aromatic finish.
    11. Check for doneness by piercing the thickest part of the chicken, the thigh. If the juices run clear, it’s ready. If not, give it more time.
    12. Once done, let the chicken rest for 10 minutes before carving. Serve it on a platter over the roasted potatoes.

    Pro Tips from Meaghan’s Kitchen

    • Dry your chicken well: A dry surface is key to achieving that crispy, golden-brown skin.
    • Herb crust trick: Press the herb mixture firmly onto the skin to ensure it sticks and crisps up beautifully.
    • Truffle oil timing: Add the truffle oil at the end to prevent it from losing its delicate flavor during cooking.
    • Rest before carving: Allowing the chicken to rest helps the juices redistribute, resulting in tender, juicy meat.
    • Save the pan juices: They make a fantastic gravy or sauce when reduced on the stovetop with a splash of white wine.

    Variations & Dietary Swaps

    • Vegetarian swap: Replace chicken with whole cauliflower. Coat with the same herb crust and roast until tender.
    • Spice-it-up version: Add smoked paprika and cumin to the butter mixture for a smoky kick.
    • Kids-friendly version: Omit chili flakes and add a touch of honey to the butter for a sweeter, milder flavor.

    What to Serve With It

    This dish pairs beautifully with a crisp Chardonnay, whose acidity complements the savory roast chicken and earthy truffle notes. For a fresh, vibrant side, serve with an arugula salad tossed in a lemon vinaigrette. The peppery arugula and zesty dressing cut through the richness, balancing the meal perfectly.

    Storage & Meal Prep

    Leftovers can be a lifesaver! Store any leftover chicken and potatoes in an airtight container in the fridge for up to three days. You can also freeze them for up to two months. To reheat, place in a 350°F oven until warmed through, or microwave for a quick fix, though the oven preserves the texture better.

    FAQ

    Can I use dried herbs instead of fresh ones?

    Yes, but fresh herbs provide a more vibrant flavor and aroma. If using dried herbs, reduce the quantity by about half.

    Is truffle oil necessary?

    While truffle oil adds a luxurious touch, it’s not essential. You can skip it or substitute with a drizzle of high-quality olive oil for a simpler finish.

    How do I know when the chicken is fully cooked?

    Check the internal temperature with a meat thermometer. It should read 165°F at the thickest part of the thigh. Alternatively, when pierced, the juices should run clear.

    What type of potatoes work best?

    Yukon gold and sweet potatoes offer a perfect texture contrast and sweetness. However, russets or red potatoes can also be used if preferred.

    Can I prepare this dish in advance?

    Absolutely! You can season and prepare the chicken a day ahead and store it covered in the fridge. This allows the flavors to meld, and all you need to do is roast it when you’re ready.

    Final Thoughts

    There’s something truly magical about gathering around a table and enjoying a home-cooked meal that’s been crafted with love and care. This Herb-Crusted Lemon Roast Chicken with Truffle-Infused Potatoes brings that magic to life, transforming a weeknight dinner into a culinary celebration. I’d love to hear your thoughts and any personal twists you might add to this recipe. Please share your experiences in the comments, and don’t forget to spread the love by sharing this recipe with friends and family. Happy cooking!

    Related update: Herb-Crusted Lemon Roast Chicken with Truffle-Infused Potatoes

    Related update: Umami-Packed Truffle Veggie Fried Rice with Crispy Shiitake

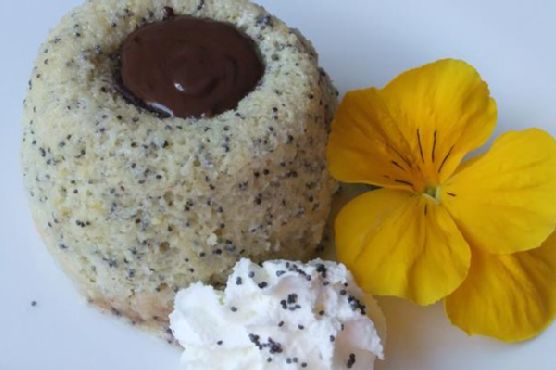
  • Zesty Lemon Poppy Seed Lava Cakes with Spiced Chocolate Ganache | Made by Meaghan Moineau

    Zesty Lemon Poppy Seed Lava Cakes with Spiced Chocolate Ganache | Made by Meaghan Moineau

    Zesty Lemon Poppy Seed Lava Cakes with Spiced Chocolate Ganache

    Imagine this: a warm, golden-brown cake with a delicate crust, cradling a pool of molten chocolate that spills onto your plate with the first forkful. The aroma of fresh lemon zest mingles with the warm, spiced scent of cardamom and ginger, creating a sensory symphony that dances around your kitchen. Welcome to the world of Zesty Lemon Poppy Seed Lava Cakes with Spiced Chocolate Ganache — a dessert that tantalizes both your taste buds and your imagination.

    Personal Story

    When I was a little girl, my grandmother would often bake her famous lemon poppy seed cake. It was a simple yet decadent treat, and I can still recall the scent wafting through the house, mingling with the laughter of family gatherings. That cake was a staple at our family celebrations, a beloved tradition that brought everyone together around the dining table.

    Fast forward to a few years ago when I found myself in Paris, walking through a bustling market. I stumbled upon a quaint patisserie where I experienced my first taste of molten chocolate lava cake. The intense richness of the chocolate was perfectly balanced by a hint of spice, an unexpected twist that left me dreaming of recreating the experience back home.

    Inspired by those memories, I embarked on a culinary journey to merge these two beloved desserts into one perfect fusion. The result? Zesty Lemon Poppy Seed Lava Cakes with Spiced Chocolate Ganache. Each bite is a nostalgic nod to my past, while the rich, spiced ganache adds a bold and contemporary twist.

    Not only does this recipe marry two beloved flavors, but it also embodies the essence of my culinary philosophy: to honor tradition while embracing innovation. This dish is a testament to the joys of experimentation and the magic that happens when you bring together unexpected ingredients.

    What Makes This Version Special

    This isn’t just any lemon poppy seed cake or molten chocolate lava cake — it’s a delightful fusion that brings together the best of both worlds. By incorporating a hint of cardamom and ginger into the chocolate ganache, this version creates a warm, spiced flavor that perfectly complements the zesty lemon cake. The result is a harmonious blend that elevates the traditional dessert to new heights, offering a sophisticated twist that’s both surprising and satisfying.

    Why settle for a standard recipe when you can indulge in a dessert that tantalizes the senses and surprises the palate? This version is not only a feast for your taste buds but also an experience that your guests will remember and rave about.

    Flavor Profile

    Imagine a bite that begins with the fresh, zingy pop of lemon and the nutty crunch of poppy seeds. As you reach the center, the warm, spiced chocolate ganache spills out in a silky cascade, enveloping your senses in a rich and aromatic embrace. The balance of sweetness and spice is delicate yet pronounced, creating a flavor experience that lingers beautifully on the palate.

    Every element of this dish works in harmony: the zesty brightness of the lemon cake, the subtle warmth of the spices, and the deep, rich chocolate — all coming together in a symphony of flavors that feels both nostalgic and novel.

    Ingredients

    • 1 cup all-purpose flour
    • 1 tablespoon grated lemon rind
    • 2 tablespoons poppy seeds
    • 3 large egg yolks
    • 3/4 cup granulated sugar
    • 1/2 cup unsalted butter, melted
    • 3 large egg whites
    • 6 ounces bittersweet chocolate, chopped
    • 1 teaspoon ground cardamom
    • 1/2 teaspoon ground ginger
    • 1 teaspoon vanilla extract
    • Pinch of salt

    Instructions

    1. Position a rack in the center of the oven and preheat to 400 degrees F. Lightly butter six 6-ounce ramekins, dust with sugar, and place on a baking sheet.
    2. In a small bowl, whisk together the flour, lemon rind, and poppy seeds; set aside.
    3. In the 4-1/2 quart bowl of a heavy-duty electric mixer using the wire whip attachment, whip the egg yolks and sugar until the mixture is pale and forms a ribbon when the whip is lifted. Add the vanilla extract and a pinch of salt for enhanced depth of flavor.
    4. Place the egg whites in a medium grease-free bowl and using a hand-held electric mixer, whip the whites to soft peaks.
    5. Fold the flour mixture into the yolk/sugar mixture, then add the melted butter and gently mix until combined. Fold in the egg whites until combined.
    6. In a small saucepan, melt the chocolate over low heat. Once melted, remove from heat and stir in the ground cardamom and ground ginger for a spiced kick.
    7. Fill each of the prepared ramekins 3/4 full with the cake batter and place a 1-ounce piece of the spiced chocolate ganache in the center of the batter.
    8. Bake for 15 minutes or until the cakes are firm yet have a slight jiggle in the center. Allow to cool on a wire rack for 5 minutes.
    9. Gently invert each cake onto a dessert plate and serve warm, letting the spiced chocolate ganache ooze out enticingly.

    Pro Tips from Meaghan’s Kitchen

    • For a more intense lemon flavor, consider adding a bit of freshly squeezed lemon juice to the batter.
    • Ensure your egg whites are at room temperature before whipping for maximum volume.
    • Gently fold the egg whites into the batter to maintain airiness — overmixing can result in dense cakes.
    • If you’re short on time, you can prepare the spiced chocolate ganache in advance and refrigerate it until needed.
    • Use a serrated knife to chop the chocolate; it will prevent the chocolate from flying everywhere.

    Variations & Dietary Swaps

    • For a gluten-free version, substitute the all-purpose flour with a gluten-free flour blend.
    • Spice it up by adding a pinch of cayenne pepper to the ganache for an extra kick.
    • Make it kid-friendly by omitting the spices and using milk chocolate instead of bittersweet chocolate.

    What to Serve With It

    These Zesty Lemon Poppy Seed Lava Cakes with Spiced Chocolate Ganache are a show-stopping dessert on their own, but for a truly indulgent experience, pair them with a chilled glass of sparkling Moscato. The effervescence and sweetness of the wine complement the rich flavors perfectly. Alternatively, a scoop of vanilla bean ice cream adds a creamy contrast to the warm, gooey center.

    Storage & Meal Prep

    These lava cakes are best enjoyed fresh from the oven, but if you have leftovers, you can store them in an airtight container in the refrigerator for up to 2 days. To reheat, place them in a preheated oven at 350 degrees F for about 5-7 minutes or until warmed through. If freezing, wrap each cake tightly in plastic wrap and then aluminum foil. They can be frozen for up to 1 month. Thaw in the refrigerator overnight before reheating.

    FAQ

    Can I use milk chocolate instead of bittersweet chocolate?

    Yes, you can substitute milk chocolate for a sweeter, creamier ganache. Keep in mind that it will be less intense than bittersweet chocolate.

    What if I don’t have cardamom at home?

    No worries! You can substitute with cinnamon, though the flavor profile will be slightly different. The warmth of cinnamon pairs well with ginger and chocolate.

    How do I know when the cakes are done baking?

    The cakes should be firm around the edges but have a slight jiggle in the center. This indicates that the chocolate core remains gooey.

    Can I make the batter ahead of time?

    It’s best to prepare and bake the batter immediately for optimal texture. However, you can prepare the dry and wet ingredients separately a day in advance and combine them right before baking.

    What if I don’t have ramekins?

    If you don’t have ramekins, you can use muffin tins as an alternative. Just be sure to adjust the baking time slightly as they may cook faster.

    Final Thoughts

    Thank you for joining me on this delicious journey of creating Zesty Lemon Poppy Seed Lava Cakes with Spiced Chocolate Ganache. I hope this recipe brings as much joy and warmth to your kitchen as it does to mine. I encourage you to experiment and adapt as you see fit — after all, cooking is as much about personal expression as it is about flavor. Don’t hesitate to share your culinary creations and experiences in the comments below. Happy baking, my dear friends!

    Related update: Zesty Lemon Poppy Seed Lava Cakes with Spiced Chocolate Ganache

    Related update: Decadent Honey-Roasted Peanut Butter Ice Cream with Dark Chocolate Shards

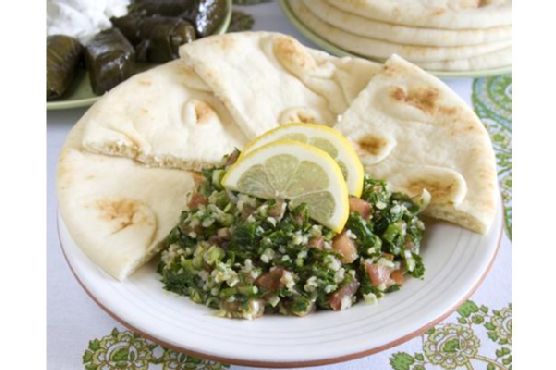
  • Zesty Citrus-Infused Tabouleh with Pomegranate Seeds | Made by Meaghan Moineau

    Zesty Citrus-Infused Tabouleh with Pomegranate Seeds | Made by Meaghan Moineau

    Zesty Citrus-Infused Tabouleh with Pomegranate Seeds

    Imagine the sun-dappled kitchen, where a cool breeze carries the scent of fresh herbs, mingling with the tangy zest of lemons and the sweet allure of ripe pomegranates. This isn’t just any tabouleh; it’s a vibrant, citrus-infused delight that promises to transport your taste buds straight to the bustling markets of the Middle East.

    My Journey to the Perfect Tabouleh

    Tabouleh has long been a staple in my culinary repertoire, a dish I first fell in love with during a summer spent exploring the diverse flavors of Middle Eastern cuisine. I vividly remember the first bite I took at a tiny café in Beirut, where the salad was as bright and refreshing as the Mediterranean Sea itself. The balance of fresh herbs, juicy tomatoes, and the unexpected crunch of pomegranate seeds was a revelation.

    Back in my own kitchen, I was determined to recreate that magic — but with my own personal twist. After many delicious experiments, I discovered that the secret to capturing that vibrant essence lay in the citrus. By incorporating the zest and juice of fresh lemons, and adding a sprinkle of sumac for a subtle kick, I could elevate this classic dish to new heights.

    Of course, not every experiment was a success. There was that one time I mistook cumin for sumac — let’s just say it led to a very spicy surprise! But with each misstep came the invaluable lessons that have shaped my culinary journey.

    Now, this Zesty Citrus-Infused Tabouleh has become a beloved recipe, not just for its refreshing taste, but for the memories it evokes — of sunlit kitchens and the joy of discovery. I can’t wait to share it with you.

    What Makes This Version Special

    This tabouleh isn’t your standard salad. The addition of **pomegranate seeds** introduces a burst of sweetness that dances on the palate, while **sumac** lends a subtle, lemony spice that contrasts beautifully with the traditional flavors. The lemon zest, a simple but transformative upgrade, infuses the dish with a citrusy aroma that lingers long after the last bite. It’s a salad that’s not just fresh but full of surprises, making it a standout at any gathering.

    Flavor Profile

    When you savor a forkful of this tabouleh, you’re met with an orchestra of flavors: the refreshing, herbaceous notes of parsley and mint; the juicy, sun-ripened tomatoes; and the sweet, jewel-like pomegranate seeds that pop with every bite. The dish is tangy and invigorating, thanks to the fresh lemon juice, while the sumac provides a spicy, lemony warmth that ties everything together. It’s a flavor journey that’s both familiar and delightfully new.

    Ingredients

    • 1 cup cooked bulgur wheat
    • 1 cup flat leaf parsley, stems removed
    • 1/2 cup fresh mint, stems removed
    • 3 green onions, finely chopped
    • 2 roma tomatoes, diced
    • 1/2 cup **pomegranate seeds**
    • 1 teaspoon **sumac**
    • Zest of one **lemon**
    • Juice from 1 lemon
    • 1/4 cup olive oil
    • 1/2 cucumber, diced

    Instructions

    1. Begin by removing the stems from the parsley and mint. Rinse the leaves thoroughly in a colander to remove any dirt. Pat them dry with a paper towel.
    2. In a food processor, pulse the parsley and mint until finely chopped. This should only take a few quick pulses — be careful not to over-process into a paste.
    3. Transfer the chopped herbs to a large mixing bowl. Add the diced green onions, roma tomatoes, cucumber, and cooked bulgur wheat. Stir gently to combine, ensuring the ingredients are evenly distributed.
    4. In a small bowl, combine the lemon juice and olive oil. Remember to zest the lemon before juicing to release those essential oils, which enhance the citrus flavor.
    5. Pour the lemon and olive oil mixture over the salad. Toss everything together, making sure every ingredient is coated in the citrusy dressing.
    6. Refrigerate the tabouleh for at least an hour before serving. This allows the flavors to meld beautifully.
    7. Just before serving, sprinkle the sumac over the salad for that final spicy finish. Serve chilled or at room temperature, on its own or with warm pita bread.

    Pro Tips from Meaghan’s Kitchen

    • Use fresh herbs for the best flavor. Dry herbs won’t provide the same vibrant taste.
    • For a quicker prep, chop the herbs with a sharp knife if you don’t have a food processor. Just be sure to chop them finely.
    • If you can’t find bulgur, couscous or quinoa makes a great substitute.
    • Toast the bulgur wheat before cooking to bring out a nutty flavor that adds depth to the dish.
    • Adjust the amount of lemon juice to your taste. Some like it tangier, while others prefer a milder citrus zing.

    Variations & Dietary Swaps

    • Vegetarian Delight: This tabouleh is already vegetarian, but for a vegan version, ensure all your ingredients, like the olive oil, are certified vegan.
    • Spice-It-Up Version: Add a pinch of cayenne pepper for a fiery kick that complements the lemony notes.
    • Kid-Friendly Version: Reduce the sumac and add more pomegranate seeds for extra sweetness that kids love.

    What to Serve With It

    This Zesty Citrus-Infused Tabouleh pairs beautifully with a chilled glass of crisp Sauvignon Blanc, which complements the citrus notes perfectly. For a complete meal, serve it alongside grilled halloumi cheese for a delightful contrast in textures. It’s also a great side dish to roasted lamb or chicken kebabs, adding a refreshing balance to rich, savory meats.

    Storage & Meal Prep

    Store any leftover tabouleh in an airtight container in the refrigerator for up to three days. The flavors continue to develop, making it even more delicious the next day. While tabouleh doesn’t freeze well due to the fresh vegetable content, it’s quick to whip up as part of your weekly meal prep. For best results, keep the dressing separate until ready to serve.

    FAQ

    Can I make tabouleh ahead of time?

    Absolutely! In fact, making it a day ahead allows the flavors to meld, resulting in an even tastier dish.

    What can I use instead of bulgur wheat?

    If you’re out of bulgur wheat, couscous or cooked quinoa are great alternatives that maintain the dish’s texture.

    Is sumac essential to this recipe?

    While sumac adds a unique, tangy flavor, you can omit it if unavailable. Consider substituting with a bit of lemon zest for a similar effect.

    Can I add more vegetables to the tabouleh?

    Feel free to experiment! Diced bell peppers or radishes make excellent additions for extra crunch and flavor.

    Final Thoughts

    There you have it — a vibrant, Zesty Citrus-Infused Tabouleh with Pomegranate Seeds that is sure to impress both your palate and your guests. Whether you’re new to the kitchen or a seasoned cook, this dish is an easy yet impressive addition to your culinary repertoire. I’d love to hear how your tabouleh turns out, so feel free to share your experiences and any twists you might add in the comments below. Happy cooking!

    Related update: Zesty Citrus-Infused Tabouleh with Pomegranate Seeds

    Related update: Tropical Avocado Salad with Grilled Shrimp and Toasted Coconut

  • Meyer Lemon Cheesecake | Made by Meaghan Moineau

    Meyer Lemon Cheesecake | Made by Meaghan Moineau

    Meyer Lemon Cheesecake: A Zesty Delight

    There’s something magical about a cheesecake that perfectly balances creamy richness and zesty freshness. Meyer Lemon Cheesecake does just that, offering a delightful dance of flavors that transport you to sunlit lemon orchards with every bite. This recipe holds a special place in my heart, reminding me of summer afternoons spent at my grandmother’s house, where we’d bake together, the scent of lemon filling the air.

    Why You’ll Love It

    Meyer Lemon Cheesecake is not only a feast for the taste buds but also a joy to create. Whether you’re a seasoned baker or a novice in the kitchen, this recipe is approachable and rewarding. The gingersnap crust adds a spicy twist that complements the tangy lemon filling beautifully. It’s a perfect dessert for special occasions or whenever you need a little sunshine in your life.

    Ingredients

    • 2 cups gingersnaps, crushed
    • 1/2 cup unsalted butter, melted
    • 24 oz cream cheese, softened
    • 1 cup sugar
    • 1/4 teaspoon salt
    • 3 large eggs
    • 1 cup sour cream
    • 1/2 cup Meyer lemon juice (about 4-5 lemons)
    • 2 tablespoons Meyer lemon zest
    • Cooking spray

    Instructions

    1. Preheat your oven to 300°F (150°C).
    2. In a Ninja Blender or food processor, combine the gingersnaps and melted butter until the gingersnaps are crumbly.
    3. Press the mixture firmly into the bottom of two 6-inch Springform pans coated with cooking spray. Bake for 15 minutes, then cool on a wire rack.
    4. Using an electric mixer, beat the cream cheese until smooth. Gradually add the sugar and salt, mixing well.
    5. Add the eggs one at a time, beating after each addition. Then incorporate the sour cream, lemon juice, and zest, mixing until thoroughly combined. Ensure all cream cheese from the bottom of the mixing bowl is integrated.
    6. Pour the filling into the prepared pans, leaving some space at the top as the mixture will expand slightly.
    7. If there is extra filling, bake it in a small baking dish.
    8. Place an 11×13-inch pan filled with water on a lower oven rack. Position the Springform pans on the middle rack above the water pan.
    9. Bake for 1 hour and 10 minutes. After 35 minutes, switch the positions of the pans if necessary to ensure even baking.
    10. Turn off the oven and allow the cheesecakes to rest inside for another hour.
    11. Remove from the oven and cool to room temperature on a wire rack.
    12. Refrigerate for 8 hours or overnight.
    13. Before serving, run a knife around the edges of the pans to loosen the cheesecakes. Release the Springform clasp and transfer the cheesecakes to a serving plate.

    Tips

    For the best results, use room temperature ingredients, especially the cream cheese, which ensures a smooth and creamy filling. Also, make sure to mix the batter thoroughly to avoid lumps. If you find your cheesecake cracking, don’t fret; a little sour cream or lemon curd can be a delightful topping to cover any imperfections.

    Variations & Substitutions

    If Meyer lemons are unavailable, regular lemons can be used, though the flavor will be slightly more tart. For a different crust experience, try using graham crackers or digestive biscuits instead of gingersnaps. You can also add a teaspoon of vanilla extract for a subtle flavor enhancement.

    Storage

    Store any leftovers in an airtight container in the refrigerator for up to 5 days. You can also freeze the cheesecake for up to 2 months. To freeze, wrap the cheesecake tightly in plastic wrap and foil, then place it in a freezer-safe container.

    FAQ

    Can I use low-fat cream cheese?

    While you can use low-fat cream cheese, the texture and richness of the cheesecake may be affected. For the best results, I recommend using full-fat cream cheese.

    How do I prevent my cheesecake from cracking?

    To avoid cracks, ensure the ingredients are at room temperature for smooth mixing. Baking the cheesecake in a water bath and allowing it to cool gradually in the oven also help prevent cracking.

    Can I make this cheesecake ahead of time?

    Absolutely! This cheesecake is perfect for making ahead. Prepare it a day in advance and store it in the refrigerator until you’re ready to serve.

    Nutrition

    This cheesecake is an indulgent dessert, so it’s best enjoyed in moderation. Each slice (based on 12 servings) contains approximately 350 calories, with 25 grams of fat, 28 grams of carbohydrates, and 6 grams of protein.

    Final Thoughts

    Meyer Lemon Cheesecake is a testament to the beauty of combining classic flavors with a modern twist. Whether you’re an ardent lemon lover or simply searching for a dessert that impresses, this cheesecake is sure to delight. I hope it brings as much joy to your table as it does to mine, evoking cherished memories and creating new ones with every bite.

    Related update: Meyer Lemon Cheesecake

    Related update: Chocolate Almond Bark