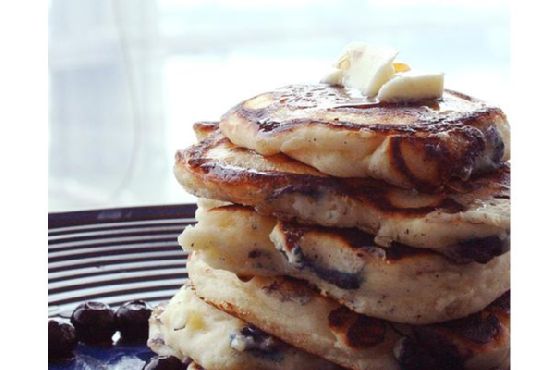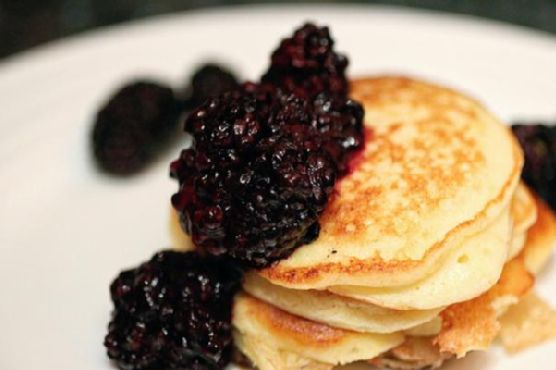
Meyer Lemon Ricotta Pancakes with Vanilla-Infused Blackberry-Cardamom Compote
There’s something undeniably magical about the moment when a stack of pancakes hits the table, their golden-brown edges inviting you to dive in. Picture this: delicate, fluffy Meyer lemon ricotta pancakes crowned with a luscious, aromatic blackberry-cardamom compote. The sweet fragrance of vanilla mingles with the tartness of blackberries, creating a breakfast experience you’ll want to savor slowly.
Personal Story
I still remember the first time I tasted pancakes that transcended the usual weekend breakfast fare. It was at a quaint little café tucked away in a bustling city, where the chef had a knack for turning simple dishes into culinary works of art. There, amidst the comforting hum of conversations and the intoxicating scent of fresh coffee, I discovered a delightful twist on the classic pancake.
This discovery inspired me to experiment in my own kitchen, eager to capture that enchanting blend of flavors and make it my own. One Saturday morning, armed with a bowl of fresh blackberries and a few humble pantry staples, I set out to recreate the magic. A few attempts and a couple of kitchen mishaps later — including one memorable incident involving a runaway vanilla bean — I finally perfected my recipe.
As I whisked together Meyer lemon zest and ricotta, I realized I was crafting something truly special. The tangy brightness of the lemon melded beautifully with the creamy richness of the ricotta. It was the blackberry compote, however, that truly elevated the dish. Infusing it with a hint of cardamom and vanilla gave it an exotic flair that was both unexpected and delightful.
Now, these Meyer lemon ricotta pancakes with vanilla-infused blackberry-cardamom compote have become a weekend staple in my home, a dish I love sharing with friends and family. They never fail to impress, and I’m thrilled to share the recipe with you today.
What Makes This Version Special
This recipe takes traditional pancakes and gives them a luxurious upgrade. By introducing a hint of cardamom and vanilla to the blackberry compote, we’re elevating the classic flavors to a new level. The fragrant and exotic notes of cardamom pair beautifully with the sweet, juicy blackberries, while the vanilla adds a subtle floral depth that harmonizes with the Meyer lemon’s bright acidity.
What sets these Meyer lemon ricotta pancakes apart is their ability to transform a simple breakfast into an indulgent experience. The richness of ricotta creates an incredibly tender and moist pancake, while the Meyer lemon zest and juice add a refreshing zing. This version is better than the standard recipe because it combines unexpected flavors in a way that is both comforting and sophisticated.
Flavor Profile
Imagine biting into a pancake that’s fruity and creamy, with subtle floral notes and a hint of warm spice. The Meyer lemon ricotta pancakes offer a delicate balance of sweet and tangy, while the blackberry-compote enhances each mouthful with its aromatic infusion of cardamom and vanilla. The browned butter in the batter adds a nutty richness that rounds out the flavor profile, making every bite a taste sensation to remember.
Ingredients
- 1 cup all-purpose flour
- 1 cup fresh blackberries
- **4 tablespoons butter**
- 2 large eggs, separated
- 2 tablespoons granulated sugar
- Zest of 1 Meyer lemon
- 2 tablespoons Meyer lemon juice
- 1 cup ricotta
- Pinch of salt
- 2 tablespoons water
- **1 vanilla bean, split**
- **1/4 teaspoon ground cardamom**
- Pure maple syrup, for serving
Instructions
- In a small saucepan over medium heat, add the fresh blackberries, Meyer lemon zest, granulated sugar, and water. Stir to combine.
- Add the split vanilla bean and a pinch of ground cardamom to the saucepan. Continue cooking until the water starts to thicken and the berries lose their shape, stirring occasionally, about 10 minutes. Remove from heat and set aside.
- In a medium bowl, whisk together the ricotta cheese, Meyer lemon zest, Meyer lemon juice, sugar, and egg yolks until smooth.
- Gradually stir in the all-purpose flour until just combined, being careful not to overmix.
- Using a stand mixer or hand mixer, beat the egg whites with a pinch of salt until stiff peaks form.
- Gently fold a large spoonful of the egg whites into the batter to lighten it. Then, fold in half of the remaining egg whites, slowly turning the bowl while you fold. It’s fine if there are some white streaks left in the batter. Fold in the remaining egg whites.
- Set the pancake batter aside and heat a griddle or non-stick pan over medium heat. Add a tablespoon of browned butter to the pre-heated pan, swirling to coat.
- Pour about 1/4 cup of batter onto the hot pan, spreading it slightly. Cook until bubbles start to form on the surface and the edges begin to brown slightly, about 2-3 minutes.
- Flip the pancakes and cook for an additional minute until golden-brown. Remove and keep warm while you repeat with the remaining batter.
- Serve the pancakes stacked high, topped with the vanilla-infused blackberry-cardamom compote and a drizzle of pure maple syrup.
Pro Tips from Meaghan’s Kitchen
- Use room temperature ingredients for the batter to ensure a smooth, lump-free mixture.
- Brown the butter carefully, watching closely as it turns golden and releases a nutty aroma. This adds depth to the pancakes.
- Don’t overmix the pancake batter; a few lumps are perfectly fine and will result in fluffier pancakes.
- Keep the pancakes warm in a low oven (around 200°F) if you’re making a large batch.
- If you don’t have a vanilla bean, substitute with 1 teaspoon of pure vanilla extract added to the compote after cooking.
Variations & Dietary Swaps
- Vegetarian Swap: These pancakes are already vegetarian-friendly, but for a vegan version, substitute the ricotta with a vegan option and use flax eggs instead of regular eggs.
- Spice-It-Up Version: Add a pinch of cinnamon to the compote for an extra layer of warmth and spice.
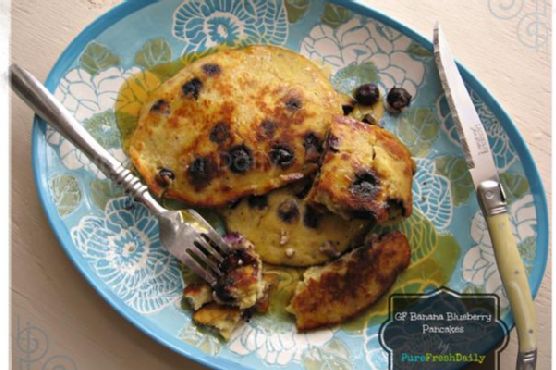
- Kids-Friendly Version: Skip the cardamom and vanilla for a simpler blackberry compote. Add some chocolate chips to the pancake batter for a fun twist.
What to Serve With It
These Meyer lemon ricotta pancakes pair beautifully with a lavender-infused latte, providing a calming floral note to complement the citrusy and fruity flavors. For a brunch-worthy treat, serve them with a chilled glass of prosecco, adding a touch of sparkle to your leisurely morning.
Storage & Meal Prep
Store any leftover pancakes in an airtight container in the refrigerator for up to 3 days. To freeze, layer them between sheets of parchment paper and place in a freezer-safe bag for up to 2 months. Reheat in a toaster or warm oven until heated through. The compote can be stored separately in the fridge for up to a week and reheated gently on the stove before serving.
FAQ
Can I use frozen blackberries for the compote?
Yes, you can use frozen blackberries. Just be sure to thaw them first and drain any excess liquid before using.
What if I can’t find Meyer lemons?
If Meyer lemons are unavailable, you can substitute with regular lemons. The flavor will be a bit more tart, so you might want to add a touch more sugar to balance it out.
How do I know when the pancakes are ready to flip?
Look for bubbles forming on the surface of the pancakes and the edges starting to look set and slightly browned. That’s your cue to flip!
Can I make the batter ahead of time?
It’s best to make the batter just before cooking to keep the pancakes light and fluffy. If you need to prep ahead, you can mix the dry and wet ingredients separately and combine them right before cooking.
What can I use instead of ricotta?
If you don’t have ricotta, you can try cottage cheese or mascarpone for a similar creamy texture, though the flavor will vary slightly.
Final Thoughts
I hope these Meyer lemon ricotta pancakes with vanilla-infused blackberry-cardamom compote bring as much joy to your kitchen as they do to mine. Whether you’re cooking for a special occasion or just want to elevate your weekend breakfast, this recipe is sure to impress. I’d love to hear how your pancakes turn out and any personal twists you might add — feel free to share your thoughts and photos in the comments below!
Related update: Meyer Lemon Ricotta Pancakes with Vanilla-Infused Blackberry-Cardamom Compote
Related update: Truffle-Infused Poached Eggs with Spinach, Tomato, and Crispy Prosciutto