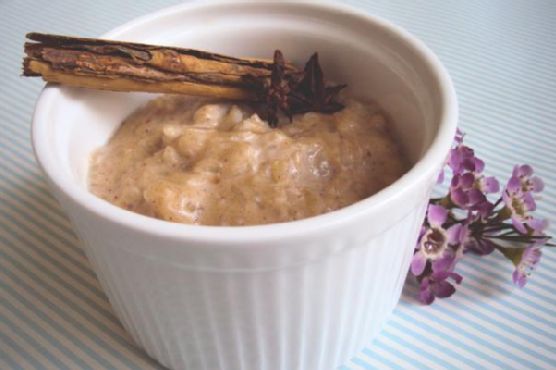
Author: Meaghan Moineau

  • Decadent Chai Rice Pudding with Rosewater and Pistachio Crunch | Made by Meaghan Moineau

    Decadent Chai Rice Pudding with Rosewater and Pistachio Crunch | Made by Meaghan Moineau

    Decadent Chai Rice Pudding with Rosewater and Pistachio Crunch

    Imagine the heady aroma of chai spices curling around you as you take a spoonful of creamy rice pudding that feels like a warm hug on a chilly evening. Each bite is a dance of floral and nutty notes, thanks to the luxurious touch of rosewater and a crunchy pistachio topping. This isn’t just any rice pudding—it’s an invitation to indulge in something truly special.

    Personal Story

    Growing up, rice pudding was a staple in our household, a humble dessert that evoked comfort and a sense of home. My grandmother, the matriarch of our kitchen, would stand over the stove, patiently stirring the pot, with the sweet fragrance of vanilla and cinnamon wafting through the air. This simple dish was her way of bringing the family together, sharing stories and laughter around the table.

    One chilly autumn afternoon, craving the nostalgia of those family gatherings, I attempted to recreate her classic rice pudding. It was then I had my first kitchen mishap—spilling a jar of cardamom pods into the simmering milk. Rather than a disaster, it turned into a delightful discovery. The unexpected spice added a new depth to the dish, and I was inspired to experiment further.

    That’s how I stumbled upon the idea of infusing the rice pudding with chai spices. By adding rosewater and a pistachio crunch, I created a dish that pays homage to my roots while offering a new, luxurious twist. This Decadent Chai Rice Pudding with Rosewater and Pistachio Crunch is a testament to how sometimes, a little kitchen accident can lead to culinary magic.

    What Makes This Version Special

    This version of rice pudding is an elevated take on the beloved classic, transformed by the infusion of **aromatic rosewater** and topped with a **pistachio crunch**. The rosewater adds a fragrant, floral note that perfectly complements the warm chai spices, making each bite an experience. The pistachios, toasted to perfection, provide a delightful contrast to the creamy texture of the pudding. It’s a dessert that feels both familiar and indulgently exotic, offering the best of both worlds.

    Flavor Profile

    The flavor profile of this Decadent Chai Rice Pudding with Rosewater and Pistachio Crunch is a celebration of contrasts. The richness of the creamy rice is beautifully balanced by the floral sweetness of the rosewater. The chai spices—cinnamon, cardamom, ginger, and cloves—infuse the pudding with a warm, comforting aroma. The crunchy pistachio topping adds a nutty depth, making every bite a symphony of flavors that lingers on the palate.

    Ingredients

    • 1 cup long grain rice
    • 4 cups whole milk
    • 2 bags English breakfast tea
    • 1 teaspoon cinnamon powder
    • 1 teaspoon ginger powder
    • 4 whole cardamom pods
    • 1 whole star anise
    • 3 large cloves
    • 1 teaspoon vanilla essence
    • 1/2 cup brown sugar
    • 1 tablespoon **rosewater**
    • 1/2 cup **pistachios**, crushed
    • 1 tablespoon honey
    • Pinch of salt

    Instructions

    1. In a small saucepan, combine the milk, tea bags, rice, and all the spices: cinnamon, ginger, cardamom, star anise, and cloves. Bring the mixture to a gentle boil over medium heat.
    2. Once boiling, lower the heat and let it simmer for about 20 minutes, stirring occasionally. This allows the rice to absorb the spice-infused milk.
    3. While the pudding simmers, toast the pistachios in a dry pan over medium heat with a pinch of salt. Stir frequently until they are lightly golden and aromatic, about 5 minutes. Remove from heat and crush coarsely.
    4. After 20 minutes, remove the tea bags from the pudding, and stir in the brown sugar. Increase the heat to high and cook for another 3-4 minutes, stirring continuously until the pudding thickens and turns creamy.
    5. Stir in the vanilla essence and rosewater, ensuring they are evenly distributed. Remove from heat.
    6. Spoon the rice pudding into individual serving bowls. Drizzle with honey and sprinkle the toasted pistachios on top before serving.

    Pro Tips from Meaghan’s Kitchen

    • Rinse the rice in cold water before cooking to remove excess starch and prevent clumping.
    • For a creamier texture, use a combination of whole milk and half-and-half.
    • If you prefer a thicker pudding, let it cool slightly before serving; it will continue to thicken as it cools.
    • Adjust the sweetness to your liking by tasting the pudding before adding the full amount of sugar.
    • For a burst of color and extra flavor, garnish with a sprinkle of edible dried rose petals.

    Variations & Dietary Swaps

    • Vegan Swap: Replace whole milk with coconut milk or almond milk for a dairy-free version.
    • Spice-It-Up Version: Add a pinch of cayenne pepper to the pistachio topping for a subtle heat contrast.
    • Kids-Friendly Version: Reduce the amount of chai spices and serve with a drizzle of chocolate syrup to appeal to younger palates.

    What to Serve With It

    This Decadent Chai Rice Pudding pairs wonderfully with a glass of chilled sweet dessert wine, like a late harvest Riesling, which complements the floral and nutty notes. Alternatively, for a warm beverage pairing, a steaming cup of masala chai enhances the spice profile and rounds out the meal beautifully.

    Storage & Meal Prep

    Leftover rice pudding can be stored in an airtight container in the refrigerator for up to 3 days. To reheat, gently warm on the stovetop over low heat, stirring in a splash of milk to restore its creamy consistency. While it’s best enjoyed fresh, the pudding can also be frozen for up to a month. Thaw overnight in the refrigerator before reheating.

    FAQ

    Can I use a different type of rice?

    Yes, you can use short grain rice for a creamier texture, but adjust the cooking time as it may cook faster than long grain rice.

    Is it possible to make this dessert ahead of time?

    Absolutely! Prepare the pudding a day in advance and store it in the fridge. Add the rosewater and pistachio topping just before serving to maintain freshness.

    What if I don’t have rosewater?

    If rosewater isn’t available, you can substitute it with a few drops of orange blossom water or simply omit it for a classic chai rice pudding experience.

    How do I know when the pudding is ready?

    The pudding is ready when the rice is tender and the mixture has thickened to a creamy consistency. It should coat the back of a spoon without being too runny.

    Final Thoughts

    I hope this Decadent Chai Rice Pudding with Rosewater and Pistachio Crunch becomes a new favorite in your dessert repertoire. It’s a dish that brings warmth and a touch of luxury to any occasion, whether you’re serving it at a family dinner or enjoying a quiet moment for yourself. I’d love to hear how it turns out for you, so feel free to leave a comment below or share your creation on social media. Remember, the kitchen is a place of exploration and joy—happy cooking!

    Related update: Decadent Chai Rice Pudding with Rosewater and Pistachio Crunch

    Related update: Caramelized Fig and Walnut Upside-Down Cake with Rosemary-Honey Drizzle
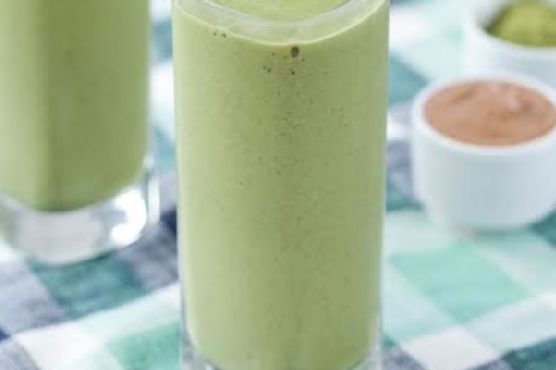
  • Tropical Almond Matcha Energy Smoothie with Coconut and Spirulina | Made by Meaghan Moineau

    Tropical Almond Matcha Energy Smoothie with Coconut and Spirulina | Made by Meaghan Moineau

    Tropical Almond Matcha Energy Smoothie with Coconut and Spirulina

    Imagine waking up to a sunrise that’s painting the sky with hues of gold and pink, the air filled with the scent of blooming flowers. Now, picture starting your day with a sip of something equally vibrant: a Tropical Almond Matcha Energy Smoothie with Coconut and Spirulina. This isn’t just any smoothie; it’s a vacation in a glass, with layers of flavor that transport you to a tropical island, one sip at a time.

    Personal Story

    Growing up, my mornings were less about leisurely sips of smoothies and more about grabbing a quick breakfast as I dashed out the door. It wasn’t until I took a summer trip to Maui that I discovered the blissful art of the smoothie. I vividly remember wandering into a little beachside café, the air salty with ocean spray, and ordering what would become a pivotal moment in my culinary journey.

    The café’s smoothie was a blend of fresh local fruits and exotic ingredients I had never tried before. The first sip was nothing short of a revelation. It was like tasting summer itself, bursting with flavors of ripe mango and creamy coconut, with a hint of something uniquely invigorating. That was the day I fell in love with tropical smoothies.

    Fast forward a few years, and I found myself experimenting in my kitchen, trying to recreate that magical experience. After much trial and delightful error, I came up with my own twist, adding nutrient powerhouses like spirulina and matcha to the mix. And so, the Tropical Almond Matcha Energy Smoothie with Coconut and Spirulina was born, becoming a staple in my morning routine and a favorite among friends and family.

    There was this one time I forgot to secure the lid on my blender properly. Let’s just say my kitchen walls got a surprise tropical splash that day! But every mistake led me to perfecting this recipe, ensuring each sip is as smooth and satisfying as the last.

    What Makes This Version Special

    This Tropical Almond Matcha Energy Smoothie with Coconut and Spirulina is more than just a blend of fruits and liquids; it’s an energizing start to your day. What sets this version apart from the standard superfood smoothie is its tropical twist with the addition of coconut and the vibrant green nutrient boost from spirulina. Coconut water and shredded coconut elevate the island vibe, while spirulina and matcha add a layer of earthiness and a boost of sustained energy. It’s perfect for busy mornings when you need a nutritious jumpstart that feels like a treat.

    Flavor Profile

    The flavor journey of this smoothie is nothing short of exhilarating. With each sip, you’re first greeted by the refreshing and bright notes of tropical fruits like mango and pineapple. This is followed by the creamy, nutty undertone of unsalted natural almond butter and shredded coconut, offering a luscious mouthfeel. The spirulina introduces a subtle earthiness that balances the sweetness, while a splash of fresh lime juice ties everything together with a zesty finish. It’s like a tropical getaway in a glass, right from your kitchen.

    Ingredients

    • 1 tablespoon **unsalted natural almond butter**
    • 1 cup **unsweetened almond milk**
    • 1 **frozen banana**
    • 1 tablespoon chia seeds
    • 1 handful baby kale
    • 1/2 cup **frozen mango pieces**
    • 1 teaspoon **green matcha tea powder**
    • 1/2 cup **frozen pineapple**
    • 1 teaspoon vanilla extract
    • 1/2 cup **coconut water**
    • 2 tablespoons **shredded coconut**
    • 1 teaspoon **spirulina powder**
    • 1 tablespoon fresh lime juice

    Instructions

    1. Start by adding the spirulina powder into a blender with a small amount of almond milk. Blend on low to ensure the spirulina dissolves completely, preventing any clumps and allowing the vibrant green color to integrate smoothly.
    2. Add the remaining almond milk, frozen banana, chia seeds, and baby kale. Blend until the kale is fully incorporated, and no green leaves are visible—just a smooth, emerald base.
    3. Introduce the frozen mango pieces, green matcha tea powder, frozen pineapple, vanilla extract, and coconut water. Blend on high until the mixture is silky and all the frozen fruit has broken down, creating a thick and creamy texture.
    4. Finally, add the shredded coconut. Pulse the blender a few times to mix in the coconut, adding a delightful texture without over-blending.
    5. Pour the smoothie into glasses, squeeze a touch of fresh lime juice on top, and serve immediately for the ultimate refreshing experience.

    Pro Tips from Meaghan’s Kitchen

    • For an extra creamy smoothie, freeze your almond milk in ice cube trays and use these instead of regular ice cubes.
    • Always add liquids to the blender first to help the blades move easily through the ingredients.
    • If you prefer a thicker smoothie, add more frozen banana or reduce the coconut water.
    • Spirulina can have a strong flavor—start with less if you’re new to it, and gradually increase as you become more accustomed to its taste.
    • Experiment with different brands of matcha powder to find one that suits your taste preferences and budget.

    Variations & Dietary Swaps

    • Nut-Free Version: Swap almond butter and almond milk for sunflower seed butter and oat milk.
    • Extra Protein Boost: Add a scoop of your favorite vanilla protein powder.
    • Kid-Friendly Version: Reduce spirulina to half a teaspoon and add a touch of honey or agave for extra sweetness.

    What to Serve With It

    This Tropical Almond Matcha Energy Smoothie with Coconut and Spirulina pairs beautifully with a side of freshly sliced papaya or mango for an extra tropical punch. For a more filling breakfast, serve it alongside a warm piece of whole grain toast topped with avocado and a sprinkle of salt.

    Storage & Meal Prep

    If you want to save time in the morning, pre-portion the frozen fruits and dry ingredients into individual baggies, then store them in the freezer. When you’re ready to make your smoothie, simply pour the contents of the bag into the blender, add your liquids, and blend.

    While this smoothie is best enjoyed fresh, you can refrigerate leftovers in an airtight container for up to 24 hours. Shake or stir well before drinking. For longer storage, freeze the smoothie in a mason jar with some space at the top for expansion. Thaw overnight in the fridge before enjoying.

    FAQ

    Can I use fresh fruit instead of frozen?

    Yes, you can use fresh fruit, but you might need to add ice cubes to achieve the same thick, cold consistency that frozen fruit provides.

    Is spirulina really necessary?

    While spirulina is a wonderful nutrient boost, you can leave it out if you’re not a fan of its flavor. The smoothie will still be delicious without it.

    Can I add additional sweeteners?

    Absolutely! If you have a sweet tooth, a touch of honey, agave syrup, or even a Medjool date can enhance the sweetness.

    How can I make this smoothie more filling?

    To make this smoothie heartier, consider adding a half-cup of rolled oats or a tablespoon of flaxseeds for extra fiber and satiety.

    Final Thoughts

    There you have it, my Tropical Almond Matcha Energy Smoothie with Coconut and Spirulina—a deliciously refreshing way to kick-start your morning with a burst of tropical flavors. I hope this recipe brings a little piece of paradise to your day, just as it has to mine. I’d love to hear how it turns out for you, so feel free to leave a comment or share your own unique twist on this smoothie. Cheers to vibrant mornings and happy blending!

    Related update: Tropical Almond Matcha Energy Smoothie with Coconut and Spirulina

    Related update: Tropical Strawberry-Mango Green Tea Limeade with Ginger Mint Infusion

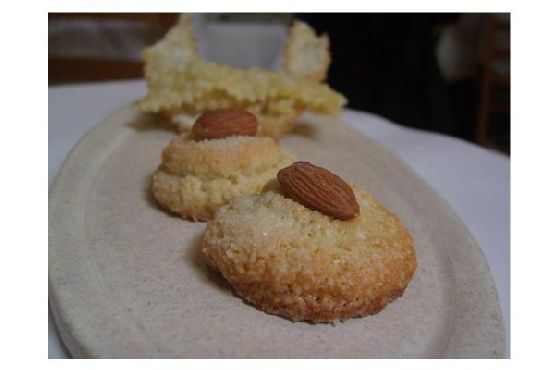
  • Orange Blossom Amaretto Almond Cookies with Dark Chocolate Drizzle | Made by Meaghan Moineau

    Orange Blossom Amaretto Almond Cookies with Dark Chocolate Drizzle | Made by Meaghan Moineau

    Orange Blossom Amaretto Almond Cookies with Dark Chocolate Drizzle

    The moment the cookies hit the oven, the kitchen fills with a warm, nutty aroma, hinting at the rich, complex flavors to come. Imagine biting into a delicate almond cookie, its soft center revealing a whisper of citrus and the bold embrace of dark chocolate.

    These Orange Blossom Amaretto Almond Cookies with Dark Chocolate Drizzle are not just a treat — they’re an experience.

    Personal Story

    There’s something about the combination of almonds and amaretto that instantly transports me back to my grandmother’s sunlit kitchen in Tuscany. I remember being a little girl, watching her expertly toss ingredients together, turning the mundane into the magical. Her hands moved with rhythmic precision, each motion a testament to years of practice and love.

    On one particularly memorable afternoon, I stood at her side, flour dusted on my cheek, my small fingers attempting to mimic her grace. She caught my eye and handed me a spoon, “Try this,” she urged, as she slid a bowl of her famous almond cookie dough my way. The taste was sublime — nutty, sweet, with a hint of something floral I couldn’t quite place. It was a moment that marked the beginning of my love affair with baking.

    Years later, while flipping through her recipes, I found a scribbled note at the corner of the page, suggesting the addition of orange blossom water. Curiosity piqued, I set out to recreate and elevate her classic cookie. Thus, these Orange Blossom Amaretto Almond Cookies with Dark Chocolate Drizzle were born, a tribute to her timeless recipe with a modern twist that I hope she would’ve loved.

    And as for the dark chocolate drizzle? That was an accident, a kitchen mishap that turned into a stroke of genius. One day, while reaching for the amaretto, I accidentally knocked over a bar of dark chocolate into the cookie dough. Fate, it seems, had a delicious plan in mind.

    What Makes This Version Special

    These cookies are enhanced with the delicate aroma of orange blossom water and topped with a decadent dark chocolate drizzle, offering a sophisticated twist on a classic treat. The orange blossom water infuses the cookies with a subtle floral note that elevates the traditional almond flavor profile. The addition of dark chocolate adds a luxurious, bittersweet contrast that complements the sweetness of the cookies perfectly. This version is a refined take on the standard recipe, offering a complexity and depth of flavor that’s sure to impress.

    Flavor Profile

    Prepare your taste buds for a journey through layers of flavor. The first bite reveals a nutty, aromatic base, thanks to the ground almonds and almond extract. As you savor the cookie, hints of citrus from the orange blossom water and lemon rind begin to unfold, adding a refreshing brightness to the rich, buttery dough. Finally, the dark chocolate drizzle finishes the experience with its silky, bittersweet touch. It’s a symphony of flavors that dance on your palate with every bite.

    Ingredients

    • 1 cup unsalted butter
    • 1/2 cup molasses
    • 2 large eggs
    • 2 cups ground almonds
    • 1 teaspoon almond extract
    • Zest of 1 lemon
    • 1/4 cup Amaretto
    • 2 cups whole wheat pastry flour
    • **2 teaspoons orange blossom water**
    • **1/2 cup dark chocolate, melted**

    Instructions

    1. Preheat your oven to 350°F (175°C). Line your cookie sheets, although these cookies won’t stick, it’s always safer to use parchment paper.
    2. In a small saucepan, gently warm the butter and **orange blossom water** together over low heat until just combined. This infusion step will allow the floral notes to meld beautifully with the butter. Remove from heat and cool slightly.
    3. In a large mixing bowl, cream together the infused butter and molasses until light and fluffy. This should take about 3-4 minutes. The mixture should be smooth with a rich, caramel hue.
    4. Add the eggs, one at a time, mixing well after each addition. Then, incorporate the ground almonds, lemon rind, and almond extract, stirring until just combined.
    5. Slowly add the **Amaretto**, alternating with the whole wheat pastry flour. Mix until the dough is smooth and holds together, but be careful not to overmix.
    6. Drop the dough by teaspoonsful onto the prepared cookie sheets, leaving about 2 inches between each cookie to allow for spreading.
    7. Bake in the preheated oven for 12-15 minutes, or until the edges are golden brown. Your kitchen will smell divine, a sure sign they’re nearly done.
    8. Once baked, let the cookies cool on the sheets for 5 minutes before transferring them to a wire rack to cool completely.
    9. Once cooled, drizzle the **melted dark chocolate** over the cookies. Use a spoon or a piping bag with a fine tip for an elegant finish. Allow the chocolate to set before serving.

    Pro Tips from Meaghan’s Kitchen

    • If you don’t have a piping bag, a zip-top bag with a small corner cut off works perfectly for drizzling the chocolate.
    • For an enhanced citrus punch, you can add a little extra lemon zest to the dough.
    • Want a chewier cookie? Slightly underbake them, removing from the oven when the centers are just set.
    • Use a quality **dark chocolate** with at least 70% cocoa for a rich, flavorful drizzle.
    • Store your orange blossom water in the fridge to extend its shelf life and keep its aroma vibrant.

    Variations & Dietary Swaps

    • Gluten-Free Version: Replace the whole wheat pastry flour with a gluten-free all-purpose flour blend. The texture will remain wonderfully chewy.
    • Nut-Free Alternative: Swap the ground almonds for sunflower seed flour and use vanilla extract instead of almond extract. The flavor will differ but still be delightful.
    • Spice-It-Up Version: Add a teaspoon of cinnamon and a pinch of nutmeg to the dough for a warm, spiced twist.

    What to Serve With It

    These cookies pair beautifully with a glass of sparkling Prosecco, the bubbles perfectly complementing the cookie’s texture and flavors. For a non-alcoholic option, a cup of Earl Grey tea, with its own subtle notes of citrus and bergamot, makes for a calming match.

    Storage & Meal Prep

    To keep your cookies fresh, store them in an airtight container at room temperature for up to a week. For longer storage, you can freeze the cookies in a freezer-safe bag or container for up to three months. When you’re ready to enjoy them, let them come to room temperature or warm them in a 300°F (150°C) oven for about 5 minutes. The drizzled chocolate will hold up beautifully even after freezing.

    FAQ

    Can I substitute orange blossom water with something else?

    Yes, if you can’t find orange blossom water, you can use a teaspoon of vanilla extract for a different, yet still delicious, flavor.

    What type of molasses should I use?

    For a milder flavor, use light molasses. If you prefer a stronger, more robust flavor, dark molasses is the way to go.

    Can I make these cookies without alcohol?

    Absolutely! Simply omit the Amaretto or replace it with a non-alcoholic almond syrup for a similar flavor without the alcohol.

    Why are my cookies spreading too much?

    Ensure your butter isn’t too warm when mixing the dough, and chill the dough for 30 minutes before baking if your kitchen is particularly warm.

    How do I know when the cookies are done?

    The cookies should be golden brown around the edges and slightly soft in the center. They will continue to firm up as they cool.

    Final Thoughts

    Baking these Orange Blossom Amaretto Almond Cookies with Dark Chocolate Drizzle is like giving a warm hug to your taste buds. Each batch is a small celebration of flavor, nostalgia, and a touch of culinary adventure. I hope you find as much joy in baking and sharing these cookies as I have. I’d love to hear about your experience, so please leave a comment or share your thoughts on social media. Happy baking, my friends!

    Related update: Orange Blossom Amaretto Almond Cookies with Dark Chocolate Drizzle

    Related update: Decadent Chai Rice Pudding with Rosewater and Pistachio Crunch

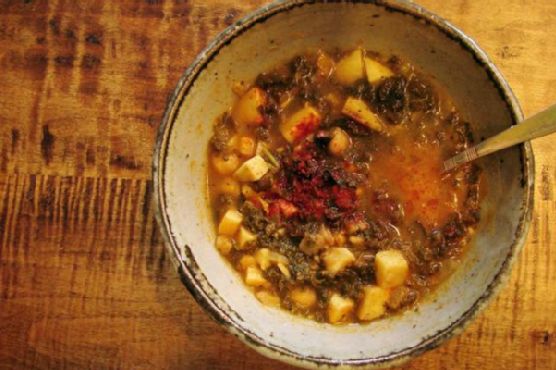
  • Moroccan Spiced Kale and Chickpea Stew with Harissa and Apricots | Made by Meaghan Moineau

    Moroccan Spiced Kale and Chickpea Stew with Harissa and Apricots | Made by Meaghan Moineau

    Moroccan Spiced Kale and Chickpea Stew with Harissa and Apricots

    Imagine a pot of stew simmering on the stove, its aromas filling your kitchen with sweet, spicy, and earthy scents. The combination of harissa and dried apricots in this Moroccan-inspired dish provides a delightful contrast that will make your taste buds dance. This isn’t just any stew; it’s a warm hug in a bowl, a dish that transforms everyday ingredients into something extraordinary.

    Personal Story

    There’s a certain magic in the air when I cook up a pot of stew. It takes me back to a cozy winter evening in my little kitchen apartment years ago. It was raining outside, a steady drumming against the window. I remember wanting something comforting yet different. That’s when I stumbled upon the idea of incorporating Moroccan flavors into a classic stew. As I chopped and stirred, the kitchen came alive with vibrant scents that transported me from my rainy cityscape to a bustling Moroccan souk.

    I wasn’t always a fan of sweet and savory combinations. Growing up, my palate leaned more towards traditional flavors. But that evening, I decided to take a culinary leap of faith. As I added the harissa paste, dried apricots, and a hint of cinnamon, I felt a thrill. It smelled divine, and as I took that first spoonful, I knew I had created something special.

    What started as a simple experiment turned into a beloved recipe. Friends and family would request this stew at gatherings, and it became a staple in my household. The dish not only warms the body but also the soul, with its complex layers of flavor and texture. It’s a reminder of that rainy night, a testament to the joy of experimentation in the kitchen.

    Over the years, I’ve refined the recipe, adding a sprinkle of toasted almonds and fresh cilantro at the end for a perfect finish. Today, I’m excited to share this Moroccan Spiced Kale and Chickpea Stew with Harissa and Apricots with you, hoping it brings warmth and adventure to your table as it has to mine.

    What Makes This Version Special

    This isn’t your ordinary stew. The magic of this Moroccan Spiced Kale and Chickpea Stew lies in its unique blend of sweet and spicy flavors. The addition of harissa paste introduces a smoky heat that perfectly complements the sweetness of dried apricots. These key ingredients elevate the stew, creating a symphony of flavors that dance on your palate. Unlike a standard chickpea stew, this version is infused with Moroccan flair, offering a culinary journey with every bite.

    Flavor Profile

    The taste experience of this dish can best be described as a harmonious blend of sweet, spicy, and aromatic flavors. As you take a bite, the subtle heat from the harissa mingles with the luscious sweetness of the apricots. The earthy undertones from the cumin and smoked paprika add depth, while a hint of cinnamon provides warmth. The kale brings a touch of bitterness that balances the dish beautifully, and the toasted almonds and fresh cilantro add a delightful crunch and freshness.

    Ingredients

    • 2 tablespoons olive oil
    • 1 large diced shallot
    • 3 cloves garlic, minced
    • 1 teaspoon red pepper flakes
    • 1 teaspoon dried basil
    • 2 medium sweet potatoes, peeled and chopped
    • 1/2 cup beer
    • 1 can (15 oz) chickpeas, drained and rinsed
    • 1 teaspoon smoked paprika
    • 1 teaspoon ground cumin
    • 1/4 cup golden raisins
    • 2 cups water (plus more as needed)
    • 1 bunch kale, chopped
    • 1 tablespoon butter
    • Juice of 1 lime
    • Salt and pepper to taste
    • 2 tablespoons harissa paste
    • 1/2 cup chopped dried apricots
    • 1 cinnamon stick
    • 1/4 cup fresh cilantro, chopped
    • 1/4 cup toasted almonds, sliced

    Instructions

    1. Warm the olive oil in a large frying pan over medium heat. Bloom the spices by adding the harissa paste, red pepper flakes, and dried basil. Stir for about 1 minute until fragrant.
    2. Add the shallots and garlic to the pan and cook until they start to brown, about 3–4 minutes.
    3. Stir in the sweet potatoes, cooking until they begin to brown and soften, around 5–7 minutes.
    4. Pour in the beer and let it cook until thick and syrupy, approximately 3 minutes.
    5. Add the chickpeas, smoked paprika, cumin, golden raisins, and 2 cups of water. Bring the mixture to a boil, then reduce the heat and let it simmer until the sweet potatoes are tender, about 20 minutes. Stir occasionally and add more water if needed to maintain your desired consistency.
    6. Stir in the chopped kale and cook until everything is heated through and the kale is tender, about 5 minutes.
    7. Finish by stirring in the butter and lime juice. Season with salt and pepper to taste.
    8. For a final touch, sprinkle the stew with toasted almonds and fresh cilantro before serving. Enjoy the crunch and aroma these garnishes bring to the dish.

    Pro Tips from Meaghan’s Kitchen

    • When selecting your harissa paste, taste it first. Harissa varies in heat, so adjust the quantity to your spice preference.
    • Don’t rush the blooming process for the spices and harissa. This step is crucial for maximizing their flavors.
    • If you’re a fan of thicker stews, mash some of the sweet potatoes against the side of the pot to release their starches.
    • Leftover beer? Don’t let it go to waste—use it in your next bread or batter recipe for depth of flavor.
    • Toasting almonds can be done in the oven or stovetop. Keep a close eye to prevent burning, as they toast quickly.

    Variations & Dietary Swaps

    • Vegetarian Swap: Replace the butter with a plant-based alternative for a fully vegan stew.
    • Spice-It-Up Version: Add more red pepper flakes or a pinch of cayenne if you love extra heat.
    • Kids-Friendly Version: Reduce the harissa and omit the red pepper flakes for a milder version.

    What to Serve With It

    This stew pairs beautifully with a side of fluffy couscous tossed with pine nuts, creating a perfect bed for the rich flavors. Alternatively, serve it with a glass of mint tea to complement the aromatic spices and refresh your palate. The earthiness of the tea enhances the sweetness of the apricots, crafting a well-rounded meal experience.

    Storage & Meal Prep

    This Moroccan Spiced Kale and Chickpea Stew is perfect for meal prep and can be stored in an airtight container in the fridge for up to 4 days. For longer storage, freeze it in portion-sized containers for up to 3 months. When reheating, gently warm it on the stove over low heat, stirring occasionally until heated through. You might need to add a splash of water or broth to loosen the consistency as it thickens when cooled.

    FAQ

    Can I use fresh apricots instead of dried?

    While fresh apricots add a lovely texture, they don’t offer the concentrated sweetness and flavor punch that dried apricots do. Stick with dried for this recipe.

    What if I can’t find harissa paste?

    If harissa isn’t available, you can substitute with a mix of chili paste, smoked paprika, and a pinch of cumin. The flavor won’t be identical, but it’ll still be delicious.

    Can I make this stew in a slow cooker?

    Absolutely! Bloom the spices and sauté the aromatics on the stovetop first, then transfer everything to a slow cooker. Cook on low for 6-8 hours or until the sweet potatoes are tender.

    Is this stew freezer-friendly?

    Yes, it freezes well! Just ensure it’s completely cooled before transferring to freezer-safe containers. For best results, consume within 3 months.

    How do I adjust for a smaller batch?

    Simply halve the ingredients to make a smaller portion. The cooking time remains the same, ensuring each bite is perfectly cooked.

    Final Thoughts

    I hope this Moroccan Spiced Kale and Chickpea Stew with Harissa and Apricots brings a touch of warmth and spice to your kitchen. It’s a dish that invites you to savor each spoonful and share the joy of cooking with loved ones. As always, I’d love to hear about your culinary adventures with this recipe. Feel free to leave a comment or share your own twists on this dish. Happy cooking, my fellow food enthusiasts!

    Related update: Moroccan Spiced Kale and Chickpea Stew with Harissa and Apricots

    Related update: Truffle Gouda Sausage & Pepperoni Stromboli with Caramelized Onions

    Related update: Velvety Potato and Roasted Red Pepper Soup with Olive Tapenade Swirl

  • Lavender-Infused Gluten-Free Blueberry Muffins with Almond Crunch | Made by Meaghan Moineau

    Lavender-Infused Gluten-Free Blueberry Muffins with Almond Crunch | Made by Meaghan Moineau

    Lavender-Infused Gluten-Free Blueberry Muffins with Almond Crunch

    Picture this: the comforting aroma of freshly baked muffins wafting through your kitchen, mingling with the delicate scent of lavender. These aren’t your ordinary blueberry muffins—they’re a symphony of flavors and textures that promise to elevate your morning ritual. With their floral notes and a satisfyingly crunchy almond topping, these muffins are the epitome of breakfast bliss.

    Personal Story

    There’s something magical about baking on a lazy Sunday morning, surrounded by the quiet hum of a waking household. It was on one such morning, as the sunlight streamed through my kitchen window, that I first experimented with adding lavender to my muffin recipe. Inspired by a recent trip to Provence, where I had been captivated by fields of purple blooms and the gentle hum of bees, I decided to bring a hint of that experience into my baking.

    My initial attempts were, quite frankly, a bit too ambitious. I had underestimated the potency of lavender, and my first batch tasted like a soap mishap. It was a humbling experience that reminded me of the delicate balance between flavor and fragrance. But I was determined to make it work, persistently tweaking the quantities until the lavender complemented, rather than overpowered, the other ingredients.

    One day, as I was about to give up, I had an epiphany. The secret to the perfect lavender-infused muffins lay in steeping the dried lavender in warm milk. This method allowed the floral notes to infuse gently into the batter, creating a harmonious blend that paired beautifully with the sweetness of the blueberries.

    Now, each time I bake these Lavender-Infused Gluten-Free Blueberry Muffins with Almond Crunch, I’m transported back to those sun-drenched fields. They’ve become my go-to treat for breakfast gatherings, always sparking conversation and delighting guests with their unique twist on a classic favorite.

    What Makes This Version Special

    These muffins stand out from the crowd due to their unique flavor profile and texture. By adding a floral hint of lavender and a crunchy almond topping, they offer complexity far beyond the standard blueberry muffin. The **dried lavender** lends an aromatic depth that pairs surprisingly well with the juicy bursts of **Driscoll’s blueberries**. Topping the muffins with **sliced almonds** and a touch of honey before baking introduces a delightful crunch and subtle sweetness that completes the experience. These gluten-free treats also cater to those with dietary restrictions, while maintaining a moist and tender crumb, thanks to the smart use of **gluten-free flour** and **xanthan gum**.

    Flavor Profile

    Imagine biting into a muffin that is floral and nutty, with juicy bursts of blueberries and a hint of citrus from **lemon zest**. The lavender is subtle yet distinct, providing a gentle aromatic undertone that doesn’t overpower. The muffin’s texture is perfectly balanced—soft and moist inside with a golden-brown exterior, crowned by the crunchy almond topping. This sensory delight makes these muffins more than just a breakfast item; they’re a journey for your taste buds, leaving you with a lasting impression of culinary creativity.

    Ingredients

    • 1 1/2 cups **gluten-free flour**
    • 1 cup sugar
    • 2 teaspoons baking powder
    • 1/4 teaspoon **xanthan gum**
    • 1/2 teaspoon salt
    • 1/2 cup unsalted butter, melted
    • 1 cup **whole milk**
    • 2 large eggs
    • 1 teaspoon **lemon zest**
    • 1 teaspoon vanilla extract
    • 1 1/2 cups **Driscoll’s blueberries**
    • 1 tablespoon **dried lavender**
    • 1/2 cup **sliced almonds**
    • 2 tablespoons honey

    Instructions

    1. Preheat your oven to 375°F (190°C). Lightly butter or grease a 12-cup muffin pan or line with paper liners.
    2. In a small saucepan, gently heat the **whole milk** and add the **dried lavender**. Allow it to steep for about 10 minutes, letting the milk become infused with the lavender aroma. Strain and set aside to cool slightly.
    3. In a medium bowl, stir together the **gluten-free flour**, sugar, baking powder, **xanthan gum**, and salt until well blended.
    4. In a large bowl, whisk together the melted butter, lavender-infused milk, eggs, **lemon zest**, and vanilla extract until combined.
    5. Gradually stir in the flour mixture into the wet ingredients until partially moistened. The batter will be thick—be careful not to overmix.
    6. Gently fold in the **Driscoll’s blueberries**, ensuring they’re evenly distributed throughout the batter.
    7. Divide the batter evenly between the muffin cups, filling each about three-fourths full.
    8. Top each muffin with a sprinkle of **sliced almonds** and drizzle lightly with honey for added texture and sweetness.
    9. Bake for 10 minutes, then rotate the pan and continue baking for another 10 minutes, or until the muffins are golden brown and a toothpick inserted in the center comes out clean.
    10. Allow the muffins to cool in the pan for about 3 minutes, then transfer them to a wire rack to cool completely or serve warm.

    Pro Tips from Meaghan’s Kitchen

    • Measure Carefully: For the best gluten-free results, measure your flour by spooning it into the measuring cup and leveling it off with a knife.
    • Mind the Lavender: Lavender can be potent, so don’t be tempted to add extra. Trust the process, and let the steeping do its magic.
    • Fresh is Best: Use fresh blueberries if you can. If using frozen, do not thaw them before folding into the batter to prevent excess moisture.
    • Honey Drizzle: If honey isn’t your thing, a light sprinkle of brown sugar over the almond topping can add a similar sweetness and crunch.
    • Cooling Matters: Letting the muffins cool slightly before eating allows the flavors to meld, while serving them warm enhances the aroma.

    Variations & Dietary Swaps

    • Vegan Swap: Replace eggs with flax eggs (1 tablespoon flaxseed meal + 2.5 tablespoons water per egg) and use plant-based milk and vegan butter.
    • Citrus Twist: Add a tablespoon of orange zest for a more pronounced citrus flavor that pairs beautifully with the lavender.
    • Kids-Friendly Version: Omit the lavender for a classic blueberry muffin that’s sure to please picky eaters.

    What to Serve With It

    For a truly soothing breakfast experience, pair these muffins with a cup of chamomile tea. The calming notes of the tea complement the floral lavender, creating a moment of pure tranquility. Alternatively, a glass of freshly squeezed orange juice will enhance the citrus undertones of the muffins, making for a refreshing start to your day.

    Storage & Meal Prep

    Store any leftover muffins in an airtight container at room temperature for up to two days. For longer storage, place them in the refrigerator for up to a week. These muffins also freeze beautifully—simply wrap each one in plastic wrap and store in a freezer-safe bag for up to three months. To reheat, thaw at room temperature or warm in a 300°F oven for about 10 minutes.

    FAQ

    Can I use fresh lavender instead of dried?

    Yes, you can use fresh lavender, but use it sparingly as it’s more potent than dried. Start with half the amount and adjust to taste.

    Do I need to use xanthan gum?

    Xanthan gum provides structure and helps mimic the texture of gluten, but if you’re sensitive to it, you can try substituting with a similar binding agent like guar gum.

    Why did my muffins turn out dense?

    Overmixing the batter can lead to dense muffins. Mix just until the dry ingredients are incorporated for a light, airy texture.

    Can I use almond milk instead of whole milk?

    Absolutely! Almond milk is a great substitute, particularly if you’re looking to enhance the almond flavor in the muffins.

    Are these muffins suitable for someone with a nut allergy?

    To make them nut-free, omit the almond topping or replace it with toasted oats or seeds for a similar crunch.

    Final Thoughts

    And there you have it, a delightful twist on the classic blueberry muffin that promises to transport your senses to a lavender field on a sunny day. Whether you’re enjoying them over a leisurely breakfast or as a sweet afternoon treat, these Lavender-Infused Gluten-Free Blueberry Muffins with Almond Crunch are sure to impress. I’d love to hear how they turn out for you, so please leave a comment below or share your muffin magic with us on social media. Happy baking!

    Related update: Lavender-Infused Gluten-Free Blueberry Muffins with Almond Crunch

    Related update: Strawberry-Banana Pancakes with Honey-Almond Drizzle

  • Savory Herb-Infused Chicken Noodle Casserole with Truffle Panko Crust | Made by Meaghan Moineau

    Savory Herb-Infused Chicken Noodle Casserole with Truffle Panko Crust | Made by Meaghan Moineau

    Savory Herb-Infused Chicken Noodle Casserole with Truffle Panko Crust

    The comforting aroma of a homemade casserole wafting through the house is a surefire way to summon everyone to the table. Imagine biting into a golden-brown crust that gives way to creamy layers of chicken and noodles, punctuated by the earthy allure of truffle oil. This isn’t just any casserole—it’s an elevated experience for your taste buds.

    Personal Story

    Growing up, chicken noodle casserole was a staple at our family gatherings. My grandmother had her own secret blend of spices that made it irresistible, and it was a dish that brought us all together, no matter how busy we were. I distinctly remember one Thanksgiving when I decided to take the reins and make it myself for the first time. Nervous but excited, I wanted to impress my family with my take on this classic dish.

    In my youthful enthusiasm, I added what I thought were mild enhancements. However, I accidentally swapped the teaspoons of salt for tablespoons, and let’s just say that year’s casserole was a bit too seasoned for everyone’s liking. Despite the mishap, my family encouraged my creativity, and it sparked a lifelong passion for putting my own twist on traditional recipes.

    Fast forward to today, and that early kitchen blunder has evolved into the Savory Herb-Infused Chicken Noodle Casserole with Truffle Panko Crust you see here. It’s a dish that keeps my family’s spirit alive, while also honoring my culinary journey through its unique blend of flavors and textures.

    By infusing the casserole with fresh herbs and a luxurious drizzle of truffle oil, I’ve turned this homey classic into a gourmet delight. It’s become a recipe I proudly serve at dinner parties or when I want to offer a comforting yet elevated meal.

    What Makes This Version Special

    This version of chicken noodle casserole stands out thanks to its gourmet twist. The luxurious touch of truffle oil and a crunchy panko topping elevate this comforting classic into something truly special. The truffle oil adds a subtle earthiness that complements the creamy, savory filling. Meanwhile, the panko crust offers a satisfying contrast to the soft noodles and tender chicken. With these tweaks, this dish becomes more than just a meal—it’s an experience.

    Flavor Profile

    The Savory Herb-Infused Chicken Noodle Casserole with Truffle Panko Crust offers a rich, savory flavor profile. Imagine a warm, creamy base with succulent pieces of chicken, perfectly cooked noodles, and a medley of vegetables. The earthy undertones from the truffle oil add a layer of complexity, while the fresh thyme introduces an aromatic herbaceous note. The finishing touch of the golden panko crust provides a delightful crunch, making each bite a harmonious blend of textures and flavors.

    Ingredients

    • 2 tablespoons olive oil
    • 1 sweet diced onion
    • 1 cup chicken broth
    • 1 cup frozen carrots
    • 1 cup frozen corn
    • 1 cup frozen peas
    • 2 tablespoons all-purpose flour
    • 1 cup milk
    • 1/2 cup sour cream
    • 1 cup shredded parmesan cheese
    • 1 cup shredded mozzarella cheese
    • 3 cups cooked shredded chicken
    • 1 teaspoon garlic powder
    • 1 teaspoon Italian seasoning
    • Salt and pepper to taste
    • 3 cups cooked egg noodles
    • 1/2 cup Italian bread crumbs
    • 1/4 cup melted butter
    • 2 tablespoons truffle oil
    • 1/2 cup panko bread crumbs
    • 2 tablespoons fresh thyme
    • 1/4 cup white wine

    Instructions

    1. Preheat your oven to 350°F (175°C).
    2. In a large skillet, heat the olive oil over medium heat. Add the diced onion and sauté until it becomes translucent, about 5 minutes.
    3. Deglaze the sautéed onions with the white wine, allowing it to simmer for about 2 minutes to add depth of flavor.
    4. Add the chicken broth, frozen carrots, corn, and peas to the skillet. Bring the mixture to a boil, then reduce the heat and let it simmer for 2 minutes.
    5. Slowly whisk in the flour until smooth, then gradually add the milk while continuing to whisk until the mixture thickens.
    6. Stir in the sour cream, shredded parmesan, shredded mozzarella, shredded chicken, garlic powder, Italian seasoning, salt, and pepper. Mix until everything is well combined and the cheeses are melted.
    7. Gently fold in the cooked egg noodles, ensuring they are evenly coated with the creamy sauce.
    8. Drizzle the truffle oil over the casserole mixture, stirring lightly to disperse the earthy aroma.
    9. Pour the mixture into a 13×9-inch casserole dish coated with butter. Spread it out evenly.
    10. In a separate bowl, combine the remaining shredded parmesan, Italian bread crumbs, panko bread crumbs, and melted butter. Mix until it forms a crumbly topping.
    11. Sprinkle the breadcrumb mixture evenly over the top of the casserole.
    12. Bake in the preheated oven for 25 minutes, or until the top is golden-brown and crispy.
    13. Let the casserole cool for a few minutes before serving. Enjoy!

    Pro Tips from Meaghan’s Kitchen

    • Use a variety of cheeses: Mixing mozzarella and parmesan gives the casserole a creamy yet tangy flavor profile. Don’t shy away from experimenting with other cheeses like Gruyère for a unique twist.
    • Fresh herbs make a difference: While dried herbs are convenient, using fresh thyme elevates the dish’s aromatic qualities. Add it towards the end of cooking to preserve its delicate flavor.
    • Don’t skip the deglazing: Deglazing the onions with white wine not only enhances flavor but also helps to pick up all the delicious caramelized bits sticking to the pan.
    • Customize the breadcrumb topping: Add a pinch of cayenne to the breadcrumb mixture for a subtle kick, or mix in some finely chopped nuts for added texture.
    • Truffle oil drizzle technique: For an even distribution, use a small spoon to drizzle the truffle oil over the casserole before gently folding it in. This ensures every bite has a hint of truffle essence.

    Variations & Dietary Swaps

    • Vegetarian Version: Swap the chicken with sliced mushrooms or a can of chickpeas for a hearty, meat-free option.
    • Spice-It-Up Version: Add a tablespoon of hot sauce or a teaspoon of crushed red pepper flakes to the sauce for a fiery kick.
    • Kids-Friendly Version: Skip the truffle oil and use cheddar cheese in place of parmesan for a more familiar and mild flavor kids love.

    What to Serve With It

    This luxurious casserole pairs beautifully with a crisp Chardonnay, whose bright acidity complements the creamy richness of the dish. For a refreshing contrast, serve alongside an arugula salad tossed with a simple lemon vinaigrette. The peppery arugula and tart dressing cut through the casserole’s richness, providing a balanced meal.

    Storage & Meal Prep

    To store leftovers, cover the casserole tightly and keep it in the refrigerator for up to 3 days. For longer storage, portion the casserole into airtight containers and freeze for up to 3 months. To reheat, thaw overnight in the refrigerator, then bake in a preheated oven at 350°F (175°C) for about 20 minutes or until heated through. This casserole is also great for meal prep—simply assemble it ahead of time, cover, and refrigerate for up to 24 hours before baking.

    FAQ

    Can I use fresh vegetables instead of frozen?

    Absolutely! Fresh vegetables work well, but be sure to sauté them until they’re tender before adding them to the casserole.

    What if I don’t have truffle oil?

    No worries! You can substitute with a drizzle of good quality olive oil or use a truffle seasoning blend for a similar flavor profile.

    Can I make this dish gluten-free?

    Yes, just substitute the flour with a gluten-free all-purpose blend and use gluten-free noodles and breadcrumbs.

    Is there a dairy-free version?

    For a dairy-free version, use plant-based milk and cheeses. Coconut cream can replace sour cream for creaminess without the dairy.

    How can I make the casserole richer?

    For a more decadent version, add a splash of heavy cream to the sauce or increase the amount of cheese for extra richness.

    Final Thoughts

    There’s something incredibly satisfying about transforming a classic dish into a gourmet masterpiece, and I hope this Savory Herb-Infused Chicken Noodle Casserole with Truffle Panko Crust becomes a beloved staple in your kitchen as it is in mine. Whether you’re sharing it with family or serving it to guests, it’s a dish that sparks joy and conversations. I’d love to hear about your experiences and any personal twists you add to this recipe. Please feel free to leave a comment or share your version on social media. Happy cooking!

    Related update: Savory Herb-Infused Chicken Noodle Casserole with Truffle Panko Crust

    Related update: Moroccan Spiced Kale and Chickpea Stew with Harissa and Apricots

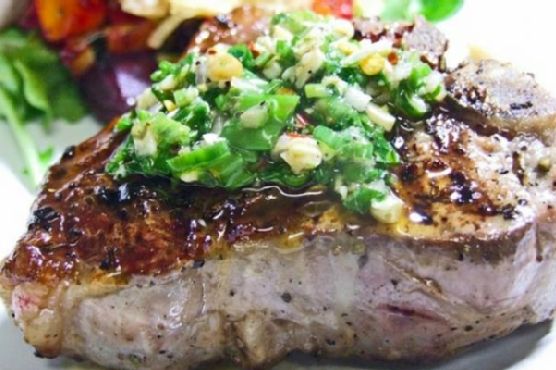
  • Pan Seared Lamb Loin with Spicy Chimichurri & Honey-Glazed Squash Salad | Made by Meaghan Moineau

    Pan Seared Lamb Loin with Spicy Chimichurri & Honey-Glazed Squash Salad | Made by Meaghan Moineau

    Pan Seared Lamb Loin with Spicy Chimichurri & Honey-Glazed Squash Salad

    Imagine the sizzle of lamb loins hitting a hot pan, releasing a fragrant cloud of savory goodness that dances through the air. Your kitchen fills with the earthy aroma of roasted squash, kissed by a honey glaze that caramelizes into a sweet, sticky perfection. This isn’t just any meal — it’s an orchestra of flavors waiting to dazzle your senses.

    Personal Story

    Growing up, Sunday dinners were a sacred ritual in my family. My mother, apron-clad and humming a tune, would transform our kitchen into a wonderland of delicious aromas. One particular Sunday, as a precocious eleven-year-old, I decided to take charge of the main dish. With a little too much confidence and a recipe clutched in hand, I embarked on cooking my first lamb loin.

    My initial attempt was, to put it kindly, a learning experience. The lamb was overcooked and the chimichurri, lacking the spicy kick I had envisioned, was more of a parsley parade than a flavor fiesta. Yet, despite the mishap, we sat around the table, savoring the meal and laughing at my culinary adventure. That day, I learned more about balancing flavors than any cookbook could teach.

    A few years and countless experiments later, I revisited that dish. This time, with a twist: a spicy chimichurri that dances on the tongue, and a trio of honey-glazed squash to complement the savory lamb. The result was a revelation, a dish that not only paid homage to my childhood memory but elevated it into something truly special.

    Now, every time I make this Pan Seared Lamb Loin with Spicy Chimichurri and Honey-Glazed Squash Salad, I’m reminded of that first foray into the kitchen — and the joy of discovering just how delightfully complex simple ingredients can be.

    What Makes This Version Special

    This version of Pan Seared Lamb Loin is not your average recipe. The spicy chimichurri, with its bold use of jalapeño and **red pepper flakes**, elevates the dish by adding a tantalizing heat that wakes up your taste buds. But it’s the **honey-glazed squash salad** that truly sets this recipe apart. The natural sweetness of butternut, acorn, and delicata squash is amplified through roasting, creating a caramelized exterior that beautifully contrasts the spicy chimichurri. Each bite offers a delightful balance of sweet and spicy, making this dish a standout on any dinner table.

    Flavor Profile

    Picture this: the smoky, spicy aroma of the chimichurri fills the room, a tantalizing prelude to the complex flavors it promises. The lamb loin, seared to a golden-brown perfection, provides a rich, savory depth that anchors the dish. As you take a bite, the spicy heat of the chimichurri dances with the sweetness of the honey-glazed squash, creating a symphony of flavors that is both unexpected and delightful. The nutty crunch of **pinenuts** and the creamy tang of goat cheese add layers of texture and taste, ensuring that each mouthful is a new experience.

    Ingredients

    • 1/2 cup **cilantro**, chopped
    • 1/4 cup **extra virgin olive oil**
    • 1/2 cup **flat leaf parsley**, chopped
    • 1 **garlic clove**, minced
    • 1 teaspoon **black ground pepper**
    • 1 tablespoon **kosher salt and pepper**
    • 4 **lamb loin chops**
    • 1 **lemon**, juiced
    • 1/4 cup **mint**, chopped
    • 2 tablespoons **pinenuts**, toasted
    • 1 teaspoon **red pepper flakes**
    • 1 **shallot**, finely chopped
    • 1 **jalapeño**, minced
    • 2 tablespoons **honey**
    • 1 **butternut squash**, peeled and cubed
    • 1 **acorn squash**, sliced
    • 1 **delicata squash**, sliced
    • 1/4 cup **goat cheese**, crumbled
    • 1 teaspoon **smoked paprika**

    Instructions

    1. Preheat your oven to 400°F (200°C).
    2. To prepare the chimichurri, bloom the **red pepper flakes** and **smoked paprika**: In a small pan, heat 1 tablespoon of **extra virgin olive oil** over medium heat. Add the flakes and paprika, stirring for about 30 seconds until fragrant. Remove from heat.
    3. In a large bowl, combine the bloomed spices with **cilantro**, **flat leaf parsley**, **garlic**, **shallot**, **jalapeño**, **lemon juice**, and remaining olive oil. Season with **kosher salt and pepper**. Mix well and set aside.
    4. For the squash, place the **butternut**, **acorn**, and **delicata squash** on a baking sheet. Drizzle with **honey** and a pinch of salt. Roast for 25-30 minutes, turning halfway, until the squash is tender and caramelized.
    5. Meanwhile, heat a large, heavy-bottomed pan over high heat with the remaining olive oil. Season the **lamb loin chops** with **black ground pepper** and **kosher salt**.
    6. Sear the lamb loins in the hot pan for 2 minutes on each side until a golden-brown crust forms. Transfer the pan to the preheated oven.
    7. Bake to your desired doneness: 2-3 minutes for rare, 6-8 minutes for medium-rare, 9-11 minutes for medium, or 12-14 minutes for well done. Remember, the lamb will continue to cook as it rests.
    8. Allow the lamb to rest for 5 minutes before serving, allowing the juices to redistribute.
    9. To serve, place a portion of the roasted squash on each plate, top with sliced lamb loin, drizzle with spicy chimichurri, and sprinkle with **goat cheese** and **pinenuts**.

    Pro Tips from Meaghan’s Kitchen

    • Use a meat thermometer for perfect lamb doneness. Aim for an internal temperature of 135°F (57°C) for medium-rare.
    • To enhance the flavor of the chimichurri, let it sit for at least 30 minutes before serving to allow the flavors to meld.
    • Toss the squash halfway through roasting to ensure even caramelization.
    • When searing lamb, ensure your pan is smoking hot to achieve a perfect crust.
    • If the chimichurri is too spicy, add a bit more olive oil or a splash of lemon juice to balance the heat.

    Variations & Dietary Swaps

    • Vegetarian Swap: Replace lamb with thick slices of portobello mushrooms for a meaty texture that pairs wonderfully with the chimichurri.
    • Spice-it-up Version: Add a pinch of cayenne pepper to the chimichurri for an extra kick.
    • Kids-Friendly Version: Tone down the spice by reducing the red pepper flakes and jalapeño, and serve the squash with a light sprinkle of cinnamon instead of chimichurri.

    What to Serve With It

    This vibrant dish pairs beautifully with a chilled glass of Sauvignon Blanc, its crisp notes complementing the spicy and sweet flavors. For a hearty side, serve with roasted garlic mashed potatoes, which offer a creamy, savory contrast to the meal’s dynamic profile.

    Storage & Meal Prep

    To store, place leftovers in an airtight container in the fridge for up to 3 days. For longer storage, freeze the lamb and squash separately for up to 1 month. Reheat the lamb gently in a skillet over low heat to prevent overcooking. The squash can be reheated in the oven at 350°F (175°C) until warmed through.

    FAQ

    Can I make the chimichurri ahead of time?

    Absolutely! Chimichurri can be made up to 3 days in advance. Store it in the fridge and bring it to room temperature before serving.

    What if I don’t have fresh herbs on hand?

    While fresh herbs are best, dried herbs can be used in a pinch. Just reduce the amount by half, as dried herbs are more concentrated.

    How do I know when the lamb is properly seared?

    Look for a deep golden-brown crust on each side of the lamb. If it sticks to the pan, give it a few more seconds — it will release when it’s ready.

    Can I use other types of squash?

    Yes, feel free to experiment with other winter squashes like kabocha or hubbard. Adjust the roasting time as needed, depending on the size of the pieces.

    Is this dish gluten-free?

    Yes, this recipe is naturally gluten-free, making it suitable for those with gluten sensitivities.

    Final Thoughts

    Cooking is as much about the journey as it is about the destination. This Pan Seared Lamb Loin with Spicy Chimichurri and Honey-Glazed Squash Salad is a testament to the magic that happens when flavors are carefully balanced and thoughtfully prepared. I hope this dish brings as much joy to your table as it has to mine. Don’t forget to share your version in the comments — I love hearing your stories and seeing your creations!

    Related update: Pan Seared Lamb Loin with Spicy Chimichurri & Honey-Glazed Squash Salad

    Related update: Savory Herb-Infused Chicken Noodle Casserole with Truffle Panko Crust

  • Spicy Italian Sausage & Roasted Pepper Ragu with Basil Pesto | Made by Meaghan Moineau

    Spicy Italian Sausage & Roasted Pepper Ragu with Basil Pesto | Made by Meaghan Moineau

    Spicy Italian Sausage & Roasted Pepper Ragu with Basil Pesto

    Picture this: a bubbling pot on the stove, aromatic with the scent of fire-roasted peppers and sizzling Italian sausage. The air is filled with the promise of something comforting yet daring, a dish that wraps you in a warm embrace with a gentle kick. Welcome to my kitchen, where the classic Italian Ragu gets a vibrant makeover with a smoky, spicy twist and a fresh, creamy finish.

    Personal Story

    There’s something undeniably magical about a humble ragu. Growing up, Sundays were synonymous with the rich, tangy aroma of my grandmother’s kitchen. She would simmer her ragu for hours, filling every corner of the house with the promise of a hearty meal. It was more than just food; it was the centerpiece of our family gatherings, a tradition that glued us together over plates of pasta and stories shared.

    Years later, when I embarked on my own culinary journey, I decided to honor this family tradition by adding my own flair to it. I remember the first time I attempted my spin on the classic ragu. It was a chilly fall evening, and I was craving that old familiar warmth but with a kick of excitement. As I charred the bell peppers over an open flame, the kitchen filled with a smoky aroma that was nothing short of enchanting. The addition of jalapeño and a swirl of homemade basil pesto was a revelation — it turned out to be the perfect symphony of flavors.

    Of course, there were some mishaps along the way. On one occasion, I got a bit too adventurous and added an entire jalapeño without seeding it first. The result was a ragu that could have doubled as a fire extinguisher! But with each attempt, I learned more about balancing heat and depth of flavor, eventually crafting what I believe to be the perfect Spicy Italian Sausage & Roasted Pepper Ragu with Basil Pesto.

    This dish has now become a staple in my household, a delightful surprise for guests and a comforting favorite for a cozy night in. It’s a testament to how food evolves and adapts, much like the families and memories it nurtures. Let’s dive into what makes this version uniquely special.

    What Makes This Version Special

    When you think of a traditional Italian ragu, you might picture a rich, tomato-based sauce simmered to perfection. But this version of Spicy Italian Sausage & Roasted Pepper Ragu takes things to a whole new level. The smoky depth comes from fire-roasted bell peppers, charred to perfection over an open flame. This technique adds a robust, earthy flavor that you just can’t achieve with raw or sautéed peppers.

    But that’s not all — the pièce de résistance is the fresh, creamy finish you’ll achieve with a generous drizzle of homemade basil pesto. This isn’t your ordinary pesto; it’s a blend of fresh basil leaves, parmesan cheese, olive oil, pine nuts, and a touch of lemon zest that brings a zesty, herbaceous brightness to the dish, rounding out the smoky and spicy elements beautifully.

    By marrying these elements, this ragu becomes a dynamic, multi-layered experience that dances on the palate. It’s a dish that embodies warmth, comfort, and a bit of adventure, making it a perfect centerpiece for any meal.

    Flavor Profile

    The first bite of this Spicy Italian Sausage & Roasted Pepper Ragu with Basil Pesto is a vivid journey through smoky, spicy, and fresh flavors. The charred bell peppers impart a deep, smoky foundation, while the Italian sausages bring a savory, spiced richness. The subtle heat from the jalapeño adds a tantalizing tingling sensation, perfectly balanced by the creamy, fragrant basil pesto that finishes each forkful with a fresh, herbal touch. It’s a symphony of flavors that will leave your taste buds singing.

    Ingredients

    • 4 **bell peppers** (red and yellow, for color and sweetness)
    • 3 cloves **garlic**, crushed
    • 1/2 teaspoon black fresh ground pepper
    • 3 **Italian sausages**, casings removed
    • 3 **Italian sweet sausages**, casings removed
    • 1 **jalapeño**, seeded and finely chopped
    • 3 tablespoons olive oil, divided
    • 1/4 cup chopped Italian fresh parsley
    • 1/2 cup salsa
    • 1 teaspoon sea salt
    • 1 **sweet onion**, chopped
    • 1 jar (12 oz) **fire-roasted red peppers**, drained and sliced
    • 1 cup fresh basil leaves
    • 1/2 cup grated parmesan cheese
    • 1/4 cup **pine nuts**
    • Zest of 1 lemon

    Instructions

    1. Preheat your oven to 375°F (190°C). Place the Italian sausages on a baking sheet and bake for 25-30 minutes, until they are cooked through and golden-brown. Set aside to cool slightly before slicing them lengthwise.
    2. While the sausages are baking, char the bell peppers over an open flame on your stovetop or grill. Rotate them frequently until the skins are blackened and blistered. Place the charred peppers in a bowl and cover with plastic wrap to steam for about 10 minutes. This makes peeling them easier. Once cooled, peel off the skins and slice the peppers into strips.
    3. In a large frying pan, heat 2 tablespoons of olive oil over medium heat. Add the sweet onion, garlic, and jalapeño. Sauté for about 5 minutes until the onion is translucent and fragrant.
    4. Add the sliced sausages to the pan along with the sliced fire-roasted red peppers and the charred bell peppers. Stir in the salsa, sea salt, and black pepper. Cook for another 10 minutes, allowing the flavors to meld together.
    5. Meanwhile, prepare the basil pesto. In a food processor, combine the fresh basil leaves, parmesan cheese, pine nuts, lemon zest, and the remaining tablespoon of olive oil. Blend until smooth and creamy.
    6. Once the ragu is ready, remove from heat and serve over your choice of pasta. Drizzle generously with the homemade basil pesto, and garnish with fresh Italian parsley.

    Pro Tips from Meaghan’s Kitchen

    • For an extra smoky flavor, consider adding a splash of smoked paprika to the ragu during the final simmer.
    • If you prefer a milder version, use half a jalapeño or substitute with a milder chili pepper.
    • Roasting your own peppers? Let them steam in a sealed container to make peeling easier and retain moisture.
    • For a creamier pesto, add a tablespoon of ricotta cheese to the food processor.
    • Don’t skip toasting the pine nuts before adding to the pesto — it brings out their nutty flavor beautifully.

    Variations & Dietary Swaps

    • Vegetarian Swap: Replace the sausages with a plant-based alternative or add hearty mushrooms like portobello for a meaty texture.
    • Spice-it-up Version: Add an extra jalapeño and a pinch of red pepper flakes for those who love it hot.
    • Kids-Friendly Version: Omit the jalapeño and reduce the garlic for a milder, kid-friendly dish that even the little ones will enjoy.

    What to Serve With It

    This ragu pairs beautifully with a glass of chilled Pinot Grigio, which complements the smoky and spicy notes perfectly. Serve it with a side of garlic bread to soak up the delicious sauce, or opt for a simple green salad with a lemon vinaigrette for a refreshing contrast.

    Storage & Meal Prep

    Store any leftover ragu in an airtight container in the refrigerator for up to 3 days. To freeze, allow the ragu to cool completely, then place it in a freezer-safe container for up to 2 months. Reheat on the stovetop over low heat until warmed through, adding a splash of water or broth if necessary to loosen the sauce.

    FAQ

    Can I use store-bought pesto instead of making my own?

    Absolutely! While homemade pesto adds a fresh touch, a good-quality store-bought pesto can be a convenient substitute.

    What’s the best pasta to serve with this ragu?

    I love pairing this ragu with a wide, flat pasta like pappardelle or fettuccine, as it holds the sauce beautifully.

    How can I make this dish less spicy?

    To reduce the heat, simply omit the jalapeño or replace it with a milder pepper, and adjust the amount of black pepper used.

    Can I make this dish ahead of time?

    Yes! This ragu actually tastes even better the next day as the flavors continue to meld. Prepare it a day in advance and store it in the fridge.

    What if I don’t have a gas stove to char the peppers?

    No worries! You can achieve a similar effect by broiling the peppers in the oven until their skins are blackened and blistered.

    Final Thoughts

    Thank you for joining me in my kitchen today! I hope this Spicy Italian Sausage & Roasted Pepper Ragu with Basil Pesto brings warmth and excitement to your dining table, just as it has to mine. I’d love to hear how your ragu turns out, so feel free to share your thoughts, tips, or any variations you try in the comments below. Happy cooking, and don’t forget to savor every bite!

    Related update: Spicy Italian Sausage & Roasted Pepper Ragu with Basil Pesto

    Related update: Pan Seared Lamb Loin with Spicy Chimichurri & Honey-Glazed Squash Salad

  • Exquisite Saffron-Infused Chicken Korma with Toasted Almonds | Made by Meaghan Moineau

    Exquisite Saffron-Infused Chicken Korma with Toasted Almonds | Made by Meaghan Moineau

    Exquisite Saffron-Infused Chicken Korma with Toasted Almonds

    Imagine this: a luxurious aroma wafting through your kitchen, golden saffron swirling into creamy coconut milk, and the sound of almond flakes gently crackling in a pan. This isn’t just any dinner — it’s an invitation to embark on a flavorful journey with my Exquisite Saffron-Infused Chicken Korma with Toasted Almonds.

    Personal Story

    My first encounter with chicken korma was at a tiny, bustling eatery in Delhi. Packed with locals and tourists alike, the aroma of spices enveloped us as we stepped in. I was hooked at the first bite — tender chicken, a symphony of spices, and a richness that lingered long after the meal was over. But the magic ingredient I didn’t know then was saffron, which would later elevate my own version of this beloved dish.

    Back in my own kitchen, I was determined to recreate that experience. My earliest attempts were, let’s say, educational. In one misadventure, I learned that not all saffron is created equal. I somehow managed to buy saffron threads that were as colorful as my evening plans, but sadly, lacked the depth of flavor I sought. Lesson learned — quality matters!

    One day, as I experimented with different variations, a lightbulb moment struck. I was sipping on a golden milk latte, and the warm embrace of saffron inspired me to blend it with coconut milk for the korma. That was the turning point. The addition of toasted almond flakes for texture was the cherry on top, winning over the hearts (and taste buds) of my family and friends.

    Now, every time I prepare this Saffron-Infused Chicken Korma, I’m transported back to that bustling Delhi eatery. It’s a dish steeped in tradition, yet with my own personal twist — an homage to my culinary journey and the flavors that have shaped it.

    What Makes This Version Special

    This isn’t your average chicken korma. The luxurious addition of saffron transforms the dish from classic to exquisite, infusing it with a depth of flavor and a golden hue that is nothing short of mesmerizing. But that’s not all — the toasted almond flakes bring an unexpected crunch that delights the senses. It’s this unique combination that elevates the dish, making it a standout on any dinner table.

    While traditional chicken korma is undeniably delicious, this version offers a delightful contrast of textures and a richness that only saffron can provide. If you’re a fan of classic Indian cuisine, this Saffron-Infused Chicken Korma with Toasted Almonds is a must-try recipe that promises to impress.

    Flavor Profile

    Prepare your taste buds for a rich and aromatic experience. As you take your first bite, the tender chicken melts in your mouth, enveloped in a velvety coconut milk sauce. The saffron adds a luxurious hint of floral warmth, perfectly balanced by the earthiness of cumin and coriander. Just when you think you’ve savored it all, the toasted almond flakes offer a delightful crunch, and a subtle hint of lemon zest ties it all together with a refreshing finish.

    Ingredients

    • 1 lb chicken breast, cut into small pieces
    • 2 cups coconut milk
    • 1 tablespoon coriander powder
    • 1 teaspoon cumin powder
    • 2 tablespoons ginger/garlic paste
    • 2 tablespoons ground almond
    • 2 tablespoons oil
    • 1 tablespoon poppy seeds
    • 2 tablespoons raisins
    • Salt, to taste
    • 1 teaspoon saffron threads
    • 1/4 cup toasted almond flakes
    • Fresh cilantro leaves, for garnish
    • Zest of 1 lemon

    Instructions

    1. Begin by blooming the saffron threads in warm coconut milk. Heat 1/4 cup of coconut milk until it’s just warm, then add the saffron and let it sit for about 10 minutes. This step will release the full flavor and color of the saffron.
    2. In a large pan, heat the oil over low heat. Add the ginger/garlic paste and fry for about 3 minutes until fragrant, ensuring you don’t burn the paste.
    3. Stir in the cumin powder, coriander powder, ground almond, and poppy seeds. Continue frying the masala for about 3-4 minutes over low heat, until the spices are well blended and aromatic.
    4. Add the chicken pieces to the masala, stirring carefully to ensure they’re evenly coated. Cook for another 5 minutes, folding the masala over the chicken pieces gently.
    5. Pour in the remaining coconut milk along with the saffron-infused milk. Stir well to cover all the chicken pieces. Add salt to taste and the raisins.
    6. Cover the pan and let the chicken simmer on low heat for about 20-25 minutes, stirring occasionally, until the chicken is cooked through and tender.
    7. Meanwhile, toast the almond flakes in a dry pan over medium heat. Keep a close eye on them, tossing frequently until they’re golden and aromatic.
    8. Once the chicken is cooked, stir in the lemon zest. Serve the korma hot, garnished with fresh cilantro leaves and the toasted almond flakes for added crunch.

    Pro Tips from Meaghan’s Kitchen

    • Use high-quality saffron threads for the best flavor. A little goes a long way, so invest in the good stuff.
    • When toasting almond flakes, be patient. Keep them moving in the pan to avoid burning, which can happen quickly.
    • For an even creamier texture, use full-fat coconut milk — it makes a noticeable difference.
    • Don’t rush the blooming of saffron. Properly blooming it in warm liquid enhances both color and flavor.
    • If you like a little heat, add a finely chopped green chili to the masala step for a gentle kick.

    Variations & Dietary Swaps

    • Vegetarian Swap: Replace chicken with paneer or tofu. The creamy sauce pairs beautifully with these proteins.
    • Spice-It-Up Version: Add a teaspoon of garam masala or more chilies for a spicier kick.
    • Kids-Friendly Version: Tone down the spices and omit the raisins if your little ones aren’t fans of sweet surprises in savory dishes.

    What to Serve With It

    This Saffron-Infused Chicken Korma is perfectly complemented by a side of fluffy basmati rice. For a more indulgent meal, pair it with garlic naan or paratha. A chilled glass of Gewürztraminer is an excellent choice for those who enjoy a bit of wine with their meal, as its floral notes harmonize beautifully with the saffron.

    Storage & Meal Prep

    If you have leftovers, store them in an airtight container in the fridge for up to 3 days. Reheat gently on the stove over low heat, adding a splash of coconut milk if needed to maintain the creamy consistency. This dish also freezes well for up to a month. Allow it to thaw overnight in the fridge before reheating.

    FAQ

    Can I use chicken thighs instead of breasts?

    Absolutely! Chicken thighs are juicier and can add even more flavor to the dish. Adjust the cooking time slightly as thighs may take a bit longer to cook through.

    Is there a substitute for saffron?

    While there’s no perfect substitute for saffron’s unique flavor, you can try a pinch of turmeric for color, but it won’t replicate the taste. For the best experience, use saffron.

    How do I prevent the almonds from burning?

    Toast the almonds over medium heat and keep stirring them frequently. Removing them from the pan as soon as they’re golden will prevent them from overcooking.

    Can I make this dish ahead of time?

    Yes, this dish actually benefits from being made ahead as the flavors meld beautifully over time. Just reheat gently before serving.

    What if I don’t have coconut milk?

    You can substitute with heavy cream for a richer texture or almond milk for a lighter version.

    Final Thoughts

    Whether you’re a seasoned home cook or trying your hand at Indian cuisine for the first time, this Exquisite Saffron-Infused Chicken Korma with Toasted Almonds is sure to impress. It’s a dish that brings warmth and comfort to any table, and I’m thrilled to share it with you. If you try this recipe, I’d love to hear your thoughts! Feel free to leave a comment or share your creations with me. Happy cooking!

    Related update: Exquisite Saffron-Infused Chicken Korma with Toasted Almonds

    Related update: Spicy Italian Sausage & Roasted Pepper Ragu with Basil Pesto

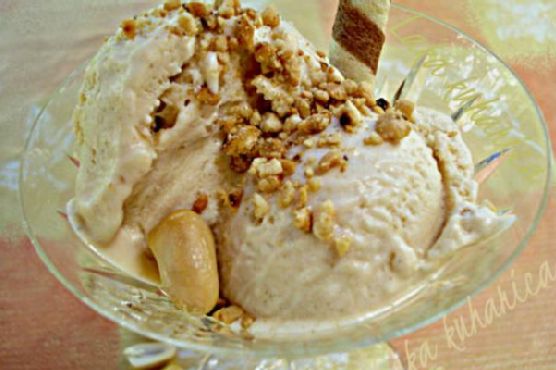
  • Decadent Honey-Roasted Peanut Butter Ice Cream with Dark Chocolate Shards | Made by Meaghan Moineau

    Decadent Honey-Roasted Peanut Butter Ice Cream with Dark Chocolate Shards | Made by Meaghan Moineau

    Decadent Honey-Roasted Peanut Butter Ice Cream with Dark Chocolate Shards

    Imagine the creamy, nutty goodness of peanut butter ice cream taken to new heights with a luxurious swirl of homemade chocolate ganache and the crunch of honey-roasted peanuts. The first spoonful is a revelation, a dance of caramelized sweetness and rich chocolate undertones that lingers long after the last bite.

    Personal Story

    Growing up, peanut butter ice cream was a rare treat, reserved for special Sunday afternoons when my family would pile into our sun-faded station wagon and head to the local ice cream parlor. I remember the thrill of watching the server scoop out my favorite flavor, the peanut butter ribbons weaving through the creamy concoction like golden streams through a lush forest. It was pure joy in a cone.

    Fast forward a few years to my first tiny apartment kitchen, where I decided to recreate this childhood favorite. My initial attempts were, well, let’s just say, more of a learning experience than a triumph. I quickly discovered that achieving the right balance of flavors in homemade ice cream is both an art and a science, one that requires patience—and a bit of courage.

    One day, as I was experimenting with a batch, I decided to add a handful of honey-roasted peanuts that were hiding at the back of my pantry. The resulting flavor was a revelation. The caramelized crunch paired perfectly with the silky peanut butter base, and I knew I had stumbled upon something special. From there, the addition of dark chocolate shards seemed only natural, enhancing the peanut butter’s richness with a sophisticated depth.

    Now, this decadent honey-roasted peanut butter ice cream with dark chocolate shards holds a cherished spot not only in my recipe book but also in my heart. It’s a sweet reminder that sometimes the best things come from unexpected twists and a little bit of kitchen serendipity.

    What Makes This Version Special

    This isn’t your average peanut butter ice cream. What sets this recipe apart is the thoughtful addition of honey-roasted peanuts and a swirl of homemade chocolate ganache. The peanuts are roasted with honey to enhance their natural sweetness, adding a layer of caramelized flavor that complements the rich, nutty base. The chocolate ganache, made by melting dark chocolate with butter and cocoa powder, is carefully swirled into the ice cream during the final stages of churning. This technique creates deep, chocolatey undertones that elevate the classic peanut butter ice cream to something truly extraordinary.

    Flavor Profile

    The taste of this ice cream is a symphony of rich, nutty notes with a hint of caramel sweetness from the honey-roasted peanuts. Each bite delivers a creamy texture that’s punctuated by the satisfying crunch of the peanuts. The chocolate ganache adds a luxurious depth, with its bittersweet flavor cutting through the sweetness and providing a sophisticated twist. It’s a harmonious blend that dances on your palate, leaving a lingering, delectable aftertaste.

    Ingredients

    • 2 cups whole milk
    • 1 cup sugar
    • 1/4 teaspoon salt
    • 2 large eggs
    • 1 cup smooth peanut butter
    • 1 cup heavy cream
    • 1 teaspoon vanilla extract
    • 1 cup unsalted peanuts, roasted with honey
    • 1/2 cup bits of bitter chocolate
    • 1/4 cup honey
    • 1/4 cup cocoa powder
    • 4 ounces dark chocolate (70% cacao)
    • 2 tablespoons butter

    Instructions

    1. Preheat your oven to 350°F (175°C). Spread the unsalted peanuts on a baking sheet and drizzle with honey. Toss to coat, then roast in the oven for 10-15 minutes, or until golden-brown and fragrant. Allow to cool.
    2. In a medium saucepan, combine the milk, sugar, and salt. Cook over medium heat, stirring occasionally, until the mixture is just about to boil. Reduce the heat to low.
    3. In a separate bowl, beat the eggs with a hand mixer or whisk until frothy, about 2 minutes. Gradually stir about 1 cup of the hot milk mixture into the beaten eggs to temper them.
    4. Return the egg mixture to the saucepan with the remaining milk mixture. Cook over low heat, stirring constantly, until the mixture thickens slightly, about 2-3 minutes. Remove from heat.
    5. Whisk in the smooth peanut butter until fully incorporated. Transfer the mixture to a bowl, cover, and refrigerate for at least 3 hours.
    6. To make the chocolate ganache, melt the dark chocolate and butter together in a small saucepan over low heat. Stir in the cocoa powder until smooth and set aside.
    7. In a large bowl, combine the chilled peanut butter mixture with the heavy cream and vanilla extract, stirring with a whisk.
    8. Pour the mixture into an ice cream maker and churn according to the manufacturer’s instructions. In the last few minutes of churning, drizzle in the chocolate ganache to create swirls.
    9. Once churned, fold in the honey-roasted peanuts and chocolate bits. Transfer the ice cream to a plastic container and freeze for at least an hour before serving.
    10. When ready to serve, let the ice cream sit at room temperature for 5-10 minutes before scooping. Enjoy your decadent treat with an extra sprinkle of chopped peanuts and chocolate bits if desired.

    Pro Tips from Meaghan’s Kitchen

    • For the best texture, ensure your ice cream base is thoroughly chilled before churning. This helps achieve that perfect creamy consistency.
    • When roasting the peanuts, keep a close eye on them. The honey can quickly go from caramelized to burnt if left unattended.
    • If you don’t have an ice cream maker, no worries! Pour the mixture into a shallow dish and place it in the freezer. Stir every 30 minutes until it reaches your desired consistency.
    • For neat swirls, pour the ganache into the ice cream maker just moments before finishing the churn. This will create beautiful ribbons of chocolate throughout.
    • Always use high-quality dark chocolate for the ganache. It makes a significant difference in flavor.

    Variations & Dietary Swaps

    • Vegetarian option: Replace the eggs with a plant-based egg substitute, and use coconut cream instead of heavy cream for a vegan-friendly version.
    • Spice-it-up version: Add a pinch of cayenne pepper or a swirl of chili chocolate for an unexpected kick.
    • Kids-friendly version: Substitute the dark chocolate with milk chocolate and reduce the amount of cocoa powder for a sweeter, milder taste.

    What to Serve With It

    This decadent treat pairs beautifully with a glass of cold brew coffee or espresso, which provides a complementary bitter contrast to the ice cream’s rich sweetness. Alternatively, serve it alongside a warm brownie or a slice of banana bread for an indulgent dessert experience.

    Storage & Meal Prep

    Store your homemade ice cream in an airtight container in the freezer for up to two weeks. When ready to enjoy, let it sit at room temperature for 5-10 minutes before scooping to ensure it’s at the perfect creamy consistency. If the ice cream hardens too much in the freezer, a brief zap in the microwave (10-15 seconds) can soften it up for easier scooping.

    FAQ

    How do I prevent my ice cream from becoming too icy?

    Ensuring that your ice cream base is completely chilled before churning and using an ice cream maker will help prevent ice crystals from forming. Additionally, incorporating enough sugar helps achieve a smoother texture.

    Can I use crunchy peanut butter instead of smooth?

    Absolutely! Crunchy peanut butter will add extra texture and peanut bits, enhancing the nutty experience. Just ensure it’s well incorporated into the mixture.

    Is there an alternative to honey for roasting the peanuts?

    Yes, you can use maple syrup or agave nectar as a substitute for honey if you prefer a different flavor or are avoiding honey.

    Can I add more chocolate?

    Of course! Feel free to increase the amount of dark chocolate or add extra chocolate bits on top for an even richer chocolate experience.

    Final Thoughts

    Creating this decadent honey-roasted peanut butter ice cream with dark chocolate shards is a delightful culinary adventure, one that’s sure to impress family and friends. I hope you find as much joy in making and tasting this ice cream as I did in creating it. I’d love to hear about your own twists on this recipe, so feel free to share your comments and experiences below. Happy scooping!

    Related update: Decadent Honey-Roasted Peanut Butter Ice Cream with Dark Chocolate Shards

    Related update: Orange Blossom Amaretto Almond Cookies with Dark Chocolate Drizzle