Tag: Special Occasion

  • Maple-Glazed Bacon Wrapped Gouda-Stuffed Chicken Breast | Made by Meaghan Moineau

    Maple-Glazed Bacon Wrapped Gouda-Stuffed Chicken Breast | Made by Meaghan Moineau

    Maple-Glazed Bacon Wrapped Gouda-Stuffed Chicken Breast

    Imagine the aroma wafting through your kitchen: sizzling bacon intertwined with the sweetness of maple syrup, wrapped around a succulent chicken breast slowly oozing rich, creamy Gouda. This is not just a meal; it’s a culinary experience that turns any ordinary evening into a gourmet delight.

    My love affair with this dish began on a chilly autumn day. I was hosting my first-ever Friendsgiving and wanted to impress without straying too far from classic comforts. The idea of wrapping chicken in bacon was inspired by a family barbecue, where my uncle would always toss bacon-wrapped hot dogs onto the grill. They were a simple hit, but I knew there was a way to elevate that concept into something truly memorable.

    In my tiny, bustling kitchen, I experimented with flavors, textures, and techniques. The kitchen was alive with chatter and laughter, while the smell of maple-glazed bacon filled the air. At that moment, I knew I had stumbled upon something special. The final dish was met with “oohs” and “aahs” as the savory, smoky, and sweet flavors melded together beautifully.

    There was a mishap or two—like the time I tried to cook the bacon-wrapped chicken entirely on the stovetop, only to end up with a smoky kitchen and undercooked chicken. But every mistake was a lesson, bringing me closer to the perfect Maple-Glazed Bacon Wrapped Gouda-Stuffed Chicken Breast recipe that I am proud to share with you today.

    What Makes This Version Special

    This isn’t your everyday bacon-wrapped chicken. What sets this version apart is the addition of creamy Gouda cheese inside the chicken breast, which melts beautifully as it cooks. The Gouda introduces a sophistication with its nutty, slightly sweet profile that perfectly complements the other flavors. The real star, however, is the maple glaze. By brushing the chicken with a mix of maple syrup and Dijon mustard before wrapping it in bacon, we create a sweet and tangy glaze that caramelizes the bacon to golden perfection. This recipe elevates the classic dish to gourmet heights, making it ideal for special occasions or when you simply want to impress.

    Flavor Profile

    Prepare your taste buds for a delightful journey of sweet, smoky, and savory flavors. The creamy, melted Gouda provides a luscious texture, while the bacon offers a crispy, smoky contrast. A hint of herbaceous thyme rounds out the flavors, adding a subtle freshness that ties everything together. Each bite is an explosion of taste, making this dish a standout on any table.
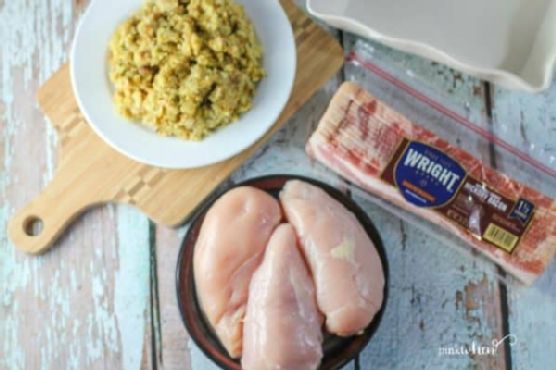
    Ingredients

    • 4 skinless, boneless chicken breasts
    • 8 slices smoked Wright Brand Hickory Bacon
    • 4 slices **Gouda cheese**
    • 2 tablespoons **maple syrup**
    • 1 tablespoon Dijon mustard
    • 1 teaspoon fresh thyme leaves
    • Salt and pepper to taste

    Instructions

    1. Preheat your oven to 375°F (190°C). Clean and thoroughly dry the chicken breasts. Drying the chicken makes slicing easier and helps the bacon crisp up.
    2. Slice each chicken breast lengthwise to create a pocket, being careful not to cut all the way through. Stuff each pocket with a slice of Gouda cheese and a sprinkle of fresh thyme.
    3. Season the outside of the chicken breasts with salt and pepper.
    4. In a small bowl, mix together the maple syrup and Dijon mustard. Brush this mixture generously over each chicken breast.
    5. Carefully wrap each stuffed chicken breast with two slices of bacon, overlapping the edges as you wrap to secure the filling inside.
    6. Heat a large oven-safe skillet over medium-high heat. Sear the wrapped chicken breasts on all sides until the bacon is caramelized and golden-brown, about 3-4 minutes per side.
    7. Transfer the skillet to the preheated oven and bake for 25-30 minutes, or until the chicken is cooked through and reaches an internal temperature of 165°F (74°C).
    8. Remove from the oven and let the chicken rest for 5 minutes before slicing. This ensures the juices redistribute evenly.
    9. Serve warm with your favorite sides.

    Pro Tips from Meaghan’s Kitchen

    • Use a Meat Thermometer: Ensure perfectly cooked chicken by using a meat thermometer to check for a safe internal temperature of 165°F.
    • Let Gouda Shine: Opt for high-quality Gouda for maximum flavor impact. Smoked Gouda can add an extra layer of smokiness if you’re feeling adventurous.
    • Bacon Choice Matters: Thick-cut bacon works best for wrapping as it holds up well during cooking and crisps nicely.
    • Secure with Toothpicks: If your bacon seems to be slipping, use toothpicks to secure it in place during cooking—just remember to remove them before serving!
    • Sauce It Up: For a finishing touch, drizzle a little extra maple-Dijon glaze over the cooked chicken before serving.

    Variations & Dietary Swaps

    • Vegetarian Swap: Replace the chicken with thick slices of portobello mushrooms. Use a plant-based bacon alternative and vegan cheese for a delicious vegetarian option.
    • Spice-It-Up Version: Add a teaspoon of cayenne pepper to the maple-Dijon glaze for a spicy kick that contrasts beautifully with the sweetness.
    • Kids-Friendly Version: Use cheddar cheese instead of Gouda and skip the thyme for a milder, more kid-friendly flavor profile.

    What to Serve With It

    This Maple-Glazed Bacon Wrapped Gouda-Stuffed Chicken Breast pairs beautifully with a chilled glass of Riesling, which balances the sweetness and richness of the dish. For sides, consider roasted sweet potatoes or a fresh, zesty arugula salad to add a refreshing contrast.

    Storage & Meal Prep

    Store any leftover chicken in an airtight container in the refrigerator for up to 3 days. To freeze, wrap each cooked chicken breast tightly in plastic wrap and place in a freezer-safe bag for up to 2 months. Reheat in a 350°F oven until warmed through, about 15-20 minutes, ensuring the bacon remains crispy.

    FAQ

    Can I prepare this dish ahead of time?

    Yes! You can assemble the chicken breasts a day in advance and store them in the fridge. Sear and bake them just before you’re ready to serve.

    What if I don’t have an oven-safe skillet?

    After searing, transfer the wrapped chicken breasts to a baking dish or sheet before placing them in the oven.

    How do I prevent the cheese from leaking out?

    Be sure to seal the edges of the chicken well and secure the bacon tightly. A toothpick can also help hold everything together during cooking.

    What other cheeses can I use?

    If Gouda isn’t your style, you can try cheeses like mozzarella, cheddar, or even a spicy pepper jack for a different flavor profile.

    Can I use turkey bacon instead?

    Absolutely! Turkey bacon is a leaner option and will work well, though it may not crisp up as much as pork bacon.

    Final Thoughts

    Bringing this Maple-Glazed Bacon Wrapped Gouda-Stuffed Chicken Breast to your table is like sharing a piece of my kitchen with you. Whether you’re making this for a special occasion or simply to treat yourself on a Tuesday night, I hope you find as much joy in cooking and serving this dish as I have. Don’t forget to share your experience with me in the comments — I’d love to hear how your culinary adventure turns out!

    Related update: Maple-Glazed Bacon Wrapped Gouda-Stuffed Chicken Breast

    Related update: Sumptuous Mediterranean Moussaka with Pistachio-Crusted Eggplants

  • Steak with lemon and capers | Made by Meaghan Moineau

    Steak with lemon and capers | Made by Meaghan Moineau

    Steak with Lemon and Capers

    There’s something truly magical about the aroma of sizzling steak mingling with the zesty freshness of lemon and the briny pop of capers. This recipe for Steak with Lemon and Capers not only delivers a mouthwatering dining experience but also carries with it a memory of warm family gatherings, where laughter and delicious food went hand in hand.

    Why You’ll Love It

    Imagine a tender, juicy steak infused with the tang of lemon and the unique flavor of capers. This recipe is a delightful blend of simplicity and sophistication. You’ll love how quickly it comes together, making it perfect for both weekday dinners and special occasions. The ingredients are straightforward, yet they combine to create a dish that feels both luxurious and comforting. Plus, the sauce is absolutely divine when drizzled over the steak—or anything else on your plate!

    Ingredients

    • Beef steak
    • Butter
    • Capers
    • Dry white wine
    • Flour
    • Garlic
    • Black ground pepper
    • Lemon juice
    • Lemon wedges
    • Olive oil
    • Parsley
    • Salt

    Instructions

    1. Flatten the steaks lightly with a meat mallet.
    2. In a shallow dish, combine flour, salt, and pepper. Dip the steaks into the mixture, ensuring both sides are well-coated.
    3. Heat a mixture of butter and olive oil in a pan over medium heat. Sauté the steaks for about 4 minutes on each side until they are browned to your liking. Remove from the pan and set aside.
    4. In the same pan, sauté the garlic for about 1 minute, stirring continuously to avoid burning.
    5. Add the wine and lemon juice to the pan, stir, and let it simmer for 5 minutes to slightly reduce the liquid.
    6. Add the capers and give everything a good stir.
    7. Return the steaks to the pan, cover, and simmer over low heat for 4 minutes to allow the flavors to meld.
    8. Garnish with chopped parsley and serve with lemon wedges on the side.

    Tips

    For the best results, make sure your steaks are at room temperature before cooking. This ensures even cooking throughout. When flattening the steaks, be gentle to maintain their structure. Lastly, don’t skip the resting part after cooking; it allows the juices to redistribute, making each bite as juicy as possible.

    Variations & Substitutions

    If you’re looking to switch things up, consider using chicken or pork cutlets instead of beef. Both proteins work wonderfully with the lemon and capers. For a bit of heat, add a pinch of red pepper flakes to the sauce. You can also substitute white wine with chicken broth if you prefer an alcohol-free version.

    Storage

    Leftovers can be a delightful treat. Store any remaining steak and sauce in an airtight container in the refrigerator for up to three days. To reheat, gently warm the steak in a pan over low heat until it’s heated through. Avoid microwaving as it can toughen the meat.

    FAQ

    What can I serve with Steak with Lemon and Capers?

    This dish pairs beautifully with a variety of sides. Consider serving it with creamy mashed potatoes, steamed asparagus, or a fresh arugula salad. The sauce is also fantastic when soaked up with crusty bread.

    Can I use a different type of steak?

    Absolutely! This recipe is quite versatile. Ribeye, sirloin, or even filet mignon would be excellent choices. Just be mindful of cooking times as they may vary depending on the thickness of the steak.

    Nutrition (if applicable)

    This dish is rich in protein and offers a good balance of flavors from healthy fats like olive oil and butter. If you’re mindful of sodium intake, consider rinsing the capers to reduce their saltiness. Adjusting the amount of butter and oil can also help manage caloric content.

    Final Thoughts

    Steak with Lemon and Capers is more than just a meal; it’s an experience. The bright, bold flavors are sure to impress family and guests alike. Whether it’s a casual dinner or a special celebration, this dish delivers a taste of elegance with every bite. Give it a try, and let it become a new favorite in your culinary repertoire!

    Related update: Steak with lemon and capers

  • Almond Ricotta Cake | Made by Meaghan Moineau

    Almond Ricotta Cake | Made by Meaghan Moineau

    Almond Ricotta Cake

    There’s something deeply comforting about baking a cake that fills your home with the warm, inviting aroma of almonds and citrus. This Almond Ricotta Cake is a cherished recipe passed down through generations in my family. I remember watching my grandmother whip up this cake in her cozy kitchen, her hands moving with the kind of practiced ease that only comes from years of baking. She would always let me lick the spoon, and to this day, the taste of this cake brings back the fondest memories of those afternoons spent in her sunlit kitchen. I’m thrilled to share this recipe with you, and I hope it becomes a treasured part of your family traditions as well.

    Why You’ll Love It

    This Almond Ricotta Cake is the perfect blend of moist, tender crumb and rich flavors. The ricotta cheese adds an incredible creaminess, while the almond extract and zest of fresh lemon bring a bright, aromatic profile. With a delightful topping of almonds and a sweet apricot glaze, this cake is both elegant and delicious. Whether you’re serving it for a special occasion or simply enjoying a slice with your afternoon tea, this cake is sure to impress.

    Ingredients

    • 1 cup all-purpose flour
    • 1 teaspoon almond extract
    • 1 cup ground almonds
    • 1/4 cup apricot jam
    • 1 teaspoon baking powder
    • 1/2 cup canola oil
    • 1 large egg
    • 3 large eggs
    • 2 tablespoons lemon juice
    • Zest of 1 lemon
    • 1/4 cup milk
    • 2 tablespoons orange liqueur
    • 3/4 cup 2% ricotta cheese, plus 3/4 cup for topping
    • 1 tablespoon rum
    • 1/4 teaspoon salt
    • 2 tablespoons sugar, plus 1/4 cup for topping
    • 1 cup sugar
    • 1 teaspoon vanilla extract
    • 1/2 cup sliced almonds

    Instructions

    1. Cake: In a large mixing bowl, beat the eggs, sugar, and oil on high speed until thick and pale, about 8 minutes. Add the ricotta, lemon juice, zest, rum, vanilla, and almond extract. Mix until blended.
    2. In a separate bowl, sift together the ground almonds, flour, baking powder, and salt. Whisk into the ricotta mixture in 3 additions.
    3. Pour the batter into a 10″ springform pan that has been buttered and the bottom lined with parchment paper. Bake in a preheated 350°F oven for 45-50 minutes. The cake is done when a wooden skewer inserted in the center comes out clean.
    4. Topping: Increase your oven temperature to 375°F. Heat the milk and stir in 2 tablespoons of sugar. Toss in the almonds, ensuring they are coated.
    5. In a separate bowl, blend together 3/4 cup ricotta, the egg, 1/4 cup sugar, zest, and vanilla. Spread the ricotta mixture topping over the baked cake and sprinkle with the almond slices.
    6. Return to the oven and continue baking for 15 minutes, until the almonds are golden brown.
    7. Remove from the oven and spread the glaze over the almonds. Allow the cake to cool before removing from the cake pan.
    8. Glaze: In the microwave or in a small pan, heat the apricot jam until it starts to liquefy, about 1-2 minutes. Stir to ensure it doesn’t burn. Strain the jam if there is a large amount of pulp. Brush gently on the baked cake.

    Tips

    • Ensure all ingredients are at room temperature before beginning to mix for a smoother batter.
    • Use fresh lemon for the best flavor; the zest adds a lovely aromatic quality to the cake.
    • Allow the cake to cool completely before glazing to prevent the glaze from soaking into the cake.

    Variations & Substitutions

    • Dairy-Free: Substitute the ricotta cheese with a plant-based ricotta alternative and use almond milk instead of regular milk.
    • Gluten-Free: Replace the all-purpose flour with a gluten-free flour blend suitable for baking.
    • Flavor Twist: Try using different citrus zests, like orange or lime, for a unique twist on the original recipe.

    Storage

    This cake can be stored in an airtight container at room temperature for up to 3 days. If you wish to keep it longer, place it in the refrigerator for up to a week. For even longer storage, wrap it tightly in plastic wrap and freeze for up to a month. Thaw overnight in the refrigerator before serving.

    FAQ

    Can I use a different type of nut for the topping?

    Yes, you can experiment with other nuts like pistachios or walnuts for the topping. Just ensure they are sliced thinly for even baking.

    What can I use instead of apricot jam for the glaze?

    If you don’t have apricot jam, you can substitute it with peach or orange marmalade for a similar sweet and tangy flavor.

    Nutrition

    While this cake is a delightful treat, it’s important to enjoy it in moderation. Each slice contains approximately:

    • Calories: 320
    • Fat: 18g
    • Carbohydrates: 34g
    • Protein: 7g
    • Sugar: 21g

    Final Thoughts

    This Almond Ricotta Cake is more than just a dessert; it’s a delicious reminder of the love and care that goes into home baking. Whether you’re enjoying it with family or sharing it with friends, this cake is sure to warm hearts and create lasting memories. I hope this recipe becomes a beloved part of your baking repertoire, just as it has in mine. Happy baking!

    Related update: Almond Ricotta Cake

  • Meyer Lemon Cheesecake | Made by Meaghan Moineau

    Meyer Lemon Cheesecake | Made by Meaghan Moineau

    Meyer Lemon Cheesecake: A Zesty Delight

    There’s something magical about a cheesecake that perfectly balances creamy richness and zesty freshness. Meyer Lemon Cheesecake does just that, offering a delightful dance of flavors that transport you to sunlit lemon orchards with every bite. This recipe holds a special place in my heart, reminding me of summer afternoons spent at my grandmother’s house, where we’d bake together, the scent of lemon filling the air.

    Why You’ll Love It

    Meyer Lemon Cheesecake is not only a feast for the taste buds but also a joy to create. Whether you’re a seasoned baker or a novice in the kitchen, this recipe is approachable and rewarding. The gingersnap crust adds a spicy twist that complements the tangy lemon filling beautifully. It’s a perfect dessert for special occasions or whenever you need a little sunshine in your life.

    Ingredients

    • 2 cups gingersnaps, crushed
    • 1/2 cup unsalted butter, melted
    • 24 oz cream cheese, softened
    • 1 cup sugar
    • 1/4 teaspoon salt
    • 3 large eggs
    • 1 cup sour cream
    • 1/2 cup Meyer lemon juice (about 4-5 lemons)
    • 2 tablespoons Meyer lemon zest
    • Cooking spray

    Instructions

    1. Preheat your oven to 300°F (150°C).
    2. In a Ninja Blender or food processor, combine the gingersnaps and melted butter until the gingersnaps are crumbly.
    3. Press the mixture firmly into the bottom of two 6-inch Springform pans coated with cooking spray. Bake for 15 minutes, then cool on a wire rack.
    4. Using an electric mixer, beat the cream cheese until smooth. Gradually add the sugar and salt, mixing well.
    5. Add the eggs one at a time, beating after each addition. Then incorporate the sour cream, lemon juice, and zest, mixing until thoroughly combined. Ensure all cream cheese from the bottom of the mixing bowl is integrated.
    6. Pour the filling into the prepared pans, leaving some space at the top as the mixture will expand slightly.
    7. If there is extra filling, bake it in a small baking dish.
    8. Place an 11×13-inch pan filled with water on a lower oven rack. Position the Springform pans on the middle rack above the water pan.
    9. Bake for 1 hour and 10 minutes. After 35 minutes, switch the positions of the pans if necessary to ensure even baking.
    10. Turn off the oven and allow the cheesecakes to rest inside for another hour.
    11. Remove from the oven and cool to room temperature on a wire rack.
    12. Refrigerate for 8 hours or overnight.
    13. Before serving, run a knife around the edges of the pans to loosen the cheesecakes. Release the Springform clasp and transfer the cheesecakes to a serving plate.

    Tips

    For the best results, use room temperature ingredients, especially the cream cheese, which ensures a smooth and creamy filling. Also, make sure to mix the batter thoroughly to avoid lumps. If you find your cheesecake cracking, don’t fret; a little sour cream or lemon curd can be a delightful topping to cover any imperfections.

    Variations & Substitutions

    If Meyer lemons are unavailable, regular lemons can be used, though the flavor will be slightly more tart. For a different crust experience, try using graham crackers or digestive biscuits instead of gingersnaps. You can also add a teaspoon of vanilla extract for a subtle flavor enhancement.

    Storage

    Store any leftovers in an airtight container in the refrigerator for up to 5 days. You can also freeze the cheesecake for up to 2 months. To freeze, wrap the cheesecake tightly in plastic wrap and foil, then place it in a freezer-safe container.

    FAQ

    Can I use low-fat cream cheese?

    While you can use low-fat cream cheese, the texture and richness of the cheesecake may be affected. For the best results, I recommend using full-fat cream cheese.

    How do I prevent my cheesecake from cracking?

    To avoid cracks, ensure the ingredients are at room temperature for smooth mixing. Baking the cheesecake in a water bath and allowing it to cool gradually in the oven also help prevent cracking.

    Can I make this cheesecake ahead of time?

    Absolutely! This cheesecake is perfect for making ahead. Prepare it a day in advance and store it in the refrigerator until you’re ready to serve.

    Nutrition

    This cheesecake is an indulgent dessert, so it’s best enjoyed in moderation. Each slice (based on 12 servings) contains approximately 350 calories, with 25 grams of fat, 28 grams of carbohydrates, and 6 grams of protein.

    Final Thoughts

    Meyer Lemon Cheesecake is a testament to the beauty of combining classic flavors with a modern twist. Whether you’re an ardent lemon lover or simply searching for a dessert that impresses, this cheesecake is sure to delight. I hope it brings as much joy to your table as it does to mine, evoking cherished memories and creating new ones with every bite.

    Related update: Meyer Lemon Cheesecake

    Related update: Chocolate Almond Bark

  • Mascarpone & Ricotta Cheese Cake | Made by Meaghan Moineau

    Mascarpone & Ricotta Cheese Cake | Made by Meaghan Moineau

    Decadent Mascarpone & Ricotta Cheese Cake

    There’s something magical about the aroma of a cheesecake baking in the oven. I remember the first time I made this Mascarpone & Ricotta Cheese Cake. It was a chilly Sunday afternoon, and the kitchen was filled with warmth and laughter as my grandmother guided me through the recipe, her hands deftly working the ingredients into something extraordinary. This recipe has since become a cherished tradition, a sweet reminder of those cozy afternoons spent together. Now, I’m excited to share this delightful recipe with you, so you too can experience the joy it brings.

    Why You’ll Love It

    This Mascarpone & Ricotta Cheese Cake is a slice of heaven, combining the creamy richness of mascarpone and ricotta cheeses with the perfect hint of lemon and vanilla. The nutty crunch of the almond-infused graham cracker crust complements the smooth, luscious filling. It’s a sophisticated dessert that’s surprisingly easy to make, perfect for celebrations or as a special treat for yourself. Whether you’re a seasoned baker or a novice, this cheesecake will impress everyone with its luxurious texture and delightful flavor.

    Ingredients

    • 1 cup almonds
    • 1/2 cup butter, melted
    • 1 cup whipped cream cheese
    • 4 large eggs
    • 1/4 cup flour
    • 1 1/2 cups graham crackers
    • 2 tablespoons lemon juice
    • 1 cup mascarpone cheese
    • 1 cup ricotta cheese
    • 1/4 teaspoon salt
    • 1 cup sugar
    • 1 teaspoon vanilla extract

    Instructions

    1. Preheat your oven to 325°F (160°C).
    2. Crust: Grind the graham crackers and almonds using a food processor or a mortar and pestle until they form fine crumbs. Add the melted butter and salt, mixing until combined. Press this mixture into the bottom of a greased springform pan or deep dish pie pan. Bake for 10 minutes, then let cool.
    3. Mix the sugar and flour together and sprinkle over the top of the cooled crust. This step helps prevent the crust from becoming soggy.
    4. Filling: In a large bowl, beat together the cream cheese, mascarpone cheese, ricotta cheese, and sugar until smooth.
    5. Beat in the lemon juice and vanilla extract until well combined.
    6. Add the eggs one at a time, beating well after each addition.
    7. Pour the cheese mixture over the prepared crust in the pan.
    8. Bake in the preheated oven until the center of the cheesecake is wobbly when shaken, about 1 hour and 5 minutes.
    9. Let the cheesecake cool completely, then refrigerate, preferably overnight, to allow it to set fully.

    Tips

    For best results, ensure that all your ingredients are at room temperature before starting. This helps in achieving a smooth and creamy cheesecake filling. Also, avoid over-mixing the batter as it can incorporate too much air, leading to cracks on the surface of your cheesecake.

    Variations & Substitutions

    If you prefer a gluten-free version, simply replace the graham crackers with your favorite gluten-free cookies. For a different flavor profile, try adding a teaspoon of almond extract to the filling. You can also top the cheesecake with fresh berries or a drizzle of chocolate sauce before serving for an added layer of indulgence.

    Storage

    This cheesecake can be stored in the refrigerator for up to 5 days. Make sure to cover it with plastic wrap or store it in an airtight container to keep it fresh. If you need to store it longer, slice the cheesecake and wrap each piece individually in plastic wrap, then place in a freezer-safe container for up to 2 months. Thaw in the refrigerator before serving.

    FAQ

    Can I use low-fat cheeses for this recipe?

    While you can use low-fat versions of the cheeses, the texture and flavor of the cheesecake may be slightly different. Full-fat cheeses provide the best creamy texture and rich flavor.

    What if my cheesecake cracks?

    If your cheesecake happens to crack, don’t worry! It’s just a cosmetic issue and doesn’t affect the taste. You can easily cover any cracks with toppings such as whipped cream, fruit, or ganache.

    Nutrition

    This Mascarpone & Ricotta Cheese Cake is an indulgent treat, so it’s best enjoyed in moderation. Each slice contains approximately 450 calories, with 30g of fat, 40g of carbohydrates, and 9g of protein. These values can vary based on portion size and any variations or substitutions you choose.

    Final Thoughts

    This Mascarpone & Ricotta Cheese Cake is truly a dessert to savor and share. It’s an elegant addition to any dessert table and a wonderful way to celebrate special occasions or simply indulge in a sweet treat. I hope this recipe brings as much joy to your kitchen as it has to mine. Enjoy every creamy, dreamy bite!

    Related update: Mascarpone & Ricotta Cheese Cake

    Related update: Almond Ricotta Cake