Tag: Smoked Paprika

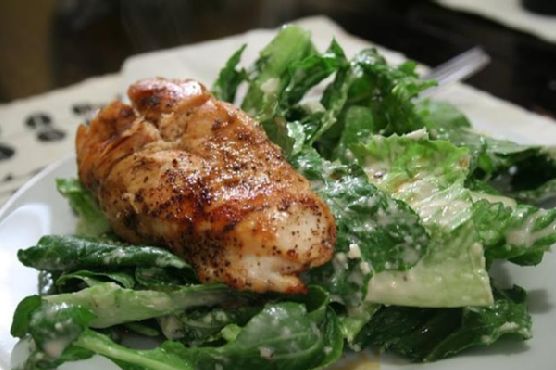
  • Smoky Maple-Glazed Salmon Caesar Salad with Toasted Pepitas | Made by Meaghan Moineau

    Smoky Maple-Glazed Salmon Caesar Salad with Toasted Pepitas | Made by Meaghan Moineau

    Smoky Maple-Glazed Salmon Caesar Salad with Toasted Pepitas

    The aroma of salmon sizzling in a hot skillet, mingling with the sweet, smoky whisper of maple syrup and smoked paprika, is a scent that promises pure culinary magic. Picture a golden-brown fillet, its surface glistening with a glaze that invites both the eyes and taste buds for a delightful dance. This isn’t just any salad; it’s a Smoky Maple-Glazed Salmon Caesar Salad with Toasted Pepitas, a dish that transforms the ordinary into the extraordinary.

    Personal Story

    I still remember the first time I boldly deviated from the standard Caesar salad. It was a sunny Saturday afternoon, and I was hosting an impromptu gathering for friends. My fridge revealed a lone salmon fillet, a half-empty bottle of maple syrup, and a packet of pepitas. The clock was ticking and my options were few, but inspiration struck like a lightning bolt. What if I merged these elements into a dish that was both familiar yet thrillingly new?

    As I stood over the stove, the salmon began to transform under the glaze of sticky maple syrup and aromatic smoked paprika. It was a revelation, the sweet and smoky flavors melding into a perfect harmony. The subtle crunch of toasted pepitas added a delightful contrast, and the addition of fresh dill brought a refreshing herbal note. My friends, initially skeptical, were soon enchanted. That day, the Smoky Maple-Glazed Salmon Caesar Salad with Toasted Pepitas not only became a staple in my culinary repertoire but a cherished memory.

    Since then, this dish has been my go-to for impressing guests or indulging in a personal treat. It evokes the nostalgia of that sunny afternoon every time I prepare it, yet each iteration brings a new layer of discovery. Whether it’s experimenting with different spice levels or swapping ingredients to suit dietary preferences, this salad is a canvas for creativity.

    What Makes This Version Special

    At the heart of this Smoky Maple-Glazed Salmon Caesar Salad with Toasted Pepitas is the unique combination of flavors and textures. The star of the show, the maple syrup and smoked paprika glaze, infuses the salmon with a smoky-sweet richness that elevates the dish beyond the typical Caesar salad. The addition of toasted pepitas, with their nutty crunch, complements the creamy dressing and tender salmon, creating a symphony of textures that dance across your palate. Fresh dill adds an unexpected yet refreshing herbal note, lifting the entire dish with its vibrant aroma.

    Unlike traditional Caesar salads, which can sometimes be heavy and one-dimensional, this version brims with a delightful complexity. The balance of flavors — sweet, smoky, and herby — combined with the rich umami of parmesan cheese, make this recipe a far superior choice. It’s more than just a salad; it’s an experience that brings together the best of fresh, wholesome ingredients in a unique and memorable way.

    Flavor Profile

    The first bite of this Smoky Maple-Glazed Salmon Caesar Salad with Toasted Pepitas is a sensory journey. The sweet warmth of the maple glaze hits first, followed by the smoky depth of smoked paprika. As you savor the salmon, the fresh dill offers a bright, herbaceous finish that cleanses the palate. The creamy Caesar dressing and nutty parmesan cheese provide a rich backdrop, while the toasted pepitas punctuate each mouthful with a satisfying crunch. It’s an intricate dance of flavors and textures, leaving you lingering over each forkful with delight.

    Ingredients

    • 2 tablespoons **maple syrup**
    • 1 teaspoon **smoked paprika**
    • 4 cups romaine lettuce, chopped
    • 1/4 cup light Caesar dressing
    • 1 tablespoon lemon juice
    • 2 tablespoons olive oil
    • 1/4 cup shredded parmesan cheese
    • 1/4 teaspoon black pepper
    • 1 pound salmon fillet
    • 1/4 teaspoon salt
    • 2 tablespoons slivered almonds
    • 2 tablespoons **pepitas (pumpkin seeds)**
    • 1 tablespoon fresh dill, chopped

    Instructions

    1. Preheat a skillet over medium heat. Combine the maple syrup and smoked paprika in a small bowl to create your glaze.
    2. Rub the salmon fillet with olive oil, salt, and black pepper. Place the salmon in the hot skillet, cooking for 4-5 minutes on each side until lightly browned and flaky.
    3. During the last 2 minutes of cooking, brush the maple-paprika glaze generously over the salmon. Allow it to caramelize slightly, forming a glossy coat.
    4. Remove the salmon from the skillet and let it rest for a minute. Squeeze fresh lemon juice over the top for a burst of acidity.
    5. In a separate small pan, toast the pepitas with a pinch of salt over medium heat. Stir frequently until they begin to puff up and turn golden brown, about 2-3 minutes.
    6. In a large bowl, toss the chopped romaine with Caesar dressing until evenly coated. Transfer to a serving platter and sprinkle with shredded parmesan and slivered almonds.
    7. Slice the salmon into strips and arrange over the dressed romaine. Garnish with toasted pepitas and a sprinkle of fresh dill.
    8. Finish with an extra drizzle of lemon juice and a dash of black pepper before serving.

    Pro Tips from Meaghan’s Kitchen

    • When choosing salmon, opt for a fillet with the skin on. It helps retain moisture during cooking and prevents sticking.
    • Feel free to adjust the amount of smoked paprika in the glaze depending on your taste preference for smokiness.
    • For an extra layer of flavor, try adding a touch of garlic powder to the glaze.
    • To keep the Caesar dressing light, whisk in a tablespoon of Greek yogurt for a creamy texture without the added calories.
    • If you don’t have fresh dill on hand, substitute with fresh parsley or chives for a similar herbal note.

    Variations & Dietary Swaps

    • Vegetarian Version: Replace the salmon with grilled portobello mushrooms or extra-firm tofu marinated in the maple-paprika glaze.
    • Spice-It-Up Version: Add a pinch of cayenne pepper to the glaze for an extra kick of heat.
    • Kids-Friendly Version: Use honey instead of maple syrup for a milder sweetness and skip the paprika for a more subtle flavor profile.

    What to Serve With It

    This Smoky Maple-Glazed Salmon Caesar Salad with Toasted Pepitas pairs beautifully with a crisp, chilled glass of Sauvignon Blanc. The wine’s acidity complements the sweetness of the glaze and the creaminess of the dressing. For a complete meal, serve alongside a warm, crusty baguette or a simple side of roasted asparagus.

    Storage & Meal Prep

    To store leftovers, place the salad in an airtight container and refrigerate for up to 2 days. To reheat the salmon, gently warm it in a skillet over low heat or in the microwave until just heated through. For meal prep, you can prepare the glaze, toast the pepitas, and chop the vegetables in advance to save time on busy days.

    FAQ

    Can I use frozen salmon for this recipe?

    Absolutely! Just make sure to thaw the salmon completely and pat it dry before cooking to ensure even browning and proper glaze adherence.

    What if I don’t have smoked paprika?

    In a pinch, you can substitute regular paprika, although you might lose a bit of that smoky depth. A drop of liquid smoke can also add a similar flavor.

    How do I know when the salmon is perfectly cooked?

    Look for a golden-brown crust and check for flakiness with a fork. The interior should be opaque and just slightly pink for medium doneness.

    Is there a way to make this dish dairy-free?

    Certainly! Use a dairy-free Caesar dressing and swap the parmesan for a plant-based cheese or nutritional yeast for that cheesy flavor.

    Final Thoughts

    This Smoky Maple-Glazed Salmon Caesar Salad with Toasted Pepitas is more than a dish; it’s a celebration of flavors and textures that promise to delight your senses. I hope it finds a place at your table as it has at mine. Don’t forget to share your own twists and experiences in the comments — I love hearing how you make this recipe your own!

    Related update: Smoky Maple-Glazed Salmon Caesar Salad with Toasted Pepitas

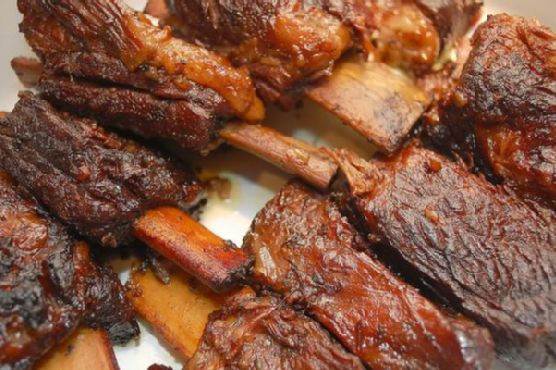
  • Honey-Bourbon Glazed Country-Style Ribs with Smoked Paprika | Made by Meaghan Moineau

    Honey-Bourbon Glazed Country-Style Ribs with Smoked Paprika | Made by Meaghan Moineau

    Honey-Bourbon Glazed Country-Style Ribs with Smoked Paprika

    The tantalizing aroma of these Honey-Bourbon Glazed Country-Style Ribs with Smoked Paprika will have you salivating long before they hit the table. Picture this: golden-brown beef short ribs, sizzling in a cast iron skillet, enveloped in a rich, smoky glaze that melds sweet honey with the bold, oaky warmth of bourbon. It’s a gastronomic symphony that promises to delight and surprise your taste buds.

    Personal Story

    For me, ribs were a weekend ritual growing up. Every Sunday, my family would gather around the table, eagerly anticipating the moment when my dad would present his perfectly charred ribs, a secret recipe he guarded fiercely. The kitchen would be filled with the sound of sizzling meat and the warm, comforting aroma of slow-cooked goodness. It was a tradition that brought us together, no matter what the week had thrown our way.

    As I grew older, I started experimenting in the kitchen, eager to make my mark on the family tradition. One Sunday, I decided to venture into uncharted territory, adding a splash of bourbon to the mix. My heart raced as I deglazed the pan, the alcohol sizzling and popping as it met the heat. I worried I had gone too far, that my little twist would be too bold for my family’s taste.

    But the moment those Honey-Bourbon Glazed Country-Style Ribs hit the table, I knew I had a winner. The smoky depth of the paprika intertwined with the sweet and spicy glaze, enhanced by the bourbon’s oaky undertone, was met with nods of approval and satisfied smiles. It was an elevated twist on a cherished classic, one that earned me a spot in the family rib hall of fame.

    Now, every time I make this dish, I’m reminded of that first successful attempt, the joy of creative cooking, and the power of food to bring us together. It’s a recipe that’s close to my heart, and I’m thrilled to share it with you.

    What Makes This Version Special

    This version of Honey-Bourbon Glazed Country-Style Ribs isn’t just a nod to tradition—it’s a celebration of flavor. By incorporating a bold bourbon kick and the smoky depth of paprika, I’ve elevated the sweet and spicy profile of the original recipe. The bourbon not only deglazes the pan, infusing the ribs with a rich, oaky flavor, but it also adds a layer of sophistication that makes this dish stand out.

    The smoked paprika, on the other hand, deepens the sauce’s complexity, bringing out the best in the other ingredients. It’s a combination that transforms the humble rib into something truly special—perfect for impressing guests or simply treating yourself to a restaurant-quality meal at home. This version is not just better than the standard recipe; it’s a whole new experience.

    Flavor Profile

    Imagine biting into a piece of tender, juicy rib, the sweet glaze mingling with a subtle smokiness that clings to your taste buds. The first notes are of honey’s natural sweetness, quickly followed by the warm embrace of bourbon, its oaky essence adding depth and richness. A hint of heat from the cayenne and ancho chili powder dances on your tongue, balanced by the savory undertones of fresh thyme and smoked paprika. It’s a symphony of sweet, smoky, and spicy flavors that keeps you coming back for more.

    Ingredients

    • 2 pounds beef short ribs
    • 2 tablespoons vegetable oil
    • 1 large yellow onion, diced
    • 4 cloves garlic, minced
    • 2 tablespoons unsalted butter
    • 1 cup tomato sauce
    • 1/4 cup apple cider vinegar
    • 1/2 cup honey
    • 1 tablespoon hot sauce
    • 1/2 teaspoon cayenne pepper
    • 1 tablespoon ancho chili powder
    • 1 teaspoon salt
    • 1 teaspoon dry mustard
    • 1 cup vegetable scraps (such as carrot peels)
    • 2 cups beef stock
    • 1/2 cup water (if needed)
    • 1/2 cup bourbon whiskey
    • 1 tablespoon smoked paprika
    • 2 teaspoons fresh thyme
    • 1/4 cup dark brown sugar

    Instructions

    1. Heat the vegetable oil in a 6-quart enameled Dutch oven over medium-high heat. Add the beef short ribs, browning them on all sides until they achieve a golden-brown crust, about 6-8 minutes.
    2. Once browned, remove the ribs and pour in the bourbon whiskey to deglaze the pan, scraping up all those flavorful bits. Allow the alcohol to cook off, about 2 minutes.
    3. Return the ribs to the pot, pour in the beef stock, and add water just to cover if necessary. Toss in the vegetable scraps and bring to a boil.
    4. Lower the heat to a simmer, cover, and cook for 45 minutes to an hour, or until the ribs are tender and the meat easily pulls away from the bone.
    5. While the ribs are braising, melt the butter in a large cast iron skillet over medium-low heat. Add the diced onion and sauté until soft and translucent, about 5 minutes.
    6. Stir in the garlic and sauté for another minute until fragrant. Add the tomato sauce, apple cider vinegar, honey, hot sauce, cayenne pepper, ancho chili powder, salt, dry mustard, dark brown sugar, smoked paprika, and fresh thyme.
    7. Bring the mixture to a boil, then reduce the heat and simmer uncovered for 25 minutes, stirring occasionally until the sauce thickens.
    8. When the ribs are tender, remove them from the braising liquid and transfer to the skillet with the sauce. Raise the heat to medium-high and cook, stirring frequently, until the sauce has glazed the ribs, about 10 minutes.
    9. Serve the ribs hot, with the remaining sauce on the side if desired.

    Pro Tips from Meaghan’s Kitchen

    • For maximum flavor, let the ribs marinate in the sauce overnight before cooking. This allows the spices and bourbon to penetrate deeper into the meat.
    • If you’re short on time, use a pressure cooker to tenderize the ribs before finishing them in the skillet.
    • Keep an eye on the sauce as it simmers. Stir regularly to prevent it from sticking and burning on the bottom of the pan.
    • To achieve a nice caramelization, don’t rush the browning process of the ribs. Pat them dry before adding to the hot oil for the best sear.
    • If you prefer a smokier flavor, consider adding a few drops of liquid smoke to the sauce.

    Variations & Dietary Swaps

    • Vegetarian Swap: Replace beef ribs with large portobello mushrooms. Adjust the cooking time as needed since mushrooms cook faster.
    • Spice-It-Up Version: Increase the cayenne pepper to 1 teaspoon for an extra kick. You can also add sliced jalapeños to the sauce.
    • Kids-Friendly Version: Reduce the hot sauce and cayenne to make the glaze milder. Serve with a side of honey dipping sauce for sweetness.

    What to Serve With It

    These Honey-Bourbon Glazed Country-Style Ribs pair beautifully with a side of creamy coleslaw, its crunch and tang balancing the rich, meaty flavors. A glass of chilled lager complements the dish perfectly, cutting through the sweetness of the glaze and refreshing your palate with every sip. For a complete meal, consider adding some buttery cornbread or crispy roasted potatoes.

    Storage & Meal Prep

    If you have leftovers (lucky you!), store the ribs in an airtight container in the fridge for up to 3 days. To reheat, place them in a preheated oven at 350°F for about 15-20 minutes, or until warmed through. For longer storage, freeze the ribs in a freezer-safe bag for up to 3 months. Thaw overnight in the refrigerator before reheating.

    FAQ

    Can I use pork ribs instead of beef?

    Absolutely! Pork ribs will work well with this recipe, though the cooking time may vary slightly. Just ensure they are tender before moving them to the sauce.

    What can I substitute for bourbon whiskey?

    If you prefer to avoid alcohol, substitute with apple juice or beef broth. You’ll miss the oaky flavor, but the dish will still be delicious.

    Is there a way to make this dish less sweet?

    Yes, you can reduce the amount of honey and dark brown sugar in the sauce. Start with half the amount and adjust to taste.

    Can I make the sauce ahead of time?

    Definitely! Prepare the sauce up to two days in advance. Store it in the fridge, and reheat gently before tossing with the ribs.

    What’s the best way to achieve a sticky glaze?

    Ensure the sauce reduces sufficiently by simmering it uncovered. Stir frequently and keep an eye on the consistency—it should be thick enough to coat the back of a spoon.

    Final Thoughts

    There you have it, my Honey-Bourbon Glazed Country-Style Ribs with Smoked Paprika—a dish that’s both a nod to tradition and a testament to the joys of culinary creativity. It’s a recipe that brings warmth and flavor to any table, and one that I hope will become a staple in your kitchen as it has in mine. I’d love to hear how these ribs turn out for you, so please leave a comment below or share your photos on social media. Happy cooking, my friends!

    Related update: Honey-Bourbon Glazed Country-Style Ribs with Smoked Paprika

    Related update: Zesty Lemon-Honey Glazed Chicken with Ginger-Infused Mashed Potatoes

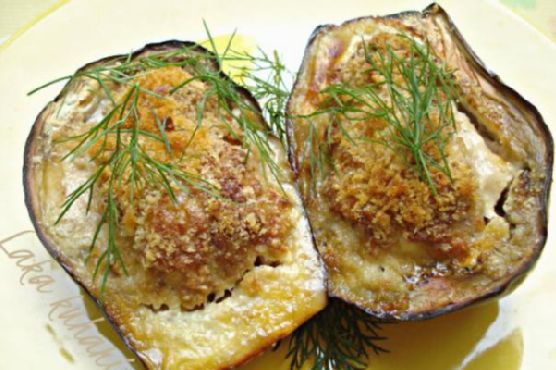
  • Mediterranean Stuffed Eggplants with Spiced Sausage and Herb-Crust | Made by Meaghan Moineau

    Mediterranean Stuffed Eggplants with Spiced Sausage and Herb-Crust | Made by Meaghan Moineau

    Mediterranean Stuffed Eggplants with Spiced Sausage and Herb-Crust

    Picture this: the comforting aroma of roasted eggplant mingling with the warm, inviting scent of smoked paprika and lemon zest. It’s a sensory journey that transports you straight to a Mediterranean kitchen, where every bite is a harmonious blend of bold flavors and rustic charm. Welcome to my twist on a classic — Mediterranean Stuffed Eggplants with Spiced Sausage and Herb-Crust.

    Personal Story

    My love affair with stuffed eggplants began in a small, bustling market in the heart of Santorini. I was on a long-overdue vacation, seeking solace and inspiration amidst the azure waters and sun-kissed landscapes. The market was alive with colors and sounds, each stall brimming with fresh produce and aromatic spices. There, I discovered a humble vendor selling perfectly roasted eggplants, filled with a savory stuffing that seemed to capture the essence of the Mediterranean in every bite.

    That first bite was revelatory. The eggplant was tender, almost creamy, and the stuffing was a perfect medley of flavors — rich, savory, and unexpectedly smoky. I was hooked. I knew I had to recreate this magic back home, but with my own signature twist.

    Back in my kitchen, I set out to capture that same magic. After a few (okay, several) kitchen experiments, I settled on a combination that’s become a beloved staple in my culinary repertoire. The addition of smoked paprika and lemon zest in the stuffing brings a smoky, citrusy depth, while a walnut-parsley crust adds an earthy crunch that elevates the dish beyond the classic version.

    Every time I prepare these Mediterranean Stuffed Eggplants, I’m transported back to that sun-drenched market, and I’m thrilled to share this journey with you. Whether you’re a seasoned home cook or just beginning your culinary adventures, this dish is a testament to the power of food to connect us to places and memories.

    What Makes This Version Special

    The magic of my Mediterranean Stuffed Eggplants lies in the details. The stuffing, enriched with smoked paprika and a hint of lemon zest, sings with a smoky, citrusy depth that enlivens the palate. These flavors harmonize beautifully with the creamy eggplant, making each bite a delightful surprise.

    But that’s not all. I’ve added a walnut-parsley crust that offers an earthy crunch, contrasting with the softness of the eggplant and the juiciness of the sausage. This crust is not just a topping; it’s a flavor-packed layer that transforms this dish into a textural masterpiece. By blooming the smoked paprika in olive oil, the spice’s essence is fully realized, permeating the sausage with a warmth that is both unexpected and comforting.

    In essence, this version of Mediterranean Stuffed Eggplants isn’t just about filling a vegetable; it’s about creating a symphony of flavors and textures that elevate a simple dish to something truly special.

    Flavor Profile

    Imagine a rich, smoky aroma wafting from your oven, mingling with the zesty brightness of lemon. As you take a bite, the eggplant’s tender flesh melts into a savory stuffing enriched with the depth of smoked paprika. The citrusy burst from lemon zest cuts through the richness of the sausage, balancing the flavors beautifully.

    And then, the final flourish: a crunchy, nutty crust of walnuts and parsley that adds a herbaceous finish, leaving you craving just one more bite. This dish is a sensory journey — rich, smoky, citrusy, and delightfully crunchy, all in one experience.

    Ingredients

    • 2 large eggplants
    • 2 tablespoons **olive oil**
    • 1/2 cup **walnuts**, finely chopped
    • 1/4 cup **fresh parsley**, chopped
    • 1/2 cup bread crumbs
    • 1 tablespoon **smoked paprika**
    • 1 tablespoon **lemon zest**
    • 1 pound fresh sausage, casings removed
    • 1/2 cup feta cheese, crumbled
    • 1/2 cup mozzarella cheese, shredded
    • 1/4 cup almonds, chopped
    • 1 large egg
    • Salt and pepper to taste
    • Fresh dill, chives, or basil for garnish

    Instructions

    1. Preheat your oven to 230°C (450°F). Line a baking sheet with parchment paper.
    2. Wash the eggplants thoroughly. Cut the stems off and halve them lengthwise. Use a spoon to scoop out the middle, leaving about a half-inch border to create a boat for the stuffing.
    3. In a small pan, heat the olive oil over medium heat. Add **smoked paprika** and cook for about 1 minute, stirring continuously, until it releases its aroma. This blooming process intensifies the paprika’s flavor.
    4. In a mixing bowl, combine the sausage meat, egg, feta cheese, mozzarella, almonds, and the bloomed paprika. Add salt and pepper to taste. Mix until well incorporated.
    5. Using a spoon, generously stuff the eggplant halves with the sausage mixture. Press down lightly to ensure even distribution.
    6. In a separate bowl, combine the **walnuts**, fresh parsley, and bread crumbs. Sprinkle this mixture over the stuffed eggplants, pressing down gently to form the crust.
    7. Drizzle the stuffed eggplants with a bit more olive oil to encourage browning, then place them on the prepared baking sheet.
    8. Bake in the preheated oven for 25 minutes, or until the crust is golden-brown and crispy, and the eggplants are tender.
    9. Remove from the oven and let them cool slightly. Garnish with fresh dill, chives, or basil before serving.

    Pro Tips from Meaghan’s Kitchen

    • For the best flavor, choose eggplants that are firm and heavy for their size. They should have smooth, glossy skin and feel slightly springy when pressed.
    • Blooming spices like smoked paprika in oil unlocks their full flavor potential, so don’t skip this step!
    • If the walnut-parsley crust starts to brown too quickly, cover the eggplants loosely with foil halfway through baking.
    • For added depth, toast the walnuts lightly in a dry pan before chopping. This enhances their nuttiness.
    • Feel free to adjust the amount of lemon zest to suit your taste. A bit more zest can brighten the overall flavor profile.

    Variations & Dietary Swaps

    • Vegetarian Version: Swap the sausage for a plant-based sausage or a mixture of cooked lentils and mushrooms for a hearty, meat-free option.
    • Spice-It-Up Version: Add a pinch of red pepper flakes to the sausage mixture for a spicy kick that complements the smoky paprika.
    • Kid-Friendly Version: Simplify by omitting the lemon zest and using only mozzarella in the stuffing. Serve with a side of marinara sauce for dipping.

    What to Serve With It

    These Mediterranean Stuffed Eggplants are a meal in themselves, but they pair beautifully with a fresh, crisp salad of arugula and cherry tomatoes. The peppery greens and juicy tomatoes offer a refreshing contrast to the rich, savory eggplants.

    For a complete dining experience, serve with a crisp, chilled glass of Sauvignon Blanc. The wine’s acidity and fruity notes complement the smoky, citrusy flavors of the dish perfectly.

    Storage & Meal Prep

    Leftovers can be stored in an airtight container in the fridge for up to three days. To reheat, place the eggplants in a preheated oven at 180°C (350°F) for about 10-15 minutes, or until warmed through.

    For meal prep, you can assemble the stuffed eggplants in advance and store them, uncooked, in the fridge for up to a day. When ready to serve, simply bake as directed.

    FAQ

    Can I freeze the stuffed eggplants?

    Yes, you can freeze the stuffed eggplants before baking. Wrap them tightly in plastic wrap and place in a freezer-safe container. Freeze for up to three months. To bake, thaw overnight in the fridge and proceed with the baking instructions.

    What can I use instead of walnuts for the crust?

    If you’re avoiding nuts, consider using panko bread crumbs or crushed sunflower seeds for a similar crunch without the nuts.

    How can I make this dish vegan?

    To make this dish vegan, use a plant-based sausage, replace the cheese with a vegan alternative, and use a flax egg (1 tablespoon ground flaxseed mixed with 2.5 tablespoons water) instead of the egg.

    Can I use a different type of cheese?

    Absolutely! Goat cheese or ricotta can be wonderful substitutes, adding a creamy texture and slight tang to the stuffing.

    Is there a way to reduce the saltiness?

    If you find the dish too salty, use reduced-sodium cheese and sausage, and rinse the feta under cold water before crumbling.

    Final Thoughts

    I hope these Mediterranean Stuffed Eggplants with Spiced Sausage and Herb-Crust inspire you to bring a taste of the Mediterranean into your kitchen. They’re a testament to the joy of cooking and the power of food to connect us to faraway places and cherished memories. I’d love to hear how this recipe turns out for you, so please leave a comment or share a photo of your creation. Happy cooking, and may your kitchen be filled with delicious aromas and happy memories!

    Related update: Mediterranean Stuffed Eggplants with Spiced Sausage and Herb-Crust

    Related update: Sumptuous Indian-Spiced Beef with Creamy Coconut Spinach

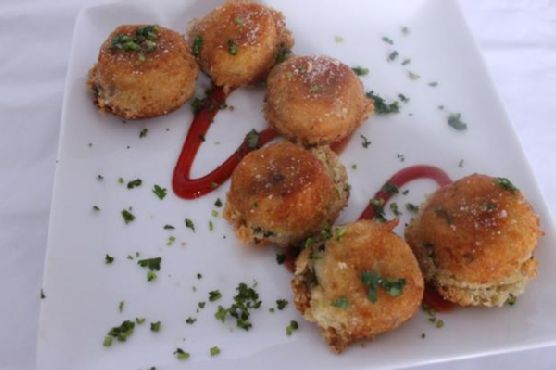
  • Spicy Sardine Croquettes with Zesty Lime-Cilantro Aioli | Made by Meaghan Moineau

    Spicy Sardine Croquettes with Zesty Lime-Cilantro Aioli | Made by Meaghan Moineau

    Spicy Sardine Croquettes with Zesty Lime-Cilantro Aioli

    Picture this: the sizzle of croquettes hitting hot oil, a scent of garlic wafting through the kitchen, and a hint of lime cutting through the air with its zesty promise. This isn’t just any croquette; it’s a symphony of flavors, a Spanish classic reimagined with a refreshing and flavorful twist. Welcome to the world of Spicy Sardine Croquettes with Zesty Lime-Cilantro Aioli!

    Personal Story

    I still remember the first time I encountered croquettes. It was a sunny afternoon in Barcelona, sitting in a vibrant tapas bar tucked away in a cobblestone alley. The locals’ laughter harmonized with the clinking of glasses, and I had my first bite of a perfectly crisp, savory croquette. It was love at first taste.

    Returning home, I was determined to recreate that magical experience in my own kitchen. However, my initial attempts were, let’s say, less than successful. There was the time I confused baking powder with baking soda — the result was more of a pancake than a croquette. Or the afternoon when I learned the hard way that patience is a virtue as I hastily turned the croquettes too soon, leaving them pale and unsatisfying.

    But, as with any good recipe, persistence led to perfection. After many trials (and errors), I discovered that the secret to a truly remarkable croquette was in the details — the ingredients, the techniques, and the flavors that elevate it from ordinary to extraordinary.

    Today, I’m thrilled to share this special Spicy Sardine Croquettes recipe with you. It’s a testament to those sunlit afternoons in Spain and my kitchen escapades, with a delightful twist: a tangy lime-cilantro aioli and a hint of smoked paprika that make these croquettes stand out. Let’s dive into what makes this version something truly special.

    What Makes This Version Special

    What sets these Spicy Sardine Croquettes apart from the traditional recipe is the harmonious blend of classic and innovative elements. The addition of a tangy lime-cilantro aioli offers a refreshing contrast to the rich, savory croquettes, making every bite a delightful explosion of flavor. The aioli not only adds brightness but also enhances the overall taste experience with its herbaceous, zesty notes.

    Moreover, the hint of smoked paprika in the breadcrumbs provides these croquettes with a subtle yet distinctive smoky taste that elevates the dish. This spice, along with the briny depth of the sardines and the creaminess of parmesan cheese, creates a nuanced flavor profile that’s both comforting and bold. This version is more than just a snack; it’s a gourmet experience that’s better than the standard recipe because it plays with textures and flavors in a way that’s both familiar and exciting.

    Flavor Profile

    The Spicy Sardine Croquettes with Zesty Lime-Cilantro Aioli present a multi-layered taste adventure that’s hard to resist. Imagine biting into a perfectly crisp exterior, revealing a savory, moist interior bursting with the umami of sardines and the richness of parmesan cheese. The smoked paprika introduces a gentle, smoky undertone that lingers just long enough to intrigue your palate.

    Then comes the aioli — a vibrant, citrusy kick that brightens the dish. The lime juice and zest cut through the richness, while the cilantro adds a refreshing, aromatic note. Finally, the jalapeño pepper brings a gentle heat, ensuring that these croquettes are not just flavorful but also spirited. Together, these elements create a dish that is deeply satisfying and unexpectedly complex.

    Ingredients

    • 1 can sardines, drained
    • 2 cups frozen cassava, thawed
    • 1/2 cup parmesan cheese, grated
    • 2 egg yolks
    • 2 egg whites
    • 1 teaspoon baking powder
    • 1 cup plain bread crumbs
    • 1 tablespoon smoked paprika
    • 1/4 cup fresh cilantro, chopped
    • 1 clove garlic, minced
    • 1/2 teaspoon salt
    • 1/2 teaspoon black pepper
    • 1 lime, zested and juiced
    • 1 cup mayonnaise
    • 1 jalapeño pepper, minced
    • Oil for frying

    Instructions

    1. In a pot, bring salted water to a boil and cook the frozen cassava (yuca) until fork-tender, about 20 minutes. Drain and mash until smooth.
    2. In a large mixing bowl, combine the mashed cassava, drained sardines, parmesan cheese, egg yolks, baking powder, salt, pepper, and cilantro. Mix well until the ingredients are fully incorporated.
    3. Preheat the oil in a frying pan over medium heat. Add the minced garlic to the oil and let it infuse for about 2 minutes, then remove the garlic to prevent burning.
    4. With wet hands, shape the sardine mixture into small balls. Dip each ball into the egg whites, then roll in the smoked paprika-infused bread crumbs, ensuring each croquette is evenly coated.
    5. Carefully place the croquettes in the hot oil. Fry until golden-brown on all sides, about 4-5 minutes per batch. Remove and let them rest on a double-lined paper towel to absorb excess oil.
    6. For the aioli, in a small bowl, mix the mayonnaise, lime zest, lime juice, and minced jalapeño pepper. Stir until smooth and well combined.
    7. Serve the croquettes hot alongside the zesty lime-cilantro aioli for dipping.

    Pro Tips from Meaghan’s Kitchen

    • When mashing the cassava, ensure it’s smooth to avoid any lumps in your croquettes.
    • Infusing the oil with garlic before frying adds an aromatic depth to the croquettes. Just remember to remove the garlic to prevent it from burning.
    • Use a thermometer to maintain the oil temperature around 350°F for even frying without the croquettes absorbing too much oil.
    • For an extra crispy texture, double dip the croquettes in egg whites and bread crumbs.
    • Let the croquette mixture chill in the refrigerator for 30 minutes before shaping to make it easier to handle.

    Variations & Dietary Swaps

    • Vegetarian Swap: Replace sardines with mashed chickpeas or cooked lentils for a vegetarian option that retains the protein punch.
    • Spice-It-Up Version: Add a dash of cayenne pepper to the sardine mixture for those who love a fiery kick.
    • Kids-Friendly Version: Omit the jalapeño in the aioli and reduce the smoked paprika for a milder flavor that kids will enjoy.

    What to Serve With It

    These croquettes are wonderfully versatile and pair beautifully with a crisp, cold glass of Sauvignon Blanc, which complements the smoky and tangy flavors. Alternatively, a side of fresh mango salsa can add a sweet and fruity contrast that enhances the overall dish. For a full meal, consider serving with a simple green salad dressed with olive oil and vinegar to keep things light and refreshing.

    Storage & Meal Prep

    To store, place any leftover croquettes in an airtight container in the fridge for up to 3 days. For longer storage, freeze the uncooked, breaded croquettes in a single layer on a baking sheet. Once frozen, transfer them to a freezer-safe bag or container, where they’ll keep for up to 3 months. To reheat, bake the frozen croquettes in a preheated 375°F oven for 15-20 minutes, or until heated through and crispy.

    FAQ

    Can I use fresh cassava instead of frozen?

    Yes, fresh cassava can be used. Just peel and cut it into chunks before boiling. It might take a bit longer to cook, so check for tenderness with a fork before mashing.

    Is there an alternative to frying these croquettes?

    Absolutely! You can bake the croquettes on a baking sheet lined with parchment paper at 400°F for about 20-25 minutes or until golden and crispy.

    How can I make the aioli less spicy?

    To reduce the heat, simply omit the jalapeño pepper or use only half. You can also replace it with a milder pepper if you prefer.

    What if I don’t have smoked paprika?

    Regular paprika will work, though it won’t have the smoky flavor. You can add a drop of liquid smoke to the mixture for a similar effect.

    Can these croquettes be made gluten-free?

    Yes, just substitute the bread crumbs with gluten-free bread crumbs or crushed gluten-free crackers.

    Final Thoughts

    These Spicy Sardine Croquettes with Zesty Lime-Cilantro Aioli are a testament to the fact that classics can be reimagined in deliciously creative ways. Whether you’re hosting a tapas night or simply craving something extraordinary, these croquettes deliver on flavor and flair. I’m excited for you to try them and make them your own. Don’t forget to share your experiences and any unique twists you come up with in the comments below. Happy cooking!

    Related update: Zesty Crab Salad Avocado Boats with Mango Salsa

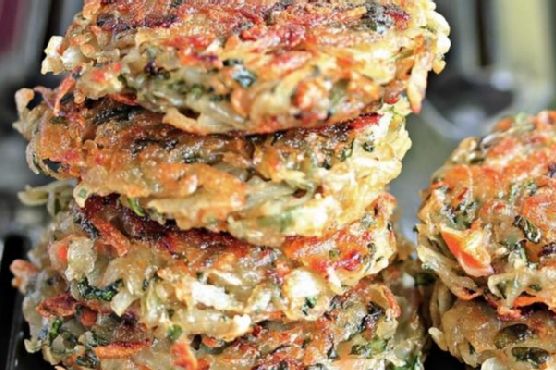
  • Savory Hashbrowns with Spinach, Carrot & Smoked Paprika Aioli | Made by Meaghan Moineau

    Savory Hashbrowns with Spinach, Carrot & Smoked Paprika Aioli | Made by Meaghan Moineau

    Savory Hashbrowns with Spinach, Carrot & Smoked Paprika Aioli

    Imagine the sound of potatoes sizzling away in a hot pan, their surfaces turning a perfect golden-brown, while the air fills with the tantalizing aroma of smoked paprika and fresh dill. These are no ordinary hashbrowns, my friend. This is a breakfast experience, an ode to mornings made extraordinary.

    Personal Story

    Hashbrowns have always held a special place in my heart. I vividly remember my first attempt at making them as a teenager. I was at my grandmother’s quaint little kitchen, the kind of kitchen that felt like a warm hug. My grandmother watched over me with her twinkling eyes, as I awkwardly grated potatoes, leaving a mess that probably took longer to clean than it did to cook.

    Despite the chaos, the first bite was transformative. It was a simple dish, yet it was full of comfort and nostalgia. From that day on, hashbrowns became a staple in my culinary repertoire, a dish I could always rely on to bring a smile to anyone’s face. But, as I evolved as a home cook, so did my hashbrown recipe.

    Fast forward a few years, and I found myself yearning for a little more adventure in my breakfast routine. That’s when inspiration struck: Why not add a smoky aioli and a touch of feta cheese to those classic hashbrowns? This idea was born out of a love for bold flavors and a desire to elevate an already beloved dish.

    Now, with every sizzle of these hashbrowns in the pan, I’m reminded of my grandmother’s influence and the joy of reinventing a classic. Each bite is a journey, a blend of nostalgia and culinary innovation.

    What Makes This Version Special

    This version of hashbrowns takes the classic to a whole new level by introducing a smoky aioli enhanced with smoked paprika and a generous sprinkle of tangy feta cheese. These additions bring a depth and creaminess that you won’t find in your everyday hashbrown recipe. The smoked paprika blooms in oil, releasing its deep, earthy aroma, while the feta cheese introduces a rich, creamy texture that pairs beautifully with the crispy potato exterior.

    By incorporating fresh spinach and carrot into the mixture, these hashbrowns not only become more nutritious but also boast an intriguing blend of flavors and colors. The spinach adds a freshness, while the carrot provides a subtle sweetness, creating a harmonious balance that makes this version stand out from the crowd.

    Flavor Profile

    The flavor profile of these savory hashbrowns is a delightful dance of savory, smoky, and tangy notes, underpinned by creamy undertones. As you take the first bite, the crispy exterior gives way to a tender, flavorful interior, with the fresh spinach and sweet carrot harmonizing beautifully. The smoked paprika aioli adds a layer of complexity, wrapping each bite in a warm, earthy embrace, while the feta cheese provides a tangy, luscious contrast. It’s a multi-sensory experience that leaves you craving more.

    Ingredients

    • 4 medium potatoes, grated
    • 1 cup fresh spinach leaves, chopped
    • 1 medium onion, finely chopped
    • 1 medium carrot, grated
    • 1/2 teaspoon salt, plus more to taste
    • 1/2 teaspoon red chili powder
    • 2 tablespoons cornflour
    • 1/2 cup feta cheese, crumbled
    • 1/2 cup mayonnaise
    • 1 teaspoon smoked paprika
    • 1 tablespoon lemon juice
    • 1 tablespoon fresh dill, chopped
    • Oil for frying

    Instructions

    1. In a large bowl, combine the grated potatoes, chopped spinach, onion, and grated carrot. Add 1/2 teaspoon of salt and mix well. Squeeze the mixture with your hands to remove as much moisture as possible. This step is crucial for achieving that desired crispiness.
    2. Add the red chili powder and cornflour to the potato mixture. Crumble the feta cheese into the bowl for a creamy, tangy twist. Mix until everything is evenly incorporated. Taste and adjust the salt if necessary.
    3. Form the mixture into small, even patties, pressing them firmly to ensure they hold together.
    4. Heat a generous amount of oil in a pan over medium-high heat. Once hot, carefully place the patties into the pan. Allow them to brown for a few minutes on each side, then reduce the heat to medium and continue cooking until they are golden-brown and cooked through, about 10-12 minutes total.
    5. While the hashbrowns are cooking, prepare the smoky aioli. In a small saucepan, heat 1 tablespoon of oil over low heat. Add the smoked paprika and gently stir for about 30 seconds to bloom the spice, releasing its deep flavor. Remove from heat and let it cool slightly.
    6. In a small bowl, combine the mayonnaise, lemon juice, and chopped dill. Stir in the smoked paprika oil, mixing until smooth and well combined.
    7. Serve the hashbrowns hot, drizzled with the smoky aioli.

    Pro Tips from Meaghan’s Kitchen

    • Always squeeze out as much moisture as possible from the potato mixture. It’s the secret to achieving perfectly crispy hashbrowns.
    • If your mixture seems too wet, add a little more cornflour to help bind the patties.
    • For an extra flavorful aioli, let the smoked paprika bloom in the oil for a full minute, but be careful not to burn it.
    • Don’t overcrowd the pan when frying the patties. This ensures even cooking and better browning.
    • Use a non-stick pan for easier flipping and to prevent sticking.

    Variations & Dietary Swaps

    • Vegetarian Delight: Swap the feta cheese with a plant-based feta alternative to make these hashbrowns completely vegetarian.
    • Spice-It-Up Version: Add a pinch of cayenne pepper to the aioli for an extra kick, or fresh jalapeños to the hashbrown mixture for more heat.
    • Kids-Friendly Version: Omit the red chili powder and smoked paprika for a milder flavor that kids will love.

    What to Serve With It

    These savory hashbrowns pair beautifully with a crisp, chilled Chardonnay, bringing out their smoky and tangy notes. For a non-alcoholic option, a lemon-infused sparkling water makes a refreshing accompaniment, cutting through the richness of the dish. You can also serve them alongside a fresh green salad or some grilled vegetables for a balanced meal.

    Storage & Meal Prep

    Leftover hashbrowns can be stored in an airtight container in the fridge for up to 3 days. To reheat, place them in a preheated oven at 350°F (175°C) for about 10 minutes, or until heated through and crispy again. For longer storage, freeze the uncooked patties on a baking sheet until solid, then transfer them to a freezer-safe bag. When ready to cook, fry them directly from frozen, adding a few extra minutes to the cooking time.

    FAQ

    Can I make the hashbrowns ahead of time?

    Yes, you can prepare the patties in advance and store them in the fridge for up to a day before frying. This makes breakfast prep a breeze.

    What if I don’t have smoked paprika?

    If you don’t have smoked paprika, regular paprika can be used, but you’ll miss out on that smoky flavor. You could also try a pinch of chipotle powder for a similar effect.

    How do I prevent the hashbrowns from falling apart?

    Ensure that you’ve squeezed out as much moisture as possible from the mixture and that you press the patties firmly when shaping them. If they’re still falling apart, try adding a bit more cornflour.

    Can I bake these hashbrowns instead of frying?

    Yes, you can bake them! Preheat your oven to 400°F (200°C) and bake on a parchment-lined baking sheet for about 25-30 minutes, flipping halfway through, until golden and crispy.

    Can I substitute dill with another herb?

    Absolutely! Fresh parsley or chives would also work beautifully in the aioli for a different herbal note.

    Final Thoughts

    I hope this recipe for Savory Hashbrowns with Spinach, Carrot & Smoked Paprika Aioli becomes a cherished addition to your breakfast or brunch repertoire. It’s a dish that’s close to my heart and perfect for sharing with loved ones. As always, I’d love to hear how it turns out for you. Please leave a comment below or share your delicious creations on social media. Let’s make mornings a little more magical, one hashbrown at a time!

    Related update: Savory Hashbrowns with Spinach, Carrot & Smoked Paprika Aioli

    Related update: Spiced Carrot Cake Pancakes with Maple Cream Cheese Drizzle

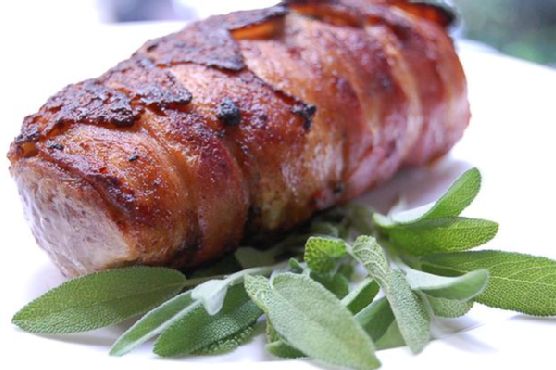
  • Maple-Glazed Bacon Wrapped Pork Tenderloin with Smoked Paprika | Made by Meaghan Moineau

    Maple-Glazed Bacon Wrapped Pork Tenderloin with Smoked Paprika | Made by Meaghan Moineau

    Maple-Glazed Bacon Wrapped Pork Tenderloin with Smoked Paprika

    Imagine the sizzle of bacon meeting the gentle caramelization of maple syrup, enveloping a perfectly seasoned pork tenderloin. This culinary delight tantalizes the senses with its sweet, smoky, and savory symphony, making it an irresistible centerpiece for any meal.

    Personal Story

    Every family has that one dish that always steals the show during gatherings. For mine, it’s always been the classic pork tenderloin. I remember the first time I tried to cook it solo; I was determined to elevate the dish beyond my grandmother’s simple yet delicious recipe. I wanted something that would leave everyone talking, something unforgettable. That’s when I stumbled upon the idea of wrapping it in bacon. But, not just any bacon-wrapped tenderloin — it needed a twist.

    One autumn afternoon, while watching the leaves cascade from the trees in a flurry of reds and golds, inspiration struck. The answer was in the sweet, smoky allure of maple syrup; it was the missing puzzle piece that would elevate the dish from ordinary to extraordinary. Combining it with a hint of smoky paprika and the earthiness of fresh sage seemed like a symphonic blend of flavors destined to come together.

    However, my first attempt was a kitchen disaster. I forgot to preheat the oven and ended up with a chewy mess instead of a tender masterpiece. But with every misstep, I learned. I perfected the maple glaze, discovered the right bacon crispness, and honed my timing to a science. And every time I prepare this dish now, it’s a beautiful reminder of those early culinary adventures.

    Today, the Maple-Glazed Bacon Wrapped Pork Tenderloin with Smoked Paprika has become a signature favorite at our gatherings, always leaving family and friends asking for more. The journey from kitchen mishap to mouthwatering success is a testament to the power of creativity and persistence in the kitchen.

    What Makes This Version Special

    The beauty of this Maple-Glazed Bacon Wrapped Pork Tenderloin with Smoked Paprika lies in its complex layering of flavors. The sweet and smoky maple glaze adds depth to the dish, while the hint of smoked paprika enhances the savory punch from the bacon wrap. This version of the classic pork tenderloin transcends the mundane by infusing a rich tapestry of flavors that awaken the palate. Unlike the standard bacon-wrapped tenderloin, this recipe transforms it into a gourmet experience with its sophisticated glaze and aromatic accompaniments.

    Flavor Profile

    Imagine biting into a succulent piece of pork tenderloin, perfectly cooked and enveloped in crispy bacon. The first taste is a delightful mix of sweetness and smokiness, with the maple syrup providing a caramelized glaze that dances on the taste buds. The smoked paprika adds an earthy depth, while the fresh sage leaves impart a subtle herbaceous note. Together, these flavors create a harmonious balance that’s both comforting and exciting, a true testament to culinary craftsmanship.

    Ingredients

    • Pork tenderloin – 2 pieces
    • **Bacon** – enough slices to wrap tenderloins
    • Black pepper – to taste
    • Coarse salt – to taste
    • **Fresh sage** – about 9-10 leaves
    • Garlic powder – a pinch
    • **2 tablespoons maple syrup**
    • **1 teaspoon smoked paprika**
    • **1 teaspoon Dijon mustard**

    Instructions

    1. Preheat your oven to 425°F (220°C). This step is crucial for achieving that perfect golden-brown crust on your tenderloin.
    2. Remove about an inch off the tapered end of each tenderloin to make a perfect cylinder. This ensures even cooking throughout.
    3. Season the tenderloins generously with coarse salt, black pepper, and a pinch of garlic powder. This foundational seasoning sets the stage for the bold flavors to come.
    4. In a small bowl, mix the maple syrup and Dijon mustard until well combined. Brush this glaze over the surface of the tenderloins, ensuring every nook and cranny is covered.
    5. On a sheet of cling wrap, lay out the bacon strips in an overlapping line. This will form the crispy exterior of your dish.
    6. Sprinkle the smoked paprika over the bacon, embedding a deep smoky flavor into the wrap.
    7. Place the sage leaves all over the bacon, about 9-10 leaves in total, to add a fragrant earthy note.
    8. Position one piece of tenderloin across the short ends of the bacon and roll to cover it completely with the bacon. Repeat for the other tenderloin segment.
    9. Transfer the bacon-wrapped tenderloins to a non-stick pan and sear on all sides over medium-high heat. This step is key to achieving a crispy, golden-brown exterior.
    10. Once seared, transfer the pan to the preheated oven. Cook for 8-10 minutes, turning the pieces after 5 minutes to ensure even cooking. You’re aiming for an internal temperature of 145°F (63°C).
    11. Remove from the oven and let it rest for at least 5 minutes before slicing. This allows the juices to redistribute, ensuring every bite is juicy and flavorful.

    Pro Tips from Meaghan’s Kitchen

    • When brushing the glaze, let it sit for a few minutes to slightly absorb into the meat before wrapping it with bacon.
    • Use a meat thermometer to ensure the tenderloin reaches the perfect internal temperature without overcooking.
    • For a beautiful presentation, slice the tenderloin into 1-inch medallions and serve fanned out on a platter.
    • If you prefer a spicier kick, add a sprinkling of crushed red pepper flakes to the glaze mixture.
    • Wrapping the tenderloins tightly in bacon helps maintain their shape and ensures an even cook.

    Variations & Dietary Swaps

    • Vegetarian Swap: Replace the pork with a thick, firm tofu. Follow the same steps for seasoning and wrapping with vegetarian bacon.
    • Spice-It-Up Version: Add a tablespoon of sriracha or hot sauce to the maple-Dijon glaze for an extra spicy kick.
    • Kids-Friendly Version: Use a honey glaze instead of maple syrup for a sweeter, milder flavor that kids will love.

    What to Serve With It

    This Maple-Glazed Bacon Wrapped Pork Tenderloin pairs beautifully with a glass of medium-bodied Pinot Noir, its acidity balancing the dish’s richness. For sides, roasted Brussels sprouts with a touch of balsamic vinegar or a creamy garlic mashed potato will complement the savory-sweet profile perfectly.

    Storage & Meal Prep

    If you find yourself with leftovers (a rare occurrence with this dish), store them in an airtight container in the fridge for up to three days. To reheat, place in a preheated oven at 350°F (175°C) for about 15 minutes, or until warmed through. This dish also freezes well; wrap the cooked tenderloin in aluminum foil and store it in a freezer-safe bag for up to 2 months. Thaw overnight in the fridge before reheating.

    FAQ

    Can I use turkey bacon instead of regular bacon?

    Absolutely! Turkey bacon will work just as well, though it may not crisp up quite the same way. Keep an eye on it during the searing process.

    What if I don’t have smoked paprika?

    If smoked paprika is unavailable, you can use regular paprika and add a dash of liquid smoke to the glaze for a similar effect.

    How do I know when the pork tenderloin is done?

    The best way to ensure doneness is by using a meat thermometer. The internal temperature should reach 145°F (63°C) for perfectly cooked pork.

    Can I prepare this dish ahead of time?

    Yes, you can prepare the tenderloin up to the searing step and refrigerate it overnight. Allow it to come to room temperature before continuing with the oven cooking process.

    What other herbs can I use instead of sage?

    Rosemary or thyme can be excellent substitutes if sage is not to your liking. They will provide a different but equally aromatic flavor profile.

    Final Thoughts

    Cooking is an adventure, and this Maple-Glazed Bacon Wrapped Pork Tenderloin with Smoked Paprika is a testament to how a little creativity can transform a classic into a show-stopping masterpiece. I’d love to hear how your dish turned out, so feel free to leave a comment or share your own twists on the recipe. Until next time, happy cooking from my kitchen to yours!

    Related update: Maple-Glazed Bacon Wrapped Pork Tenderloin with Smoked Paprika

    Related update: Zesty Citrus-Herb Pork Carnitas Tacos with Pineapple Salsa