Tag: Seafood

  • Spicy Crunchy Prawn Skewers with Zesty Lime-Avocado Cream | Made by Meaghan Moineau

    Spicy Crunchy Prawn Skewers with Zesty Lime-Avocado Cream | Made by Meaghan Moineau

    Spicy Crunchy Prawn Skewers with Zesty Lime-Avocado Cream

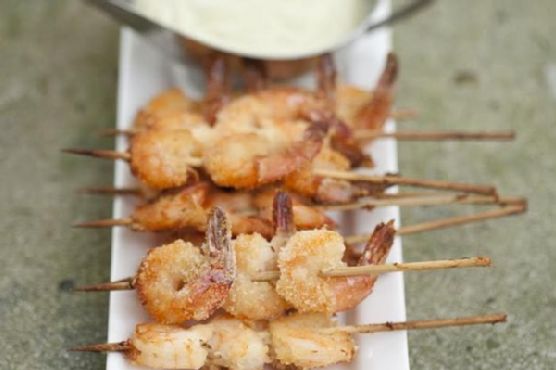
    Imagine the sizzle of plump prawns on a hot grill, the air filled with the smoky scent of paprika and cayenne, while a refreshing lime-avocado cream quietly chills in the background, waiting to steal the show. This isn’t just dinner; it’s a culinary adventure right in your kitchen, and you’re invited to join me!

    Personal Story

    There was a time during a family barbecue when I decided to impress my relatives with a seafood dish that was a bit out of my comfort zone. I had always loved prawns for their delicate sweetness, but I wanted to elevate them beyond the typical garlic butter route. On a whim, I tossed them with spices, skewered them, and sent them onto the grill. The result? A smoky, spicy masterpiece that had everyone reaching for seconds. It was a moment of culinary triumph I won’t soon forget.

    However, this wasn’t my first attempt. Oh no, before this success, there was a rather spectacular failure involving prawns, an overly ambitious amount of chili, and a grill that was too hot to handle. Let’s just say, the prawns were more reminiscent of charcoal than a culinary delight. But every mishap is a learning opportunity, and I took notes. That’s when I discovered the art of blooming spices to draw out their full potential and the transformative power of letting flavors meld.

    Fast forward a few months, and I found myself at a local farmer’s market, inspired by the array of fresh produce and fragrant herbs. That’s where I stumbled upon the idea of pairing my spicy prawns with a creamy, zesty avocado dip. The lime zest added a pop of brightness that balanced the heat and richness perfectly. It was a revelation! Since then, this dish has become a beloved staple in my home, perfect for impressing guests or treating myself to something special.

    What Makes This Version Special

    This isn’t your average prawn skewer recipe—oh no, it’s a flavor explosion with a twist. By infusing the breadcrumbs with smoked paprika and cayenne, we create a coating that’s smoky and spicy, offering a true sensory experience with every bite. But the magic doesn’t stop there. The avocado dip is elevated with a hint of fresh lime zest, adding an unexpected layer of zesty flavor that brightens the dish and complements the heat. This combination of flavors and textures makes this version of prawn skewers stand out from the crowd.

    Flavor Profile

    Imagine biting into these prawn skewers: the crispy coating gives way to tender, juicy prawns, while the smoky and spicy notes from the paprika and cayenne leave a lingering warmth on your palate. The accompanying lime-avocado cream is a refreshing oasis, with its silky texture and vibrant citrus finish that dances on your tongue. Each element works in harmony, creating a dish that’s as complex as it is delicious.

    Ingredients

    • 1 ripe avocado, flesh scooped out
    • 1/4 cup crème fraiche
    • 2 tablespoons fresh lemon juice
    • **Zest of 1 lime**
    • 1 teaspoon **smoked paprika**
    • 1/2 teaspoon **cayenne pepper**
    • 1 cup **breadcrumbs**
    • 1 pound large prawns, peeled and deveined
    • 3 tablespoons olive oil
    • 8-10 bamboo skewers, soaked in water
    • Salt and pepper, to taste

    Instructions

    1. Start with the avocado dip. In a food processor, combine the avocado flesh, crème fraiche, and lemon juice. Blend until smooth and creamy. Season with salt and pepper to taste. Stir in the lime zest. Transfer to a bowl and chill in the refrigerator for at least 30 minutes to let the flavors meld.
    2. In a small pan, heat the olive oil over medium heat. Add the smoked paprika and cayenne pepper, stirring constantly for about 1 minute until fragrant. This blooming technique enhances the spices’ flavors.
    3. In a large bowl, combine the breadcrumbs with the bloomed spices, mixing well. Season the mixture with salt and pepper.
    4. Pat the prawns dry with paper towels to ensure the coating sticks. Toss them in the spiced breadcrumbs, pressing gently to adhere.
    5. Thread three prawns onto each soaked skewer, pressing them together to ensure even cooking.
    6. Preheat your grill to medium-high heat. Place the prawn skewers on the grill and cook for about 2 minutes on each side, or until the prawns are crisp and golden brown.
    7. Serve immediately with the chilled lime-avocado cream on the side. Enjoy the delightful contrast of flavors!

    Pro Tips from Meaghan’s Kitchen

    • Always soak your bamboo skewers in cold water for at least an hour before use to prevent them from burning on the grill.
    • For an extra layer of flavor, add a few sprigs of fresh herbs like cilantro or parsley to the breadcrumb mixture.
    • If you’re short on time, the avocado dip can be made a day ahead. Just give it a good stir before serving.
    • For perfectly cooked prawns, make sure your grill is preheated to the right temperature and avoid overcooking, which makes them tough.

    Variations & Dietary Swaps

    • Vegetarian Swap: Replace prawns with firm tofu cubes marinated in the same spice mix for a delightful vegetarian option.
    • Spice-It-Up Version: Add a pinch more cayenne or a dash of chili flakes to the breadcrumb mixture for extra heat.
    • Kids-Friendly Version: Reduce the cayenne pepper by half and serve the prawn skewers with a side of sweet ketchup instead of the lime-avocado cream.

    What to Serve With It

    This Mediterranean-inspired dish pairs beautifully with a chilled glass of Sauvignon Blanc, which complements the spicy, smoky flavors with its crispness. For a more filling meal, serve the prawn skewers alongside a side of cilantro-lime rice, bringing a cohesive and refreshing element to your dining experience.

    Storage & Meal Prep

    If you have leftovers, store the prawn skewers and avocado dip separately in airtight containers. The prawns will keep in the refrigerator for up to 2 days, while the avocado dip should be consumed within a day to ensure freshness. To reheat the prawns, place them on a baking sheet and warm in a preheated 350°F oven for about 5 minutes. Do not freeze, as the texture of the prawns and dip will change.

    FAQ

    Can I use frozen prawns for this recipe?

    Yes, you can use frozen prawns. Just make sure they are completely thawed and dried before coating them with the breadcrumb mixture.

    What can I use instead of crème fraiche?

    If you don’t have crème fraiche, Greek yogurt or sour cream are great substitutes that will maintain the creamy texture of the dip.

    Is there a way to make this dish less spicy?

    Absolutely! Simply reduce the amount of cayenne pepper in the breadcrumb mixture to tone down the heat.

    Can I bake the prawns instead of grilling?

    Yes, you can bake the prawns in a 400°F oven for 8-10 minutes, or until golden brown. Just make sure to turn them halfway through for even cooking.

    How can I prevent the avocado dip from browning?

    The lime juice helps prevent browning, but for extra protection, cover the surface directly with plastic wrap before sealing the container.

    Final Thoughts

    I hope this Spicy Crunchy Prawn Skewers with Zesty Lime-Avocado Cream recipe brings a bit of zest and excitement to your kitchen, just as it has in mine. It’s a dish that’s sure to impress, whether you’re entertaining guests or simply treating yourself. I’d love to hear how this recipe turns out for you, so please leave a comment or share your own twist on it. Happy cooking, and remember, the best meals are made with love!

    Related update: Spicy Crunchy Prawn Skewers with Zesty Lime-Avocado Cream

    Related update: Savory White Onion and Herb Tuna Tart with Truffle Essence
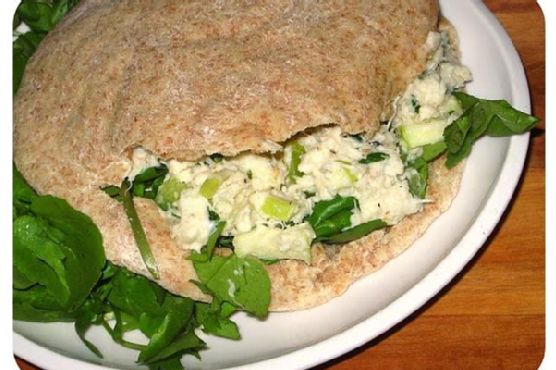
  • Zesty Citrus Crab Salad Stuffed Pita Pockets with Avocado Cream | Made by Meaghan Moineau

    Zesty Citrus Crab Salad Stuffed Pita Pockets with Avocado Cream | Made by Meaghan Moineau

    Zesty Citrus Crab Salad Stuffed Pita Pockets with Avocado Cream

    Imagine the moment you bite into a warm, toasty pita pocket, the slightly smoky aroma wafting up as you sink your teeth into the refreshing, creamy crab salad nestled within. The zing of citrus and the smoothness of avocado blend together to create a flavor experience that’s both familiar yet delightfully unexpected. Welcome to your new favorite Fusion dish: Zesty Citrus Crab Salad Stuffed Pita Pockets with Avocado Cream.

    Personal Story

    One breezy summer evening, I found myself at a seaside picnic with friends, where the air was filled with laughter and the scent of saltwater. A friend brought along a crab salad, and as I took my first bite, memories of family beach outings flooded back. However, something was missing — a burst of flavor that would make the salad truly unforgettable. That evening sparked my culinary quest to elevate the classic crab salad with a few personal twists.

    Back in my kitchen, I started experimenting with ingredients that would add a fresh twist while still honoring the original essence of the dish. I remembered the vibrant citrus grove behind my childhood home, where as kids, we’d run around, picking limes and lemons to snack on during hot afternoons. The zest of lime seemed like a natural addition to brighten up the crab salad.

    Then came the avocado, a staple I often use for its creamy texture and healthy fats. Mashing it into mayonnaise for a richer taste was a game-changer, turning the dressing into a luscious, almost velvety affair. It was one of those aha moments that made the crab salad not only more sophisticated but also more satisfying.

    After a few trials and plenty of taste tests — where friends became enthusiastic guinea pigs — what emerged was a dish that felt both nostalgic and refreshingly new. Now, every time I whip up these Zesty Citrus Crab Salad Stuffed Pita Pockets with Avocado Cream, it feels like a warm, flavorful hug from the past, with a modern twist.

    What Makes This Version Special

    This version of crab salad stands out because of its refreshing citrus zest and the decadent, creamy avocado mayonnaise. These two key ingredients elevate the salad from a simple picnic staple into a gourmet delight. The lime zest infuses the crab salad with a bright, tangy flavor, while the avocado mayo adds a smooth, rich texture that complements the crab meat beautifully. Toasting the pita breads over an open flame before stuffing them not only brings out a delightful smoky hint but also gives the pockets a satisfying crunch.

    Flavor Profile

    The taste experience of these Zesty Citrus Crab Salad Stuffed Pita Pockets with Avocado Cream is a culinary journey on its own. Picture this: refreshing notes of lime zest dancing with the subtle sweetness of canned white crabmeat. The creamy avocado mayo introduces a rich, smoky undertone thanks to a pinch of smoked paprika. Juicy apple chunks and crisp yellow bell pepper add a satisfying crunch, while the fresh coriander leaves and watercress bring an herbal brightness that ties everything together. It’s like taking a bite of summer sunshine.

    Ingredients

    • 1 can of white crabmeat, drained
    • 1 small apple, diced
    • 1 yellow bell pepper, diced
    • **Zest of 1 lime**
    • **Juice of 1/2 lime**
    • 1 tablespoon fresh coriander leaves, chopped
    • **1 ripe avocado**
    • **1/3 cup light mayonnaise**
    • Pinch of smoked paprika
    • Salt & pepper to taste
    • 4 wholewheat pita breads
    • 1 cup watercress

    Instructions

    1. Start by mashing the ripe avocado in a small bowl until smooth. Stir in the light mayonnaise and a pinch of smoked paprika to create a creamy avocado mayo. Set aside.
    2. In a large mixing bowl, combine the drained white crabmeat, diced apple, and yellow bell pepper. Add the chopped coriander leaves, lime zest, and lime juice. Season with salt and pepper to taste. Fold in the creamy avocado mayo until the mixture is well combined.
    3. Toast the wholewheat pita breads over an open flame until they puff up and have a smoky aroma. This should take about 1-2 minutes per side. Once toasted, cut open one side of each pita to create a pocket.
    4. Line each pita pocket with a handful of fresh watercress. Spoon the zesty citrus crab salad generously into each pocket until filled.
    5. Serve immediately for the best taste experience, and watch as these pockets become the star of any gathering.

    Pro Tips from Meaghan’s Kitchen

    • For the ripest avocado, look for one that yields slightly to pressure. It should be firm but not hard.
    • If you want a spicier kick, add a dash of cayenne pepper to the avocado mayo.
    • Toast the pita breads just before serving to ensure they remain crisp and warm.
    • For a touch of sweetness, drizzle a bit of honey over the crab salad before stuffing the pitas.
    • Use a serrated knife to cut the pita pockets open; it makes for a cleaner cut without tearing the bread.

    Variations & Dietary Swaps

    • Vegetarian Swap: Replace the crabmeat with chickpeas for a plant-based version. Simply mash them slightly for texture.
    • Spice-It-Up Version: Add finely chopped jalapeños to the crab salad for an extra spicy kick.
    • Kids-Friendly Version: Skip the smoked paprika and add a spoonful of Greek yogurt to the avocado mayo for a milder flavor kids will love.

    What to Serve With It

    These Zesty Citrus Crab Salad Stuffed Pita Pockets pair beautifully with a chilled glass of Sauvignon Blanc, bringing out the bright citrus notes in the salad. For a non-alcoholic option, a crisp cucumber lemonade is equally refreshing. Consider serving a simple arugula and cherry tomato salad on the side to complement the dish.

    Storage & Meal Prep

    If you have leftovers, store the crab salad and pita pockets separately in airtight containers in the fridge for up to two days. To enjoy, gently reheat the pita breads in a toaster or oven before stuffing them with the chilled crab salad. Freezing is not recommended as it can alter the texture of the crab and avocado.

    FAQ

    Can I use fresh crabmeat instead of canned?

    Absolutely! Fresh crabmeat will enhance the flavor and texture, making the dish even more luxurious.

    Is there a substitute for coriander leaves?

    If you’re not a fan of coriander, fresh dill or parsley will also work well to add a fresh herbal note.

    How do I prevent the avocado from browning?

    The lime juice in the recipe should help prevent browning, but you can also press a piece of plastic wrap directly onto the surface of the avocado mayo if storing overnight.

    Can I prepare the crab salad in advance?

    Yes, you can prepare the crab salad up to a day ahead. Just make sure to add the avocado mayo right before serving to maintain its freshness.

    What if I don’t have an open flame for toasting?

    No worries! You can toast the pita breads in a hot skillet or under a broiler for a similar effect.

    Final Thoughts

    I hope you’ll find as much joy in making and sharing these Zesty Citrus Crab Salad Stuffed Pita Pockets with Avocado Cream as I do. They’re a testament to how a few thoughtful tweaks can transform a beloved classic into something extraordinary. Feel free to leave your thoughts, share your own variations, or just say hi in the comments below. Bon appétit, friends!

    Related update: Zesty Citrus Crab Salad Stuffed Pita Pockets with Avocado Cream

  • Spicy Saffron Mussels & Clams in White Wine Broth | Made by Meaghan Moineau

    Spicy Saffron Mussels & Clams in White Wine Broth | Made by Meaghan Moineau

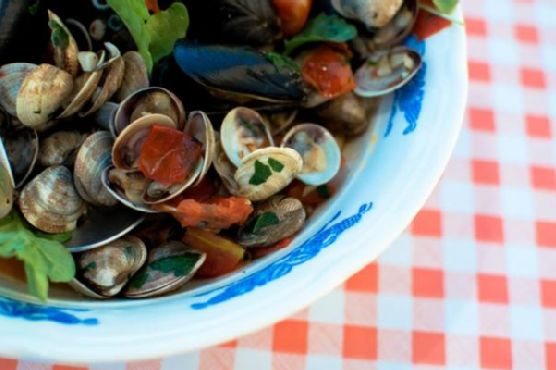
    Spicy Saffron Mussels & Clams in White Wine Broth

    Imagine the sound of clams popping open, releasing their briny aroma, mingling with the earthy scent of saffron. The heat of the chili tickles your nose, and the bright zest of lemon dances in the air. This is not just a dish; it’s an invitation to savor the luxury of the sea with every spoonful.

    Personal Story

    I first encountered the delightful harmony of mussels and clams in a small family-run trattoria on the Amalfi Coast. The rustic charm, the gentle clinking of cutlery, and the soft hum of Italian conversation set the perfect stage for my culinary revelation. As a passionate home cook, I was eager to recreate that magic back home.

    My first attempt was, let’s say, a spirited adventure. The mussels refused to open, and the broth was more reminiscent of a watery soup than the rich, golden elixir I remembered. But every mishap in the kitchen is a learning opportunity, and I was determined to master the art of Italian seafood dishes.

    After experimenting with different techniques and flavors, I discovered the transformative magic of saffron. Infusing the white wine broth with saffron threads elevated the dish to new heights, reminding me of the golden sunsets over the Mediterranean. The spice not only imparted a luxurious color but enriched the aroma, creating a truly unforgettable dining experience.

    Now, this dish has become a staple in my home, especially when I want to impress guests or simply indulge in a little culinary escapism. Each time I prepare it, I’m transported back to that charming trattoria, and I hope to share that experience with you.

    What Makes This Version Special

    My version of Spicy Saffron Mussels & Clams in White Wine Broth stands out because of its unique infusion of saffron threads. This addition not only gives the dish a luxurious color but also infuses the broth with a rich, aromatic flavor that standard recipes often lack. Furthermore, I incorporate a touch of lemon zest to brighten the overall taste, providing a refreshing contrast to the rich, buttery broth. This extra step makes all the difference, transforming a simple seafood dish into a gourmet experience.

    Flavor Profile

    The flavor profile of this dish is a symphony of sensations. The rich and aromatic broth is infused with the earthy warmth of saffron and complemented by a citrusy brightness from the lemon zest. A subtle heat from the chili flakes adds a delightful kick, perfectly balanced by the sweet, juicy burst of cherry tomatoes. The mussels and clams lend their briny essence, while fresh parsley ties everything together with a hint of freshness. Each bite is a layered experience, inviting you to savor the rich tapestry of flavors.

    Ingredients

    • 3-4 glugs of olive oil
    • **8 saffron threads**
    • 4 cloves of garlic, sliced
    • 1/2 teaspoon chili flakes
    • 1 pound clams, cleaned
    • 1 pound mussels, cleaned
    • **1 cup cherry tomatoes, halved**
    • **1/2 cup white wine**
    • **Zest of 1 lemon**
    • Salt to taste
    • 2 tablespoons butter
    • 1/4 cup fresh parsley, chopped
    • 1 cup arugula (optional)
    • Crusty sourdough bread, for serving

    Instructions

    1. Begin by warming the white wine slightly in a small saucepan. Add the saffron threads and let them bloom for about 10 minutes to release their full color and flavor.
    2. In a large frying pan, heat the olive oil over low heat. Add the garlic and cook until it turns golden-brown. Remove and discard the garlic unless you prefer to keep it in for extra flavor.
    3. Turn up the heat to medium and add the chili flakes. Stir them briefly before adding the clams. Cook for about 30 seconds to 1 minute.
    4. Next, add the mussels to the pan. Increase the heat to high and toss in the cherry tomatoes. Sauté for 2 minutes, allowing the tomatoes to soften slightly.
    5. Pour in the saffron-infused white wine and cover the pan. Let it cook for 1-2 minutes, just until the shells of the mussels and clams have opened. Discard any that remain closed.
    6. Turn off the heat and stir in the fresh parsley and butter, allowing it to melt into the broth.
    7. For an extra touch of freshness, you can top the dish with arugula before serving. Serve immediately with plenty of crusty sourdough bread for dipping, and a glass of white wine.

    Pro Tips from Meaghan’s Kitchen

    • Always clean your mussels and clams thoroughly. Scrub the shells and remove any beards to prevent grit in your dish.
    • Toasting lemon zest in olive oil before adding other ingredients releases its essential oils for maximum flavor.
    • If you’re short on time, you can prepare the saffron-infused wine a day ahead and store it in the fridge.
    • For a richer broth, don’t skimp on the butter. It brings a velvety texture that pairs beautifully with the seafood.
    • If a mussel or clam doesn’t open, don’t force it. Discard it to avoid any unpleasant surprises.

    Variations & Dietary Swaps

    • Vegetarian Swap: Use vegetable broth instead of seafood and double the cherry tomatoes. Substitute mussels and clams with artichoke hearts for a satisfying alternative.
    • Spice-It-Up Version: Add a teaspoon of smoked paprika and a pinch of cayenne pepper for an extra fiery kick.
    • Kids-Friendly Version: Reduce or omit the chili flakes and add sweet, roasted bell peppers for a milder taste.

    What to Serve With It

    This dish pairs beautifully with a chilled glass of crisp Sauvignon Blanc, which complements the citrusy notes, or a citrusy Belgian Witbier, enhancing the fresh flavors of the seafood. For a heartier meal, serve alongside a simple arugula salad drizzled with lemon vinaigrette, and don’t forget the crusty sourdough bread to soak up every drop of the delicious broth!

    Storage & Meal Prep

    Store any leftovers in an airtight container in the refrigerator for up to two days. To reheat, gently warm them on the stove over low heat to avoid overcooking the seafood. Unfortunately, this dish does not freeze well, as the texture of the mussels and clams may change. If you’re planning for a future meal, prepare the broth in advance and add fresh seafood when you’re ready to serve.

    FAQ

    Can I use frozen mussels and clams?

    Yes, you can use frozen seafood, but be sure to thaw them completely and drain any excess liquid before cooking.

    What if I can’t find saffron?

    If saffron is unavailable, you can use a pinch of turmeric for color, but be aware that it won’t replicate the unique flavor of saffron.

    How do I know when the mussels and clams are cooked?

    The mussels and clams are done when their shells open wide. Any that remain closed should be discarded as they may not be safe to eat.

    Can I make this dish ahead of time?

    The broth can be made a day ahead, but for the freshest taste, cook the mussels and clams just before serving.

    What if my broth is too salty?

    If your broth ends up too salty, add a bit more wine or a splash of water to dilute it. Taste and adjust as needed.

    Final Thoughts

    Spicy Saffron Mussels & Clams in White Wine Broth is more than a recipe; it’s a journey to the heart of Italian coastal cuisine. Whether you’re impressing guests or treating yourself to a special dinner, this dish is sure to delight. I’d love to hear about your experience making it — feel free to leave a comment or share your own twists on this seafood classic. Let’s keep the conversation delicious!

    Related update: Spicy Saffron Mussels & Clams in White Wine Broth

    Related update: Smoky Slow Cooker Chicken Gumbo with Charred Jalapeño

  • Saffron-Infused Seafood & Chorizo Paella with Roasted Red Peppers | Made by Meaghan Moineau

    Saffron-Infused Seafood & Chorizo Paella with Roasted Red Peppers | Made by Meaghan Moineau

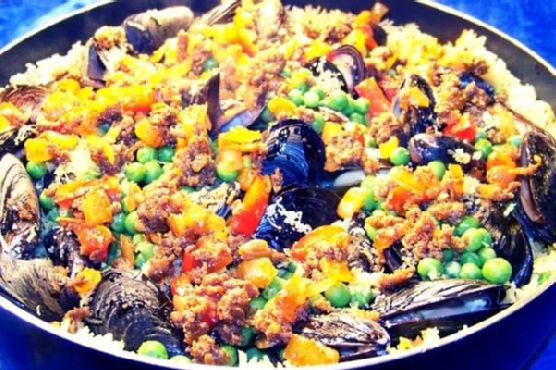
    Saffron-Infused Seafood & Chorizo Paella with Roasted Red Peppers

    Imagine the sizzle of chorizo releasing its crimson oils in a skillet, mingling with the sweet, smoky aroma of roasted red peppers. As the saffron-infused broth bubbles away, your kitchen transforms into a cozy, aromatic Spanish haven. This isn’t just any paella; this is a culinary journey to the sun-drenched coasts of Spain, right from your very own home.

    Personal Story

    My love affair with paella began many years ago during a serendipitous trip to Valencia, Spain, where I first experienced the enchanting flair of this iconic dish. I remember the vibrant street market, bustling with vendors and the seductive scent of spices and seafood wafting through the air. It was there, amidst the lively chatter and colorful stalls, that I tasted my first bite of authentic paella. The flavors were a revelation—a harmonious symphony of saffron, seafood, and a hint of earthiness from the chorizo.

    Back in my own kitchen, I was determined to recreate that unforgettable experience. However, my first few attempts were, shall we say, less than successful. I vividly recall a memorable kitchen mishap involving a stubborn mussel that just wouldn’t open. Despite these early culinary challenges, I was undeterred. With each attempt, my connection to the dish deepened, and I began to understand the nuances that make a great paella.

    It wasn’t until I discovered the magic of roasted red peppers and smoked paprika that my paella truly came alive. These ingredients, with their deep, caramelized sweetness and subtle smokiness, added an unexpected depth to the dish. It’s these little discoveries that turn cooking from a mere task into a joyful, creative endeavor.

    Now, whenever I prepare my Saffron-Infused Seafood & Chorizo Paella with Roasted Red Peppers, I’m transported back to those cobblestone streets of Valencia, and I hope to bring a slice of that Spanish magic to your kitchen, too.

    What Makes This Version Special

    The secret to elevating this classic Spanish paella lies in the addition of caramelized roasted red peppers and a touch of smoked paprika. The roasted red peppers are roasted until charred, then peeled to reveal their sweet, silky flesh. When mingled with the smoky paprika, these flavors infuse the paella with an irresistible depth and subtle smokiness that sets it apart from the traditional version.

    These ingredients bring a balance to the richness of the seafood and the spiciness of the chorizo, creating a dish that is as vibrant in flavor as it is in color. This isn’t just paella—it’s a sensory delight that captures the very essence of Spanish cuisine.

    Flavor Profile

    From the first bite, you’ll be greeted with a rich and smoky aroma, thanks to our star ingredients: **smoked paprika** and **caramelized roasted red peppers**. The saffron threads, bloomed in warm broth, add an aromatic warmth that envelops the senses. The delicate sweetness of the seafood—shrimp, mussels, and white fish—balances beautifully with the spicy savoriness of crumbled chorizo sausage. Each mouthful offers a perfect harmony of flavors, with the peas and lemon zest providing bursts of freshness amidst the depth.

    Ingredients

    • 2 teaspoons extra virgin olive oil
    • 2 cloves garlic, minced
    • 1/2 teaspoon crushed red pepper flakes
    • 1 1/2 cups dry rice
    • **1 pinch saffron threads**
    • 2 cups chicken broth
    • 1 bay leaf
    • 1/2 teaspoon thyme
    • 8 ounces chorizo sausage
    • **1 large red bell pepper, roasted and peeled**
    • 1 spanish onion, diced
    • 8 ounces white fish, cut into chunks
    • 8 ounces shrimp, peeled and deveined
    • 1 pound mussels, cleaned
    • 1/2 cup peas
    • 1 teaspoon lemon zest
    • 1 tablespoon parsley, chopped
    • **1 teaspoon smoked paprika**
    • Lemon wedges, for serving
    • Salt and pepper, to taste

    Instructions

    1. Begin by roasting the red bell peppers. Place them under a broiler or directly on a gas flame, turning occasionally, until charred all over. Let them cool, then peel and set aside.
    2. In a small bowl, bloom the saffron threads in a few tablespoons of warm chicken broth. This will help release their aromatic flavor.
    3. In a very large non-stick skillet or paella pan preheated over medium-high heat, add 2 teaspoons of olive oil. Add the minced garlic, crushed red pepper flakes, and dry rice. Sauté for about 3 minutes until the rice is slightly translucent and fragrant.
    4. Add the bloomed saffron, thyme, bay leaf, and the remaining chicken broth. Bring to a boil, then cover and reduce the heat to a simmer. Do not stir the rice; let it cook undisturbed for about 15 minutes.
    5. In another non-stick skillet, cook the chorizo over medium-high heat, crumbling it with a spoon. Once browned, add the diced spanish onion and roasted red peppers. Sauté until the onion is tender, then remove from heat and set aside.
    6. When the rice is nearly done, gently press the white fish and shrimp into the rice. Add the mussels and peas, then sprinkle with lemon zest. Cover and continue to simmer until the rice is cooked through and the mussels have opened, discarding any that do not.
    7. Top the paella with the chorizo mixture and sprinkle with chopped parsley. Serve with lemon wedges and crusty bread.

    Pro Tips from Meaghan’s Kitchen

    • For perfectly cooked mussels, ensure they are tightly closed before cooking and discard any that don’t open after cooking.
    • Use a good-quality saffron for the best flavor—trust me, it makes a difference!
    • Invest in a paella pan if possible; its shallow, wide shape ensures even cooking and the perfect rice texture.
    • For a crisp, golden-brown socarrat (the crusty bottom layer of rice), let the paella sit over medium heat, uncovered, for a few extra minutes after cooking.
    • Feel free to add a splash of white wine to the broth for an extra layer of depth and flavor.

    Variations & Dietary Swaps

    • Vegetarian Version: Swap out the seafood and chorizo for artichoke hearts, more peas, and chickpeas. Use vegetable broth instead of chicken broth.
    • Spicy Kick Version: Add an extra teaspoon of crushed red pepper flakes and a dash of hot sauce for heat lovers.
    • Kid-Friendly Version: Omit the chorizo and red pepper flakes, and substitute with cooked chicken pieces and mild sweet peppers.

    What to Serve With It

    This Saffron-Infused Seafood & Chorizo Paella pairs beautifully with a chilled glass of Spanish Albariño wine, which complements the dish’s rich flavors with its bright acidity and hints of citrus. To complete your meal, consider serving a simple mixed green salad with a light vinaigrette and some crusty bread for soaking up the delicious juices.

    Storage & Meal Prep

    Any leftover paella can be stored in an airtight container in the refrigerator for up to 3 days. To reheat, gently warm it on the stovetop over low heat, adding a splash of broth or water to prevent it from drying out. While paella is best enjoyed fresh, you can freeze it for up to 1 month. Just be aware that the texture of the seafood might change slightly upon thawing.

    FAQ

    Can I make paella without a paella pan?

    Yes, a large non-stick skillet will work just fine. The key is to ensure even heat distribution and avoid overcrowding the pan.

    What is the best rice to use for paella?

    Bomba rice is the traditional choice for paella due to its excellent absorption qualities, but Arborio rice can be a good substitute if Bomba isn’t available.

    Do I have to include saffron?

    Saffron is essential for traditional flavor and color; however, if you’re in a pinch, you can substitute with turmeric for color, though the flavor won’t be the same.

    How do I know when the paella is done?

    The paella is done when the rice is tender and has absorbed the liquid, and the mussels have opened up. Remember, a slight socarrat is desirable!

    Final Thoughts

    Cooking this Saffron-Infused Seafood & Chorizo Paella with Roasted Red Peppers is more than just preparing a meal—it’s about creating an experience, a celebration of flavors that transports you to the heart of Spanish cuisine. I hope you enjoy making and sharing this dish as much as I do. Please feel free to leave a comment below with your thoughts or any variations you tried. And don’t forget to share your culinary creations on social media with the hashtag #PaellaWithMeaghan. Here’s to many more flavorful adventures in your kitchen!

    Related update: Saffron-Infused Seafood & Chorizo Paella with Roasted Red Peppers

    Related update: Smoky Chipotle Turkey Chili with Dark Chocolate and Lager

  • Crab Cakes Rockefeller | Made by Meaghan Moineau

    Crab Cakes Rockefeller | Made by Meaghan Moineau

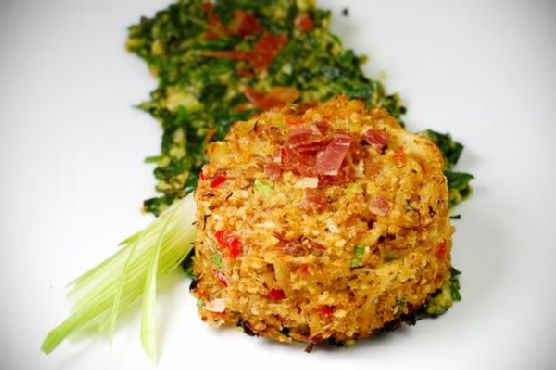
    Crab Cakes Rockefeller

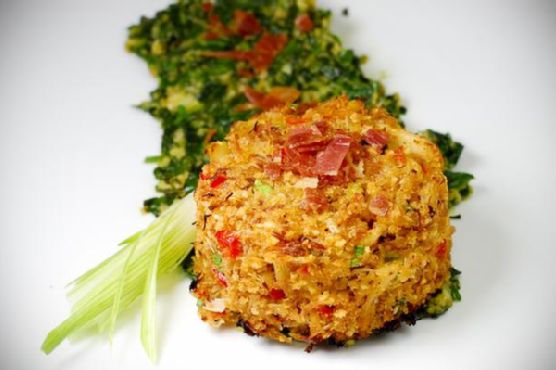
    Growing up near the coast, seafood has always held a special place in my heart. The smell of fresh crab being cooked would waft through our home, bringing with it memories of family gatherings and laughter. My grandmother used to make a version of this dish every summer, and now, I’m thrilled to share my take on it with you. This Crab Cakes Rockefeller recipe combines the classic flavors of crab cakes with the rich, savory notes of spinach, bacon, and watercress, making it a dish that’s both nostalgic and delightfully modern.

    Why You’ll Love It

    This Crab Cakes Rockefeller recipe is a celebration of flavors and textures. You’ll love it for its:

    • Deliciously Rich Flavor: The combination of crab, bacon, and sautéed greens creates a harmonious blend of sweet and savory.
    • Easy Preparation: With simple steps and readily available ingredients, you can whip up this dish without any fuss.
    • Versatility: Perfect for a fancy dinner party or a casual weeknight meal, this dish suits any occasion.
    • Impressive Presentation: The vibrant colors make for an eye-catching plate that will wow your family and guests.

    Ingredients

    • 1 can lump crab claw meat
    • 1 red bell pepper, diced
    • 2 green onions, diced and divided
    • 1 cup bread crumbs, divided
    • 1 tablespoon honey
    • 1 teaspoon chili powder
    • Salt and black pepper, to taste
    • 2 tablespoons unsalted butter
    • 4 slices of bacon
    • 2 cups baby spinach, finely chopped
    • 1 cup watercress stems, finely chopped
    • 2 cloves garlic, minced
    • Olive oil for drizzling

    Instructions

    1. Preheat your oven to 375°F and set the top rack to the middle position. Line a baking sheet with aluminum foil or a nonstick cooking mat.
    2. In a large bowl, combine the crab meat, diced red bell pepper, half of the diced green onion, and half of the bread crumbs. Mix in the honey and chili powder, then season to taste with salt and pepper.
    3. Form the crab mixture into cakes using a 1/2 cup measure, pressing tightly to hold their shape. Arrange the crab cakes on the lined baking sheet, leaving at least 1 inch between each.
    4. Lightly coat the outside of each crab cake with olive oil to help with browning and forming a crust.
    5. Bake for 25 minutes, or until golden brown.
    6. Meanwhile, fry the bacon in a large skillet until crispy. Set aside to drain, then crumble into small pieces.
    7. In the same skillet, melt the butter over medium heat. Add the garlic and sauté for 1 minute.
    8. Add the remaining green onion, bread crumbs, and watercress stems. Sauté for another minute.
    9. Finally, add the chopped spinach and cook until wilted, about 1-2 minutes. Season with salt and pepper to taste.
    10. To serve, plate a crab cake atop a smear of the spinach mixture, then sprinkle the whole plate with crumbled bacon.

    Tips

    • Shape Matters: Use a measuring cup to ensure each crab cake is uniform in size, which helps them cook evenly.
    • Don’t Skip the Oil: A light coating of olive oil ensures your crab cakes develop a crispy, golden crust.
    • Adjust Seasoning: Always taste and adjust the seasoning of your crab mixture and spinach before serving.

    Variations & Substitutions

    • Protein Choice: Replace crab with salmon or shrimp for a different seafood twist.
    • Greens Swap: Substitute kale or Swiss chard for spinach if desired.
    • Bacon Alternatives: Use prosciutto or turkey bacon for a lighter option.

    Storage

    These crab cakes can be stored in the refrigerator in an airtight container for up to two days. Reheat them in a toaster oven or regular oven at 350°F until they’re warmed through. For longer storage, freeze them for up to three months. Defrost in the fridge overnight before reheating.

    FAQ

    Can I use fresh crab meat instead of canned?

    Yes, fresh crab meat can be used in place of canned. Just ensure that it’s properly cooked and drained to avoid excess moisture in the crab cakes.

    Is there a way to make this dish gluten-free?

    Absolutely! Simply substitute the bread crumbs with gluten-free bread crumbs or crushed gluten-free crackers.

    What can I serve with Crab Cakes Rockefeller?

    This dish pairs beautifully with a side salad, roasted vegetables, or even a light pasta dish for a complete meal.

    Nutrition

    While the nutritional content will vary based on exact portions and ingredients, each crab cake is roughly estimated to contain:

    • Calories: 250
    • Protein: 15g
    • Fat: 10g
    • Carbohydrates: 20g

    Final Thoughts

    Crab Cakes Rockefeller is a dish that brings a touch of elegance and comfort to your dining table. Whether you’re reminiscing about coastal summers or simply seeking a delicious meal, this recipe is sure to please. Share it with loved ones or enjoy it as a personal treat; it’s a culinary experience that delights the senses and warms the soul. Happy cooking!

    Related update: Crab Cakes Rockefeller

  • Mixed Paella | Made by Meaghan Moineau

    Mixed Paella | Made by Meaghan Moineau

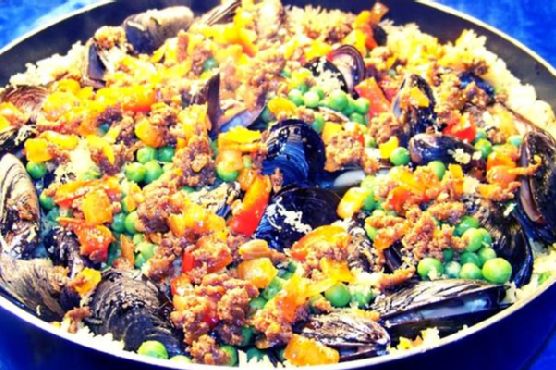
    Delicious Mixed Paella: A Taste of Spain in Your Kitchen

    Remember those long summer evenings when the family would gather around a large, vibrant dish, the aroma of saffron filling the air? Mixed Paella has always been a dish of celebration for me. Growing up, my family would often host get-togethers, and my mother would prepare this dish with love and enthusiasm. The sizzle of chorizo in the pan and the vibrant colors of fresh vegetables and seafood always created a symphony of flavors that we couldn’t resist. Today, I’m excited to share this cherished recipe with you, hoping it will bring as much joy to your table as it has to mine.

    Why You’ll Love It

    This Mixed Paella recipe is an ideal blend of land and sea, bringing together a rich tapestry of flavors and textures. The rice soaks up the robust taste of saffron and broth, while the seafood adds a delightful freshness. The crispy chorizo introduces a smoky depth that ties the dish together perfectly. Whether you’re a novice cook or a seasoned chef, this dish is both accessible and impressive, making it perfect for family dinners and special occasions alike.

    Ingredients

    • Bay leaf
    • Chicken broth
    • Chorizo sausage
    • Extra virgin olive oil
    • White fish
    • Garlic
    • Lemon
    • Lemon zest
    • Mussels
    • Spanish onion
    • Parsley
    • Peas
    • Red bell pepper
    • Crushed red pepper flakes
    • Dry rice
    • Saffron threads
    • Shrimp
    • Thyme

    Instructions

    1. In a very large non-stick skillet or paella pan preheated over medium-high heat, add 2 teaspoons of your olive oil (you will need more oil if you’re not using non-stick), garlic, red pepper flakes, and rice. Sauté for about 3 minutes.
    2. Add saffron, thyme, bay leaf, and chicken broth and bring to a boil. Cover and reduce the heat to a simmer. Leave covered, do not stir.
    3. In another non-stick skillet, heat to medium-high. Add chorizo and crumble as you sauté. When the sausage is cooked through, add red pepper and onion. Salt and pepper to taste if needed. Sauté until the onion is tender, then remove from heat and set aside.
    4. When the rice is nearly done (about 15 minutes), add fish and shrimp and press into the rice. Add mussels, peas, and sprinkle with lemon zest. Cover and continue to simmer until the rice is done and the mussels have opened. Discard any that do not open.
    5. Top with the chorizo mixture and parsley. Serve with lemon wedges and crusty bread.

    Tips

    For the best results, use a paella pan if you have one, as its wide and shallow shape allows the rice to cook evenly. Remember not to stir the rice once the liquid has been added; this ensures the classic paella texture. Use fresh seafood for the best flavor, and don’t skimp on the saffron—it truly is the soul of this dish.

    Variations & Substitutions

    If you’re looking to customize your paella, consider these variations:

    • Vegetarian Option: Replace the seafood and chorizo with a variety of mushrooms and artichokes for a hearty vegetarian version.
    • Meat Lovers: Add some diced chicken thighs or rabbit for a more traditional take on paella Valenciana.
    • Spice It Up: If you enjoy a kick of heat, increase the amount of crushed red pepper flakes or add a splash of hot sauce.

    Storage

    Leftover paella can be stored in an airtight container in the refrigerator for up to 3 days. To reheat, add a splash of water or broth and warm slowly over low heat to maintain the dish’s moist texture. Avoid using the microwave as it can dry out the rice.

    FAQ

    Can I make paella in advance?

    Yes, you can prepare the components in advance, such as cooking the chorizo and chopping the vegetables. However, for the best flavor and texture, it’s recommended to cook the rice and assemble the dish just before serving.

    What type of rice should I use for paella?

    Short-grain rice, such as Bomba or Arborio, is ideal for paella as it absorbs the liquid well without becoming mushy. Avoid using long-grain rice as it doesn’t provide the traditional paella texture.

    Can I use frozen seafood?

    While fresh seafood is preferred for the best flavor, you can use frozen seafood in a pinch. Just ensure it is fully thawed and drained before adding to the paella to avoid excess moisture.

    Nutrition

    This Mixed Paella is a balanced dish, providing a good source of protein from the seafood and chorizo, and plenty of vitamins and minerals from the vegetables. Saffron is known for its antioxidant properties, and the olive oil adds heart-healthy fats.

    Final Thoughts

    Mixed Paella is more than just a dish; it’s a celebration of flavors and cultures, a reminder of family gatherings and joyous occasions. With its vibrant colors and rich flavors, it’s sure to become a favorite in your household. I hope this recipe brings warmth and happiness to your table, just as it has to mine. Bon appétit!

    Related update: Mixed Paella

    Related update: Sweet and Spicy Country-Style Ribs

  • Steamed Clams In Wine and Chorizo | Made by Meaghan Moineau

    Steamed Clams In Wine and Chorizo | Made by Meaghan Moineau

    Steamed Clams in Wine and Chorizo

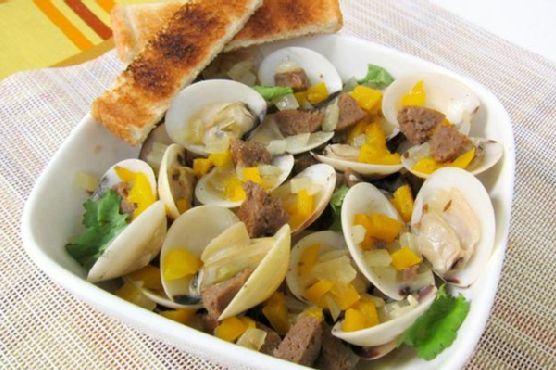
    Welcome to my kitchen! Today, I’m excited to share with you a recipe that carries a special place in my heart: Steamed Clams in Wine and Chorizo. This dish is a delightful fusion of flavors that brings back fond memories of summer evenings spent by the seaside. I remember the first time I enjoyed this dish was during a family vacation in Spain. We gathered around a big table, the sea breeze gently brushing against our faces, as we eagerly dipped crusty bread into the rich, savory broth. It was an experience that made me fall in love with the simplicity and charm of this meal. Now, I’m thrilled to recreate this dish with you, bringing a taste of the coast into your home.

    Why You’ll Love It

    This recipe is a magnificent blend of simplicity and flavor that captures the essence of coastal dining. The savory chorizo complements the briny clams perfectly, while the hint of cumin and the vibrant freshness of cilantro add depth and complexity. Plus, it’s a one-pot dish, making it both convenient and quick to prepare. Whether you’re hosting a dinner party or enjoying a cozy night in, this dish is sure to impress and delight your guests.

    Ingredients

    • 1 Spanish chorizo, cut into slices
    • 1 teaspoon cumin seeds
    • 1 cup dry white wine
    • 1/4 cup fresh cilantro, chopped
    • 1 garlic clove, minced
    • 2 pounds little neck clams, scrubbed
    • 2 tablespoons olive oil
    • 1 onion, diced
    • 1/2 teaspoon salt
    • 1 yellow bell pepper, diced

    Instructions

    1. Heat the olive oil in a deep pot over moderate heat. Add the onion, yellow bell pepper, garlic, cumin seeds, and salt. Cook, stirring occasionally, until the vegetables are softened, about 7 to 9 minutes.
    2. Stir in the dry white wine and bring the mixture to a boil.
    3. Add the clams and chorizo to the pot. Cover and boil until the clams open, approximately 7 to 8 minutes. Discard any clams that do not open.
    4. Season the dish with freshly cracked pepper and stir in the chopped cilantro.
    5. Serve the clams with some crusty bread to sop up the delicious sauce.

    Tips

    For the best results, ensure your clams are fresh. They should have a pleasant, briny smell and be tightly closed. If any are open, give them a tap; they should close. If not, discard them. Additionally, don’t skip the crusty bread! It’s perfect for soaking up the flavorful broth and makes the meal truly satisfying.

    Variations & Substitutions

    If you’re not a fan of cilantro, you can swap it for fresh parsley, which will also add a nice herbaceous note. Feel free to experiment with different types of chorizo or even replace it with another smoked sausage if you prefer a milder flavor. For a spicier kick, add a pinch of red pepper flakes to the pot along with the cumin seeds.

    Storage

    If you have leftovers, store them in an airtight container in the refrigerator for up to two days. To reheat, gently warm them in a saucepan over low heat, adding a splash of water or broth if needed to restore the sauce’s consistency. However, this dish is best enjoyed fresh, as reheating can sometimes affect the texture of the clams.

    FAQ

    Can I use frozen clams?

    While fresh clams are recommended for the best flavor and texture, you can use frozen clams in a pinch. Just make sure they’re fully thawed before cooking, and adjust the cooking time as needed.

    What type of white wine should I use?

    A dry white wine like Sauvignon Blanc or Pinot Grigio works wonderfully in this recipe, adding a crisp acidity that pairs beautifully with the briny clams and rich chorizo.

    Nutrition

    This dish is not only delicious but also a good source of protein and essential nutrients. Clams are high in iron and vitamin B12, while chorizo adds flavorful fats and proteins. Just be mindful of the sodium content, especially if you’re watching your salt intake.

    Final Thoughts

    Steamed Clams in Wine and Chorizo is more than just a dish; it’s an invitation to experience the flavors of the sea, the warmth of the chorizo, and the comfort of a home-cooked meal. I hope that as you prepare and share this recipe with your loved ones, it brings as much joy and fond memories to your table as it has to mine. Bon appétit!

    Related update: Steamed Clams In Wine and Chorizo

    Related update: Masala-Tofu Burger

    Related update: Steak with lemon and capers

  • Crab Cakes Rockefeller | Made by Meaghan Moineau

    Crab Cakes Rockefeller | Made by Meaghan Moineau

    Crab Cakes Rockefeller

    There’s something inherently special about the combination of flavors in a classic dish like Crab Cakes Rockefeller. I remember the very first time I tasted crab cakes during a summer vacation at the coast with my family. The crispy exterior and tender, savory interior were a revelation to my taste buds. Years later, I decided to recreate that magic at home, adding my own twist by merging it with the robust, green flavors of Rockefeller-style toppings. The result? A dish that brings back fond memories and creates new ones every time I serve it.

    Why You’ll Love It

    This Crab Cakes Rockefeller recipe is a delightful fusion of textures and flavors. The crab cakes themselves are tender with a hint of sweetness from honey and heat from chili powder, while the Rockefeller topping adds a savory, garlicky depth. Each bite is a harmonious blend of crispy, creamy, and green, reminiscent of a coastal getaway. Plus, it’s a versatile dish that works as an appetizer, main course, or even a fancy brunch option. You’ll love how easy it is to prepare and how impressive it looks on the plate!

    Ingredients

    • Canned lump crab claw meat
    • Red diced bell pepper
    • Diced green onions
    • Bread crumbs
    • Honey
    • Chili powder
    • Unsalted butter
    • Bacon
    • Baby spinach
    • Watercress stems
    • Garlic
    • Black salt & pepper

    Instructions

    1. Preheat your oven to 375°F and set the top rack to the middle position. This recipe is a great toaster oven candidate as well.
    2. Line a baking sheet with aluminum foil or a nonstick cooking mat.
    3. In a large bowl, combine the crab meat, diced red bell pepper, half of the diced green onion (reserving the other half), and half of the bread crumbs (reserving the other half).
    4. Mix in the honey and chili powder, then season to taste with salt and pepper.
    5. Form the crab cakes by pressing them into a 1/2 cup measure, squeezing tightly so they hold their shape. You can also mold them with your hands, but be sure to press them together tightly.
    6. Arrange the crab cakes on the lined baking sheet, leaving at least 1 inch between each crab cake.
    7. Using an olive oil sprayer (or by drizzling olive oil), lightly coat the outside of each crab cake. This will help with browning and forming an outer crust.
    8. Bake at 375°F for 25 minutes, or until golden brown.
    9. Meanwhile, fry the bacon in a large skillet until crispy. Set aside to drain, then crumble into small pieces using a sharp knife.
    10. Finely chop the spinach and watercress stems.
    11. In a large skillet, melt the butter over medium heat. Add the garlic and sauté for 1 minute.
    12. Add the remaining green onion, bread crumbs, and watercress stems. Sauté for 1 minute more.
    13. Finally, add the chopped spinach and cook until wilted, 1-2 minutes. Season to taste with salt and pepper.
    14. To serve, plate a crab cake atop a smear of the spinach mixture, then sprinkle the whole plate with crumbled bacon.

    Tips

    For best results, ensure your crab meat is well-drained to prevent the mixture from becoming too wet. When forming the crab cakes, pressing them tightly helps them hold together better during cooking. If you’re using fresh crab meat, give it a gentle squeeze to remove excess moisture. Additionally, resist the temptation to flip the crab cakes while baking; this ensures they develop a beautiful golden crust.

    Variations & Substitutions

    If you want to switch things up, consider using prosciutto instead of bacon for a slightly different flavor profile. You can also substitute arugula for watercress if you’re looking for a milder taste. For a gluten-free version, use gluten-free bread crumbs. Feel free to adjust the level of heat by adding more or less chili powder according to your preference.

    Storage

    Leftover crab cakes can be stored in an airtight container in the refrigerator for up to 3 days. To reheat, place them in a preheated oven at 350°F for about 10 minutes or until warmed through. Alternatively, you can freeze the crab cakes before baking. Just form the cakes, place them on a baking sheet, and freeze until solid. Then, transfer them to a freezer bag. Bake from frozen, adding an additional 5 minutes to the cooking time.

    FAQ

    Can I use fresh crab meat instead of canned?

    Absolutely! Fresh crab meat will work beautifully in this recipe. Just be sure to pick through it to remove any shell fragments and drain any excess liquid to avoid a soggy mixture.

    What can I serve with Crab Cakes Rockefeller?

    These crab cakes pair wonderfully with a simple green salad or roasted vegetables. For a heartier meal, consider serving them alongside a creamy risotto or buttery mashed potatoes. A crisp white wine or a light, refreshing cocktail makes for a perfect beverage companion.

    Nutrition (if applicable)

    Each serving of Crab Cakes Rockefeller (assuming 4 servings) contains approximately:

    • Calories: 450
    • Protein: 15g
    • Carbohydrates: 20g
    • Fat: 32g
    • Fiber: 3g
    • Sugar: 6g
    • Sodium: 560mg

    Final Thoughts

    Crab Cakes Rockefeller is a recipe that effortlessly combines elegance with comfort, making it a wonderful choice for both special occasions and everyday indulgence. Whether you’re reminiscing about past seaside adventures or creating new culinary traditions, this dish is sure to bring joy to your table. I hope you enjoy making and sharing it with those you love as much as I do. Bon appétit!

    Related update: Crab Cakes Rockefeller

    Related update: Steamed Clams In Wine and Chorizo

    Related update: Fava Crostini

  • Wild Salmon Cakes | Made by Meaghan Moineau

    Wild Salmon Cakes | Made by Meaghan Moineau

    Wild Salmon Cakes: A Delicious and Nutritious Treat

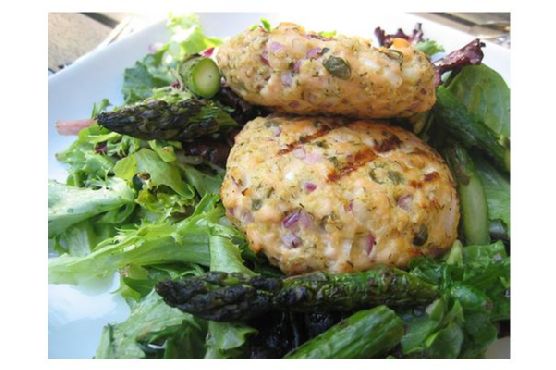
    Welcome to our cozy kitchen corner, where today we’re diving into the delightful world of Wild Salmon Cakes. These savory patties are a celebration of simplicity and flavor, perfect for any occasion from a quick weeknight dinner to a lavish brunch gathering. Let me take you on a journey of taste and nostalgia, sharing not just a recipe but a piece of my culinary heart.

    Why You’ll Love It

    There’s something magical about the way these Wild Salmon Cakes come together. The fusion of fresh, wild-caught salmon with the crunch of panko and the tang of capers creates a symphony of flavors that dance on your palate. Whether you’re a seafood aficionado or a curious cook looking to expand your culinary repertoire, this dish will not disappoint.

    Growing up, seafood was a staple at our family table. I vividly remember summer evenings spent by the coast, where my grandmother would serve her famous salmon cakes. The recipe was a guarded secret, a treasured heirloom passed down through generations. Each bite was a reminder of home, of laughter shared around the table, and of the love that binds a family together. Today, I share with you a modern twist on that cherished recipe, hoping it brings as much joy to your home as it has to mine.

    Ingredients

    • 1 pound skinless, boneless wild salmon fillet
    • 1/2 cup red onion, finely diced
    • 2 tablespoons capers, drained
    • 1 large egg
    • 1 cup panko bread crumbs

    Instructions

    1. Mince the salmon fillet into fine pieces, ensuring that each piece is uniform in size for even cooking.
    2. In a medium-sized bowl, gently whip the egg until frothy. This will act as the binding agent for your salmon mixture.
    3. Add the finely diced red onion and capers to the egg, stirring until the ingredients are well incorporated.
    4. Fold in the minced salmon, mixing gently to maintain the texture of the fish.
    5. Gradually add the panko bread crumbs, mixing until the mixture holds together but is not overly dry.
    6. Form the mixture into 4 equal-sized patties, pressing gently to ensure they hold their shape.
    7. Place the patties on a preheated grill, cooking for about 2-3 minutes on each side until golden brown and cooked through. Alternatively, bake in a 350-degree oven for 15-20 minutes.
    8. Serve hot, garnished with fresh herbs or a squeeze of lemon for an extra zing.

    Tips

    For the best results, ensure that your salmon is as fresh as possible. Fresh salmon not only enhances the flavor but also improves the texture of the cakes. If your mixture seems too wet, add a little more panko to achieve the right consistency. Remember, the key to perfect salmon cakes is balance—too much panko can overpower the delicate flavor of the fish.

    Variations & Substitutions

    Feel free to get creative with this recipe! You can substitute the wild salmon with canned salmon in a pinch, though fresh is always preferred for the best flavor. If you’re looking to add a bit of spice, consider incorporating a finely chopped jalapeño or a dash of cayenne pepper. For a gluten-free version, replace panko with gluten-free bread crumbs or crushed cornflakes.

    Storage

    Store any leftover salmon cakes in an airtight container in the refrigerator for up to 3 days. To reheat, place them in a preheated oven at 350 degrees for about 10 minutes or until warmed through. Avoid microwaving as it can make them soggy. These cakes also freeze well; simply wrap them individually in plastic wrap and store them in a freezer-safe bag for up to 3 months.

    FAQ

    Can I use smoked salmon for this recipe?

    While smoked salmon adds a unique flavor, it might overpower the other ingredients in this recipe. If you love the taste of smoked salmon, consider using a mix of fresh and smoked salmon for a balanced flavor profile.

    What can I serve with salmon cakes?

    Salmon cakes pair beautifully with a fresh green salad, roasted vegetables, or a light yogurt dill sauce. For a more hearty meal, serve them alongside quinoa or couscous.

    Nutrition

    Wild salmon is packed with Omega-3 fatty acids, which are essential for heart health. Each serving of these salmon cakes is not only a source of lean protein but also provides essential vitamins and minerals, making it a nutritious choice for you and your family.

    Final Thoughts

    These Wild Salmon Cakes are more than just a meal; they’re a testament to the power of simple ingredients coming together to create something truly special. Whether you’re sharing them with loved ones or enjoying a quiet meal by yourself, I hope these salmon cakes bring a touch of warmth and nostalgia to your table.

    Thank you for joining me on this culinary journey. I look forward to hearing how this recipe finds its place in your home, creating new memories and traditions for years to come. Bon appétit!

    Related update: Wild Salmon Cakes

    Related update: Chicken Adobo & Coconut Ginger Rice

  • Salmon In Banana Leaf | Made by Meaghan Moineau

    Salmon In Banana Leaf: A Flavorful Island Experience

    Intro

    Salmon in banana leaf is a dish that transports me back to my childhood summers spent on the tropical islands of Southeast Asia. I remember the vibrant markets filled with the aroma of freshly caught fish and the earthy scent of banana leaves. My grandmother would lovingly prepare this dish, infusing each bite with flavors that spoke of her heritage and our family’s history. Today, I’m thrilled to share this recipe with you, so you can create your own flavorful memories around the dinner table.

    Why You’ll Love It

    This dish is a culinary adventure wrapped in the simplicity of banana leaves. The salmon is marinated to perfection, absorbing the savory, sweet, and slightly spicy flavors of the marinade. Steaming in banana leaves adds an earthy aroma and keeps the fish perfectly moist. It’s a healthy, gluten-free meal that’s also visually stunning, perfect for impressing guests or treating yourself to an exotic dinner at home.

    Ingredients

    • Banana leaves
    • 1 teaspoon cinnamon
    • 1 teaspoon fennel seed
    • 2 tablespoons fish sauce
    • 2 cloves garlic, minced
    • 1 tablespoon ginger, minced
    • 3 tablespoons peach preserves
    • 2 red chiles, sliced
    • 1 cup rice
    • 1/4 cup rice wine vinegar
    • 2 salmon steaks
    • 2 scallions, chopped
    • 1 tablespoon sesame oil
    • 2 tablespoons soy sauce
    • 1 star anise
    • 2 tablespoons tahini
    • 2 tablespoons vegetable oil

    Instructions

    1. Mix all marinade ingredients: fish sauce, garlic, ginger, peach preserves, red chiles, rice wine vinegar, sesame oil, soy sauce, and tahini in a bowl.
    2. Place salmon steaks in a large resealable bag or container and pour the marinade over them. Seal and refrigerate for at least 30 minutes, up to 2 hours.
    3. Meanwhile, prepare your scented rice powder by grinding rice, cinnamon, fennel seed, and star anise in a spice grinder until coarsely ground. Leave some larger crumbles for texture.
    4. Remove salmon from the marinade (discard any leftover marinade) and coat each fillet with the scented rice powder. Reserve some powder for future use.
    5. Lay banana leaves flat. Place one salmon fillet in the center of each leaf. Fold one side over the salmon, then the opposite side, followed by folding both ends to create a package.
    6. Place the salmon packets in a steamer basket over boiling water. Steam for about 10-13 minutes until the salmon is cooked through.
    7. For the dipping sauce, heat the remaining marinade ingredients in a small saucepot or microwave-safe dish. Whisk together until warm and blended.
    8. To serve, make a slit in the banana leaves to reveal the salmon. Serve with steamed rice or noodles, corn, and the dipping sauce on the side.

    Tips

    Ensure your banana leaves are pliable by briefly passing them over an open flame or soaking them in hot water. This prevents them from cracking when folding. If you can’t find fresh banana leaves, parchment paper can be a substitute, though it won’t provide the same aromatic quality.

    Variations & Substitutions

    If you prefer a milder flavor, omit the red chiles or reduce the amount. For a different twist, substitute the salmon with your favorite fish, such as tilapia or cod. Vegetarians can replace the fish with thick slices of tofu, adjusting the marinating time to allow the flavors to penetrate fully. For a nutty flavor, add a sprinkle of ground peanuts to the marinade.

    Storage

    Leftover salmon can be stored in the refrigerator for up to 2 days. Keep it wrapped in the banana leaf to retain moisture and flavor. Reheat gently in a steamer or microwave to prevent drying out. The scented rice powder can be stored in an airtight container for up to a month, ready to use for your next culinary creation.

    FAQ

    Can I use frozen salmon for this recipe?

    Yes, frozen salmon can be used, but make sure it is fully thawed before marinating to ensure the flavors are absorbed properly.

    Where can I find banana leaves?

    Banana leaves are often available at Asian grocery stores or specialty markets. They are typically sold fresh or frozen. If using frozen, allow them to thaw before use.

    How can I tell when the salmon is fully cooked?

    The salmon is done when it flakes easily with a fork and has a light pink color throughout. Cooking times may vary slightly depending on the thickness of the fillets.

    Nutrition

    This dish is rich in omega-3 fatty acids, thanks to the salmon, and it offers a balanced profile of protein and healthy fats. The aromatic spices add flavor without the need for excessive salt or sugars, making it a heart-healthy choice. Adjust the oil and soy sauce quantities if you are monitoring your sodium or fat intake.

    Conclusion

    Salmon in banana leaf is more than just a meal—it’s an experience. With its rich flavors and aromatic presentation, it brings a touch of tropical paradise to your dining table. Whether you’re reminiscing about past travels or dreaming of future adventures, this dish is sure to delight your senses and warm your heart. Enjoy preparing and savoring this special recipe, and don’t forget to share it with those you love, creating new memories one delicious bite at a time.

    Related update: Salmon In Banana Leaf

    Related update: Wild Salmon Cakes