Tag: Rosemary

  • Maple-Glazed Roast Chicken with Apple-Rosemary Medley | Made by Meaghan Moineau

    Maple-Glazed Roast Chicken with Apple-Rosemary Medley | Made by Meaghan Moineau

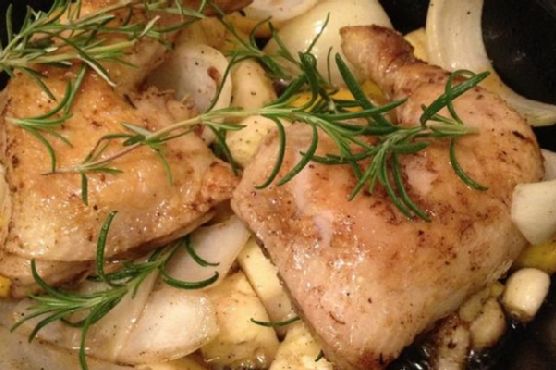
    Maple-Glazed Roast Chicken with Apple-Rosemary Medley

    Picture this: the comforting aroma of rosemary mingling with the sweet, smoky scent of maple syrup as it caramelizes on a perfectly roasted chicken. It’s a sensory delight that transforms your kitchen into a warm haven of mouth-watering anticipation.

    This dish isn’t just any ordinary roast chicken; it’s my Maple-Glazed Roast Chicken with Apple-Rosemary Medley, a recipe that’s as much about the journey as it is the destination.

    Personal Story

    My love affair with roast chicken began during a particularly chilly autumn visit to New England. The leaves were a fiery palette of reds and golds, and the air carried that familiar crispness that only fall can bring. One evening, I was invited by a local friend to a family dinner, where I was introduced to a roast chicken so succulent and flavorful, it was as if the very essence of fall had been captured on a plate.

    Determined to recreate that experience, I embarked on a culinary journey. My first few attempts were, admittedly, kitchen mishaps — from undercooked birds to over-seasoned disasters. But it was during these trials-and-errors that I discovered the magic of maple syrup. The idea struck me like a bolt of inspiration: a sweet glaze that could enhance the natural flavors of the chicken while complementing the savory elements like fresh rosemary and smoked paprika.

    Back in my own kitchen, I began experimenting. I wanted to craft a roast chicken that wasn’t just a meal but an experience — one that brought together the unexpected sweetness of maple syrup and the aromatic warmth of rosemary, with a little zing from citrus to tie it all together. After much tweaking and tasting, I finally landed on a recipe that now holds a special place in my family’s heart.

    Every time I prepare this dish, I’m transported back to that New England evening, surrounded by warmth and laughter. It’s more than just a recipe; it’s a cherished memory, a tradition, a part of who I am. And now, I’m excited to share it with you.

    What Makes This Version Special

    This isn’t your grandmother’s roast chicken — although I bet she’d approve! What sets my Maple-Glazed Roast Chicken with Apple-Rosemary Medley apart is the delightful interplay of sweet and smoky flavors. The touch of maple syrup brushed onto the chicken during the last 10 minutes of roasting creates a caramelized finish that’s out of this world. Meanwhile, blooming the smoked paprika in olive oil before adding it to the seasoning rub deepens its flavor, offering a subtle smoky warmth that pairs beautifully with the fragrant rosemary and citrus notes.

    This version is not only more flavorful but also offers a complexity that a standard roast chicken might lack. The apple-rosemary medley adds a layer of aromatic depth, while the lemon balsamic vinegar infuses a tangy brightness. It’s these thoughtful touches that elevate a simple roast chicken into a memorable feast.

    Flavor Profile

    Imagine biting into a piece of chicken that’s perfectly tender and juicy, with a golden-brown skin that crackles delicately. The initial taste is a sweet, smoky blend, thanks to the maple syrup and smoked paprika, followed by the earthy herbaceousness of rosemary. As you savor each bite, the subtle citrus tang from the lemon and balsamic vinegar adds a refreshing contrast, keeping your palate intrigued until the last morsel disappears from your plate.

    The accompanying apple-rosemary medley offers its own delightful flavor journey. The apples, roasted to softened perfection, release a natural sweetness that mingles with the savory onions and aromatic garlic, creating a side dish that’s every bit as enticing as the main event.

    Ingredients

    • 1 whole roasting chicken, about 4-5 pounds
    • 3 fresh apples, cored and quartered
    • 2 onions, peeled and quartered
    • 4 cloves garlic, smashed
    • **Fresh rosemary**, a few sprigs
    • 3 lemons, halved
    • **Raimondo Sicilian Lemon Balsamic Vinegar**
    • Salt and freshly ground black pepper, to taste
    • **Maple syrup**, for brushing
    • **Smoked paprika**, 1 teaspoon
    • Olive oil, for blooming the paprika
    • Fresh thyme, a handful
    • 1 cup canned chicken stock

    Instructions

    1. Preheat your oven to 400 degrees Fahrenheit. Position a rack in the lower third of the oven.
    2. Rinse the chicken thoroughly under cold water, then dry it very well with paper towels, inside and out. This helps the skin crisp up nicely.
    3. In a shallow roasting pan, arrange the apples, rosemary, 3 halved lemons, onions, and garlic in a single layer. Season generously with salt and pepper, toss well, and pour over the balsamic vinegar.
    4. In a small skillet, warm a tablespoon of olive oil over medium heat. Add the smoked paprika and let it bloom for about 30 seconds, stirring constantly to avoid burning. This will enhance its smoky flavor.
    5. Mix the bloomed paprika with salt and pepper to create a seasoning rub. Rub the mixture generously over the chicken, ensuring every nook and cranny is covered. Place the chicken breast-side-up on top of the fruit and vegetables in the pan. Stuff the cavity with some of the fruit and rosemary for extra flavor.
    6. Roast the chicken for 30 minutes, until the breast is firm and just beginning to brown in spots. Using tongs, carefully turn the chicken breast-side-down and roast for another 20 minutes, until the skin is lightly browned and a thermometer inserted into the thickest part of the thigh registers 175 to 180 degrees.
    7. Brush the chicken with maple syrup during the last 10 minutes of roasting to give it a beautiful caramelized finish.
    8. Remove the chicken from the oven. Tilt it to drain the cavity juices into the pan and remove the goodies from inside. Transfer the chicken to a cutting board and let it rest for 10-15 minutes before carving.
    9. Remove the rack from the roasting pan and skim off the fat. Set the pan over high heat on the stovetop. Add the chicken stock and cook, scraping up any browned bits and leftover pieces of goodies. Squeeze the last lemon into the pan to release its juices, creating a chunky jus to serve alongside the chicken.
    10. Carve the chicken and serve it with the apple-rosemary medley and the jus. Enjoy!

    Pro Tips from Meaghan’s Kitchen

    • Dry the chicken thoroughly: This step is crucial for achieving that crispy, golden skin we all crave.
    • Let the chicken rest: Allowing the chicken to rest before carving helps the juices redistribute, ensuring each piece is moist and flavorful.
    • Bloom the paprika: Don’t skip this step! Blooming the smoked paprika in oil releases its full flavor potential.
    • Use a meat thermometer: This is your best friend for perfectly cooked chicken. Trust it over guesswork.
    • Don’t rush the jus: Take your time scraping up the browned bits — they add incredible depth to the sauce.

    Variations & Dietary Swaps

    • Vegetarian Swap: Replace the chicken with whole portobello mushrooms or cauliflower steaks. Adjust cooking times accordingly.
    • Spice-It-Up Version: Add a pinch of cayenne pepper to the seasoning rub for a bit of heat.
    • Kids-Friendly Version: Use honey instead of maple syrup for a milder sweetness that kids love.

    What to Serve With It

    This Maple-Glazed Roast Chicken pairs beautifully with a light-bodied Chardonnay, which complements the smoky and sweet flavors without overpowering them. As for sides, roasted sweet potatoes or a fresh arugula salad with a zesty vinaigrette would be perfect companions.

    Storage & Meal Prep

    Leftovers can be stored in an airtight container in the fridge for up to 3 days. Reheat in a 350-degree oven until warmed through. For longer storage, wrap the chicken tightly and freeze for up to 3 months. Thaw overnight in the fridge before reheating.

    FAQ

    Can I use dried rosemary instead of fresh?

    Yes, you can use dried rosemary, but fresh will provide a more vibrant flavor and aroma.

    What if I don’t have a meat thermometer?

    While a meat thermometer is recommended, you can check for doneness by piercing the chicken; the juices should run clear, not pink.

    Can I use a different type of vinegar?

    Absolutely! Apple cider vinegar can be a good substitute, though it may alter the flavor profile slightly.

    How do I prevent the chicken from drying out?

    Ensure the chicken is not overcooked by using a meat thermometer and letting it rest before carving.

    Final Thoughts

    There you have it — my Maple-Glazed Roast Chicken with Apple-Rosemary Medley is more than just a meal; it’s an experience, a story, a celebration of flavor. I hope this dish brings as much joy to your home as it has to mine. I would love to hear how it turns out for you, so please share your experiences and any twists you made to the recipe. Remember, the kitchen is a place of love and creativity, and I’m thrilled to be a part of your culinary journey. Bon appétit!

    Related update: Maple-Glazed Roast Chicken with Apple-Rosemary Medley

    Related update: Cornmeal-Crusted Catfish with Smoky Chipotle Tartar Sauce
  • Herb-Crusted Sirloin Steak with Balsamic Onion Glaze | Made by Meaghan Moineau

    Herb-Crusted Sirloin Steak with Balsamic Onion Glaze | Made by Meaghan Moineau

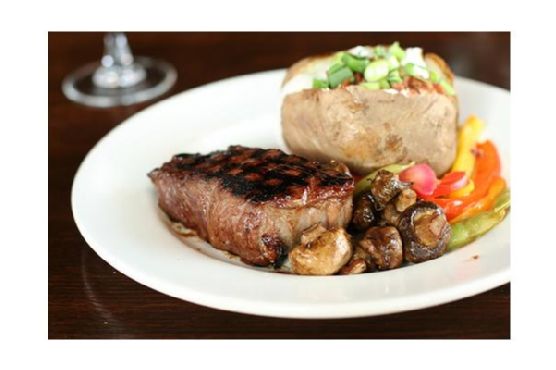
    Herb-Crusted Sirloin Steak with Balsamic Onion Glaze

    Imagine the sound of a sizzling steak as it hits the hot pan, the aroma of fresh herbs dancing through the kitchen air, and the sweet tang of a balsamic glaze slowly thickening and caramelizing around tender onions. This is not just any steak dinner; this is a culinary experience that elevates a classic sirloin to a sophisticated masterpiece.

    Every time I prepare my Herb-Crusted Sirloin Steak with Balsamic Onion Glaze, I’m transported back to a snowy evening in my tiny first apartment. My kitchen was cramped, and my cookware was a mismatched collection of hand-me-downs. Yet, the joy of creating something delicious kept me warm and inspired. I remember the first time I attempted a steak dish — a simple cut with salt and pepper. While it was satisfying, I knew there was potential for more. That’s when I began experimenting with herbs and reduction sauces, leading to the creation of this very recipe.

    That initial attempt wasn’t without its mishaps. I didn’t know then that steak needs to rest before cutting to retain its juices, so I ended up with a dry slice of meat. But as I perfected my technique, the texture improved, and I learned how to accentuate the natural flavors of the beef with a well-balanced crust and glaze. My friends started requesting my steak for dinner parties, saying, “It’s like a restaurant dish, but better!” That was the best compliment I could have received.

    Now, every time I make this dish, I’m reminded of those early days, the journey from novice to confident cook, and the joy of sharing something truly special with others. Let’s dive into what makes this version of sirloin steak stand out.

    What Makes This Version Special

    This isn’t just any sirloin steak. This recipe features a delicate yet flavorful herb crust made by finely chopping **fresh thyme** and **fresh rosemary** and pressing them onto the buttered steak. The herbs infuse the meat with an aromatic essence that’s both earthy and fresh. But the magic doesn’t stop there. The **balsamic vinegar** reduction complements the herby crust with its sweet and tangy complexity, while caramelized onions add a deep, savory sweetness to each bite. This combination transforms the humble sirloin steak into something extraordinary.

    Flavor Profile

    The flavor journey of this Herb-Crusted Sirloin Steak with Balsamic Onion Glaze is a harmonious blend of savory, sweet, and tangy notes. The herb crust introduces an aromatic layer that beautifully complements the richness of the steak, while the balsamic glaze provides a sweet and slightly tangy finish that lingers on the palate. It’s a sensory dance where each bite offers a delicate crunch from the crust, followed by the tender juiciness of the steak, making it a truly memorable culinary experience.

    Ingredients

    • 2 sirloin steaks
    • 2 tablespoons butter, softened
    • **Fresh thyme**, finely chopped
    • **Fresh rosemary**, finely chopped
    • Salt and pepper to taste
    • 1 lemon, thinly sliced
    • 2 white onions, thinly sliced
    • 1/4 cup **balsamic vinegar**
    • 2 tablespoons olive oil
    • 3 garlic cloves, minced
    • 2 tablespoons ketchup
    • 1 tablespoon Worcestershire sauce
    • 1/4 cup water

    Instructions

    1. Preheat your oven to 425°F (220°C). Grease a shallow baking pan with olive oil.
    2. Rub both sides of each sirloin steak with softened butter. Ensure they’re evenly coated to help the herbs stick and create a golden-brown crust.
    3. Mix the finely chopped fresh thyme and rosemary in a small bowl. Press this herb mixture onto both sides of the buttered steaks, embedding the flavors deeply into the meat.
    4. Season the steaks generously with salt and pepper to taste. Arrange thin lemon slices on top of each steak.
    5. Layer the onion slices evenly over the steaks. The onions will caramelize and meld with the meat, adding a sweet depth.
    6. In a separate bowl, combine ketchup, Worcestershire sauce, and water. Mix well and pour this over the steaks to enhance the glaze.
    7. Place the steaks on the prepared pan and bake them in the oven for 30 to 45 minutes, depending on your desired level of doneness. Check for a golden-brown crust and medium to medium-rare center for optimal flavor.
    8. While the steak is baking, prepare the balsamic onion glaze. In a skillet, heat olive oil over medium heat, add the onions and a pinch of salt. Cook until the onions are soft and translucent, about 10 minutes.
    9. Add the minced garlic to the skillet and sauté for another 2 minutes. Pour in the balsamic vinegar and let it reduce until the mixture is thick and glossy, about 5 minutes.
    10. Remove the steaks from the oven and let them rest for at least 5 minutes. This allows the juices to redistribute, ensuring a juicy bite.
    11. To serve, slice the steaks against the grain and drizzle generously with the balsamic onion glaze. Enjoy the symphony of flavors!

    Pro Tips from Meaghan’s Kitchen

    • Always bring your steak to room temperature before cooking. This ensures even cooking and a perfect crust.
    • Use a meat thermometer to check for doneness. Aim for 130°F (54°C) for medium-rare.
    • Rest the steak for at least 5 minutes after cooking. This helps retain its juices and enhances flavor.
    • For an extra boost, add a splash of red wine to the balsamic reduction for added depth and richness.
    • Experiment with different herbs like sage or parsley for a unique twist on the herb crust.

    Variations & Dietary Swaps

    • Vegetarian Swap: Replace the sirloin steak with thick slices of portobello mushrooms. The meaty texture pairs wonderfully with the herb crust and balsamic glaze.
    • Spice-It-Up Version: Add a pinch of red pepper flakes or cayenne to the herb mixture for a subtle heat that complements the sweet glaze.
    • Kids-Friendly Version: Omit the balsamic glaze and serve the steak with a side of ketchup for a more straightforward, child-friendly taste.

    What to Serve With It

    This Herb-Crusted Sirloin Steak with Balsamic Onion Glaze pairs beautifully with a full-bodied red wine, like a Cabernet Sauvignon. The wine’s bold flavors complement the steak’s richness and the glaze’s sweetness. For a complete meal, serve alongside creamy garlic mashed potatoes and a simple arugula salad dressed with a lemon vinaigrette. The fresh greens balance the hearty flavors of the steak and potatoes, creating a well-rounded dining experience.

    Storage & Meal Prep

    Leftovers can be stored in an airtight container in the refrigerator for up to 3 days. For longer storage, wrap the steak tightly in aluminum foil and place it in the freezer for up to 2 months. To reheat, thaw overnight in the fridge and then heat in a skillet over medium heat until warmed through, taking care not to overcook and dry out the meat.

    FAQ

    Can I use dried herbs instead of fresh?

    Yes, you can substitute dried herbs, but remember they are more potent, so use about one-third of the amount. Fresh herbs offer a brighter, more vibrant flavor profile.

    What is the best way to slice the steak?

    Always slice the steak against the grain. This results in tender, easy-to-chew pieces. Look for the direction of the muscle fibers and cut perpendicular to them.

    Can I make the balsamic glaze ahead of time?

    Absolutely! Prepare the glaze up to two days in advance. Store it in the refrigerator, and gently reheat it before serving.

    How do I know when the steak is done?

    Use a meat thermometer for accuracy. Insert it into the thickest part of the steak. For medium-rare, aim for 130°F (54°C), and allow it to rest as it will continue cooking slightly.

    What if I don’t have a meat thermometer?

    No worries! Use the touch test: a medium-rare steak feels like the fleshy part of your hand beneath your thumb when your hand is relaxed.

    Final Thoughts

    There you have it — a gourmet steak dish that’s as beautiful as it is delicious. My Herb-Crusted Sirloin Steak with Balsamic Onion Glaze is a testament to the power of simple ingredients elevated by technique and a touch of creativity. Whether you’re cooking for a special occasion or simply treating yourself, this recipe is sure to impress. I’d love to hear how it turns out for you, so feel free to leave a comment below or share your creation on social media. Happy cooking, and remember, the best kitchen is one filled with love and laughter!

    Related update: Herb-Crusted Sirloin Steak with Balsamic Onion Glaze

    Related update: Smoky Lamb Mole with Spiced Pumpkin Seeds

  • Mediterranean Slow Cooker Chicken with Rosemary and Olives | Made by Meaghan Moineau

    Mediterranean Slow Cooker Chicken with Rosemary and Olives | Made by Meaghan Moineau

    Mediterranean Slow Cooker Chicken with Rosemary and Olives

    Picture this: the kitchen is filled with the intoxicating aroma of rosemary mingling with the earthy sweetness of sun-dried tomatoes, as a golden-brown chicken slowly cooks to perfection in your slow cooker. This is not just any chicken recipe — it’s a Mediterranean masterpiece that promises to whisk you away to sun-drenched shores with every bite.

    Personal Story

    Years ago, on a spontaneous trip to the Mediterranean coast, I stumbled upon a hidden gem of a restaurant. The chef, an elderly woman whose laughter was as hearty as her meals, served me a dish so memorable that it lingered in my taste buds long after I’d left. It was a simple chicken, but with a twist — it encapsulated the vibrant, fresh flavors of the region: olives, tomatoes, and fragrant herbs.

    Once back home, I found myself longing to recreate that experience, but with a twist of my own. I wanted the dish to be as aromatic and comforting as those Mediterranean evenings, yet convenient enough to fit into a busy lifestyle. Thus, the idea of a slow cooker adaptation was born. After several attempts, I finally captured the essence of that unforgettable meal: a slow cooker chicken enriched with the bold flavors of olives and sun-dried tomatoes.

    One particularly chilly afternoon, I decided to give my newly crafted recipe a go, seeking warmth and nostalgia. As the chicken simmered away, my home was enveloped in the most delightful aroma, reminiscent of that distant seaside town. When my family gathered around the table that evening, their excited smiles confirmed what I already knew: this dish was a keeper.

    What Makes This Version Special

    This version of slow cooker chicken is a culinary journey to the Mediterranean without leaving your kitchen. Traditional slow cooker chicken is comforting and tender, but adding olives and sun-dried tomatoes takes the flavor profile to a whole new level. The briny olives and sweet sun-dried tomatoes meld together beautifully, imparting a rich and savory depth to the dish that is simply irresistible. Plus, the use of fresh rosemary and thyme adds a layer of fragrant complexity that makes this dish stand out from the standard recipes.

    Flavor Profile

    The flavor profile of this Mediterranean Slow Cooker Chicken is nothing short of a sensory delight. Picture rich, savory notes enveloped in layers of citrusy brightness, thanks to the fresh lemons that permeate the dish. Earthy undertones from the rosemary and thyme are enhanced by the subtle brininess of the olives. The sun-dried tomatoes introduce a sweet yet tangy element, creating a harmonious balance that dances on your palate. It’s like a symphony of flavors, each note complementing the other, making every bite an experience to savor.

    Ingredients

    • 1 whole chicken, about 4 pounds
    • **2 tablespoons extra virgin olive oil**
    • 1 lemon, halved
    • 1 large onion, quartered
    • **1 tablespoon paprika**
    • 1 teaspoon freshly ground pepper
    • 2 tablespoons fresh rosemary, chopped
    • 1 teaspoon salt
    • **2 tablespoons unsalted butter**
    • 1/4 cup water
    • **1/2 cup kalamata olives, pitted and halved**
    • **1/3 cup sun-dried tomatoes, julienned**
    • 1 tablespoon fresh thyme leaves
    • **3 garlic cloves, minced**

    Instructions

    1. Begin by setting the stage: gather all your ingredients, allowing the chicken to reach room temperature for even cooking.
    2. In a small bowl, combine the paprika, salt, and pepper, reserving half of the rosemary for later. This will ensure a pop of flavor both inside and out.
    3. Over medium-high heat, sear the chicken in a large skillet with the olive oil and unsalted butter, skin-side down, until it’s golden and crispy. This step is crucial for locking in that delicious flavor and texture.
    4. In the same pan, bloom the minced garlic and paprika in the remaining olive oil for about a minute, until fragrant. This enhances their flavors, creating a deeper, more complex taste for your dish.
    5. Rub the seasoned butter mixture all over the chicken, ensuring it’s evenly coated. Don’t forget to include a generous dash of the paprika and garlic blend for added depth.
    6. Stuff half of the onion, lemon halves, and half of the rosemary into the chicken’s cavity, infusing it with bright, citrusy notes.
    7. Roll up three small lemon-sized balls of aluminum foil and place them at the bottom of your slow cooker. This keeps the chicken elevated, ensuring it cooks evenly all around.
    8. Add the remaining onion and lemon halves to the slow cooker, along with the water and olives. These ingredients will create a flavorful base for the chicken to soak in.
    9. Place the chicken on top of the foil balls, sprinkle the rest of the rosemary and thyme over it, cover, and cook on low for 7-8 hours, or on high for 4-5 hours, until the chicken is tender and fully cooked.

    Pro Tips from Meaghan’s Kitchen

    • For an extra crispy skin, transfer the chicken to a baking sheet and place it under the broiler for a few minutes after slow cooking. Keep a close eye to prevent burning.
    • If you’re short on time, prep the chicken and ingredients the night before, and simply set your slow cooker in the morning.
    • Save any leftover broth from the slow cooker to use as a base for soups or as a flavorful addition to grains like rice or couscous.
    • For a milder garlic flavor, roast the garlic cloves before adding them to the dish.
    • Feel free to add a splash of white wine to the slow cooker for an added layer of sophistication.

    Variations & Dietary Swaps

    • Vegetarian Swap: Replace the chicken with hearty vegetables like eggplant, zucchini, and bell peppers. Add chickpeas for protein, and cook as directed.
    • Spice-It-Up Version: Add a teaspoon of red pepper flakes or a sliced jalapeño to the seasoning mix for a bit of heat.
    • Kids-Friendly Version: Substitute the olives with sliced mushrooms or bell peppers, and reduce the paprika for a milder flavor profile.

    What to Serve With It

    This Mediterranean Slow Cooker Chicken pairs beautifully with a side of roasted garlic mashed potatoes, their creamy texture complementing the savory, flavorful chicken. For a complete meal, add a fresh, crisp Greek salad with cucumbers and feta. A glass of chilled Chardonnay makes for a perfect pairing, accentuating the dish’s citrusy notes while balancing its richness.

    Storage & Meal Prep

    To store leftovers, place the chicken in an airtight container and refrigerate for up to 3 days. For freezing, separate the meat from the bones and freeze in portions for up to 2 months. Reheat the chicken gently in the microwave or on the stovetop over low heat, adding a splash of broth or water to prevent it from drying out. This dish is ideal for meal prep, as its flavors only deepen with time.

    FAQ

    Can I use chicken breasts instead of a whole chicken?

    Absolutely! Chicken breasts will work well, though they may cook faster, so keep an eye on them to avoid overcooking.

    Can I add vegetables directly to the slow cooker?

    Yes, adding vegetables like carrots, potatoes, or bell peppers can enhance the dish. Just be sure to cut them into uniform pieces for even cooking.

    What if I don’t have fresh herbs?

    No worries! You can substitute dried rosemary and thyme, using about one-third of the fresh amount.

    How can I make this dish gluten-free?

    The recipe is naturally gluten-free, just ensure your sun-dried tomatoes don’t contain any added wheat-based ingredients.

    Final Thoughts

    Cooking this Mediterranean Slow Cooker Chicken with Rosemary and Olives is an experience that not only fills your home with mouthwatering aromas but also brings a touch of Mediterranean magic to your dinner table. I invite you to try this recipe and share your thoughts in the comments below. Happy slow cooking, and may your kitchen always be filled with joy and deliciousness!

    Related update: Mediterranean Slow Cooker Chicken with Rosemary and Olives

    Related update: Smoky Cardamom-Infused Chicken Tikka Masala with Charred Peppers

  • Caramelized Fig and Walnut Upside-Down Cake with Rosemary-Honey Drizzle | Made by Meaghan Moineau

    Caramelized Fig and Walnut Upside-Down Cake with Rosemary-Honey Drizzle | Made by Meaghan Moineau

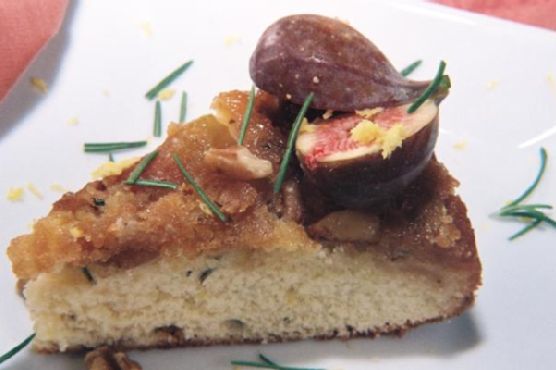
    Caramelized Fig and Walnut Upside-Down Cake with Rosemary-Honey Drizzle

    Imagine the smell of a cake baking, its sweet aroma wrapping around you like a warm hug. Now add a hint of rosemary, the sweet, earthy fragrance mingling with the caramelized figs and toasted walnuts. This cake is not just a dessert; it’s an experience, a story told through flavors and textures.

    Personal Story

    The first time I encountered figs was in my grandmother’s garden. She had a modest fig tree that bore the juiciest fruits during late summer. I remember sneaking out with a basket, picking the ripest figs until my hands were sticky with their syrupy sweetness. Those sun-warmed figs, eaten under the shade of the tree, became the inspiration for this Caramelized Fig and Walnut Upside-Down Cake.

    Years later, while hosting a dinner party, I wanted to serve something that would surprise my guests. I remembered those figs and decided to create a cake that would capture their essence. My first attempt was a disaster; the figs stuck to the pan and the cake was unevenly baked. However, each failure taught me something new. I experimented with different techniques, tweaking the recipe until it became what it is today—a beautifully balanced cake with layers of flavor.

    One fine summer evening, when I finally perfected the recipe, I served it to my friends. Their eyes lit up with each bite, the compliments flowed, and I knew this cake was special. It was more than just a cake; it was a piece of my past, a shared experience, and a new tradition. Now, it’s a staple at my gatherings, always bringing back those sweet, sticky memories of summers past.

    What Makes This Version Special

    This version of the Caramelized Fig and Walnut Upside-Down Cake is unique because of the rosemary-infused honey drizzle that elevates the dessert to a whole new level. The infusion process adds a fragrant finish that perfectly complements the caramelized figs. The rosemary’s woody aroma mingles with the honey’s sweetness, creating a sophisticated yet comforting flavor profile. It’s this attention to detail, these small touches, that make this cake stand out from the typical upside-down cakes you might encounter.

    Flavor Profile

    The flavor journey of this cake begins with the sweet, caramelized figs that provide a luscious, jam-like texture. The walnuts add a nutty crunch, creating a delightful contrast. But the true magic lies in the rosemary-infused honey drizzle that ties everything together. This drizzle imparts a subtle herbal fragrance that lingers, while the added fresh orange zest in the batter lifts the cake with citrusy brightness. It’s a harmonious blend of sweet, nutty, herbal, and citrusy notes—a symphony for your taste buds.

    Ingredients

    • 1/2 cup unsalted butter
    • 3/4 cup light brown sugar
    • **1 pound fresh figs, halved**
    • **2 teaspoons fresh rosemary, chopped**
    • 3/4 cup walnut pieces
    • 1 1/2 cups all-purpose flour
    • 2 teaspoons baking powder
    • 1/2 teaspoon salt
    • 3 large eggs
    • 1 cup granulated sugar
    • **1 tablespoon fresh lemon juice**
    • 1 teaspoon lemon extract
    • 1 tablespoon citron vodka
    • **1 tablespoon fresh lemon zest**
    • 1 teaspoon vanilla extract
    • **1/4 cup honey**
    • **1 teaspoon fresh orange zest**

    Instructions

    1. Position a rack in the center of the oven and preheat it to 350 degrees Fahrenheit.
    2. Add the butter to a 9-inch round baking pan and place it inside the warm oven until melted, about 5 minutes. Remove from the oven and sprinkle the brown sugar evenly over the butter.
    3. Arrange the figs, flesh side up, over the sugar layer. Sprinkle with 1 teaspoon of the rosemary, then fill in the nooks and crannies with walnut pieces.
    4. In a medium bowl, sift together the flour, baking powder, and salt. This step ensures that your cake has a light, airy texture.
    5. In a separate bowl, beat the eggs with the granulated sugar at medium speed until creamy. Because I love a light, fluffy texture, I beat the eggs and sugar for an additional 3 minutes until frothy with small bubbles forming.
    6. Add the flour mixture to the creamed mixture and beat until well combined. Gently fold in the fresh lemon juice, lemon extract, citron vodka, and lemon zest. Don’t forget the fresh orange zest—it adds a burst of citrusy brightness!
    7. Pour the cake batter evenly over the fruit and smooth it with a spatula. Bake for 35 to 40 minutes or until the cake is golden and a toothpick inserted into the center comes out clean.
    8. While the cake bakes, prepare the rosemary-infused honey drizzle. Gently heat the honey with the remaining teaspoon of rosemary in a small saucepan over low heat, allowing the flavors to meld.
    9. Once baked, place the cake on a wire rack to cool for 10 minutes. Run a blunt knife around the edges of the pan to loosen the cake, then carefully invert it onto a plate.
    10. Drizzle the rosemary-infused honey over the warm cake before serving. Enjoy the cake warm or at room temperature.

    Pro Tips from Meaghan’s Kitchen

    • Make sure your figs are ripe and sweet for the best flavor. Unripe figs can be too firm and less sweet.
    • When inverting the cake, use a large plate or platter to catch any extra syrup that might run off.
    • For an extra nutty flavor, toast the walnut pieces before adding them to the pan.
    • If you’re short on time, prepare the rosemary-infused honey drizzle a day in advance and store it in a sealed container.
    • Use room temperature ingredients for the batter to ensure even mixing and a smoother texture.

    Variations & Dietary Swaps

    • Vegetarian Swap: This cake is naturally vegetarian-friendly, but you can make it vegan by replacing the butter with a vegan alternative and using flax eggs instead of regular eggs.
    • Spice-It-Up Version: Add a pinch of cardamom to the batter for a warm, exotic twist.
    • Kids-Friendly Version: Skip the citron vodka and increase the vanilla extract to 2 teaspoons for a more family-friendly flavor.

    What to Serve With It

    This Caramelized Fig and Walnut Upside-Down Cake pairs beautifully with a glass of sparkling Prosecco, which complements the cake’s sweetness with its crisp bubbles. Alternatively, serve it with a scoop of vanilla ice cream for a classic, creamy contrast. For a drink pairing, a bold cup of coffee or a cool glass of Edna Valley 2010 Paragon Chardonnay, with its crisp, citrusy notes and hint of peach, make a delightful accompaniment.

    Storage & Meal Prep

    Store any leftover cake in an airtight container in the refrigerator for up to 3 days. To freeze, wrap individual slices in plastic wrap and place them in a freezer bag for up to 1 month. To reheat, simply warm slices in the microwave for about 15 seconds or until heated through. If reheating from frozen, allow slices to thaw overnight in the refrigerator before warming.

    FAQ

    Can I use dried figs instead of fresh ones?

    While fresh figs are ideal for this recipe, you can use dried figs in a pinch. Just soak them in warm water for about 15 minutes to soften before using.

    What if I don’t have citron vodka?

    You can substitute citron vodka with regular vodka or omit it altogether. The lemon extract and zest will still provide plenty of citrus flavor.

    Can I make this cake gluten-free?

    Yes, you can substitute the all-purpose flour with a gluten-free flour blend. Make sure it’s a 1:1 substitute for best results.

    How do I prevent the cake from sticking to the pan?

    Ensure your pan is well-greased with melted butter and that the sugar is evenly distributed. Running a knife around the edges before inverting will also help.

    Is there a substitute for fresh rosemary?

    If you don’t have fresh rosemary, you can use dried rosemary. However, use only half the amount as dried herbs are more concentrated.

    Final Thoughts

    Thank you for joining me in my kitchen to explore this delightful Caramelized Fig and Walnut Upside-Down Cake with Rosemary-Honey Drizzle. It’s a cake that’s as much about the experience of making it as it is about enjoying it. I hope this recipe becomes a cherished part of your dessert repertoire, perhaps creating sweet memories of your own. I’d love to hear how it turns out for you, so please leave a comment or share your creation on social media. Happy baking, my friends!

    Related update: Caramelized Fig and Walnut Upside-Down Cake with Rosemary-Honey Drizzle

    Related update: Luscious Almond Ricotta Cake with Lavender-Honey Glaze

  • Zesty Citrus-Herb Pork Carnitas Tacos with Pineapple Salsa | Made by Meaghan Moineau

    Zesty Citrus-Herb Pork Carnitas Tacos with Pineapple Salsa | Made by Meaghan Moineau

    Zesty Citrus-Herb Pork Carnitas Tacos with Pineapple Salsa

    Imagine this: the sound of pork gently sizzling in a cast-iron pan, the aroma of rosemary wafting through the kitchen, and a splash of lime that transforms the ordinary into something extraordinary. This isn’t just any taco night; it’s an experience, a celebration of flavors with my Zesty Citrus-Herb Pork Carnitas Tacos with Pineapple Salsa.

    My love affair with carnitas began on a balmy summer night at a bustling food market in Oaxaca. The air was thick with the scent of spices, and I found myself drawn to a tiny stall nestled between colorful piñatas and fresh produce. The vendor, with twinkling eyes and a knowing smile, handed me a taco that was unlike any I’d ever tasted. It was the perfect balance of savory, zesty, and sweet. That evening, I vowed to bring that magic back home.

    Back in my kitchen, I was determined to recreate that unforgettable taste. I bought every cut of pork imaginable, tried every combination of spices, and even enlisted my friends as taste testers. It was a labor of love, filled with mishaps like the time I accidentally added too much salt and had to start over (I learned the hard way to taste as I go!). But through trial and error, I discovered my secret weapon: a hint of rosemary that adds an aromatic depth, and a pineapple salsa that gives a bright, tropical flair.

    Every time I serve these Zesty Citrus-Herb Pork Carnitas Tacos with Pineapple Salsa, I’m transported back to that enchanting night in Oaxaca. The laughter, the music, the vibrant flavors — all alive in every bite. It’s not just a meal; it’s a memory, a piece of my heart shared with you.

    What Makes This Version Special

    What sets this recipe apart from traditional carnitas is the surprising twist of pineapple salsa and rosemary infusion. By warming olive oil with fresh rosemary before browning the pork, the meat takes on an aromatic quality that’s both unexpected and delightful. Meanwhile, the pineapple salsa introduces a refreshing sweetness that balances the savory richness of the pork. Plus, adding a splash of lime juice and zest during the final browning stage elevates the flavors with a zesty brightness. This isn’t just a dish; it’s a flavor journey that transforms classic carnitas into something exceptionally vibrant and fresh.

    Flavor Profile

    Prepare to be wowed by the taste experience these tacos offer. Picture the juicy, tender pork, slightly crispy on the edges, infused with the fragrant essence of rosemary. The natural sweetness of pineapple salsa dances on your tongue, countering the savory depth of the carnitas. Add to that the zesty kick from lime juice and zest, and you’ve got a dynamic, multi-layered flavor profile that’s both invigorating and comforting. It’s a harmonious blend of zesty, savory, and sweet, with a delicate herbal note that lingers beautifully.

    Ingredients

    • 2 lbs lean pork butt, cut into large chunks
    • 4 cloves garlic, crushed
    • 1 tablespoon sea salt
    • 1 teaspoon ground pepper
    • **3 tablespoons olive oil**
    • **1 tablespoon fresh rosemary, finely chopped**
    • 1/2 cup orange juice
    • 1/4 cup milk
    • **1 lime, juiced and zested**
    • 12 corn tortillas
    • 1 cup **fresh pineapple, diced**
    • 1 small jalapeño, minced
    • 1/2 cup salsa fresca
    • 1 avocado, sliced
    • 1/4 cup cilantro, chopped
    • 1 small onion, chopped
    • 2 additional limes, sliced for serving

    Instructions

    1. In a large Dutch oven, combine the pork, garlic, sea salt, ground pepper, and enough water to cover the pork. Bring to a boil over medium-high heat, then reduce the heat, cover, and simmer over medium-low for 45 minutes to one hour, until the pork is tender and easy to shred.
    2. Drain the pork well and allow it to cool slightly. Once cool enough to handle, shred the meat using your hands or the tines of a fork. Remove and discard any remaining fat.
    3. Return the shredded pork to the Dutch oven. In a small pan, gently warm the olive oil with the rosemary for 2-3 minutes to infuse the flavors. Add the infused olive oil to the pot with the pork.
    4. Add the orange juice and milk to the pork, cooking over medium heat until the liquid has evaporated and the pork begins to brown, about 15 minutes. Stir occasionally to achieve an even golden-brown crispiness.
    5. During the final browning stage, add the lime juice and zest to the pork for a bright, citrusy finish. Season with additional salt and pepper to taste.
    6. While the pork is browning, prepare the pineapple salsa by combining the diced pineapple, minced jalapeño, and salsa fresca in a bowl. Set aside.
    7. Chop the onions and cilantro, and slice the avocado and limes. Place each in small individual bowls for serving.
    8. Heat the corn tortillas in a dry frying pan over medium heat until warm and pliable. Keep them warm by wrapping in a clean kitchen towel.
    9. To assemble the tacos, stack two tortillas, layer with warm carnitas, a spoonful of pineapple salsa, chopped cilantro, onion, and avocado slices. Finish with a squeeze of lime juice for an extra burst of flavor.

    Pro Tips from Meaghan’s Kitchen

    • Infuse the Oil: Infusing the olive oil with rosemary is key. Do it gently over low heat to avoid burning and maximize flavor transfer.
    • Crispy Edges: For those irresistible crispy edges, ensure the pork is in a single layer in the pan, allowing maximum contact with the heat.
    • Balance the Heat: If the jalapeño is too spicy for your taste, remove the seeds and veins to tone down the heat.
    • Tortilla Warmth: Warming the tortillas in a dry pan keeps them pliable and enhances their flavor, making the taco experience more enjoyable.
    • Juicy Pineapple Salsa: Let the pineapple salsa sit for a few minutes before serving to allow the flavors to meld beautifully.

    Variations & Dietary Swaps

    • Vegetarian Swap: Substitute the pork with jackfruit for a vegetarian-friendly version that still delivers that pulled texture.
    • Spice-It-Up Version: Add chipotle powder to the pork for a smoky, spicier kick that complements the pineapple salsa.
    • Kids-Friendly Version: Use sweet bell peppers instead of jalapeños in the salsa for a milder, kid-approved flavor.

    What to Serve With It

    Pair these vibrant Zesty Citrus-Herb Pork Carnitas Tacos with a chilled glass of hibiscus iced tea, which perfectly complements the tacos’ tropical flair. Alternatively, a light Mexican lager offers a refreshing balance to the zesty and savory notes of the carnitas, making it an ideal companion for this festive dish.

    Storage & Meal Prep

    Leftover carnitas can be stored in an airtight container in the fridge for up to 3 days. For longer storage, freeze the shredded pork in portions, ensuring they’re tightly sealed to prevent freezer burn, for up to 3 months. To reheat, thaw overnight in the fridge, then warm in a skillet over medium heat until hot and crispy. Pineapple salsa is best fresh but can be refrigerated for up to a day.

    FAQ

    Can I make this recipe in advance?

    Absolutely! You can prepare the carnitas a day ahead, allowing the flavors to develop further. Simply reheat in a skillet before serving to regain crispiness.

    Is there a substitute for milk in this recipe?

    Yes, you can use a non-dairy alternative like almond or coconut milk. Just be mindful of the flavor it might add to the dish.

    How can I adjust the spice level?

    To adjust the heat, simply modify the amount of jalapeño in the salsa. Removing the seeds and veins will also reduce the spiciness.

    What if I don’t have fresh pineapple?

    Canned pineapple can be used as a substitute. Just make sure to drain it well to avoid adding excess moisture to the salsa.

    Final Thoughts

    I hope these Zesty Citrus-Herb Pork Carnitas Tacos with Pineapple Salsa bring a bit of my kitchen to yours. They’re more than just a meal; they’re a celebration of flavors and memories. I’d love to hear how they turn out in your own kitchen. Feel free to leave a comment or share your experience on social media. Let’s keep the conversation going — after all, cooking is always better together!

    Related update: Zesty Citrus-Herb Pork Carnitas Tacos with Pineapple Salsa

    Related update: Spicy Stir-Fried Cabbage and Tomatoes with Ginger-Lime Zest