Tuscan White Bean & Kale Pasta Fagioli with Lemon Zest
Picture this: a chilly autumn evening, the kind where a crisp breeze carries the scent of fireplace smoke and golden leaves crunch underfoot. Inside, the kitchen is warm and inviting, filled with the rich aroma of simmering herbs and the intoxicating scent of garlic sautéing in olive oil. This is the moment when a bowl of Tuscan White Bean & Kale Pasta Fagioli with Lemon Zest becomes more than just dinner — it’s a comforting embrace from the inside out.
Personal Story
My love affair with Pasta Fagioli began in a small trattoria in Florence, where the owner, an affable man with a hearty laugh, dished up bowls of this soul-satisfying dish to locals and tourists alike. It was a chilly evening, and I was seated at a rustic wooden table, warmed by the glow of a flickering candle and the hearty flavors of this classic Italian soup. Each spoonful was a revelation — a symphony of tender beans, al dente pasta, and an aromatic broth that spoke of time-honored traditions.
Back home, I tried countless times to recreate that culinary magic in my own kitchen. My early attempts were valiant yet lacking that certain je ne sais quoi. A near kitchen disaster, when I accidentally added twice the amount of garlic, led to an unexpected discovery: the depth and warmth that an extra punch of garlic could bring to the dish. It was a happy accident that opened my eyes to the possibilities of tweaking a classic.
Over time, I began to experiment with my own variations, each pot simmering with the promise of something new. Kale found its way into the mix on a day when I was short on spinach, and it brought a vibrant, nutrient-rich twist that felt like it had always belonged. The final flourish of lemon zest came on a whim, inspired by a sun-drenched lemon grove visit during a Tuscan tour. This bright addition elevated the dish to new heights, creating a balance of hearty and fresh that quickly became my signature version.
Now, every time I make this dish, I’m reminded of that little trattoria and the joy of discovery that a simple bowl of soup can bring.
What Makes This Version Special
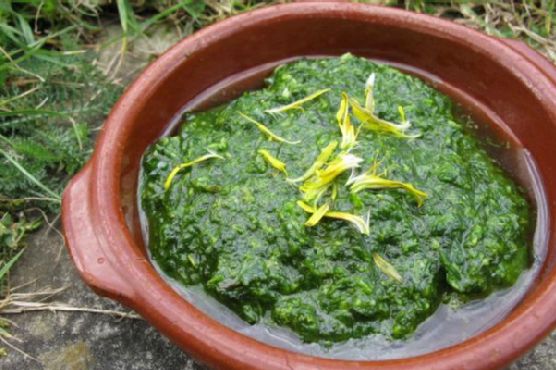
This version of Tuscan White Bean & Kale Pasta Fagioli includes nutrient-rich kale and a hint of lemon zest to brighten up the classic flavors, offering a fresh take on a hearty Italian staple. The kale introduces a robust, earthy note that complements the beans and pasta beautifully, while the lemon zest adds a zesty brightness that cuts through the richness of the dish. By incorporating these elements, the soup becomes not only a comforting classic but also a vibrant and healthful meal that feels both indulgent and nourishing.
Flavor Profile
Imagine a bowl of this Pasta Fagioli: it’s rich and hearty, with the creamy texture of white beans and the slight chew of whole wheat penne pasta. The kale brings an herbaceous lift, mingling with the aromatic garlic and Italian seasoning blend. As you savor each spoonful, a refreshing citrus note from the lemon zest emerges, dancing on your palate and leaving a fragrant finish. It’s a delightful balance of warmth and brightness, with a touch of spice from the red pepper flakes, rounding out a truly memorable taste experience.
Ingredients
- 1 pound lean ground turkey
- 2 tablespoons olive oil
- 1 large onion, diced
- 2 carrots, diced
- 2 celery stalks, diced
- 4 garlic cloves, minced
- 1 can (14.5 ounces) diced tomatoes
- 1 can (15 ounces) red kidney beans, rinsed and drained
- 1 can (15 ounces) white kidney beans, rinsed and drained
- 1 can (15 ounces) great northern beans, rinsed and drained
- 5 cups beef broth
- 1 cup pasta sauce
- 1 zucchini, diced
- 1 tablespoon Italian seasoning blend
- Fresh ground pepper, to taste
- 2 cups whole wheat penne pasta
- Grated Parmesan cheese, for serving
- 2 cups fresh kale, chopped
- Zest of 1 lemon
- 1/2 teaspoon red pepper flakes
- Fresh basil leaves, for garnish
Instructions
- In a large soup pot, brown the lean ground turkey over medium-high heat, breaking it up with a wooden spoon, until it’s no longer pink. This should take about 5-7 minutes. Drain the meat in a colander and set aside.
- In the same pot, heat the olive oil over medium heat. Add the diced onions, carrots, celery, and minced garlic. Sauté the mixture for about 5 minutes, stirring often, until the vegetables are just beginning to soften and the garlic is fragrant.
- Return the turkey to the pot, stirring to combine. Pour in the diced tomatoes, red kidney beans, white kidney beans, great northern beans, beef broth, and pasta sauce. Stir in the diced zucchini, Italian seasoning blend, and fresh ground pepper.
- Bring the soup to a boil, then reduce the heat to low. Cover the pot and let it simmer for 50 minutes, allowing the flavors to meld together beautifully.
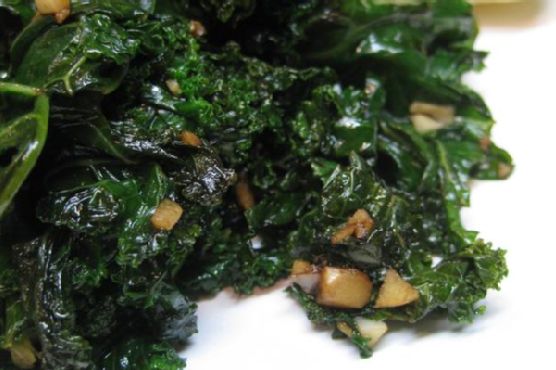
- Meanwhile, in a separate skillet, sauté the chopped kale and minced garlic over medium heat with a touch of olive oil. Cook until the kale is bright green and slightly wilted, about 3-4 minutes. This step ensures the kale retains its vibrant color and adds a delightful texture to the soup.
- Add the sautéed kale to the soup, followed by the whole wheat penne pasta. Stir well, cover, and let the soup continue to simmer for another 10 minutes, or until the pasta is tender but still has a nice bite.
- Finish the dish by stirring in the lemon zest and a sprinkle of red pepper flakes to taste. Garnish with fresh basil leaves and a generous grating of Parmesan cheese before serving.
Pro Tips from Meaghan’s Kitchen
- For an extra depth of flavor, try browning the turkey with a splash of balsamic vinegar. It adds a subtle sweetness that complements the tomatoes beautifully.
- Keep the kale bright by sautéing it separately. This prevents it from overcooking in the soup, maintaining its vibrant color and texture.
- Adjust the seasoning at the end. As the soup simmers, flavors can intensify, so taste and tweak the salt and pepper as needed before serving.
- Don’t skimp on the lemon zest. It’s the secret ingredient that elevates the dish, adding a fresh, zesty aroma that ties all the flavors together.
- If you like a bit more heat, feel free to increase the red pepper flakes or add a dash of hot sauce for an extra kick.
Variations & Dietary Swaps
- Vegetarian Version: Omit the turkey and use vegetable broth instead of beef broth. Add extra beans or a can of chickpeas for added protein.
- Spice-It-Up Version: For those who love heat, add a chopped jalapeño or a sprinkle of cayenne pepper along with the red pepper flakes.
- Kids-Friendly Version: Reduce the amount of garlic and red pepper flakes. Use orzo or small pasta shapes to make it more fun and approachable for little ones.
What to Serve With It
This Tuscan White Bean & Kale Pasta Fagioli pairs beautifully with a chilled glass of Pinot Grigio, which complements the citrus notes and balances the hearty flavors of the soup. Alternatively, a side of crusty garlic bread is perfect for soaking up every last drop of the delicious broth. For a lighter side, consider a simple mixed green salad with a lemon vinaigrette to enhance the zesty notes in the dish.
Storage & Meal Prep
Store leftovers of your Pasta Fagioli in an airtight container in the refrigerator for up to 4 days. For longer storage, freeze the soup in individual portions — it keeps well for up to 3 months. When reheating, gently warm the soup on the stovetop over medium heat, adding a splash of broth or water if needed to reach your desired consistency. Avoid reheating in the microwave if possible, as it may overcook the pasta and kale, diminishing their texture.
FAQ
Can I use fresh tomatoes instead of canned?
Yes, you can use fresh tomatoes if you prefer. Simply blanch and peel them, then chop and use in place of the canned tomatoes. Keep in mind that canned tomatoes have a more concentrated flavor, so you may want to adjust the seasoning.
Can I make this soup in a slow cooker?
Absolutely! Brown the turkey and sauté the vegetables as directed, then transfer everything to a slow cooker. Cook on low for 6-7 hours or on high for 3-4 hours, adding the pasta and kale in the last 30 minutes of cooking.
Is it possible to make this dish gluten-free?
Yes, simply substitute the whole wheat penne with your favorite gluten-free pasta. Be mindful of cooking times, as gluten-free pasta tends to cook faster and may become mushy if overcooked.
What other types of beans can I use?
You can experiment with different beans based on your preference or what you have on hand. Cannellini beans or chickpeas make great substitutes, offering a creamy texture and a hearty bite.
How can I thicken the soup?
If you prefer a thicker soup, mash some of the beans before adding them to the pot. This will release their natural starches, creating a creamier consistency.
Final Thoughts
Embarking on the culinary adventure of making Tuscan White Bean & Kale Pasta Fagioli with Lemon Zest is a delicious way to bring a taste of Italy into your home. Whether you’re cooking for family, entertaining friends, or simply savoring a quiet meal alone, this dish is sure to impress with its hearty yet fresh flavors. I hope you find joy in every spoonful as I do, and I invite you to share your own twists and experiences in the comments below. Happy cooking, and remember, the kitchen is your canvas!
Related update: Tuscan White Bean & Kale Pasta Fagioli with Lemon Zest
Related update: Zesty Chana Masala with Charred Lime and Mint Yogurt Drizzle