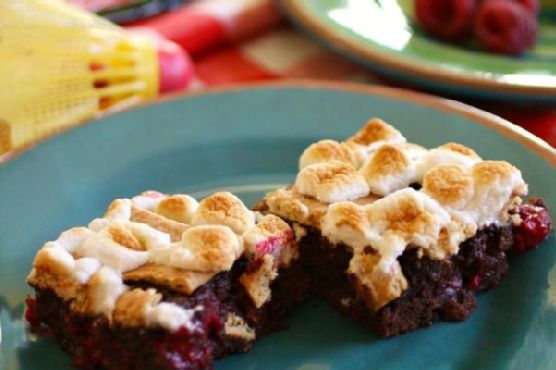
Decadent Dark Chocolate Raspberry S’mores Bars with Salted Caramel Drizzle
Imagine biting into a decadent bar that brings together all the best parts of your favorite campfire treat — the gooey marshmallow, the sweet yet savory graham cracker, and of course, the rich chocolate. But wait, there’s a twist: a tart raspberry burst and a silky, salted caramel drizzle. These aren’t just any s’mores bars; they’re an elevated experience, a symphony of flavors that dance on your palate. Welcome to the world of Decadent Dark Chocolate Raspberry S’mores Bars with Salted Caramel Drizzle.
Personal Story
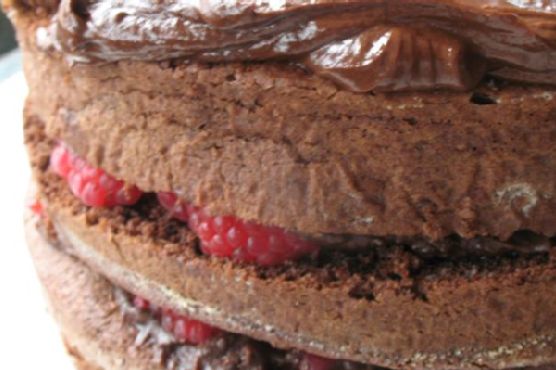
It was a crisp autumn evening when I first fell in love with the combination of chocolate and raspberry. I was at a small family gathering, and my aunt had brought along a rich chocolate cake sprinkled with fresh raspberries. The moment I took a bite, I was transported — the tartness of the raspberries cutting through the luscious chocolate was nothing short of perfection. That experience lingered with me, inspiring me to explore this magical pairing in other dishes.
Fast forward a few years, and I found myself experimenting in my own kitchen, determined to recreate that flavor harmony. My goal was to bring a touch of sophistication to the classic s’mores, a dessert that has always held a nostalgic place in my heart. I wanted to craft a recipe that could be cherished at both campfires and dinner parties.
The first batch of s’mores bars was good but lacked the depth I remembered. That’s when I decided to incorporate not just raspberries but dark chocolate chunks and a salted caramel drizzle. I had a vision of layers upon layers of flavor, each element enhancing the others.
The result? A decadent dessert that not only takes you back to childhood memories of sticky fingers and melted marshmallows but also elevates your taste experience to new heights. Every bite is a journey through rich dark chocolate, tart raspberries, and the sophisticated sweetness of salted caramel.
What Makes This Version Special
What truly sets these Decadent Dark Chocolate Raspberry S’mores Bars with Salted Caramel Drizzle apart is the luxurious combination of flavors and textures. By incorporating **decadent dark chocolate** and a **luscious salted caramel drizzle**, this recipe adds a depth and complexity that takes the classic s’mores to an entirely new level. The dark chocolate chunks melt into the brownie, creating a moist, chocolaty experience, while the salted caramel plays brilliantly against the sweetness of the marshmallows and graham crackers. It’s a sophisticated twist that makes each bite a moment to savor.
Flavor Profile
Prepare for a taste adventure that starts with the rich, velvety embrace of dark chocolate. As you chew, you’ll encounter the vibrant pop of **tart raspberry notes**, a surprise element that cuts through the sweetness like a refreshing breeze. The salted caramel drizzle weaves throughout, providing a salty-sweet finish that lingers deliciously on your palate. These bars are a symphony of contrasting yet complementary flavors that will have your taste buds singing.
Ingredients
- 1 box cooked brownie mix
- 1 large egg
- 1 cup graham cracker crumbs
- 2 whole graham crackers
- 1 cup mini marshmallows
- **1/2 cup fresh dried raspberries**
- 1/4 cup sugar
- 1/2 cup unsalted butter, melted
- 1/4 cup vegetable oil
- 1/4 cup water
- **1 cup dark chocolate chunks**
- **1/2 teaspoon sea salt**
- **1/4 cup caramel sauce**
Instructions
- Preheat your oven to 325 degrees F. Line an 8-inch-square baking pan with foil so that it hangs over the edges, and spray it with nonstick cooking spray for easy removal later.
- In a medium-sized bowl, mix together the melted butter, graham cracker crumbs, and sugar until the mixture has the texture of wet sand.
- Press the crumb mixture evenly on the bottom of the prepared pan. Bake until golden, or for about 20 minutes. The base should be set and slightly firm to the touch. Remove and set aside.
- Raise the oven temperature to 350 degrees F. Meanwhile, prepare the brownie mix according to package instructions in a medium-sized bowl. Gently fold in the fresh dried raspberries and dark chocolate chunks, being careful not to overmix.
- Pour the batter over the graham cracker crust, spreading it evenly. Bake the brownie mixture for about 25 minutes, or until a toothpick inserted in the middle of the brownie comes out clean. The top should be slightly cracked and the edges set.
- Remove the brownie from the oven and set your oven to broil. Be cautious, as the broiler can quickly burn your topping.
- Break the two graham crackers into small pieces and arrange them in a single layer on top of the brownie.
- Evenly arrange the mini marshmallows over the top of the graham crackers. Place the pan back in the oven for just a few minutes, watching closely, until the marshmallows are golden brown.
- Remove from the oven immediately and drizzle the salted caramel sauce over the marshmallows for an added layer of flavor. Allow the bars to cool completely in the pan.
- Once cool, use the overhanging foil to lift the bars from the pan and onto a cutting board. Cut into squares and serve.
Pro Tips from Meaghan’s Kitchen
- Use a high-quality dark chocolate for the best flavor payoff. Trust me, it makes a world of difference!
- If your caramel sauce is too thick to drizzle, warm it gently in the microwave for about 10 seconds to make it more pourable.
- For the best marshmallow topping, use a broiler-safe dish and keep an eye on the marshmallows as they can go from golden to burnt very quickly.
- Let the bars cool completely before cutting to ensure clean slices. This patience pays off with picture-perfect bars!
- To intensify the raspberry flavor, consider adding a teaspoon of raspberry extract to the brownie batter.
Variations & Dietary Swaps
- Vegetarian Swap: Use vegetarian marshmallows to make this recipe suitable for a vegetarian diet.
- Extra Spicy Version: Add a pinch of cayenne pepper to the brownie mix for a spicy kick that pairs surprisingly well with the chocolate and raspberries.
- Kid-Friendly Version: Omit the salted caramel drizzle and instead add a layer of milk chocolate chips for a sweeter treat that kids will love.
What to Serve With It
These Decadent Dark Chocolate Raspberry S’mores Bars with Salted Caramel Drizzle are incredibly rich, making them perfect for pairing with a chilled glass of milk to balance the flavors. Alternatively, serve them with a robust cup of coffee to enhance the chocolatey notes and offset the sweetness.
Storage & Meal Prep
Store these s’mores bars in an airtight container at room temperature for up to three days. If you prefer to keep them longer, they freeze beautifully — wrap each bar individually in plastic wrap, then place in a freezer-safe bag or container for up to three months. To enjoy, simply thaw at room temperature and, if desired, reheat in a warm oven for a few minutes to restore their gooey texture.
FAQ
Can I make these bars gluten-free?
Absolutely! Simply swap the graham crackers and crumbs for your favorite gluten-free variety. Ensure all other ingredients are certified gluten-free as well.
What if I don’t have fresh dried raspberries?
No worries! You can substitute with fresh raspberries, though they might add a bit more moisture to the brownies. Alternatively, use raspberry preserves for a different texture and flavor profile.
Can I use milk chocolate instead of dark chocolate?
Yes, you can! However, keep in mind that milk chocolate will result in a sweeter bar, which might alter the balance of flavors with the raspberries and caramel.
How do I keep the marshmallows from burning?
The key is to watch them closely under the broiler and remove them as soon as they turn golden brown. If you’re worried, you can lower the broiler rack to give yourself a bit more control over the browning process.
Can I make the caramel sauce from scratch?
Of course! A homemade caramel sauce can add a personal touch to your bars. Just ensure it’s salted for that signature sweet-savory balance.
Final Thoughts
There you have it, my dear culinary adventurers: a deliciously elevated take on the beloved s’mores. These Decadent Dark Chocolate Raspberry S’mores Bars with Salted Caramel Drizzle are sure to impress at any gathering or satisfy a quiet night in. I’d love to hear how they turn out for you! Feel free to leave your comments and share your own twists on this recipe. Let’s keep the conversation going — because, as always, the best recipes are the ones we create together.
Related update: Decadent Dark Chocolate Raspberry S’mores Bars with Salted Caramel Drizzle
Related update: Decadent Spiced Chocolate Mousse in Hazelnut Chocolate Shells