Tag: Pistachio

  • Spiced Pistachio Falafel Wraps with Zesty Mint-Yogurt Sauce | Made by Meaghan Moineau

    Spiced Pistachio Falafel Wraps with Zesty Mint-Yogurt Sauce | Made by Meaghan Moineau

    Spiced Pistachio Falafel Wraps with Zesty Mint-Yogurt Sauce

    Imagine biting into a warm, crisp falafel wrap that’s bursting with flavors of the Middle East — nutty, aromatic, and refreshingly cool. The falafel crumbles slightly, releasing a fragrant mix of spices that dance on your palate, while the creamy mint-yogurt sauce soothes with a refreshing tang. It’s a culinary experience that invites you to savor every bite.

    My Journey to the Perfect Falafel

    It all started on a balmy summer evening at my grandmother’s house. The air was filled with the intoxicating aroma of cumin and coriander, mingling with the laughter of my family gathered in the kitchen. Grandma was known for her falafel — crispy on the outside, tender on the inside, with a blend of spices that was uniquely hers. She always said the key was in the mix — and a touch of love.

    Years later, as I tried to recreate that magic in my own kitchen, I found myself on a journey of experimentation. My first attempt was a bit of a disaster. I used canned chickpeas without properly drying them, resulting in a soggy mess. But I was determined. After several tries, including a memorable incident with a food processor mishap that ended with chickpeas on the ceiling, I finally found a recipe that not only paid homage to my grandmother’s falafel but took it to new heights.

    The breakthrough came when I decided to incorporate crushed pistachios into the falafel mix. This nutty addition, combined with a zesty mint-yogurt sauce, added a layer of sophistication and depth that I hadn’t tasted before. It was a revelation. The falafel now had a delightful crunch and a rich, nutty flavor that paired perfectly with the cool, creamy sauce. It was a falafel fit for any occasion, from a casual lunch to a dinner party delight.

    What Makes This Version Special

    This version of Spiced Pistachio Falafel Wraps with Zesty Mint-Yogurt Sauce stands out due to its unique nutty twist. By incorporating crushed pistachios into the falafel mix, you introduce a rich, buttery flavor that’s a delightful departure from the traditional recipe. These pistachios not only add texture but also complement the warm spices beautifully. Paired with the refreshing mint-yogurt sauce, every bite is a perfect harmony of flavors and textures, elevating the classic falafel to something extraordinary.

    Flavor Profile

    Imagine a symphony of flavors: the falafel is nutty and aromatic, with the pistachios providing a rich undertone. The cumin and coriander lend a warm, earthy aroma that fills your kitchen as they bloom in olive oil. The mint-yogurt sauce adds a refreshingly cool element, with a hint of zesty spice from the lemon juice. Together, they create a taste experience that is both comforting and exciting, making these Spiced Pistachio Falafel Wraps a memorable meal.

    Ingredients

    • 1 can of chickpeas, drained and rinsed
    • 1 cup fresh parsley, chopped
    • 1 yellow onion, roughly chopped
    • 3 garlic cloves, minced
    • 1 teaspoon ground cumin
    • 1 teaspoon ground coriander
    • 1/2 cup cooked bulgar wheat
    • 2 tablespoons whole wheat flour
    • 1/3 cup crushed pistachios
    • 1/4 cup mint leaves, chopped
    • 1 cup plain Greek yogurt
    • Juice from 2 lemons
    • 1 tablespoon paprika
    • 4 wraps or pita breads
    • 1 diced tomato
    • 1/2 red onion, thinly sliced
    • 1 cucumber, diced
    • 1 cup shredded romaine lettuce
    • 1/2 cup tzatziki
    • 1/2 cup feta cheese, crumbled
    • 1/2 cup tabouleh

    Instructions

    1. Start by toasting the crushed pistachios in a dry pan over medium heat until they’re golden and fragrant, about 3-5 minutes. This will enhance their nutty flavor.
    2. In a small skillet, add a bit of olive oil and bloom the ground cumin and coriander over low heat for about 2 minutes, stirring constantly until aromatic.
    3. In a food processor, combine the chickpeas, parsley, onion, garlic, bulgar wheat, whole wheat flour, toasted pistachios, bloomed spices, and a pinch of salt. Pulse until the mixture is smooth but still has some texture.
    4. Transfer the mixture to a sealable container and refrigerate for at least one hour to allow flavors to meld.
    5. Preheat your oven to 400°F (200°C) and prepare a baking sheet with cooking oil spray.
    6. Scoop about two tablespoons of the mixture and roll it into a ball with your hands. Place it on the prepared baking sheet. Repeat with the rest of the mixture to make approximately 12 falafel balls.
    7. Brush each falafel ball with olive oil for a golden finish, then bake in the oven for 20 minutes. For extra crispiness, broil them for an additional 2 minutes until the tops are golden-brown.
    8. While the falafel bakes, whisk together the mint, Greek yogurt, lemon juice, and a pinch of salt in a small bowl. Set aside this zesty mint-yogurt sauce.
    9. To assemble, spread tzatziki over the warmed pitas or wraps. Place three falafel balls on each, then top with diced tomato, red onion, cucumber, and lettuce. Drizzle with the lemon tahini sauce, sprinkle with feta cheese and tabouleh, and fold the pita. Secure with tin foil if desired. Serve warm.

    Pro Tips from Meaghan’s Kitchen

    • Make sure to thoroughly dry your canned chickpeas after rinsing. This prevents the falafel mixture from becoming too wet and difficult to shape.
    • Refrigerating the falafel mix is crucial for the flavors to develop and the mixture to firm up, making shaping easier.
    • Don’t skip toasting the pistachios — it really enhances their natural nuttiness and adds depth to the falafel.
    • If you prefer a spicy kick, add a pinch of cayenne pepper to the falafel mix for some heat.
    • For a smoother sauce, blend the mint-yogurt mixture instead of whisking for a velvety texture.

    Variations & Dietary Swaps

    • Vegetarian Delight: This recipe is already vegetarian, but for a vegan version, swap the Greek yogurt in the sauce for a plant-based yogurt.
    • Spice-It-Up: Add finely chopped jalapeños or a dash of chili flakes to the falafel mix for an extra spicy version.
    • Kid-Friendly: Shape the falafel into smaller, bite-sized nuggets and serve with a side of hummus for dipping, making it easier and more fun for kids to eat.

    What to Serve With It

    These Spiced Pistachio Falafel Wraps are a meal in themselves, but they pair beautifully with a side of tabouleh or a simple cucumber salad. A chilled glass of mint-lime iced tea complements the flavors perfectly, adding a refreshing citrusy note to the meal. For a heartier accompaniment, consider serving with a bowl of roasted vegetable couscous.

    Storage & Meal Prep

    Store any leftover falafel in an airtight container in the fridge for up to 3 days. To freeze, place the cooked falafel on a baking sheet, freeze until solid, then transfer to a freezer-safe bag for up to 3 months. Reheat in a 350°F (175°C) oven until warmed through. The mint-yogurt sauce can be kept in the fridge for up to 5 days, but it’s best fresh.

    FAQ

    Can I use dried chickpeas instead of canned?

    Absolutely! Just be sure to soak them overnight and cook until tender before using them in the recipe.

    What can I do if my falafel mixture is too wet?

    If your mixture is too wet, try adding a bit more flour or bulgar wheat to help bind it together. Ensuring your chickpeas are well-dried is also key.

    Can I fry the falafel instead of baking?

    Yes, you can! Frying will give you a crispier exterior. Heat oil in a pan over medium-high heat and fry until golden-brown on all sides.

    Is there a gluten-free option for this recipe?

    To make it gluten-free, substitute the bulgar wheat and flour with gluten-free oats or a chickpea flour blend.

    How do I keep the falafel from falling apart?

    Refrigerating the mixture helps, as does ensuring it’s not too wet. Be gentle when forming and handling the falafel balls.

    Final Thoughts

    I hope you enjoy making and savoring these Spiced Pistachio Falafel Wraps with Zesty Mint-Yogurt Sauce as much as I do. They’re a delightful twist on a classic, bringing new flavors and textures to the table. I invite you to share your experience and any creative spins you might have tried in the comments below. Happy cooking, my friends!

    Related update: Spiced Pistachio Falafel Wraps with Zesty Mint-Yogurt Sauce

  • Exotic Cardamom-Poached Pears with Spicy Mango-Nectar Reduction and Pistachio Crumble | Made by Meaghan Moineau

    Exotic Cardamom-Poached Pears with Spicy Mango-Nectar Reduction and Pistachio Crumble | Made by Meaghan Moineau

    Exotic Cardamom-Poached Pears with Spicy Mango-Nectar Reduction and Pistachio Crumble

    Imagine the gentle sizzle of cardamom pods toasting in a pan, releasing their intoxicating fragrance, while a golden syrup simmers alongside. This isn’t your average poached pear recipe; it’s an aromatic journey that will transform your kitchen into a paradise of exotic flavors. Your senses are about to be enveloped in a dance of spice, sweetness, and crunch.

    Personal Story

    I still remember that crisp autumn afternoon when I stumbled upon this recipe’s inspiration. Wandering through a bustling farmer’s market, I was drawn to a vendor with an array of vibrant pears, their skins glistening under the soft sunlight. Intrigued, I picked up a Bartlett, its firm texture promising the perfect poach. As I walked away, a gentle breeze carried the scent of cardamom from a nearby spice stall, and an idea began to blossom.

    Back in my cozy kitchen, I set out to create a dish that would marry the traditional elegance of poached pears with the bold allure of global spices. My first attempt was a comedy of errors — too much cardamom, not enough sweetness. My kitchen smelled divine, but the taste didn’t quite match. Not one to be deterred, I tweaked and tested, learning from each delicious mistake.

    And then, finally, that magical balance was struck. The pears, poached to perfection, absorbed the spicy-sweet notes of the cardamom syrup, while a pistachio crumble provided an unexpected crunch. The addition of a spicy mango-nectar reduction elevated the dish to something truly special. Every time I make it now, I’m reminded of that market day and the joy of discovery it sparked.

    What Makes This Version Special

    This is no ordinary poached pear recipe. By infusing the poaching liquid with **cardamom pods**, we unlock a deep, aromatic flavor that dances on your palate. Toasting the pods before adding them to the syrup ensures that their oils fully release, giving the dish an unparalleled depth. But it doesn’t stop there. A **pistachio crumble**, scented with honey and vanilla bean seeds, adds a delightful texture that contrasts beautifully with the tender pears. This combination transforms a classic dessert into a culinary masterpiece, offering layers of flavor and texture in every bite.

    Flavor Profile

    When you bite into these exotic cardamom-poached pears, you’re greeted with a symphony of rich and aromatic flavors. The cardamom infuses the pears with a warm, spicy fragrance that lingers on the tongue, while the spicy mango-nectar reduction adds a sweet and slightly tart contrast. The **pistachio crumble** provides a satisfying crunch, with a fragrant hint of honey and vanilla. Every mouthful is a sensory journey, inviting you to savor the intricate dance of flavors and textures.

    Ingredients

    • 4 firm pears, peeled with stems intact
    • 1 tablespoon lemon juice
    • 1/2 cup sugar
    • 1 cup water
    • 1/2 cup mango pulp
    • 1/2 cup fruit juice (orange or apple)
    • 1 tablespoon orange rind
    • 1 dash cinnamon
    • **5 cardamom pods**
    • **1/2 cup pistachios**
    • **2 tablespoons honey**
    • **Seeds from 1 vanilla bean**
    • Mint leaves, for garnish

    Instructions

    1. Peel the pears and slice a small piece off the bottom so they can stand upright. Gently dab each pear with lemon juice to prevent browning and set aside.
    2. In a medium pot, combine the sugar and water. Heat over medium until the sugar dissolves, creating a simple syrup.
    3. In a dry pan, toast the **cardamom pods** over medium heat until they’re fragrant, about 2 minutes. Add the pods to the syrup.
    4. Add mango pulp, fruit juice, orange rind, and a dash of cinnamon to the syrup. Stir to combine.
    5. Submerge the pears in the syrup. Poach on low heat for 15 to 20 minutes, until the pears are tender and have taken on an amber hue from the mango syrup, ensuring they’re completely immersed.
    6. Meanwhile, create the **pistachio crumble** by pulsing pistachios, honey, and vanilla bean seeds in a food processor until coarse and crumbly.
    7. Once the pears are tender, remove them from the syrup and let them cool slightly on a plate.
    8. Garnish each pear with a mint sprig and drizzle with the spicy mango-nectar reduction. Sprinkle the pistachio crumble generously over the top.

    Pro Tips from Meaghan’s Kitchen

    • Choose pears that are firm to the touch for poaching; they hold their shape better during cooking.
    • Don’t skip toasting the cardamom pods. This step is key to releasing their full flavor potential.
    • If you prefer a less sweet dessert, reduce the sugar in the syrup by a tablespoon or two.
    • For an extra zing, consider adding a tiny pinch of saffron to the syrup during poaching.
    • Ensure the syrup fully covers the pears while poaching to ensure even flavor absorption.

    Variations & Dietary Swaps

    • For a gluten-free version, ensure your vanilla bean and other ingredients are certified gluten-free.
    • To spice it up, add a pinch of cayenne pepper to the pistachio crumble for a subtle heat.
    • For a kid-friendly version, serve the poached pears with a scoop of vanilla ice cream instead of the pistachio crumble.

    What to Serve With It

    This exquisite dessert pairs beautifully with a glass of sweet Riesling, offering a refreshing contrast to the rich flavors of the poached pears and pistachio crumble. Alternatively, a dollop of freshly whipped cream can complement the dish’s spicy and sweet notes.

    Storage & Meal Prep

    To store, place the poached pears in an airtight container with their syrup and refrigerate for up to 3 days. The pistachio crumble should be kept separately in an airtight container at room temperature. To reheat, gently warm the pears in their syrup on the stove until heated through. Avoid reheating the crumble to maintain its crunch.

    FAQ

    Can I use canned pears instead of fresh ones?

    While fresh pears provide the best texture and flavor, canned pears can be used in a pinch. Be sure to choose ones that are not overly sweetened and reduce the sugar in the syrup accordingly.

    What other nuts can I use for the crumble?

    If you don’t have pistachios, almonds or hazelnuts make excellent substitutes, offering a similar crunch and nutty flavor.

    Can I make this dish ahead of time?

    Yes, you can prepare the pears and syrup a day in advance and store them in the refrigerator. Just assemble with the pistachio crumble and mint before serving.

    How do I prevent the pears from browning?

    Dabbing the peeled pears with lemon juice, as mentioned in the recipe, will help prevent browning and maintain their fresh appearance.

    Is there a non-alcoholic pairing suggestion?

    A fragrant herbal tea, such as chamomile or jasmine, complements the exotic flavors of this dish beautifully.

    Final Thoughts

    I hope this recipe brings as much joy to your table as it does to mine. It’s a celebration of flavors and textures that invites you to savor each bite. I’d love to hear how your own culinary adventure unfolds — feel free to leave a comment below or share your experience on social media. Happy cooking!

    Related update: Exotic Cardamom-Poached Pears with Spicy Mango-Nectar Reduction and Pistachio Crumble

    Related update: Chai-Spiced Carrot Raisin Chocolate Chip Cookies

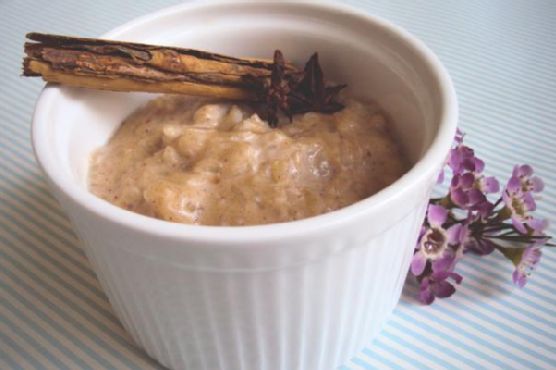
  • Decadent Chai Rice Pudding with Rosewater and Pistachio Crunch | Made by Meaghan Moineau

    Decadent Chai Rice Pudding with Rosewater and Pistachio Crunch | Made by Meaghan Moineau

    Decadent Chai Rice Pudding with Rosewater and Pistachio Crunch

    Imagine the heady aroma of chai spices curling around you as you take a spoonful of creamy rice pudding that feels like a warm hug on a chilly evening. Each bite is a dance of floral and nutty notes, thanks to the luxurious touch of rosewater and a crunchy pistachio topping. This isn’t just any rice pudding—it’s an invitation to indulge in something truly special.

    Personal Story

    Growing up, rice pudding was a staple in our household, a humble dessert that evoked comfort and a sense of home. My grandmother, the matriarch of our kitchen, would stand over the stove, patiently stirring the pot, with the sweet fragrance of vanilla and cinnamon wafting through the air. This simple dish was her way of bringing the family together, sharing stories and laughter around the table.

    One chilly autumn afternoon, craving the nostalgia of those family gatherings, I attempted to recreate her classic rice pudding. It was then I had my first kitchen mishap—spilling a jar of cardamom pods into the simmering milk. Rather than a disaster, it turned into a delightful discovery. The unexpected spice added a new depth to the dish, and I was inspired to experiment further.

    That’s how I stumbled upon the idea of infusing the rice pudding with chai spices. By adding rosewater and a pistachio crunch, I created a dish that pays homage to my roots while offering a new, luxurious twist. This Decadent Chai Rice Pudding with Rosewater and Pistachio Crunch is a testament to how sometimes, a little kitchen accident can lead to culinary magic.

    What Makes This Version Special

    This version of rice pudding is an elevated take on the beloved classic, transformed by the infusion of **aromatic rosewater** and topped with a **pistachio crunch**. The rosewater adds a fragrant, floral note that perfectly complements the warm chai spices, making each bite an experience. The pistachios, toasted to perfection, provide a delightful contrast to the creamy texture of the pudding. It’s a dessert that feels both familiar and indulgently exotic, offering the best of both worlds.

    Flavor Profile

    The flavor profile of this Decadent Chai Rice Pudding with Rosewater and Pistachio Crunch is a celebration of contrasts. The richness of the creamy rice is beautifully balanced by the floral sweetness of the rosewater. The chai spices—cinnamon, cardamom, ginger, and cloves—infuse the pudding with a warm, comforting aroma. The crunchy pistachio topping adds a nutty depth, making every bite a symphony of flavors that lingers on the palate.

    Ingredients

    • 1 cup long grain rice
    • 4 cups whole milk
    • 2 bags English breakfast tea
    • 1 teaspoon cinnamon powder
    • 1 teaspoon ginger powder
    • 4 whole cardamom pods
    • 1 whole star anise
    • 3 large cloves
    • 1 teaspoon vanilla essence
    • 1/2 cup brown sugar
    • 1 tablespoon **rosewater**
    • 1/2 cup **pistachios**, crushed
    • 1 tablespoon honey
    • Pinch of salt

    Instructions

    1. In a small saucepan, combine the milk, tea bags, rice, and all the spices: cinnamon, ginger, cardamom, star anise, and cloves. Bring the mixture to a gentle boil over medium heat.
    2. Once boiling, lower the heat and let it simmer for about 20 minutes, stirring occasionally. This allows the rice to absorb the spice-infused milk.
    3. While the pudding simmers, toast the pistachios in a dry pan over medium heat with a pinch of salt. Stir frequently until they are lightly golden and aromatic, about 5 minutes. Remove from heat and crush coarsely.
    4. After 20 minutes, remove the tea bags from the pudding, and stir in the brown sugar. Increase the heat to high and cook for another 3-4 minutes, stirring continuously until the pudding thickens and turns creamy.
    5. Stir in the vanilla essence and rosewater, ensuring they are evenly distributed. Remove from heat.
    6. Spoon the rice pudding into individual serving bowls. Drizzle with honey and sprinkle the toasted pistachios on top before serving.

    Pro Tips from Meaghan’s Kitchen

    • Rinse the rice in cold water before cooking to remove excess starch and prevent clumping.
    • For a creamier texture, use a combination of whole milk and half-and-half.
    • If you prefer a thicker pudding, let it cool slightly before serving; it will continue to thicken as it cools.
    • Adjust the sweetness to your liking by tasting the pudding before adding the full amount of sugar.
    • For a burst of color and extra flavor, garnish with a sprinkle of edible dried rose petals.

    Variations & Dietary Swaps

    • Vegan Swap: Replace whole milk with coconut milk or almond milk for a dairy-free version.
    • Spice-It-Up Version: Add a pinch of cayenne pepper to the pistachio topping for a subtle heat contrast.
    • Kids-Friendly Version: Reduce the amount of chai spices and serve with a drizzle of chocolate syrup to appeal to younger palates.

    What to Serve With It

    This Decadent Chai Rice Pudding pairs wonderfully with a glass of chilled sweet dessert wine, like a late harvest Riesling, which complements the floral and nutty notes. Alternatively, for a warm beverage pairing, a steaming cup of masala chai enhances the spice profile and rounds out the meal beautifully.

    Storage & Meal Prep

    Leftover rice pudding can be stored in an airtight container in the refrigerator for up to 3 days. To reheat, gently warm on the stovetop over low heat, stirring in a splash of milk to restore its creamy consistency. While it’s best enjoyed fresh, the pudding can also be frozen for up to a month. Thaw overnight in the refrigerator before reheating.

    FAQ

    Can I use a different type of rice?

    Yes, you can use short grain rice for a creamier texture, but adjust the cooking time as it may cook faster than long grain rice.

    Is it possible to make this dessert ahead of time?

    Absolutely! Prepare the pudding a day in advance and store it in the fridge. Add the rosewater and pistachio topping just before serving to maintain freshness.

    What if I don’t have rosewater?

    If rosewater isn’t available, you can substitute it with a few drops of orange blossom water or simply omit it for a classic chai rice pudding experience.

    How do I know when the pudding is ready?

    The pudding is ready when the rice is tender and the mixture has thickened to a creamy consistency. It should coat the back of a spoon without being too runny.

    Final Thoughts

    I hope this Decadent Chai Rice Pudding with Rosewater and Pistachio Crunch becomes a new favorite in your dessert repertoire. It’s a dish that brings warmth and a touch of luxury to any occasion, whether you’re serving it at a family dinner or enjoying a quiet moment for yourself. I’d love to hear how it turns out for you, so feel free to leave a comment below or share your creation on social media. Remember, the kitchen is a place of exploration and joy—happy cooking!

    Related update: Decadent Chai Rice Pudding with Rosewater and Pistachio Crunch

    Related update: Caramelized Fig and Walnut Upside-Down Cake with Rosemary-Honey Drizzle

  • Sumptuous Mediterranean Moussaka with Pistachio-Crusted Eggplants | Made by Meaghan Moineau

    Sumptuous Mediterranean Moussaka with Pistachio-Crusted Eggplants

    Imagine the scent of roasted eggplant mingling with the warm, spicy aroma of cinnamon and nutmeg. The sizzle of sautéing onions and garlic fills the air, drawing you into the kitchen where a Mediterranean feast is unfolding. This isn’t just any moussaka — it’s a Sumptuous Mediterranean Moussaka with Pistachio-Crusted Eggplants, and it’s about to redefine your culinary expectations.

    Personal Story

    My love affair with moussaka began on a sun-soaked trip to Crete, where the vibrant flavors and hospitable locals made every meal an unforgettable experience. One evening, nestled in a cozy taverna overlooking the Aegean Sea, I was served a slice of moussaka that stopped time. The layers of eggplant, rich meat sauce, and creamy béchamel were perfectly balanced, each bite a harmonious dance of flavors.

    Back home, I was determined to recreate that magical dish. My first few attempts were less than stellar, resulting in soggy eggplant and bland béchamel. But with persistence and a few creative twists, I found a version that not only captured the essence of that Cretan evening but elevated it in unexpected ways.

    One day, while rummaging through my pantry, I stumbled upon a bag of pistachios. A light bulb moment occurred — why not add a nutty crust to the eggplant layers? The result was a delightful crunch that contrasted beautifully with the creamy béchamel. My family, who had been my patient taste-testers, were unanimous in their verdict: this was the best moussaka yet.

    And so, the Sumptuous Mediterranean Moussaka with Pistachio-Crusted Eggplants was born, a dish that now holds a special place in my kitchen and heart. It’s a testament to the power of experimentation and the joy of bringing a taste of the Mediterranean home.

    What Makes This Version Special

    This version of moussaka stands out with its unique pistachio-crusted eggplant layers. The crunch of the pistachios adds a delightful texture that transforms the dish from ordinary to extraordinary. Meanwhile, the béchamel sauce is infused with a hint of lemon zest, offering a refreshing lift that brightens the rich, hearty flavors. These tweaks not only elevate the classic moussaka but also provide a new dimension to every bite.

    Flavor Profile

    The Sumptuous Mediterranean Moussaka with Pistachio-Crusted Eggplants is a feast for the senses. Imagine the rich and hearty flavors of a traditional moussaka, now enhanced by a zesty, nutty undertone. The pistachio crust adds a satisfying crunch that complements the savory meat sauce, while the lemon-infused béchamel provides a light, aromatic finish. It’s a symphony of textures and tastes, with each layer bringing something special to the table.

    Ingredients

    • 4 medium-sized eggplants, cut into 1/4 inch slices
    • **1 cup pistachios, finely chopped**
    • 2 tablespoons olive oil
    • 1 teaspoon sea salt
    • 1 tablespoon butter
    • 1/4 cup flour
    • 2 cups warm milk
    • **Zest of 1 lemon**
    • 1/4 cup fresh mint leaves, chopped
    • 3 egg yolks
    • 1/2 teaspoon ground nutmeg
    • 1 pound lean beef
    • 1 onion, finely chopped
    • 2 cloves garlic, minced
    • 1/2 teaspoon ground cinnamon
    • 1/2 teaspoon ground allspice
    • 1/2 teaspoon white salt
    • 1/2 teaspoon ground pepper
    • 1 can (14 oz) tomatoes, crushed
    • 2 tablespoons tomato paste
    • 1 cup feta cheese, crumbled
    • 1 cup bread crumbs

    Instructions

    1. Sprinkle the eggplant slices with sea salt and let them stand for 45 minutes to draw out excess moisture. Rinse thoroughly and pat dry.
    2. Preheat your oven to 180°C (350°F). Coat each eggplant slice with olive oil and dip them into the **finely chopped pistachios**. Arrange on a baking sheet and bake until golden-brown, about 15 minutes per side. Set aside.
    3. In a large skillet, heat olive oil over medium heat. Sauté the onions until soft, about 5 minutes. Add garlic and cook for another minute.
    4. Add the ground beef, breaking it into small pieces as it cooks. Once browned, stir in the crushed tomatoes, cinnamon, allspice, white salt, and ground pepper. Simmer on low heat for about 10 minutes. Mix in the tomato paste and adjust consistency with a little water if needed. Set aside.
    5. For the béchamel, melt butter in a saucepan over medium heat. Add flour and stir constantly until it forms a smooth paste. Gradually whisk in warm milk, bringing it to a gentle boil. Remove from heat and season with ground nutmeg. Whisk in the egg yolks vigorously until smooth. Stir in the **lemon zest** and fresh mint.
    6. Lightly oil a suitable ovenproof baking dish and sprinkle the base with bread crumbs. Layer with pistachio-crusted eggplants, some meat sauce, and crumbled feta cheese. Repeat these layers until the dish is nearly full, finishing with a layer of feta.
    7. Top everything with the lemon-mint béchamel sauce. Cover with foil and bake in the preheated oven for 1 hour.
    8. Remove the foil and let the moussaka set at room temperature for about 45 minutes before serving. This helps the layers to firm up and blend their flavors beautifully.

    Pro Tips from Meaghan’s Kitchen

    • For an even crunchier pistachio crust, toast the pistachios lightly in a dry pan before chopping.
    • Letting the eggplant sit with salt not only removes bitterness but also makes them absorb less oil during baking.
    • Don’t skip the resting time after baking; it’s crucial for achieving neat, well-defined layers when you cut into the moussaka.
    • To save time, make the meat sauce a day ahead. It allows the flavors to meld and makes your kitchen work more manageable.
    • If you prefer a thicker béchamel, simply add a bit more flour to your roux and adjust the milk accordingly.

    Variations & Dietary Swaps

    • Vegetarian Swap: Replace the beef with a mixture of mushrooms and lentils for a hearty vegetarian option.
    • Spice-It-Up Version: Add a teaspoon of crushed red pepper flakes to the meat sauce for a bit of heat.
    • Kids-Friendly Version: Substitute the eggplant with zucchini to make it more appealing to younger palates.

    What to Serve With It

    This Sumptuous Mediterranean Moussaka pairs wonderfully with a glass of chilled Sauvignon Blanc, whose crisp acidity complements the richness of the dish. For a side, consider a classic Greek salad with olives, cucumbers, and a sprinkle of feta cheese to keep the Mediterranean theme going.

    Storage & Meal Prep

    For leftovers, store the moussaka in an airtight container in the fridge for up to four days. It also freezes exceptionally well; just wrap tightly in foil and place in a freezer-safe container for up to two months. Reheat in the oven at 180°C (350°F) until heated through. This dish is perfect for meal prep, as it often tastes even better the next day!

    FAQ

    Can I make this moussaka ahead of time?

    Yes, you can! Prepare the moussaka up to the baking step, cover it, and refrigerate for up to 24 hours. When you’re ready to bake, simply add an extra 10-15 minutes to the cooking time.

    What is the best way to chop pistachios?

    For a fine chop, use a food processor, pulsing a few times until you reach the desired consistency. Be careful not to over-process, as you want small pieces, not a paste.

    How can I prevent the béchamel sauce from curdling?

    Always add the egg yolks off the heat and whisk vigorously. Slowly tempering the yolks with a bit of the hot milk before adding to the sauce can also help prevent curdling.

    What’s a good substitute for feta cheese?

    If you’re not a fan of feta, ricotta cheese can be a milder alternative, or you can use goat cheese for a slightly tangier flavor.

    Can I use pre-cooked meat for the sauce?

    Absolutely. If you have leftover cooked beef, simply crumble it into the sauce after sautéing the onions and garlic.

    Final Thoughts

    Creating this Sumptuous Mediterranean Moussaka with Pistachio-Crusted Eggplants is more than just making dinner; it’s an exploration of texture and flavor that brings the spirit of the Mediterranean into your home. I hope you’ll find as much joy in making and sharing this dish as I do. If you give it a try, please leave a comment or share your version on social media. Happy cooking, my friends!

    Related update: Sumptuous Mediterranean Moussaka with Pistachio-Crusted Eggplants

    Related update: Gourmet Turkey Burgers with Roasted Red Pepper and Feta