Tag: Pecans

  • Ginger-Spiced Caramel Pecan Sticky Buns with Citrus Glaze | Made by Meaghan Moineau

    Ginger-Spiced Caramel Pecan Sticky Buns with Citrus Glaze | Made by Meaghan Moineau

    Ginger-Spiced Caramel Pecan Sticky Buns with Citrus Glaze

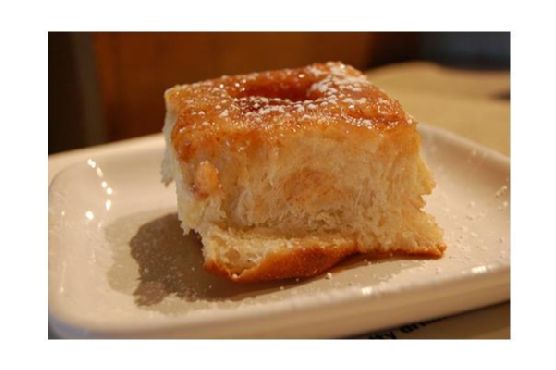
    Picture this: the aromatic warmth of ginger melding with the rich, buttery scent of baking caramel as your kitchen transforms into a cozy haven. The anticipation builds as the sticky buns rise, golden-brown and glistening, ready to be crowned with a bright citrus glaze that promises a refreshing contrast. Welcome to your new favorite morning indulgence.

    Personal Story

    Growing up, weekend mornings were a treasured time in our household. My mom would wake up early, and the scent of freshly baked breakfast treats would nudge me out of bed. It’s a memory etched in my senses, and one I’ve carried into my own kitchen. When I first attempted to recreate her sticky buns, I clumsily dropped a pan of pecans across the floor. It was a kitchen catastrophe, but one that led to the delightful discovery of adding a ginger twist to the mix.

    After that near-disaster, I realized that sometimes, the kitchen gods have a way of nudging us toward new flavor horizons. I found myself thinking about how ginger, with its warm, spicy notes, could add depth to the traditional caramel pecan sticky buns. That’s when I decided to experiment, introducing a zesty hint of ginger and finishing with a citrus glaze.

    This ginger-spiced caramel pecan sticky buns recipe has become a staple in our family, particularly during the chillier months when the warmth of ginger complements the coziness of the season. It’s not just a recipe; it’s a tradition in the making, one sticky, delicious bite at a time.

    As I perfected this recipe, I realized how much I enjoyed the interplay between the buttery sweetness and the bright citrus finish. It’s an unexpected combination that works beautifully, transforming a classic into something uniquely special. Preparing these buns is like a morning meditation, a way to connect with loved ones over a shared, delightful indulgence.

    What Makes This Version Special

    The magic of these Ginger-Spiced Caramel Pecan Sticky Buns lies in their delightful contrast of flavors. By incorporating a zesty hint of ground ginger, we elevate the traditional sticky bun to new heights. This spicy addition blooms in melted butter, enhancing its flavor and infusing the dough with warmth. The final touch is a citrus glaze made by whisking powdered sugar with fresh lemon juice and orange zest. This bright finish balances the rich caramel sweetness, making each bite refreshing and satisfying. It’s a modern twist on tradition that’s sure to become a favorite in your repertoire.

    Flavor Profile

    Imagine sinking your teeth into a warm, buttery bun that’s both soft and chewy. The first taste is an explosion of rich caramel that envelops your senses, while the pecans add a satisfying crunch. As you savor the sticky goodness, the subtle warmth of ginger emerges, leaving a gentle spice on your palate. Just when you think it couldn’t get better, the citrus glaze swoops in with its fresh, tangy kiss, cutting through the sweetness and leaving you reaching for another bite. It’s an intricate dance of flavors and textures that will keep you coming back for more.

    Ingredients

    • 1 cup of brown sugar
    • 1/2 cup of butter, melted
    • 1 package of butterscotch pudding (not instant)
    • 1 cup of pecans, roughly chopped
    • 1 package of frozen Rich’s rolls
    • **1 tablespoon ground ginger**
    • **Zest of 1 orange**
    • **Juice of 1 fresh lemon**
    • 1 cup of powdered sugar
    • 1/2 teaspoon of sea salt

    Instructions

    1. Spray a 10-inch tube pan generously with a no-stick cooking spray. Evenly spread the pecans across the bottom of the pan to ensure a crunchy base for the buns.
    2. Arrange the frozen Rich’s rolls on top of the pecans. Sprinkle the package of butterscotch pudding over the rolls to provide an extra layer of flavor.
    3. In a small saucepan, melt the butter over medium heat. Once melted, add the ground ginger and bloom it until it releases a fragrant aroma, about 1-2 minutes.
    4. Mix the brown sugar into the ginger-infused butter until the sugar dissolves completely.
    5. Pour the buttery mixture over the rolls, ensuring even coverage. This will soak into the rolls as they rise and bake.
    6. Cover the pan with a clean towel and let it stand overnight at room temperature. This allows the rolls to thaw and rise perfectly.
    7. Preheat your oven to 350 degrees Fahrenheit. Once preheated, bake the buns for 20-25 minutes, or until golden-brown and bubbling with caramel.
    8. While the buns bake, prepare the citrus glaze. In a small bowl, whisk together the powdered sugar, orange zest, and fresh lemon juice until smooth.
    9. Once baked, carefully turn the buns over and out onto a serving plate while they’re still hot. This ensures the sticky caramel and pecans coat the top of the buns.
    10. Drizzle the citrus glaze generously over the warm buns and let it set slightly before serving.

    Pro Tips from Meaghan’s Kitchen

    • When blooming the ginger, keep the heat at medium to prevent burning. Properly bloomed ginger will have a rich and aromatic scent.
    • For a more pronounced citrus flavor, add a splash of orange juice to the glaze.
    • Use a serrated knife to cut the sticky buns for clean slices without squishing the rolls.
    • If you’re short on time, you can speed up the overnight rise process by placing the covered pan in a warm oven (turned off) for 2-3 hours.
    • Experiment with different nut combinations, like walnuts or almonds, to suit your preference.

    Variations & Dietary Swaps

    • Vegetarian Swap: This recipe is naturally vegetarian, but ensure the butterscotch pudding is gelatin-free.
    • Spice-It-Up Version: Add a pinch of cayenne pepper to the blooming ginger for a spicy kick that complements the sweetness.
    • Kids-Friendly Version: Omit the ginger and citrus glaze for a classic caramel pecan sticky bun that kids will love.

    What to Serve With It

    These decadent Ginger-Spiced Caramel Pecan Sticky Buns pair beautifully with a cup of spiced chai tea, which complements the warmth of the ginger. Alternatively, serve them with a glass of freshly squeezed orange juice for a refreshing breakfast treat. The citrus notes in the juice enhance the glaze, making every bite a delight.

    Storage & Meal Prep

    If you have leftovers (a rarity, I assure you), store them in an airtight container in the fridge for up to three days. To reheat, warm them in the oven at 300 degrees Fahrenheit for about 10 minutes, or until heated through. You can also freeze the baked sticky buns for up to a month. Just defrost them in the fridge overnight and reheat as needed.

    FAQ

    Can I use fresh rolls instead of frozen?

    Absolutely! Just shorten the rise time since fresh dough won’t need to thaw overnight.

    What if I don’t have a tube pan?

    You can use a Bundt pan or any similar-sized baking dish. Just ensure it has enough depth for the buns to rise.

    Is there a substitute for butterscotch pudding?

    If butterscotch isn’t available, vanilla pudding works as a substitute, though the flavor will be slightly different.

    How can I prevent the buns from sticking to the pan?

    Make sure to spray the pan generously with non-stick cooking spray. Turning them out while they’re still hot also helps.

    Can I make the dough from scratch?

    Yes, you can use any sweet roll dough recipe. Just ensure it’s enough to fill a 10-inch tube pan.

    Final Thoughts

    There you have it, friends — a recipe that’s not only a treat for the taste buds but also a warm hug in dough form. I hope you enjoy making these Ginger-Spiced Caramel Pecan Sticky Buns with Citrus Glaze as much as I enjoy sharing them with you. Don’t forget to drop a comment below with your thoughts or share your baking adventure on social media. Let’s spread the love, one sticky bun at a time!

    Related update: Ginger-Spiced Caramel Pecan Sticky Buns with Citrus Glaze

    Related update: Tropical Coconut Flour Pancakes with Spiced Mango-Blueberry Compote
  • Rustic Sourdough Stuffing with Calvados-Sautéed Apples and Pecans | Made by Meaghan Moineau

    Rustic Sourdough Stuffing with Calvados-Sautéed Apples and Pecans | Made by Meaghan Moineau

    Rustic Sourdough Stuffing with Calvados-Sautéed Apples and Pecans

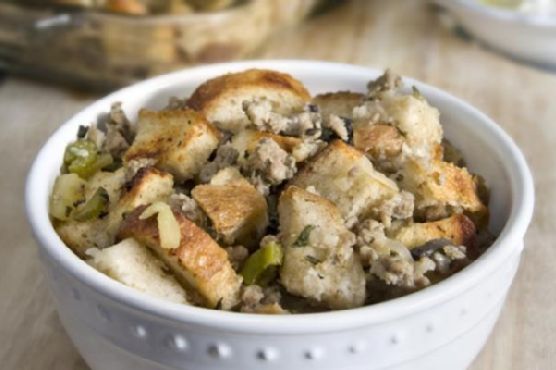
    Imagine the aroma of golden-brown sourdough, the warm scent of sautéed apples mingling with a hint of thyme, and the irresistible crunch of toasted pecans. This isn’t just any stuffing; it’s a symphony of textures and flavors that elevates your holiday table. Welcome to the world of Rustic Sourdough Stuffing with Calvados-Sautéed Apples and Pecans.

    Personal Story

    As a child, Thanksgiving was a bustling affair at our house, with bustling activity and wafting aromas that set the stage for our family’s culinary traditions. Among the army of dishes, it was the stuffing, or “dressing” as my Southern grandmother called it, that held a special place in my heart. I remember peeking over the countertop, watching my grandmother deftly mix and season with the seemingly magical touch only she possessed.

    Fast forward to a few years ago, when I decided it was time to put my own spin on this cherished family dish. Armed with my grandmother’s recipe, I ventured into unfamiliar territory, driven by a quest for something new yet nostalgically comforting. That was the year I discovered Calvados, a French apple brandy, while wandering through a local market. Its rich, fruity notes spoke to me, whispering promises of a stuffing that could bridge past and present.

    In my small kitchen, as I casually sautéed shallots and mushrooms, I reached for the Calvados, deglazing the pan with a confident flair. The transformation was immediate — an aromatic richness enveloped the room, infusing the air with a promise of something extraordinary. Toasted pecans soon followed, adding a nutty depth that contrasted beautifully with the apple notes.

    When the dish emerged from the oven, the top golden and inviting, I knew I had found it — a version of stuffing that honored tradition but boldly embraced new flavors. This dish has since become a staple at my own holiday gatherings, a testament to the power of family recipes and the audacity of culinary exploration.

    What Makes This Version Special

    The soul of this Rustic Sourdough Stuffing lies in its careful balance of classic and contemporary. While many stuffing recipes rely on white wine for deglazing, I opted for Calvados. This choice imparts a fruity depth that elevates the entire dish. The toasted pecans, another key upgrade, offer a delightful crunch that contrasts with the tender crumb of the sourdough.

    Furthermore, by toasting the sourdough cubes, we introduce an extra layer of texture, ensuring that each bite captures the essence of the stuffing — crispy on the outside, soft and flavorful on the inside. This version respects the traditional expectations of stuffing while introducing a gourmet twist that makes it the star of the meal.

    Flavor Profile

    Nutty, aromatic, and subtly sweet from the Calvados-sautéed apples, this stuffing dances on the palate with a savory umami backbone. The toasted pecans inject a satisfying crunch, while the sourdough bread provides a hearty, rustic base. Fresh thyme and sage weave through the dish, grounding it with their earthy fragrance, all culminating in a mouthwatering experience that’s as comforting as it is sophisticated.

    Ingredients

    • 1 pound sausage
    • 3 tablespoons butter, divided
    • 2 shallots, minced
    • 2 cloves garlic, minced
    • 2 diced celery stalks
    • 1 large apple, diced
    • 1 cup diced portabello mushrooms
    • 1 tablespoon fresh thyme, chopped
    • 1 tablespoon fresh sage, chopped
    • 1/2 cup **Calvados (apple brandy)**
    • 8 cups **whole wheat diced sourdough bread**
    • 2 cups chicken broth
    • Salt and pepper to taste
    • 1 cup **toasted pecans**
    • 1/2 cup grated Parmesan cheese

    Instructions

    1. Preheat your oven to 350°F (175°C). Spread the diced sourdough bread on a baking sheet and toast in the oven for 10-12 minutes, until golden and slightly crispy. Set aside.
    2. In a large skillet over medium heat, cook the sausage until no longer pink, about 10 minutes. Drain the fat and set the sausage aside.
    3. In the same skillet, melt 1 tablespoon of butter. Add the shallots, garlic, celery, apple, and mushrooms. Sauté until tender, about 5-7 minutes. Sprinkle with fresh thyme and sage.
    4. Pour the **Calvados** over the vegetable mixture and deglaze the pan, scraping up any brown bits. Sauté for another 2 minutes to cook off the alcohol.
    5. In a large bowl, combine the cooked sausage, vegetable mixture, 2 tablespoons of butter, toasted sourdough cubes, and **toasted pecans**. Pour the chicken broth over the stuffing, stirring well to ensure the bread is moist but not soggy. Season with salt and pepper to taste.
    6. Transfer the stuffing mixture to a 9×13 inch casserole dish. Cover with foil and bake for 20 minutes. Remove the foil, dot the top with the remaining tablespoon of butter, and bake uncovered for an additional 10 minutes, or until the top is browned.
    7. Sprinkle with grated Parmesan cheese before serving immediately, enjoying the symphony of flavors and textures.

    Pro Tips from Meaghan’s Kitchen

    • For an even toastier sourdough, cube and leave the bread out overnight to dry.
    • Don’t rush the deglazing process with the Calvados — let it simmer until the alcohol’s sharp edge softens, leaving behind deep, fruity notes.
    • For an extra layer of flavor, try roasting the pecans with a pinch of cayenne for a subtle kick.
    • If the stuffing seems a bit dry before baking, add an extra splash of chicken broth to ensure perfect moisture.
    • For a glossy finish, brush the top of the baked stuffing with a bit of melted butter before serving.

    Variations & Dietary Swaps

    • Vegetarian Version: Swap the sausage for sautéed mushrooms or a plant-based sausage alternative, and use vegetable broth instead of chicken broth.
    • Spice-It-Up: Add a pinch of red pepper flakes to the sautéed vegetables for a gentle heat.
    • Kids-Friendly: Reduce the amount of Calvados, opting instead for apple cider, and omit the pecans if nut allergies are a concern.

    What to Serve With It

    This Rustic Sourdough Stuffing pairs beautifully with a crisp, chilled apple cider or a glass of semi-dry Riesling. On the plate, accompany it with roasted turkey or chicken, a side of green beans almondine, and a dollop of cranberry sauce to echo the apple notes in the stuffing.

    Storage & Meal Prep

    To store leftovers, place the stuffing in an airtight container and refrigerate for up to 3 days. For longer storage, freeze individual portions for up to 2 months. Reheat in a preheated oven at 350°F (175°C) for about 15-20 minutes, or until warmed through. Add a splash of broth if the stuffing seems dry.

    FAQ

    Can I make this stuffing ahead of time?

    Yes! Prepare the stuffing up to a day in advance, cover it tightly, and store in the fridge. Bake it fresh on the day of serving for the best texture and flavor.

    What can I use if I don’t have Calvados?

    If you don’t have Calvados, a good substitute is regular apple cider or a non-alcoholic apple juice to maintain the fruity undertones.

    How do I prevent the stuffing from becoming soggy?

    Ensure that the bread is properly toasted and that you add the broth gradually, checking for moisture. The bread should be moist but not waterlogged.

    Can I use different types of bread?

    Absolutely! While sourdough adds a tangy depth, you can use any hearty bread like a rustic Italian loaf or even cornbread for a sweeter variation.

    Is it possible to make this dish gluten-free?

    Yes, simply use your favorite gluten-free bread and ensure all other ingredients are certified gluten-free.

    Final Thoughts

    There’s something magical about elevating a classic dish like stuffing with a few thoughtful twists. I hope this Rustic Sourdough Stuffing with Calvados-Sautéed Apples and Pecans finds a place at your table, bringing joy and warmth to your gatherings. If you try it, I’d love to hear about your experience in the comments below. Share your twists and variations, and let’s keep the conversation — and the flavors — flowing!

    Related update: Rustic Sourdough Stuffing with Calvados-Sautéed Apples and Pecans

    Related update: Smoky Chipotle Corn Pudding with Roasted Garlic and Lime

  • Maple Pecan Honey Cornbread with Orange Zest | Made by Meaghan Moineau

    Maple Pecan Honey Cornbread with Orange Zest | Made by Meaghan Moineau

    Maple Pecan Honey Cornbread with Orange Zest

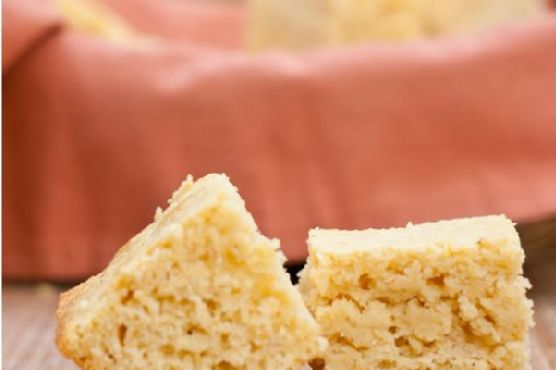
    Imagine this: the golden crust of a freshly baked cornbread, still warm from the oven, with a sweet aroma that dances through your kitchen. A slice reveals a moist, sun-kissed interior dotted with crunchy pecans and hints of bright orange zest. This is not your grandmother’s cornbread — it’s something a little more magical.

    My Love Affair with Cornbread

    Growing up in the South, cornbread was more than just a side dish; it was a family staple, gracing our table during Sunday dinners, holiday feasts, and even simple weekday suppers. My earliest memory of this comforting dish is watching my grandmother expertly mix cornmeal and buttermilk in her old ceramic bowl, a routine she had perfected over decades. I vividly remember the scent of it baking, mingling with the savory tang of collard greens or the rich aroma of a beef stew.

    However, my journey to crafting the perfect cornbread was not without its hiccups. I recall a particularly chaotic Thanksgiving where, in my excitement to impress the family with my own take on the classic, I inadvertently forgot the baking powder. The result was a flat, sad disk that my family graciously ate with polite smiles. That little mishap taught me a valuable lesson about the science of baking and the importance of precision.

    Determined to redeem myself, I spent months experimenting with different ingredients and techniques, seeking to elevate the traditional recipe without losing its comforting soul. It was during a trip to a local farmer’s market that I stumbled upon fresh pecans and a basket of fragrant oranges, sparking an idea. What if I could infuse my cornbread with these vibrant flavors? Hence, the Maple Pecan Honey Cornbread with Orange Zest was born, a creation that has since become a beloved staple in my home.

    What Makes This Version Special

    This isn’t just any cornbread recipe, and here’s why: by infusing the batter with aromatic **orange zest** and crunchy **pecans**, I’ve added layers of texture and flavor that transform this humble side into a standout dish. The warm, earthy notes of **maple syrup** replace the usual vanilla, giving it a subtle sweetness that’s both comforting and sophisticated. Each element plays its part in creating a cornbread that is vibrant, complex, and utterly satisfying.

    Flavor Profile

    The Maple Pecan Honey Cornbread with Orange Zest bursts with a sweet and nutty profile, where each bite reveals a bright citrus aroma and a warm maple undertone. The cornmeal provides a heartiness, while the pecans add a delightful crunch. The orange zest weaves a thread of freshness throughout, ensuring a balanced bite that is both familiar and refreshingly new.

    Ingredients

    • 1 cup corn meal
    • 1 cup flour
    • 1 tablespoon baking powder
    • 1/2 cup white sugar
    • 1/2 teaspoon salt
    • 1/4 cup **honey**
    • 1/4 cup **maple syrup**
    • 1 large egg
    • 1 cup milk
    • 1/2 cup melted butter
    • 1 tablespoon grated **orange zest**
    • 1/2 cup chopped **pecans**

    Instructions

    1. Preheat your oven to 350°F (175°C) and grease a 9×9 inch baking pan.
    2. In a large bowl, combine the corn meal, flour, baking powder, sugar, and salt. Whisk these dry ingredients together until well mixed.
    3. In a separate bowl, whisk together the honey, maple syrup, egg, and milk. Ensure the mixture is smooth and the honey is fully integrated.
    4. Pour the wet ingredients into the dry ingredients and stir until just combined. Avoid over-mixing as this can lead to a dense cornbread.
    5. Gently fold in the melted butter, followed by the grated orange zest. Be careful to preserve the citrus aroma by folding lightly.
    6. Heat a dry skillet over medium heat and toast the pecans until they are fragrant and slightly golden, about 3-4 minutes. This step enhances their flavor and crunch.
    7. Fold the toasted pecans into the batter, distributing evenly.
    8. Pour the batter into the prepared pan and smooth the top with a spatula. Bake in the preheated oven for 25-30 minutes, or until the top is golden-brown and a toothpick inserted into the center comes out clean.
    9. Allow the cornbread to cool in the pan for at least 10 minutes before slicing. Serve warm.

    Pro Tips from Meaghan’s Kitchen

    • Use fresh orange zest for maximum flavor. Store-bought zest can sometimes be dry and lack vibrancy.
    • To ensure even mixing, bring your egg and milk to room temperature before combining with other ingredients.
    • If you prefer a slightly sweeter cornbread, try drizzling a bit of maple syrup over the top before serving.
    • For a more robust flavor, use dark maple syrup instead of the regular one.
    • Letting the cornbread cool slightly before cutting will make it easier to get clean slices.

    Variations & Dietary Swaps

    • Vegetarian Swap: Substitute the butter with a plant-based alternative like coconut oil or vegan butter for a vegetarian-friendly version.
    • Spice-It-Up Version: Add a teaspoon of cinnamon or nutmeg to the dry ingredients for a warm, spiced version.
    • Kids-Friendly Version: Reduce the orange zest to a teaspoon and add in a handful of mini chocolate chips for a sweeter, kid-approved treat.

    What to Serve With It

    Pair this Maple Pecan Honey Cornbread with a refreshing glass of iced green tea or a light citrus salad to complement its flavors. It’s also a fantastic side for hearty soups or chili, where its sweet nuttiness can shine against savory, spicy notes.

    Storage & Meal Prep

    Store any leftover cornbread in an airtight container at room temperature for up to 3 days. For longer storage, wrap individual slices in plastic wrap and place them in a zip-top freezer bag. Freeze for up to 3 months. To reheat, simply thaw at room temperature and warm in a 350°F oven for about 10 minutes.

    FAQ

    Can I use whole wheat flour instead of all-purpose flour?

    Yes, you can substitute whole wheat flour, but it may result in a denser texture. Consider using half whole wheat and half all-purpose to maintain a lighter crumb.

    How can I make this cornbread gluten-free?

    To make it gluten-free, you can use a 1:1 gluten-free baking flour blend in place of the all-purpose flour. Ensure your cornmeal is also certified gluten-free.

    What if I don’t have fresh oranges?

    If fresh oranges aren’t available, you can use store-bought orange juice and a teaspoon of orange extract as a substitute. However, fresh zest is recommended for the best flavor.

    Can I add other nuts or seeds?

    Absolutely! Feel free to swap the pecans for walnuts or even add sunflower seeds for extra crunch.

    How do I know when the cornbread is done?

    The cornbread is done when the top is golden-brown and a toothpick inserted into the center comes out clean. If the top browns too quickly, cover it with foil and continue baking.

    Final Thoughts

    There you have it, my dear kitchen adventurers, a Maple Pecan Honey Cornbread with Orange Zest that is sure to become a favorite in your baking repertoire. I hope this recipe brings warmth and joy to your table, just as it has to mine. Please feel free to leave comments about how your cornbread turned out or any tweaks you made. Sharing is caring, after all — let’s spread the cornbread love!

    Related update: Maple Pecan Honey Cornbread with Orange Zest

    Related update: Spicy Maple-Roasted Autumn Vegetables with Herbed Goat Cheese Drizzle

  • Decadent Caramel Bourbon Apple Brown Betty | Made by Meaghan Moineau

    Decadent Caramel Bourbon Apple Brown Betty | Made by Meaghan Moineau

    Decadent Caramel Bourbon Apple Brown Betty

    Picture this: a cozy kitchen filled with the warm, inviting aroma of sweet spiced apples mingling with the rich, buttery scent of freshly toasted bread. As the apples soften and release their juices, the air becomes heavy with notes of caramel and a whisper of bourbon. It’s an olfactory delight that promises comfort and indulgence in every bite.

    My Journey with Apple Brown Betty

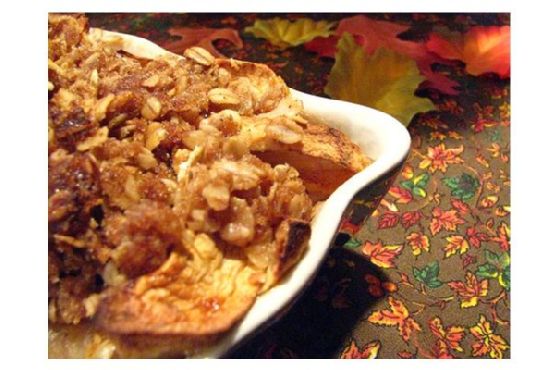
    My love affair with Apple Brown Betty began in my grandmother’s sun-dappled kitchen. Every fall, she would orchestrate a symphony of flavors with the simplest of ingredients: apples picked from the backyard, day-old bread, and a dusting of brown sugar and cinnamon. It was a humble dessert, but to me, it was magic. I remember the way the top layer would turn irresistibly crispy, giving way to the tender, spiced apples beneath. Each spoonful was a taste of nostalgia, a reminder of her warm embrace and endless love.

    But let me share a little secret: not all my adventures with Apple Brown Betty were seamless. There was the time I ambitiously tried to make it for a Thanksgiving potluck, only to discover I’d forgotten to buy apples. I had to improvise with pears and, though delicious, it just wasn’t the same. It taught me an important lesson about the integrity of ingredients and the stories they carry. The apples were more than a flavor — they were a bridge to my past.

    Years later, as I grew more confident in my culinary skills, I decided to give this classic dessert an adult twist. Inspired by a bottle of bourbon gifted by a dear friend and a craving for something a little more decadent, I embarked on a mission to elevate my beloved Apple Brown Betty. The result? A rich caramel bourbon sauce that transforms each layer of apples into something truly luxurious. And for a touch of crunch, a sprinkle of candied pecans that adds a delightful contrast to the soft, spiced filling.

    What Makes This Version Special

    This version of Apple Brown Betty takes a beloved classic and infuses it with a touch of indulgence that feels both familiar and exciting. The addition of a **caramel bourbon sauce** brings an elevated richness, enhancing the natural sweetness of the apples while adding a smoky depth that’s utterly irresistible. But that’s not all. The **candied pecans** I use for this recipe add a delightful crunch, offering a nutty counterpoint that pairs perfectly with the soft, buttery bread cubes.

    By toasting the bread cubes before layering them with the apples, we enhance their texture and flavor, ensuring that the final dessert has a satisfying crispness that contrasts beautifully with the tender apple layers. This upgraded version is not just an Apple Brown Betty, but an experience — one that marries tradition with a modern twist, creating a dessert that’s perfect for cozy evenings and special occasions alike.

    Flavor Profile

    Prepare your senses for a journey through layers of warm, rich flavors with this Decadent Caramel Bourbon Apple Brown Betty. The first bite greets you with the buttery crunch of toasted bread, mingled with the toasty sweetness of caramel. As you delve deeper, the apples reveal themselves — tender and juicy, infused with the aromatic spice of cinnamon and the sophisticated warmth of bourbon. The candied pecans punctuate the experience, adding a nutty sweetness that lingers on your palate, making each spoonful a harmonious blend of textures and tastes.

    Ingredients

    • 5 cups of diced apples, peeled and cored
    • 3 cups of cubed bread (preferably day-old)
    • **1/2 cup of butter, melted**
    • 1/2 cup of white sugar
    • 1 teaspoon of cinnamon
    • 1 teaspoon of nutmeg
    • Juice of 1 lemon
    • **1/2 cup of caramel sauce**
    • **1/4 cup of bourbon**
    • **1/2 cup of candied pecans**

    Instructions

    1. Preheat your oven to 375°F (190°C). Butter a soufflé dish that holds 1-1/2 quarts to ensure the dessert doesn’t stick.
    2. In a large bowl, mix the diced apples with the white sugar, cinnamon, and nutmeg until well combined. Add the lemon juice and toss to coat, which helps to prevent the apples from browning and enhances their flavor.
    3. On a baking sheet, spread the cubed bread and toast in the oven for about 10 minutes, or until lightly golden-brown. This step not only intensifies the bread’s flavor but also helps it absorb the delicious apple juices without becoming soggy.
    4. In a small saucepan over medium heat, combine the **caramel sauce** with the **bourbon**, stirring until the mixture is smooth and aromatic. This will be our luscious drizzle that ties all the flavors together.
    5. Begin layering in the prepared soufflé dish: start with a base layer of toasted bread cubes. Add a layer of the apple mixture, followed by a drizzle of the caramel bourbon sauce. Dot with some of the melted butter.
    6. Repeat the layering process, ending with a top layer of bread cubes. Make sure the dish is well-heaped, as the ingredients will settle as they bake.
    7. Cover the dish with foil and bake in the preheated oven for 30 minutes.
    8. Remove the foil and continue baking for an additional 30 minutes, or until the apples are tender and the top is a beautiful golden-brown.
    9. Once out of the oven, sprinkle the **candied pecans** over the top for a finishing touch.

    Pro Tips from Meaghan’s Kitchen

    • Choose apples that hold up well during baking, like Granny Smith or Honeycrisp, for the best texture.
    • If your caramel sauce is too thick, gently warm it before mixing with the bourbon to ensure a smooth consistency.
    • For extra depth of flavor, consider adding a pinch of salt to the caramel bourbon mixture.
    • You can prepare the bread cubes and apple mixture a day ahead, saving you time on the day of baking.
    • If you prefer a less sweet dessert, reduce the sugar to 1/3 cup and let the natural sweetness of the apples shine.

    Variations & Dietary Swaps

    • Vegetarian Swap: Use a plant-based butter alternative and ensure your caramel sauce contains no dairy for a vegan-friendly dessert.
    • Spice-It-Up Version: Add a pinch of ground cloves or ginger to the apple mixture for a spicier kick.
    • Kids-Friendly Version: Omit the bourbon and use a splash of apple juice instead for a family-friendly treat.

    What to Serve With It

    This Decadent Caramel Bourbon Apple Brown Betty pairs beautifully with a scoop of vanilla bean ice cream, allowing the cold, creamy texture to balance the warm, spiced flavors of the dessert. For a cozy beverage pairing, consider a glass of spiced cider — the subtle warmth of the spices will complement the dessert wonderfully.

    Storage & Meal Prep

    Any leftovers can be stored in an airtight container in the fridge for up to three days. For longer storage, wrap portions individually and freeze for up to a month. When you’re ready to enjoy your Apple Brown Betty again, simply reheat in a 350°F (175°C) oven until warmed through, or microwave on medium power to maintain the dessert’s delightful texture.

    FAQ

    Can I use a different type of bread?

    Absolutely! While day-old white bread works well, you can experiment with brioche or challah for a richer flavor, or even whole wheat if you prefer a heartier texture.

    What can I use if I don’t have bourbon?

    If bourbon isn’t available, you can substitute it with a similar spirit like rum or omit it altogether for a non-alcoholic version.

    How can I make this gluten-free?

    Simply replace the bread cubes with a gluten-free bread variety. Make sure all other ingredients, like the caramel sauce, are also gluten-free.

    Does the alcohol cook out?

    Yes, most of the alcohol in the bourbon will cook off during baking, leaving behind just the rich, complex flavors.

    Can I prepare this dish in advance?

    Yes! You can assemble the dish a day in advance and store it in the fridge. Bake it fresh before serving for the best results.

    Final Thoughts

    There you have it — a sumptuous twist on the classic Apple Brown Betty, perfect for impressing guests or simply indulging yourself. I hope you find as much joy in making and eating this dessert as I do. If you try it, I’d love to hear your thoughts and see your creations! Share your experiences in the comments below, and don’t hesitate to pass this recipe along to fellow dessert lovers.

    Related update: Decadent Caramel Bourbon Apple Brown Betty

    Related update: Almond Amaretto Cloud Cake with Rosewater Marzipan Glaze