Tag: Nutmeg

  • Spiced Loquat Pie with Maple-Oat Crumble Topping | Made by Meaghan Moineau

    Spiced Loquat Pie with Maple-Oat Crumble Topping | Made by Meaghan Moineau

    Spiced Loquat Pie with Maple-Oat Crumble Topping

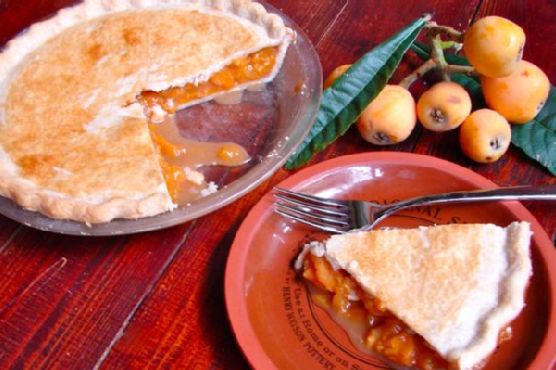
    Picture this: the sun setting over the turquoise waters of Bermuda, a gentle breeze carrying the scent of tropical fruit ripening in the warmth of the day. Now, imagine slicing into a golden-brown loquat pie, the sweet and tart filling bubbling beneath a buttery, maple-oat crumble. This isn’t just any pie; it’s a taste of Bermuda’s soul, elevated with a personal twist.

    Personal Story

    My love affair with loquats began during a family trip to Bermuda. While most tourists were captivated by the island’s pink sand beaches, I was enchanted by the loquat trees lining the streets. These small, golden-hued fruits were unfamiliar to me at the time, but their succulent sweetness and slight tartness quickly captured my heart. I remember the first time I bit into a loquat — its juicy flesh bursting with flavor, like a sunbeam captured in fruit form.

    Back home, I yearned to recreate that island magic. On a crisp autumn day, I decided to channel my inner Bermudian baker and whip up a loquat pie. But, as any home cook knows, the first attempt rarely goes as planned. My initial pie was delicious, but something was missing. It lacked the extra layer of texture and warmth that my taste memory craved.

    That’s when inspiration struck. Why not add a maple-oat crumble topping for a sweet, crunchy contrast to the silky loquat filling? This was the twist that transformed the pie from delightful to downright irresistible. The combination of nutmeg and maple in the crumble added a dimension of warmth and complexity that harmonized beautifully with the natural sweetness and tang of the loquats.

    Now, whenever I bake this pie, I’m transported back to those Balmy Bermudian evenings, and I can’t help but smile at how a simple tweak made all the difference.

    What Makes This Version Special

    This Spiced Loquat Pie with Maple-Oat Crumble Topping isn’t your average pie. What sets it apart is the tantalizing maple-oat crumble that crowns it. This topping not only adds a delightful crunch but also infuses the pie with the subtle sweetness of maple and the earthy warmth of nutmeg. The result? A dessert experience that’s as comforting as it is sophisticated. Each slice is a testament to how a simple addition can elevate a classic dish to new heights, bringing layers of flavor and texture that make every bite a revelation.

    Flavor Profile

    Imagine a pie that’s warm and spiced, with a delicate balance of sweet and tart flavors. The loquats provide a lush, fruity base that’s kissed by hints of cinnamon and allspice, creating a harmonious blend of tropical and familiar spices. The maple-oat crumble topping is the pièce de résistance — buttery and crunchy, with a nutty depth that complements the pie’s juicy filling. As you bite into this pie, the flavors unfold like a story, each ingredient playing its part in a sweet symphony that lingers long after the last crumb is gone.

    Ingredients

    • 2 lbs fresh loquats, washed, quartered, and seeds removed
    • 1 cup water
    • 1 cup sugar
    • 1/2 tsp cinnamon
    • 1/4 tsp allspice
    • 1/4 tsp salt
    • 1/4 cup flour
    • Ginger pastry for a 9-inch pie crust
    • **1/2 cup rolled oats**
    • **1/4 cup maple syrup**
    • **1/4 cup brown sugar**
    • 1/4 tsp nutmeg
    • **2 tbsp butter**

    Instructions

    1. Preheat your oven to 450°F (232°C).
    2. In a medium saucepan, combine the loquats and water. Cook over medium heat until the loquats are tender, about 15 minutes.
    3. Sift together the sugar, cinnamon, allspice, salt, and flour. Stir this mixture into the loquats, continuing to cook over medium heat until the mixture thickens. Remove from heat and let it cool slightly.
    4. While the filling cools, prepare your ginger pastry for a 9-inch pie plate. Roll out the bottom crust and fit it into the pie plate.
    5. Toast the rolled oats in a small pan with the butter and brown sugar over low heat until golden and fragrant. This enhances their flavor and adds a delicious layer to the crumble.
    6. In a separate bowl, combine the toasted oats with the maple syrup and nutmeg to create the crumble topping.
    7. Once the loquat filling is partially cooled, pour it into the prepared pie dish containing the bottom crust. Spread the maple-oat crumble evenly over the top.
    8. Place the pie in the preheated oven and bake for 10 minutes. Reduce the temperature to 350°F (177°C) and continue baking for an additional 30 minutes, or until the crust is golden-brown and the filling is bubbling.
    9. Allow the pie to cool slightly before serving, letting the flavors meld and the filling set.

    Pro Tips from Meaghan’s Kitchen

    • Choose ripe loquats for the best flavor; they should be soft to the touch with a vibrant orange hue.
    • To prevent your pie crust from becoming soggy, brush it with a thin layer of egg white before adding the filling.
    • For an added depth of flavor, try incorporating a dash of freshly grated ginger into the loquat filling.
    • Let your pie cool completely before slicing to ensure clean, neat cuts and a well-set filling.
    • If you’re short on time, prepare the crumble topping a day in advance and store it in the refrigerator.

    Variations & Dietary Swaps

    • Vegetarian Swap: Substitute the butter in the crumble with coconut oil for a plant-based version.
    • Spice-It-Up Version: Add a pinch of cayenne pepper to the loquat filling for a surprising kick.
    • Kids-Friendly Version: Replace some of the allspice with vanilla extract for a milder, sweeter taste that kids love.

    What to Serve With It

    To complement this spiced loquat pie, pair it with a chilled glass of late harvest Riesling. The wine’s sweetness echoes the pie’s fruity notes, while its acidity cuts through the richness of the crumble. For an indulgent treat, serve a slice of pie with a scoop of creamy vanilla bean ice cream. The cold, velvety ice cream contrasts beautifully with the warm, spiced filling, making each bite an absolute delight.

    Storage & Meal Prep

    Store any leftover pie in the refrigerator, covered with foil or plastic wrap, for up to 3 days. If you wish to freeze the pie, wrap it tightly in plastic wrap and then in aluminum foil to prevent freezer burn. It will keep for up to 2 months. To reheat, thaw the pie overnight in the refrigerator, then warm it in a 350°F (177°C) oven for about 15-20 minutes until heated through.

    FAQ

    Can I use canned loquats instead of fresh ones?

    While fresh loquats offer the best flavor and texture, canned loquats can be used in a pinch. Just be sure to drain them well before cooking.

    What if I can’t find loquats at my local store?

    If loquats are out of reach, apricots make a great substitute due to their similar sweetness and tartness.

    Can I make this pie gluten-free?

    Absolutely! Use a gluten-free flour blend for the crust and filling, and make sure your oats are certified gluten-free.

    How do I know when the pie is fully baked?

    The pie is ready when the crust is golden-brown and the filling is bubbling around the edges. You can also insert a knife into the filling to check if it’s thickened properly.

    Can I make the pie crust from scratch?

    Definitely! A homemade crust can add extra flavor and flakiness. Use your favorite pie crust recipe or try one with a hint of ginger for added spice.

    Final Thoughts

    There you have it — a Spiced Loquat Pie with Maple-Oat Crumble Topping that’s sure to become a cherished favorite in your dessert repertoire. Whether you’re sharing it with family or savoring a slice solo, this pie is a celebration of flavors and textures that brings a taste of Bermuda to your home. I’d love to hear how your pie turns out, so feel free to share your baking adventures in the comments below. And if you enjoyed this recipe, don’t forget to share it with your fellow food enthusiasts! Here’s to bringing a little bit of island magic into our kitchens, one slice at a time.

    Related update: Spiced Loquat Pie with Maple-Oat Crumble Topping

  • Spiced Carrot Cake Pancakes with Maple Mascarpone Cream | Made by Meaghan Moineau

    Spiced Carrot Cake Pancakes with Maple Mascarpone Cream | Made by Meaghan Moineau

    Spiced Carrot Cake Pancakes with Maple Mascarpone Cream

    Picture this: a stack of fluffy pancakes, each one laced with the warmth of cinnamon and nutmeg, crowned with a dollop of creamy, sweet maple mascarpone. The aroma fills your kitchen, wrapping you in a cozy, spiced hug. These are not just any pancakes — these are Spiced Carrot Cake Pancakes with Maple Mascarpone Cream, a breakfast masterpiece that transforms a simple morning into an indulgent celebration.

    Personal Story

    The first time I made carrot cake pancakes, it was a culinary experiment born out of a sweet tooth and a surplus of carrots. I was initially skeptical. Pancakes are sacred in my house, a weekend ritual that demands respect. But, driven by the spirit of adventure and the memory of my grandmother’s legendary carrot cake, I decided to give it a whirl.

    As a child, I spent countless afternoons in my grandmother’s kitchen, where the air was perpetually infused with the scent of baking spices. Her carrot cake was a family favorite, dense and moist, with a frosting that melted in your mouth. It was her way of showing love, and in those moments, I learned that food was more than sustenance; it was a way to connect and create memories.

    Fast forward to my own kitchen, where a chance encounter with a jar of cardamom inspired a twist on tradition. I remembered the zing it brought to a chai latte, and I wondered — could it elevate those pancakes to something transcendent? Spoiler alert: it did. The cardamom added an exotic nuance that made these pancakes sing.

    So here we are, with Spiced Carrot Cake Pancakes with Maple Mascarpone Cream. It’s a recipe that bridges past and present, honoring my grandmother’s legacy while embracing my own culinary creativity. Let me invite you into my kitchen — let’s make some breakfast magic.

    What Makes This Version Special

    These pancakes are elevated with a luxurious maple mascarpone cream and a hint of cardamom for an exotic twist. Unlike traditional pancakes, this version incorporates grated carrots, adding a natural sweetness and moistness that is simply unbeatable. The addition of spices like cinnamon, nutmeg, and allspice transforms these pancakes into a symphony of flavors that dance on the palate, while the cardamom adds a unique, fragrant note that sets this recipe apart. The maple mascarpone cream is the pièce de résistance, providing a creamy, sweet finish that perfectly complements the warm spices.

    Flavor Profile

    The taste experience of these Spiced Carrot Cake Pancakes is nothing short of delightful. They are warm and spicy, with cinnamon and nutmeg providing a familiar, comforting base. The touch of cardamom adds an unexpected twist, a hint of the exotic that intrigues the senses. Each bite reveals tender bits of carrot, lending a subtle sweetness and a pleasing texture. The rich, creamy maple mascarpone atop each pancake melds the flavors together, offering a sweet, smooth contrast to the spice and creating a decadent finish that leaves you yearning for more.

    Ingredients

    • 3-4 medium carrots, peeled and grated (about 1 to 1.5 cups)
    • 1 1/2 cups white whole wheat flour
    • 2 teaspoons baking powder
    • 1/2 teaspoon salt
    • 1 teaspoon cinnamon
    • 1/2 teaspoon ground nutmeg
    • 1/4 teaspoon ground allspice
    • 1/4 teaspoon ground cardamom
    • 2 tablespoons butter, melted
    • 1 large egg
    • 1 cup milk
    • 2 tablespoons turbinado sugar
    • 1 teaspoon vanilla extract
    • Optional: 1/2 cup raisins or toasted walnuts
    • Oil or butter for cooking
    • 1/2 cup mascarpone cheese
    • 2 tablespoons maple syrup

    Instructions

    1. Peel and grate the carrots. If you end up having more than 1 cup of grated carrots from the 3-4 medium carrots, that’s okay; this recipe can easily handle up to 1.5 cups of grated carrots. Microwave the grated carrots for 3 minutes on medium, or until the carrots are soft and partially cooked.
    2. In a large bowl, mix together the dry ingredients: flour, baking powder, salt, cinnamon, nutmeg, allspice, and cardamom.
    3. In a separate bowl, whisk together the wet ingredients until well combined: melted butter, turbinado sugar, egg, milk, and vanilla extract.
    4. Add the wet ingredients to the dry ingredients and whisk together until almost combined. Gently fold the grated carrots and optional raisins or walnuts into the batter to maintain their texture. Stir until everything is combined, but do not overmix!
    5. Heat some oil or butter in a skillet over medium/low heat. Use heaping tablespoons (or an ice cream scoop) to add the pancake batter to the pan. Cook for about 2-3 minutes, or until little bubbles start forming at the surface.
    6. Flip each pancake, and cook for another 2-3 minutes on the other side, or until the inside is fully cooked.
    7. Prepare the maple mascarpone cream by blending mascarpone cheese with a dash of maple syrup until smooth.
    8. Serve the pancakes warm, topped with the maple mascarpone cream and any additional toppings you desire, such as butter, syrup, or powdered sugar.

    Pro Tips from Meaghan’s Kitchen

    • Use an ice cream scoop for evenly sized pancakes, ensuring they cook uniformly.
    • Gently fold the carrots into the batter to prevent them from losing their structure, which adds to the delightful texture of the pancakes.
    • If you’re a fan of nuts, lightly toast the walnuts before adding them to the batter for an extra depth of flavor.
    • Let the batter rest for a few minutes after mixing. This allows the baking powder to activate, resulting in fluffier pancakes.
    • Don’t rush the cooking process. Lower heat ensures that the pancakes cook through without burning on the outside.

    Variations & Dietary Swaps

    • Vegetarian Swap: Use plant-based milk like almond or oat milk to make these pancakes dairy-free. Ensure your butter substitute is also vegan-friendly.
    • Spice-it-Up Version: Add a pinch of cayenne pepper or ginger to the batter for a little extra kick.
    • Kids-Friendly Version: Add mini chocolate chips to the batter to make them more appealing to younger palates. You can also use a cookie cutter to make fun shapes.

    What to Serve With It

    These Spiced Carrot Cake Pancakes with Maple Mascarpone Cream pair wonderfully with a spiced chai latte, which echoes the warming spices in the pancakes. Alternatively, a glass of freshly squeezed orange juice offers a bright, citrusy contrast to the rich and spicy flavors. For a more indulgent breakfast, consider serving with crispy bacon or a fresh fruit salad.

    Storage & Meal Prep

    To store leftover pancakes, allow them to cool to room temperature before stacking them with sheets of parchment paper in between, then place them in an airtight container. They can be kept in the refrigerator for up to 3 days. For longer storage, freeze them in a single layer on a baking sheet until solid, then transfer them to a freezer-safe bag for up to 2 months. To reheat, toast them in the oven at 350°F for about 10 minutes or until heated through, or zap them in the microwave for a quick minute.

    FAQ

    Can I make the batter ahead of time?

    Yes, you can prepare the batter the night before and store it in the refrigerator. Just make sure to give it a good stir before cooking the pancakes the next morning.

    What can I use instead of mascarpone cheese?

    If mascarpone isn’t available, you can substitute it with cream cheese or Greek yogurt for a similar creamy texture, though each will impart a slightly different flavor.

    How do I keep pancakes warm before serving?

    Place cooked pancakes on a baking sheet in a 200°F oven while you finish cooking the rest. This keeps them warm without overcooking them.

    Can these pancakes be made gluten-free?

    Yes, substitute the white whole wheat flour with a gluten-free flour blend that includes xanthan gum for structure. The texture might vary slightly, but the flavors will remain delicious.

    What’s the best way to grate the carrots?

    A box grater works wonderfully for grating carrots into fine shreds, perfect for incorporating into the pancake batter. You can also use a food processor with a grating attachment for a quicker option.

    Final Thoughts

    These Spiced Carrot Cake Pancakes with Maple Mascarpone Cream are a delightful way to start your day, bringing warmth, sweetness, and a touch of nostalgia to your breakfast table. I hope this recipe inspires you to get creative in the kitchen and make mornings a little more magical. I’d love to hear how these pancakes turn out for you — feel free to leave a comment below or share your pancake creations on social media. Happy cooking, and may your pancakes always be fluffy!

    Related update: Spiced Carrot Cake Pancakes with Maple Mascarpone Cream

    Related update: Spiced Carrot Quinoa Muffins with Cardamom Coconut Whip

  • Chai-Spiced Pumpkin Bread with Maple Pecan Swirl | Made by Meaghan Moineau

    Chai-Spiced Pumpkin Bread with Maple Pecan Swirl | Made by Meaghan Moineau

    Chai-Spiced Pumpkin Bread with Maple Pecan Swirl

    Imagine a warm kitchen filled with the heady scent of cinnamon, cardamom, and cloves. The air is sweet and nutty, and there’s the promise of something delightful emerging from the oven. This isn’t just any pumpkin bread — it’s a Chai-Spiced Pumpkin Bread with Maple Pecan Swirl, and it’s about to become your new favorite fall treat.

    Personal Story

    I remember the first time I discovered the magic of chai spices. It was a chilly autumn afternoon, and I was wandering through a bustling spice market in Seattle. The vibrant colors and intoxicating aromas were like nothing I’d ever experienced. A kind vendor handed me a cup of chai tea, and with one sip, I was transported to another world — one where warmth and comfort wrapped around me like a cozy blanket.

    That memory stayed with me, and years later, as I was experimenting in my kitchen, I had a sudden flash of inspiration. Why not take those same enchanting spices and infuse them into my beloved pumpkin bread recipe? The idea of combining chai spices with the earthy sweetness of pumpkin seemed almost too good to be true.

    Of course, my first few attempts weren’t perfect. I learned the hard way that too much clove can overpower the subtler spices, and that finding the right balance of sweetness was key. But with each iteration, the bread became more magical, more aromatic, more…well, perfect.

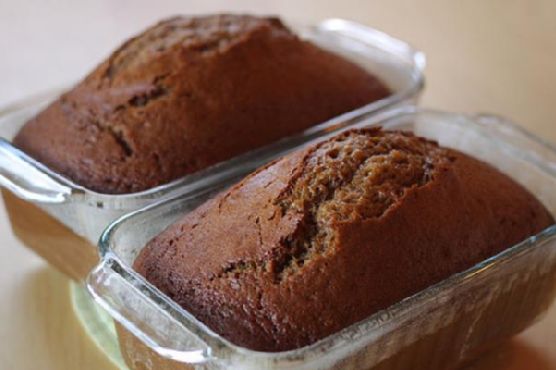
    Finally, I added a maple pecan swirl for that extra touch of indulgence. This addition transformed the bread from a simple treat to a showstopper, creating a marbled effect that was as beautiful as it was delicious. Now, every autumn, I make this Chai-Spiced Pumpkin Bread with Maple Pecan Swirl as a tribute to that first sip of chai and the journey of discovery it inspired.

    What Makes This Version Special

    This pumpkin bread isn’t just another seasonal loaf. My unique twist incorporates a warm chai spice mix and a luscious maple pecan swirl, adding a comforting and aromatic dimension to the classic pumpkin bread. The chai spices — cinnamon, cardamom, cloves, nutmeg, and ginger — are bloomed in oil to fully release their flavors, infusing the bread with a rich, spicy warmth. The maple pecan swirl elevates the experience, offering a sweet, nutty counterpoint to the spiced bread. This version is not only more complex in flavor but also visually stunning, making it a standout at any gathering.

    Flavor Profile

    Every bite of this Chai-Spiced Pumpkin Bread with Maple Pecan Swirl is a journey through layers of warm spices and earthy pumpkin. The aromatic chai spices create a rich, warming flavor, while the sweet maple pecan swirl adds a delightful crunch and nuttiness. The combination of these elements results in a bread that is both comforting and exhilarating, with the sweet and spicy notes perfectly complementing the natural earthiness of the pumpkin. It’s a symphony of flavors that dances on your palate, leaving you craving just one more slice.

    Ingredients

    • 1/2 cup oil
    • 1 cup light firmly brown sugar
    • 1 tablespoon molasses
    • 2 large eggs
    • 1 cup canned pumpkin
    • 1 cup all-purpose flour
    • 1 cup whole wheat flour
    • 1/2 cup oat bran
    • 1/2 cup wheat bran
    • 1/4 cup wheat germ
    • 1 teaspoon baking soda
    • 1 teaspoon salt
    • 1 teaspoon **ground cinnamon**
    • 1/2 teaspoon **ground cardamom**
    • 1/2 teaspoon **ground cloves**
    • 1/2 teaspoon **ground nutmeg**
    • 1/2 teaspoon **ground ginger**
    • 1 cup chopped **pecans**
    • 1/4 cup **maple syrup**
    • 1 teaspoon vanilla extract

    Instructions

    1. Preheat your oven to 375 degrees Fahrenheit. Grease two loaf pans and set them aside.
    2. In a small saucepan, heat the oil over medium heat. Add the **cinnamon, cardamom, cloves, nutmeg, and ginger**, and stir for about 1 minute until the spices are fragrant. This step blooms the spices, releasing their full flavors.
    3. In a large mixing bowl, combine the spiced oil, brown sugar, and molasses. Beat until well blended and smooth.
    4. Add the eggs and canned pumpkin to the mixture, and blend until fully incorporated.
    5. In a separate bowl, whisk together the all-purpose flour, whole wheat flour, oat bran, wheat bran, wheat germ, baking soda, and salt.
    6. Gradually stir the dry ingredients into the wet ingredients, mixing just until everything is moistened. Be careful not to overmix!
    7. In another small bowl, combine the chopped pecans and maple syrup. Gently swirl this mixture into the batter, creating a marbled effect.
    8. Divide the batter evenly between the prepared loaf pans.
    9. Bake for approximately 1 hour, or until a toothpick inserted into the center comes out clean. The top should be golden-brown.
    10. Cool the loaves in the pans for about 10 minutes, then transfer to a wire rack to cool completely.

    Pro Tips from Meaghan’s Kitchen

    • Blooming the spices in oil is crucial for releasing their full potential. Don’t skip this step!
    • Use fresh spices for the best flavor. Ground spices lose their potency over time.
    • Let the bread cool completely before slicing. This allows the flavors to meld together beautifully.
    • For a more pronounced maple flavor, consider drizzling additional maple syrup over the baked loaves.
    • Store your pecans in the freezer to keep them fresh and prevent rancidity.

    Variations & Dietary Swaps

    • Gluten-Free Version: Replace all-purpose and whole wheat flours with a gluten-free flour blend.
    • Vegan Version: Substitute eggs with flax eggs (1 tablespoon flaxseed meal mixed with 2.5 tablespoons water per egg) and use a plant-based oil.
    • Spice-It-Up Version: Add a pinch of cayenne pepper to the chai spice blend for a subtle heat.

    What to Serve With It

    This Chai-Spiced Pumpkin Bread with Maple Pecan Swirl pairs beautifully with a hot chai latte, enhancing the spice profile of the bread. For something a little different, try a glass of spiced apple cider — the apple notes will complement the pumpkin and spices perfectly. And if you’re feeling indulgent, a dollop of whipped cream or a scoop of vanilla ice cream transforms this bread into a delightful dessert!

    Storage & Meal Prep

    To store your bread, wrap it tightly in plastic wrap or aluminum foil and keep it at room temperature for up to 3 days. For longer storage, wrap the bread and place it in a resealable freezer bag; it will keep in the freezer for up to 3 months.

    To reheat, let the bread thaw at room temperature, then warm slices in a low oven or toaster oven. This will bring back the fresh-baked texture and aroma.

    FAQ

    Can I make this recipe without a stand mixer?

    Absolutely! A hand mixer or even a sturdy whisk and some elbow grease will work just fine for this recipe.

    Can I substitute fresh pumpkin for canned?

    Yes, you can use fresh pumpkin puree if you have it on hand. Just ensure it’s well-drained to avoid excess moisture in the batter.

    How do I prevent the bread from becoming too dense?

    Be careful not to overmix the batter. Mixing just until the ingredients are combined will keep the bread light and tender.

    What can I do if my bread doesn’t rise well?

    Check your baking soda’s freshness. It’s crucial for the bread’s rise, so if it’s been sitting in your pantry for a while, it might be time to replace it.

    Final Thoughts

    There you have it — a loaf of Chai-Spiced Pumpkin Bread with Maple Pecan Swirl that’s sure to impress. Whether you’re enjoying it with a warm beverage or sharing it with friends and family, this bread is bound to become a staple in your fall baking repertoire. I would love to hear how your version turns out, so feel free to leave a comment below or share your creations on social media. Happy baking, my friends!

  • Tropical Spiced Pina Colada with Coconut Cream Floater | Made by Meaghan Moineau

    Tropical Spiced Pina Colada with Coconut Cream Floater | Made by Meaghan Moineau

    Tropical Spiced Pina Colada with Coconut Cream Floater

    Imagine the gentle clinking of ice cubes against a glass, the air perfumed with a symphony of tropical scents, and the first sip of a drink that feels like a warm island breeze. Welcome to the world of the Tropical Spiced Pina Colada with Coconut Cream Floater — a lush, creamy escape from the everyday.

    For me, the journey to this exotic concoction began in the most unexpected of places: my grandmother’s kitchen. During our annual family reunion, she would whip up her famous pina coladas, using a simple blend of pineapple juice, coconut milk, and a splash of rum. It became a cherished tradition, a marker of summer’s peak when the sun seemed to linger a bit longer just to savor the taste.

    One summer, as I watched her deftly work her magic, I dared to suggest a twist. The idea was born from an impromptu trip to a Caribbean spice market where the air was thick with cinnamon and nutmeg. I was captivated by these aromas and couldn’t help but imagine them mingling with the creamy, sweet notes of our beloved pina colada.

    My grandmother, ever the culinary adventurer, gave me the green light. We decided to try our hands at a Tropical Spiced Pina Colada, infusing it with a dash of these heady spices. The result was nothing short of transformative. The addition of a luxurious coconut cream floater brought a new layer of indulgence, turning a beloved classic into something sophisticated and new.

    What Makes This Version Special

    This version of the Tropical Spiced Pina Colada stands out because it introduces a hint of tropical spices and a luxurious coconut cream floater. While traditional pina coladas are undeniably delightful, they can sometimes feel a bit too sweet or one-dimensional. By blooming cinnamon and nutmeg before blending, we unlock their full aromatic potential, giving the drink warm, inviting undertones. The coconut cream floater is the crowning glory, adding a velvety richness that elevates the experience from a simple cocktail to a decadent treat.

    Flavor Profile

    Close your eyes and imagine taking a sip. The first thing you notice is the creamy texture, instantly transporting you to a sandy beach. The pineapple juice brings a vibrant, tangy sweetness that dances with the mellow richness of the coconut milk. The spiced notes of cinnamon and nutmeg are subtle yet undeniably present, adding warmth and depth. And just when you think it couldn’t get any better, the coconut cream floater glides across your palate, leaving a lingering, luxurious finish.

    Ingredients

    • 2 cups ice
    • 1 cup pineapple juice
    • 1 cup coconut milk
    • 1/2 cup coconut rum
    • 1/2 teaspoon ground cinnamon
    • 1/4 teaspoon ground nutmeg
    • **2 tablespoons coconut cream**
    • 1 tablespoon toasted coconut flakes
    • Pineapple wedges, for garnish
    • Maraschino cherries, for garnish

    Instructions

    1. In a small pan over low heat, bloom the cinnamon and nutmeg until their aromas are released, about 2 minutes. This step enhances their flavors, so don’t rush it.
    2. Add the ice, pineapple juice, coconut milk, coconut rum, and the bloomed spices to a blender.
    3. Blend the mixture on high until smooth and creamy, about 1-2 minutes. You want everything well-combined and silky.
    4. Pour the blended drink into chilled glasses, leaving a bit of space at the top for the floater.
    5. Gently float a dollop of coconut cream on top of each glass, allowing it to slowly meld with the drink as you sip.
    6. Garnish with fresh pineapple wedges, maraschino cherries, and a sprinkle of toasted coconut flakes for that extra touch of elegance.

    Pro Tips from Meaghan’s Kitchen

    • Always use fresh pineapple juice, if possible. It makes a world of difference in the taste.
    • Blooming spices is crucial; it releases their oils and intensifies their flavor without adding bitterness.
    • For an extra frothy drink, blend for another minute on high speed.
    • If you like a thicker consistency, reduce the amount of ice or add a bit more coconut cream to the blend.
    • Don’t skip the toasted coconut flakes! They add a delightful crunch and aromatic finish.

    Variations & Dietary Swaps

    • Non-Alcoholic Version: Simply omit the coconut rum. The drink remains deliciously creamy and satisfying.
    • Spice-It-Up: Add a pinch of cayenne pepper to the blender for a subtle kick.
    • Kid-Friendly Version: Replace the rum with a splash of coconut water or additional pineapple juice, perfect for little ones.

    What to Serve With It

    The Tropical Spiced Pina Colada pairs beautifully with a light and crunchy coconut shrimp appetizer. The crispy texture and subtle sweetness of the shrimp complement the creamy, spiced notes of the drink. A fresh mango salsa on the side adds a tangy contrast that ties the flavors together perfectly.

    Storage & Meal Prep

    While pina coladas are best enjoyed fresh, you can prepare the blended components ahead of time. Store the mixture in an airtight container in the fridge for up to 24 hours. Before serving, give it a quick blend to refresh its texture. If you’re storing leftovers, keep the coconut cream separate and add it just before serving. For extended storage, freeze the blended mixture in ice cube trays and blend with a splash of pineapple juice when ready to enjoy.

    FAQ

    Can I use canned pineapple juice?

    Yes, you can, but fresh pineapple juice will provide a brighter, more vibrant flavor.

    What if I don’t have coconut cream?

    You can substitute with heavy cream or simply add extra coconut milk for a similar creamy effect.

    Is it okay to use sweetened coconut milk?

    I recommend unsweetened coconut milk to avoid making the drink overly sweet, but sweetened can be used if you prefer a dessert-like taste.

    How do I toast coconut flakes?

    Simply spread the flakes on a baking sheet and toast in a 350°F oven for 5-6 minutes until golden-brown, stirring once for even color.

    Can I make this drink without a blender?

    While a blender is ideal for achieving that smooth, creamy texture, you can shake the ingredients vigorously in a cocktail shaker as an alternative.

    Final Thoughts

    Creating this Tropical Spiced Pina Colada with Coconut Cream Floater has been a journey of flavors and memories. It’s a drink that invites you to sit back, relax, and savor each luxurious sip. I hope this recipe brings a touch of the exotic to your kitchen, and I can’t wait to hear how it turns out for you. Please share your thoughts, variations, and any special memories you create along the way. Here’s to new traditions and the joy of discovery in every glass. Cheers!

    Related update: Tropical Spiced Pina Colada with Coconut Cream Floater

    Related update: Tropical Almond Matcha Energy Smoothie with Coconut and Spirulina