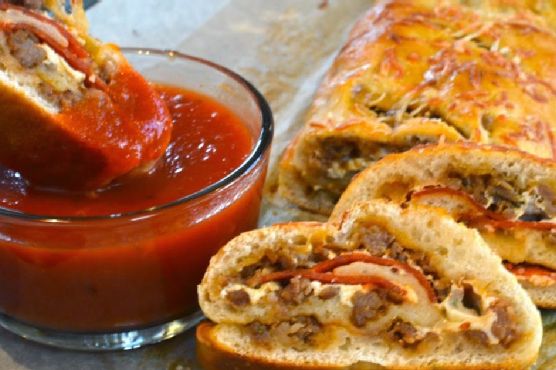
Sausage & Pepperoni Stromboli
Welcome to our cozy kitchen, where today we’re going to dive into a classic, mouthwatering recipe: Sausage & Pepperoni Stromboli. This dish brings back fond memories of family gatherings at my grandmother’s house, where the rich aromas of freshly baked bread and sizzling sausage would fill the air. As a child, I remember eagerly waiting for the moment we could slice into the golden crust to reveal the cheesy, savory filling inside. Now, I’m excited to share this beloved recipe with you!
Why You’ll Love It
This Sausage & Pepperoni Stromboli is a delightful twist on traditional pizza, featuring a flaky, golden crust wrapped around a hearty, cheesy filling. It’s perfect for a cozy dinner, a game day snack, or even a potluck dish. Here are a few reasons why you’ll fall in love with this recipe:
- Simple and Satisfying: With just a few ingredients, this stromboli is easy to assemble yet incredibly satisfying.
- Versatile: Perfect as an appetizer, main dish, or even a lunchbox treat.
- Family-Friendly: Kids and adults alike will enjoy customizing their slices with extra pizza sauce or toppings.
- Make-Ahead: Prepare it in advance and pop it in the oven when you’re ready to enjoy!
Ingredients
- 1 egg
- 1/2 pound Italian sausage
- 1 cup shredded Parmesan cheese
- 1/2 cup pepperoni slices
- 1 roll of pizza dough
- 1/2 cup pizza sauce, plus more for serving
- 1 cup shredded mozzarella cheese
Instructions
- Preheat your oven to 450 degrees F. Cook the Italian sausage in a medium skillet over medium heat until browned. Drain on paper towels and crumble into small pieces.
- Line a baking pan with parchment paper and lightly flour the surface. Roll out the pizza dough to form a large rectangle.
- Brush a thin layer of pizza sauce over the dough, leaving a small border around the edges.
- Evenly spread the crumbled sausage over the sauce, followed by the shredded mozzarella cheese.
- Layer the pepperoni slices on top of the cheese, then sprinkle 3/4 cup of the Parmesan cheese over the top.
- Gently fold in the short sides of the dough to form a seal around the filling.
- Starting from one long side, carefully roll the dough into about one third of the stromboli. Using the parchment paper to assist, continue rolling until you reach the opposite end. Pinch the seam to seal and place the stromboli seam-side down on the baking pan.
- In a small bowl, mix the egg with 1 tablespoon of water. Brush the egg mixture over the stromboli and sprinkle with the remaining 1/4 cup of Parmesan cheese.
- Place in the oven and immediately turn the temperature down to 350 degrees F. Bake for approximately 18 minutes.
- Remove from the oven and let the stromboli rest for 10 minutes. Check the center to ensure the dough is fully cooked. If needed, slice the stromboli in half and bake for an additional 5-8 minutes.
- Slice and serve with warm pizza sauce for dipping.
Tips
- Ensure your dough is at room temperature before rolling it out to prevent it from shrinking back.
- For a crispier crust, use a pizza stone preheated in the oven.
- Let the stromboli rest before slicing to allow the cheese to set slightly, making it easier to cut.
Variations & Substitutions
Feel free to get creative with your stromboli filling! Here are some ideas to customize your dish:
- Vegetarian: Swap the sausage and pepperoni for mushrooms, bell peppers, and spinach.
- Extra Spicy: Add sliced jalapeños or a sprinkle of red pepper flakes for a kick.
- Different Cheeses: Experiment with provolone or cheddar cheese for a different flavor profile.
Storage
Store any leftover stromboli in an airtight container in the refrigerator for up to 3 days. To reheat, place slices in a preheated oven at 350 degrees F for about 10 minutes or until heated through. You can also freeze the baked stromboli for up to 3 months. Thaw overnight in the refrigerator before reheating.
FAQ
Can I use store-bought dough?
Absolutely! Store-bought pizza dough works wonderfully for this recipe and saves time. Just ensure it’s at room temperature before rolling it out.
How can I prevent the filling from leaking?
Be sure to seal the edges of the dough well and avoid overfilling. Gently pinching the seams and tucking the ends will help contain the delicious filling.
Nutrition
This stromboli is a hearty dish that provides protein from the sausage and cheese, along with carbohydrates from the dough. While it’s a treat best enjoyed occasionally, you can balance it with a side salad or roasted vegetables for a well-rounded meal.
Final Thoughts
This Sausage & Pepperoni Stromboli is a delightful way to enjoy the flavors of pizza in a new, exciting form. Whether you’re serving it for a family dinner or a casual get-together, it’s sure to be a hit. I hope this recipe brings as much joy to your table as it has to mine. Happy cooking!
Related update: Sausage & Pepperoni Stromboli
Related update: North Carolina-Style BBQ Pulled Pork