Tag: Indian Cuisine

  • Smoky Cardamom-Infused Chicken Tikka Masala with Charred Peppers | Made by Meaghan Moineau

    Smoky Cardamom-Infused Chicken Tikka Masala with Charred Peppers | Made by Meaghan Moineau

    Smoky Cardamom-Infused Chicken Tikka Masala with Charred Peppers

    The tantalizing aroma of cardamom wafting through the kitchen, mingling with the subtle smokiness of charred bell peppers, is enough to make anyone’s mouth water. Imagine a rich, creamy sauce enveloping tender pieces of chicken, each bite more aromatic and flavorful than the last. This Smoky Cardamom-Infused Chicken Tikka Masala with Charred Peppers transforms a beloved classic into a new and exciting culinary adventure.

    Personal Story

    I remember the first time I attempted to make Chicken Tikka Masala at home. It was a cold Saturday afternoon, and I was feeling adventurous, ready to tackle what I thought was a complex dish only meant for restaurant kitchens. My tiny kitchen was soon filled with the heady aroma of spices toasting in the pan, and despite a few initial mishaps—like accidentally using twice the amount of chili powder—the end result was a revelation.

    Fast forward a few years and countless trials later, I’ve developed a version of Chicken Tikka Masala that not only satisfies my craving for this beloved dish but also elevates it with a personal twist. During one of my culinary escapades, I stumbled upon the magic of charring bell peppers. The slightly sweet, smoky flavor adds an unexpected depth to the traditional tikka masala, a discovery that was nothing short of a game-changer.

    This dish became a hit in my household, a comfort meal with a hint of sophistication. Sharing the recipe with friends and family, I watched as it became a staple in their kitchens as well. Each time I serve this dish, it’s like revisiting a cherished memory, reminding me of the journey from kitchen mishaps to mastering a recipe that feels truly my own.

    What Makes This Version Special

    This version of Chicken Tikka Masala stands out for its distinct smoky flavor, achieved by charring red bell peppers over an open flame. This technique brings a subtle sweetness and complexity to the dish that pairs beautifully with the traditional spices. Additionally, blooming the cardamom and smoked paprika in butter before adding the garlic and jalapeno creates a deeply aromatic base that elevates the overall flavor profile. This recipe not only retains the comforting richness of the original dish but also introduces an exciting new layer of taste that makes it even more irresistible.

    Flavor Profile

    Imagine biting into a piece of tender chicken, enveloped in a rich, creamy sauce that bursts with smoky, aromatic flavors. The charred red bell peppers add a subtle sweet char that dances on your taste buds, while the layers of warm spices like cardamom, cumin, and cinnamon create a symphony of flavors. Each spoonful is a warm, comforting experience, with a hint of heat from the jalapeno, balanced perfectly by the creamy, tangy richness of the sauce.

    Ingredients

    • 1 cup yogurt
    • 2 tablespoons lemon juice
    • **2 teaspoons ground cumin**
    • 1 teaspoon ground cinnamon
    • 1 teaspoon cayenne pepper
    • 1 teaspoon ground black pepper
    • 1 tablespoon grated fresh ginger
    • **4 teaspoons salt**
    • 1 ½ pounds skinless, boneless chicken breasts, cut into bite-size pieces
    • **1 red bell pepper**
    • **2 tablespoons unsalted butter**
    • 4 cloves garlic, minced
    • 1 jalapeno pepper, finely chopped
    • **2 teaspoons smoked paprika**
    • 2 teaspoons ground cardamom
    • 1 (15-ounce) can tomato sauce
    • 1 cup heavy cream
    • Fresh cilantro, chopped, for garnish

    Instructions

    1. In a large bowl, combine the yogurt, lemon juice, 2 teaspoons of ground cumin, ground cinnamon, cayenne pepper, ground black pepper, grated fresh ginger, and 4 teaspoons of salt. Stir well, then add the chicken pieces. Ensure each piece is well-coated, cover, and refrigerate for at least 1 hour to marinate.
    2. Preheat a grill for high heat. Lightly oil the grill grate. Remove the chicken from the marinade and thread onto skewers, discarding the marinade. Grill the chicken until the juices run clear, approximately 5 minutes on each side. Set aside.
    3. Char the red bell pepper by placing it directly over an open flame or under a broiler. Turn occasionally until the skin is blackened all over. Once charred, place the bell pepper in a bowl and cover with a plate or plastic wrap. After cooling, peel, remove seeds, and dice the pepper.
    4. In a large heavy skillet over medium heat, melt the unsalted butter. Add the minced garlic and jalapeno, sautéing for about 1 minute until fragrant. Then, sprinkle in the smoked paprika and ground cardamom, allowing them to bloom in the butter for an additional minute.
    5. Stir in the canned tomato sauce and heavy cream, mixing well. Allow the sauce to simmer on low heat until it thickens slightly, about 20 minutes.
    6. Add the grilled chicken pieces and diced charred bell pepper to the sauce. Let it simmer together for 10 more minutes, allowing the flavors to meld.
    7. Transfer the Chicken Tikka Masala to a serving platter, garnishing generously with fresh cilantro. Serve hot and enjoy!

    Pro Tips from Meaghan’s Kitchen

    • For an even deeper smoky flavor, try using smoked salt instead of regular salt in the marinade.
    • Always let the chicken come to room temperature before grilling to ensure even cooking.
    • If you don’t have a grill, you can broil the chicken in the oven on a wire rack to achieve a similar charred effect.
    • Blooming spices in butter is crucial for unlocking their full flavor potential. Do not skip this step!
    • Use full-fat yogurt for the marinade; it not only tenderizes the chicken but also adds richness to the dish.

    Variations & Dietary Swaps

    • Vegetarian Version: Substitute chicken with paneer or tofu. Marinate and grill as directed for a delightful vegetarian twist.
    • Spice-It-Up: Double the jalapeno and cayenne for those who love their tikka masala with extra heat.
    • Kid-Friendly: Omit the jalapeno and reduce the cayenne pepper to make the dish milder for little taste buds.

    What to Serve With It

    This Smoky Cardamom-Infused Chicken Tikka Masala pairs beautifully with a chilled glass of mango lassi, providing a refreshing contrast to the rich, spicy flavors. Additionally, buttery naan bread or fragrant basmati rice makes for the perfect accompaniment, allowing you to savor every drop of the luscious sauce.

    Storage & Meal Prep

    To store leftovers, transfer the Chicken Tikka Masala to an airtight container and refrigerate for up to 3 days. For longer storage, freeze in a freezer-safe container for up to 3 months. To reheat, thaw overnight in the fridge if frozen, then warm gently in a saucepan over medium heat, stirring occasionally until heated through.

    FAQ

    Can I use chicken thighs instead of breasts?

    Absolutely! Chicken thighs are juicier and stay tender during grilling. Just adjust the grilling time as they might take a bit longer to cook through.

    Is it necessary to char the bell peppers?

    While not strictly necessary, charring the bell peppers adds a depth of flavor that truly enhances the dish. It’s worth the extra step for the smoky sweetness it imparts.

    Can I make this dish ahead of time?

    Yes, you can prepare the sauce and the grilled chicken a day in advance. Store them separately in the fridge, and combine them when you’re ready to serve, reheating gently on the stove.

    What if I don’t have an open flame for charring?

    No worries! You can achieve a similar effect by broiling the peppers in the oven, turning them occasionally until the skin is blackened.

    How can I make this dish dairy-free?

    For a dairy-free version, substitute the yogurt with a coconut or almond milk-based yogurt, and replace the heavy cream with coconut cream.

    Final Thoughts

    There’s something magical about transforming classic recipes into something uniquely yours, and this Smoky Cardamom-Infused Chicken Tikka Masala with Charred Peppers does just that. Whether you’re serving it for a family dinner or impressing guests at a dinner party, this dish is sure to delight with its rich, smoky flavors and aromatic spices. I’d love to hear how this recipe turns out for you! Feel free to leave a comment below, and don’t forget to share your kitchen adventures with my recipe on social media. Happy cooking, friends!

    Related update: Smoky Cardamom-Infused Chicken Tikka Masala with Charred Peppers
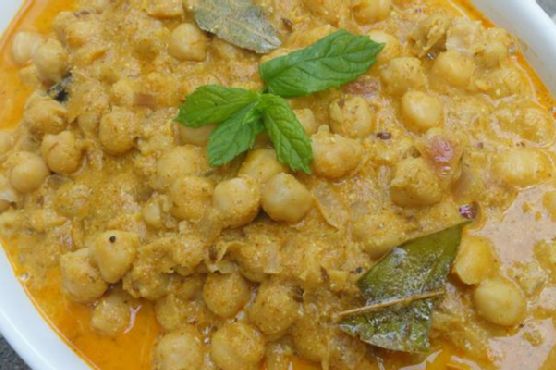
  • Zesty Chana Masala with Charred Lime and Mint Yogurt Drizzle | Made by Meaghan Moineau

    Zesty Chana Masala with Charred Lime and Mint Yogurt Drizzle | Made by Meaghan Moineau

    Zesty Chana Masala with Charred Lime and Mint Yogurt Drizzle

    Picture this: the comforting aroma of spices wafting through your kitchen, mingling with the tantalizing, smoky scent of charred lime. This isn’t just any chana masala; it’s a sensory journey that awakens your taste buds and transports you straight to the bustling streets of India. Are you intrigued yet? Well, read on, because this dish is about to become your new favorite dinnertime staple.

    Personal Story

    I still remember the first time I tried chana masala. It was a blustery fall evening, and I was huddled around a table with friends at a local Indian restaurant. I hadn’t expected the dish to leave such a lasting impression, but one spoonful of the warmly spiced chickpeas, and I was hooked. The rich, complex flavors felt like a warm hug in a bowl. That night, I became determined to replicate those flavors in my own kitchen.

    Things didn’t start off smoothly. My first attempt was, to put it kindly, a bit bland. I hadn’t yet learned about the essential role of blooming spices like cumin seeds and bay leaves in hot oil. It was a rookie mistake. But as with all culinary endeavors, practice makes perfect. Over time, my chana masala began to resemble the dish I had fallen in love with — rich, aromatic, and comforting.

    Yet, I wanted more from the dish — a unique twist that would make it truly my own. On a whim one day, I decided to experiment. I charred lime halves in a dry pan, intrigued by the possibilities. The smoky, tangy burst they added was revolutionary, cutting through the richness of the dish and enhancing its flavors. Then, a drizzle of cooling mint yogurt brought it all together, offering a refreshing contrast that made each bite irresistible. My Zesty Chana Masala with Charred Lime and Mint Yogurt Drizzle was born, and my kitchen has never been the same since.

    What Makes This Version Special

    This isn’t just any chana masala; it’s an elevated experience that brings new dimensions to a classic Indian dish. By introducing the refreshing zest of charred lime, this version takes a bold step beyond the traditional recipe. The lime’s smoky, tangy flavor cuts through the warmth of the spices, adding a surprising layer of complexity. To balance it all, a luxurious drizzle of mint yogurt brings a cool, creamy finish. This Zesty Chana Masala is not just better than the standard recipe; it’s a celebration of flavors that dance together on your palate.

    Flavor Profile

    Prepare for a taste sensation that’s smoky, tangy, and utterly refreshing. The chickpeas simmer in a savory, spice-laden sauce, warmed by the gentle heat of red chili powder and the earthy notes of cumin and coriander. As you savor each bite, the charred lime’s citrusy tang emerges, adding a surprising zing that keeps you coming back for more. Finally, the mint yogurt drizzle cools things down, offering a creamy contrast that ties all the flavors together beautifully. It’s a dish that promises to excite and delight your senses.

    Ingredients

    • 1 bay leaf
    • 1 can chickpeas, drained and rinsed
    • 1 tablespoon chana masala powder
    • 1 tablespoon coriander powder
    • 1 teaspoon cumin seeds
    • 3 cloves garlic, minced
    • 1-inch piece ginger, grated
    • 1/4 cup fresh mint leaves
    • 2 tablespoons oil
    • 1 large onion, chopped
    • 1 teaspoon red chili powder
    • Salt to taste
    • 2 large tomatoes, chopped
    • 1/2 teaspoon turmeric powder
    • 1/2 cup yogurt
    • 1 lime, halved and charred
    • Fresh cilantro, chopped, for garnish
    • 1/4 teaspoon black salt

    Instructions

    1. Start by blending the tomatoes, ginger, garlic, and mint leaves into a smooth paste. No need to add water — the tomatoes will provide enough moisture.
    2. Heat the oil in a large pan over medium heat. Once hot, add the cumin seeds and bay leaf. Fry for about 10 seconds until fragrant.
    3. Add the chopped onion and sauté until it turns soft and translucent, about 5 minutes.
    4. Sprinkle in the coriander powder, chana masala powder, turmeric powder, and red chili powder. Fry the spices with the onions for 2 minutes to develop their flavors.
    5. Stir in the blended tomato paste, mixing well. Cook until the oil starts to separate from the paste, about 10 minutes, stirring occasionally.
    6. Add the drained chickpeas and salt, mixing thoroughly. Let them cook in the sauce for 7-8 minutes, allowing the flavors to meld.
    7. Lower the heat to a simmer and carefully fold in the yogurt. If the mixture looks too thick, add 1/4 cup of water to loosen it. Let it simmer gently for 5 minutes.
    8. Meanwhile, in a dry pan, char the lime halves cut-side down over medium-high heat until they are beautifully browned and aromatic.
    9. Once done, squeeze the charred lime juice into the chickpea mixture, stirring to combine.
    10. In a small bowl, mix the remaining yogurt with finely chopped mint and a pinch of black salt. Drizzle this over the chana masala just before serving.
    11. Garnish with fresh cilantro and serve hot with rice, roti, or naan.

    Pro Tips from Meaghan’s Kitchen

    • For a richer flavor, make the chana masala a day in advance. The spices will have more time to meld together.
    • Don’t skip the step of frying the spices; it’s crucial for unlocking their full flavor potential.
    • Control the heat level by adjusting the amount of red chili powder to suit your preference.
    • Use a cast iron pan to char the lime for the best results and an even char.
    • Chill the mint yogurt drizzle before serving for an extra refreshing touch.

    Variations & Dietary Swaps

    • Vegetarian Swap: This dish is naturally vegetarian. For a vegan version, use coconut yogurt instead of dairy yogurt.
    • Spice-It-Up Version: Add finely chopped green chilies along with the spices for an extra kick.
    • Kids-Friendly Version: Reduce the amount of chili powder and serve with a dollop of plain yogurt to mellow the heat.

    What to Serve With It

    This Zesty Chana Masala pairs perfectly with a chilled mango lassi or a refreshing cucumber raita, balancing the spice with cool, creamy flavors. Serve it alongside fluffy basmati rice or warm naan to soak up every last drop of the savory sauce.

    Storage & Meal Prep

    Store leftover chana masala in an airtight container in the fridge for up to 3 days. To freeze, pack it in a freezer-safe container, leaving some space at the top for expansion, and store for up to 3 months. Reheat gently on the stove, adding a splash of water to loosen the sauce if needed.

    FAQ

    Can I use fresh chickpeas instead of canned?

    Absolutely! Just be sure to soak them overnight and cook until tender before using them in the recipe.

    How do I prevent the yogurt from curdling?

    Ensure the heat is low when adding the yogurt, and stir continuously to incorporate it smoothly into the sauce.

    Can I use lemon instead of lime?

    You can, but the charred lime provides a unique smoky flavor that really sets this dish apart.

    What if I don’t have chana masala powder?

    You can substitute with a mix of garam masala and cumin, though the flavor profile will be slightly different.

    Is it okay to skip the mint yogurt drizzle?

    You can skip it, but the drizzle adds a refreshing element that really complements the smokiness of the lime. I highly recommend trying it!

    Final Thoughts

    Cooking this Zesty Chana Masala with Charred Lime and Mint Yogurt Drizzle is not just about making a meal; it’s about creating an experience that’s fun, flavorful, and deeply satisfying. I hope you enjoy making and eating this dish as much as I do. Please share your thoughts, variations, or questions in the comments below. I’d love to hear how your chana masala journey unfolds!

    Related update: Zesty Chana Masala with Charred Lime and Mint Yogurt Drizzle

    Related update: Truffle-Infused 3 Cheese Ravioli with Sage Brown Butter

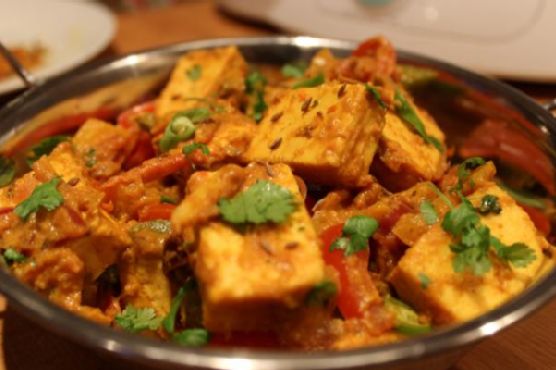
  • Smoky Grilled Paneer Jalfrezi with Charred Peppers | Made by Meaghan Moineau

    Smoky Grilled Paneer Jalfrezi with Charred Peppers | Made by Meaghan Moineau

    Smoky Grilled Paneer Jalfrezi with Charred Peppers

    The scent of cumin seeds popping in hot oil, mingling with the rich, smoky aroma of grilled paneer — it’s the kind of magic that makes your taste buds tingle with anticipation. Imagine the vibrant colors of charred red and green bell peppers dancing in a pan, releasing their sweetly caramelized notes into the air. This isn’t just a meal; it’s an experience, a journey through flavors that are both rustic and refined.

    Personal Story

    Paneer Jalfrezi holds a special place in my heart, reminiscent of those animated family dinners where every dish was a story waiting to be told. Growing up, my Sundays were filled with the symphony of spices sizzling in my grandmother’s kitchen. She had a way with paneer — it was always perfectly tender and flavorful, comforting in its simplicity. But it wasn’t until a summer trip to a local food festival that I stumbled upon the idea of adding a smoky twist.

    That festival was a kaleidoscope of culinary inspiration. Among the bustling stalls, a smoky aroma drew me in like a moth to a flame. There, a chef was grilling paneer over an open flame, the edges beautifully charred. It was an epiphany. The grilled paneer, combined with the bold spices of Jalfrezi, created a symphony of flavors that I couldn’t get out of my mind.

    Returning to my kitchen, I was eager to recreate this revelation. I started experimenting with grilling techniques and playing with the spice blend. Each attempt brought me closer to the perfect balance of smokiness and spice. The grilled paneer added a depth that elevated the dish from a comforting classic to something truly remarkable. It became my go-to dish for gatherings, a hit among friends who loved the unexpected twist on a beloved favorite.

    Now, whenever I make Smoky Grilled Paneer Jalfrezi with Charred Peppers, it’s not just about recreating that unforgettable flavor. It’s about sharing a piece of my culinary journey, inviting others to savor the layers of tradition and innovation merged in each bite.

    What Makes This Version Special

    This version of Paneer Jalfrezi stands out because it introduces a smoky depth by grilling the paneer and charring the bell peppers. This simple yet transformative technique adds an exciting new layer of flavor, making each bite an adventure. The grill marks on the paneer not only enhance its texture but also infuse it with a subtle smokiness that complements the robust spices beautifully. The charred peppers add a sweet, caramelized note that balances the dish, making it a feast for the senses. This is not just an upgrade; it’s a revelation that makes the traditional recipe seem almost one-dimensional in comparison.

    Flavor Profile

    Prepare yourself for a taste experience that is rich and smoky, with a robust blend of spices and a refreshing hint of mint. As you savor a bite, the initial smoky aroma gives way to the warm, earthy flavors of cumin and garam masala. The charred bell peppers add a surprising sweetness, while the heat from the green and red chillies provides a satisfying kick. The cooling effect of fresh mint leaves rounds off the ensemble, leaving a lingering freshness on your palate. Each mouthful is an intricate dance of flavors — a testament to the power of well-balanced ingredients.

    Ingredients

    • 250g paneer, cut into cubes
    • 2 tbsp oil, divided
    • 1 tsp cumin seeds
    • 2 medium tomatoes, cut into strips
    • 1 large onion, roughly chopped
    • 1 red bell pepper, charred and sliced
    • 1 green bell pepper, charred and sliced
    • 1/2 tsp turmeric powder
    • 1 tsp chili powder
    • 2 green chillies, finely chopped
    • 3 dried red chillies, whole
    • 1-inch piece ginger, finely sliced
    • 1 tsp garam masala
    • 1 tsp sugar
    • 1 tbsp vinegar
    • Fresh coriander, chopped
    • Salt to taste
    • 1 tsp smoked paprika
    • Juice of 1 fresh lemon
    • Fresh mint leaves for garnish

    Instructions

    1. Begin by roughly chopping half an onion and two tomatoes. In a non-stick pan, heat 1 tablespoon of oil. Once hot, add the onions and fry until they turn lightly brown. Add the tomatoes and cook for 2-3 minutes until they soften. Remove from heat, let cool, and blend into a puree.
    2. Preheat your grill or a grill pan. Lightly oil the paneer cubes and grill them over an open flame until they develop a smoky char, approximately 2-3 minutes on each side. Do the same with the red and green bell peppers until they are slightly blackened and tender. Set aside.
    3. In the same pan where you cooked the onions, heat another tablespoon of oil over medium heat. Add the cumin seeds and allow them to sputter, releasing their aromatic oils.
    4. Add the dried red chillies and sliced ginger, frying for 30-45 seconds until fragrant. Sprinkle in the turmeric powder and give it a quick stir.
    5. Add the remaining onions and the charred peppers, followed by the chili powder, salt, and two-thirds of the chopped green chillies. Fry for 3-4 minutes, letting the spices bloom and meld with the vegetables.
    6. Gently fold in the grilled paneer, ensuring each piece is coated with the spice mixture. Lower the heat and let it cook for about 5 minutes, allowing the flavors to infuse.
    7. Add the tomato puree, garam masala, and sugar, stirring well. Let it simmer for 2 minutes, allowing the sauce to thicken slightly.
    8. Lastly, add the strips of fresh tomatoes and toss everything together. Stir in the vinegar for a hint of tanginess and garnish with the remaining green chillies and chopped coriander.
    9. Finish with a sprinkle of smoked paprika and a generous squeeze of fresh lemon juice for that extra zing. Garnish with fresh mint leaves before serving.

    Pro Tips from Meaghan’s Kitchen

    • For the best smoky flavor, ensure your grill is preheated properly. A hot grill sears the paneer quickly, giving it those perfect char marks.
    • Don’t rush the process of blooming the spices in oil. This step is crucial for releasing their full aroma and flavor.
    • Use fresh, high-quality paneer for optimal texture and flavor. If fresh isn’t available, soak store-bought paneer in warm water for 10 minutes before using.
    • Adjust the level of heat by varying the amount of green and red chillies according to your preference. Taste and tweak as you go!
    • Let the dish rest for a few minutes before serving. This allows the flavors to meld together beautifully.

    Variations & Dietary Swaps

    • Vegetarian Swap: Replace paneer with firm tofu for a vegan version. Ensure the tofu is pressed and well-marinated to absorb the flavors.
    • Spice-It-Up Version: Add a pinch of cayenne pepper or extra green chillies for those who love an extra spicy kick.
    • Kids-Friendly Version: Tone down the spice by reducing the chillies and adding a touch of cream to make it milder and creamier, appealing to younger palates.

    What to Serve With It

    This Smoky Grilled Paneer Jalfrezi with Charred Peppers is beautifully complemented by a chilled mango lassi, which acts as a soothing contrast to the dish’s bold flavors. Alternatively, serve it with a side of fluffy naan bread to mop up every bit of the luscious sauce. A simple cucumber raita can also add a refreshing balance.

    Storage & Meal Prep

    Store any leftovers in an airtight container in the refrigerator for up to 3 days. When reheating, add a splash of water or cream to bring back the saucy texture. For longer storage, freeze the dish in a suitable container for up to a month. Thaw in the refrigerator overnight before reheating on the stove over low heat.

    FAQ

    Can I use store-bought paneer for this recipe?

    Absolutely! Store-bought paneer works well. For best results, soak it in warm water for 10 minutes to soften it before grilling.

    What if I don’t have a grill?

    No worries! You can use a grill pan on the stovetop or an oven broiler to achieve a similar smoky effect on the paneer and peppers.

    How do I know when the paneer is properly grilled?

    The paneer is perfectly grilled when it has a nice char on the outside and is still soft on the inside. This usually takes about 2-3 minutes on each side on a hot grill.

    Is there a substitute for smoked paprika?

    If you don’t have smoked paprika, you can use regular paprika with a touch of liquid smoke or a smoky BBQ sauce to mimic the flavor.

    Can I make this dish in advance?

    Yes! This dish can be made a day in advance. The flavors deepen overnight, making it even more delicious the next day.

    Final Thoughts

    There you have it, friends — a Smoky Grilled Paneer Jalfrezi with Charred Peppers that’s sure to impress at your next dinner table gathering. This dish is a true celebration of bold flavors and culinary creativity. I invite you to try it out and make it your own. If you do, please share your experience in the comments below or tag me in your kitchen adventures on social media. Let’s keep the conversation delicious!

    Related update: Smoky Grilled Paneer Jalfrezi with Charred Peppers

    Related update: Honey-Bourbon Glazed Country-Style Ribs with Smoked Paprika

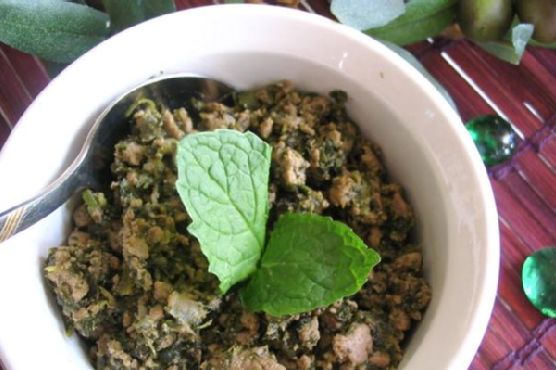
  • Sumptuous Indian-Spiced Beef with Creamy Coconut Spinach | Made by Meaghan Moineau

    Sumptuous Indian-Spiced Beef with Creamy Coconut Spinach | Made by Meaghan Moineau

    Sumptuous Indian-Spiced Beef with Creamy Coconut Spinach

    Imagine walking into a warm, inviting kitchen where the air is rich with the aromatic blend of exotic spices, hints of citrus, and a whisper of coconut. The sizzle of beef in a hot pan mingles with the fragrant steam rising from a pot, instantly whisking you away to distant lands. This is not just a meal; it’s an experience.

    Personal Story

    I still remember the first time I encountered the enchanting world of Indian spices. It was a few years ago during a trip to a bustling local market in Delhi. The vibrant colors of spices piled high in baskets were a feast for the senses. I was mesmerized by the cacophony of voices, the clatter of cookware, and the intoxicating aromas that seemed to dance in the air. That day, I became captivated by the art of blending spices to create flavors that tell a story.

    Back in my kitchen, I tried my hand at recreating the magic I had tasted. My first attempt at Indian-spiced beef was, let’s say, rustic. The aroma was there, but the complexity of the flavors seemed just out of reach. It was then my culinary journey really began. I started experimenting with various ingredients, adjusting the balance of spices, and infusing my own personal twists into traditional recipes.

    One particularly chilly winter evening, I decided to try something new. I wanted to bring warmth to the dish with the addition of creamy coconut milk and a pop of freshness with lemon zest. The creamy coconut milk melded beautifully with the spices, while the lemon zest added a surprising brightness. It was an instant hit, transforming the dish into something truly special.

    Now, this sumptuous Indian-spiced beef with creamy coconut spinach has become a beloved staple in my home. It’s a testament to how a bit of creativity and a dash of courage can elevate a classic dish into a culinary masterpiece.

    What Makes This Version Special

    This version of Indian-spiced beef is elevated by the addition of creamy coconut milk and a tangy lemon zest infusion. The coconut milk not only adds a luscious, smooth texture but also tempers the heat of the spices, creating a harmonious balance. The lemon zest, on the other hand, provides a burst of citrusy brightness that cuts through the richness, making the dish feel vibrant and fresh.

    Traditional recipes often stick to the basics, but this twist brings a new dimension to the table. The subtle tropical undertones from the coconut milk and the aromatic infusion of curry leaves make this version stand out. It’s an experience that transcends the ordinary, inviting you to savor each and every bite.

    Flavor Profile

    The rich, aromatic flavors of this dish are truly captivating. Imagine tender ground beef, infused with an exotic blend of spices like garam masala, cumin, and cardamom, each contributing to a multi-layered taste sensation. The creamy coconut milk adds a hint of tropical creaminess, perfectly complementing the bold spices. And just when you think you’ve tasted it all, the lemon zest infuses a citrusy brightness that refreshes the palate. It’s a delightful dance of flavors that leaves you craving more.

    Ingredients

    • 2 tablespoons canola oil
    • 1 teaspoon red chilli powder
    • 2 tablespoons fresh cilantro
    • 1 cinnamon stick
    • 1/4 cup fresh mint leaves
    • 1 cup frozen spinach, thawed and drained
    • 2 teaspoons garam masala
    • 1 garlic clove, minced
    • 1 tablespoon ginger paste
    • 3 green cardamom pods
    • 2 green chillies, chopped
    • 1 pound ground beef
    • 1 teaspoon ground cumin
    • 1/2 teaspoon black ground pepper
    • 1 large onion, finely chopped
    • 1/2 cup plain yogurt
    • Salt to taste
    • 1 cup coconut milk
    • Zest of 1 lemon
    • 10 fresh curry leaves

    Instructions

    1. Begin by making a vibrant green paste. In a food processor, puree the spinach, cilantro, and mint with a tablespoon or two of water. Be cautious not to overdo the mint to avoid bitterness.
    2. In a large pan, heat the canola oil over medium heat. Infuse the oil by adding fresh curry leaves and lemon zest, stirring for about 30 seconds until aromatic.
    3. Add the cardamom pods, cloves, and cinnamon stick to the infused oil. After a minute, introduce the chopped onion, sautéing until it turns golden-brown, approximately 5-7 minutes.
    4. Stir in the green chillies, minced garlic, and ginger paste. Cook for another minute, letting the flavors meld together.
    5. Add the ground beef to the pan. Sprinkle in the red chilli powder, ground cumin, garam masala, black pepper, and salt. Cook on medium-high heat for 10 minutes, stirring often to prevent burning.
    6. Incorporate half of the plain yogurt, mixing well until fully integrated. Cook for an additional 2 minutes.
    7. Pour in all of the green paste and mix thoroughly, letting it simmer for 10 minutes to allow the flavors to develop.
    8. Add the remaining yogurt, stirring well, and continue cooking for another 5 minutes. Taste and adjust salt if necessary.
    9. Finish with a swirl of creamy coconut milk, stirring gently to combine. Serve hot with parathas and fresh tomato salsa for a delightful meal.

    Pro Tips from Meaghan’s Kitchen

    • Use fresh curry leaves whenever possible for the best flavor infusion. If you can’t find them, dried leaves are a good substitute.
    • Be mindful of the mint quantity in the green paste. Too much can overpower the dish with bitterness.
    • If you don’t have a food processor, finely chop the spinach, cilantro, and mint by hand. It takes more time but yields a chunkier texture that’s equally delicious.
    • For an extra layer of flavor, toast the spices in the pan before adding the beef, releasing their essential oils.
    • When zesting the lemon, avoid the white pith as it can add unwanted bitterness.

    Variations & Dietary Swaps

    • Vegetarian Swap: Replace the ground beef with crumbled paneer or chickpeas for a delicious vegetarian version.
    • Spice-It-Up Version: Add a pinch of cayenne pepper or an extra green chilli for those who like it hot!
    • Kids-Friendly Version: Reduce the red chilli powder and omit the green chillies to make it more palatable for younger taste buds.

    What to Serve With It

    To complement this sumptuous Indian-spiced beef with creamy coconut spinach, serve it over a bed of fragrant basmati rice, which absorbs the rich, spicy sauce beautifully. A chilled mango lassi on the side provides a sweet, cooling contrast that’ll balance the dish’s heat perfectly. Alternatively, pair it with warm, fluffy naan or crispy parathas, perfect for scooping up every last bite.

    Storage & Meal Prep

    This dish is a meal prep superstar! Store leftovers in an airtight container in the refrigerator for up to 3 days. For longer storage, freeze it for up to 3 months. When reheating, add a splash of coconut milk or water to maintain its creamy texture. Heat gently on the stove or in the microwave until heated through.

    FAQ

    Can I use fresh spinach instead of frozen?

    Absolutely! Fresh spinach works just as well. Simply blanch it quickly in boiling water, drain, and then use it in the green paste as directed.

    Is there a substitute for coconut milk?

    If you’re not a fan of coconut milk or have dietary restrictions, you can substitute with cashew cream or heavy cream for a similar creamy texture.

    How can I make this dish less spicy?

    To reduce the heat, simply omit the green chillies and decrease the amount of red chilli powder. This will still leave you with a flavorful dish without the extra kick.

    What can I do if I don’t have garam masala?

    If you run out of garam masala, a quick homemade blend of ground cumin, coriander, cardamom, cinnamon, cloves, and nutmeg can work in a pinch.

    Can I prepare this dish in advance?

    Yes! This dish actually tastes better the next day as the flavors have time to meld. Prepare it a day ahead and store it in the fridge, then reheat before serving.

    Final Thoughts

    Cooking is all about exploration and making each dish your own. This sumptuous Indian-spiced beef with creamy coconut spinach is a testament to that journey. I encourage you to dive into the world of spices and let your creativity shine. I can’t wait to hear your thoughts on this recipe and any personal twists you might add. Share your experiences in the comments below or tag me on social media. Let’s keep the culinary conversation going!

    Related update: Sumptuous Indian-Spiced Beef with Creamy Coconut Spinach

    Related update: Umami-Truffle Infused Mushroom Parmesan Brown Rice Risotto

  • Spicy Chettinad Egg Curry with Smoky Roasted Peppers | Made by Meaghan Moineau

    Spicy Chettinad Egg Curry with Smoky Roasted Peppers | Made by Meaghan Moineau

    Spicy Chettinad Egg Curry with Smoky Roasted Peppers

    Imagine the intoxicating aroma of spices blooming in hot oil, mingling with the sweet, smoky scent of roasted bell peppers. This isn’t just a meal; it’s an experience that dances on your taste buds and transports you straight to the heart of southern India. Welcome to my take on the Spicy Chettinad Egg Curry with Smoky Roasted Peppers, where traditional flavors meet an unexpected twist.

    Personal Story

    My journey with the Chettinad egg curry started in a bustling kitchen in Chennai, where my friend’s mother was known for her magical touch with spices. I stood in awe, watching her effortlessly balance heat and fragrance, mesmerized by the sizzling sounds and the heady scent that filled the room. The experience was nothing short of culinary theater, and I was hooked from the very first bite.

    Years later, I found myself craving that same depth of flavor but wanted to introduce a twist that would make the dish my own. On a whim, I decided to char some red bell peppers over an open flame. The idea struck while I was reminiscing about a summer barbecue, where the smoky sweetness of grilled vegetables lingered long after the meal was over. It was a bold leap, but one that paid off with a delightful complexity.

    There was a sort of symmetry to it all—blending a childhood memory with a cherished culinary tradition, like adding a new verse to an old song. The addition of roasted peppers not only enhances the robustness of the dish but also balances the fiery Chettinad spices with a touch of sweetness.

    My kitchen has since become a place where the past and present meld seamlessly, and this Spicy Chettinad Egg Curry with Smoky Roasted Peppers is a testament to that harmony. Every time I prepare it, I’m reminded of the rich tapestry of flavors and stories that food can weave.

    What Makes This Version Special

    This version of the classic Chettinad egg curry stands out due to its unique infusion of smokiness from roasted red bell peppers. Traditional Chettinad recipes are known for their fiery punch and aromatic spices, but by introducing roasted peppers, we add a new dimension of flavor. The peppers bring a natural sweetness and depth that perfectly complements the heat of the spices, creating a harmonious balance. This layer of smokiness elevates the dish from a familiar favorite to an extraordinary culinary adventure. Trust me, once you’ve tried it, there’s no going back to the standard recipe!

    Flavor Profile

    The taste journey of this Spicy Chettinad Egg Curry with Smoky Roasted Peppers is nothing short of a revelation. It begins with a fiery kick from the red chilies and peppercorns, followed by the warm, earthy notes of cumin and coriander. The roasted bell peppers introduce a tantalizing smokiness, wrapping the spices in a gentle sweetness that lingers. As you savor each bite, the aromatic symphony of ginger, garlic, and curry leaves unfolds, leaving a lasting impression that’s both bold and comforting. It’s a dish that delights in layers, each more intriguing than the last.

    Ingredients

    • 2 tablespoons oil
    • 2 large onions, finely chopped
    • 5 cloves of garlic, minced
    • 1 tablespoon ginger garlic paste
    • 4-5 dried red chilies
    • 1 teaspoon coriander seeds
    • 1 teaspoon cumin seeds
    • 1 cinnamon stick
    • 4 green cardamoms/ elaichi
    • 10 curry leaves
    • 2 large tomatoes, pureed
    • **2 red bell peppers, roasted and peeled**
    • 1 tablespoon smoked paprika
    • 1 teaspoon poppy seeds
    • Salt, to taste
    • 6 hard-boiled eggs, peeled
    • 1/2 teaspoon freshly ground black pepper
    • Chopped coriander leaves, for garnish

    Instructions

    1. Start by charring the **2 red bell peppers** over an open flame, turning them occasionally until their skin is blackened. Once charred, place them in a bowl, cover with plastic wrap, and let them steam for 10 minutes. This will make the skin easy to peel off. Peel off the skins, remove the seeds, and blend the flesh to a smooth puree.
    2. Heat 2 tablespoons of oil in a large pan over medium heat. Add the coriander seeds, cumin seeds, and dried red chilies, allowing them to bloom in the oil for about 1 minute, or until they’re fragrant and begin to pop.
    3. Add the cinnamon stick, green cardamoms, and curry leaves. Stir for another 30 seconds, releasing their aromatic oils.
    4. Introduce the chopped onions to the pan, sautéing them until they turn golden-brown, around 8-10 minutes. Stir in the ginger garlic paste and minced garlic, cooking for an additional 2 minutes.
    5. Add the pureed tomatoes and the blended roasted bell peppers. Mix well, then stir in the smoked paprika and poppy seeds. Cook until the mixture thickens and the oil starts to separate, approximately 10 minutes.
    6. Season with salt and freshly ground black pepper. Gently add the hard-boiled eggs, coating them well in the sauce. Simmer for 5-7 minutes to allow the eggs to absorb the flavors.
    7. Garnish with chopped coriander leaves before serving.

    Pro Tips from Meaghan’s Kitchen

    • For the best smoky flavor, let the peppers char until their skins are fully blackened. It might look extreme, but it’s essential for that deep, smoky taste.
    • When blooming the spices, listen for the sound of popping and watch for a slight darkening in color. This process is crucial for unlocking their full flavor potential.
    • If possible, use freshly ground spices instead of pre-ground ones. The difference in aroma and flavor is well worth the extra step.
    • To prevent overcooked eggs, remove them from the heat as soon as they’re coated in sauce. They’ll continue to absorb flavors without hardening.
    • Feel free to adjust the spice level by reducing the number of red chilies or substituting them with milder ones if preferred.

    Variations & Dietary Swaps

    • Vegetarian Version: Replace the eggs with paneer or tofu for a delicious vegetarian alternative that still packs a protein punch.
    • Spice-It-Up Version: Add more dried red chilies or a dash of cayenne pepper for those who crave extra heat.
    • Kid-Friendly Version: Reduce the amount of chili and smoked paprika, and add a bit of coconut milk for a milder, creamier curry that kids will love.

    What to Serve With It

    This Spicy Chettinad Egg Curry with Smoky Roasted Peppers pairs beautifully with garlic naan or fluffy basmati rice. The subtle sweetness of the naan or the fragrant rice complements the bold flavors of the curry. For a refreshing contrast, serve it alongside a cooling cucumber raita, which offers a soothing balance to the heat of the dish.

    Storage & Meal Prep

    Store any leftover curry in an airtight container in the fridge for up to 3 days. It can also be frozen for up to a month; just be sure to let it cool completely before sealing it in a freezer-safe container. To reheat, thaw overnight in the fridge (if frozen) and gently warm on the stove over low heat, stirring occasionally, until heated through. The flavors often deepen with time, making this an excellent make-ahead meal.

    FAQ

    Can I use green bell peppers instead of red?

    While you can use green bell peppers, they have a more bitter taste compared to the sweetness of red ones. If you prefer a less sweet and slightly more bitter flavor, feel free to make the swap.

    Is there a way to make this dish less spicy?

    Absolutely! You can cut down on the red chilies and skip the black pepper to tone down the heat. Adding coconut milk can also mellow the spices while adding a creamy texture.

    How do I prevent the eggs from overcooking?

    To keep the eggs tender, make sure to add them at the end of the cooking process and simmer only briefly. Turning off the heat once they’re fully coated in the sauce helps maintain their texture.

    Can I prepare the roasted peppers in advance?

    Yes, you can roast and blend the peppers up to 2 days in advance. Store the puree in the refrigerator until you’re ready to use it in the recipe.

    What if I don’t have smoked paprika?

    If you don’t have smoked paprika, you can substitute it with regular paprika and add a small dash of liquid smoke for that smoky flavor.

    Final Thoughts

    There’s something incredibly satisfying about transforming a classic dish into something that feels both familiar and brand new. This Spicy Chettinad Egg Curry with Smoky Roasted Peppers is a celebration of bold flavors and creative twists, and I hope it finds a special place in your culinary repertoire. Whether you’re a seasoned home cook or just beginning your journey, this recipe invites you to experiment and make it your own. I’d love to hear how it turns out for you, so please share your thoughts and any unique spins you add in the comments below or on social media. Let’s keep the kitchen conversation going!

    Related update: Spicy Chettinad Egg Curry with Smoky Roasted Peppers

    Related update: Guinness Braised Corned Beef with Whiskey-Maple Glaze and Roasted Root Vegetables

  • Decadent Chai Rice Pudding with Rosewater and Pistachio Crunch | Made by Meaghan Moineau

    Decadent Chai Rice Pudding with Rosewater and Pistachio Crunch | Made by Meaghan Moineau

    Decadent Chai Rice Pudding with Rosewater and Pistachio Crunch

    Imagine the heady aroma of chai spices curling around you as you take a spoonful of creamy rice pudding that feels like a warm hug on a chilly evening. Each bite is a dance of floral and nutty notes, thanks to the luxurious touch of rosewater and a crunchy pistachio topping. This isn’t just any rice pudding—it’s an invitation to indulge in something truly special.

    Personal Story

    Growing up, rice pudding was a staple in our household, a humble dessert that evoked comfort and a sense of home. My grandmother, the matriarch of our kitchen, would stand over the stove, patiently stirring the pot, with the sweet fragrance of vanilla and cinnamon wafting through the air. This simple dish was her way of bringing the family together, sharing stories and laughter around the table.

    One chilly autumn afternoon, craving the nostalgia of those family gatherings, I attempted to recreate her classic rice pudding. It was then I had my first kitchen mishap—spilling a jar of cardamom pods into the simmering milk. Rather than a disaster, it turned into a delightful discovery. The unexpected spice added a new depth to the dish, and I was inspired to experiment further.

    That’s how I stumbled upon the idea of infusing the rice pudding with chai spices. By adding rosewater and a pistachio crunch, I created a dish that pays homage to my roots while offering a new, luxurious twist. This Decadent Chai Rice Pudding with Rosewater and Pistachio Crunch is a testament to how sometimes, a little kitchen accident can lead to culinary magic.

    What Makes This Version Special

    This version of rice pudding is an elevated take on the beloved classic, transformed by the infusion of **aromatic rosewater** and topped with a **pistachio crunch**. The rosewater adds a fragrant, floral note that perfectly complements the warm chai spices, making each bite an experience. The pistachios, toasted to perfection, provide a delightful contrast to the creamy texture of the pudding. It’s a dessert that feels both familiar and indulgently exotic, offering the best of both worlds.

    Flavor Profile

    The flavor profile of this Decadent Chai Rice Pudding with Rosewater and Pistachio Crunch is a celebration of contrasts. The richness of the creamy rice is beautifully balanced by the floral sweetness of the rosewater. The chai spices—cinnamon, cardamom, ginger, and cloves—infuse the pudding with a warm, comforting aroma. The crunchy pistachio topping adds a nutty depth, making every bite a symphony of flavors that lingers on the palate.

    Ingredients

    • 1 cup long grain rice
    • 4 cups whole milk
    • 2 bags English breakfast tea
    • 1 teaspoon cinnamon powder
    • 1 teaspoon ginger powder
    • 4 whole cardamom pods
    • 1 whole star anise
    • 3 large cloves
    • 1 teaspoon vanilla essence
    • 1/2 cup brown sugar
    • 1 tablespoon **rosewater**
    • 1/2 cup **pistachios**, crushed
    • 1 tablespoon honey
    • Pinch of salt

    Instructions

    1. In a small saucepan, combine the milk, tea bags, rice, and all the spices: cinnamon, ginger, cardamom, star anise, and cloves. Bring the mixture to a gentle boil over medium heat.
    2. Once boiling, lower the heat and let it simmer for about 20 minutes, stirring occasionally. This allows the rice to absorb the spice-infused milk.
    3. While the pudding simmers, toast the pistachios in a dry pan over medium heat with a pinch of salt. Stir frequently until they are lightly golden and aromatic, about 5 minutes. Remove from heat and crush coarsely.
    4. After 20 minutes, remove the tea bags from the pudding, and stir in the brown sugar. Increase the heat to high and cook for another 3-4 minutes, stirring continuously until the pudding thickens and turns creamy.
    5. Stir in the vanilla essence and rosewater, ensuring they are evenly distributed. Remove from heat.
    6. Spoon the rice pudding into individual serving bowls. Drizzle with honey and sprinkle the toasted pistachios on top before serving.

    Pro Tips from Meaghan’s Kitchen

    • Rinse the rice in cold water before cooking to remove excess starch and prevent clumping.
    • For a creamier texture, use a combination of whole milk and half-and-half.
    • If you prefer a thicker pudding, let it cool slightly before serving; it will continue to thicken as it cools.
    • Adjust the sweetness to your liking by tasting the pudding before adding the full amount of sugar.
    • For a burst of color and extra flavor, garnish with a sprinkle of edible dried rose petals.

    Variations & Dietary Swaps

    • Vegan Swap: Replace whole milk with coconut milk or almond milk for a dairy-free version.
    • Spice-It-Up Version: Add a pinch of cayenne pepper to the pistachio topping for a subtle heat contrast.
    • Kids-Friendly Version: Reduce the amount of chai spices and serve with a drizzle of chocolate syrup to appeal to younger palates.

    What to Serve With It

    This Decadent Chai Rice Pudding pairs wonderfully with a glass of chilled sweet dessert wine, like a late harvest Riesling, which complements the floral and nutty notes. Alternatively, for a warm beverage pairing, a steaming cup of masala chai enhances the spice profile and rounds out the meal beautifully.

    Storage & Meal Prep

    Leftover rice pudding can be stored in an airtight container in the refrigerator for up to 3 days. To reheat, gently warm on the stovetop over low heat, stirring in a splash of milk to restore its creamy consistency. While it’s best enjoyed fresh, the pudding can also be frozen for up to a month. Thaw overnight in the refrigerator before reheating.

    FAQ

    Can I use a different type of rice?

    Yes, you can use short grain rice for a creamier texture, but adjust the cooking time as it may cook faster than long grain rice.

    Is it possible to make this dessert ahead of time?

    Absolutely! Prepare the pudding a day in advance and store it in the fridge. Add the rosewater and pistachio topping just before serving to maintain freshness.

    What if I don’t have rosewater?

    If rosewater isn’t available, you can substitute it with a few drops of orange blossom water or simply omit it for a classic chai rice pudding experience.

    How do I know when the pudding is ready?

    The pudding is ready when the rice is tender and the mixture has thickened to a creamy consistency. It should coat the back of a spoon without being too runny.

    Final Thoughts

    I hope this Decadent Chai Rice Pudding with Rosewater and Pistachio Crunch becomes a new favorite in your dessert repertoire. It’s a dish that brings warmth and a touch of luxury to any occasion, whether you’re serving it at a family dinner or enjoying a quiet moment for yourself. I’d love to hear how it turns out for you, so feel free to leave a comment below or share your creation on social media. Remember, the kitchen is a place of exploration and joy—happy cooking!

    Related update: Decadent Chai Rice Pudding with Rosewater and Pistachio Crunch

    Related update: Caramelized Fig and Walnut Upside-Down Cake with Rosemary-Honey Drizzle

  • Exquisite Saffron-Infused Chicken Korma with Toasted Almonds | Made by Meaghan Moineau

    Exquisite Saffron-Infused Chicken Korma with Toasted Almonds | Made by Meaghan Moineau

    Exquisite Saffron-Infused Chicken Korma with Toasted Almonds

    Imagine this: a luxurious aroma wafting through your kitchen, golden saffron swirling into creamy coconut milk, and the sound of almond flakes gently crackling in a pan. This isn’t just any dinner — it’s an invitation to embark on a flavorful journey with my Exquisite Saffron-Infused Chicken Korma with Toasted Almonds.

    Personal Story

    My first encounter with chicken korma was at a tiny, bustling eatery in Delhi. Packed with locals and tourists alike, the aroma of spices enveloped us as we stepped in. I was hooked at the first bite — tender chicken, a symphony of spices, and a richness that lingered long after the meal was over. But the magic ingredient I didn’t know then was saffron, which would later elevate my own version of this beloved dish.

    Back in my own kitchen, I was determined to recreate that experience. My earliest attempts were, let’s say, educational. In one misadventure, I learned that not all saffron is created equal. I somehow managed to buy saffron threads that were as colorful as my evening plans, but sadly, lacked the depth of flavor I sought. Lesson learned — quality matters!

    One day, as I experimented with different variations, a lightbulb moment struck. I was sipping on a golden milk latte, and the warm embrace of saffron inspired me to blend it with coconut milk for the korma. That was the turning point. The addition of toasted almond flakes for texture was the cherry on top, winning over the hearts (and taste buds) of my family and friends.

    Now, every time I prepare this Saffron-Infused Chicken Korma, I’m transported back to that bustling Delhi eatery. It’s a dish steeped in tradition, yet with my own personal twist — an homage to my culinary journey and the flavors that have shaped it.

    What Makes This Version Special

    This isn’t your average chicken korma. The luxurious addition of saffron transforms the dish from classic to exquisite, infusing it with a depth of flavor and a golden hue that is nothing short of mesmerizing. But that’s not all — the toasted almond flakes bring an unexpected crunch that delights the senses. It’s this unique combination that elevates the dish, making it a standout on any dinner table.

    While traditional chicken korma is undeniably delicious, this version offers a delightful contrast of textures and a richness that only saffron can provide. If you’re a fan of classic Indian cuisine, this Saffron-Infused Chicken Korma with Toasted Almonds is a must-try recipe that promises to impress.

    Flavor Profile

    Prepare your taste buds for a rich and aromatic experience. As you take your first bite, the tender chicken melts in your mouth, enveloped in a velvety coconut milk sauce. The saffron adds a luxurious hint of floral warmth, perfectly balanced by the earthiness of cumin and coriander. Just when you think you’ve savored it all, the toasted almond flakes offer a delightful crunch, and a subtle hint of lemon zest ties it all together with a refreshing finish.

    Ingredients

    • 1 lb chicken breast, cut into small pieces
    • 2 cups coconut milk
    • 1 tablespoon coriander powder
    • 1 teaspoon cumin powder
    • 2 tablespoons ginger/garlic paste
    • 2 tablespoons ground almond
    • 2 tablespoons oil
    • 1 tablespoon poppy seeds
    • 2 tablespoons raisins
    • Salt, to taste
    • 1 teaspoon saffron threads
    • 1/4 cup toasted almond flakes
    • Fresh cilantro leaves, for garnish
    • Zest of 1 lemon

    Instructions

    1. Begin by blooming the saffron threads in warm coconut milk. Heat 1/4 cup of coconut milk until it’s just warm, then add the saffron and let it sit for about 10 minutes. This step will release the full flavor and color of the saffron.
    2. In a large pan, heat the oil over low heat. Add the ginger/garlic paste and fry for about 3 minutes until fragrant, ensuring you don’t burn the paste.
    3. Stir in the cumin powder, coriander powder, ground almond, and poppy seeds. Continue frying the masala for about 3-4 minutes over low heat, until the spices are well blended and aromatic.
    4. Add the chicken pieces to the masala, stirring carefully to ensure they’re evenly coated. Cook for another 5 minutes, folding the masala over the chicken pieces gently.
    5. Pour in the remaining coconut milk along with the saffron-infused milk. Stir well to cover all the chicken pieces. Add salt to taste and the raisins.
    6. Cover the pan and let the chicken simmer on low heat for about 20-25 minutes, stirring occasionally, until the chicken is cooked through and tender.
    7. Meanwhile, toast the almond flakes in a dry pan over medium heat. Keep a close eye on them, tossing frequently until they’re golden and aromatic.
    8. Once the chicken is cooked, stir in the lemon zest. Serve the korma hot, garnished with fresh cilantro leaves and the toasted almond flakes for added crunch.

    Pro Tips from Meaghan’s Kitchen

    • Use high-quality saffron threads for the best flavor. A little goes a long way, so invest in the good stuff.
    • When toasting almond flakes, be patient. Keep them moving in the pan to avoid burning, which can happen quickly.
    • For an even creamier texture, use full-fat coconut milk — it makes a noticeable difference.
    • Don’t rush the blooming of saffron. Properly blooming it in warm liquid enhances both color and flavor.
    • If you like a little heat, add a finely chopped green chili to the masala step for a gentle kick.

    Variations & Dietary Swaps

    • Vegetarian Swap: Replace chicken with paneer or tofu. The creamy sauce pairs beautifully with these proteins.
    • Spice-It-Up Version: Add a teaspoon of garam masala or more chilies for a spicier kick.
    • Kids-Friendly Version: Tone down the spices and omit the raisins if your little ones aren’t fans of sweet surprises in savory dishes.

    What to Serve With It

    This Saffron-Infused Chicken Korma is perfectly complemented by a side of fluffy basmati rice. For a more indulgent meal, pair it with garlic naan or paratha. A chilled glass of Gewürztraminer is an excellent choice for those who enjoy a bit of wine with their meal, as its floral notes harmonize beautifully with the saffron.

    Storage & Meal Prep

    If you have leftovers, store them in an airtight container in the fridge for up to 3 days. Reheat gently on the stove over low heat, adding a splash of coconut milk if needed to maintain the creamy consistency. This dish also freezes well for up to a month. Allow it to thaw overnight in the fridge before reheating.

    FAQ

    Can I use chicken thighs instead of breasts?

    Absolutely! Chicken thighs are juicier and can add even more flavor to the dish. Adjust the cooking time slightly as thighs may take a bit longer to cook through.

    Is there a substitute for saffron?

    While there’s no perfect substitute for saffron’s unique flavor, you can try a pinch of turmeric for color, but it won’t replicate the taste. For the best experience, use saffron.

    How do I prevent the almonds from burning?

    Toast the almonds over medium heat and keep stirring them frequently. Removing them from the pan as soon as they’re golden will prevent them from overcooking.

    Can I make this dish ahead of time?

    Yes, this dish actually benefits from being made ahead as the flavors meld beautifully over time. Just reheat gently before serving.

    What if I don’t have coconut milk?

    You can substitute with heavy cream for a richer texture or almond milk for a lighter version.

    Final Thoughts

    Whether you’re a seasoned home cook or trying your hand at Indian cuisine for the first time, this Exquisite Saffron-Infused Chicken Korma with Toasted Almonds is sure to impress. It’s a dish that brings warmth and comfort to any table, and I’m thrilled to share it with you. If you try this recipe, I’d love to hear your thoughts! Feel free to leave a comment or share your creations with me. Happy cooking!

    Related update: Exquisite Saffron-Infused Chicken Korma with Toasted Almonds

    Related update: Spicy Italian Sausage & Roasted Pepper Ragu with Basil Pesto

  • Spicy Garlic-Curry Leaf Crunch Potatoes with Tamarind Chutney | Made by Meaghan Moineau

    Spicy Garlic-Curry Leaf Crunch Potatoes with Tamarind Chutney | Made by Meaghan Moineau

    Spicy Garlic-Curry Leaf Crunch Potatoes with Tamarind Chutney

    Imagine walking into a kitchen where the aromas of warm spices, crispy garlic, and a tangy tamarind chutney envelop you like a cozy culinary hug. The sizzle of potatoes frying to a perfect golden-brown is music to your ears, promising a dish that’s both familiar and exciting. Welcome to the world of Spicy Garlic-Curry Leaf Crunch Potatoes with Tamarind Chutney, where each bite is a journey through layers of flavor.

    Personal Story

    Let me take you back to a lazy Sunday afternoon in my childhood home, where the kitchen was always bustling with activity. My mother, the maestro of culinary artistry, would whip up dishes that could make anyone feel right at home. One of my fondest memories is of her preparing a version of these spicy potatoes, their aroma wafting through the house and drawing everyone towards the kitchen.

    However, it wasn’t always smooth sailing. I remember the day I first tried to recreate her masterpiece. I was a novice in the kitchen, eagerly tossing potatoes into hot oil, only to find them sticking to the pan and refusing to reach that coveted golden-brown hue. My mother, with her soft chuckle, stepped in to teach me the art of patience and the magic of the right heat. It was a lesson in humility and a pivotal moment in my culinary journey.

    Fast forward a few years, and those kitchen mishaps are now cherished memories. The dish evolved as I experimented with flavors and textures, especially after a trip to India where I discovered the transformative power of tamarind. That tangy delight became the perfect partner to my crispy potatoes, adding a refreshing twist that made the dish my own.

    And that’s how these Spicy Garlic-Curry Leaf Crunch Potatoes with Tamarind Chutney came into being — a harmonious blend of nostalgia, discovery, and innovation. Now, I’m thrilled to share this recipe with you, hoping it brings as much joy to your table as it has to mine.

    What Makes This Version Special

    This isn’t just any potato dish; it’s a symphony of flavors that dance on your palate. The addition of a tangy tamarind chutney and crispy garlic chips sets this version apart from traditional recipes. The chutney’s sweet and sour notes perfectly complement the spicy, aromatic potatoes, while the garlic chips add an irresistible crunch.

    Blooming the mustard and coriander seeds in oil amplifies their aroma, creating a foundation that elevates the dish from the first bite. This recipe is a testament to the power of thoughtful enhancements — each ingredient playing its role to perfection, making this version an experience rather than just a meal.

    Flavor Profile

    Prepare your taste buds for a vibrant flavor journey. The Spicy Garlic-Curry Leaf Crunch Potatoes with Tamarind Chutney offer a spicy and aromatic adventure with a tangy undertone. The hint of sweetness from the tamarind chutney balances the spice, while the fried garlic chips add a savory depth. As you enjoy this dish, the warmth of cinnamon and the freshness of cilantro will envelop you, leaving a lasting impression that beckons you to savor each bite.

    Ingredients

    • 2 lbs cooked par potatoes, cut into wedges
    • **Oil** for frying
    • 1 tsp mustard seeds
    • 1 tsp coriander seeds
    • 1 **cinnamon stick**
    • 15-20 **curry leaves**
    • 1 large onion, sliced
    • 1/2 tsp turmeric
    • 1 tsp salt (adjust to taste)
    • 1 tsp red dried chilli flakes
    • 4-5 garlic cloves, thinly sliced
    • 1/4 cup tamarind pulp
    • 2 tbsp jaggery
    • Fresh cilantro for garnish

    Instructions

    1. Begin by heating oil in a large pan over medium-high heat for deep frying. Once hot, carefully add the potato wedges. Fry them until they achieve a slight golden-brown color, about 5-7 minutes. Remove with a slotted spoon and set aside on paper towels to drain excess oil.
    2. In a separate non-stick pan, add 1 1/2 tablespoons of oil over medium heat. Once hot, add mustard seeds and coriander seeds, and let them bloom until the mustard seeds start to pop. This should take about 30 seconds.
    3. Add the cinnamon stick and curry leaves, stirring gently to release their aromas. This step should take another 30 seconds.
    4. Introduce the sliced onions to the pan, cooking for about 1 minute until they begin to soften.
    5. Return the fried potatoes to the pan, along with turmeric and salt. Stir everything together, letting the potatoes absorb the flavors for about 5 minutes on low heat. Keep an eye out for the onions turning a slightly golden-brown.
    6. Add the red dried chilli flakes and give it one final stir, cooking for an additional minute. Turn off the heat and transfer the potatoes to a serving dish.
    7. In the same pan, heat a bit more oil and fry the thinly sliced garlic until golden and crispy, about 2-3 minutes. Be careful not to burn them. Set aside.
    8. For the tamarind chutney, mix tamarind pulp and jaggery in a small saucepan over low heat until the jaggery dissolves completely. Let it simmer for a few minutes until slightly thickened. Drizzle over the potatoes.
    9. Top the dish with crispy garlic chips and a generous sprinkle of fresh cilantro. Serve warm and enjoy!

    Pro Tips from Meaghan’s Kitchen

    • To prevent the potatoes from sticking to the pan, make sure they’re completely dry before frying. Moisture on the surface can lead to sticking.
    • For an even more intense flavor, marinate the potatoes with turmeric and salt before frying. This allows the spices to penetrate deeper.
    • When frying the garlic, keep a close eye on it. Garlic turns from golden to burnt in seconds, and you want that perfect crispy texture.
    • If you find the tamarind chutney too tangy, adjust with more jaggery. It’s all about balancing the flavors to your liking.
    • Let the mustard seeds pop completely when blooming. If they don’t, they might add a bitter note to your dish.

    Variations & Dietary Swaps

    • Vegetarian Delight: This dish is already vegetarian, but for a vegan version, ensure your jaggery is plant-based, as some may contain animal by-products.
    • Spice-It-Up: For those who crave more heat, add finely chopped green chilies alongside the red dried chilli flakes.
    • Kids-Friendly: Tone down the spices by reducing the chilli flakes and skipping the green chilies. Serve with a side of ketchup if they prefer it a bit sweeter.

    What to Serve With It

    This dish pairs wonderfully with a chilled mango lassi, offering a cooling counterpoint to the spice. Alternatively, a side of cucumber raita can do wonders to mellow out the heat. If you’re looking for a fuller meal, serve these Spicy Garlic-Curry Leaf Crunch Potatoes with warm naan or freshly cooked basmati rice.

    Storage & Meal Prep

    These potatoes are best enjoyed fresh, but if you have leftovers, they can be stored in an airtight container in the fridge for up to three days. Reheat them in a dry pan over medium heat to revive their crispiness. For longer storage, freeze the fried potatoes without the chutney and garlic chips. When ready to enjoy, reheat in the oven and prepare the chutney and garlic fresh.

    FAQ

    Can I use sweet potatoes instead of regular potatoes?

    Absolutely! Sweet potatoes add a lovely sweetness that pairs well with the tangy chutney.

    What can I use as a substitute for jaggery?

    If you can’t find jaggery, brown sugar or palm sugar can work as substitutes, though the flavor profile will vary slightly.

    Why is my garlic burning before it gets crispy?

    Garlic burns quickly due to its high sugar content. Make sure the oil is not too hot and keep stirring constantly while frying.

    Can I make the tamarind chutney ahead of time?

    Yes, you can prepare the tamarind chutney up to a week in advance and store it in the fridge. It actually allows the flavors to meld and deepen over time.

    Is there a way to make this dish less spicy?

    To reduce the spice level, simply cut back on the red dried chilli flakes and avoid adding green chilies. You can also serve it with more cooling sides like raita.

    Final Thoughts

    I hope this Spicy Garlic-Curry Leaf Crunch Potatoes with Tamarind Chutney recipe becomes a favorite at your table. It’s a dish that embodies warmth, nostalgia, and a touch of adventure — perfect for sharing with loved ones or savoring alone on a quiet evening. I’d love to hear how it turned out for you. Feel free to leave a comment or share your version with me on social media. Bon appétit and happy cooking!

    Related update: Spicy Garlic-Curry Leaf Crunch Potatoes with Tamarind Chutney

    Related update: Smoky Maple Chipotle Grilled Sweet Potatoes

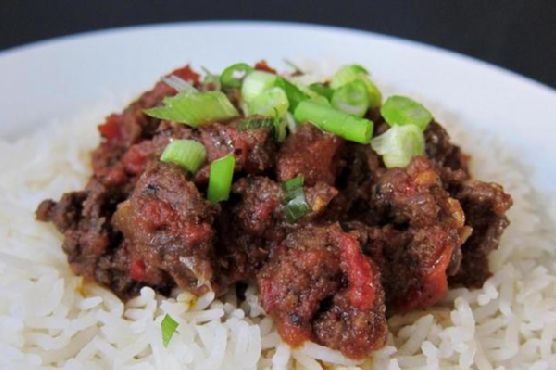
  • Madras Beef Curry | Made by Meaghan Moineau

    Madras Beef Curry | Made by Meaghan Moineau

    Madras Beef Curry

    Welcome to a journey into the warmth and spice of Indian cuisine with our Madras Beef Curry. This dish, filled with the aromatic flavors of garam masala and the heat of cayenne pepper, is bound to become a favorite in your household. Growing up, Sunday evenings at my grandmother’s house were always dedicated to exploring different cuisines, and the delightful aroma of curry simmering in the kitchen was my favorite. This Madras Beef Curry recipe brings back those cherished memories and is sure to create new ones for your family as well.

    Why You’ll Love It

    This Madras Beef Curry is a vibrant and hearty dish that will tantalize your taste buds. Here are a few reasons why you’ll fall in love with it:

    • Flavor Explosion: The combination of garam masala, cinnamon, and curry powder creates a symphony of flavors that dances on the palate.
    • Customizable Heat: Whether you like it mild or spicy, you can adjust the cayenne pepper to suit your taste.
    • Perfect for Meal Prep: This curry stores well and tastes even better the next day, making it ideal for meal prepping.
    • Comforting and Satisfying: Served over warm basmati rice, this curry provides a comforting meal that’s perfect for any occasion.

    Ingredients

    • 2 tsp garam masala
    • 1/2 tsp ground cinnamon
    • 2 tbsp curry powder
    • 1/2 tsp black pepper
    • 1 tsp salt
    • 1/4 tsp cayenne pepper
    • 1 tbsp light brown sugar
    • 4 garlic cloves, minced
    • 1-inch piece of ginger, grated
    • 2 tbsp lemon juice
    • 2 tbsp vegetable oil
    • 1.5 lbs beef, thinly sliced
    • 1 can (14 oz) diced tomatoes
    • 2 green onions, chopped
    • Cooked basmati rice, for serving

    Instructions

    1. Slice the beef thinly (as for a stir fry) and place it in a medium bowl.
    2. Add all of the other ingredients, except the tomatoes, green onions, and rice, and combine to coat the meat well.
    3. Let sit for 10-15 minutes to allow the flavors to infuse into the meat.
    4. Heat a medium pan with a lid over medium heat. Add the meat and brown well, stirring occasionally.
    5. Continue to cook over medium heat until all of the meat juices have evaporated and only oil remains in the bottom of the pan with the meat.
    6. Add the tomatoes, stir to combine, and lower the heat to medium low. Cover and simmer, stirring occasionally, until the meat is tender and most of the moisture from the tomatoes has been absorbed by the meat, about 30 minutes.
    7. If the sauce becomes too thick before the beef is tender, add 1/4 cup water and continue to simmer with the lid on.
    8. Taste and adjust the seasoning, adding additional salt if needed. For a spicier curry, additional cayenne pepper may be added at this point.
    9. Serve over steamed basmati rice with chopped green onions on top.

    Tips

    To ensure the best results, here are some tips:

    • Beef Selection: Choose a cut of beef that is suitable for quick cooking, such as sirloin or flank steak, to keep it tender.
    • Marinating Time: If you have extra time, marinate the beef longer for deeper flavors.
    • Consistent Slicing: Slice the beef evenly for uniform cooking.

    Variations & Substitutions

    This recipe is flexible and can be adapted to suit your preferences:

    • Protein Swap: Substitute chicken or lamb for beef. Adjust cooking time as needed.
    • Vegetarian Option: Use tofu or chickpeas in place of beef for a plant-based version.
    • Spice Level: Adjust the cayenne pepper to make it as mild or spicy as you like.

    Storage

    Leftover Madras Beef Curry can be stored in an airtight container in the refrigerator for up to 3 days. For longer storage, freeze in a freezer-safe container for up to 3 months. Reheat gently on the stovetop or in the microwave before serving.

    FAQ

    Can I make this curry ahead of time?

    Absolutely! This curry actually tastes better the next day as the flavors continue to develop. Just store it in the refrigerator and reheat before serving.

    What can I serve with Madras Beef Curry?

    This curry is traditionally served with basmati rice, but it also pairs well with naan bread or a side of steamed vegetables.

    Nutrition

    This Madras Beef Curry is not only delicious but also packed with protein and spices that may boost metabolism. For a lighter option, you can serve it with brown rice or quinoa.

    Final Thoughts

    Madras Beef Curry is more than just a meal; it’s an experience. Each bite invites you into a world of rich aromas and bold flavors, reminiscent of a cozy family dinner filled with laughter and good conversation. Whether you’re cooking for yourself, your family, or entertaining guests, this recipe is sure to impress. Enjoy the process of creating this dish and the warmth it brings to your table. Happy cooking!

    Related update: Madras Beef Curry

    Related update: Spicy Black Bean and Quinoa Burgers with Pineapple-Jalapeño Salsa