Tag: Honey

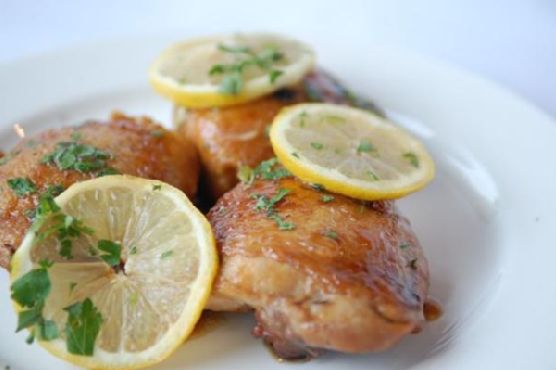
  • Zesty Lemon-Honey Glazed Chicken with Ginger-Infused Mashed Potatoes | Made by Meaghan Moineau

    Zesty Lemon-Honey Glazed Chicken with Ginger-Infused Mashed Potatoes | Made by Meaghan Moineau

    Zesty Lemon-Honey Glazed Chicken with Ginger-Infused Mashed Potatoes

    Imagine your kitchen filled with the enticing aroma of zesty lemon and sweet honey caramelizing into a perfect glaze, while the gentle hum of bubbling potatoes promises a creamy, aromatic side dish. This dish is a celebration of bold flavors and comforting textures, ready to elevate any dinner gathering or a cozy night in.

    Personal Story

    Growing up, Sunday dinners were a sacred affair in our household. My grandmother would somehow transform a humble chicken into something magical, her secret always a mystery. It wasn’t until years later, when I attempted to replicate her magic, that I stumbled upon my own secret twist: a hint of ginger and turmeric to the mashed potatoes.

    I remember the first time I made this dish vividly. It was a rainy afternoon, the kind that beckons you to stay indoors and embrace the warmth of your kitchen. As I stood there, garlic sizzling in olive oil, I felt a connection to my grandmother’s kitchen, the same comforting symphony of flavors filling the air.

    Of course, there was a mishap or two. Like when I accidentally used too much turmeric, turning my potatoes an alarming shade of yellow. But with each attempt, the recipe became a comforting ritual. The zing of lemon, the sweetness of honey, and the earthy warmth of ginger and turmeric became my signature touch.

    Sharing this recipe with friends and family, I found it brought the same joy to others as it did to me. It’s not just a meal; it’s a shared experience, a conversation starter, and a tribute to culinary creativity.

    What Makes This Version Special

    This version of Zesty Lemon-Honey Glazed Chicken with Ginger-Infused Mashed Potatoes stands out because it introduces a subtle complexity to the classic combination. The addition of fresh ginger and ground turmeric to the mashed potatoes not only adds a burst of color but also a depth of flavor that harmonizes beautifully with the citrusy glaze of the chicken. It’s a fusion of comfort and sophistication, offering a delightful twist that surprises and delights.

    Unlike traditional mashed potatoes, this version boasts a hint of spice and fragrance from the ginger and turmeric, which are bloomed in butter before being mixed into the sweet potatoes. This technique elevates the dish, transforming it from a simple side into a star on your plate. Accompanied by the sweet and tart glaze on the chicken, this meal becomes a symphony of flavors, each bite more intriguing than the last.

    Flavor Profile

    Sink your teeth into the sweet and tangy chicken, where a citrusy glaze envelops each piece in a delightful, sticky hug. The garlic and thyme infuse the meat with a savory depth, while the honey and lemon slices caramelize into a glossy finish. Paired with the warm, earthy notes of ginger and turmeric in the creamy mashed potatoes, this dish offers a balanced flavor journey. The potatoes are rich and velvety, with a pop of freshness from scallions and a slight nuttiness from the buttermilk.

    Ingredients

    • 8 chicken thighs
    • 2 teaspoons black sea salt
    • 1 teaspoon pepper
    • 2 tablespoons olive oil
    • 4 cloves garlic, minced
    • 4 sprigs thyme
    • 1 splash red wine vinegar
    • 2 tablespoons dark soy sauce
    • 3 tablespoons honey
    • 1 lemon, thinly sliced
    • 2 tablespoons flat leaf parsley, chopped
    • 1 inch fresh ginger, grated
    • 1 teaspoon ground turmeric
    • 1 cup buttermilk
    • 4 large sweet potatoes, peeled and cubed
    • 2 scallions, sliced

    Instructions

    1. Season the chicken thighs with salt and pepper. Heat olive oil in a large sauté pan over medium-high heat. Add the chicken, skin-side down, in a single layer. Brown the chicken pieces (in batches if necessary) along with the garlic and thyme for 2-3 minutes on each side until golden brown. Remove and set aside.
    2. Return all the chicken to the pan. Add a splash of red wine vinegar and let it bubble until reduced by half. Drizzle the soy sauce and honey over the chicken, then shake the pan to mix all ingredients thoroughly.
    3. Pour 1/2 cup of hot water into the pan and add the lemon slices. Let the liquid bubble and reduce down until syrupy, which will take about 10 minutes or so. By now, the chicken should be cooked through. Transfer the chicken to a platter and sprinkle over the chopped parsley.
    4. Meanwhile, boil the sweet potatoes in salted water until tender, about 15-20 minutes. Drain and set aside.
    5. In a small pan, melt a tablespoon of butter over low heat. Add the grated ginger and turmeric, and bloom them in the butter for about 1-2 minutes until fragrant.
    6. In a large bowl, mash the sweet potatoes with the buttermilk and the spiced butter mixture until smooth and creamy. Stir in the scallions for a fresh finish.
    7. Serve the chicken hot, accompanied by the ginger-infused mashed sweet potatoes.

    Pro Tips from Meaghan’s Kitchen

    • Bloom spices: Always bloom your ginger and turmeric in butter before adding them to the mashed potatoes. This step releases their essential oils, enhancing the fragrance and flavor.
    • Use the right soy sauce: Dark soy sauce adds a richer color and deeper flavor to the glaze. Don’t substitute with regular soy sauce if you want that deep umami.
    • Caramelize your lemons: Allow the lemon slices to caramelize slightly in the pan for an extra depth of flavor that complements the sweet and savory notes of the glaze.
    • Adjust sweetness: If you prefer a slightly less sweet glaze, reduce the honey by one tablespoon and add a touch more vinegar for balance.
    • Rest the chicken: Let the chicken rest for a few minutes after cooking to reabsorb juices, ensuring moist and flavorful meat.

    Variations & Dietary Swaps

    • Vegetarian Swap: Replace chicken with tofu. Use the same glaze ingredients and method for a plant-based alternative.
    • Spice-it-up Version: Add a pinch of cayenne pepper to the glaze for a spicy kick that pairs beautifully with the sweetness of the honey.
    • Kids-Friendly Version: Substitute sweet potatoes with regular potatoes for a milder flavor and skip the turmeric if your little ones aren’t fan of the color or taste.

    What to Serve With It

    This dish pairs beautifully with a chilled Riesling, whose crispness complements the sweet and tart glaze of the chicken. Alternatively, a lightly sparkling elderflower soda is a refreshing, non-alcoholic option that enhances the floral notes of the dish. For a complete meal, consider serving with a side of lightly sautéed green beans or a simple arugula salad tossed in lemon vinaigrette.

    Storage & Meal Prep

    Store any leftovers in an airtight container in the fridge for up to 3 days. To reheat, place in a 350°F oven until warmed through, about 15 minutes. Alternatively, you can freeze the chicken and mashed potatoes separately for up to 2 months. Thaw overnight in the fridge before reheating.

    FAQ

    Can I use chicken breasts instead of thighs?

    Yes, you can use boneless chicken breasts. Keep in mind they cook faster, so monitor them closely to avoid drying out.

    Can I make this dish ahead of time?

    Absolutely! Prepare the chicken and mashed potatoes in advance, then reheat before serving. The flavors meld beautifully, making it an ideal make-ahead dish.

    What if I don’t have fresh ginger?

    You can substitute with 1/2 teaspoon of ground ginger, but the flavor might not be as vibrant as fresh ginger.

    Is there a non-dairy substitute for buttermilk?

    Yes, use almond milk with a teaspoon of apple cider vinegar or lemon juice. Let it sit for a few minutes to curdle slightly before using.

    How can I thicken the glaze if it’s too runny?

    If the glaze is too runny, let it simmer longer to reduce or add a cornstarch slurry (1 teaspoon cornstarch mixed with 1 tablespoon cold water) to thicken it quickly.

    Final Thoughts

    There you have it, a dish that combines tradition with a twist, bringing warmth and flavor to your table. I hope you find as much joy in making Zesty Lemon-Honey Glazed Chicken with Ginger-Infused Mashed Potatoes as I do. I’d love to hear about your experiences and any creative spins you might add. Don’t forget to share your culinary adventures and spread the love of cooking!

    Related update: Zesty Lemon-Honey Glazed Chicken with Ginger-Infused Mashed Potatoes
  • Honey-Bourbon Glazed Country-Style Ribs with Smoked Paprika | Made by Meaghan Moineau

    Honey-Bourbon Glazed Country-Style Ribs with Smoked Paprika | Made by Meaghan Moineau

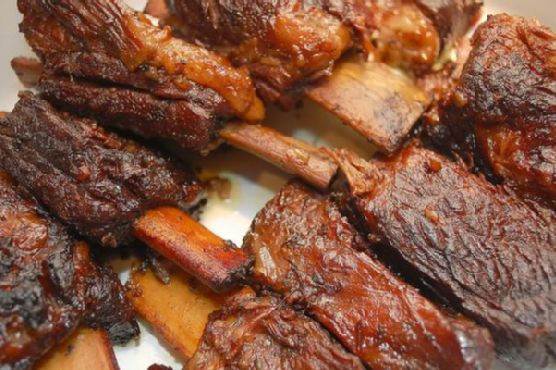
    Honey-Bourbon Glazed Country-Style Ribs with Smoked Paprika

    The tantalizing aroma of these Honey-Bourbon Glazed Country-Style Ribs with Smoked Paprika will have you salivating long before they hit the table. Picture this: golden-brown beef short ribs, sizzling in a cast iron skillet, enveloped in a rich, smoky glaze that melds sweet honey with the bold, oaky warmth of bourbon. It’s a gastronomic symphony that promises to delight and surprise your taste buds.

    Personal Story

    For me, ribs were a weekend ritual growing up. Every Sunday, my family would gather around the table, eagerly anticipating the moment when my dad would present his perfectly charred ribs, a secret recipe he guarded fiercely. The kitchen would be filled with the sound of sizzling meat and the warm, comforting aroma of slow-cooked goodness. It was a tradition that brought us together, no matter what the week had thrown our way.

    As I grew older, I started experimenting in the kitchen, eager to make my mark on the family tradition. One Sunday, I decided to venture into uncharted territory, adding a splash of bourbon to the mix. My heart raced as I deglazed the pan, the alcohol sizzling and popping as it met the heat. I worried I had gone too far, that my little twist would be too bold for my family’s taste.

    But the moment those Honey-Bourbon Glazed Country-Style Ribs hit the table, I knew I had a winner. The smoky depth of the paprika intertwined with the sweet and spicy glaze, enhanced by the bourbon’s oaky undertone, was met with nods of approval and satisfied smiles. It was an elevated twist on a cherished classic, one that earned me a spot in the family rib hall of fame.

    Now, every time I make this dish, I’m reminded of that first successful attempt, the joy of creative cooking, and the power of food to bring us together. It’s a recipe that’s close to my heart, and I’m thrilled to share it with you.

    What Makes This Version Special

    This version of Honey-Bourbon Glazed Country-Style Ribs isn’t just a nod to tradition—it’s a celebration of flavor. By incorporating a bold bourbon kick and the smoky depth of paprika, I’ve elevated the sweet and spicy profile of the original recipe. The bourbon not only deglazes the pan, infusing the ribs with a rich, oaky flavor, but it also adds a layer of sophistication that makes this dish stand out.

    The smoked paprika, on the other hand, deepens the sauce’s complexity, bringing out the best in the other ingredients. It’s a combination that transforms the humble rib into something truly special—perfect for impressing guests or simply treating yourself to a restaurant-quality meal at home. This version is not just better than the standard recipe; it’s a whole new experience.

    Flavor Profile

    Imagine biting into a piece of tender, juicy rib, the sweet glaze mingling with a subtle smokiness that clings to your taste buds. The first notes are of honey’s natural sweetness, quickly followed by the warm embrace of bourbon, its oaky essence adding depth and richness. A hint of heat from the cayenne and ancho chili powder dances on your tongue, balanced by the savory undertones of fresh thyme and smoked paprika. It’s a symphony of sweet, smoky, and spicy flavors that keeps you coming back for more.

    Ingredients

    • 2 pounds beef short ribs
    • 2 tablespoons vegetable oil
    • 1 large yellow onion, diced
    • 4 cloves garlic, minced
    • 2 tablespoons unsalted butter
    • 1 cup tomato sauce
    • 1/4 cup apple cider vinegar
    • 1/2 cup honey
    • 1 tablespoon hot sauce
    • 1/2 teaspoon cayenne pepper
    • 1 tablespoon ancho chili powder
    • 1 teaspoon salt
    • 1 teaspoon dry mustard
    • 1 cup vegetable scraps (such as carrot peels)
    • 2 cups beef stock
    • 1/2 cup water (if needed)
    • 1/2 cup bourbon whiskey
    • 1 tablespoon smoked paprika
    • 2 teaspoons fresh thyme
    • 1/4 cup dark brown sugar

    Instructions

    1. Heat the vegetable oil in a 6-quart enameled Dutch oven over medium-high heat. Add the beef short ribs, browning them on all sides until they achieve a golden-brown crust, about 6-8 minutes.
    2. Once browned, remove the ribs and pour in the bourbon whiskey to deglaze the pan, scraping up all those flavorful bits. Allow the alcohol to cook off, about 2 minutes.
    3. Return the ribs to the pot, pour in the beef stock, and add water just to cover if necessary. Toss in the vegetable scraps and bring to a boil.
    4. Lower the heat to a simmer, cover, and cook for 45 minutes to an hour, or until the ribs are tender and the meat easily pulls away from the bone.
    5. While the ribs are braising, melt the butter in a large cast iron skillet over medium-low heat. Add the diced onion and sauté until soft and translucent, about 5 minutes.
    6. Stir in the garlic and sauté for another minute until fragrant. Add the tomato sauce, apple cider vinegar, honey, hot sauce, cayenne pepper, ancho chili powder, salt, dry mustard, dark brown sugar, smoked paprika, and fresh thyme.
    7. Bring the mixture to a boil, then reduce the heat and simmer uncovered for 25 minutes, stirring occasionally until the sauce thickens.
    8. When the ribs are tender, remove them from the braising liquid and transfer to the skillet with the sauce. Raise the heat to medium-high and cook, stirring frequently, until the sauce has glazed the ribs, about 10 minutes.
    9. Serve the ribs hot, with the remaining sauce on the side if desired.

    Pro Tips from Meaghan’s Kitchen

    • For maximum flavor, let the ribs marinate in the sauce overnight before cooking. This allows the spices and bourbon to penetrate deeper into the meat.
    • If you’re short on time, use a pressure cooker to tenderize the ribs before finishing them in the skillet.
    • Keep an eye on the sauce as it simmers. Stir regularly to prevent it from sticking and burning on the bottom of the pan.
    • To achieve a nice caramelization, don’t rush the browning process of the ribs. Pat them dry before adding to the hot oil for the best sear.
    • If you prefer a smokier flavor, consider adding a few drops of liquid smoke to the sauce.

    Variations & Dietary Swaps

    • Vegetarian Swap: Replace beef ribs with large portobello mushrooms. Adjust the cooking time as needed since mushrooms cook faster.
    • Spice-It-Up Version: Increase the cayenne pepper to 1 teaspoon for an extra kick. You can also add sliced jalapeños to the sauce.
    • Kids-Friendly Version: Reduce the hot sauce and cayenne to make the glaze milder. Serve with a side of honey dipping sauce for sweetness.

    What to Serve With It

    These Honey-Bourbon Glazed Country-Style Ribs pair beautifully with a side of creamy coleslaw, its crunch and tang balancing the rich, meaty flavors. A glass of chilled lager complements the dish perfectly, cutting through the sweetness of the glaze and refreshing your palate with every sip. For a complete meal, consider adding some buttery cornbread or crispy roasted potatoes.

    Storage & Meal Prep

    If you have leftovers (lucky you!), store the ribs in an airtight container in the fridge for up to 3 days. To reheat, place them in a preheated oven at 350°F for about 15-20 minutes, or until warmed through. For longer storage, freeze the ribs in a freezer-safe bag for up to 3 months. Thaw overnight in the refrigerator before reheating.

    FAQ

    Can I use pork ribs instead of beef?

    Absolutely! Pork ribs will work well with this recipe, though the cooking time may vary slightly. Just ensure they are tender before moving them to the sauce.

    What can I substitute for bourbon whiskey?

    If you prefer to avoid alcohol, substitute with apple juice or beef broth. You’ll miss the oaky flavor, but the dish will still be delicious.

    Is there a way to make this dish less sweet?

    Yes, you can reduce the amount of honey and dark brown sugar in the sauce. Start with half the amount and adjust to taste.

    Can I make the sauce ahead of time?

    Definitely! Prepare the sauce up to two days in advance. Store it in the fridge, and reheat gently before tossing with the ribs.

    What’s the best way to achieve a sticky glaze?

    Ensure the sauce reduces sufficiently by simmering it uncovered. Stir frequently and keep an eye on the consistency—it should be thick enough to coat the back of a spoon.

    Final Thoughts

    There you have it, my Honey-Bourbon Glazed Country-Style Ribs with Smoked Paprika—a dish that’s both a nod to tradition and a testament to the joys of culinary creativity. It’s a recipe that brings warmth and flavor to any table, and one that I hope will become a staple in your kitchen as it has in mine. I’d love to hear how these ribs turn out for you, so please leave a comment below or share your photos on social media. Happy cooking, my friends!

    Related update: Honey-Bourbon Glazed Country-Style Ribs with Smoked Paprika

    Related update: Zesty Lemon-Honey Glazed Chicken with Ginger-Infused Mashed Potatoes
  • Lavender-Infused Upside-Down Blueberry Puffs with Honey-Citrus Drizzle | Made by Meaghan Moineau

    Lavender-Infused Upside-Down Blueberry Puffs with Honey-Citrus Drizzle | Made by Meaghan Moineau

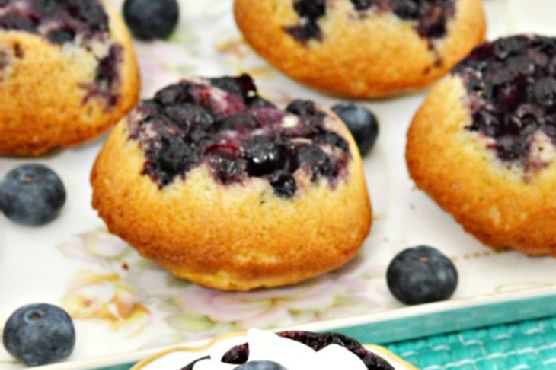
    Lavender-Infused Upside-Down Blueberry Puffs with Honey-Citrus Drizzle

    Imagine walking through a sunlit lavender field, the breeze carrying whispers of floral perfume. Now, picture this essence captured in a warm, buttery puff, crowned with a tangy honey-citrus drizzle that dances across your taste buds. Welcome to the culinary delight that is Lavender-Infused Upside-Down Blueberry Puffs.

    Personal Story

    My love affair with blueberries began in my grandmother’s kitchen. Every summer, we’d venture into the tiny berry patch behind her house, our hands becoming stained with the rich indigo juice of freshly picked berries. Back inside, the kitchen would come alive with the smells of home-baked goodies, the sweet promise of blueberry pies and muffins filling the air. But there was one dish that stood out — her famous blueberry puffs, a cloud-like dessert that was equal parts comfort and indulgence.

    One rainy afternoon, determined to recreate the magic, I invited my friends for a baking session. We laughed, got flour on every possible surface, and took turns stirring the batter, each adding our own little twist. That’s when I decided to experiment with lavender, a favorite childhood scent, and honey, reminiscent of the sticky-sweet summers of my youth. The first attempt was a disaster — too much lavender made it taste like a soap bar! But after a few tweaks, I found the perfect balance.

    Now, these lavender-infused upside-down blueberry puffs are my signature dessert. Their floral and citrusy notes never fail to evoke memories of my grandmother’s kitchen, combined with a new, sophisticated twist. Every bite is a reminder that sometimes, the best dishes come from a blend of tradition and a dash of the unexpected.

    What Makes This Version Special

    This recipe takes the classic upside-down blueberry puff and elevates it with a fragrant twist. By infusing the batter with dried culinary lavender, each bite offers a subtle floral aroma that pairs beautifully with the buttery softness of the puffs. Topped with a honey-citrus drizzle — a luscious concoction of honey warmed with lemon and orange zest — the dish gains a zesty, tangy dimension that cuts through the sweetness, providing a perfect balance. It’s this harmony of flavors that sets my version apart, transforming a beloved classic into a sophisticated dessert experience.

    Flavor Profile

    From the first spoonful, the taste experience is a symphony of contrasts. The floral notes of lavender gently perfume the soft, buttery puffs, while the fresh blueberries burst with sweet juiciness. The crowning glory is the honey-citrus drizzle, which introduces a bold, tangy zing. As the honey seeps into the warm puffs, it melds with the fragrant lavender, creating a lingering taste that is both indulgent and refreshing. Each bite is a journey from floral to fruity, sweet to zesty, promising a delightful sensory adventure.

    Ingredients

    • 1 cup blueberries, plus 6 extra for topping
    • 1 cup flour
    • 1/2 teaspoon baking powder
    • 1/4 teaspoon salt
    • 1 stick butter, softened
    • 1 cup sugar
    • 1 large egg, separated
    • 1/4 teaspoon **butter vanilla bakery emulsion**
    • 1/2 teaspoon cream of tartar
    • 1/2 cup milk
    • **1 tablespoon dried culinary lavender**
    • **1/4 cup honey**
    • **1 teaspoon lemon zest**
    • **1 teaspoon orange zest**
    • Fresh mint leaves, for garnish

    Instructions

    1. Preheat your oven to 375°F. Take a deep breath — the anticipation is part of the fun!
    2. Wash the blueberries gently and pat them dry. Divide them among six 6-ounce custard cups, saving six to top the cakes later.
    3. In a small saucepan, warm the milk over low heat. Add the dried culinary lavender and let it steep for about 5 minutes. Strain the milk to remove lavender bits and let it cool.
    4. Spray the custard cups with baking spray to ensure easy release later.
    5. In a mixing bowl, combine flour, salt, and baking powder. Set aside.
    6. In another bowl, beat the egg white until foamy. Add the cream of tartar and continue beating until stiff peaks form. This is your workout for the day — embrace it!
    7. Cream the butter until smooth. Gradually add sugar, beating until the mixture is light and fluffy.
    8. Add the egg yolk and butter vanilla bakery emulsion to the butter mixture, mixing until well combined.
    9. Alternate adding the flour mixture and lavender-infused milk to the butter mixture, beating until the batter is thick and well combined.
    10. Gently fold the beaten egg white into the batter with a spatula, careful not to deflate the air you’ve worked so hard to incorporate.
    11. Spoon the batter into the prepared custard cups, filling them no more than 3/4 full. Place them on a baking sheet for easy handling.
    12. Bake for 30 minutes, or until a toothpick inserted near the center comes out clean and the tops are golden-brown.
    13. While the puffs bake, prepare the honey-citrus drizzle. In a small saucepan, warm the honey with lemon and orange zest over low heat, stirring occasionally.
    14. Once the puffs are done, immediately turn them out onto wire racks.
    15. Drizzle the warm honey-citrus over the puffs. Top each with a reserved blueberry and a sprig of fresh mint.
    16. Serve warm or at room temperature, savoring each bite of floral and citrusy goodness.

    Pro Tips from Meaghan’s Kitchen

    • Use culinary-grade lavender to avoid any bitterness — it’s the secret to an aromatic delight.
    • Gently fold in the egg whites for a lighter, airier texture — a little patience goes a long way.
    • Steeping the lavender in milk is key; too long, and it becomes overpowering, so set a timer.
    • For the honey-citrus drizzle, use fresh zest for maximum flavor impact — it makes all the difference.
    • Baking on a lower shelf prevents over-browning, ensuring even cooking throughout.

    Variations & Dietary Swaps

    • Vegetarian swap: Substitute the egg with a flaxseed egg for a plant-based option.
    • Spice-it-up version: Add a pinch of cardamom to the batter for an exotic, spicy twist.
    • Kids-friendly version: Use less lavender and add a swirl of chocolate sauce for a sweeter, more familiar taste.

    What to Serve With It

    These lavender-infused upside-down blueberry puffs pair beautifully with a chilled glass of sparkling elderflower lemonade. The bubbly, floral notes of the elderflower complement the lavender, while the lemonade’s tangy kick highlights the citrus drizzle. Alternatively, a scoop of vanilla ice cream offers a creamy counterpoint to the puffs’ warm, airy texture.

    Storage & Meal Prep

    Leftover puffs can be stored in an airtight container in the fridge for up to three days. To reheat, place them in a preheated oven at 300°F for about 10 minutes, or until warm. For longer storage, freeze the puffs (without the drizzle) for up to a month. Thaw overnight in the fridge and reheat as directed before serving.

    FAQ

    Can I use fresh lavender instead of dried?

    While fresh lavender can be used, it tends to have a stronger flavor, so use it sparingly. Always ensure it’s pesticide-free and suitable for culinary use.

    What if I don’t have custard cups?

    No worries! A muffin tin can work in a pinch. Just ensure you adjust the baking time, as the puffs may cook faster.

    Can I make the drizzle ahead of time?

    Absolutely! Prepare the honey-citrus drizzle up to a week in advance. Store it in the fridge and gently warm it before drizzling over the puffs.

    Is there a gluten-free version?

    Yes! Substitute the regular flour with a 1:1 gluten-free baking blend. Ensure your baking powder is gluten-free as well.

    Final Thoughts

    Thank you for joining me on this delightful culinary journey. These lavender-infused upside-down blueberry puffs with honey-citrus drizzle are a testament to the joy of experimentation and the magic that unfolds when tradition meets innovation. I can’t wait for you to try them and share your experiences. Feel free to leave a comment below — your thoughts and suggestions are what make this community so vibrant. Happy baking!

    Related update: Lavender-Infused Upside-Down Blueberry Puffs with Honey-Citrus Drizzle

    Related update: Decadent Rocky Road Rice Krispie Treats with Espresso Almond Brittle

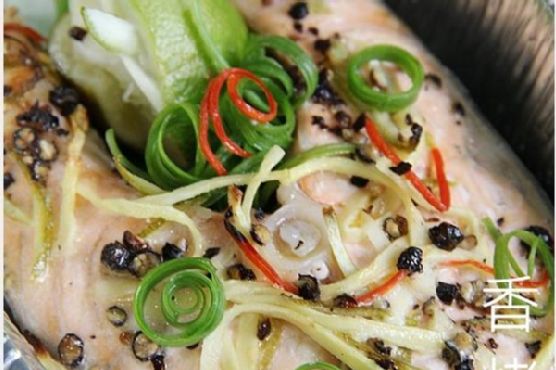
  • Honey-Lime Glazed Baked Salmon with Crispy Ginger Garlic Topping | Made by Meaghan Moineau

    Honey-Lime Glazed Baked Salmon with Crispy Ginger Garlic Topping | Made by Meaghan Moineau

    Honey-Lime Glazed Baked Salmon with Crispy Ginger Garlic Topping

    Imagine a sizzling salmon fillet, its skin crackling as it bakes to perfection. As you lean closer, a fragrant wave of honey and lime envelops your senses, and you can almost taste the sweet, tangy glaze. The crispy ginger garlic topping offers an unexpected crunch that leaves you craving more with every bite.

    Personal Story

    I can still remember the first time I tried salmon. It was during a family vacation to the Pacific Northwest, and the memory is as vivid as the taste was profound. We dined at a cozy little restaurant by the sea, where the air was filled with the salty breeze and the distant calls of seagulls. I was hesitant, but my curiosity got the better of me. The moment that piece of salmon touched my tongue, I was hooked.

    Back home, I was determined to recreate that magic. My first attempt was far from perfect — perhaps a bit too much lime, a touch too little honey. But that was the start of my love affair with cooking salmon, and I’ve been refining my technique ever since. Each salmon dish I create is a tribute to that first taste, a journey to capture and elevate the flavors I experienced by the sea.

    This new honey-lime glazed baked salmon with a crispy ginger garlic topping is my latest triumph. Every time I prepare this dish, I am transported back to that maritime memory, yet it feels distinctively mine — a fusion of my love for classic flavors with a modern twist.

    What Makes This Version Special

    The magic of this honey-lime glazed baked salmon lies in its unique combination of flavors and textures. The addition of a honey and lime glaze not only enhances the salmon’s natural flavors but also introduces a delightful sweet and tangy profile. The real game-changer, however, is the crispy ginger garlic topping. By mixing shredded ginger, minced garlic, and panko breadcrumbs with sesame oil, we create a topping that broils to a golden-brown finish. This topping provides a delightful crunch that contrasts beautifully with the tender, flaky salmon beneath.

    Flavor Profile

    When you take a bite of this honey-lime glazed baked salmon, your taste buds are treated to a symphony of flavors. The sweet and tangy glaze dances on your palate, with a hint of heat from the chili that adds an intriguing edge. The crispy, savory topping is not just an afterthought — it’s an integral part of the dish that enhances the overall experience. It’s like a melody where every note is in perfect harmony.

    Ingredients

    • 1 salmon cutlet, cleaned and scales removed
    • 2 tablespoons cooking wine
    • **Rind of 1 lime**
    • **Juice of 1 lime**
    • 1 tablespoon crushed black peppercorns
    • 1 tablespoon shredded ginger
    • 1 red chili, finely chopped
    • 2 spring onions, chopped
    • 2 tablespoons butter, cubed
    • **3 tablespoons honey**
    • 3 cloves garlic, minced
    • 1/4 cup panko breadcrumbs
    • 2 tablespoons sesame oil
    • Fresh cilantro, chopped, for garnish

    Instructions

    1. Preheat your oven to 200°C (about 390°F).
    2. Clean the salmon cutlet thoroughly, ensuring all scales are removed. Pat it dry with a paper towel and place it on a baking tray lined with foil.
    3. Season the salmon all over with cooking wine, then sprinkle with the lime rind and juice. Top with crushed black peppercorns, shredded ginger, chopped chili, spring onions, and butter cubes.
    4. In a small saucepan over medium heat, combine **honey** and **lime juice**. Allow the mixture to reduce slightly, creating a glaze. Brush this glaze generously over the salmon.
    5. Bake the salmon in the preheated oven for 12 minutes. Alternatively, you can toast it in an oven toaster for 15-18 minutes depending on thickness and desired doneness.
    6. Meanwhile, in a bowl, mix shredded ginger, minced garlic, and panko breadcrumbs with sesame oil.
    7. After the initial baking time, remove the salmon and sprinkle the breadcrumb mixture over it. Return to the oven and broil for the last 2 minutes until the topping is golden-brown.
    8. Garnish with fresh cilantro before serving.

    Pro Tips from Meaghan’s Kitchen

    • For extra flavor, marinate the salmon with lime juice and rind a few hours before cooking.
    • Ensure your oven is preheated to the right temperature to get that perfect crispy topping.
    • For an even crunchier topping, add a tablespoon of finely chopped nuts to the breadcrumb mixture.
    • Use a fish spatula to carefully transfer the salmon to a serving dish without breaking the fillet.
    • Don’t skip the cilantro — it adds a fresh, bright note that balances the dish beautifully.

    Variations & Dietary Swaps

    • Vegetarian Swap: Replace the salmon with firm tofu. The honey-lime and ginger garlic flavors work wonderfully with tofu’s texture.
    • Spice-It-Up Version: Add a teaspoon of sriracha to the glaze for an extra kick.
    • Kids-Friendly Version: Omit the chili and reduce the garlic for a milder taste that children will love.

    What to Serve With It

    This honey-lime glazed baked salmon pairs beautifully with a chilled glass of Sauvignon Blanc, complementing the zesty lime and savory notes. For a side, consider coconut rice, which adds a creamy, tropical undertone that balances the dish’s vibrant flavors. A simple green salad or steamed asparagus would also make a fresh, complementary side.

    Storage & Meal Prep

    Leftovers can be stored in an airtight container in the fridge for up to 2 days. To reheat, gently warm in the oven at 150°C (about 300°F) until heated through. Avoid microwaving, as this can make the topping soggy. If you wish to freeze, do so without the topping and add fresh topping before reheating.

    FAQ

    Can I use frozen salmon?

    Yes, you can use frozen salmon. Just make sure it is fully thawed and pat it dry before seasoning to remove excess moisture.

    What if I don’t have sesame oil?

    No worries! Olive oil can be used as a substitute, though it will slightly alter the flavor profile by adding a more Mediterranean note.

    How do I know when the salmon is fully cooked?

    The salmon is done when it flakes easily with a fork and appears opaque in the center. A cooking thermometer should read 145°F (62.8°C) at the thickest part.

    Can I make the glaze ahead of time?

    Absolutely! You can prepare the honey-lime glaze up to two days in advance. Just store it in the fridge and reheat gently before using.

    Is there a substitute for panko breadcrumbs?

    If panko isn’t available, regular breadcrumbs can be used; however, the topping may not be as crispy. You can also try crushed cornflakes for a gluten-free option.

    Final Thoughts

    Cooking this honey-lime glazed baked salmon is more than just preparing a meal; it’s an experience, a celebration of flavors that come together in perfect harmony. I hope you feel inspired to give this recipe a try and let it transport you to your own culinary bliss. As always, I love hearing from you, so please share your thoughts and variations in the comments below. Happy cooking, and may your kitchen be filled with love and laughter!

    Related update: Honey-Lime Glazed Baked Salmon with Crispy Ginger Garlic Topping

    Related update: Smoky Grilled Paneer Jalfrezi with Charred Peppers

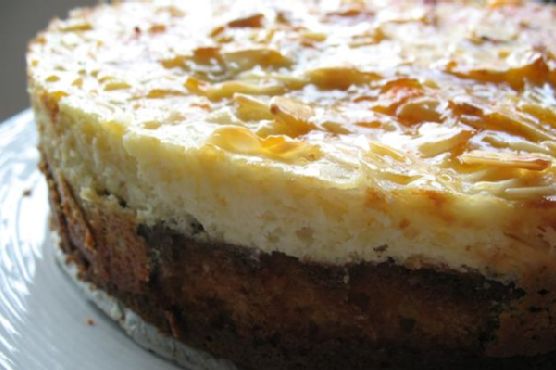
  • Luscious Almond Ricotta Cake with Lavender-Honey Glaze | Made by Meaghan Moineau

    Luscious Almond Ricotta Cake with Lavender-Honey Glaze | Made by Meaghan Moineau

    Luscious Almond Ricotta Cake with Lavender-Honey Glaze

    Picture this: The intoxicating aroma of almonds toasting in your oven, mingling with the warm sweetness of honey and the gentle floral notes of lavender. Now imagine slicing into a cake that’s as tender as a whisper, with a glossy glaze that catches the light just so. Let me take you on a culinary journey to Italy with my Luscious Almond Ricotta Cake, uniquely elevated with a Lavender-Honey Glaze.

    My Italian Kitchen Adventure

    It was a sun-drenched afternoon in Tuscany, where my love affair with almond ricotta cake truly began. I was on a cooking retreat, nestled amidst rolling vineyards and olive groves. Our instructor, a spirited Nonna with a penchant for storytelling, shared her family’s cherished recipes. But it was her almond ricotta cake that captivated my senses. The cake was simple yet divine, a perfect marriage of flavors and textures.

    Back home, I couldn’t shake the memory of that cake. It beckoned me to experiment in my own kitchen, to create a version that not only paid homage to Nonna’s artistry but also infused a touch of my own culinary flair. My first attempt was a classic rendition, but my heart yearned for something more exciting — something that danced on the palate.

    After several trials (and a few hilarious mishaps involving overly ambitious experiments with local wildflowers), I stumbled upon the magic of lavender-honey. The idea came to me during a quiet moment in my garden, where the lavender bushes swayed gently in the breeze. I imagined their subtle aroma blending seamlessly into the cake’s glaze, adding a whisper of elegance.

    With each iteration, I inched closer to perfection. As I combined the ingredients, the kitchen came alive with the heady scent of lavender intertwining with honey, transporting me back to Tuscany with every whiff. This version, I knew, was ready to be shared.

    What Makes This Version Special

    What truly sets this Almond Ricotta Cake apart is the infusion of aromatic lavender and luscious honey into the glaze. This addition introduces a floral sweetness that harmonizes beautifully with the nutty, creamy base of the cake. While traditional almond ricotta cakes are deliciously satisfying, the lavender-honey glaze elevates this dessert to a new level of sophistication and intrigue.

    The glaze is not merely an afterthought; it’s an integral part of the experience. Each bite offers a delicate balance, the kind that makes you pause, close your eyes, and savor the moment. This version captures the essence of a classic Italian dessert while adding a delightful twist that surprises and delights.

    Flavor Profile

    The flavor profile of this Luscious Almond Ricotta Cake is an ode to subtlety and richness. As you take your first bite, the delicate floral notes of lavender gently unfold, bringing a hint of springtime fields to your palate. This is followed by a mellow, sweet embrace from the honey, which complements the cake’s natural sweetness without overpowering it.

    The cake itself is a symphony of textures and tastes. Its base is creamy and nutty, thanks to the rich ricotta and ground almonds. The citrusy whispers of lemon zest add brightness, while the vanilla and almond extracts weave a comforting familiarity throughout each bite. Paired with the glaze, every mouthful is an experience — a testament to the harmony of flavors crafted with care.

    Ingredients

    • 1 cup **all-purpose flour**
    • 1 teaspoon baking powder
    • 1/4 teaspoon salt
    • 3/4 cup sugar
    • 3 large eggs
    • 1/2 cup canola oil
    • 1 cup **2% ricotta cheese**
    • 2 tablespoons lemon juice
    • 1 tablespoon lemon zest
    • 1 teaspoon vanilla extract
    • 1/2 teaspoon **almond extract**
    • 2 tablespoons **orange liqueur**
    • 1 tablespoon rum
    • 1/2 cup ground almonds
    • 1/4 cup **milk**
    • 1/4 cup apricot jam
    • 1/4 cup sliced almonds
    • 1/4 cup **honey**
    • 1 tablespoon **dried lavender**
    • 1 teaspoon **fresh thyme**
    • 1 tablespoon sugar (for thyme)

    Instructions

    1. Preheat your oven to 350°F (175°C) and prepare a 10-inch springform pan by buttering it and lining the bottom with parchment paper.
    2. In a large mixing bowl, beat the eggs, sugar, and canola oil on high speed until the mixture becomes thick and pale, about 8 minutes.
    3. Add the ricotta cheese, lemon juice, lemon zest, vanilla extract, almond extract, orange liqueur, and rum to the egg mixture. Mix until well blended.
    4. In a separate bowl, sift together the ground almonds, flour, baking powder, and salt. Gradually whisk this dry mixture into the ricotta mixture in three additions, ensuring each incorporation is smooth.
    5. Pour the batter into the prepared springform pan. Bake in the preheated oven for 45-50 minutes, or until a wooden skewer inserted into the center comes out clean.
    6. While the cake is baking, prepare the glaze by gently heating the honey and dried lavender in a small saucepan. Allow it to infuse for a few minutes before straining out the lavender.
    7. Once the cake is done, increase the oven temperature to 375°F (190°C).
    8. Heat the milk and stir in 2 tablespoons of sugar. Toss in the sliced almonds, ensuring they are well coated.
    9. In another bowl, blend together 3/4 cup ricotta, 1 egg, 1/4 cup sugar, lemon zest, and vanilla extract. Spread this ricotta mixture over the baked cake and sprinkle with the sugared almonds.
    10. Return the cake to the oven and bake for an additional 15 minutes, until the almonds are a golden brown.
    11. Remove from the oven and brush the strained lavender-honey glaze gently over the almonds.
    12. Allow the cake to cool before removing it from the springform pan.

    Pro Tips from Meaghan’s Kitchen

    • For a more intense lavender flavor, let the lavender steep in the honey for a longer period, but avoid overheating which can turn it bitter.
    • Use a mortar and pestle to crush fresh thyme with sugar for the batter, releasing aromatic oils that infuse the cake with subtle herbal notes.
    • Ensure your eggs are at room temperature for better volume and a lighter cake texture.
    • Toasting the almonds before adding them as a topping enhances their nuttiness and adds a delightful crunch.
    • For a clean release, lightly grease your parchment paper lining in the pan.

    Variations & Dietary Swaps

    • Gluten-Free Version: Substitute the all-purpose flour with almond flour for a completely gluten-free delight.
    • Extra Citrus Zest: For a zingier profile, add an extra tablespoon of orange zest to the batter.
    • Nut-Free Option: Omit the almonds and use a nut-free crumb topping for those with nut allergies.

    What to Serve With It

    This Luscious Almond Ricotta Cake pairs beautifully with a glass of chilled Moscato, its sweetness complementing the cake’s subtle floral notes. For a cozy pairing, enjoy a hot cup of chamomile tea, which echoes the gentle herbal undertones of the lavender. Either choice will elevate your cake experience to a new level of enjoyment.

    Storage & Meal Prep

    To store, wrap the cake tightly in plastic wrap and keep it in the refrigerator for up to 4 days. For longer storage, freeze individual slices wrapped in parchment paper and placed in a freezer-safe container. Thaw overnight in the fridge. To reheat, warm slices in the oven at 300°F (150°C) for about 10 minutes, or until just heated through.

    FAQ

    Can I use fresh lavender instead of dried?

    Yes, you can, but use about double the amount of fresh lavender, as dried lavender is more concentrated in flavor.

    What if I don’t have a springform pan?

    You can use a regular 10-inch cake pan, but line it well with parchment paper for easy removal.

    Is there an alternative to orange liqueur?

    Feel free to substitute with extra lemon juice or a splash of amaretto for a different twist.

    Can I make this cake ahead of time?

    Absolutely! This cake actually tastes even better the next day as the flavors have more time to meld.

    How do I prevent the cake from getting too brown on top?

    If you notice the top browning too quickly, cover it loosely with aluminum foil halfway through baking.

    Final Thoughts

    Creating this Luscious Almond Ricotta Cake with Lavender-Honey Glaze has been a journey of culinary exploration and love. I hope you feel the same joy and satisfaction in your kitchen as I do in mine when baking this delightful dessert. I would love to hear about your own baking adventures, so please leave a comment or share your creation with me on social media. Happy baking, dear friends!

    Related update: Luscious Almond Ricotta Cake with Lavender-Honey Glaze

    Related update: Pumpkin Spice Cookie Ice Cream with Spiced Caramel Swirl

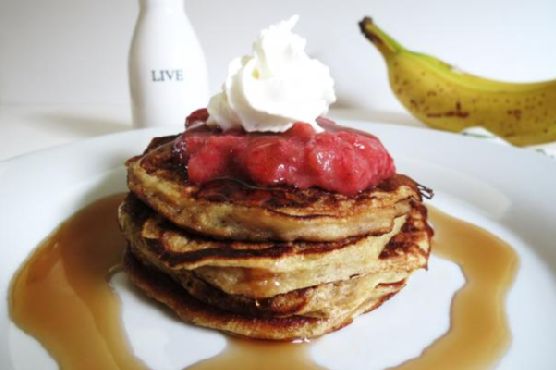
  • Strawberry-Banana Pancakes with Honey-Almond Drizzle | Made by Meaghan Moineau

    Strawberry-Banana Pancakes with Honey-Almond Drizzle | Made by Meaghan Moineau

    Strawberry-Banana Pancakes with Honey-Almond Drizzle

    The aroma of toasted almonds wafts through the kitchen, mingling with the sweet scent of honey and ripe bananas. Imagine flipping golden-brown pancakes, each one studded with juicy strawberries and ready to be draped in a warm honey-almond drizzle. This isn’t just breakfast; it’s an experience.

    Personal Story

    Growing up, Saturday mornings meant one thing: the smell of pancakes sizzling on the griddle. My dad would flip them with a practiced hand, occasionally tossing chocolate chips or berries into the batter as a surprise. Those mornings were a slice of heaven, where time seemed to stand still, and the only thing that mattered was the perfect stack of pancakes.

    As I grew older, my culinary adventures took me beyond the simple pancake. Yet, no matter how far I wandered, I always found myself drawn back to those comforting stacks. About a year ago, I stumbled upon a quaint café during a trip to San Francisco that offered a unique take on pancakes. Intrigued, I ordered what would become my muse: pancakes with an almond flair.

    The revelation of nutty almond essence combined with classic pancake flavors was nothing short of magical. I knew I had to recreate this at home. My first attempt was a bit too heavy on the almonds, but after a few tweaks and some added honey, I struck gold. Thus, the Strawberry-Banana Pancakes with Honey-Almond Drizzle were born — a nod to tradition with a delicious twist.

    What Makes This Version Special

    This recipe elevates the humble pancake into a gourmet breakfast delight. The key lies in the **nutty almond essence** infused throughout the batter and the **luscious honey-almond drizzle** that graces each stack. Traditional pancakes often rely on syrup for sweetness, but the honey-almond drizzle adds a sophisticated layer of flavor. The addition of whole wheat pastry flour not only boosts the nutritional profile but also adds a subtle nutty undertone that complements the almonds perfectly.

    Flavor Profile

    Expect a symphony of flavors with these pancakes. The base is nutty and rich, thanks to the almond extract and whole wheat pastry flour. Each bite reveals the sweetness of ripe bananas and the juicy tartness of fresh strawberries, balanced by a hint of citrus from the lemon zest. The honey-almond drizzle ties everything together with its warm, sweet, and slightly nutty notes that linger on the palate.

    Ingredients

    • 1/2 cup non-fat Greek yogurt
    • 1/4 cup mashed banana
    • 2 whole egg whites
    • 1 teaspoon vanilla extract
    • 1 cup whole wheat pastry flour
    • 1/2 teaspoon baking soda
    • 1/2 teaspoon sugar
    • 1/4 teaspoon salt
    • 5 whole diced fresh strawberries
    • **1 teaspoon almond extract**
    • **1/4 cup sliced almonds**
    • **1/4 cup honey**
    • Zest of 1 lemon

    Instructions

    1. In a small bowl, mix together the Greek yogurt, mashed banana, egg whites, and vanilla extract until smooth and well combined.
    2. In a separate larger bowl, whisk together the flour, baking soda, sugar, and salt. Gradually add the wet ingredients to the dry, stirring gently until just combined to avoid overmixing.
    3. Fold in the diced strawberries, ensuring they’re evenly distributed throughout the batter.
    4. Heat a non-stick skillet over medium heat and toast the sliced almonds until golden and fragrant, about 3-4 minutes. Set aside.
    5. For the honey-almond drizzle, gently warm the honey in a small saucepan over low heat. Remove from heat and stir in the almond extract and lemon zest. Let it bloom for a minute to intensify its nutty aroma.
    6. Lightly coat the skillet with cooking spray. Pour 1/4 cup of batter per pancake onto the skillet. Cook until bubbles form on the surface, about 2 minutes, then flip and cook an additional 1-2 minutes until golden-brown.
    7. Stack the pancakes on a plate, sprinkle with toasted almonds, and generously drizzle with the honey-almond sauce.

    Pro Tips from Meaghan’s Kitchen

    • For fluffier pancakes, let the batter rest for 5-10 minutes before cooking. This allows the baking soda to activate fully.
    • When folding in the strawberries, do so gently to keep them from breaking apart and turning the batter pink.
    • If you crave an extra almond kick, sprinkle a few chopped almonds directly into the batter before cooking.
    • Adjust the sweetness of the honey drizzle by adding a touch more honey or lemon zest, depending on your preference.
    • Use a good quality non-stick skillet to ensure even cooking and easy flipping of your pancakes.

    Variations & Dietary Swaps

    • For a gluten-free version, substitute the whole wheat pastry flour with a gluten-free all-purpose flour blend.
    • Spice it up by adding a pinch of cinnamon or nutmeg to the batter for a warm, aromatic twist.
    • For a kid-friendly option, create fun pancake shapes with molds and let the kids top them with their favorite fruits.

    What to Serve With It

    Pair these gourmet pancakes with a tall glass of freshly squeezed orange juice for a refreshing citrus balance or enjoy them with a frothy cappuccino to complement the subtle almond notes. A side of crispy bacon or sausage also adds a savory contrast that enhances the overall breakfast experience.

    Storage & Meal Prep

    These pancakes are perfect for meal prep. Store any leftover pancakes in an airtight container in the fridge for up to three days. For longer storage, place them in a single layer on a baking sheet and freeze until solid, then transfer to a freezer-safe bag for up to a month. Reheat in a toaster or oven at 350°F until warmed through. The honey-almond drizzle can be stored in the refrigerator and gently reheated before serving.

    FAQ

    Can I use frozen strawberries instead of fresh?

    Yes, you can use frozen strawberries. Just make sure to thaw and drain them well to prevent excess moisture in the batter.

    Can I make the batter ahead of time?

    It’s best to make the batter fresh, as the baking soda starts reacting once wet. If needed, prepare the dry and wet ingredients separately and combine them just before cooking.

    Is there a substitute for almond extract?

    If you don’t have almond extract, you can use a little extra vanilla extract, though it won’t deliver the same nutty depth.

    What can I use in place of Greek yogurt?

    You can substitute Greek yogurt with plain regular yogurt or even applesauce for a slightly different texture and flavor.

    How do I prevent the pancakes from sticking to the skillet?

    Ensure your skillet is well-heated before adding the batter, and use a light spray of non-stick cooking oil between batches.

    Final Thoughts

    I hope these Strawberry-Banana Pancakes with Honey-Almond Drizzle bring as much joy to your mornings as they have to mine. They are a testament to the beauty of elevating classic flavors with a touch of creativity. If you try this recipe, I’d love to hear how it went — feel free to leave a comment below or share your pancake creations on social media. Happy cooking, and remember, the best dishes are made with love!

    Related update: Strawberry-Banana Pancakes with Honey-Almond Drizzle

    Related update: Savory Hashbrowns with Spinach, Carrot & Smoked Paprika Aioli

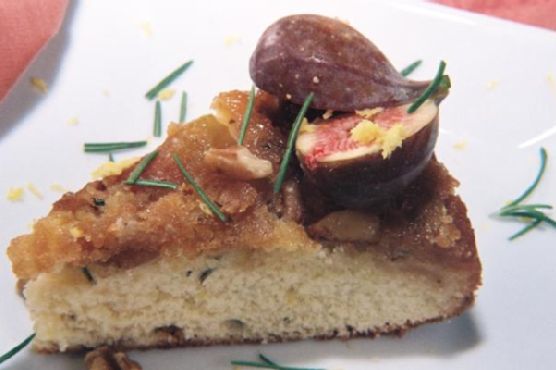
  • Caramelized Fig and Walnut Upside-Down Cake with Rosemary-Honey Drizzle | Made by Meaghan Moineau

    Caramelized Fig and Walnut Upside-Down Cake with Rosemary-Honey Drizzle | Made by Meaghan Moineau

    Caramelized Fig and Walnut Upside-Down Cake with Rosemary-Honey Drizzle

    Imagine the smell of a cake baking, its sweet aroma wrapping around you like a warm hug. Now add a hint of rosemary, the sweet, earthy fragrance mingling with the caramelized figs and toasted walnuts. This cake is not just a dessert; it’s an experience, a story told through flavors and textures.

    Personal Story

    The first time I encountered figs was in my grandmother’s garden. She had a modest fig tree that bore the juiciest fruits during late summer. I remember sneaking out with a basket, picking the ripest figs until my hands were sticky with their syrupy sweetness. Those sun-warmed figs, eaten under the shade of the tree, became the inspiration for this Caramelized Fig and Walnut Upside-Down Cake.

    Years later, while hosting a dinner party, I wanted to serve something that would surprise my guests. I remembered those figs and decided to create a cake that would capture their essence. My first attempt was a disaster; the figs stuck to the pan and the cake was unevenly baked. However, each failure taught me something new. I experimented with different techniques, tweaking the recipe until it became what it is today—a beautifully balanced cake with layers of flavor.

    One fine summer evening, when I finally perfected the recipe, I served it to my friends. Their eyes lit up with each bite, the compliments flowed, and I knew this cake was special. It was more than just a cake; it was a piece of my past, a shared experience, and a new tradition. Now, it’s a staple at my gatherings, always bringing back those sweet, sticky memories of summers past.

    What Makes This Version Special

    This version of the Caramelized Fig and Walnut Upside-Down Cake is unique because of the rosemary-infused honey drizzle that elevates the dessert to a whole new level. The infusion process adds a fragrant finish that perfectly complements the caramelized figs. The rosemary’s woody aroma mingles with the honey’s sweetness, creating a sophisticated yet comforting flavor profile. It’s this attention to detail, these small touches, that make this cake stand out from the typical upside-down cakes you might encounter.

    Flavor Profile

    The flavor journey of this cake begins with the sweet, caramelized figs that provide a luscious, jam-like texture. The walnuts add a nutty crunch, creating a delightful contrast. But the true magic lies in the rosemary-infused honey drizzle that ties everything together. This drizzle imparts a subtle herbal fragrance that lingers, while the added fresh orange zest in the batter lifts the cake with citrusy brightness. It’s a harmonious blend of sweet, nutty, herbal, and citrusy notes—a symphony for your taste buds.

    Ingredients

    • 1/2 cup unsalted butter
    • 3/4 cup light brown sugar
    • **1 pound fresh figs, halved**
    • **2 teaspoons fresh rosemary, chopped**
    • 3/4 cup walnut pieces
    • 1 1/2 cups all-purpose flour
    • 2 teaspoons baking powder
    • 1/2 teaspoon salt
    • 3 large eggs
    • 1 cup granulated sugar
    • **1 tablespoon fresh lemon juice**
    • 1 teaspoon lemon extract
    • 1 tablespoon citron vodka
    • **1 tablespoon fresh lemon zest**
    • 1 teaspoon vanilla extract
    • **1/4 cup honey**
    • **1 teaspoon fresh orange zest**

    Instructions

    1. Position a rack in the center of the oven and preheat it to 350 degrees Fahrenheit.
    2. Add the butter to a 9-inch round baking pan and place it inside the warm oven until melted, about 5 minutes. Remove from the oven and sprinkle the brown sugar evenly over the butter.
    3. Arrange the figs, flesh side up, over the sugar layer. Sprinkle with 1 teaspoon of the rosemary, then fill in the nooks and crannies with walnut pieces.
    4. In a medium bowl, sift together the flour, baking powder, and salt. This step ensures that your cake has a light, airy texture.
    5. In a separate bowl, beat the eggs with the granulated sugar at medium speed until creamy. Because I love a light, fluffy texture, I beat the eggs and sugar for an additional 3 minutes until frothy with small bubbles forming.
    6. Add the flour mixture to the creamed mixture and beat until well combined. Gently fold in the fresh lemon juice, lemon extract, citron vodka, and lemon zest. Don’t forget the fresh orange zest—it adds a burst of citrusy brightness!
    7. Pour the cake batter evenly over the fruit and smooth it with a spatula. Bake for 35 to 40 minutes or until the cake is golden and a toothpick inserted into the center comes out clean.
    8. While the cake bakes, prepare the rosemary-infused honey drizzle. Gently heat the honey with the remaining teaspoon of rosemary in a small saucepan over low heat, allowing the flavors to meld.
    9. Once baked, place the cake on a wire rack to cool for 10 minutes. Run a blunt knife around the edges of the pan to loosen the cake, then carefully invert it onto a plate.
    10. Drizzle the rosemary-infused honey over the warm cake before serving. Enjoy the cake warm or at room temperature.

    Pro Tips from Meaghan’s Kitchen

    • Make sure your figs are ripe and sweet for the best flavor. Unripe figs can be too firm and less sweet.
    • When inverting the cake, use a large plate or platter to catch any extra syrup that might run off.
    • For an extra nutty flavor, toast the walnut pieces before adding them to the pan.
    • If you’re short on time, prepare the rosemary-infused honey drizzle a day in advance and store it in a sealed container.
    • Use room temperature ingredients for the batter to ensure even mixing and a smoother texture.

    Variations & Dietary Swaps

    • Vegetarian Swap: This cake is naturally vegetarian-friendly, but you can make it vegan by replacing the butter with a vegan alternative and using flax eggs instead of regular eggs.
    • Spice-It-Up Version: Add a pinch of cardamom to the batter for a warm, exotic twist.
    • Kids-Friendly Version: Skip the citron vodka and increase the vanilla extract to 2 teaspoons for a more family-friendly flavor.

    What to Serve With It

    This Caramelized Fig and Walnut Upside-Down Cake pairs beautifully with a glass of sparkling Prosecco, which complements the cake’s sweetness with its crisp bubbles. Alternatively, serve it with a scoop of vanilla ice cream for a classic, creamy contrast. For a drink pairing, a bold cup of coffee or a cool glass of Edna Valley 2010 Paragon Chardonnay, with its crisp, citrusy notes and hint of peach, make a delightful accompaniment.

    Storage & Meal Prep

    Store any leftover cake in an airtight container in the refrigerator for up to 3 days. To freeze, wrap individual slices in plastic wrap and place them in a freezer bag for up to 1 month. To reheat, simply warm slices in the microwave for about 15 seconds or until heated through. If reheating from frozen, allow slices to thaw overnight in the refrigerator before warming.

    FAQ

    Can I use dried figs instead of fresh ones?

    While fresh figs are ideal for this recipe, you can use dried figs in a pinch. Just soak them in warm water for about 15 minutes to soften before using.

    What if I don’t have citron vodka?

    You can substitute citron vodka with regular vodka or omit it altogether. The lemon extract and zest will still provide plenty of citrus flavor.

    Can I make this cake gluten-free?

    Yes, you can substitute the all-purpose flour with a gluten-free flour blend. Make sure it’s a 1:1 substitute for best results.

    How do I prevent the cake from sticking to the pan?

    Ensure your pan is well-greased with melted butter and that the sugar is evenly distributed. Running a knife around the edges before inverting will also help.

    Is there a substitute for fresh rosemary?

    If you don’t have fresh rosemary, you can use dried rosemary. However, use only half the amount as dried herbs are more concentrated.

    Final Thoughts

    Thank you for joining me in my kitchen to explore this delightful Caramelized Fig and Walnut Upside-Down Cake with Rosemary-Honey Drizzle. It’s a cake that’s as much about the experience of making it as it is about enjoying it. I hope this recipe becomes a cherished part of your dessert repertoire, perhaps creating sweet memories of your own. I’d love to hear how it turns out for you, so please leave a comment or share your creation on social media. Happy baking, my friends!

    Related update: Caramelized Fig and Walnut Upside-Down Cake with Rosemary-Honey Drizzle

    Related update: Luscious Almond Ricotta Cake with Lavender-Honey Glaze

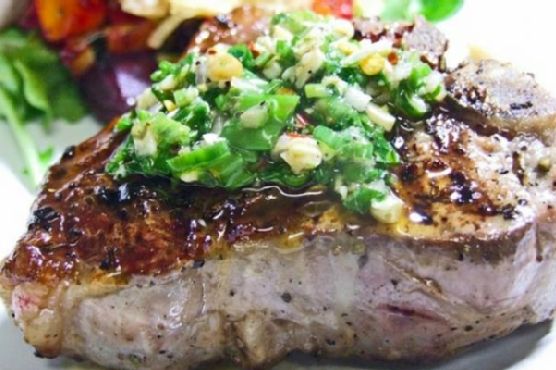
  • Pan Seared Lamb Loin with Spicy Chimichurri & Honey-Glazed Squash Salad | Made by Meaghan Moineau

    Pan Seared Lamb Loin with Spicy Chimichurri & Honey-Glazed Squash Salad | Made by Meaghan Moineau

    Pan Seared Lamb Loin with Spicy Chimichurri & Honey-Glazed Squash Salad

    Imagine the sizzle of lamb loins hitting a hot pan, releasing a fragrant cloud of savory goodness that dances through the air. Your kitchen fills with the earthy aroma of roasted squash, kissed by a honey glaze that caramelizes into a sweet, sticky perfection. This isn’t just any meal — it’s an orchestra of flavors waiting to dazzle your senses.

    Personal Story

    Growing up, Sunday dinners were a sacred ritual in my family. My mother, apron-clad and humming a tune, would transform our kitchen into a wonderland of delicious aromas. One particular Sunday, as a precocious eleven-year-old, I decided to take charge of the main dish. With a little too much confidence and a recipe clutched in hand, I embarked on cooking my first lamb loin.

    My initial attempt was, to put it kindly, a learning experience. The lamb was overcooked and the chimichurri, lacking the spicy kick I had envisioned, was more of a parsley parade than a flavor fiesta. Yet, despite the mishap, we sat around the table, savoring the meal and laughing at my culinary adventure. That day, I learned more about balancing flavors than any cookbook could teach.

    A few years and countless experiments later, I revisited that dish. This time, with a twist: a spicy chimichurri that dances on the tongue, and a trio of honey-glazed squash to complement the savory lamb. The result was a revelation, a dish that not only paid homage to my childhood memory but elevated it into something truly special.

    Now, every time I make this Pan Seared Lamb Loin with Spicy Chimichurri and Honey-Glazed Squash Salad, I’m reminded of that first foray into the kitchen — and the joy of discovering just how delightfully complex simple ingredients can be.

    What Makes This Version Special

    This version of Pan Seared Lamb Loin is not your average recipe. The spicy chimichurri, with its bold use of jalapeño and **red pepper flakes**, elevates the dish by adding a tantalizing heat that wakes up your taste buds. But it’s the **honey-glazed squash salad** that truly sets this recipe apart. The natural sweetness of butternut, acorn, and delicata squash is amplified through roasting, creating a caramelized exterior that beautifully contrasts the spicy chimichurri. Each bite offers a delightful balance of sweet and spicy, making this dish a standout on any dinner table.

    Flavor Profile

    Picture this: the smoky, spicy aroma of the chimichurri fills the room, a tantalizing prelude to the complex flavors it promises. The lamb loin, seared to a golden-brown perfection, provides a rich, savory depth that anchors the dish. As you take a bite, the spicy heat of the chimichurri dances with the sweetness of the honey-glazed squash, creating a symphony of flavors that is both unexpected and delightful. The nutty crunch of **pinenuts** and the creamy tang of goat cheese add layers of texture and taste, ensuring that each mouthful is a new experience.

    Ingredients

    • 1/2 cup **cilantro**, chopped
    • 1/4 cup **extra virgin olive oil**
    • 1/2 cup **flat leaf parsley**, chopped
    • 1 **garlic clove**, minced
    • 1 teaspoon **black ground pepper**
    • 1 tablespoon **kosher salt and pepper**
    • 4 **lamb loin chops**
    • 1 **lemon**, juiced
    • 1/4 cup **mint**, chopped
    • 2 tablespoons **pinenuts**, toasted
    • 1 teaspoon **red pepper flakes**
    • 1 **shallot**, finely chopped
    • 1 **jalapeño**, minced
    • 2 tablespoons **honey**
    • 1 **butternut squash**, peeled and cubed
    • 1 **acorn squash**, sliced
    • 1 **delicata squash**, sliced
    • 1/4 cup **goat cheese**, crumbled
    • 1 teaspoon **smoked paprika**

    Instructions

    1. Preheat your oven to 400°F (200°C).
    2. To prepare the chimichurri, bloom the **red pepper flakes** and **smoked paprika**: In a small pan, heat 1 tablespoon of **extra virgin olive oil** over medium heat. Add the flakes and paprika, stirring for about 30 seconds until fragrant. Remove from heat.
    3. In a large bowl, combine the bloomed spices with **cilantro**, **flat leaf parsley**, **garlic**, **shallot**, **jalapeño**, **lemon juice**, and remaining olive oil. Season with **kosher salt and pepper**. Mix well and set aside.
    4. For the squash, place the **butternut**, **acorn**, and **delicata squash** on a baking sheet. Drizzle with **honey** and a pinch of salt. Roast for 25-30 minutes, turning halfway, until the squash is tender and caramelized.
    5. Meanwhile, heat a large, heavy-bottomed pan over high heat with the remaining olive oil. Season the **lamb loin chops** with **black ground pepper** and **kosher salt**.
    6. Sear the lamb loins in the hot pan for 2 minutes on each side until a golden-brown crust forms. Transfer the pan to the preheated oven.
    7. Bake to your desired doneness: 2-3 minutes for rare, 6-8 minutes for medium-rare, 9-11 minutes for medium, or 12-14 minutes for well done. Remember, the lamb will continue to cook as it rests.
    8. Allow the lamb to rest for 5 minutes before serving, allowing the juices to redistribute.
    9. To serve, place a portion of the roasted squash on each plate, top with sliced lamb loin, drizzle with spicy chimichurri, and sprinkle with **goat cheese** and **pinenuts**.

    Pro Tips from Meaghan’s Kitchen

    • Use a meat thermometer for perfect lamb doneness. Aim for an internal temperature of 135°F (57°C) for medium-rare.
    • To enhance the flavor of the chimichurri, let it sit for at least 30 minutes before serving to allow the flavors to meld.
    • Toss the squash halfway through roasting to ensure even caramelization.
    • When searing lamb, ensure your pan is smoking hot to achieve a perfect crust.
    • If the chimichurri is too spicy, add a bit more olive oil or a splash of lemon juice to balance the heat.

    Variations & Dietary Swaps

    • Vegetarian Swap: Replace lamb with thick slices of portobello mushrooms for a meaty texture that pairs wonderfully with the chimichurri.
    • Spice-it-up Version: Add a pinch of cayenne pepper to the chimichurri for an extra kick.
    • Kids-Friendly Version: Tone down the spice by reducing the red pepper flakes and jalapeño, and serve the squash with a light sprinkle of cinnamon instead of chimichurri.

    What to Serve With It

    This vibrant dish pairs beautifully with a chilled glass of Sauvignon Blanc, its crisp notes complementing the spicy and sweet flavors. For a hearty side, serve with roasted garlic mashed potatoes, which offer a creamy, savory contrast to the meal’s dynamic profile.

    Storage & Meal Prep

    To store, place leftovers in an airtight container in the fridge for up to 3 days. For longer storage, freeze the lamb and squash separately for up to 1 month. Reheat the lamb gently in a skillet over low heat to prevent overcooking. The squash can be reheated in the oven at 350°F (175°C) until warmed through.

    FAQ

    Can I make the chimichurri ahead of time?

    Absolutely! Chimichurri can be made up to 3 days in advance. Store it in the fridge and bring it to room temperature before serving.

    What if I don’t have fresh herbs on hand?

    While fresh herbs are best, dried herbs can be used in a pinch. Just reduce the amount by half, as dried herbs are more concentrated.

    How do I know when the lamb is properly seared?

    Look for a deep golden-brown crust on each side of the lamb. If it sticks to the pan, give it a few more seconds — it will release when it’s ready.

    Can I use other types of squash?

    Yes, feel free to experiment with other winter squashes like kabocha or hubbard. Adjust the roasting time as needed, depending on the size of the pieces.

    Is this dish gluten-free?

    Yes, this recipe is naturally gluten-free, making it suitable for those with gluten sensitivities.

    Final Thoughts

    Cooking is as much about the journey as it is about the destination. This Pan Seared Lamb Loin with Spicy Chimichurri and Honey-Glazed Squash Salad is a testament to the magic that happens when flavors are carefully balanced and thoughtfully prepared. I hope this dish brings as much joy to your table as it has to mine. Don’t forget to share your version in the comments — I love hearing your stories and seeing your creations!

    Related update: Pan Seared Lamb Loin with Spicy Chimichurri & Honey-Glazed Squash Salad

    Related update: Savory Herb-Infused Chicken Noodle Casserole with Truffle Panko Crust

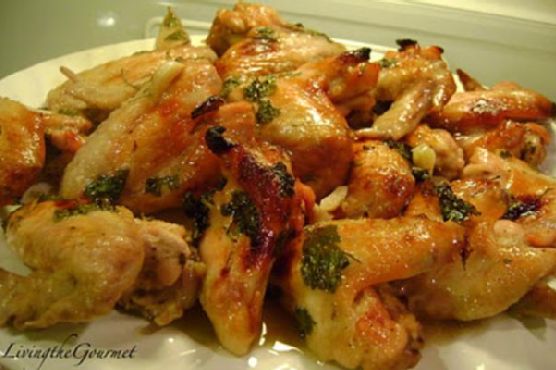
  • Zesty Citrus-Herb Baked Chicken Wings with Honey-Lime Glaze | Made by Meaghan Moineau

    Zesty Citrus-Herb Baked Chicken Wings with Honey-Lime Glaze | Made by Meaghan Moineau

    Zesty Citrus-Herb Baked Chicken Wings with Honey-Lime Glaze

    Imagine this: the sound of sizzling chicken wings in the oven, the kitchen enveloped in an aromatic symphony of citrus and herbs, and the anticipation of that first juicy bite. These are no ordinary wings — they are a vibrant explosion of sweet, tangy, and herbaceous flavors, perfectly sticky from a honey-lime glaze that beckons you back for more.

    Personal Story

    Growing up, chicken wings were a family favorite in our household, a weekend staple that brought us all together around the kitchen table. My earliest memories involve me standing on a stool next to my grandfather, watching as he expertly marinated the wings, adding just a splash of this and a pinch of that. The magic of his cooking wasn’t just in the ingredients but in the love and patience he poured into each dish.

    But it wasn’t always smooth sailing in my culinary journey with chicken wings. I recall a kitchen mishap in my early cooking days when, in a moment of overzealous ambition, I decided to improvise with a marinade that was more vinegar than anything else. The result was a batch of wings so tangy they made our mouths pucker more than smile. It was a humbling lesson in balance and restraint.

    Over the years, I’ve experimented and refined my approach, aiming to replicate the warmth and joy of those family gatherings in every bite. This current version, the Zesty Citrus-Herb Baked Chicken Wings with Honey-Lime Glaze, feels like the culmination of those lessons. It’s a dish that not only tantalizes the taste buds but also pays homage to the culinary memories that shaped my love for cooking.

    One evening, while preparing these wings for friends, I stumbled upon the magic of pairing citrus with herbs like fresh cilantro and mint. The result was a revelation, a perfect marriage of flavors that elevated the humble chicken wing to new heights. And the honey-lime glaze? Well, that was the sticky, sweet cherry on top.

    What Makes This Version Special

    This version of baked chicken wings is special because it infuses the wings with a vibrant citrus-herb marinade, accented with a honey-lime glaze for an irresistible sticky finish. Unlike traditional recipes that might rely solely on hot sauce or a simple barbecue glaze, this recipe brings in a medley of fresh herbs and citrus elements. The inclusion of **orange zest** adds a fragrant layer of citrus aroma, which, when combined with the **fresh cilantro** and **mint**, provides an herbaceous depth that traditional wing recipes often lack.

    The sweet, tangy, and herbaceous profile is enhanced by the **dark brown sugar** and **smoked paprika**, which introduce a subtle smokiness and sweetness that complements the natural flavors of the chicken. And then, finishing the wings under the broiler caramelizes the honey-lime glaze, offering that delightful sticky texture that everyone loves.

    Flavor Profile

    Prepare yourself for a taste experience like no other: these citrus-herb baked chicken wings are a harmonious blend of sweet, tangy, and herbaceous with a touch of smokiness. As you take your first bite, the initial sweetness of the honey-lime glaze hits your palate, quickly followed by the zesty brightness of the citrus. The herbs — parsley, cilantro, and mint — dance in the background, providing a refreshing counterpoint to the richness of the chicken. Finally, the smoked paprika leaves a gentle smoky finish, making each bite a multi-layered journey of flavors.

    Ingredients

    • 2 pounds chicken wings
    • **2 tablespoons lemon juice**
    • **2 tablespoons lime juice**
    • **1 tablespoon orange zest**
    • 2 cloves garlic, minced
    • **1/4 cup honey**
    • 2 tablespoons dark brown sugar
    • 2 tablespoons red wine
    • 1/4 cup chicken broth
    • 2 tablespoons vegetable oil
    • **1/4 cup fresh Italian parsley, chopped**
    • **1/4 cup fresh cilantro, chopped**
    • **2 tablespoons fresh mint, chopped**
    • 1 teaspoon smoked paprika
    • 1 teaspoon salt
    • 1/2 teaspoon freshly ground black pepper

    Instructions

    1. In a large mixing bowl, combine the lemon juice, lime juice, orange zest, garlic, honey, dark brown sugar, red wine, chicken broth, and vegetable oil. Whisk until the sugar has dissolved.
    2. Add the fresh parsley, cilantro, mint, smoked paprika, salt, and black pepper to the marinade, stirring until well incorporated.
    3. Place the chicken wings in a large resealable plastic bag or a shallow dish. Pour the marinade over the wings, ensuring they are well coated. Seal the bag or cover the dish and marinate in the refrigerator for at least 1 hour, or up to a few hours for maximum flavor infusion.
    4. Preheat your oven to 400°F (200°C). Line a baking sheet with aluminum foil and place a wire rack on top. Arrange the wings in a single layer on the rack, reserving the marinade.
    5. Bake the wings for 35-40 minutes, basting with the reserved marinade every 10 minutes, until the wings are cooked through and golden-brown.
    6. For an irresistible sticky finish, turn on the broiler and broil the wings for an additional 2-3 minutes, watching closely to ensure they don’t burn, until the honey-lime glaze is caramelized and sticky.
    7. Remove the wings from the oven and let them rest for a few minutes before serving. Garnish with additional fresh herbs if desired.

    Pro Tips from Meaghan’s Kitchen

    • If you’re short on time, a quick 30-minute marinade will still yield flavorful results, but for the best taste, go for at least a few hours.
    • Use a microplane to zest the orange; it’s the best tool for getting fine, fragrant zest without the bitter pith.
    • For extra crispy skin, pat the wings dry with paper towels before marinating. The less moisture, the crispier the skin will become.
    • Don’t overcrowd the baking rack. Ensuring space between the wings allows for even cooking and optimal crispiness.
    • Store leftover marinade in a sealed container in the fridge and use it to marinate other proteins like shrimp or pork for an easy meal later in the week.

    Variations & Dietary Swaps

    • Vegetarian Swap: Try this marinade on cauliflower florets or tofu. Both absorb the flavors wonderfully and make a great vegetarian alternative.
    • Spice-It-Up Version: Add a teaspoon of chili flakes or a dash of hot sauce to the marinade for some extra heat.
    • Kids-Friendly Version: Reduce the smoked paprika and skip the broiling step to keep the wings milder and less sticky, perfect for little ones.

    What to Serve With It

    These zesty wings pair beautifully with a chilled glass of Sauvignon Blanc, whose crispness complements the citrus notes perfectly. For a more substantial meal, serve with a zesty coleslaw tossed in a lime vinaigrette or alongside some roasted sweet potatoes for a delightful contrast of flavors.

    Storage & Meal Prep

    Leftover wings can be stored in an airtight container in the refrigerator for up to 3 days. To reheat, place them in a preheated 350°F (175°C) oven for about 10-12 minutes until heated through. For longer storage, freeze the wings in a single layer on a baking sheet; once frozen, transfer them to a freezer-safe bag or container. They can be frozen for up to 3 months. Reheat directly from frozen in a 375°F (190°C) oven for about 20-25 minutes.

    FAQ

    What if I don’t have fresh herbs?

    If fresh herbs are unavailable, you can substitute with dried herbs. Use a third of the quantity as dried herbs are more concentrated in flavor.

    Can I use chicken drumsticks instead of wings?

    Absolutely! Chicken drumsticks will work just as well, though you may need to adjust the cooking time, baking them for an additional 10-15 minutes to ensure they’re cooked through.

    Is there a non-alcoholic substitute for red wine?

    You can substitute the red wine with either red grape juice or additional chicken broth. Both will provide the necessary liquid and flavor.

    How can I make the wings crispier?

    For extra crispiness, consider adding a tablespoon of baking powder to the marinade. It raises the pH level of the skin, helping it crisp up beautifully in the oven.

    What’s the best way to zest an orange?

    Use a microplane or fine grater for zesting. Avoid the white pith as it can be bitter; focus on just the colorful outer layer of the orange peel.

    Final Thoughts

    There’s something deeply satisfying about crafting a dish that not only delights the senses but also carries the warmth of shared memories and culinary adventures. These Zesty Citrus-Herb Baked Chicken Wings with Honey-Lime Glaze are a testament to flavor exploration and a celebration of the simple joys of cooking. I hope you savor every bite as much as I do. If you give this recipe a try, I’d love to hear how it turned out for you. Share your thoughts in the comments below or tag me on social media with your delicious creations. Happy cooking, dear friends!

    Related update: Zesty Citrus-Herb Baked Chicken Wings with Honey-Lime Glaze

    Related update: Peruvian Lomo Saltado with Crispy Quinoa Crust and Citrus Avocado Salsa

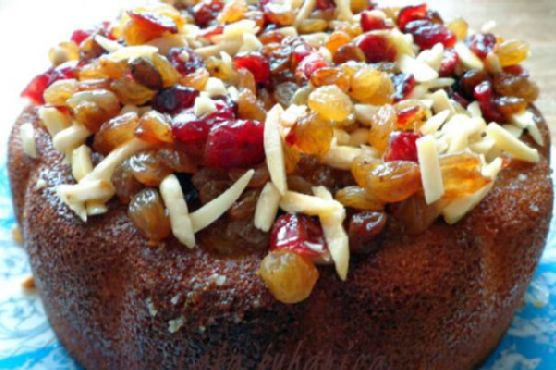
  • Mediterranean Citrus-Infused Semolina Cake with Spiced Honey Nuts | Made by Meaghan Moineau

    Mediterranean Citrus-Infused Semolina Cake with Spiced Honey Nuts | Made by Meaghan Moineau

    Mediterranean Citrus-Infused Semolina Cake with Spiced Honey Nuts

    Picture this: A sunlit kitchen filled with the intoxicating aroma of citrus and spices, where a golden-brown cake cools on the counter, glistening with a glossy syrup that catches the light just so. This isn’t just any cake; it’s a Mediterranean Citrus-Infused Semolina Cake with Spiced Honey Nuts, a dessert that promises to transport your taste buds straight to a sun-drenched Mediterranean coast.

    Personal Story

    My love affair with semolina cake began on a spontaneous trip to a small Mediterranean village. I was wandering through a bustling food market, where the air was thick with the scent of fresh spices and citrus. A local vendor, with a warm smile and hands that moved with the grace of a seasoned cook, offered me a slice of what I’d later come to know as basbousa—a semolina cake soaked in syrup. It was love at first bite.

    The texture was unlike anything I’d ever tasted — dense yet tender, with a syrup that was both sweet and subtly spiced. I knew then that I had to bring a piece of this culinary magic back home. Of course, my first few attempts in my kitchen were far from perfect. There was a memorable mishap where I mistook salt for sugar, resulting in a cake that was, let’s say, uniquely inedible.

    But with each attempt, I learned something new. I started experimenting with flavors, wanting to incorporate my own twist on the classic. After many trials, I finally landed on a version that felt like me. My Mediterranean Citrus-Infused Semolina Cake with Spiced Honey Nuts was born, and with it, a little piece of my heart.

    Now, whenever I make this cake, I remember that sunlit market and the taste of adventure. It’s a reminder of how food can connect us to places and moments, and how a single slice of cake can hold a world of memories.

    What Makes This Version Special

    This is not your average semolina cake. The magic starts with the cake itself, which is infused with a fragrant blend of cardamom and rose water. These ingredients add a luxurious, aromatic depth that elevates the entire dessert. But the true star? The spiced honey nut syrup. Featuring a hint of cinnamon, it provides a warm, aromatic finish that complements the citrus-forward flavors perfectly.

    Unlike traditional versions, which can be overly sweet, this cake achieves a harmonious balance of flavors. The syrup is not just a sweetener but a complex layer of taste that brings out the best in the semolina’s nutty notes. Trust me, once you’ve had a taste of this version, there’s no going back to the standard recipe.

    Flavor Profile

    The flavor journey begins with a burst of citrus — a vibrant combination of lemon and orange zest that dances on your palate. As you savor each bite, the subtle floral notes of rose water emerge, adding an ethereal quality to the cake. Finally, the warm, spiced finish from the honey nut syrup, infused with a hint of cinnamon, wraps everything in a comforting embrace. It’s a taste experience that’s both refreshing and indulgent.

    Ingredients

    • 1 cup sugar
    • 4 eggs
    • 1 cup yoghurt
    • Zest of 1 lemon
    • Zest of 1 orange
    • 1 cup almond meal
    • 1 cup semolina
    • 2 teaspoons baking powder
    • 1/2 cup **olive oil**
    • 1 teaspoon **cardamom**
    • 1 teaspoon **rose water**
    • 1/2 cup almonds
    • 1/2 cup raisins
    • 1/2 cup dry cranberries
    • 1 cup **honey**
    • Juice of 1 orange
    • 1 **cinnamon stick**
    • 1/4 cup pistachios

    Instructions

    1. Preheat your oven to 180°C (160°C fan). Prepare a 20-23cm round baking tin by lining it with baking paper or using a silicone mold.
    2. In a small pan, heat the olive oil over low heat. Add the **cardamom** and allow it to bloom for about 2 minutes, stirring gently to release its aroma. Set aside to cool slightly.
    3. In a mixer, whisk the eggs and sugar until the mixture is thick and pale in color, about 5 minutes.
    4. Add the yoghurt, lemon zest, and orange zest to the egg mixture. Mix until well combined.
    5. Gradually add the almond meal, semolina, and baking powder. Mix on low speed until just combined.
    6. Incorporate the cardamom-infused olive oil and rose water into the batter. Mix until smooth.
    7. Pour the mixture into the prepared baking tin. Bake for 35 minutes or until the top is golden-brown and a skewer inserted into the center comes out clean.
    8. While the cake bakes, prepare the syrup: In a pot, combine the honey, orange juice, almonds, raisins, cranberries, and the **cinnamon stick**. Bring to a boil, then reduce to a simmer for 1-2 minutes to enhance the aroma.
    9. Remove the cake from the oven and pierce all over with a skewer. Pour the warm syrup evenly over the cake. Allow it to soak and cool slightly before serving.
    10. Garnish with pistachios just before serving for a touch of color and crunch.

    Pro Tips from Meaghan’s Kitchen

    • Use fresh citrus for zesting — it makes all the difference in flavor and aroma.
    • Blooming spices in oil intensifies their flavor, so don’t skip this step!
    • If your syrup is too thick, thin it with a tablespoon of water while simmering.
    • For a moist cake, ensure your yoghurt is at room temperature before mixing.
    • Don’t overmix the batter once dry ingredients are added, to keep the cake tender.

    Variations & Dietary Swaps

    • Gluten-free version: Substitute semolina with gluten-free flour blend and ensure all other ingredients are certified gluten-free.
    • Vegan option: Replace eggs with a flaxseed mixture (1 tablespoon flaxseed meal + 2.5 tablespoons water per egg) and yoghurt with coconut yoghurt.
    • Spice-it-up version: Add a pinch of saffron to the syrup for an extra layer of flavor complexity.

    What to Serve With It

    This Mediterranean Citrus-Infused Semolina Cake pairs beautifully with a cup of freshly brewed mint tea, enhancing the cake’s aromatic notes. If you’re feeling a bit more indulgent, a glass of sweet dessert wine like Moscato complements the citrus and honey flavors exquisitely. For a complete Mediterranean experience, consider serving it alongside a platter of fresh fruits and nuts.

    Storage & Meal Prep

    To store, wrap the cake tightly in plastic wrap and keep it in the fridge for up to 5 days. For longer storage, slice the cake and freeze the pieces in an airtight container for up to 2 months. To reheat, thaw the slices in the fridge overnight and warm in a low oven for a few minutes or enjoy at room temperature.

    FAQ

    Can I make the cake ahead of time?

    Absolutely! This cake actually tastes better the next day as the flavors meld together. Make it a day ahead and store it in the fridge.

    What other nuts can I use?

    If you don’t have almonds or pistachios, walnuts or pecans are great alternatives. They add a wonderful texture and flavor.

    Can I use bottled lemon and orange juice?

    Fresh is best for zest and juice in this recipe, as it provides the most vibrant flavor. But in a pinch, bottled can work for the syrup component.

    How do I know when the syrup is ready?

    You’ll know it’s ready when it has thickened slightly and coats the back of a spoon. The aroma should also be warm and spiced from the cinnamon.

    What if my cake turns out dry?

    If the cake seems dry, it might have been overbaked. Ensure it’s only baked until a skewer comes out clean. Adding more syrup can help salvage moisture.

    Final Thoughts

    There you have it, my dear baking companions — a cake that’s not just a dessert but a journey through flavors and memories. I hope you enjoy making and eating this Mediterranean Citrus-Infused Semolina Cake with Spiced Honey Nuts as much as I do. If you give it a try, I’d love to hear how it turns out or any personal twists you add. Please share your thoughts in the comments, or better yet, snap a picture and tag me in your delicious creations. Happy baking!

    Related update: Mediterranean Citrus-Infused Semolina Cake with Spiced Honey Nuts

    Related update: Decadent Dark Chocolate Raspberry S’mores Bars with Salted Caramel Drizzle