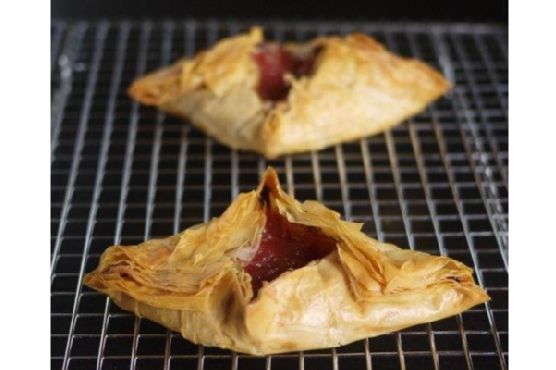
Tag: Fusion

  • Roasted Squash and Cauliflower Soup with Curried Coconut Twist | Made by Meaghan Moineau

    Roasted Squash and Cauliflower Soup with Curried Coconut Twist | Made by Meaghan Moineau

    Roasted Squash and Cauliflower Soup with Curried Coconut Twist

    Picture this: a chilly autumn evening, the kind where the leaves crunch underfoot and the air carries a crisp bite. You come inside, shake off the chill, and the aroma of roasted squash and warm spices wraps around you like a cozy blanket. This isn’t just soup; it’s comfort in a bowl, a hug from the inside out. Welcome to my Roasted Squash and Cauliflower Soup with Curried Coconut Twist, where every spoonful is an invitation to savor the exotic and familiar, all at once.

    Personal Story

    My love affair with soup began when I was just a child. Every Sunday, my grandmother would simmer a pot of something magical on the stove, filling her tiny kitchen with the scent of home. It wasn’t just food; it was tradition, a weekly ritual of warmth and nourishment. Back then, the recipes were simple, the ingredients sometimes plucked straight from her garden. As I grew older, I found myself drawn to this comforting practice, a thread connecting me to my past.

    One winter, during my university days, I decided to recreate that magic in my small apartment kitchen. Eager and slightly overconfident, I dove into a recipe for squash soup, certain it would be a breeze. However, in my haste, I forgot to remove the seeds from the squash before pureeing it. The result was a gritty concoction that even the most forgiving palate would struggle to enjoy. My roommates, bless their hearts, did their best to muster enthusiasm, but it was clear: I had some learning to do.

    Undeterred, I kept experimenting. Over time, I discovered the beauty of combining unexpected flavors, like the creamy richness of coconut milk and the vibrant zing of ginger. This Roasted Squash and Cauliflower Soup with Curried Coconut Twist was born out of those kitchen adventures, a dish that marries my love for tradition with a modern twist. Now, when the weather turns chilly, this soup is my go-to — a tribute to my grandmother’s legacy and my own culinary journey.

    What Makes This Version Special

    What sets this Roasted Squash and Cauliflower Soup with Curried Coconut Twist apart from the standard squash soup is the way it plays with flavors. The addition of coconut milk adds a luxurious creaminess that elevates the texture, making it silky and indulgent. Meanwhile, a hint of fresh ginger and a dash of cayenne pepper introduce an exotic depth that intrigues the palate without overwhelming it. This fusion of flavors turns a humble soup into a culinary adventure.

    Moreover, roasting the squash and cauliflower together enhances their natural sweetness and caramelization, a trick that adds a complex layer of flavor to the dish. Blooming the curry powder and grated ginger in butter before adding the vegetables releases their essential oils, enriching the soup with aromatic depth. These small but significant adjustments transform a classic recipe into something truly special.

    Flavor Profile

    The Roasted Squash and Cauliflower Soup with Curried Coconut Twist is a symphony of flavors. With each spoonful, you’re greeted by the creamy, velvety texture of coconut milk, which carries the roasted, slightly nutty sweetness of the squash. The cauliflower adds a subtle earthiness, while the ginger imparts a gentle warmth that lingers on your palate. The curry powder ties everything together with its aromatic notes, and just when you think you’ve savored it all, a whisper of cayenne pepper leaves a playful tickle of heat. Each bite is a sensory experience, a dance of sweet, spicy, and savory.

    Ingredients

    • 1 medium butternut squash
    • 1 medium delicata squash
    • 1 head of cauliflower, cut into florets
    • 4 cups vegetable stock
    • 1 large yellow onion, diced
    • 3 cloves fresh garlic, minced
    • **3 tablespoons curry powder**
    • **2 tablespoons butter**
    • 1/2 teaspoon cayenne pepper
    • Salt and pepper to taste
    • **1 can (14 oz) coconut milk**
    • 1 tablespoon freshly grated ginger
    • Fresh cilantro, for garnish
    • Lime wedges, for serving

    Instructions

    1. Preheat your oven to 375°F (190°C). Slice the butternut and delicata squash lengthwise and place them cut-side down in a casserole dish with about 1/4 inch of water on the bottom. This will help steam and roast the squash simultaneously. Bake for about 30 minutes, or until the squash is tender and a fork can easily pierce the skin.
    2. While the squash is roasting, spread the cauliflower florets on a baking sheet, drizzle with a bit of oil, and season with salt and pepper. Add to the oven for the last 20 minutes of the squash roasting time, stirring once midway to ensure even caramelization.
    3. Remove the squash from the oven and allow it to cool slightly. When you can handle it, scoop out the seeds and discard them. Scoop the squash flesh into a bowl and set aside.
    4. In a large stockpot, heat the butter over medium heat. Add the diced onion and sauté until translucent and fragrant, about 5 minutes. Add the minced garlic, curry powder, and freshly grated ginger, stirring constantly for about 1 minute to bloom the spices and release their aromas.
    5. Add the roasted squash, cauliflower, cayenne pepper, and vegetable stock to the pot. Season with salt and pepper to taste. Bring the mixture to a simmer and let it cook for about 20 minutes, allowing the flavors to meld together beautifully.
    6. Remove the pot from heat and carefully use an immersion blender to puree the soup until smooth and creamy. Alternatively, you can blend it in batches using a countertop blender. If the soup is too thick for your liking, gradually add more vegetable stock until the desired consistency is reached.
    7. Return the soup to the pot, stir in the **coconut milk**, and gently heat until warmed through. Taste and adjust seasoning as needed.
    8. Ladle the soup into bowls, garnish with fresh cilantro, and serve with lime wedges on the side for a zesty finish. Enjoy!

    Pro Tips from Meaghan’s Kitchen

    • Roast your vegetables: Roasting the squash and cauliflower brings out their natural sweetness and adds a depth of flavor you won’t get from boiling.
    • Bloom your spices: Don’t skip the step of blooming your curry powder and ginger in butter. This process releases the oils in the spices, amplifying their flavors.
    • Use full-fat coconut milk: The creaminess of full-fat coconut milk is unparalleled and will give your soup a luxurious texture.
    • Adjust the spice level: If you prefer a milder soup, reduce the cayenne pepper. For more heat, feel free to add a pinch more or even some chopped fresh chili.
    • Let it rest: If you have the time, let the soup sit for a few hours or overnight. The flavors will deepen and meld together beautifully.

    Variations & Dietary Swaps

    • Vegetarian/Vegan: This soup is naturally vegetarian. To make it vegan, simply ensure the butter is plant-based or replace it with olive oil.
    • Spice-it-up: For a bolder spice kick, add a chopped fresh red chili or an extra teaspoon of cayenne pepper.
    • Kid-friendly version: Reduce the curry powder and omit the cayenne pepper for a milder, more child-friendly version. Consider adding a swirl of plain yogurt for creaminess that kids will love.

    What to Serve With It

    This Roasted Squash and Cauliflower Soup with Curried Coconut Twist pairs beautifully with a chilled Riesling, whose sweetness complements the soup’s aromatic spices. Alternatively, serve it alongside warm, crusty naan bread for dipping. The contrast of the crispy, warm bread with the creamy soup is a match made in culinary heaven.

    Storage & Meal Prep

    To store, let the soup cool to room temperature before transferring it to airtight containers. It will keep in the refrigerator for up to 4 days. For longer storage, freeze the soup in portioned containers for up to 3 months. When ready to enjoy, thaw the soup overnight in the fridge, then reheat gently on the stovetop, stirring occasionally until hot.

    FAQ

    Can I use a different type of squash?

    Absolutely! Feel free to use acorn squash or kabocha if that’s what you have on hand. Each type of squash will slightly alter the flavor and texture but will still be delicious.

    Can I make this soup ahead of time?

    Yes, this soup actually tastes better the next day as the flavors have more time to meld together. Just be sure to store it properly and reheat gently.

    Is there a substitute for coconut milk?

    If you’re not a fan of coconut milk or have an allergy, heavy cream or cashew cream can be used as a substitute. Keep in mind this will alter the flavor slightly.

    How can I make this soup thicker?

    If you prefer a thicker soup, reduce the amount of stock or add a peeled and diced potato to the pot while simmering. The potato will break down and thicken the soup naturally.

    Why roast the vegetables first?

    Roasting caramelizes the natural sugars in the vegetables, adding a richer, deeper flavor that enhances the overall taste of the soup.

    Final Thoughts

    This Roasted Squash and Cauliflower Soup with Curried Coconut Twist is more than just a dish; it’s an experience. Each spoonful is a journey through flavors and memories, from the comforting aroma that fills your kitchen to the vibrant taste that dances on your palate. I hope you enjoy making and savoring this soup as much as I do. If you try it, I’d love to hear about your experience. Feel free to leave a comment or share your own twist on this recipe. Until next time, happy cooking!

    Related update: Roasted Squash and Cauliflower Soup with Curried Coconut Twist

  • Tropical Coconut-Lime Chicken Tenders with Spicy Mango Salsa | Made by Meaghan Moineau

    Tropical Coconut-Lime Chicken Tenders with Spicy Mango Salsa | Made by Meaghan Moineau

    Tropical Coconut-Lime Chicken Tenders with Spicy Mango Salsa

    Imagine the sizzle of chicken tenders as they hit a hot pan, the aroma of freshly zested lime mingling with toasted coconut, and the vibrant colors of a mango salsa that practically dances off the plate. This isn’t just any chicken dish; it’s a culinary escape to a tropical paradise.

    Personal Story

    There was a summer I spent in a small beach town, one of those hidden gems where life moves at a slower pace, and the air is always tinged with the scent of salt and citrus. It was there that I first fell in love with the bold, refreshing flavors of tropical cuisine. Every meal seemed like a celebration, a dance of unexpected flavors that brought a sense of adventure to the table. Since then, I’ve chased that feeling, eager to recreate it in my own kitchen.

    One day, while experimenting with classic chicken tenders, the idea struck me — why not infuse them with the vibrant, zesty flavors I adored so much? I’d had my fair share of fried chicken tenders, but they often left me wanting something more exciting, something that would transport my taste buds back to that sun-drenched beach. That’s when the Tropical Coconut-Lime Chicken Tenders with Spicy Mango Salsa were born.

    It wasn’t all smooth sailing, though. My first attempt was a bit too ambitious, resulting in mango chunks that were more like mush, and chicken tenders that were a tad overbrowned. But with each trial, I learned, adjusted, and eventually perfected the balance. The result? A dish that’s not only flavorful but evokes the carefree spirit of those summer days.

    What Makes This Version Special

    This version of chicken tenders introduces a zesty lime marinade and a fiery mango salsa, bringing a refreshing tropical flair to the classic. The marinade infuses the chicken with a tangy brightness, while the coconut and breadcrumb coating adds a crispy, nutty texture. The spicy mango salsa complements these flavors with its juicy sweetness and a hint of heat from the jalapeño, creating a dish that’s layered with complexity and excitement.

    Unlike standard chicken tenders, which can often be heavy and greasy, this rendition is light and vibrant. The use of unsweetened coconut and whole wheat breadcrumbs not only enhances the flavor but also adds a healthful twist. It’s a fusion of comforting familiarity and exotic novelty that will elevate any meal.

    Flavor Profile

    With your first bite, you’ll experience a burst of tropical zest as the lime-marinated chicken tenders melt in your mouth. The toasted coconut and whole wheat breadcrumbs create a crunch that’s both satisfying and addictive. As you dip your tenders into the spicy mango salsa, the sweetness of ripe mango dances with the heat of jalapeño, creating a symphony of flavors that’s both invigorating and harmonious. Every element of this dish is designed to complement and enhance the others, making each bite a delightful journey.

    Ingredients

    • 1 pound chicken tenders
    • 2 egg whites
    • **1 cup unsweetened coconut**
    • **1 cup whole wheat bread crumbs**
    • **Juice and zest of 2 limes**
    • 1 teaspoon smoked paprika
    • **1 ripe fresh mango, diced**
    • 1 jalapeño, finely diced
    • 1/2 small red onion, finely chopped
    • 1/4 cup fresh cilantro, chopped
    • 1 tablespoon honey
    • 1 teaspoon sea salt

    Instructions

    1. Preheat your oven to 350°F (175°C).
    2. In a shallow dish, combine the lime juice, lime zest, and smoked paprika. Add the chicken tenders, ensuring they are well coated with the marinade. Let them marinate for at least 30 minutes to absorb the flavors.
    3. While the chicken is marinating, toast the unsweetened coconut and whole wheat breadcrumbs in a large skillet over medium heat. Stir continuously until golden brown, about 5 minutes. This will enhance the flavor and aroma.
    4. In a separate bowl, beat the egg whites until slightly frothy.
    5. Remove the chicken tenders from the marinade, allowing any excess liquid to drip off. Dip each tender into the egg whites, ensuring a thin, even coating.
    6. Roll each chicken tender in the toasted coconut and breadcrumb mixture, pressing lightly to adhere the coating.
    7. Place the coated chicken tenders on a baking sheet lined with parchment paper. Bake in the preheated oven for 20 minutes, or until the chicken is cooked through and the coating is crispy and golden-brown.
    8. While the chicken bakes, prepare the mango salsa. In a medium bowl, combine the diced mango, jalapeño, red onion, cilantro, honey, and sea salt. Mix well and adjust seasoning as desired.
    9. Serve the chicken tenders hot, alongside the spicy mango salsa. Enjoy!

    Pro Tips from Meaghan’s Kitchen

    • To ensure the chicken tenders are juicy, don’t skip the marinating step. The lime not only adds flavor but also tenderizes the meat.
    • Be patient when toasting the coconut and breadcrumbs. Stir constantly to prevent burning and achieve an even golden hue.
    • If you find the mango salsa too spicy, remove the seeds from the jalapeño or use half of it.
    • For an extra layer of flavor, consider adding a pinch of cayenne pepper to the breadcrumb mixture for a subtle kick.
    • Make sure your mango is ripe for the best sweetness and balance in the salsa.

    Variations & Dietary Swaps

    • Vegetarian Swap: Replace chicken tenders with firm tofu slices. Marinate and bake as instructed for a delightful plant-based option.
    • Spice-It-Up Version: Add a teaspoon of cayenne pepper to the marinade for a spicier flavor profile.
    • Kids-Friendly Version: Skip the jalapeño in the salsa and offer a side of yogurt dip for a milder option.

    What to Serve With It

    This dish pairs beautifully with a chilled glass of coconut water, enhancing its tropical flair. For a fuller meal, serve with a light, tropical fruit smoothie or a side of coconut rice to complement the flavors and textures of the chicken tenders and salsa.

    Storage & Meal Prep

    Store any leftover chicken tenders in an airtight container in the refrigerator for up to 3 days. Reheat in a preheated oven at 350°F (175°C) for 10-12 minutes to maintain crispiness. The mango salsa is best enjoyed fresh but can be kept in the fridge for up to 2 days.

    FAQ

    Can I use sweetened coconut instead of unsweetened?

    While sweetened coconut can be used, it may alter the dish’s balance, making it sweeter. Unsweetened coconut offers a more authentic flavor without overpowering the other elements.

    What can I substitute for whole wheat breadcrumbs?

    If whole wheat breadcrumbs are unavailable, panko breadcrumbs work well, offering a similar crunchy texture.

    Can I grill the chicken tenders instead of baking them?

    Yes, grilling is an excellent alternative. Preheat your grill to medium heat and cook the tenders for 4-5 minutes on each side until fully cooked.

    How do I know when the chicken tenders are fully cooked?

    The chicken is done when it reaches an internal temperature of 165°F (75°C) and the juices run clear.

    Can this dish be made ahead of time?

    While fresh is best, you can marinate the chicken and prepare the salsa a day in advance. Bake the tenders just before serving for optimal texture.

    Final Thoughts

    Cooking is a journey, and recipes like these Tropical Coconut-Lime Chicken Tenders with Spicy Mango Salsa are meant to be both an adventure and a joy. I hope this dish transports you to a tropical paradise, filling your kitchen with vibrant flavors and delightful aromas. Feel free to share your experience, and I’d love to hear your variations and creative spins. Happy cooking, friends!

    Related update: Tropical Coconut-Lime Chicken Tenders with Spicy Mango Salsa

  • Tropical Almond Matcha Energy Smoothie with Coconut and Spirulina | Made by Meaghan Moineau

    Tropical Almond Matcha Energy Smoothie with Coconut and Spirulina | Made by Meaghan Moineau

    Tropical Almond Matcha Energy Smoothie with Coconut and Spirulina

    Imagine waking up to a sunrise that’s painting the sky with hues of gold and pink, the air filled with the scent of blooming flowers. Now, picture starting your day with a sip of something equally vibrant: a Tropical Almond Matcha Energy Smoothie with Coconut and Spirulina. This isn’t just any smoothie; it’s a vacation in a glass, with layers of flavor that transport you to a tropical island, one sip at a time.

    Personal Story

    Growing up, my mornings were less about leisurely sips of smoothies and more about grabbing a quick breakfast as I dashed out the door. It wasn’t until I took a summer trip to Maui that I discovered the blissful art of the smoothie. I vividly remember wandering into a little beachside café, the air salty with ocean spray, and ordering what would become a pivotal moment in my culinary journey.

    The café’s smoothie was a blend of fresh local fruits and exotic ingredients I had never tried before. The first sip was nothing short of a revelation. It was like tasting summer itself, bursting with flavors of ripe mango and creamy coconut, with a hint of something uniquely invigorating. That was the day I fell in love with tropical smoothies.

    Fast forward a few years, and I found myself experimenting in my kitchen, trying to recreate that magical experience. After much trial and delightful error, I came up with my own twist, adding nutrient powerhouses like spirulina and matcha to the mix. And so, the Tropical Almond Matcha Energy Smoothie with Coconut and Spirulina was born, becoming a staple in my morning routine and a favorite among friends and family.

    There was this one time I forgot to secure the lid on my blender properly. Let’s just say my kitchen walls got a surprise tropical splash that day! But every mistake led me to perfecting this recipe, ensuring each sip is as smooth and satisfying as the last.

    What Makes This Version Special

    This Tropical Almond Matcha Energy Smoothie with Coconut and Spirulina is more than just a blend of fruits and liquids; it’s an energizing start to your day. What sets this version apart from the standard superfood smoothie is its tropical twist with the addition of coconut and the vibrant green nutrient boost from spirulina. Coconut water and shredded coconut elevate the island vibe, while spirulina and matcha add a layer of earthiness and a boost of sustained energy. It’s perfect for busy mornings when you need a nutritious jumpstart that feels like a treat.

    Flavor Profile

    The flavor journey of this smoothie is nothing short of exhilarating. With each sip, you’re first greeted by the refreshing and bright notes of tropical fruits like mango and pineapple. This is followed by the creamy, nutty undertone of unsalted natural almond butter and shredded coconut, offering a luscious mouthfeel. The spirulina introduces a subtle earthiness that balances the sweetness, while a splash of fresh lime juice ties everything together with a zesty finish. It’s like a tropical getaway in a glass, right from your kitchen.

    Ingredients

    • 1 tablespoon **unsalted natural almond butter**
    • 1 cup **unsweetened almond milk**
    • 1 **frozen banana**
    • 1 tablespoon chia seeds
    • 1 handful baby kale
    • 1/2 cup **frozen mango pieces**
    • 1 teaspoon **green matcha tea powder**
    • 1/2 cup **frozen pineapple**
    • 1 teaspoon vanilla extract
    • 1/2 cup **coconut water**
    • 2 tablespoons **shredded coconut**
    • 1 teaspoon **spirulina powder**
    • 1 tablespoon fresh lime juice

    Instructions

    1. Start by adding the spirulina powder into a blender with a small amount of almond milk. Blend on low to ensure the spirulina dissolves completely, preventing any clumps and allowing the vibrant green color to integrate smoothly.
    2. Add the remaining almond milk, frozen banana, chia seeds, and baby kale. Blend until the kale is fully incorporated, and no green leaves are visible—just a smooth, emerald base.
    3. Introduce the frozen mango pieces, green matcha tea powder, frozen pineapple, vanilla extract, and coconut water. Blend on high until the mixture is silky and all the frozen fruit has broken down, creating a thick and creamy texture.
    4. Finally, add the shredded coconut. Pulse the blender a few times to mix in the coconut, adding a delightful texture without over-blending.
    5. Pour the smoothie into glasses, squeeze a touch of fresh lime juice on top, and serve immediately for the ultimate refreshing experience.

    Pro Tips from Meaghan’s Kitchen

    • For an extra creamy smoothie, freeze your almond milk in ice cube trays and use these instead of regular ice cubes.
    • Always add liquids to the blender first to help the blades move easily through the ingredients.
    • If you prefer a thicker smoothie, add more frozen banana or reduce the coconut water.
    • Spirulina can have a strong flavor—start with less if you’re new to it, and gradually increase as you become more accustomed to its taste.
    • Experiment with different brands of matcha powder to find one that suits your taste preferences and budget.

    Variations & Dietary Swaps

    • Nut-Free Version: Swap almond butter and almond milk for sunflower seed butter and oat milk.
    • Extra Protein Boost: Add a scoop of your favorite vanilla protein powder.
    • Kid-Friendly Version: Reduce spirulina to half a teaspoon and add a touch of honey or agave for extra sweetness.

    What to Serve With It

    This Tropical Almond Matcha Energy Smoothie with Coconut and Spirulina pairs beautifully with a side of freshly sliced papaya or mango for an extra tropical punch. For a more filling breakfast, serve it alongside a warm piece of whole grain toast topped with avocado and a sprinkle of salt.

    Storage & Meal Prep

    If you want to save time in the morning, pre-portion the frozen fruits and dry ingredients into individual baggies, then store them in the freezer. When you’re ready to make your smoothie, simply pour the contents of the bag into the blender, add your liquids, and blend.

    While this smoothie is best enjoyed fresh, you can refrigerate leftovers in an airtight container for up to 24 hours. Shake or stir well before drinking. For longer storage, freeze the smoothie in a mason jar with some space at the top for expansion. Thaw overnight in the fridge before enjoying.

    FAQ

    Can I use fresh fruit instead of frozen?

    Yes, you can use fresh fruit, but you might need to add ice cubes to achieve the same thick, cold consistency that frozen fruit provides.

    Is spirulina really necessary?

    While spirulina is a wonderful nutrient boost, you can leave it out if you’re not a fan of its flavor. The smoothie will still be delicious without it.

    Can I add additional sweeteners?

    Absolutely! If you have a sweet tooth, a touch of honey, agave syrup, or even a Medjool date can enhance the sweetness.

    How can I make this smoothie more filling?

    To make this smoothie heartier, consider adding a half-cup of rolled oats or a tablespoon of flaxseeds for extra fiber and satiety.

    Final Thoughts

    There you have it, my Tropical Almond Matcha Energy Smoothie with Coconut and Spirulina—a deliciously refreshing way to kick-start your morning with a burst of tropical flavors. I hope this recipe brings a little piece of paradise to your day, just as it has to mine. I’d love to hear how it turns out for you, so feel free to leave a comment or share your own unique twist on this smoothie. Cheers to vibrant mornings and happy blending!

    Related update: Tropical Almond Matcha Energy Smoothie with Coconut and Spirulina

  • Pan Seared Lamb Loin with Spicy Chimichurri & Honey-Glazed Squash Salad | Made by Meaghan Moineau

    Pan Seared Lamb Loin with Spicy Chimichurri & Honey-Glazed Squash Salad | Made by Meaghan Moineau

    Pan Seared Lamb Loin with Spicy Chimichurri & Honey-Glazed Squash Salad

    Imagine the sizzle of lamb loins hitting a hot pan, releasing a fragrant cloud of savory goodness that dances through the air. Your kitchen fills with the earthy aroma of roasted squash, kissed by a honey glaze that caramelizes into a sweet, sticky perfection. This isn’t just any meal — it’s an orchestra of flavors waiting to dazzle your senses.

    Personal Story

    Growing up, Sunday dinners were a sacred ritual in my family. My mother, apron-clad and humming a tune, would transform our kitchen into a wonderland of delicious aromas. One particular Sunday, as a precocious eleven-year-old, I decided to take charge of the main dish. With a little too much confidence and a recipe clutched in hand, I embarked on cooking my first lamb loin.

    My initial attempt was, to put it kindly, a learning experience. The lamb was overcooked and the chimichurri, lacking the spicy kick I had envisioned, was more of a parsley parade than a flavor fiesta. Yet, despite the mishap, we sat around the table, savoring the meal and laughing at my culinary adventure. That day, I learned more about balancing flavors than any cookbook could teach.

    A few years and countless experiments later, I revisited that dish. This time, with a twist: a spicy chimichurri that dances on the tongue, and a trio of honey-glazed squash to complement the savory lamb. The result was a revelation, a dish that not only paid homage to my childhood memory but elevated it into something truly special.

    Now, every time I make this Pan Seared Lamb Loin with Spicy Chimichurri and Honey-Glazed Squash Salad, I’m reminded of that first foray into the kitchen — and the joy of discovering just how delightfully complex simple ingredients can be.

    What Makes This Version Special

    This version of Pan Seared Lamb Loin is not your average recipe. The spicy chimichurri, with its bold use of jalapeño and **red pepper flakes**, elevates the dish by adding a tantalizing heat that wakes up your taste buds. But it’s the **honey-glazed squash salad** that truly sets this recipe apart. The natural sweetness of butternut, acorn, and delicata squash is amplified through roasting, creating a caramelized exterior that beautifully contrasts the spicy chimichurri. Each bite offers a delightful balance of sweet and spicy, making this dish a standout on any dinner table.

    Flavor Profile

    Picture this: the smoky, spicy aroma of the chimichurri fills the room, a tantalizing prelude to the complex flavors it promises. The lamb loin, seared to a golden-brown perfection, provides a rich, savory depth that anchors the dish. As you take a bite, the spicy heat of the chimichurri dances with the sweetness of the honey-glazed squash, creating a symphony of flavors that is both unexpected and delightful. The nutty crunch of **pinenuts** and the creamy tang of goat cheese add layers of texture and taste, ensuring that each mouthful is a new experience.

    Ingredients

    • 1/2 cup **cilantro**, chopped
    • 1/4 cup **extra virgin olive oil**
    • 1/2 cup **flat leaf parsley**, chopped
    • 1 **garlic clove**, minced
    • 1 teaspoon **black ground pepper**
    • 1 tablespoon **kosher salt and pepper**
    • 4 **lamb loin chops**
    • 1 **lemon**, juiced
    • 1/4 cup **mint**, chopped
    • 2 tablespoons **pinenuts**, toasted
    • 1 teaspoon **red pepper flakes**
    • 1 **shallot**, finely chopped
    • 1 **jalapeño**, minced
    • 2 tablespoons **honey**
    • 1 **butternut squash**, peeled and cubed
    • 1 **acorn squash**, sliced
    • 1 **delicata squash**, sliced
    • 1/4 cup **goat cheese**, crumbled
    • 1 teaspoon **smoked paprika**

    Instructions

    1. Preheat your oven to 400°F (200°C).
    2. To prepare the chimichurri, bloom the **red pepper flakes** and **smoked paprika**: In a small pan, heat 1 tablespoon of **extra virgin olive oil** over medium heat. Add the flakes and paprika, stirring for about 30 seconds until fragrant. Remove from heat.
    3. In a large bowl, combine the bloomed spices with **cilantro**, **flat leaf parsley**, **garlic**, **shallot**, **jalapeño**, **lemon juice**, and remaining olive oil. Season with **kosher salt and pepper**. Mix well and set aside.
    4. For the squash, place the **butternut**, **acorn**, and **delicata squash** on a baking sheet. Drizzle with **honey** and a pinch of salt. Roast for 25-30 minutes, turning halfway, until the squash is tender and caramelized.
    5. Meanwhile, heat a large, heavy-bottomed pan over high heat with the remaining olive oil. Season the **lamb loin chops** with **black ground pepper** and **kosher salt**.
    6. Sear the lamb loins in the hot pan for 2 minutes on each side until a golden-brown crust forms. Transfer the pan to the preheated oven.
    7. Bake to your desired doneness: 2-3 minutes for rare, 6-8 minutes for medium-rare, 9-11 minutes for medium, or 12-14 minutes for well done. Remember, the lamb will continue to cook as it rests.
    8. Allow the lamb to rest for 5 minutes before serving, allowing the juices to redistribute.
    9. To serve, place a portion of the roasted squash on each plate, top with sliced lamb loin, drizzle with spicy chimichurri, and sprinkle with **goat cheese** and **pinenuts**.

    Pro Tips from Meaghan’s Kitchen

    • Use a meat thermometer for perfect lamb doneness. Aim for an internal temperature of 135°F (57°C) for medium-rare.
    • To enhance the flavor of the chimichurri, let it sit for at least 30 minutes before serving to allow the flavors to meld.
    • Toss the squash halfway through roasting to ensure even caramelization.
    • When searing lamb, ensure your pan is smoking hot to achieve a perfect crust.
    • If the chimichurri is too spicy, add a bit more olive oil or a splash of lemon juice to balance the heat.

    Variations & Dietary Swaps

    • Vegetarian Swap: Replace lamb with thick slices of portobello mushrooms for a meaty texture that pairs wonderfully with the chimichurri.
    • Spice-it-up Version: Add a pinch of cayenne pepper to the chimichurri for an extra kick.
    • Kids-Friendly Version: Tone down the spice by reducing the red pepper flakes and jalapeño, and serve the squash with a light sprinkle of cinnamon instead of chimichurri.

    What to Serve With It

    This vibrant dish pairs beautifully with a chilled glass of Sauvignon Blanc, its crisp notes complementing the spicy and sweet flavors. For a hearty side, serve with roasted garlic mashed potatoes, which offer a creamy, savory contrast to the meal’s dynamic profile.

    Storage & Meal Prep

    To store, place leftovers in an airtight container in the fridge for up to 3 days. For longer storage, freeze the lamb and squash separately for up to 1 month. Reheat the lamb gently in a skillet over low heat to prevent overcooking. The squash can be reheated in the oven at 350°F (175°C) until warmed through.

    FAQ

    Can I make the chimichurri ahead of time?

    Absolutely! Chimichurri can be made up to 3 days in advance. Store it in the fridge and bring it to room temperature before serving.

    What if I don’t have fresh herbs on hand?

    While fresh herbs are best, dried herbs can be used in a pinch. Just reduce the amount by half, as dried herbs are more concentrated.

    How do I know when the lamb is properly seared?

    Look for a deep golden-brown crust on each side of the lamb. If it sticks to the pan, give it a few more seconds — it will release when it’s ready.

    Can I use other types of squash?

    Yes, feel free to experiment with other winter squashes like kabocha or hubbard. Adjust the roasting time as needed, depending on the size of the pieces.

    Is this dish gluten-free?

    Yes, this recipe is naturally gluten-free, making it suitable for those with gluten sensitivities.

    Final Thoughts

    Cooking is as much about the journey as it is about the destination. This Pan Seared Lamb Loin with Spicy Chimichurri and Honey-Glazed Squash Salad is a testament to the magic that happens when flavors are carefully balanced and thoughtfully prepared. I hope this dish brings as much joy to your table as it has to mine. Don’t forget to share your version in the comments — I love hearing your stories and seeing your creations!

    Related update: Pan Seared Lamb Loin with Spicy Chimichurri & Honey-Glazed Squash Salad

    Related update: Savory Herb-Infused Chicken Noodle Casserole with Truffle Panko Crust

  • Zesty Lemon Poppy Seed Lava Cakes with Spiced Chocolate Ganache | Made by Meaghan Moineau

    Zesty Lemon Poppy Seed Lava Cakes with Spiced Chocolate Ganache | Made by Meaghan Moineau

    Zesty Lemon Poppy Seed Lava Cakes with Spiced Chocolate Ganache

    Imagine this: a warm, golden-brown cake with a delicate crust, cradling a pool of molten chocolate that spills onto your plate with the first forkful. The aroma of fresh lemon zest mingles with the warm, spiced scent of cardamom and ginger, creating a sensory symphony that dances around your kitchen. Welcome to the world of Zesty Lemon Poppy Seed Lava Cakes with Spiced Chocolate Ganache — a dessert that tantalizes both your taste buds and your imagination.

    Personal Story

    When I was a little girl, my grandmother would often bake her famous lemon poppy seed cake. It was a simple yet decadent treat, and I can still recall the scent wafting through the house, mingling with the laughter of family gatherings. That cake was a staple at our family celebrations, a beloved tradition that brought everyone together around the dining table.

    Fast forward to a few years ago when I found myself in Paris, walking through a bustling market. I stumbled upon a quaint patisserie where I experienced my first taste of molten chocolate lava cake. The intense richness of the chocolate was perfectly balanced by a hint of spice, an unexpected twist that left me dreaming of recreating the experience back home.

    Inspired by those memories, I embarked on a culinary journey to merge these two beloved desserts into one perfect fusion. The result? Zesty Lemon Poppy Seed Lava Cakes with Spiced Chocolate Ganache. Each bite is a nostalgic nod to my past, while the rich, spiced ganache adds a bold and contemporary twist.

    Not only does this recipe marry two beloved flavors, but it also embodies the essence of my culinary philosophy: to honor tradition while embracing innovation. This dish is a testament to the joys of experimentation and the magic that happens when you bring together unexpected ingredients.

    What Makes This Version Special

    This isn’t just any lemon poppy seed cake or molten chocolate lava cake — it’s a delightful fusion that brings together the best of both worlds. By incorporating a hint of cardamom and ginger into the chocolate ganache, this version creates a warm, spiced flavor that perfectly complements the zesty lemon cake. The result is a harmonious blend that elevates the traditional dessert to new heights, offering a sophisticated twist that’s both surprising and satisfying.

    Why settle for a standard recipe when you can indulge in a dessert that tantalizes the senses and surprises the palate? This version is not only a feast for your taste buds but also an experience that your guests will remember and rave about.

    Flavor Profile

    Imagine a bite that begins with the fresh, zingy pop of lemon and the nutty crunch of poppy seeds. As you reach the center, the warm, spiced chocolate ganache spills out in a silky cascade, enveloping your senses in a rich and aromatic embrace. The balance of sweetness and spice is delicate yet pronounced, creating a flavor experience that lingers beautifully on the palate.

    Every element of this dish works in harmony: the zesty brightness of the lemon cake, the subtle warmth of the spices, and the deep, rich chocolate — all coming together in a symphony of flavors that feels both nostalgic and novel.

    Ingredients

    • 1 cup all-purpose flour
    • 1 tablespoon grated lemon rind
    • 2 tablespoons poppy seeds
    • 3 large egg yolks
    • 3/4 cup granulated sugar
    • 1/2 cup unsalted butter, melted
    • 3 large egg whites
    • 6 ounces bittersweet chocolate, chopped
    • 1 teaspoon ground cardamom
    • 1/2 teaspoon ground ginger
    • 1 teaspoon vanilla extract
    • Pinch of salt

    Instructions

    1. Position a rack in the center of the oven and preheat to 400 degrees F. Lightly butter six 6-ounce ramekins, dust with sugar, and place on a baking sheet.
    2. In a small bowl, whisk together the flour, lemon rind, and poppy seeds; set aside.
    3. In the 4-1/2 quart bowl of a heavy-duty electric mixer using the wire whip attachment, whip the egg yolks and sugar until the mixture is pale and forms a ribbon when the whip is lifted. Add the vanilla extract and a pinch of salt for enhanced depth of flavor.
    4. Place the egg whites in a medium grease-free bowl and using a hand-held electric mixer, whip the whites to soft peaks.
    5. Fold the flour mixture into the yolk/sugar mixture, then add the melted butter and gently mix until combined. Fold in the egg whites until combined.
    6. In a small saucepan, melt the chocolate over low heat. Once melted, remove from heat and stir in the ground cardamom and ground ginger for a spiced kick.
    7. Fill each of the prepared ramekins 3/4 full with the cake batter and place a 1-ounce piece of the spiced chocolate ganache in the center of the batter.
    8. Bake for 15 minutes or until the cakes are firm yet have a slight jiggle in the center. Allow to cool on a wire rack for 5 minutes.
    9. Gently invert each cake onto a dessert plate and serve warm, letting the spiced chocolate ganache ooze out enticingly.

    Pro Tips from Meaghan’s Kitchen

    • For a more intense lemon flavor, consider adding a bit of freshly squeezed lemon juice to the batter.
    • Ensure your egg whites are at room temperature before whipping for maximum volume.
    • Gently fold the egg whites into the batter to maintain airiness — overmixing can result in dense cakes.
    • If you’re short on time, you can prepare the spiced chocolate ganache in advance and refrigerate it until needed.
    • Use a serrated knife to chop the chocolate; it will prevent the chocolate from flying everywhere.

    Variations & Dietary Swaps

    • For a gluten-free version, substitute the all-purpose flour with a gluten-free flour blend.
    • Spice it up by adding a pinch of cayenne pepper to the ganache for an extra kick.
    • Make it kid-friendly by omitting the spices and using milk chocolate instead of bittersweet chocolate.

    What to Serve With It

    These Zesty Lemon Poppy Seed Lava Cakes with Spiced Chocolate Ganache are a show-stopping dessert on their own, but for a truly indulgent experience, pair them with a chilled glass of sparkling Moscato. The effervescence and sweetness of the wine complement the rich flavors perfectly. Alternatively, a scoop of vanilla bean ice cream adds a creamy contrast to the warm, gooey center.

    Storage & Meal Prep

    These lava cakes are best enjoyed fresh from the oven, but if you have leftovers, you can store them in an airtight container in the refrigerator for up to 2 days. To reheat, place them in a preheated oven at 350 degrees F for about 5-7 minutes or until warmed through. If freezing, wrap each cake tightly in plastic wrap and then aluminum foil. They can be frozen for up to 1 month. Thaw in the refrigerator overnight before reheating.

    FAQ

    Can I use milk chocolate instead of bittersweet chocolate?

    Yes, you can substitute milk chocolate for a sweeter, creamier ganache. Keep in mind that it will be less intense than bittersweet chocolate.

    What if I don’t have cardamom at home?

    No worries! You can substitute with cinnamon, though the flavor profile will be slightly different. The warmth of cinnamon pairs well with ginger and chocolate.

    How do I know when the cakes are done baking?

    The cakes should be firm around the edges but have a slight jiggle in the center. This indicates that the chocolate core remains gooey.

    Can I make the batter ahead of time?

    It’s best to prepare and bake the batter immediately for optimal texture. However, you can prepare the dry and wet ingredients separately a day in advance and combine them right before baking.

    What if I don’t have ramekins?

    If you don’t have ramekins, you can use muffin tins as an alternative. Just be sure to adjust the baking time slightly as they may cook faster.

    Final Thoughts

    Thank you for joining me on this delicious journey of creating Zesty Lemon Poppy Seed Lava Cakes with Spiced Chocolate Ganache. I hope this recipe brings as much joy and warmth to your kitchen as it does to mine. I encourage you to experiment and adapt as you see fit — after all, cooking is as much about personal expression as it is about flavor. Don’t hesitate to share your culinary creations and experiences in the comments below. Happy baking, my dear friends!

    Related update: Zesty Lemon Poppy Seed Lava Cakes with Spiced Chocolate Ganache

    Related update: Decadent Honey-Roasted Peanut Butter Ice Cream with Dark Chocolate Shards

  • Tropical Green Monster Smoothie with Coconut & Mango | Made by Meaghan Moineau

    Tropical Green Monster Smoothie with Coconut & Mango | Made by Meaghan Moineau

    Tropical Green Monster Smoothie with Coconut & Mango

    Imagine yourself lounging on a sun-kissed beach, the soft hum of waves providing a tranquil soundtrack. In your hand is a tall glass of something vibrant and refreshing, a taste of paradise in liquid form. That’s exactly what this Tropical Green Monster Smoothie with Coconut & Mango delivers — a tropical escape with every creamy, luscious sip.

    Personal Story

    My love affair with smoothies began during a summer in my teens, when my best friend and I concocted endless variations in her kitchen, each one more adventurous than the last. We were determined to outdo ourselves with each blend, our creations fueled by a mix of youthful curiosity and the sticky summer heat. Those carefree days tasted like an endless summer break, and the blender was our magic wand.

    Fast forward to a few years ago, I found myself in a tropical paradise — a long-dreamed-of vacation to Hawaii. The lush landscape, with its vibrant fruits and fragrant coconuts, made a lasting impression. One morning, after a sunrise yoga session overlooking the ocean, I was served a smoothie that took me right back to those endless summers, but with a sophisticated twist. Let me tell you, that smoothie was an epiphany.

    Back home, I was determined to recreate that magical blend. After a few delightful kitchen experiments, I perfected my own version: the Tropical Green Monster Smoothie with Coconut & Mango. This recipe is a tribute to those carefree teenage summers and my Hawaiian adventure, capturing the essence of both in a single glass.

    Now, each time I whip up this smoothie, I’m transported back to those sun-drenched mornings and the exhilaration of trying something new. It’s a reminder that adventures, big or small, can be found even in our own kitchens.

    What Makes This Version Special

    While the classic green monster smoothie is already a health lover’s dream, my version takes it up a notch by incorporating tropical fruits and a hint of coconut. This isn’t just a smoothie — it’s an escape to a sunny paradise with every sip. The frozen mango chunks add a burst of tropical sweetness, while the coconut water and toasted coconut flakes introduce a subtle yet irresistible creaminess and crunch. It’s like a beach vacation in a glass, with the added benefit of nutrient-packed spinach and fresh ginger for a zingy warmth.

    Flavor Profile

    The Tropical Green Monster Smoothie with Coconut & Mango is a delightful balance of creamy and tangy, with a tropical twist. Each sip starts with the vibrant sweetness of mango, complemented by the smooth, nutty undertones of peanut butter. The coconut water adds a refreshing lightness, while the grated fresh ginger brings a gentle warmth that lingers just enough to intrigue. The spinach is subtle, lending its vibrant color and a hint of earthiness. Finally, those toasted coconut flakes introduce a delightful crunch and a whisper of toasted aroma, making each sip a multi-sensory delight.

    Ingredients

    • 1 frozen banana
    • 1 cup baby spinach
    • 2 tablespoons peanut butter
    • 1 cup unsweetened vanilla almond milk
    • 1/2 cup fat-free plain Greek yogurt
    • 1 cup frozen mango chunks
    • 1/2 cup coconut water
    • 1 teaspoon grated fresh ginger
    • 2 tablespoons toasted coconut flakes

    Instructions

    1. Start by layering the ingredients in your blender. Begin with the liquids at the bottom: pour in the unsweetened vanilla almond milk and coconut water. This helps the blender blades move smoothly, ensuring a creamier smoothie.
    2. Add the frozen banana, baby spinach, peanut butter, fat-free plain Greek yogurt, and frozen mango chunks. These ingredients form the body of your smoothie, creating that thick, satisfying texture.
    3. Sprinkle in the grated fresh ginger for that warm, zesty kick. This little addition elevates the tropical flavors beautifully.
    4. Before blending, add a handful of ice cubes. This step is key for achieving that frosty texture that makes each sip so refreshing.
    5. Blend until smooth, about 1-2 minutes, depending on your blender’s power. Look for a vibrant green hue and a velvety texture with no visible chunks.
    6. Pour the smoothie into glasses and garnish with the toasted coconut flakes. This final touch not only adds a delightful crunch but also enhances the tropical aroma.

    Pro Tips from Meaghan’s Kitchen

    • For an extra creamy texture, use a high-powered blender. It makes a world of difference in achieving that perfectly smooth consistency.
    • If you’re a fan of thicker smoothies, consider freezing the almond milk in ice cube trays before using it in the recipe.
    • Toasting your coconut flakes at home is easy! Simply spread them on a baking sheet and bake at 350°F for about 5 minutes, keeping a close eye to prevent burning.
    • Always taste your smoothie before serving. If you prefer it sweeter, a drizzle of honey or a splash of orange juice can work wonders.

    Variations & Dietary Swaps

    • Vegan Version: Swap the Greek yogurt for a plant-based alternative like coconut yogurt or soy yogurt.
    • Spice-it-Up Version: Add a pinch of cayenne pepper for a subtle heat that complements the ginger and tropical flavors.
    • Kids-Friendly Version: Reduce the ginger to a pinch and add more frozen banana for extra sweetness. Kids will love the creamy texture and vibrant color!

    What to Serve With It

    This Tropical Green Monster Smoothie with Coconut & Mango is a perfect standalone treat, but if you’re looking to make it a complete meal, try pairing it with a side of fresh pineapple slices or a chilled glass of coconut water. The tropical flavors will harmonize beautifully, making for a truly refreshing experience. For a heartier option, consider serving it alongside a slice of whole-grain toast topped with avocado and a sprinkle of sea salt.

    Storage & Meal Prep

    If you want to make this smoothie ahead of time, you can store it in the fridge for up to 24 hours. However, it’s best enjoyed fresh to retain that vibrant color and flavor. To prepare in advance, consider assembling the dry ingredients in a zip-top bag and storing them in the freezer. When you’re ready to enjoy, just add the liquids and blend.

    For longer storage, pour the smoothie into ice cube trays and freeze. When you’re craving a quick smoothie, simply blend the frozen cubes with a splash of almond milk or coconut water.

    FAQ

    Can I use fresh mango instead of frozen?

    Absolutely! Fresh mango will work just fine, though you might want to add a few extra ice cubes to achieve the desired frosty texture.

    What if I don’t have coconut water?

    No worries! You can substitute it with more almond milk, or even plain water, though it might slightly alter the tropical flavor profile.

    How can I make the smoothie thicker?

    Try adding more frozen banana or reducing the amount of liquid slightly. You can also freeze your almond milk into ice cubes as mentioned in the pro tips.

    Is there a nut-free option?

    Yes, you can replace the peanut butter with sunflower seed butter or simply omit it for a lighter version.

    Can I use other leafy greens besides spinach?

    Definitely! Kale is a great alternative, though it might alter the taste slightly with its more pronounced flavor. Feel free to experiment with different greens to suit your taste.

    Final Thoughts

    I hope this Tropical Green Monster Smoothie with Coconut & Mango brings a little sunshine into your day, wherever you are. It’s a simple, delicious way to enjoy a taste of the tropics, packed with vibrant flavors and nourishing ingredients. If you try it, I’d love to hear how it turned out! Feel free to leave a comment below or share your smoothie photos on social media. Let’s spread the tropical love, one sip at a time!

    Related update: Tropical Green Monster Smoothie with Coconut & Mango

    Related update: Tropical Spiced Pina Colada with Coconut Cream Floater

  • Tropical Berry Bliss Smoothie with Coconut and Lime | Made by Meaghan Moineau

    Tropical Berry Bliss Smoothie with Coconut and Lime | Made by Meaghan Moineau

    Tropical Berry Bliss Smoothie with Coconut and Lime

    Picture this: a sun-drenched morning, the air heavy with the scent of blooming flowers, and in your hand, a tall, frosty glass. It’s brimming with a vibrant, lush smoothie, the kind that tastes like a vacation in a sip. This is not just any smoothie; it’s a Tropical Berry Bliss Smoothie with Coconut and Lime, promising to take your taste buds on an island escape.

    Years ago, I stumbled upon this delightful concoction quite by accident. I was hosting a brunch for some dear friends and had ambitiously promised a spread reminiscent of a beachside retreat. In my enthusiasm, I went overboard with the berry stockpile and somehow ended up with an excess of coconut milk and limes. As I stood amidst the chaos of my kitchen, inspiration struck. Why not blend these ingredients into a refreshing smoothie? It was a serendipitous decision that changed my brunch game forever.

    The result was nothing short of magical. My friends raved about the unexpected combination: a tropical smoothie that wasn’t just sweet but had a sophisticated tang and creaminess that made it feel indulgent yet light. Since then, the Tropical Berry Bliss Smoothie with Coconut and Lime has become a staple in my home, a reminder of that memorable day and the joy of culinary creativity.

    Of course, there have been mishaps along the way. Like the time I forgot to zest the lime before juicing it, leading to a slightly less aromatic drink. Or the morning I accidentally used salted coconut milk, a lesson in reading labels carefully! Yet, every attempt brought me closer to perfecting this recipe, and now, I’m thrilled to share it with you.

    What Makes This Version Special

    This Tropical Berry Bliss Smoothie is not your average berry blend. What sets it apart is the use of creamy coconut milk and the zesty kick of fresh lime juice and zest. These ingredients introduce a tropical flair that elevates the traditional berry smoothie into something extraordinary. The coconut milk adds a lush creaminess that balances the tangy berries, while the lime infuses the drink with a refreshing zest. It’s like a beach vacation in a glass, making it a unique and delightful twist on a standard recipe.

    Flavor Profile

    Imagine the first sip: a burst of tropical and tangy flavors dance on your tongue, underscored by a creamy coconut undertone that soothes and delights. As the smoothie glides down, the refreshing lime finish leaves a lingering zest that keeps you coming back for more. This delightful fusion of flavors is what makes the Tropical Berry Bliss Smoothie with Coconut and Lime a must-try for any smoothie enthusiast.

    Ingredients

    • 1 cup frozen blackberries
    • 1 cup frozen blueberries
    • 1/2 cup lemonade concentrate
    • 1 cup frozen unsweetened raspberries
    • 1 cup frozen unsweetened strawberries
    • 2 tablespoons sugar
    • 1 teaspoon vanilla extract
    • 1 cup whole milk
    • 1 cup coconut milk
    • Juice of 1 fresh lime
    • Zest of 1 lime
    • Shredded coconut for garnish

    Instructions

    1. Zest the lime before juicing to infuse the smoothie with its fragrant oils. Set aside.
    2. In a blender, place the lemonade concentrate, whole milk, and coconut milk. Layering the ingredients starting with liquids ensures a smoother blending process.
    3. Add the frozen blackberries and blueberries. Pulse a few times until the mixture begins to break down.
    4. Add the frozen raspberries and strawberries. Pulse 2-3 times to help them incorporate.
    5. Sprinkle in the sugar and vanilla extract. Blend on high until the mixture is smooth and creamy, with no visible chunks of fruit.
    6. Pour in the fresh lime juice and add the lime zest. Blend briefly to combine.
    7. Pour into glasses and garnish with shredded coconut. Serve immediately for the best flavor and texture.

    Pro Tips from Meaghan’s Kitchen

    • Use frozen berries to avoid watering down the smoothie with ice. This keeps it thick and flavorful.
    • If you prefer a sweeter smoothie, add a tablespoon of honey or agave syrup.
    • Opt for unsweetened coconut milk to control the sweetness of the final product.
    • For an extra frosty texture, chill your glasses in the freezer before pouring the smoothie.
    • Experiment with different brands of coconut milk as they can vary significantly in creaminess and flavor.

    Variations & Dietary Swaps

    • Vegan Version: Swap the whole milk for almond or oat milk, and ensure your sugar is vegan.
    • Spice-It-Up Version: Add a pinch of cayenne pepper for a spicy kick that complements the sweetness of the berries.
    • Kids-Friendly Version: Blend in a banana for added sweetness and creaminess that kids love.

    What to Serve With It

    Pair your Tropical Berry Bliss Smoothie with a crunchy granola parfait for a delightful textural contrast. Alternatively, serve alongside coconut-lime scones for a decadent breakfast or brunch experience. These pairings enhance the tropical theme and make for a well-rounded meal.

    Storage & Meal Prep

    If you find yourself with leftover smoothie, store it in an airtight container in the fridge for up to 24 hours. Give it a good shake before serving. For longer storage, pour the smoothie into ice cube trays and freeze. When ready to enjoy, blend the cubes with a bit of coconut milk. This smoothie doesn’t reheat well due to its icy nature, so enjoy it cold.

    FAQ

    Can I use fresh berries instead of frozen?

    Yes, you can use fresh berries, but you may want to add a handful of ice to achieve the desired thickness and chill.

    Is there a substitute for lemonade concentrate?

    You can replace lemonade concentrate with freshly squeezed lemon juice mixed with a bit of honey or sugar to taste.

    What if I don’t have coconut milk?

    If you don’t have coconut milk, you can substitute with almond milk or more whole milk, though the tropical flavor will be less pronounced.

    Can I make this smoothie ahead of time?

    You can prepare the ingredients ahead but blend it fresh for the best flavor and texture. If needed, store in the fridge and give it a vigorous shake before serving.

    Is it possible to make this smoothie without a blender?

    Unfortunately, a blender is essential to achieve the smooth, creamy texture of this smoothie. A food processor might work in a pinch, but it won’t be as smooth.

    Final Thoughts

    I hope this Tropical Berry Bliss Smoothie with Coconut and Lime brings a splash of island magic into your days, just as it has mine. Whether you’re sipping it solo or sharing with friends, it’s a delightful reminder that sometimes the best culinary adventures come from a little creativity and a dash of serendipity. I’d love to hear how this recipe turns out for you, so please leave a comment or share your creations. Cheers to delicious, sun-kissed moments!

    Related update: Tropical Berry Bliss Smoothie with Coconut and Lime

    Related update: Tropical Green Monster Smoothie with Coconut & Mango

  • Zesty Kohlrabi and Apple Salad with Smoky Chipotle Bacon | Made by Meaghan Moineau

    Zesty Kohlrabi and Apple Salad with Smoky Chipotle Bacon | Made by Meaghan Moineau

    Zesty Kohlrabi and Apple Salad with Smoky Chipotle Bacon

    Imagine the crunch of freshly sliced kohlrabi meeting the sweet bite of Fuji apple, all dressed in a creamy, tangy dressing that whispers of lime and honey. Now, add crumbles of smoky chipotle bacon for a spicy twist and a sprinkle of fresh mint for a refreshing finish. This isn’t just a salad; it’s a flavor journey.

    Personal Story

    My love affair with kohlrabi began in my grandmother’s garden. As a child, I was always curious about the peculiar-looking green bulbs peeking through the soil, their leaves stretching out like open arms. My grandmother, an avid gardener and cook, would slice them paper-thin, sprinkle them with salt, and hand them to me as a snack. It was during these times that I developed a fondness for its subtle peppery taste and crisp texture.

    Fast forward a few years, and I found myself in my own kitchen, staring at a bulb of kohlrabi I impulsively bought at the farmer’s market. I wanted to recreate the magic of my childhood but with a twist that reflected my grown-up palate. That’s when the idea for this Zesty Kohlrabi and Apple Salad with Smoky Chipotle Bacon was born. The salad had to be more than just a nod to nostalgia; it had to be a celebration of flavors.

    One kitchen mishap almost derailed the entire endeavor. I was experimenting with bacon, trying to infuse it with a spicy kick, and went a bit too heavy-handed with the chipotle powder. The smoke alarm went off, the air was filled with spice, and my eyes watered. Yet, once the bacon cooled, the chipotle had infused perfectly, offering just the right amount of heat. It was a happy accident that became a defining feature of this dish.

    Ever since that serendipitous day, this salad has become a staple at my table, and each time I make it, I’m transported back to those sun-drenched afternoons in my grandmother’s garden, with a new twist that reflects my culinary journey.

    What Makes This Version Special

    This salad introduces a smoky chipotle kick in the bacon, elevating the flavor profile with a spicy twist. It’s not just about adding bacon; it’s about transforming it. By coating the bacon with chipotle powder before cooking, we add a depth of flavor that’s both smoky and spicy, creating a delicious contrast to the refreshing crunch of kohlrabi and apple.

    Additionally, a touch of fresh mint offers a refreshing contrast, completing the flavor symphony with its cool, aromatic presence. This version of the salad stands out because it harmoniously balances heat, sweet, and fresh, making it a vibrant addition to any meal.

    Flavor Profile

    The taste experience of the Zesty Kohlrabi and Apple Salad with Smoky Chipotle Bacon is an adventure in contrasts and complements. Smoky and spicy bacon crumbles introduce a bold heat, which is immediately cooled by the refreshing crunch of kohlrabi and apple. The dressing, infused with lime zest, provides a citrusy zing that brightens every bite, while the honey in the dressing offers a subtle sweetness that ties all the elements together. The sunflower seeds contribute an earthy nuttiness, and the fresh mint leaves add an aromatic lift, making each mouthful a complex, refreshing delight.

    Ingredients

    • 1 medium **kohlrabi bulb**, peeled and thinly sliced
    • 1 **Fuji apple**, cored and chopped
    • 1 cup snow peas, trimmed and shelled
    • 1/4 cup sunflower seeds
    • 6 strips of **bacon**, coated with chipotle powder
    • 1/2 cup heavy cream
    • 2 tablespoons apple cider vinegar
    • 1 tablespoon honey
    • 1 teaspoon **chipotle powder**
    • Handful of fresh **mint leaves**, roughly chopped
    • Zest of 1 **lime**
    • Salt and pepper to taste

    Instructions

    1. Preheat your oven to 400°F (200°C). Coat the bacon strips with chipotle powder and lay them on a baking sheet. Bake for 15-20 minutes or until the bacon is crispy and golden-brown. Let it cool before crumbling finely.
    2. While the bacon is cooking, use a mandolin to slice the kohlrabi paper-thin. This ensures a delicate crunch that blends seamlessly with the other ingredients.
    3. Mix the sliced kohlrabi with the chopped Fuji apple and shelled snow peas in a large bowl. Toss in the sunflower seeds for added texture.
    4. In a separate small bowl, combine the heavy cream and apple cider vinegar. Let this mixture sit out for about 10 minutes until it thickens slightly, resembling buttermilk.
    5. Once thickened, add the honey and lime zest to the cream mixture. Whisk until well combined, creating a smooth, aromatic dressing.
    6. Add the dressing to the kohlrabi, apple, and pea mixture a little at a time, tossing gently until the salad is thinly coated. Be careful not to overdress the salad; you want just enough to bind the flavors together.
    7. Add the crumbled bacon and freshly chopped mint leaves to the salad. Toss gently to combine, then season with salt and pepper to taste.
    8. For best results, refrigerate the salad for at least 30 minutes before serving. This allows the flavors to meld beautifully.

    Pro Tips from Meaghan’s Kitchen

    • Use a mandolin for ultra-thin, even slices of kohlrabi. This tool is a game-changer for achieving that perfect crunch.
    • Don’t skip the resting time for the cream and vinegar mixture. It’s essential for achieving the right consistency and tanginess.
    • Adjust the amount of chipotle powder based on your heat preference. A little goes a long way, so start small!
    • For an added layer of flavor, toast the sunflower seeds lightly before adding them to the salad. This enhances their nuttiness.
    • Prepare the salad a day in advance, if possible. It tastes even better the next day as the flavors continue to develop.

    Variations & Dietary Swaps

    • Vegetarian Swap: Replace the bacon with smoked tempeh or grilled portobello mushrooms seasoned with chipotle powder for that smoky, spicy kick.
    • Spice-It-Up Version: Add a finely diced jalapeño to the salad for an extra layer of heat, balancing with a touch more honey if needed.
    • Kids-Friendly Version: Reduce the chipotle powder in the bacon and add diced avocado for creaminess and a milder flavor profile.

    What to Serve With It

    This Zesty Kohlrabi and Apple Salad with Smoky Chipotle Bacon pairs beautifully with a crisp, cold glass of Riesling, whose slight sweetness complements the spicy bacon. Alternatively, serve it with a mint-infused sparkling water for a refreshing non-alcoholic option. This salad also makes a delightful side to grilled chicken or fish, enhancing the smoky flavors with its bright, fresh profile.

    Storage & Meal Prep

    Store any leftover salad in an airtight container in the fridge for up to 3 days. The flavors will continue to develop, but the kohlrabi and apple may lose some crunch after the first day. If you plan to make it ahead, keep the dressing separate and add it just before serving to maintain the salad’s freshness and texture. Unfortunately, this salad does not freeze well due to the fresh ingredients and cream-based dressing.

    FAQ

    Can I make this salad in advance?

    Yes! You can prepare the components in advance but keep the dressing and bacon separate until just before serving to maintain the salad’s texture and crispness.

    What’s the best substitute for kohlrabi?

    If you can’t find kohlrabi, jicama is an excellent substitute. It offers a similar crunch and mild flavor that works well in this salad.

    Is there a dairy-free option for the dressing?

    Absolutely! Substitute the heavy cream with coconut cream and use rice vinegar instead of apple cider vinegar for a dairy-free alternative.

    Can I use another type of apple?

    Sure! While Fuji apples provide a nice balance of sweetness and crunch, Honeycrisp or Gala apples would also work well in this recipe.

    How spicy is the chipotle bacon?

    The chipotle bacon has a moderate level of heat. If you’re sensitive to spice, start with less chipotle powder and adjust to your preference.

    Final Thoughts

    I hope this Zesty Kohlrabi and Apple Salad with Smoky Chipotle Bacon brings as much joy to your table as it does to mine. It’s a dish that celebrates the beauty of fresh, vibrant ingredients with a modern twist. I’d love to hear your thoughts and see your creations! Feel free to leave a comment, share your photos, or reach out with any questions. Happy cooking, friends!

    Related update: Zesty Kohlrabi and Apple Salad with Smoky Chipotle Bacon

    Related update: Zesty Citrus-Infused Tabouleh with Pomegranate Seeds

  • Zesty Tropical Lump Crab and Avocado Salad with Mango-Lime Dressing | Made by Meaghan Moineau

    Zesty Tropical Lump Crab and Avocado Salad with Mango-Lime Dressing | Made by Meaghan Moineau

    Zesty Tropical Lump Crab and Avocado Salad with Mango-Lime Dressing

    Imagine a refreshing breeze, the scent of the ocean mixed with citrusy notes, and a plate of vibrant colors capturing the essence of a tropical paradise. This Zesty Tropical Lump Crab and Avocado Salad with Mango-Lime Dressing is your passport to a flavorful escapade, right from your kitchen. With each bite, you’ll experience a delightful dance of sweet mango, creamy avocado, and succulent crab, all brought together by a zesty mango-lime dressing that leaves a light, tantalizing trail on your palate.

    Personal Story

    My love affair with crab began on a sun-drenched beach in the Caribbean, where a tiny seaside shack served seafood so fresh I could taste the ocean in every bite. There was a simplicity to the way they prepared crab—tossed with just a hint of lime and a sprinkle of fresh herbs. It was my first experience of how a few well-chosen ingredients could create something magical.

    Back home, the quest to recreate that experience led me on a culinary journey, experimenting with different ingredients and techniques. One day, as I was rummaging through my pantry, I found a ripe mango, its tropical aroma instantly transporting me back to those sun-kissed shores. That’s when the idea struck—why not add a tropical twist to my beloved crab salad?

    The first attempt was a revelation. The mango added a sweetness that balanced the richness of the crab, while the lime dressing brought everything together with a bright, zesty finish. I knew I was onto something special. It was a salad meant to be shared, to impress, and to remind us that even on the dreariest days, a taste of the tropics is just a forkful away.

    Since then, the Zesty Tropical Lump Crab and Avocado Salad with Mango-Lime Dressing has become a staple at my table. Each time I make it, I’m reminded of the simplicity and joy of cooking with fresh, vibrant ingredients. Whether it’s served for a special occasion or a casual lunch, it never fails to bring smiles and, inevitably, requests for the recipe.

    What Makes This Version Special

    What sets this Zesty Tropical Lump Crab and Avocado Salad apart is the unexpected yet delightful addition of ripe mango and a tangy mango-lime dressing. This tropical twist elevates the dish from a classic seafood salad to a culinary adventure. The sweet, juicy mango contrasts beautifully with the rich, buttery crabmeat, creating a harmonious balance of flavors.

    Unlike traditional crab salads that often rely solely on creamy dressings, this version introduces a mango-lime dressing that is both sweet and zesty. This combination not only enhances the natural sweetness of the crab but also adds a refreshing tropical essence that makes every bite feel like a mini-vacation. The subtle heat from the jalapeño in the dressing adds an exciting kick, making this dish a true standout.

    Flavor Profile

    Prepare for a vibrant mix of sweet, zesty, and spicy notes, all encapsulated in this Zesty Tropical Lump Crab and Avocado Salad. Picture the luscious sweetness of ripe mango melding with the tangy punch of lime juice, a hint of honey, and a dash of jalapeño heat. The creamy avocado provides a silky texture that complements the tender chunks of lump crabmeat.

    As you take a bite, the tropical essence of cilantro and the crunch of fresh bell pepper and scallions add layers of flavor and texture that keep your taste buds intrigued. The sriracha chile sauce and Worcestershire sauce bring a subtle umami depth to the salad, rounding out the flavor profile with a hint of spice that leaves a gentle warmth on your palate.

    Ingredients

    • 2 large avocados, halved and pitted
    • 1 medium red bell pepper, diced
    • 1/4 cup fresh parsley, chopped
    • 1 tablespoon fresh lemon juice
    • 1 pound lump crabmeat, picked over for shells
    • 1/4 cup mayonnaise
    • Salt and pepper to taste
    • 2 scallions, thinly sliced
    • 1 tablespoon **sriracha chile sauce**
    • 1 teaspoon **Worcestershire sauce**
    • 1 **ripe mango**, diced
    • 2 tablespoons **lime juice**
    • 2 tablespoons fresh cilantro, chopped
    • 1 small **jalapeño**, finely chopped
    • 1 tablespoon **honey**

    Instructions

    1. In a blender, combine the diced mango, lime juice, honey, and jalapeño. Blend until smooth to create the mango-lime dressing. Set aside.
    2. In a small bowl, mix together the mayonnaise, sriracha chile sauce, Worcestershire sauce, lemon juice, salt, and pepper. Stir until well combined and set aside.
    3. In a medium bowl, carefully toss together the lump crabmeat, scallions, red bell pepper, and parsley. Be gentle to avoid breaking up the crab lumps.
    4. Add about half of the mango-lime dressing to the crab mixture and gently fold until the crab is evenly coated. Allow the crab to marinate in the dressing for about 10 minutes to absorb the tropical flavors.
    5. Lightly fold in the spicy mayonnaise mixture into the crab salad. Taste and adjust the seasoning with more salt and pepper if needed.
    6. Prepare the avocados by slicing a small piece from the bottom of each half so they can sit flat on a plate. Brush or pour the remaining lemon juice over the cut surfaces to prevent browning.
    7. Place the avocado halves on plates and generously fill each with the dressed crab salad. Drizzle with a little extra mango-lime dressing if desired.
    8. Garnish with fresh cilantro and serve immediately, while the avocados are fresh and vibrant.

    Pro Tips from Meaghan’s Kitchen

    • Choose ripe but firm avocados for this dish to ensure they hold their shape when filled with crab salad.
    • For easier blending, dice the mango into small cubes before adding it to the blender for the dressing.
    • If your crabmeat is particularly moist, gently press it between paper towels to remove excess moisture before mixing.
    • To save time, you can prepare the mango-lime dressing a day ahead and store it in the fridge until needed.
    • Adjust the heat level by adding more or less jalapeño to the dressing based on your spice preference.

    Variations & Dietary Swaps

    • Vegetarian Version: Replace the lump crabmeat with hearts of palm or artichoke hearts for a similar texture and flavor.
    • Spice-It-Up Version: Increase the amount of sriracha in the spicy mayo mixture and add extra jalapeño to the mango-lime dressing.
    • Kids-Friendly Version: Omit the jalapeño and sriracha for a milder flavor that little ones will enjoy. Add diced pineapple for extra sweetness.

    What to Serve With It

    This Zesty Tropical Lump Crab and Avocado Salad pairs perfectly with a chilled glass of Sauvignon Blanc, which complements the citrusy notes of the dish. Alternatively, a light, citrusy craft beer can provide a refreshing balance to the salad’s flavors. For a complete meal, consider serving alongside a simple arugula salad dressed with lemon vinaigrette or a side of grilled corn on the cob for that extra touch of summer.

    Storage & Meal Prep

    This salad is best enjoyed fresh, but if you need to store it, keep the crab mixture and avocado halves separate. Store the crab salad in an airtight container in the refrigerator for up to 2 days. To prevent browning, wrap the avocado halves tightly in plastic wrap and store in the fridge for up to 1 day. When ready to serve, simply fill the avocados with the crab salad. Note that the mango-lime dressing can be made ahead and stored in the refrigerator for up to 3 days.

    FAQ

    Can I use canned crabmeat for this recipe?

    Yes, you can use canned crabmeat, but fresh lump crabmeat will offer a superior flavor and texture. If using canned, be sure to drain it well and check for any shell pieces.

    What if I can’t find ripe mangoes?

    If ripe mangoes are unavailable, you can substitute with frozen mango chunks. Thaw and drain them well before blending for the dressing.

    How can I make the salad less spicy?

    To reduce the spice level, simply omit the jalapeño from the mango-lime dressing and use less sriracha in the mayo mixture. You can also add a bit more honey to balance the flavors.

    Is there a way to make this dish dairy-free?

    Absolutely! Substitute the mayonnaise with a dairy-free version, or use mashed avocado as a creamy base for the dressing instead.

    Can this salad be made ahead of time?

    The crab mixture can be made a few hours in advance and stored in the fridge. However, wait to prepare and fill the avocados until just before serving to ensure freshness.

    Final Thoughts

    This Zesty Tropical Lump Crab and Avocado Salad with Mango-Lime Dressing is more than just a dish—it’s a culinary escape to the tropics, brimming with vibrant flavors and sunshine in every bite. I hope you enjoy making and sharing it as much as I have. Don’t forget to leave a comment below with your thoughts or any variations you tried. Happy cooking, friends, and let’s keep our kitchens filled with love and laughter!

    Related update: Zesty Tropical Lump Crab and Avocado Salad with Mango-Lime Dressing

    Related update: Truffle-Infused Panzanella with Burrata and Roasted Garlic

  • Masala-Tofu Burger | Made by Meaghan Moineau

    Masala-Tofu Burger | Made by Meaghan Moineau

    Masala-Tofu Burger

    Introduction

    Imagine a family gathering on a warm summer evening, the aroma of spices wafting through the air as laughter echoes in the backyard. This memory always takes me back to the first time I tasted a Masala-Tofu Burger, a delightful fusion of Indian spices and a beloved Western classic. Growing up in a multicultural family, food was always a bridge that connected us, blending flavors and traditions into something special. Today, I’m excited to share this delicious recipe with you, hoping it brings warmth and joy to your own family gatherings.

    Why You’ll Love It

    This Masala-Tofu Burger is a game-changer for anyone looking to add a flavorful twist to their burger repertoire. The combination of aromatic spices, crunchy veggies, and creamy tofu creates a mouthwatering experience that’s both satisfying and healthy. Whether you’re a vegetarian or simply exploring new flavors, this burger is a fantastic option. It’s easy to make, customizable, and perfect for any occasion.

    Ingredients

    • 1 white onion, diced
    • 1 red, orange, or green bell pepper, diced
    • 1 cup frozen peas-carrots mix
    • 2 green chillies, chopped
    • 1 block of tofu, cubed
    • 1 potato, boiled and diced
    • 3 cloves garlic, minced
    • 1 teaspoon black mustard seeds
    • 1 sprig curry leaves
    • A pinch of hing (asafoetida)
    • 1 teaspoon cumin powder
    • 1/2 teaspoon turmeric
    • 1 lemon, juiced
    • Salt to taste
    • 1/4 cup cilantro, finely chopped
    • 1/2 cup Indian breadcrumbs
    • Vegetable oil
    • PAM Original Flavor Spray
    • 1 red or white onion, thickly sliced
    • 2 beefsteak tomatoes, sliced
    • Mint-cilantro chutney spread
    • 4 Portuguese rolls

    Instructions

    1. In a large skillet over medium-high heat, spray a generous amount of PAM and add some oil. Add mustard seeds and saute for 30 seconds until you hear popping noises.
    2. Add the curry leaves carefully as they may pop in hot oil. Then add the onions and peppers, and sweat for about 30 seconds.
    3. Stir in the minced garlic, chopped chilies, and turmeric. Saute for 5-7 minutes until the onions and peppers are soft.
    4. Add the peas-carrots mix, cumin powder, and salt. Continue to saute for 7-10 minutes until all the veggies are cooked through.
    5. In a small bowl, mix cubed tofu with a pinch of turmeric, cumin powder, coarse black pepper, and optional cayenne pepper. Set aside to marinate briefly.
    6. Add the marinated tofu to the skillet and saute until it is slightly browned and crumbly.
    7. Add juice from half a lemon and half of the chopped cilantro. Mix well, then add the diced, boiled potato and toss until everything is coated. Adjust salt and spices to taste.
    8. Mash the mixture with a masher until mushy and the veggies are small. Set aside to cool.
    9. Once cooled, mix in some breadcrumbs with your hands. Form the mixture into four thick patties. Add more breadcrumbs if needed.
    10. Place the patties on a plate, cover with plastic wrap, and refrigerate until ready to cook.
    11. In a small skillet sprayed with PAM over medium-high heat, cook each patty for about 2 minutes on each side until browned and crispy.
    12. Simultaneously, saute the thick onion slices until charred and slightly soft.
    13. Spread a generous amount of mint-cilantro chutney on each side of the Portuguese rolls, then assemble the burger with the patty, onions, tomatoes, and cilantro leaves.
    14. Serve with a slice of lemon and reduced-fat chips on the side.

    Tips

    • Make sure to press the tofu well before marinating to remove excess moisture for a better texture.
    • If you like it spicy, feel free to add more green chilies or cayenne pepper to the mix.
    • For a gluten-free option, use gluten-free breadcrumbs or crushed cornflakes.

    Variations & Substitutions

    Feel free to get creative with this recipe by adding your favorite veggies to the mix, such as mushrooms or spinach. You can also swap tofu for paneer or chickpeas for a different protein source. If you prefer a different type of bread, whole-grain buns or lettuce wraps are excellent alternatives.

    Storage

    These Masala-Tofu Patties can be made ahead of time and stored in the refrigerator for up to 3 days. Alternatively, you can freeze them for up to a month. When ready to enjoy, simply thaw and reheat them in a skillet or oven.

    FAQ

    Can I make these burgers vegan?

    Absolutely! This recipe is already vegan as it uses tofu as the main protein source and skips any dairy or eggs. Just ensure your chutney spread is also vegan-friendly.

    Can I grill these patties instead of pan-frying?

    Yes, you can grill the patties for a smokier flavor. Just make sure to brush them with some oil to prevent sticking and handle them carefully as they can be more delicate than regular meat patties.

    What can I serve with these burgers?

    A fresh green salad, sweet potato fries, or roasted vegetables make excellent sides. You can also pair it with a refreshing yogurt dip or mango chutney for an extra burst of flavor.

    Nutrition

    While I don’t have exact nutritional information for this recipe, it’s packed with healthy ingredients. Tofu provides protein, while the variety of vegetables offers vitamins and minerals. Using a whole-grain bun can increase the fiber content, making this meal as nutritious as it is delicious.

    Final Thoughts

    The Masala-Tofu Burger is a wonderful way to explore new flavors while enjoying a comforting classic. It’s a tribute to the fusion of cultures and the joy of shared meals. I hope this recipe becomes a favorite in your home, bringing smiles and satisfaction to your table. Happy cooking!

    Related update: Masala-Tofu Burger

    Related update: Indian Butter Chicken