Tag: Fried

  • Truffle-Infused Party Rice Balls with Sun-Dried Tomato Aioli | Made by Meaghan Moineau

    Truffle-Infused Party Rice Balls with Sun-Dried Tomato Aioli | Made by Meaghan Moineau

    Truffle-Infused Party Rice Balls with Sun-Dried Tomato Aioli

    Picture this: the warm, aromatic allure of truffle oil wafting through your kitchen, mingling with the golden sizzle of rice balls frying to perfection. Add a tangy, rich sun-dried tomato aioli, and you’ve got an appetizer that’s not just a crowd-pleaser but a showstopper. Ready to elevate your next gathering with a touch of Italian elegance? Let’s dive in.

    My Italian Appetizer Adventure

    I remember the first time I made rice balls — or arancini, as my grandmother called them. It was a bustling Christmas Eve at her house, the air thick with the scent of fresh basil and marinara bubbling away on the stove. I was a teenager, tasked with simple kitchen duties, but grandma insisted I learn the art of making these delightful, crispy morsels. I gingerly rolled the rice mixture into balls, eyes wide with concentration, only to watch them transform into golden perfection under her watchful gaze.

    Fast forward a few years, and I found myself craving that nostalgic dish. But, as with most things in my life, I wanted to add my own twist. One day, while experimenting in my own kitchen, I discovered a small bottle of truffle oil tucked away in my pantry. The idea struck — why not infuse these beloved rice balls with the luxurious aroma of truffle oil?

    The result was nothing short of magical. The earthy aroma paired beautifully with the savory richness of the rice and cheese, creating a dish that was both familiar and delightfully new. It was an instant hit at our next family gathering, and I knew I had stumbled upon something special.

    Of course, I couldn’t stop there. The rice balls needed a companion, something to elevate their flavors even further. That’s when I thought of a sun-dried tomato aioli — the perfect tangy, creamy dip to complement those irresistible truffle-infused bites. Now, this dish isn’t just a tribute to my grandmother; it’s a testament to the joy of creating something uniquely your own.

    What Makes This Version Special

    This version of the classic rice ball appetizer introduces the luxurious aroma of truffle oil and a tangy sun-dried tomato aioli, adding depth and sophistication. The truffle oil infuses the rice with an earthy richness that elevates the entire dish from a simple appetizer to a culinary experience. Paired with the sun-dried tomato aioli, each bite offers a harmonious blend of flavors that dance on your palate. It’s a conversation starter and a taste bud tantalizer, all rolled into one.

    Flavor Profile

    These truffle-infused rice balls offer an earthy and aromatic experience, with a savory richness from the truffle oil that permeates each bite. The crispy outer layer gives way to a soft, flavorful core, punctuated by the sharpness of Romano cheese and fresh parsley. The sun-dried tomato aioli provides a bright, tangy finish that cuts through the richness, leaving a lingering, refreshing zing on your tongue. It’s a balance of textures and flavors that will have you reaching for just one more.

    Ingredients

    • 2 cups white rice
    • 4 cups water
    • 1 teaspoon salt
    • 2 large eggs
    • 1 cup Romano cheese, grated
    • 1/4 cup fresh parsley, chopped
    • 1 cup plain breadcrumbs
    • Oil for frying
    • 1 tablespoon truffle oil
    • 1/4 cup sun-dried tomatoes, finely chopped
    • 1/2 cup mayonnaise
    • 1 clove garlic, minced
    • 1 teaspoon lemon juice
    • Fresh basil leaves for garnish

    Instructions

    1. Begin by bringing 4 cups of water and 1 teaspoon of salt to a boil in a large pot. Stir in the 2 cups of white rice, then reduce the heat to low, cover, and let it simmer until all the water is absorbed, about 18-20 minutes. Fluff the rice and set it aside until it is warm to the touch. Remember, you must work with warm rice, not cold.
    2. In a small bowl, combine 2 large eggs, 1 cup of grated Romano cheese, and 1/4 cup of chopped fresh parsley. Drizzle 1 tablespoon of truffle oil over the warm rice before mixing it with the egg mixture to infuse it with a rich aroma. Stir well until all the rice is coated.
    3. Place 1 cup of plain breadcrumbs in a separate shallow bowl. With damp hands, roll the rice mixture into balls the size of a golf ball, about 1 1/2 inches in diameter. Gently coat each ball with breadcrumbs. Repeat until all the rice mixture is used.
    4. Heat about 1 inch of oil in a heavy skillet, preferably cast iron, to 375 degrees Fahrenheit. You can test the oil’s readiness by dropping in a cube of bread; it should brown in about 1 minute.
    5. Carefully add the rice balls to the hot oil, frying them in batches of 6-8 to avoid overcrowding. Fry until golden-brown on all sides, about 4-5 minutes per batch. Remove the rice balls and place them on a plate lined with paper towels to drain excess oil. Keep them warm in a 200-degree oven until all batches are cooked.
    6. Prepare the sun-dried tomato aioli by blending 1/2 cup of mayonnaise with 1/4 cup of finely chopped sun-dried tomatoes, 1 clove of minced garlic, and 1 teaspoon of lemon juice. Serve the rice balls with the aioli and garnish with fresh basil leaves.

    Pro Tips from Meaghan’s Kitchen

    • Always use warm rice to ensure the egg mixture binds well, creating a cohesive rice ball that won’t fall apart during frying.
    • For an even richer flavor, consider adding a small amount of grated truffle cheese to the rice mixture before forming the balls.
    • If you prefer a slightly spicier aioli, a pinch of cayenne pepper can add a delightful kick.
    • When frying, maintain a consistent oil temperature to ensure even browning and crispiness.
    • Using a slotted spoon to remove the rice balls from the oil helps drain off excess oil and keeps them from becoming greasy.

    Variations & Dietary Swaps

    • Vegetarian Swap: This recipe is already vegetarian! For a more veggie-centric version, add finely chopped mushrooms to the rice mixture.
    • Spice-It-Up Version: Add finely chopped jalapeños or red pepper flakes to the aioli for a spicy kick.
    • Kids-Friendly Version: Skip the truffle oil and aioli, serving the rice balls with a classic marinara sauce for a kid-approved favorite.

    What to Serve With It

    These truffle-infused rice balls shine as an appetizer, but they pair beautifully with a crisp, chilled glass of Sauvignon Blanc or a light Italian Prosecco. For a heartier meal, serve alongside a fresh arugula salad drizzled with lemon vinaigrette or a simple tomato and mozzarella caprese salad.

    Storage & Meal Prep

    These rice balls can be prepared ahead of time and stored in the fridge for up to 3 days. To reheat, place them on a baking sheet in a 350-degree oven for 10-15 minutes until warmed through. For freezing, arrange the cooled rice balls in a single layer on a baking sheet, freeze until solid, then transfer to a freezer-safe container. They can be stored for up to 2 months. Reheat from frozen in a 350-degree oven for 20-25 minutes.

    FAQ

    Can I use brown rice instead of white rice?

    Yes, you can use brown rice, but be aware that it will change the texture slightly. Ensure the brown rice is cooked adequately and adjust the cooking time as needed.

    Is there a substitute for truffle oil?

    If you don’t have truffle oil, you can omit it or use a truffle salt for a similar, albeit less intense, flavor enhancement.

    What’s the best way to keep the rice balls from falling apart?

    Using warm rice and ensuring the egg mixture coats it well is key. Also, avoid overcooking the rice, and be gentle when forming the balls.

    Can I bake these rice balls instead of frying them?

    Yes, you can bake them at 400 degrees Fahrenheit for about 20-25 minutes, flipping halfway through, for a healthier alternative.

    How do I prevent the rice balls from becoming too greasy?

    Ensure the oil is hot enough before frying and drain the rice balls on paper towels immediately after removing them from the oil.

    Final Thoughts

    There you have it — a deliciously sophisticated twist on a classic Italian appetizer, perfect for impressing your guests or treating yourself. I hope you enjoy making (and eating) these truffle-infused rice balls as much as I do. Give them a try, and don’t hesitate to leave a comment or share your own unique twist. Happy cooking, friends!

    Related update: Truffle-Infused Party Rice Balls with Sun-Dried Tomato Aioli

    Related update: Charred Mango Grilled Guacamole with Smoky Pistachios

  • Spicy Sardine Croquettes with Zesty Lime-Cilantro Aioli | Made by Meaghan Moineau

    Spicy Sardine Croquettes with Zesty Lime-Cilantro Aioli | Made by Meaghan Moineau

    Spicy Sardine Croquettes with Zesty Lime-Cilantro Aioli

    Picture this: the sizzle of croquettes hitting hot oil, a scent of garlic wafting through the kitchen, and a hint of lime cutting through the air with its zesty promise. This isn’t just any croquette; it’s a symphony of flavors, a Spanish classic reimagined with a refreshing and flavorful twist. Welcome to the world of Spicy Sardine Croquettes with Zesty Lime-Cilantro Aioli!

    Personal Story

    I still remember the first time I encountered croquettes. It was a sunny afternoon in Barcelona, sitting in a vibrant tapas bar tucked away in a cobblestone alley. The locals’ laughter harmonized with the clinking of glasses, and I had my first bite of a perfectly crisp, savory croquette. It was love at first taste.

    Returning home, I was determined to recreate that magical experience in my own kitchen. However, my initial attempts were, let’s say, less than successful. There was the time I confused baking powder with baking soda — the result was more of a pancake than a croquette. Or the afternoon when I learned the hard way that patience is a virtue as I hastily turned the croquettes too soon, leaving them pale and unsatisfying.

    But, as with any good recipe, persistence led to perfection. After many trials (and errors), I discovered that the secret to a truly remarkable croquette was in the details — the ingredients, the techniques, and the flavors that elevate it from ordinary to extraordinary.

    Today, I’m thrilled to share this special Spicy Sardine Croquettes recipe with you. It’s a testament to those sunlit afternoons in Spain and my kitchen escapades, with a delightful twist: a tangy lime-cilantro aioli and a hint of smoked paprika that make these croquettes stand out. Let’s dive into what makes this version something truly special.

    What Makes This Version Special

    What sets these Spicy Sardine Croquettes apart from the traditional recipe is the harmonious blend of classic and innovative elements. The addition of a tangy lime-cilantro aioli offers a refreshing contrast to the rich, savory croquettes, making every bite a delightful explosion of flavor. The aioli not only adds brightness but also enhances the overall taste experience with its herbaceous, zesty notes.

    Moreover, the hint of smoked paprika in the breadcrumbs provides these croquettes with a subtle yet distinctive smoky taste that elevates the dish. This spice, along with the briny depth of the sardines and the creaminess of parmesan cheese, creates a nuanced flavor profile that’s both comforting and bold. This version is more than just a snack; it’s a gourmet experience that’s better than the standard recipe because it plays with textures and flavors in a way that’s both familiar and exciting.

    Flavor Profile

    The Spicy Sardine Croquettes with Zesty Lime-Cilantro Aioli present a multi-layered taste adventure that’s hard to resist. Imagine biting into a perfectly crisp exterior, revealing a savory, moist interior bursting with the umami of sardines and the richness of parmesan cheese. The smoked paprika introduces a gentle, smoky undertone that lingers just long enough to intrigue your palate.

    Then comes the aioli — a vibrant, citrusy kick that brightens the dish. The lime juice and zest cut through the richness, while the cilantro adds a refreshing, aromatic note. Finally, the jalapeño pepper brings a gentle heat, ensuring that these croquettes are not just flavorful but also spirited. Together, these elements create a dish that is deeply satisfying and unexpectedly complex.

    Ingredients

    • 1 can sardines, drained
    • 2 cups frozen cassava, thawed
    • 1/2 cup parmesan cheese, grated
    • 2 egg yolks
    • 2 egg whites
    • 1 teaspoon baking powder
    • 1 cup plain bread crumbs
    • 1 tablespoon smoked paprika
    • 1/4 cup fresh cilantro, chopped
    • 1 clove garlic, minced
    • 1/2 teaspoon salt
    • 1/2 teaspoon black pepper
    • 1 lime, zested and juiced
    • 1 cup mayonnaise
    • 1 jalapeño pepper, minced
    • Oil for frying

    Instructions

    1. In a pot, bring salted water to a boil and cook the frozen cassava (yuca) until fork-tender, about 20 minutes. Drain and mash until smooth.
    2. In a large mixing bowl, combine the mashed cassava, drained sardines, parmesan cheese, egg yolks, baking powder, salt, pepper, and cilantro. Mix well until the ingredients are fully incorporated.
    3. Preheat the oil in a frying pan over medium heat. Add the minced garlic to the oil and let it infuse for about 2 minutes, then remove the garlic to prevent burning.
    4. With wet hands, shape the sardine mixture into small balls. Dip each ball into the egg whites, then roll in the smoked paprika-infused bread crumbs, ensuring each croquette is evenly coated.
    5. Carefully place the croquettes in the hot oil. Fry until golden-brown on all sides, about 4-5 minutes per batch. Remove and let them rest on a double-lined paper towel to absorb excess oil.
    6. For the aioli, in a small bowl, mix the mayonnaise, lime zest, lime juice, and minced jalapeño pepper. Stir until smooth and well combined.
    7. Serve the croquettes hot alongside the zesty lime-cilantro aioli for dipping.

    Pro Tips from Meaghan’s Kitchen

    • When mashing the cassava, ensure it’s smooth to avoid any lumps in your croquettes.
    • Infusing the oil with garlic before frying adds an aromatic depth to the croquettes. Just remember to remove the garlic to prevent it from burning.
    • Use a thermometer to maintain the oil temperature around 350°F for even frying without the croquettes absorbing too much oil.
    • For an extra crispy texture, double dip the croquettes in egg whites and bread crumbs.
    • Let the croquette mixture chill in the refrigerator for 30 minutes before shaping to make it easier to handle.

    Variations & Dietary Swaps

    • Vegetarian Swap: Replace sardines with mashed chickpeas or cooked lentils for a vegetarian option that retains the protein punch.
    • Spice-It-Up Version: Add a dash of cayenne pepper to the sardine mixture for those who love a fiery kick.
    • Kids-Friendly Version: Omit the jalapeño in the aioli and reduce the smoked paprika for a milder flavor that kids will enjoy.

    What to Serve With It

    These croquettes are wonderfully versatile and pair beautifully with a crisp, cold glass of Sauvignon Blanc, which complements the smoky and tangy flavors. Alternatively, a side of fresh mango salsa can add a sweet and fruity contrast that enhances the overall dish. For a full meal, consider serving with a simple green salad dressed with olive oil and vinegar to keep things light and refreshing.

    Storage & Meal Prep

    To store, place any leftover croquettes in an airtight container in the fridge for up to 3 days. For longer storage, freeze the uncooked, breaded croquettes in a single layer on a baking sheet. Once frozen, transfer them to a freezer-safe bag or container, where they’ll keep for up to 3 months. To reheat, bake the frozen croquettes in a preheated 375°F oven for 15-20 minutes, or until heated through and crispy.

    FAQ

    Can I use fresh cassava instead of frozen?

    Yes, fresh cassava can be used. Just peel and cut it into chunks before boiling. It might take a bit longer to cook, so check for tenderness with a fork before mashing.

    Is there an alternative to frying these croquettes?

    Absolutely! You can bake the croquettes on a baking sheet lined with parchment paper at 400°F for about 20-25 minutes or until golden and crispy.

    How can I make the aioli less spicy?

    To reduce the heat, simply omit the jalapeño pepper or use only half. You can also replace it with a milder pepper if you prefer.

    What if I don’t have smoked paprika?

    Regular paprika will work, though it won’t have the smoky flavor. You can add a drop of liquid smoke to the mixture for a similar effect.

    Can these croquettes be made gluten-free?

    Yes, just substitute the bread crumbs with gluten-free bread crumbs or crushed gluten-free crackers.

    Final Thoughts

    These Spicy Sardine Croquettes with Zesty Lime-Cilantro Aioli are a testament to the fact that classics can be reimagined in deliciously creative ways. Whether you’re hosting a tapas night or simply craving something extraordinary, these croquettes deliver on flavor and flair. I’m excited for you to try them and make them your own. Don’t forget to share your experiences and any unique twists you come up with in the comments below. Happy cooking!

    Related update: Zesty Crab Salad Avocado Boats with Mango Salsa

  • Spicy Garlic-Curry Leaf Crunch Potatoes with Tamarind Chutney | Made by Meaghan Moineau

    Spicy Garlic-Curry Leaf Crunch Potatoes with Tamarind Chutney | Made by Meaghan Moineau

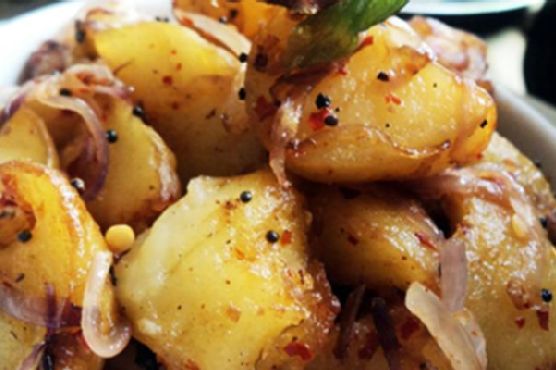
    Spicy Garlic-Curry Leaf Crunch Potatoes with Tamarind Chutney

    Imagine walking into a kitchen where the aromas of warm spices, crispy garlic, and a tangy tamarind chutney envelop you like a cozy culinary hug. The sizzle of potatoes frying to a perfect golden-brown is music to your ears, promising a dish that’s both familiar and exciting. Welcome to the world of Spicy Garlic-Curry Leaf Crunch Potatoes with Tamarind Chutney, where each bite is a journey through layers of flavor.

    Personal Story

    Let me take you back to a lazy Sunday afternoon in my childhood home, where the kitchen was always bustling with activity. My mother, the maestro of culinary artistry, would whip up dishes that could make anyone feel right at home. One of my fondest memories is of her preparing a version of these spicy potatoes, their aroma wafting through the house and drawing everyone towards the kitchen.

    However, it wasn’t always smooth sailing. I remember the day I first tried to recreate her masterpiece. I was a novice in the kitchen, eagerly tossing potatoes into hot oil, only to find them sticking to the pan and refusing to reach that coveted golden-brown hue. My mother, with her soft chuckle, stepped in to teach me the art of patience and the magic of the right heat. It was a lesson in humility and a pivotal moment in my culinary journey.

    Fast forward a few years, and those kitchen mishaps are now cherished memories. The dish evolved as I experimented with flavors and textures, especially after a trip to India where I discovered the transformative power of tamarind. That tangy delight became the perfect partner to my crispy potatoes, adding a refreshing twist that made the dish my own.

    And that’s how these Spicy Garlic-Curry Leaf Crunch Potatoes with Tamarind Chutney came into being — a harmonious blend of nostalgia, discovery, and innovation. Now, I’m thrilled to share this recipe with you, hoping it brings as much joy to your table as it has to mine.

    What Makes This Version Special

    This isn’t just any potato dish; it’s a symphony of flavors that dance on your palate. The addition of a tangy tamarind chutney and crispy garlic chips sets this version apart from traditional recipes. The chutney’s sweet and sour notes perfectly complement the spicy, aromatic potatoes, while the garlic chips add an irresistible crunch.

    Blooming the mustard and coriander seeds in oil amplifies their aroma, creating a foundation that elevates the dish from the first bite. This recipe is a testament to the power of thoughtful enhancements — each ingredient playing its role to perfection, making this version an experience rather than just a meal.

    Flavor Profile

    Prepare your taste buds for a vibrant flavor journey. The Spicy Garlic-Curry Leaf Crunch Potatoes with Tamarind Chutney offer a spicy and aromatic adventure with a tangy undertone. The hint of sweetness from the tamarind chutney balances the spice, while the fried garlic chips add a savory depth. As you enjoy this dish, the warmth of cinnamon and the freshness of cilantro will envelop you, leaving a lasting impression that beckons you to savor each bite.

    Ingredients

    • 2 lbs cooked par potatoes, cut into wedges
    • **Oil** for frying
    • 1 tsp mustard seeds
    • 1 tsp coriander seeds
    • 1 **cinnamon stick**
    • 15-20 **curry leaves**
    • 1 large onion, sliced
    • 1/2 tsp turmeric
    • 1 tsp salt (adjust to taste)
    • 1 tsp red dried chilli flakes
    • 4-5 garlic cloves, thinly sliced
    • 1/4 cup tamarind pulp
    • 2 tbsp jaggery
    • Fresh cilantro for garnish

    Instructions

    1. Begin by heating oil in a large pan over medium-high heat for deep frying. Once hot, carefully add the potato wedges. Fry them until they achieve a slight golden-brown color, about 5-7 minutes. Remove with a slotted spoon and set aside on paper towels to drain excess oil.
    2. In a separate non-stick pan, add 1 1/2 tablespoons of oil over medium heat. Once hot, add mustard seeds and coriander seeds, and let them bloom until the mustard seeds start to pop. This should take about 30 seconds.
    3. Add the cinnamon stick and curry leaves, stirring gently to release their aromas. This step should take another 30 seconds.
    4. Introduce the sliced onions to the pan, cooking for about 1 minute until they begin to soften.
    5. Return the fried potatoes to the pan, along with turmeric and salt. Stir everything together, letting the potatoes absorb the flavors for about 5 minutes on low heat. Keep an eye out for the onions turning a slightly golden-brown.
    6. Add the red dried chilli flakes and give it one final stir, cooking for an additional minute. Turn off the heat and transfer the potatoes to a serving dish.
    7. In the same pan, heat a bit more oil and fry the thinly sliced garlic until golden and crispy, about 2-3 minutes. Be careful not to burn them. Set aside.
    8. For the tamarind chutney, mix tamarind pulp and jaggery in a small saucepan over low heat until the jaggery dissolves completely. Let it simmer for a few minutes until slightly thickened. Drizzle over the potatoes.
    9. Top the dish with crispy garlic chips and a generous sprinkle of fresh cilantro. Serve warm and enjoy!

    Pro Tips from Meaghan’s Kitchen

    • To prevent the potatoes from sticking to the pan, make sure they’re completely dry before frying. Moisture on the surface can lead to sticking.
    • For an even more intense flavor, marinate the potatoes with turmeric and salt before frying. This allows the spices to penetrate deeper.
    • When frying the garlic, keep a close eye on it. Garlic turns from golden to burnt in seconds, and you want that perfect crispy texture.
    • If you find the tamarind chutney too tangy, adjust with more jaggery. It’s all about balancing the flavors to your liking.
    • Let the mustard seeds pop completely when blooming. If they don’t, they might add a bitter note to your dish.

    Variations & Dietary Swaps

    • Vegetarian Delight: This dish is already vegetarian, but for a vegan version, ensure your jaggery is plant-based, as some may contain animal by-products.
    • Spice-It-Up: For those who crave more heat, add finely chopped green chilies alongside the red dried chilli flakes.
    • Kids-Friendly: Tone down the spices by reducing the chilli flakes and skipping the green chilies. Serve with a side of ketchup if they prefer it a bit sweeter.

    What to Serve With It

    This dish pairs wonderfully with a chilled mango lassi, offering a cooling counterpoint to the spice. Alternatively, a side of cucumber raita can do wonders to mellow out the heat. If you’re looking for a fuller meal, serve these Spicy Garlic-Curry Leaf Crunch Potatoes with warm naan or freshly cooked basmati rice.

    Storage & Meal Prep

    These potatoes are best enjoyed fresh, but if you have leftovers, they can be stored in an airtight container in the fridge for up to three days. Reheat them in a dry pan over medium heat to revive their crispiness. For longer storage, freeze the fried potatoes without the chutney and garlic chips. When ready to enjoy, reheat in the oven and prepare the chutney and garlic fresh.

    FAQ

    Can I use sweet potatoes instead of regular potatoes?

    Absolutely! Sweet potatoes add a lovely sweetness that pairs well with the tangy chutney.

    What can I use as a substitute for jaggery?

    If you can’t find jaggery, brown sugar or palm sugar can work as substitutes, though the flavor profile will vary slightly.

    Why is my garlic burning before it gets crispy?

    Garlic burns quickly due to its high sugar content. Make sure the oil is not too hot and keep stirring constantly while frying.

    Can I make the tamarind chutney ahead of time?

    Yes, you can prepare the tamarind chutney up to a week in advance and store it in the fridge. It actually allows the flavors to meld and deepen over time.

    Is there a way to make this dish less spicy?

    To reduce the spice level, simply cut back on the red dried chilli flakes and avoid adding green chilies. You can also serve it with more cooling sides like raita.

    Final Thoughts

    I hope this Spicy Garlic-Curry Leaf Crunch Potatoes with Tamarind Chutney recipe becomes a favorite at your table. It’s a dish that embodies warmth, nostalgia, and a touch of adventure — perfect for sharing with loved ones or savoring alone on a quiet evening. I’d love to hear how it turned out for you. Feel free to leave a comment or share your version with me on social media. Bon appétit and happy cooking!

    Related update: Spicy Garlic-Curry Leaf Crunch Potatoes with Tamarind Chutney

    Related update: Smoky Maple Chipotle Grilled Sweet Potatoes