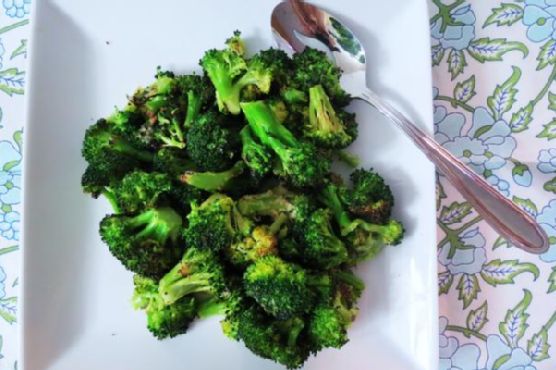
Roasted Broccoli with Lemon and Garlic
There’s something magical about the simple yet profound combination of roasted vegetables with citrus and herbs. This Roasted Broccoli with Lemon and Garlic recipe brings a burst of flavor and a delightful crisp texture to your table. Let me take you on a journey of flavors that will transform a humble vegetable into a dish that stands out on its own.
Why You’ll Love It
This roasted broccoli recipe is one you’ll want to make over and over again. It’s not just about the taste; it’s about the experience it brings to the table. Growing up, I remember my grandmother’s kitchen filled with the aroma of roasted vegetables. She had a knack for making the simplest ingredients extraordinary. That nostalgic memory is what inspired this recipe. You’ll love it for its simplicity, quick preparation, and the way it elevates broccoli into something truly special.
Ingredients
- 1 pound of broccoli florets
- 2 tablespoons extra virgin olive oil
- 3 cloves of garlic, minced
- 1/2 teaspoon black ground pepper
- 2 tablespoons lemon juice
- Salt to taste
Instructions
- Preheat your oven to 400 degrees Fahrenheit (200 degrees Celsius).
- In a large mixing bowl, combine the broccoli florets, olive oil, minced garlic, salt, and black ground pepper. Toss well to ensure the broccoli is evenly coated.
- Spread the broccoli out in an even layer on a baking sheet. Ensure they are not overlapping to allow even roasting.
- Bake in the preheated oven until the broccoli is tender enough to pierce the stems with a fork, about 15 to 20 minutes.
- Remove the broccoli from the oven and place it in a serving bowl. Drizzle with fresh lemon juice and give it a gentle toss to combine.
- Serve immediately and enjoy the vibrant flavors.
Tips
For the best results, make sure your broccoli florets are similar in size. This ensures even cooking. Always use fresh lemon juice for that zesty punch, and feel free to adjust the garlic to your preference if you’re a garlic lover like me.
Variations & Substitutions
If you want to add a little heat, sprinkle some red pepper flakes before roasting. For a touch of umami, add a tablespoon of grated Parmesan cheese just before serving. If you’re out of fresh garlic, garlic powder is a feasible substitute, though fresh will always give you the best flavor.
Storage
Store any leftover roasted broccoli in an airtight container in the refrigerator for up to 3 days. Reheat it in an oven or air fryer to regain its crispness. Avoid microwaving as it can make the broccoli soggy.
FAQ
Can I use frozen broccoli instead of fresh?
Yes, you can use frozen broccoli. Just be sure to thaw and pat it dry thoroughly to remove excess moisture before roasting. This will help achieve a crispy texture.
What can I serve with roasted broccoli?
Roasted broccoli is versatile and pairs well with a variety of main courses. Try it alongside grilled chicken, salmon, or a hearty pasta dish. It also works beautifully as a topping for salads or grain bowls.
How do I prevent the broccoli from becoming too soft?
To keep the broccoli from getting too soft, make sure not to overcrowd the pan. This allows the hot air to circulate and roast the broccoli rather than steam it.
Nutrition
This dish is not only delicious but also nutritious. Broccoli is a powerhouse of vitamins K and C, fiber, and numerous antioxidants. With minimal olive oil and fresh lemon juice, this recipe keeps the calorie count low while delivering maximum flavor.
Final Thoughts
This Roasted Broccoli with Lemon and Garlic is more than just a side dish; it’s a celebration of simple ingredients coming together to create something wonderful. Whether you’re looking to add more greens to your diet or searching for an easy weeknight side, this recipe fits the bill. Happy cooking!
Related update: Roasted Broccoli with Lemon and Garlic