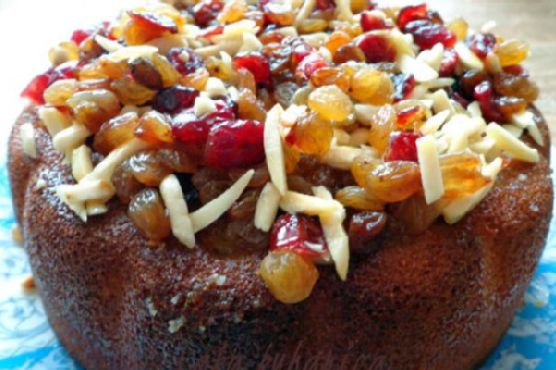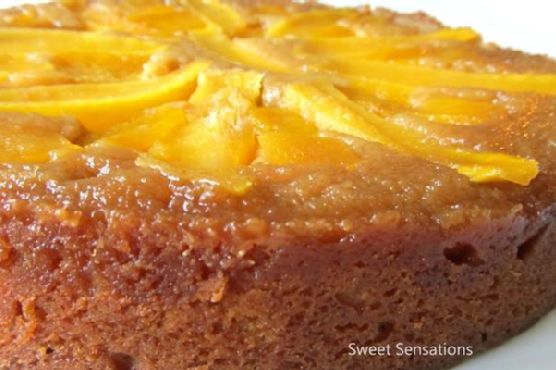
Mangolicious Upside Down Cake
Welcome to the delightful world of tropical flavors with our Mangolicious Upside Down Cake. This recipe holds a special place in my heart as it brings back memories of summer vacations spent at my grandmother’s house, where mango trees were aplenty. The sweet aroma of ripe mangos combined with the buttery goodness of cake wafting through her kitchen was nothing short of magical. Today, I’m thrilled to share this cherished recipe with you, hoping to bring a slice of that sunshine into your home.
Why You’ll Love It
This Mangolicious Upside Down Cake is a tropical twist on the classic upside-down cake, featuring juicy mangos that caramelize beautifully, creating a luscious topping. The cake itself is tender and moist, with a hint of cinnamon that complements the sweet mango perfectly. Whether you’re a seasoned baker or a beginner, you’ll find this recipe approachable and rewarding. It’s perfect for celebrations, family gatherings, or simply as a treat to indulge in at home.
Ingredients
- 1 1/2 teaspoons baking powder
- 1 cup brown sugar
- 3/4 cup butter, divided
- 1 teaspoon cinnamon
- 3 eggs
- 2 cups flour
- 1 cup granulated sugar
- 2-3 ripe mangos
- 1/4 teaspoon salt
- 1 teaspoon vanilla extract
Instructions
- Preheat your oven to 350°F (175°C).
- Butter a 9×2-inch round cake pan thoroughly.
- Pat slices of mango dry with paper towels to remove excess moisture.
- In a small bowl, stir together 1/4 cup of butter and the brown sugar, then spread this mixture evenly in the prepared pan.
- Arrange mango pieces from two mangos on the sugar mixture in the pan. Reserve the rest for mango puree and set aside.
- In a food processor, puree the remaining mangos to make 1 cup of puree.
- In a small bowl, sift together the flour, baking powder, salt, and cinnamon.
- In another bowl, use an electric mixer to cream the remaining 1/2 cup of butter and granulated sugar until the mixture is light and fluffy.
- Add the eggs, one at a time, beating well after each addition, followed by the vanilla extract.
- Add the flour mixture alternately in batches with the pureed mangos, beginning and ending with the flour mixture, and beating well after each addition.
- Pour the batter into the prepared pan, spreading it evenly over the mangos.
- Bake the cake in the middle of the oven for 45 to 55 minutes, or until it tests done with a toothpick inserted in the center coming out clean.
- Let the cake cool in the pan on a rack for 15 minutes.
- Run a thin knife around the edge and carefully invert the cake onto a platter.
Tips
For the best results, use ripe mangos that are slightly soft to the touch. This will ensure they are sweet and flavorful. When arranging the mango slices in the pan, try to create an even layer to ensure the cake has a beautiful top when inverted. If you find your mangos are too juicy, pat them dry again after slicing to avoid adding excess moisture to the cake.
Variations & Substitutions
If mangos aren’t in season or you want to experiment with different flavors, try using pineapples, peaches, or even pears for a different fruity twist. You can substitute whole wheat flour for all-purpose flour for a nuttier flavor, but keep in mind this may change the texture slightly. For a dairy-free version, use a plant-based butter substitute.
Storage
This cake can be stored at room temperature for up to 2 days, covered loosely with plastic wrap. For longer storage, keep it in the refrigerator for up to 5 days. To enjoy the cake warm, reheat slices in the microwave for 15-20 seconds.
FAQ
Can I use frozen mangos for this recipe?
Yes, you can use frozen mangos if fresh ones are not available. Be sure to thaw them completely and pat them dry before using to remove excess moisture.
How can I tell when the cake is done baking?
The cake is done when a toothpick inserted into the center comes out clean or with a few moist crumbs. The top should be golden brown, and the edges will start to pull away from the sides of the pan.
Nutrition
This cake is a delightful treat, and while it is indulgent, it’s also a great way to enjoy the natural sweetness of mangos. Each slice is rich in flavor, offering a modest amount of dietary fiber and vitamin C from the mangos.
Final Thoughts
Our Mangolicious Upside Down Cake is more than just a dessert; it’s an invitation to savor the lusciousness of mangos in every bite. Whether you’re reminiscing about sunlit afternoons or creating new memories, this cake is sure to delight your taste buds and warm your heart. I hope you enjoy making and sharing this recipe with your loved ones as much as I have over the years. Happy baking!
Related update: Mangolicious Upside Down Cake