Tag: Elegant

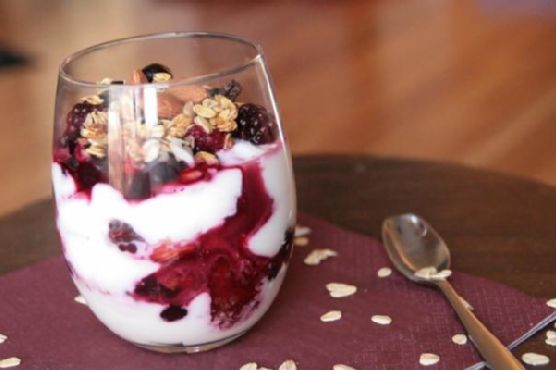
  • Balsamic Glazed Mixed Berry Yogurt Parfait with Toasted Almond Crumble | Made by Meaghan Moineau

    Balsamic Glazed Mixed Berry Yogurt Parfait with Toasted Almond Crumble | Made by Meaghan Moineau

    Balsamic Glazed Mixed Berry Yogurt Parfait with Toasted Almond Crumble

    Imagine the first spoonful of a parfait that seamlessly blends the sweetness of mixed berries, the rich depth of balsamic glaze, and the warm, nutty crunch of toasted almonds. It’s a symphony of flavors that transforms an ordinary yogurt parfait into a culinary masterpiece. Welcome to a breakfast experience that’s as elegant as it is delicious.

    Personal Story

    When I was a child, Sunday mornings were sacred. My family would gather around the breakfast table for what felt like an elaborate feast. While my siblings and I eagerly anticipated my mother’s fluffy pancakes, she would often surprise us with a bowl of fresh berries and yogurt on the side. I remember the burst of berry sweetness and the cool, creamy yogurt melding in my mouth—a simple pleasure that marked the beginning of a relaxed day spent with family.

    Years later, during a culinary journey through Italy, I discovered the magic of balsamic vinegar. It was love at first taste, as the vinegar’s complex, tangy notes struck a harmonious chord with my palate. One evening, at a small trattoria in Modena, I was served a dessert featuring strawberries drizzled with balsamic glaze. The unexpected pairing was transformative, and I knew immediately that I had to recreate this experience at home.

    Back in my kitchen, I began experimenting with ways to incorporate balsamic glaze into one of my favorite childhood breakfasts: the mixed berry yogurt parfait. By simmering frozen mixed berries with balsamic vinegar and maple syrup, I crafted a glossy, aromatic glaze that elevated the dish to new heights. Adding a hint of cinnamon-infused toasted almonds brought everything together, creating a balanced parfait that feels both luxurious and comforting.

    Now, this Balsamic Glazed Mixed Berry Yogurt Parfait with Toasted Almond Crumble has become a staple in my home, a recipe that bridges my childhood memories with my passion for bold, exciting flavors. It’s my way of honoring the past while embracing the future of breakfast indulgence.

    What Makes This Version Special

    Traditional mixed berry yogurt parfaits are delightful on their own, but my version takes this classic dish to the next level. The addition of a balsamic glaze infused with maple syrup and a hint of ground cinnamon adds an elegant touch and heightens the flavor complexity. The glaze complements the sweetness of the berries with a tangy depth, while the toasted almond crumble adds a warm, nutty flavor that contrasts beautifully with the creamy yogurt.

    The balsamic glaze not only enhances the taste but also adds a visual appeal with its rich, dark sheen that drapes elegantly over the berries. This version is perfect for those who seek a breakfast that feels special enough for entertaining, yet simple enough to enjoy on a leisurely weekend morning.

    Flavor Profile

    The Balsamic Glazed Mixed Berry Yogurt Parfait with Toasted Almond Crumble offers a taste experience that’s both sweet and tangy, with a warm, nutty undertone. The berries, simmered to perfection, release their natural sweetness which is beautifully balanced by the balsamic vinegar’s acidity. A hint of spiced depth comes through with the cinnamon, adding an unexpected layer of flavor complexity. The creamy, tangy yogurt serves as the perfect backdrop, while the toasted almonds provide a satisfying crunch with every bite.

    Ingredients

    • 2 cups of frozen mixed berries
    • 1/4 cup balsamic vinegar
    • 2 tablespoons maple syrup
    • 1 teaspoon vanilla extract
    • 2 cups plain Greek yogurt
    • 1 cup of whole oats
    • 1/2 cup whole almonds
    • 1/2 teaspoon ground cinnamon
    • 2 tablespoons honey

    Instructions

    1. In a medium saucepan, combine the frozen mixed berries, balsamic vinegar, and maple syrup. Bring to a simmer over medium heat. Stir occasionally and let the mixture cook until the berries are soft and the glaze is glossy and slightly thickened, about 10-12 minutes.
    2. Meanwhile, preheat a skillet over medium heat. Add the whole almonds and toast them, stirring frequently, until they are golden-brown and aromatic, about 5-7 minutes. Sprinkle in the ground cinnamon during the last minute of toasting to intensify the nutty aroma and flavor.
    3. Transfer the toasted almonds to a cutting board and allow them to cool slightly. Roughly chop them into small pieces and mix with the whole oats.
    4. In a bowl, combine the plain Greek yogurt and vanilla extract until smooth and creamy.
    5. To assemble the parfaits, layer a spoonful of the yogurt mixture into the bottom of a glass cup or bowl. Add a layer of the balsamic-glazed berries, followed by a sprinkle of the almond-oat crumble.
    6. Repeat the layers until all ingredients are used, finishing with a drizzle of honey on top for added sweetness.
    7. Serve immediately, and savor the medley of flavors and textures.

    Pro Tips from Meaghan’s Kitchen

    • For an even more intense flavor, let the balsamic berry glaze cool and thicken before assembling the parfaits. This will create a more concentrated taste.
    • To prevent the yogurt from becoming too watery, make sure to drain any excess liquid from the berries after simmering.
    • If you prefer a creamier texture, you can substitute the Greek yogurt with a full-fat version, or even experiment with a touch of mascarpone cheese.
    • For a touch of luxury, sprinkle a pinch of flaky sea salt over the top layer to enhance the sweetness and add a subtle, savory edge.
    • If you’re short on time, prepare the balsamic glaze and toasted almonds ahead of time. They can be stored in airtight containers, ready to be layered into your parfaits whenever you’re ready.

    Variations & Dietary Swaps

    This breakfast parfait lends itself to endless variations, allowing you to personalize it to your tastes and dietary needs:

    • **Vegan Version**: Swap the Greek yogurt for a plant-based alternative like coconut or almond yogurt, and use agave syrup instead of honey.
    • **Nut-Free Option**: If you’re allergic to nuts, replace the almonds with toasted pumpkin seeds or sunflower seeds for crunch.
    • **Berry Swap**: If you don’t have mixed berries on hand, this recipe works beautifully with just about any fruit. Consider trying it with poached pears or caramelized bananas for a seasonal twist.

    What to Serve With It

    The Balsamic Glazed Mixed Berry Yogurt Parfait with Toasted Almond Crumble pairs wonderfully with a glass of chilled Prosecco for a brunch gathering or a soothing cup of Earl Grey tea for a cozy morning at home. Its versatility makes it an ideal choice for both leisurely breakfasts and sophisticated brunches. Complement the parfait with a side of freshly baked croissants or a simple green salad to round out your meal.

    Storage & Meal Prep

    While the parfaits are best enjoyed fresh, you can certainly prepare certain elements in advance. Store the balsamic glaze and toasted almond crumble in separate airtight containers in the refrigerator for up to four days. To assemble, simply layer them with fresh yogurt and berries when you’re ready to serve.

    For meal prep, consider layering the parfaits in mason jars for an easy grab-and-go breakfast. Just add the almond crumble right before eating to ensure it stays crisp. If you must freeze, note that the texture of the yogurt and berries will change, so it’s best to consume them fresh.

    FAQ

    Can I use fresh berries instead of frozen ones?

    Absolutely! Fresh berries can be used and will bring a vibrant, juicy quality to the parfait. However, you may need to adjust the cooking time slightly as fresh berries release less liquid than frozen.

    What if I don’t like the taste of balsamic vinegar?

    If balsamic vinegar isn’t your favorite, you can reduce its quantity or substitute it with a milder option like apple cider vinegar or omit it altogether, focusing on the sweet maple glaze instead.

    How can I make this parfait more kid-friendly?

    To make this recipe more appealing to children, consider using sweeter fruits like bananas or strawberries. You can also add a layer of granola for extra crunch and a drizzle of chocolate syrup for a special treat.

    Is there a way to make this parfait gluten-free?

    Yes! Simply use certified gluten-free oats to ensure your parfait is gluten-free. Most other ingredients in this recipe are naturally free of gluten.

    Can I prepare the parfaits the night before?

    While you can prepare the parfaits in advance, it’s best to keep the components separate and assemble them just before serving to maintain the texture and freshness, especially for the almond crumble.

    Final Thoughts

    Thank you for joining me on this culinary adventure, where a simple yogurt parfait transforms into an elegant breakfast delight with a balsamic twist. I hope this recipe inspires you to explore new flavors and bring a touch of sophistication to your morning routine. I’d love to hear how your parfaits turn out, so please feel free to leave a comment below or share your creations on social media. Remember, cooking is a journey—enjoy every delicious step!

  • Creme Brulee | Made by Meaghan Moineau

    Creme Brulee | Made by Meaghan Moineau

    Creme Brulee: A Classic Dessert to Savor

    There’s something truly magical about cracking through the burnt sugar crust of a perfectly made creme brulee. This quintessential French dessert, with its silky custard and tantalizing caramelized top, has been a staple in gourmet kitchens around the world. I remember my first encounter with creme brulee at a quaint Parisian cafe; the rich vanilla aroma and the satisfying crack of the sugar captivated my senses. Today, I’m excited to share this timeless recipe with you, so you can recreate that enchanting experience at home.

    Why You’ll Love It

    Creme brulee is more than just a dessert; it’s an experience. Here are a few reasons why you’ll fall in love with this classic treat:

    • Elegant Simplicity: With just a handful of ingredients, creme brulee is a testament to simple, refined flavors.
    • Textural Delight: The contrast between the creamy custard and the crisp, caramelized sugar is a textural masterpiece.
    • Versatile: Perfect for any occasion, creme brulee can be served as a romantic dessert for two or the centerpiece of a dinner party.
    • Make-Ahead Friendly: Prepare it in advance and caramelize the top just before serving, making it both convenient and impressive.

    Ingredients

    • 1 whole egg
    • 5 egg yolks
    • 500ml fresh milk
    • 150g caster sugar, plus extra for topping
    • 1 vanilla bean pod
    • 250ml whipping cream

    Instructions

    1. Preheat your oven to 150°C (300°F).
    2. Pour the fresh milk and whipping cream into a saucepan.
    3. Slice the vanilla bean pod lengthwise and scrape the seeds into the cream mixture. Chop the empty pod into small pieces and add them to the cream as well.
    4. Bring the cream mixture to a boiling point, then reduce the heat and simmer gently for 3 minutes, allowing the flavors to meld.
    5. In a large bowl, lightly beat the sugar and eggs together until the mixture is pale and smooth.
    6. Strain the cream mixture through a fine sieve and return it to the heat, bringing it back to a boil.
    7. Gradually add the hot cream to the egg mixture, whisking vigorously to temper the eggs and prevent curdling.
    8. After incorporating all the cream, strain the mixture again for a smooth texture.
    9. Pour the custard into 7-8 ramekins, depending on their size.
    10. Place the ramekins in a large cake pan or roasting pan. Pour enough hot water into the pan to come halfway up the sides of the ramekins.
    11. Bake in the center of the oven for 30-40 minutes, or until the custards are just set but still slightly wobbly in the middle.
    12. Remove the ramekins from the water bath and allow them to cool to room temperature. Refrigerate for at least 3 hours or overnight.
    13. Just before serving, sprinkle an even layer of caster sugar over the top of each custard. Use a kitchen blowtorch to caramelize the sugar until golden and crisp.

    Tips

    • Quality Ingredients: Use fresh and high-quality ingredients, especially the vanilla, to ensure the best flavor.
    • Water Bath: The water bath is crucial for even cooking. Ensure the water level is consistent and avoid splashing water into the custard.
    • Sugar Layer: For a perfect sugar crust, use fine caster sugar and ensure an even layer before caramelizing.

    Variations & Substitutions

    While the classic creme brulee is made with vanilla, there are plenty of ways to add your own twist:

    • Flavored Creme Brulee: Infuse the cream with coffee beans, citrus zest, or spices like cinnamon or cardamom for a different flavor profile.
    • Non-Dairy Option: Substitute the milk and cream with coconut milk for a dairy-free version that adds a tropical flair.
    • Liqueur Addition: Add a splash of your favorite liqueur, like Grand Marnier or Amaretto, into the custard for an adult twist.

    Storage

    Creme brulee can be stored in the refrigerator, covered with plastic wrap, for up to 3 days. Caramelize the sugar topping just before serving to maintain the crisp texture.

    FAQ

    Can I make creme brulee without a blowtorch?

    Yes! If you don’t have a blowtorch, you can caramelize the sugar under a hot grill (broiler) for a few minutes. Keep a close watch to prevent burning and rotate the ramekins if necessary for even caramelization.

    Why did my creme brulee curdle?

    Curdling usually occurs when the eggs cook too quickly. To prevent this, make sure to gradually add the hot cream to the eggs while whisking constantly. Also, baking in a water bath helps regulate the temperature and prevent overcooking.

    Nutrition

    Each serving of creme brulee (based on 8 servings) provides approximately:

    • Calories: 320
    • Protein: 5g
    • Fat: 22g
    • Carbohydrates: 25g
    • Sugar: 24g

    Final Thoughts

    Creme brulee is a testament to the beauty of simplicity and elegance in the culinary world. Its rich flavor and delightful texture make it a cherished dessert, perfect for impressing guests or indulging yourself. Whether you’re making it for the first time or the hundredth, this classic recipe is sure to leave a lasting impression. Enjoy the process, savor the flavors, and revel in the joy of creating something truly special in your kitchen.

    Related update: Creme Brulee

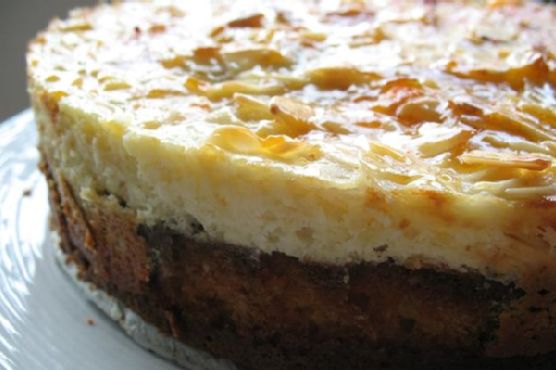
  • Almond Ricotta Cake | Made by Meaghan Moineau

    Almond Ricotta Cake | Made by Meaghan Moineau

    Almond Ricotta Cake

    There’s something deeply comforting about baking a cake that fills your home with the warm, inviting aroma of almonds and citrus. This Almond Ricotta Cake is a cherished recipe passed down through generations in my family. I remember watching my grandmother whip up this cake in her cozy kitchen, her hands moving with the kind of practiced ease that only comes from years of baking. She would always let me lick the spoon, and to this day, the taste of this cake brings back the fondest memories of those afternoons spent in her sunlit kitchen. I’m thrilled to share this recipe with you, and I hope it becomes a treasured part of your family traditions as well.

    Why You’ll Love It

    This Almond Ricotta Cake is the perfect blend of moist, tender crumb and rich flavors. The ricotta cheese adds an incredible creaminess, while the almond extract and zest of fresh lemon bring a bright, aromatic profile. With a delightful topping of almonds and a sweet apricot glaze, this cake is both elegant and delicious. Whether you’re serving it for a special occasion or simply enjoying a slice with your afternoon tea, this cake is sure to impress.

    Ingredients

    • 1 cup all-purpose flour
    • 1 teaspoon almond extract
    • 1 cup ground almonds
    • 1/4 cup apricot jam
    • 1 teaspoon baking powder
    • 1/2 cup canola oil
    • 1 large egg
    • 3 large eggs
    • 2 tablespoons lemon juice
    • Zest of 1 lemon
    • 1/4 cup milk
    • 2 tablespoons orange liqueur
    • 3/4 cup 2% ricotta cheese, plus 3/4 cup for topping
    • 1 tablespoon rum
    • 1/4 teaspoon salt
    • 2 tablespoons sugar, plus 1/4 cup for topping
    • 1 cup sugar
    • 1 teaspoon vanilla extract
    • 1/2 cup sliced almonds

    Instructions

    1. Cake: In a large mixing bowl, beat the eggs, sugar, and oil on high speed until thick and pale, about 8 minutes. Add the ricotta, lemon juice, zest, rum, vanilla, and almond extract. Mix until blended.
    2. In a separate bowl, sift together the ground almonds, flour, baking powder, and salt. Whisk into the ricotta mixture in 3 additions.
    3. Pour the batter into a 10″ springform pan that has been buttered and the bottom lined with parchment paper. Bake in a preheated 350°F oven for 45-50 minutes. The cake is done when a wooden skewer inserted in the center comes out clean.
    4. Topping: Increase your oven temperature to 375°F. Heat the milk and stir in 2 tablespoons of sugar. Toss in the almonds, ensuring they are coated.
    5. In a separate bowl, blend together 3/4 cup ricotta, the egg, 1/4 cup sugar, zest, and vanilla. Spread the ricotta mixture topping over the baked cake and sprinkle with the almond slices.
    6. Return to the oven and continue baking for 15 minutes, until the almonds are golden brown.
    7. Remove from the oven and spread the glaze over the almonds. Allow the cake to cool before removing from the cake pan.
    8. Glaze: In the microwave or in a small pan, heat the apricot jam until it starts to liquefy, about 1-2 minutes. Stir to ensure it doesn’t burn. Strain the jam if there is a large amount of pulp. Brush gently on the baked cake.

    Tips

    • Ensure all ingredients are at room temperature before beginning to mix for a smoother batter.
    • Use fresh lemon for the best flavor; the zest adds a lovely aromatic quality to the cake.
    • Allow the cake to cool completely before glazing to prevent the glaze from soaking into the cake.

    Variations & Substitutions

    • Dairy-Free: Substitute the ricotta cheese with a plant-based ricotta alternative and use almond milk instead of regular milk.
    • Gluten-Free: Replace the all-purpose flour with a gluten-free flour blend suitable for baking.
    • Flavor Twist: Try using different citrus zests, like orange or lime, for a unique twist on the original recipe.

    Storage

    This cake can be stored in an airtight container at room temperature for up to 3 days. If you wish to keep it longer, place it in the refrigerator for up to a week. For even longer storage, wrap it tightly in plastic wrap and freeze for up to a month. Thaw overnight in the refrigerator before serving.

    FAQ

    Can I use a different type of nut for the topping?

    Yes, you can experiment with other nuts like pistachios or walnuts for the topping. Just ensure they are sliced thinly for even baking.

    What can I use instead of apricot jam for the glaze?

    If you don’t have apricot jam, you can substitute it with peach or orange marmalade for a similar sweet and tangy flavor.

    Nutrition

    While this cake is a delightful treat, it’s important to enjoy it in moderation. Each slice contains approximately:

    • Calories: 320
    • Fat: 18g
    • Carbohydrates: 34g
    • Protein: 7g
    • Sugar: 21g

    Final Thoughts

    This Almond Ricotta Cake is more than just a dessert; it’s a delicious reminder of the love and care that goes into home baking. Whether you’re enjoying it with family or sharing it with friends, this cake is sure to warm hearts and create lasting memories. I hope this recipe becomes a beloved part of your baking repertoire, just as it has in mine. Happy baking!

    Related update: Almond Ricotta Cake

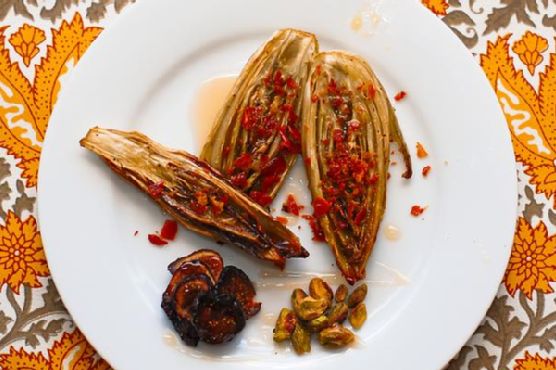
  • Roasted Endive Salad With Prosciutto, Figs and Pistachios | Made by Meaghan Moineau

    Roasted Endive Salad With Prosciutto, Figs and Pistachios | Made by Meaghan Moineau

    Roasted Endive Salad With Prosciutto, Figs and Pistachios

    Why You’ll Love It

    As the leaves begin to fall and the air turns crisp, there’s nothing quite like a warm salad to bring comfort and elegance to your table. This Roasted Endive Salad with Prosciutto, Figs, and Pistachios is one of those dishes that combines simplicity with sophistication, making it perfect for both weeknight dinners and special occasions. The combination of roasted endive’s slightly bitter taste with the sweetness of figs, the salty crunch of prosciutto, and the nutty flavor of pistachios creates a symphony of flavors that will have you coming back for more.

    Growing up, my grandmother would often prepare a similar salad during the holiday season. The aroma of roasting endive would fill the kitchen, and I remember sneaking crispy bits of prosciutto off the counter when she wasn’t looking. It was a dish that brought the family together, a recipe filled with love and joy, and one that I am now excited to share with you.

    Ingredients

    • 4 heads of red or green endive
    • 2 tablespoons olive oil
    • 4 slices prosciutto
    • 1/2 cup dried figs, sliced
    • 1/4 cup pistachio nuts, shelled
    • 2 tablespoons honey

    Instructions

    1. Preheat your oven to 350°F (this is a great toaster oven candidate for smaller batches). Line a rimmed baking sheet with aluminum foil.
    2. Wash the endive thoroughly and remove any unsightly outer leaves. Slice each endive head in half lengthwise, from the stem to the tip.
    3. Arrange the endive cut side up on the foil-lined baking sheet. Generously coat each piece with olive oil.
    4. Bake in the oven for 30 minutes, or until the outer edges of the endive are golden brown.
    5. While the endive is roasting, fry the prosciutto slices in a skillet over medium heat until crispy. Drain them on paper towels, then crumble and set aside.
    6. Once the endive is done roasting, arrange three pieces on each plate. Add a handful of sliced dried figs and pistachio nuts.
    7. Drizzle a spoonful of honey over each plate, then sprinkle with about 1/4 of the crumbled prosciutto.

    Tips

    For the best results, choose endives that are fresh and crisp. When selecting figs, opt for those that are slightly soft but not mushy. If you’re short on time, you can roast the endive and fry the prosciutto a day ahead, then assemble the salad just before serving.

    Variations & Substitutions

    If you’re looking to mix things up, consider swapping out the dried figs for fresh figs when they’re in season. You can also try using a different type of nut, such as walnuts or almonds, for a different texture and flavor. For a vegetarian version, omit the prosciutto and add a sprinkle of feta cheese for a salty kick.

    Storage

    This salad is best enjoyed fresh, but if you have leftovers, store them in an airtight container in the refrigerator for up to two days. Reheat the endive gently in the oven to retain its texture before serving again.

    FAQ

    Can I make this salad ahead of time?

    Yes, you can prepare the components ahead of time. Roast the endive and fry the prosciutto in advance, then store them separately in the refrigerator. Assemble the salad just before serving for the best taste and texture.

    What can I serve with this salad?

    This salad pairs wonderfully with a light protein like grilled chicken or fish. It also works as a delicious starter for a multi-course meal or as part of a larger spread for a festive gathering.

    Nutrition

    While this salad is a treat for the taste buds, it is also packed with nutrients. Endive is a great source of vitamins A and K, while figs provide dietary fiber and antioxidants. Prosciutto adds protein, and pistachios offer healthy fats and additional fiber. A drizzle of honey rounds out the dish with a natural sweetness, making this salad both nutritious and satisfying.

    Final Thoughts

    Roasted Endive Salad with Prosciutto, Figs, and Pistachios is more than just a dish; it’s a celebration of flavors that come together beautifully. Whether you’re hosting a dinner party or looking for a cozy meal to enjoy with your family, this salad is sure to impress. I hope it becomes a cherished part of your recipe repertoire, just as it has been in mine. Bon appétit!

    Related update: Roasted Endive Salad With Prosciutto, Figs and Pistachios