Tag: Dark Chocolate

  • Decadent Spiced Chocolate Mousse in Hazelnut Chocolate Shells | Made by Meaghan Moineau

    Decadent Spiced Chocolate Mousse in Hazelnut Chocolate Shells | Made by Meaghan Moineau

    Decadent Spiced Chocolate Mousse in Hazelnut Chocolate Shells

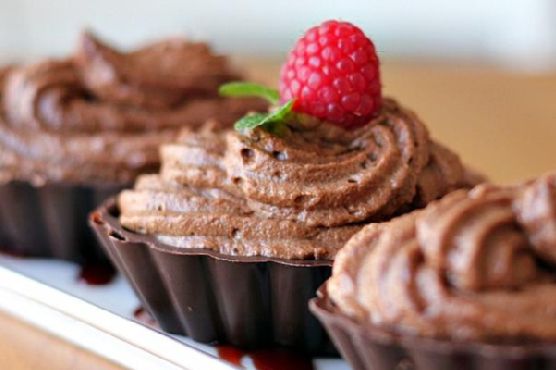
    Imagine the moment you break through a perfectly crisp chocolate shell, revealing a velvety, spiced chocolate mousse that caresses your taste buds with warmth and richness. The nutty aroma of toasted hazelnuts mingles with the sweet scent of cinnamon and cardamom, creating an unforgettable dessert experience. This is not just any chocolate mousse — it’s an indulgence that elevates the classic French dessert to new heights.

    Personal Story

    My first encounter with chocolate mousse was a revelation. I was a teenager on a family trip to Paris, where I experienced the magic of French pâtisserie for the first time. The mousse was served in a quaint café tucked away in a cobblestone alley, and it was love at first bite. The lightness, the richness — it was a delicate balance I had never tasted before. Fast forward a few years, and my love for this dessert led me to experiment in my own kitchen, determined to recreate that Parisian magic.

    But, as many of us know, not all kitchen experiments go according to plan. My first attempt was more of a chocolate soup than a mousse. Undeterred, I delved into research, learning about the chemistry of chocolate and the art of creating that perfect airy texture. It was during one of these trials that I accidentally added a pinch of cinnamon and cardamom into the mix. What might have been a mishap turned into a serendipitous discovery.

    Infused with warming spices and encased in a delightful hazelnut chocolate shell, my version of the chocolate mousse was born. It was a hit at family gatherings and quickly became a requested favorite. The spices added warmth and depth, while the hazelnut shell provided a delightful crunch — a combination that was both nostalgic and refreshingly new.

    What Makes This Version Special

    This isn’t your typical chocolate mousse. Infused with warming spices and encased in a delightful hazelnut chocolate shell, this mousse elevates the classic dessert with a nutty and aromatic touch. By blooming spices in melted butter, we release their essential oils, enhancing the depth of flavor. The crunchy hazelnut shell provides a delightful contrast to the rich, creamy mousse inside. It’s a dessert that’s both sophisticated and approachable — a tribute to the beloved classic with a modern twist.

    Flavor Profile

    The first thing you’ll notice with this decadent spiced chocolate mousse is the aroma — the hazelnuts toasted to perfection, mingling with the sweet, exotic scents of cinnamon and cardamom. Upon tasting, the mousse reveals its rich, chocolatey core, elevated by the subtle warmth of the spices. The nutty crunch of the hazelnut shell adds texture, while the chocolate melts luxuriously on the tongue. It’s a symphony of flavors and textures, each bite more indulgent than the last.

    Ingredients

    • 1 3/4 cups whipping cream, divided
    • 8 oz quality semi-sweet chocolate chips
    • 1/4 cup strong coffee
    • 2 tbsp dark rum
    • 2 tbsp butter
    • 1 tsp gelatin
    • 1/2 tsp ground cinnamon
    • 1/4 tsp ground cardamom
    • 1 tsp vanilla extract
    • 1/2 cup hazelnuts
    • 6 oz extra semi-sweet chocolate chips for shell

    Instructions

    1. Chill 1 1/2 cups of whipping cream in the refrigerator while placing a metal mixing bowl and mixer beaters in the freezer.
    2. In a dry skillet, toast the hazelnuts over medium heat until aromatic, about 5-7 minutes. Allow them to cool slightly before grinding them finely in a food processor.
    3. In a double boiler, combine the 8 oz of chocolate chips, coffee, rum, and butter. Melt over barely simmering water, stirring constantly, until smooth. Remove from heat while a couple of chunks are still visible to prevent scorching.
    4. Bloom the spices by melting butter in a small pan over low heat. Add the ground cinnamon and cardamom, stirring until fragrant, then mix this into the melted chocolate. Allow the mixture to cool to just above body temperature, stirring occasionally.
    5. Pour the remaining 1/4 cup of whipping cream into a metal measuring cup and sprinkle in the gelatin. Let it bloom for 10 minutes, then carefully heat by swirling the cup over a low flame until the gelatin dissolves. Avoid boiling.
    6. Stir the gelatin mixture into the cooled chocolate, then set aside.
    7. Beat the chilled cream in the prepared mixing bowl to medium peaks. Stir 1/4 of the whipped cream into the chocolate mixture to lighten it, then fold in the remaining whipped cream in two additions. It’s okay if there are streaks of whipped cream; do not overwork the mousse.
    8. For the chocolate shells, melt the extra semi-sweet chocolate chips over a double boiler, then stir in the finely ground hazelnuts. Use this mixture to coat the inside of molds or bowls, creating a shell. Allow to set.
    9. Spoon the mousse into the prepared chocolate shells and chill for at least 1 hour before serving. Garnish with fruit if desired.

    Pro Tips from Meaghan’s Kitchen

    • For ultra-smooth mousse, ensure your chocolate mixture is just above body temperature before adding the gelatin. If it’s too hot, it can deflate the whipped cream.
    • Toasting the hazelnuts is key. It intensifies their flavor and adds a wonderful depth to the chocolate shell.
    • When folding the whipped cream into the chocolate, use a gentle hand. This step requires patience to maintain the mousse’s airy texture.
    • If you don’t have a double boiler, a heatproof bowl over a pot of simmering water works just as well. Just make sure the bottom of the bowl doesn’t touch the water.
    • For a glossy finish on your chocolate shells, temper the chocolate by cooling it to 82°F after melting, then gently reheating it to 88°F before forming the shells.

    Variations & Dietary Swaps

    • Vegetarian Version: Substitute the gelatin with agar-agar in equal amounts to make this dessert vegetarian-friendly.
    • Spice-it-Up: For an extra kick, add a pinch of cayenne pepper to the spice mix for a chocolate mousse with a hint of heat.
    • Kids-Friendly Version: Omit the dark rum and substitute the coffee with milk or a milk alternative for a non-caffeinated version.

    What to Serve With It

    This decadent spiced chocolate mousse shines on its own, but it becomes an elevated experience when paired with a glass of tawny port or a shot of espresso. The port’s sweet, nutty flavors complement the mousse perfectly, while the espresso provides a delightful contrast to the dessert’s richness.

    Storage & Meal Prep

    Store any leftover mousse in the refrigerator, covered with plastic wrap to prevent the surface from drying out. It will keep for up to three days. If you wish to freeze it, transfer the mousse into an airtight container and freeze for up to a month. To enjoy, let the mousse thaw in the refrigerator overnight. When reheating the chocolate shells, do so gently over a double boiler to maintain their structure.

    FAQ

    Can I use milk chocolate instead of semi-sweet chocolate?

    Yes, but keep in mind that milk chocolate is sweeter and will alter the flavor profile of the mousse. You might want to reduce the amount of added sugar in other components to balance the sweetness.

    How can I tell if the mousse is properly set?

    When properly set, the mousse should hold its shape when scooped and have a light, airy texture. If it feels too liquid, it may need more chilling time.

    What if my chocolate seizes while melting?

    If your chocolate seizes, add a teaspoon of warm water at a time and stir gently until it becomes smooth again. Ensure that your equipment is completely dry before starting to avoid this issue.

    Can I make this mousse without alcohol?

    Absolutely! Simply omit the dark rum and replace it with additional coffee or a coffee-flavored syrup for added depth without the alcohol content.

    Are there alternatives to hazelnuts for the shell?

    Yes, you can use almonds or pecans as a substitute, though each will impart a slightly different flavor and texture to the shell.

    Final Thoughts

    As you savor this decadent spiced chocolate mousse encased in a hazelnut chocolate shell, I hope it brings you a moment of pure indulgence and joy. Whether you’re crafting it for a special occasion or enjoying it as a luxurious treat for yourself, this mousse is all about the experience. I invite you to share your creations and stories in the comments below — let’s keep the conversation (and the chocolate) flowing!

    Related update: Decadent Spiced Chocolate Mousse in Hazelnut Chocolate Shells

    Related update: Gourmet Candy Cane Cookies with Dark Chocolate Drizzle
  • Decadent Dark Chocolate Raspberry S’mores Bars with Salted Caramel Drizzle | Made by Meaghan Moineau

    Decadent Dark Chocolate Raspberry S’mores Bars with Salted Caramel Drizzle | Made by Meaghan Moineau

    Decadent Dark Chocolate Raspberry S’mores Bars with Salted Caramel Drizzle

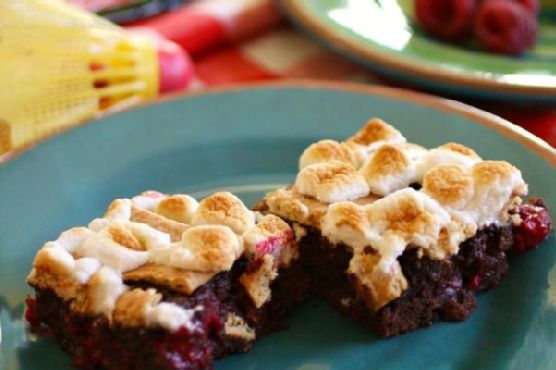
    Imagine biting into a decadent bar that brings together all the best parts of your favorite campfire treat — the gooey marshmallow, the sweet yet savory graham cracker, and of course, the rich chocolate. But wait, there’s a twist: a tart raspberry burst and a silky, salted caramel drizzle. These aren’t just any s’mores bars; they’re an elevated experience, a symphony of flavors that dance on your palate. Welcome to the world of Decadent Dark Chocolate Raspberry S’mores Bars with Salted Caramel Drizzle.

    Personal Story

    It was a crisp autumn evening when I first fell in love with the combination of chocolate and raspberry. I was at a small family gathering, and my aunt had brought along a rich chocolate cake sprinkled with fresh raspberries. The moment I took a bite, I was transported — the tartness of the raspberries cutting through the luscious chocolate was nothing short of perfection. That experience lingered with me, inspiring me to explore this magical pairing in other dishes.

    Fast forward a few years, and I found myself experimenting in my own kitchen, determined to recreate that flavor harmony. My goal was to bring a touch of sophistication to the classic s’mores, a dessert that has always held a nostalgic place in my heart. I wanted to craft a recipe that could be cherished at both campfires and dinner parties.

    The first batch of s’mores bars was good but lacked the depth I remembered. That’s when I decided to incorporate not just raspberries but dark chocolate chunks and a salted caramel drizzle. I had a vision of layers upon layers of flavor, each element enhancing the others.

    The result? A decadent dessert that not only takes you back to childhood memories of sticky fingers and melted marshmallows but also elevates your taste experience to new heights. Every bite is a journey through rich dark chocolate, tart raspberries, and the sophisticated sweetness of salted caramel.

    What Makes This Version Special

    What truly sets these Decadent Dark Chocolate Raspberry S’mores Bars with Salted Caramel Drizzle apart is the luxurious combination of flavors and textures. By incorporating **decadent dark chocolate** and a **luscious salted caramel drizzle**, this recipe adds a depth and complexity that takes the classic s’mores to an entirely new level. The dark chocolate chunks melt into the brownie, creating a moist, chocolaty experience, while the salted caramel plays brilliantly against the sweetness of the marshmallows and graham crackers. It’s a sophisticated twist that makes each bite a moment to savor.

    Flavor Profile

    Prepare for a taste adventure that starts with the rich, velvety embrace of dark chocolate. As you chew, you’ll encounter the vibrant pop of **tart raspberry notes**, a surprise element that cuts through the sweetness like a refreshing breeze. The salted caramel drizzle weaves throughout, providing a salty-sweet finish that lingers deliciously on your palate. These bars are a symphony of contrasting yet complementary flavors that will have your taste buds singing.

    Ingredients

    • 1 box cooked brownie mix
    • 1 large egg
    • 1 cup graham cracker crumbs
    • 2 whole graham crackers
    • 1 cup mini marshmallows
    • **1/2 cup fresh dried raspberries**
    • 1/4 cup sugar
    • 1/2 cup unsalted butter, melted
    • 1/4 cup vegetable oil
    • 1/4 cup water
    • **1 cup dark chocolate chunks**
    • **1/2 teaspoon sea salt**
    • **1/4 cup caramel sauce**

    Instructions

    1. Preheat your oven to 325 degrees F. Line an 8-inch-square baking pan with foil so that it hangs over the edges, and spray it with nonstick cooking spray for easy removal later.
    2. In a medium-sized bowl, mix together the melted butter, graham cracker crumbs, and sugar until the mixture has the texture of wet sand.
    3. Press the crumb mixture evenly on the bottom of the prepared pan. Bake until golden, or for about 20 minutes. The base should be set and slightly firm to the touch. Remove and set aside.
    4. Raise the oven temperature to 350 degrees F. Meanwhile, prepare the brownie mix according to package instructions in a medium-sized bowl. Gently fold in the fresh dried raspberries and dark chocolate chunks, being careful not to overmix.
    5. Pour the batter over the graham cracker crust, spreading it evenly. Bake the brownie mixture for about 25 minutes, or until a toothpick inserted in the middle of the brownie comes out clean. The top should be slightly cracked and the edges set.
    6. Remove the brownie from the oven and set your oven to broil. Be cautious, as the broiler can quickly burn your topping.
    7. Break the two graham crackers into small pieces and arrange them in a single layer on top of the brownie.
    8. Evenly arrange the mini marshmallows over the top of the graham crackers. Place the pan back in the oven for just a few minutes, watching closely, until the marshmallows are golden brown.
    9. Remove from the oven immediately and drizzle the salted caramel sauce over the marshmallows for an added layer of flavor. Allow the bars to cool completely in the pan.
    10. Once cool, use the overhanging foil to lift the bars from the pan and onto a cutting board. Cut into squares and serve.

    Pro Tips from Meaghan’s Kitchen

    • Use a high-quality dark chocolate for the best flavor payoff. Trust me, it makes a world of difference!
    • If your caramel sauce is too thick to drizzle, warm it gently in the microwave for about 10 seconds to make it more pourable.
    • For the best marshmallow topping, use a broiler-safe dish and keep an eye on the marshmallows as they can go from golden to burnt very quickly.
    • Let the bars cool completely before cutting to ensure clean slices. This patience pays off with picture-perfect bars!
    • To intensify the raspberry flavor, consider adding a teaspoon of raspberry extract to the brownie batter.

    Variations & Dietary Swaps

    • Vegetarian Swap: Use vegetarian marshmallows to make this recipe suitable for a vegetarian diet.
    • Extra Spicy Version: Add a pinch of cayenne pepper to the brownie mix for a spicy kick that pairs surprisingly well with the chocolate and raspberries.
    • Kid-Friendly Version: Omit the salted caramel drizzle and instead add a layer of milk chocolate chips for a sweeter treat that kids will love.

    What to Serve With It

    These Decadent Dark Chocolate Raspberry S’mores Bars with Salted Caramel Drizzle are incredibly rich, making them perfect for pairing with a chilled glass of milk to balance the flavors. Alternatively, serve them with a robust cup of coffee to enhance the chocolatey notes and offset the sweetness.

    Storage & Meal Prep

    Store these s’mores bars in an airtight container at room temperature for up to three days. If you prefer to keep them longer, they freeze beautifully — wrap each bar individually in plastic wrap, then place in a freezer-safe bag or container for up to three months. To enjoy, simply thaw at room temperature and, if desired, reheat in a warm oven for a few minutes to restore their gooey texture.

    FAQ

    Can I make these bars gluten-free?

    Absolutely! Simply swap the graham crackers and crumbs for your favorite gluten-free variety. Ensure all other ingredients are certified gluten-free as well.

    What if I don’t have fresh dried raspberries?

    No worries! You can substitute with fresh raspberries, though they might add a bit more moisture to the brownies. Alternatively, use raspberry preserves for a different texture and flavor profile.

    Can I use milk chocolate instead of dark chocolate?

    Yes, you can! However, keep in mind that milk chocolate will result in a sweeter bar, which might alter the balance of flavors with the raspberries and caramel.

    How do I keep the marshmallows from burning?

    The key is to watch them closely under the broiler and remove them as soon as they turn golden brown. If you’re worried, you can lower the broiler rack to give yourself a bit more control over the browning process.

    Can I make the caramel sauce from scratch?

    Of course! A homemade caramel sauce can add a personal touch to your bars. Just ensure it’s salted for that signature sweet-savory balance.

    Final Thoughts

    There you have it, my dear culinary adventurers: a deliciously elevated take on the beloved s’mores. These Decadent Dark Chocolate Raspberry S’mores Bars with Salted Caramel Drizzle are sure to impress at any gathering or satisfy a quiet night in. I’d love to hear how they turn out for you! Feel free to leave your comments and share your own twists on this recipe. Let’s keep the conversation going — because, as always, the best recipes are the ones we create together.

    Related update: Decadent Dark Chocolate Raspberry S’mores Bars with Salted Caramel Drizzle

    Related update: Decadent Spiced Chocolate Mousse in Hazelnut Chocolate Shells

  • Smoky Chipotle Turkey Chili with Dark Chocolate and Lager | Made by Meaghan Moineau

    Smoky Chipotle Turkey Chili with Dark Chocolate and Lager | Made by Meaghan Moineau

    Smoky Chipotle Turkey Chili with Dark Chocolate and Lager

    Imagine the aroma of sizzling garlic and onions wafting through your kitchen, punctuated by the smoky allure of chipotle peppers. As the chili simmers gently, a tantalizing blend of spices and a hint of dark chocolate promise a flavor adventure far beyond your typical turkey chili. Welcome to my elevated take on a classic comfort dish.

    Personal Story

    Growing up, chili was a staple in our household, especially during those brisk autumn months when the leaves would swirl around us in a colorful dance. I remember my mom’s version — a straightforward, no-nonsense turkey chili that was hearty and satisfying. It was the kind of meal that brought everyone together after a long day.

    Years later, I found myself living in a small apartment with a kitchen barely big enough to swing a spatula. It was in that modest space that I first experimented with adding depth and complexity to classic recipes. I was inspired by a trip to Mexico, where I tasted a sauce infused with rich chocolate and smoky peppers. I thought, “Why not bring this sophistication to my trusty turkey chili?”

    The first attempt was far from perfect. I overdid the chipotle, and my mouth was on fire! But with a few tweaks and some culinary wisdom gained along the way, I discovered the perfect balance of spices and ingredients that transformed this dish into something truly special. It’s become a favorite at gatherings, with friends often asking for the recipe or, better yet, an invite to dinner.

    Now, I’m excited to share this Smoky Chipotle Turkey Chili with Dark Chocolate and Lager with you. It’s a dish that brings warmth and comfort, with a touch of intrigue thanks to the unexpected addition of dark chocolate.

    What Makes This Version Special

    What sets this turkey chili apart is its deep, smoky chipotle flavors combined with rich, dark chocolate undertones. The inclusion of dried chipotle peppers and dark chocolate (70% cacao) elevates the dish from a simple comfort food to a culinary experience. These bold ingredients add layers of flavor, making this chili not only satisfying but also sophisticated. The use of a dark lager beer intensifies the chili’s depth, while low sodium soy sauce adds a subtle umami note.

    This version is better than the standard turkey chili because it transforms a classic dish into something adventurous and memorable, perfect for impressing guests or simply treating yourself to a bowl of something extraordinary.

    Flavor Profile

    This chili offers a rich, smoky, and subtly spiced flavor profile with a hint of chocolatey depth. The smokiness comes from both the dried chipotle peppers and smoked paprika, harmonizing beautifully with the savory turkey and aromatic spices. The dark chocolate provides a unique richness that lingers on the palate, while the lager adds a slightly malty sweetness that rounds out the dish. With each spoonful, you experience a medley of flavors that unfold in layers, leaving you craving more.

    Ingredients

    • 2 tablespoons of extra virgin olive oil
    • 1 large white onion, diced
    • 1 red bell pepper, diced
    • 3 cloves of garlic, minced
    • 2 jalapeno peppers, seeded and minced
    • 1 teaspoon smoked paprika
    • 1 tablespoon chili powder
    • 1 teaspoon ground cumin
    • 1/2 teaspoon black pepper
    • 1 tablespoon unsweetened cocoa powder
    • 2 ounces **dark chocolate (70% cacao)**, finely chopped
    • 1 pound lean ground turkey meat
    • 1 can (28 ounces) canned tomatoes, peeled
    • 1 can (15 ounces) canned black beans, rinsed and drained
    • 1 cup **dark lager beer**
    • 2 tablespoons **low sodium soy sauce**
    • 1/4 cup fresh cilantro, chopped
    • 2 **dried chipotle peppers**, finely chopped
    • Juice of 1 fresh lime

    Instructions

    1. Gently heat the extra virgin olive oil in a large pot over medium heat. Be cautious not to let it smoke.
    2. Add the diced onion, red bell pepper, minced garlic, and jalapenos to the pot. Sauté over medium heat until the vegetables are soft and fragrant, about 5 minutes.
    3. Add the smoked paprika, chili powder, ground cumin, black pepper, and unsweetened cocoa powder. Stir the spices to coat the vegetables, allowing them to bloom and release their aromatic flavors.
    4. Add the ground turkey and finely chopped dried chipotle peppers. Sauté for three to four minutes, breaking up the turkey with a spoon or spatula, until just cooked through.
    5. Drain the juice from the canned tomatoes into the pot, then finely chop the tomatoes and add them as well. Stir to combine.
    6. Add the canned black beans, dark lager beer, and low sodium soy sauce. Stir thoroughly to combine all ingredients.
    7. Fold in the chopped fresh cilantro and stir well. Cover the pot and allow the chili to simmer over low heat for five to ten minutes, letting the flavors meld together.
    8. Turn off the heat and let the chili rest for about fifteen minutes before serving. This resting time enhances the flavors.
    9. Serve the chili hot, optionally garnished with low-fat sour cream, grated cheese, avocado slices, or chopped green onions. Pair it with tortilla chips for a delightful crunch.

    Pro Tips from Meaghan’s Kitchen

    • Bloom those spices: Always add your spices to the oil and vegetables early on. This technique enhances their flavor, making your chili aromatic and rich.
    • Adjust the heat: If you prefer a milder chili, reduce the amount of jalapeno and chipotle peppers. Conversely, add more for an extra kick.
    • Chocolate choice matters: Use high-quality dark chocolate with at least 70% cacao. It will provide the best depth of flavor without overwhelming sweetness.
    • Resting is key: Letting the chili rest before serving allows the spices and chocolate to meld beautifully, enhancing the overall taste.
    • Layer your flavors: Adding ingredients gradually and allowing each to develop enriches the complexity of the final dish.

    Variations & Dietary Swaps

    • Vegetarian Swap: Replace the turkey with an equal amount of cooked quinoa or lentils for a hearty vegetarian version. Ensure you still get that smoky depth by keeping the chipotle and spices.
    • Spice-It-Up Version: Add a pinch of cayenne pepper or a splash of hot sauce to intensify the heat. Just be sure to taste as you go.
    • Kids-Friendly Version: Omit the chipotle and reduce the jalapenos to make a milder chili. Add some corn for a touch of sweetness that kids love.

    What to Serve With It

    This Smoky Chipotle Turkey Chili pairs perfectly with a side of warm cornbread, whose sweetness complements the chili’s smokiness. For a complete meal, enjoy it with a chilled glass of dark lager beer, which echoes the chili’s ingredients and enhances its rich, layered flavors.

    Storage & Meal Prep

    To store any leftover chili, let it cool to room temperature before transferring it to an airtight container. It can be kept in the fridge for up to 4 days. For longer storage, freeze the chili in a freezer-safe container for up to 3 months. When ready to enjoy again, simply thaw it in the refrigerator overnight and reheat on the stove over low heat, stirring occasionally until warmed through.

    FAQ

    Can I make this chili spicier?

    Absolutely! Increase the amount of jalapeno and chipotle peppers, or add a pinch of cayenne pepper to taste.

    Is there a substitute for dark lager beer?

    Yes, you can use beef broth or vegetable broth if you prefer to avoid alcohol in your cooking. It will still add depth and richness to the chili.

    Can I use a different type of meat?

    Certainly! Ground chicken or beef work well as alternatives to turkey, though they will slightly alter the flavor profile.

    How can I make this chili more kid-friendly?

    Reduce or omit the spicy ingredients like chipotle and jalapenos. Consider adding a touch of honey or corn for sweetness that appeals to younger palates.

    What’s the best way to reheat this chili?

    Reheat gently on the stove over low heat, stirring occasionally, until it’s warmed through. This method helps maintain the chili’s rich texture and flavor.

    Final Thoughts

    Thank you for joining me in the kitchen for this flavorful adventure. I hope this Smoky Chipotle Turkey Chili with Dark Chocolate and Lager becomes a cherished dish in your home, just as it has in mine. Don’t hesitate to share your own variations or experiences in the comments below, and feel free to pass this recipe along to fellow chili lovers. Happy cooking!

    Related update: Smoky Chipotle Turkey Chili with Dark Chocolate and Lager

    Related update: Spicy Saffron Mussels & Clams in White Wine Broth

  • Decadent Mocha Raspberry Chiffon Cake with Hazelnut Praline Crunch | Made by Meaghan Moineau

    Decadent Mocha Raspberry Chiffon Cake with Hazelnut Praline Crunch | Made by Meaghan Moineau

    Decadent Mocha Raspberry Chiffon Cake with Hazelnut Praline Crunch

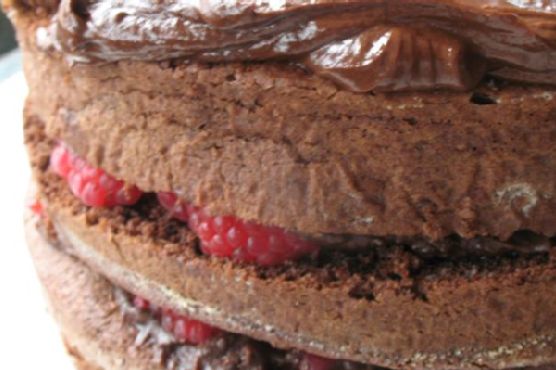
    Imagine slicing through a cloud-like layer of chiffon cake, infused with the rich aroma of espresso, and revealing a tantalizing crunch of hazelnut praline. Each bite is a dance of textures and flavors: silky ganache enveloping tart raspberries, all coming together in a symphony of chocolatey goodness. Welcome to your new favorite cake adventure.

    Personal Story

    I’ve always had a soft spot for French desserts, especially those that allow a bit of creativity and indulgence. Years ago, during a trip to Paris, I stumbled upon a quaint patisserie tucked away in a quiet corner of Montmartre. The air was thick with the smell of freshly baked pastry and dark chocolate. It was there I tasted a cake that changed my life. The combination of chocolate and raspberries had always intrigued me, but this particular creation was unlike anything I’d ever tasted.

    Back in my own kitchen, I endeavored to recreate that experience, allowing the memory to guide my hands. Many attempts later, I stumbled into an unexpected twist — a leftover espresso shot from my morning routine. What began as a quick addition to the batter evolved into a full-blown espresso infusion, giving depth to the cake’s chocolatey base.

    Then came a revelation: texture. My initial trials, though delicious, lacked that essential crunch that elevates a dessert from good to unforgettable. Enter the hazelnut praline, a delightful accident born from a caramel mishap. The praline’s nutty crunch added the missing piece to my cake puzzle, offering a satisfying contrast to the chiffon’s softness.

    Now, every time I bake this decadent mocha raspberry chiffon cake, I’m transported back to the cobblestone streets of Paris. It’s more than just a cake; it’s a slice of memory, a testament to the beautiful unpredictability of culinary exploration.

    What Makes This Version Special

    This version of the classic French chiffon cake stands out with its aromatic espresso infusion, giving it a unique and sophisticated twist. The rich chocolate flavor is deepened by blooming the espresso powder in hot water before adding it to the batter, ensuring every bite has that subtle coffee note. The addition of a crunchy hazelnut praline layer adds texture and complexity, creating a delightful contrast to the soft, airy cake and the fresh, tart raspberries. This cake isn’t just a dessert; it’s an experience.

    Flavor Profile

    Prepare yourself for a taste journey where decadence meets elegance. The cake’s rich chocolate flavor is bolstered by the aromatic notes of espresso, providing a warm, comforting background. The tartness of fresh raspberries cuts through the richness, adding a refreshing burst with each bite. And then there’s the hazelnut praline — a delightful crunch that surprises and delights, offering a nutty, caramelized counterpoint. It’s a dessert that keeps your taste buds guessing, yet satisfies at every turn.

    Ingredients

    • 1 cup all purpose flour
    • 1 cup sugar
    • 1/3 cup sugar (for egg whites)
    • 1 1/2 tsp baking powder
    • 1/2 tsp salt
    • 1/4 cup **vegetable oil**
    • 6 egg yolks
    • 6 egg whites
    • 1/2 tsp cream of tartar
    • 1 tsp vanilla extract
    • 3 tbsp **dark Dutch cocoa**
    • 3 tbsp **boiling water**
    • 1 tbsp **espresso powder**
    • 4 oz **dark 70% Belgium chocolate**
    • 1/2 cup **5% cream**
    • 1/2 cup butter
    • 1 cup icing sugar
    • 1 tsp vanilla extract
    • 1 cup **hazelnuts**
    • 1/3 cup sugar (for praline)
    • 2 tbsp **maple syrup**
    • 1/4 cup **raspberry liqueur**
    • 1 cup **fresh raspberries**

    Instructions

    1. Preheat your oven to 350°F (175°C). Prepare two 8-inch cake pans by greasing them lightly and lining with parchment paper.
    2. Bloom the espresso by dissolving the espresso powder in 3 tablespoons of boiling water. Set aside to cool slightly.
    3. In a large mixing bowl, combine the flour, 1 cup sugar, baking powder, and salt. Stir to blend.
    4. In a separate bowl, beat the egg whites and cream of tartar with an electric mixer until soft peaks form. Gradually add 1/3 cup sugar and continue to beat until firm peaks are achieved, but ensure they are not dry.
    5. Make a well in the dry ingredients. Pour in the vegetable oil, egg yolks, vanilla, bloomed espresso, and the cocoa mixture. Beat until smooth. Then gently fold in about a quarter of the beaten egg whites to loosen the batter. Carefully fold in the remaining egg whites, maintaining as much air as possible.
    6. Divide the batter evenly between the prepared pans. Bake for 30-35 minutes or until a wooden skewer inserted in the center of the cakes comes out clean.
    7. While the cakes bake, prepare the hazelnut praline. Toast the hazelnuts on a baking sheet for 8-10 minutes or until fragrant. In a saucepan, combine sugar and maple syrup, heating until the sugar dissolves and caramelizes to a light amber color. Stir in the toasted hazelnuts, then spread onto a parchment-lined tray to cool. Once hardened, crush into coarse pieces.
    8. For the filling, use an electric mixer to blend icing sugar, cocoa, butter, vanilla, and cream. Adjust cream quantity to achieve desired texture, aiming for a smooth, spreadable consistency.
    9. Prepare the ganache topping by heating the cream until just below boiling. Remove from heat, add chopped dark chocolate and butter, stirring until smooth. Allow to cool and thicken slightly before using.
    10. Once the cakes are cooled, slice each in half horizontally to create four layers in total. Begin assembly by sprinkling raspberry liqueur over the first cake layer. Spread a thin layer of filling, followed by a generous scattering of fresh raspberries and a sprinkle of hazelnut praline.
    11. Repeat with remaining layers, finishing with the top layer spread with thick ganache. Garnish with additional raspberries and praline pieces if desired.

    Pro Tips from Meaghan’s Kitchen

    • Always let the espresso and cocoa mixtures cool before adding to the batter. This prevents them from cooking the egg yolks.
    • When folding the egg whites into the batter, use a large spatula and a gentle hand to prevent deflating the batter, which ensures a light and airy cake.
    • For a more intense coffee flavor, consider using a coffee liqueur instead of raspberry liqueur.
    • Toast hazelnuts in batches to ensure even browning and enhanced flavor.
    • Prepare the praline ahead of time, as it needs to cool completely before being crushed and used in the cake layers.

    Variations & Dietary Swaps

    • Vegetarian Swap: This recipe is already vegetarian-friendly but ensure the chocolate is free from animal derivatives if serving to strict vegetarians.
    • Make it Gluten-Free: Substitute all-purpose flour with a 1:1 gluten-free baking flour blend.
    • Kid-Friendly Version: Omit the espresso powder and use vanilla extract instead for a light vanilla-chocolate flavor profile that kids will love.

    What to Serve With It

    This decadent mocha raspberry chiffon cake pairs beautifully with a glass of chilled raspberry Moscato, enhancing the tart raspberry notes in the cake. Alternatively, a robust espresso compliments the cake’s coffee undertones and makes for a sophisticated pairing. If you’re feeling indulgent, a scoop of vanilla bean ice cream provides a creamy contrast to the cake’s textures.

    Storage & Meal Prep

    Store any leftover cake in an airtight container in the refrigerator for up to three days. For longer storage, wrap individual slices in plastic wrap and place in a freezer-safe bag or container to freeze for up to one month. To enjoy, thaw at room temperature or warm slightly in the oven to refresh.

    FAQ

    Can I make the cake layers ahead of time?

    Absolutely! Bake the cake layers a day in advance. Once cooled, wrap them tightly in plastic wrap and store at room temperature. This can actually enhance the flavor as the cake has time to settle.

    What if I don’t have hazelnuts?

    If hazelnuts aren’t available, almonds or pecans are a great substitute. Each will bring a slightly different flavor profile but will still provide that necessary crunch.

    How can I prevent the cake from sticking to the pans?

    Grease your pans well and line the bottoms with parchment paper. This ensures easy release of the cake once baked and cooled.

    Can I use instant coffee instead of espresso powder?

    Yes, but the flavor won’t be as intense. If using instant coffee, consider doubling the amount to get closer to the desired espresso taste.

    Is there a non-alcoholic substitute for the raspberry liqueur?

    Yes, you can use raspberry syrup or a mixture of raspberry jam and water as a non-alcoholic alternative. It will still provide that lovely raspberry flavor without the alcohol content.

    Final Thoughts

    Whether you’re crafting this decadent mocha raspberry chiffon cake for a special occasion or simply treating yourself on a cozy weekend, know that each step is a labor of love. As you whip, fold, and assemble, feel free to experiment and make this cake your very own. I’d love to hear how it turns out for you, so please leave a comment or share your photos. Let’s keep the joy of baking alive, one delicious bite at a time!

    Related update: Decadent Mocha Raspberry Chiffon Cake with Hazelnut Praline Crunch

    Related update: Spiced Maple Carrot Cake with Ginger Cream Cheese Frosting

  • Decadent Oreo-Banana Cheesecake with Salted Caramel Swirl | Made by Meaghan Moineau

    Decadent Oreo-Banana Cheesecake with Salted Caramel Swirl | Made by Meaghan Moineau

    Decadent Oreo-Banana Cheesecake with Salted Caramel Swirl

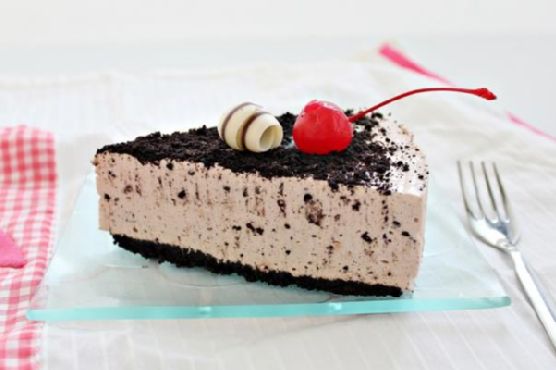
    Imagine biting into a slice of cheesecake so creamy, it feels like velvet on your tongue. Now add the rich, bittersweet dance of dark chocolate, the luscious embrace of a homemade salted caramel swirl, and the comforting, nostalgic crunch of Oreos. This, my friends, is no ordinary dessert — it’s a decadent Oreo-Banana Cheesecake that will redefine your expectations of indulgence.

    Personal Story

    Growing up, cheesecake was a special-occasion dessert, reserved for birthdays and holidays when the whole family gathered around the dining table. I remember the first time I attempted to make one; it was a classic New York-style cheesecake, and let’s just say the results were less than perfect. The crust was soggy, the filling was dense, and I forgot to let it cool before devouring it. But that experience sparked a curiosity in me that led to years of experimenting with flavors and techniques.

    Flash forward to a summer evening last year, when the sweet aroma of bananas filled my kitchen. I had an excess of ripe bananas and a pantry begging for creativity. That’s when inspiration struck. What if I combined the familiar comfort of banana bread with the elegance of a cheesecake? And, why not throw in some Oreos and a salted caramel swirl for good measure?

    This Oreo-Banana Cheesecake with a Salted Caramel Swirl was born out of a love for pushing culinary boundaries and a desire to create a dessert that felt both familiar and exciting. As I took that first bite, the creamy texture, the rich Oreo crust, and the sophisticated caramel notes danced together perfectly. It’s been a family favorite ever since.

    What Makes This Version Special

    This isn’t just any cheesecake; it’s an elevated version that marries comfort with sophistication. The luscious salted caramel swirl weaves through the creamy filling, offering a delightful contrast to the rich Oreo and banana flavors. A hint of dark chocolate adds depth, turning this dessert into a complex symphony of flavors. Unlike the standard cheesecake, this version delivers a perfect balance of sweet and salty tones, making it a standout centerpiece for any dessert table.

    Flavor Profile

    Prepare your taste buds for an unforgettable experience. The Oreo-Banana Cheesecake with Salted Caramel Swirl is rich and creamy, with a delightful balance of sweet and savory notes. The Oreo crust adds a satisfying crunch, while the banana-infused filling is smooth and velvety. The salted caramel swirl introduces a sophisticated edge, and the hint of dark chocolate provides a lingering, slightly bitter finish. Each bite is a harmonious blend of flavors and textures that will leave you craving more.

    Ingredients

    • **Oreo cookies** – 200g, crushed
    • **Butter** – 75g, melted
    • **Cream cheese** – 500g
    • **Fresh whipping cream** – 300ml
    • **Gelatin powder** – 10g
    • **Water** – 50ml
    • **Nutella** or hazelnut spread – 100g
    • Skinless bananas – 3, mashed
    • **Lemon juice** – 1/2 tbsp
    • **Milk** – 3 tbsp
    • **Dark chocolate shavings** – optional, for garnish
    • **Sea salt flakes** – pinch
    • **Homemade salted caramel sauce** – 200ml

    Instructions

    1. Start by infusing the melted butter with a pinch of sea salt to give your Oreo crust a slightly savory edge. Mix the crushed Oreo cookies with the butter until well combined.
    2. Firmly press the Oreo mixture into a 9-inch cake pan. Place this in the refrigerator to chill until firm, about 30 minutes.
    3. In a large bowl, whisk the fresh whipping cream until soft peaks form. Set aside.
    4. Combine the gelatin powder and water in a small bowl and let it soak for a few minutes. Place the bowl over a double boiler and heat gently until the gelatin dissolves completely. Set aside to cool slightly.
    5. In a separate bowl, beat the cream cheese at medium speed with 3 tablespoons of milk until it’s smooth and creamy. Add the Nutella, and continue to beat for about 1 minute.
    6. Mash the bananas and mix them with the lemon juice to prevent browning, then fold them into the cream cheese mixture until well combined. Transfer to a large bowl.
    7. Gently fold the whipped cream into the cream cheese mixture using a hand whisk, then add the dissolved gelatin and mix until fully incorporated.
    8. Fold in 20g of crushed Oreo cookies with a rubber spatula for an added crunch.
    9. Pour half of the cream cheese mixture into the prepared cake pan. Drizzle half of the homemade salted caramel sauce over the top, using a knife to swirl it through. Repeat with the remaining mixture and caramel.
    10. Refrigerate the cheesecake for at least 4 hours or overnight to set. Once chilled, remove the cheesecake from the cake pan and sprinkle with extra crushed Oreo biscuits and dark chocolate shavings, if desired.

    Pro Tips from Meaghan’s Kitchen

    • Make sure your cream cheese is at room temperature before you start. It blends much more smoothly, preventing lumps in your cheesecake.
    • For a perfectly smooth caramel swirl, let the caramel cool slightly before adding it to the cheesecake mixture.
    • To avoid over-mixing, fold the whipped cream in gently. This keeps the mixture light and airy.
    • If your bananas are too ripe, consider adding a touch more lemon juice to balance the sweetness.
    • For a clean slice, dip your knife in hot water before cutting and wipe it clean between slices.

    Variations & Dietary Swaps

    • Vegetarian swap: Use agar-agar instead of gelatin for a plant-based gelling agent.
    • Spice it up: Add a pinch of cinnamon to the crust mixture for a warm, spicy twist.
    • Kids-friendly version: Skip the dark chocolate shavings and add colorful sprinkles on top for a fun, festive look.

    What to Serve With It

    This cheesecake pairs beautifully with a chilled glass of espresso martini, marrying the dessert’s rich flavors with the cocktail’s coffee notes. Alternatively, serve a side of fresh strawberries for a refreshing contrast that complements the cheesecake’s sweetness.

    Storage & Meal Prep

    Store any leftover cheesecake in an airtight container in the refrigerator for up to 3 days. For longer storage, wrap individual slices in plastic wrap and place them in a freezer-safe bag; they can be frozen for up to 2 months. To reheat, simply thaw a slice in the refrigerator for a few hours before serving. Avoid microwaving to maintain its creamy texture.

    FAQ

    Can I make this cheesecake without a mixer?

    Yes, you can! While a mixer makes the process quicker, you can achieve a smooth texture by thoroughly whisking by hand. Just be prepared to put in a little extra elbow grease.

    Is there a substitute for Nutella?

    If you’re not a fan of hazelnut spread, you can use melted dark chocolate or even peanut butter for a different flavor profile.

    How do I prevent my cheesecake from cracking?

    The key to preventing cracks is ensuring the cream cheese is at room temperature before you start. Also, avoid over-mixing once the gelatin is added, as this can cause air bubbles that lead to cracking.

    Can I use pre-made caramel sauce?

    While homemade salted caramel sauce enhances the cheesecake’s flavor, a high-quality store-bought version will work in a pinch. Just be sure to choose one that’s thick and rich.

    What if I don’t have a double boiler?

    If you don’t have a double boiler, you can create a makeshift one by placing a heatproof bowl over a pot of simmering water, ensuring the bowl doesn’t touch the water.

    Final Thoughts

    There you have it, my take on a Decadent Oreo-Banana Cheesecake with Salted Caramel Swirl — a dessert that’s as indulgent as it is delightful. I hope this recipe brings as much joy to your table as it has to mine. I’d love to hear how your cheesecake turns out, so feel free to share your creations in the comments below. Happy baking, and remember, the best recipes are shared with love!

    Related update: Decadent Oreo-Banana Cheesecake with Salted Caramel Swirl

    Related update: Decadent Mocha Raspberry Chiffon Cake with Hazelnut Praline Crunch