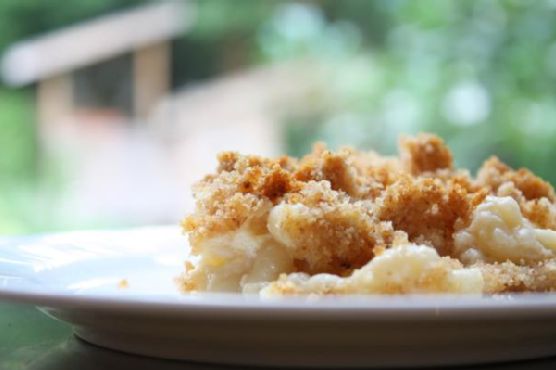
Truffle-Infused Macaroni and Cheese with Crispy Pancetta Crumble
Imagine a chilly evening with a comforting blanket of warmth enveloping your kitchen, the air heavy with the decadent aroma of truffle oil mingling with bubbling cheese. As the golden-brown crust of your macaroni and cheese forms and crisps under a blanket of pancetta crumble, anticipation builds for that first creamy, savory bite.
Personal Story
The first time I tasted truffle oil, I was in a cozy bistro in Paris, where the chef drizzled it over a simple risotto. The earthy, luxurious aroma transported me to a place of pure culinary bliss. Since then, I’ve been on a quest to incorporate that same level of indulgence into my own cooking. Truffle oil, with its distinct and irresistible fragrance, became my secret weapon in transforming everyday dishes into gourmet experiences.
Macaroni and cheese, a beloved American classic, was one of the first dishes I experimented with. I recall a time when, as a child, Kraft’s boxed version was a staple in our household, a quick and easy comfort after long school days. The ritual of mixing in the powdered cheese with milk and butter holds a nostalgic charm, but my grown-up palate craved more sophistication.
On a rainy Saturday afternoon, I decided to take the plunge and experiment. The idea was simple: elevate my childhood favorite by marrying its comforting aspects with the luxurious notes of truffle and the salty, crispy delight of pancetta. The result was far beyond my expectations, and it quickly became a signature dish at gatherings, always met with wide-eyed approval and requests for seconds.
Since then, this truffle-infused macaroni and cheese with crispy pancetta crumble has become a staple in my repertoire, a testament to the comforting power of home-cooked food elevated with a few gourmet touches. It’s a dish that never fails to impress and satisfy, and I’m thrilled to share it with you.
What Makes This Version Special
This version stands out not just for its rich, creamy texture but for the luxurious addition of truffle oil. By incorporating this ingredient just before serving, we preserve its aromatic qualities, ensuring that each bite carries its full, earthy essence. The crispy pancetta crumble isn’t just a garnish; it adds a savory, salty crunch that perfectly contrasts the smoothness of the cheese sauce. The combination transforms a standard macaroni and cheese into a gourmet delight, worthy of any dinner party or cozy night in.
Flavor Profile
This dish offers an indulgent taste experience. The creamy cheese sauce, enriched with Gruyere and white cheddar, blankets each piece of macaroni in a velvety embrace. The subtle heat from cayenne pepper and the aromatic nutmeg enhance the cheese’s complexity without overpowering it. The truffle oil’s distinct, earthy aroma complements the cheese, creating an olfactory symphony. Finally, the topping of crispy pancetta and fresh thyme adds a delightful crunch and a savory note, creating a perfect balance of flavors and textures.
Ingredients
- 1 pound elbow macaroni
- 8 tablespoons unsalted butter, divided
- 2 cups whole milk
- 1/4 cup all-purpose flour
- **1 tablespoon truffle oil**
- **1/2 cup diced pancetta**
- 3 cups sharp white cheddar cheese, shredded
- 2 cups Gruyere cheese, shredded
- 1/2 cup Parmesan cheese, grated
- 1/4 teaspoon cayenne pepper
- 1/4 teaspoon grated nutmeg
- Kosher salt, to taste
- Freshly ground black pepper, to taste
- **1 cup white bread, torn into small pieces**
- 2 tablespoons fresh thyme leaves
Instructions
- Preheat your oven to 375 degrees Fahrenheit. Butter a 3-quart casserole dish and set it aside.
- In a medium bowl, place the torn pieces of white bread. In a small saucepan over medium heat, melt 2 tablespoons of butter. Pour the melted butter over the bread pieces, tossing to coat evenly. Set the breadcrumbs aside.
- Heat the whole milk in a medium saucepan over medium heat until it is hot but not boiling. Keep it warm.
- In a high-sided skillet over medium heat, melt the remaining 6 tablespoons of butter. Once the butter starts bubbling, add the flour and cook, stirring constantly, for about 1 minute to form a roux.
- Slowly pour the hot milk into the roux, whisking vigorously to prevent lumps. Continue cooking and whisking until the mixture starts to bubble and thickens to a smooth, creamy consistency.
- Remove the pan from the heat and stir in the salt, nutmeg, black pepper, cayenne pepper, 3 cups of white cheddar cheese, and 1 1/2 cups of Gruyere cheese. Mix until the cheese is fully melted and the sauce is smooth. Set the cheese sauce aside.
- Fill a large saucepan with salted water and bring it to a boil. Add the macaroni and cook for 2 to 3 minutes less than the package instructions, ensuring the pasta is slightly undercooked. Drain the macaroni and rinse it under cold water to stop the cooking process.
- Gently fold the drained macaroni into the cheese sauce until all the pasta is well coated. Add the truffle oil, stirring just before transferring the mixture to the casserole dish to preserve its aromatic quality.
- Pour the macaroni and cheese mixture into the prepared casserole dish. Sprinkle the remaining 1 1/2 cups of cheddar and 1/2 cup of Gruyere over the top, followed by the buttered breadcrumbs.
- Fry the diced pancetta in a skillet over medium heat until crispy. In a small bowl, toss the crispy pancetta with breadcrumbs and fresh thyme.
- Scatter the pancetta crumble over the macaroni and cheese. Bake in the oven for about 30 minutes, or until the top is golden-brown and crispy.
- Transfer the dish to a wire rack and let it cool for 5 minutes before serving. Enjoy your gourmet creation!
Pro Tips from Meaghan’s Kitchen
- Don’t overcook your pasta; it will continue cooking in the oven and absorb more flavor from the cheese sauce.
- Use freshly grated cheese for the best melting quality. Pre-shredded cheese often contains anti-caking agents that can affect the sauce’s texture.
- Adjust the amount of truffle oil to your taste. A little goes a long way, so start with less and add more if desired.
- If you want a more pronounced truffle flavor, consider adding a bit of truffle salt in addition to the kosher salt.
- For a richer topping, mix some Parmesan cheese with the breadcrumbs before baking.
Variations & Dietary Swaps
- Vegetarian Version: Simply omit the pancetta and opt for a mix of sautéed mushrooms to complement the truffle oil’s earthy notes.
- Spicy Version: Amp up the heat by adding finely diced jalapeños or a sprinkle of red pepper flakes to the cheese sauce.
- Kids-Friendly Version: Skip the truffle oil and pancetta, focusing on a creamy, cheesy core with a breadcrumb topping for a milder approach that’s sure to please young palates.
What to Serve With It
This truffle-infused macaroni and cheese pairs beautifully with a crisp, chilled glass of Sauvignon Blanc, whose acidity cuts through the rich creaminess of the dish. Alternatively, a light, fruity Pinot Noir makes a great companion, enhancing the earthy, savory notes. For a non-alcoholic option, consider serving it with a refreshing glass of iced tea or sparkling water with a twist of lemon.
Storage & Meal Prep
Leftovers can be stored in an airtight container in the refrigerator for up to 3 days. To reheat, cover with foil and warm in a 350-degree oven until heated through. If freezing, do so before baking—assemble the dish in a freezer-safe container, cover tightly, and freeze for up to 2 months. When ready to serve, thaw overnight in the refrigerator, then bake as directed, adding an extra 5-10 minutes to the cooking time.
FAQ
Can I make this dish ahead of time?
Yes, you can assemble the macaroni and cheese without baking it, cover it, and refrigerate it for up to 24 hours before baking. Just remember to add a few extra minutes to the baking time if it’s coming straight from the fridge.
What can I substitute for truffle oil if I don’t have any?
If you don’t have truffle oil, you can omit it or substitute it with truffle salt or a touch of mushroom powder for a similar earthy flavor.
How do I prevent my cheese sauce from becoming grainy?
To keep your cheese sauce smooth, make sure to whisk constantly when adding the milk to the roux and use low heat to melt the cheese slowly, preventing it from seizing up.
Can I use a different type of pasta?
Absolutely! While elbow macaroni is traditional, shell pasta or cavatappi are excellent alternatives, as their shapes hold the cheese sauce well.
Is there a lower-fat version of this recipe?
You can reduce the fat content by using reduced-fat cheese and milk, though this may slightly alter the creamy texture. Consider adding a bit more seasoning to compensate for the reduced richness.
Final Thoughts
This truffle-infused macaroni and cheese with crispy pancetta crumble is more than just a meal; it’s an experience to be savored. I hope you enjoy making and sharing this dish as much as I have. Please leave a comment and let me know how it turns out for you—or share your own creative twist! Happy cooking, friends.
Related update: Truffle-Infused Macaroni and Cheese with Crispy Pancetta Crumble
Related update: Szechuan-Style Spicy Chicken Lo Mein with Crunchy Cashews