Tag: Cardamom

  • Smoky Cardamom-Infused Chicken Tikka Masala with Charred Peppers | Made by Meaghan Moineau

    Smoky Cardamom-Infused Chicken Tikka Masala with Charred Peppers | Made by Meaghan Moineau

    Smoky Cardamom-Infused Chicken Tikka Masala with Charred Peppers

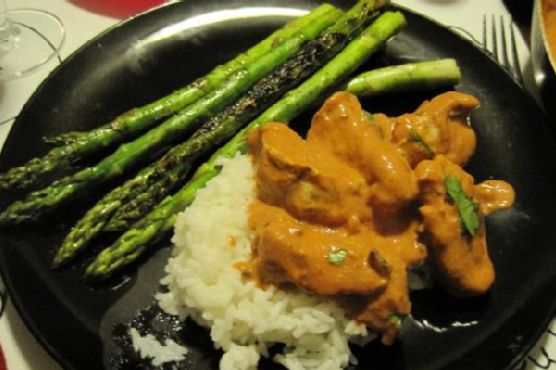
    The tantalizing aroma of cardamom wafting through the kitchen, mingling with the subtle smokiness of charred bell peppers, is enough to make anyone’s mouth water. Imagine a rich, creamy sauce enveloping tender pieces of chicken, each bite more aromatic and flavorful than the last. This Smoky Cardamom-Infused Chicken Tikka Masala with Charred Peppers transforms a beloved classic into a new and exciting culinary adventure.

    Personal Story

    I remember the first time I attempted to make Chicken Tikka Masala at home. It was a cold Saturday afternoon, and I was feeling adventurous, ready to tackle what I thought was a complex dish only meant for restaurant kitchens. My tiny kitchen was soon filled with the heady aroma of spices toasting in the pan, and despite a few initial mishaps—like accidentally using twice the amount of chili powder—the end result was a revelation.

    Fast forward a few years and countless trials later, I’ve developed a version of Chicken Tikka Masala that not only satisfies my craving for this beloved dish but also elevates it with a personal twist. During one of my culinary escapades, I stumbled upon the magic of charring bell peppers. The slightly sweet, smoky flavor adds an unexpected depth to the traditional tikka masala, a discovery that was nothing short of a game-changer.

    This dish became a hit in my household, a comfort meal with a hint of sophistication. Sharing the recipe with friends and family, I watched as it became a staple in their kitchens as well. Each time I serve this dish, it’s like revisiting a cherished memory, reminding me of the journey from kitchen mishaps to mastering a recipe that feels truly my own.

    What Makes This Version Special

    This version of Chicken Tikka Masala stands out for its distinct smoky flavor, achieved by charring red bell peppers over an open flame. This technique brings a subtle sweetness and complexity to the dish that pairs beautifully with the traditional spices. Additionally, blooming the cardamom and smoked paprika in butter before adding the garlic and jalapeno creates a deeply aromatic base that elevates the overall flavor profile. This recipe not only retains the comforting richness of the original dish but also introduces an exciting new layer of taste that makes it even more irresistible.

    Flavor Profile

    Imagine biting into a piece of tender chicken, enveloped in a rich, creamy sauce that bursts with smoky, aromatic flavors. The charred red bell peppers add a subtle sweet char that dances on your taste buds, while the layers of warm spices like cardamom, cumin, and cinnamon create a symphony of flavors. Each spoonful is a warm, comforting experience, with a hint of heat from the jalapeno, balanced perfectly by the creamy, tangy richness of the sauce.

    Ingredients

    • 1 cup yogurt
    • 2 tablespoons lemon juice
    • **2 teaspoons ground cumin**
    • 1 teaspoon ground cinnamon
    • 1 teaspoon cayenne pepper
    • 1 teaspoon ground black pepper
    • 1 tablespoon grated fresh ginger
    • **4 teaspoons salt**
    • 1 ½ pounds skinless, boneless chicken breasts, cut into bite-size pieces
    • **1 red bell pepper**
    • **2 tablespoons unsalted butter**
    • 4 cloves garlic, minced
    • 1 jalapeno pepper, finely chopped
    • **2 teaspoons smoked paprika**
    • 2 teaspoons ground cardamom
    • 1 (15-ounce) can tomato sauce
    • 1 cup heavy cream
    • Fresh cilantro, chopped, for garnish

    Instructions

    1. In a large bowl, combine the yogurt, lemon juice, 2 teaspoons of ground cumin, ground cinnamon, cayenne pepper, ground black pepper, grated fresh ginger, and 4 teaspoons of salt. Stir well, then add the chicken pieces. Ensure each piece is well-coated, cover, and refrigerate for at least 1 hour to marinate.
    2. Preheat a grill for high heat. Lightly oil the grill grate. Remove the chicken from the marinade and thread onto skewers, discarding the marinade. Grill the chicken until the juices run clear, approximately 5 minutes on each side. Set aside.
    3. Char the red bell pepper by placing it directly over an open flame or under a broiler. Turn occasionally until the skin is blackened all over. Once charred, place the bell pepper in a bowl and cover with a plate or plastic wrap. After cooling, peel, remove seeds, and dice the pepper.
    4. In a large heavy skillet over medium heat, melt the unsalted butter. Add the minced garlic and jalapeno, sautéing for about 1 minute until fragrant. Then, sprinkle in the smoked paprika and ground cardamom, allowing them to bloom in the butter for an additional minute.
    5. Stir in the canned tomato sauce and heavy cream, mixing well. Allow the sauce to simmer on low heat until it thickens slightly, about 20 minutes.
    6. Add the grilled chicken pieces and diced charred bell pepper to the sauce. Let it simmer together for 10 more minutes, allowing the flavors to meld.
    7. Transfer the Chicken Tikka Masala to a serving platter, garnishing generously with fresh cilantro. Serve hot and enjoy!

    Pro Tips from Meaghan’s Kitchen

    • For an even deeper smoky flavor, try using smoked salt instead of regular salt in the marinade.
    • Always let the chicken come to room temperature before grilling to ensure even cooking.
    • If you don’t have a grill, you can broil the chicken in the oven on a wire rack to achieve a similar charred effect.
    • Blooming spices in butter is crucial for unlocking their full flavor potential. Do not skip this step!
    • Use full-fat yogurt for the marinade; it not only tenderizes the chicken but also adds richness to the dish.

    Variations & Dietary Swaps

    • Vegetarian Version: Substitute chicken with paneer or tofu. Marinate and grill as directed for a delightful vegetarian twist.
    • Spice-It-Up: Double the jalapeno and cayenne for those who love their tikka masala with extra heat.
    • Kid-Friendly: Omit the jalapeno and reduce the cayenne pepper to make the dish milder for little taste buds.

    What to Serve With It

    This Smoky Cardamom-Infused Chicken Tikka Masala pairs beautifully with a chilled glass of mango lassi, providing a refreshing contrast to the rich, spicy flavors. Additionally, buttery naan bread or fragrant basmati rice makes for the perfect accompaniment, allowing you to savor every drop of the luscious sauce.

    Storage & Meal Prep

    To store leftovers, transfer the Chicken Tikka Masala to an airtight container and refrigerate for up to 3 days. For longer storage, freeze in a freezer-safe container for up to 3 months. To reheat, thaw overnight in the fridge if frozen, then warm gently in a saucepan over medium heat, stirring occasionally until heated through.

    FAQ

    Can I use chicken thighs instead of breasts?

    Absolutely! Chicken thighs are juicier and stay tender during grilling. Just adjust the grilling time as they might take a bit longer to cook through.

    Is it necessary to char the bell peppers?

    While not strictly necessary, charring the bell peppers adds a depth of flavor that truly enhances the dish. It’s worth the extra step for the smoky sweetness it imparts.

    Can I make this dish ahead of time?

    Yes, you can prepare the sauce and the grilled chicken a day in advance. Store them separately in the fridge, and combine them when you’re ready to serve, reheating gently on the stove.

    What if I don’t have an open flame for charring?

    No worries! You can achieve a similar effect by broiling the peppers in the oven, turning them occasionally until the skin is blackened.

    How can I make this dish dairy-free?

    For a dairy-free version, substitute the yogurt with a coconut or almond milk-based yogurt, and replace the heavy cream with coconut cream.

    Final Thoughts

    There’s something magical about transforming classic recipes into something uniquely yours, and this Smoky Cardamom-Infused Chicken Tikka Masala with Charred Peppers does just that. Whether you’re serving it for a family dinner or impressing guests at a dinner party, this dish is sure to delight with its rich, smoky flavors and aromatic spices. I’d love to hear how this recipe turns out for you! Feel free to leave a comment below, and don’t forget to share your kitchen adventures with my recipe on social media. Happy cooking, friends!

    Related update: Smoky Cardamom-Infused Chicken Tikka Masala with Charred Peppers

  • Exotic Cardamom-Poached Pears with Spicy Mango-Nectar Reduction and Pistachio Crumble | Made by Meaghan Moineau

    Exotic Cardamom-Poached Pears with Spicy Mango-Nectar Reduction and Pistachio Crumble | Made by Meaghan Moineau

    Exotic Cardamom-Poached Pears with Spicy Mango-Nectar Reduction and Pistachio Crumble

    Imagine the gentle sizzle of cardamom pods toasting in a pan, releasing their intoxicating fragrance, while a golden syrup simmers alongside. This isn’t your average poached pear recipe; it’s an aromatic journey that will transform your kitchen into a paradise of exotic flavors. Your senses are about to be enveloped in a dance of spice, sweetness, and crunch.

    Personal Story

    I still remember that crisp autumn afternoon when I stumbled upon this recipe’s inspiration. Wandering through a bustling farmer’s market, I was drawn to a vendor with an array of vibrant pears, their skins glistening under the soft sunlight. Intrigued, I picked up a Bartlett, its firm texture promising the perfect poach. As I walked away, a gentle breeze carried the scent of cardamom from a nearby spice stall, and an idea began to blossom.

    Back in my cozy kitchen, I set out to create a dish that would marry the traditional elegance of poached pears with the bold allure of global spices. My first attempt was a comedy of errors — too much cardamom, not enough sweetness. My kitchen smelled divine, but the taste didn’t quite match. Not one to be deterred, I tweaked and tested, learning from each delicious mistake.

    And then, finally, that magical balance was struck. The pears, poached to perfection, absorbed the spicy-sweet notes of the cardamom syrup, while a pistachio crumble provided an unexpected crunch. The addition of a spicy mango-nectar reduction elevated the dish to something truly special. Every time I make it now, I’m reminded of that market day and the joy of discovery it sparked.

    What Makes This Version Special

    This is no ordinary poached pear recipe. By infusing the poaching liquid with **cardamom pods**, we unlock a deep, aromatic flavor that dances on your palate. Toasting the pods before adding them to the syrup ensures that their oils fully release, giving the dish an unparalleled depth. But it doesn’t stop there. A **pistachio crumble**, scented with honey and vanilla bean seeds, adds a delightful texture that contrasts beautifully with the tender pears. This combination transforms a classic dessert into a culinary masterpiece, offering layers of flavor and texture in every bite.

    Flavor Profile

    When you bite into these exotic cardamom-poached pears, you’re greeted with a symphony of rich and aromatic flavors. The cardamom infuses the pears with a warm, spicy fragrance that lingers on the tongue, while the spicy mango-nectar reduction adds a sweet and slightly tart contrast. The **pistachio crumble** provides a satisfying crunch, with a fragrant hint of honey and vanilla. Every mouthful is a sensory journey, inviting you to savor the intricate dance of flavors and textures.

    Ingredients

    • 4 firm pears, peeled with stems intact
    • 1 tablespoon lemon juice
    • 1/2 cup sugar
    • 1 cup water
    • 1/2 cup mango pulp
    • 1/2 cup fruit juice (orange or apple)
    • 1 tablespoon orange rind
    • 1 dash cinnamon
    • **5 cardamom pods**
    • **1/2 cup pistachios**
    • **2 tablespoons honey**
    • **Seeds from 1 vanilla bean**
    • Mint leaves, for garnish

    Instructions

    1. Peel the pears and slice a small piece off the bottom so they can stand upright. Gently dab each pear with lemon juice to prevent browning and set aside.
    2. In a medium pot, combine the sugar and water. Heat over medium until the sugar dissolves, creating a simple syrup.
    3. In a dry pan, toast the **cardamom pods** over medium heat until they’re fragrant, about 2 minutes. Add the pods to the syrup.
    4. Add mango pulp, fruit juice, orange rind, and a dash of cinnamon to the syrup. Stir to combine.
    5. Submerge the pears in the syrup. Poach on low heat for 15 to 20 minutes, until the pears are tender and have taken on an amber hue from the mango syrup, ensuring they’re completely immersed.
    6. Meanwhile, create the **pistachio crumble** by pulsing pistachios, honey, and vanilla bean seeds in a food processor until coarse and crumbly.
    7. Once the pears are tender, remove them from the syrup and let them cool slightly on a plate.
    8. Garnish each pear with a mint sprig and drizzle with the spicy mango-nectar reduction. Sprinkle the pistachio crumble generously over the top.

    Pro Tips from Meaghan’s Kitchen

    • Choose pears that are firm to the touch for poaching; they hold their shape better during cooking.
    • Don’t skip toasting the cardamom pods. This step is key to releasing their full flavor potential.
    • If you prefer a less sweet dessert, reduce the sugar in the syrup by a tablespoon or two.
    • For an extra zing, consider adding a tiny pinch of saffron to the syrup during poaching.
    • Ensure the syrup fully covers the pears while poaching to ensure even flavor absorption.

    Variations & Dietary Swaps

    • For a gluten-free version, ensure your vanilla bean and other ingredients are certified gluten-free.
    • To spice it up, add a pinch of cayenne pepper to the pistachio crumble for a subtle heat.
    • For a kid-friendly version, serve the poached pears with a scoop of vanilla ice cream instead of the pistachio crumble.

    What to Serve With It

    This exquisite dessert pairs beautifully with a glass of sweet Riesling, offering a refreshing contrast to the rich flavors of the poached pears and pistachio crumble. Alternatively, a dollop of freshly whipped cream can complement the dish’s spicy and sweet notes.

    Storage & Meal Prep

    To store, place the poached pears in an airtight container with their syrup and refrigerate for up to 3 days. The pistachio crumble should be kept separately in an airtight container at room temperature. To reheat, gently warm the pears in their syrup on the stove until heated through. Avoid reheating the crumble to maintain its crunch.

    FAQ

    Can I use canned pears instead of fresh ones?

    While fresh pears provide the best texture and flavor, canned pears can be used in a pinch. Be sure to choose ones that are not overly sweetened and reduce the sugar in the syrup accordingly.

    What other nuts can I use for the crumble?

    If you don’t have pistachios, almonds or hazelnuts make excellent substitutes, offering a similar crunch and nutty flavor.

    Can I make this dish ahead of time?

    Yes, you can prepare the pears and syrup a day in advance and store them in the refrigerator. Just assemble with the pistachio crumble and mint before serving.

    How do I prevent the pears from browning?

    Dabbing the peeled pears with lemon juice, as mentioned in the recipe, will help prevent browning and maintain their fresh appearance.

    Is there a non-alcoholic pairing suggestion?

    A fragrant herbal tea, such as chamomile or jasmine, complements the exotic flavors of this dish beautifully.

    Final Thoughts

    I hope this recipe brings as much joy to your table as it does to mine. It’s a celebration of flavors and textures that invites you to savor each bite. I’d love to hear how your own culinary adventure unfolds — feel free to leave a comment below or share your experience on social media. Happy cooking!

    Related update: Exotic Cardamom-Poached Pears with Spicy Mango-Nectar Reduction and Pistachio Crumble

    Related update: Chai-Spiced Carrot Raisin Chocolate Chip Cookies

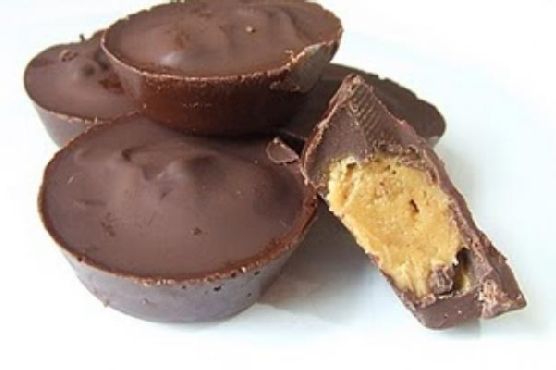
  • Spiced Double-Layered Peanut Butter Cups with Sea Salt Crystals | Made by Meaghan Moineau

    Spiced Double-Layered Peanut Butter Cups with Sea Salt Crystals | Made by Meaghan Moineau

    Spiced Double-Layered Peanut Butter Cups with Sea Salt Crystals

    Imagine biting into a velvety, rich peanut butter cup that whispers of exotic lands, where warm spices linger on your palate and a sprinkle of sea salt punctuates the sweetness. These are not your ordinary peanut butter cups; they are a journey of flavors, a little unexpected, and utterly irresistible.

    Personal Story

    I remember the first time I attempted to make my own peanut butter cups at home. It was a chilly autumn afternoon, the scent of falling leaves mingling with the warm aroma of melting chocolate in my tiny kitchen. My first batch was a humble attempt, delicious but missing a certain something — that extra oomph that would elevate them from good to unforgettable.

    One day, while rummaging through my spice cabinet, inspiration struck. A forgotten jar of ground cardamom called my name, a fragrant reminder of the chai lattes I adored. Could this be the secret ingredient my peanut butter cups had been waiting for? I decided to give it a whirl, adding a sprinkle of cinnamon for good measure. The result was magical: each bite carried a hint of warmth, a whisper of far-off places, and a balance of flavors that danced on my tongue.

    That day, I shared these spiced double-layered peanut butter cups with friends. The look of surprise and delight on their faces confirmed it — this was the version that deserved to be shared with the world. These treats became my signature dessert, the perfect ending to a cozy dinner or a sweet surprise at a gathering.

    What Makes This Version Special

    This version of peanut butter cups stands out because of its unique twist on a classic favorite. The addition of **ground cinnamon** and **ground cardamom** imbues the creamy filling with a warming spice profile that contrasts beautifully with the sweetness of the chocolate. The sprinkle of **flaky sea salt** on top offers a delightful contrast, balancing the sweetness perfectly and elevating the entire taste experience.

    Unlike standard recipes, this one isn’t just about sweetness; it’s about depth and complexity. The **vanilla extract** enhances the peanut butter’s natural nuttiness, while the careful blooming of spices in melted **non-hydrogenated shortening** with the chocolate enriches every bite. It’s a treat that feels both familiar and exotic, making it an exciting addition to any dessert repertoire.

    Flavor Profile

    Each bite of these spiced double-layered peanut butter cups offers a rich, creamy experience. The chocolate shell is smooth and melts in your mouth, while the spiced peanut butter filling surprises with its warm, aromatic blend of cinnamon and cardamom. The sea salt crystals on top provide a delightful crunch and a burst of salinity that heightens the sweetness and creaminess, making every mouthful a balanced and luxurious treat.

    Ingredients

    • 1 cup **Enjoy Life semi-sweet chocolate chips**
    • 2 tablespoons **non-hydrogenated shortening**
    • 3/4 cup creamy peanut butter
    • 2 tablespoons agave nectar
    • 1/4 teaspoon salt
    • 1/2 teaspoon **ground cinnamon**
    • 1/4 teaspoon **ground cardamom**
    • 1 teaspoon **vanilla extract**
    • 1 tablespoon **flaky sea salt**

    Instructions

    1. Begin by lining a mini muffin tin with paper liners or spraying it with a thin coat of cooking oil. This will ensure the peanut butter cups release easily once set.
    2. In a small bowl, mix together the creamy peanut butter, agave nectar, salt, and vanilla extract. Set this filling mixture aside.
    3. In a heatproof bowl, combine the chocolate chips and shortening. Place this bowl over a pot of simmering water, ensuring the bottom of the bowl does not touch the water. Stir continuously until the chocolate is completely melted and smooth.
    4. Sprinkle the ground cinnamon and cardamom over the melted chocolate and shortening. Allow the spices to bloom in the heat, stirring gently until they’re fully incorporated and aromatic.
    5. Spoon about one teaspoon of the melted chocolate mixture into each of the prepared muffin cups. Gently tap the tin on the counter to settle the chocolate evenly.
    6. Top the chocolate layer with a scant teaspoon of the peanut butter mixture, spreading it slightly to cover the chocolate.
    7. Finish by topping each cup with another teaspoon of the melted chocolate, ensuring the peanut butter layer is completely covered.
    8. Sprinkle a pinch of flaky sea salt crystals over each cup.
    9. Refrigerate the peanut butter cups for at least 30 minutes, or until they are fully set.
    10. Once set, store the spiced double-layered peanut butter cups in an airtight container in the refrigerator to maintain their firm texture.

    Pro Tips from Meaghan’s Kitchen

    • Use a double boiler technique for melting the chocolate to prevent scorching. If you don’t have one, a heatproof bowl over a pot works wonders.
    • For a smoother filling, make sure the peanut butter is at room temperature before mixing with other ingredients.
    • Don’t skip the step of blooming the spices in the chocolate. This simple technique maximizes their flavors, making a significant difference.
    • Adjust the amount of sea salt to your liking. A little goes a long way, but it can really enhance the overall taste.
    • If you’re short on time, these can also be set in the freezer for about 10-15 minutes to speed up the process.

    Variations & Dietary Swaps

    • Vegetarian Swap: Replace the non-hydrogenated shortening with coconut oil for a plant-based twist.
    • Spice-It-Up Version: Add a pinch of cayenne pepper to the chocolate for a subtle heat that complements the spices.
    • Kids-Friendly Version: Omit the spices for a classic peanut butter cup that kids will love, and use milk chocolate instead of semi-sweet.

    What to Serve With It

    These spiced double-layered peanut butter cups pair beautifully with a chai-spiced almond milk latte, enhancing the warming spices with each sip. For a refreshing contrast, a glass of cold almond milk also makes for a classic and satisfying combination. If you’re hosting a dinner party, consider serving them alongside a scoop of vanilla bean ice cream for an indulgent dessert duo.

    Storage & Meal Prep

    Once your peanut butter cups are set, store them in an airtight container in the refrigerator where they’ll stay fresh for up to two weeks. If you prefer to make a larger batch, they freeze beautifully — simply layer them between sheets of parchment paper in a freezer-safe container for up to three months. When you’re ready to enjoy them, just let them thaw in the fridge or at room temperature for a few minutes. To reheat and slightly soften, you can pop them in the microwave for about 10 seconds, but be careful not to overheat as this can alter the texture.

    FAQ

    Can I use other nut butters instead of peanut butter?

    Absolutely! Almond butter or cashew butter would be delicious alternatives that still pair well with the spices and chocolate.

    What if I don’t have agave nectar?

    No worries! You can substitute agave nectar with honey or maple syrup for a similar sweetness and consistency.

    How do I prevent the chocolate from seizing?

    Ensure that no water gets into the chocolate while melting. Keep the heat low and stir continuously for smooth results.

    Can I make these in a regular muffin tin?

    Yes, but you’ll need to adjust the amount of filling and chocolate layers accordingly. They may take a bit longer to set, too.

    Final Thoughts

    There’s something truly special about creating a dessert that’s both familiar and adventurous, and these spiced double-layered peanut butter cups with sea salt crystals achieve just that. I hope this recipe brings as much joy to your kitchen as it does to mine. I’d love to hear how yours turn out — feel free to leave a comment or share your own variations. Happy cooking, and may your culinary adventures be as sweet and exciting as these little treats!

    Related update: Spiced Double-Layered Peanut Butter Cups with Sea Salt Crystals

    Related update: Caramelized Banana Rum Ice Cream with Toasted Coconut and Spiced Maple Drizzle

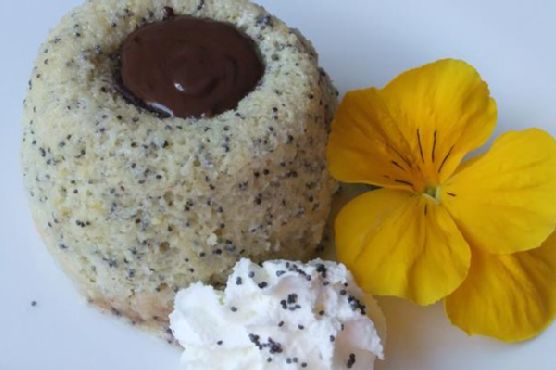
  • Zesty Lemon Poppy Seed Lava Cakes with Spiced Chocolate Ganache | Made by Meaghan Moineau

    Zesty Lemon Poppy Seed Lava Cakes with Spiced Chocolate Ganache | Made by Meaghan Moineau

    Zesty Lemon Poppy Seed Lava Cakes with Spiced Chocolate Ganache

    Imagine this: a warm, golden-brown cake with a delicate crust, cradling a pool of molten chocolate that spills onto your plate with the first forkful. The aroma of fresh lemon zest mingles with the warm, spiced scent of cardamom and ginger, creating a sensory symphony that dances around your kitchen. Welcome to the world of Zesty Lemon Poppy Seed Lava Cakes with Spiced Chocolate Ganache — a dessert that tantalizes both your taste buds and your imagination.

    Personal Story

    When I was a little girl, my grandmother would often bake her famous lemon poppy seed cake. It was a simple yet decadent treat, and I can still recall the scent wafting through the house, mingling with the laughter of family gatherings. That cake was a staple at our family celebrations, a beloved tradition that brought everyone together around the dining table.

    Fast forward to a few years ago when I found myself in Paris, walking through a bustling market. I stumbled upon a quaint patisserie where I experienced my first taste of molten chocolate lava cake. The intense richness of the chocolate was perfectly balanced by a hint of spice, an unexpected twist that left me dreaming of recreating the experience back home.

    Inspired by those memories, I embarked on a culinary journey to merge these two beloved desserts into one perfect fusion. The result? Zesty Lemon Poppy Seed Lava Cakes with Spiced Chocolate Ganache. Each bite is a nostalgic nod to my past, while the rich, spiced ganache adds a bold and contemporary twist.

    Not only does this recipe marry two beloved flavors, but it also embodies the essence of my culinary philosophy: to honor tradition while embracing innovation. This dish is a testament to the joys of experimentation and the magic that happens when you bring together unexpected ingredients.

    What Makes This Version Special

    This isn’t just any lemon poppy seed cake or molten chocolate lava cake — it’s a delightful fusion that brings together the best of both worlds. By incorporating a hint of cardamom and ginger into the chocolate ganache, this version creates a warm, spiced flavor that perfectly complements the zesty lemon cake. The result is a harmonious blend that elevates the traditional dessert to new heights, offering a sophisticated twist that’s both surprising and satisfying.

    Why settle for a standard recipe when you can indulge in a dessert that tantalizes the senses and surprises the palate? This version is not only a feast for your taste buds but also an experience that your guests will remember and rave about.

    Flavor Profile

    Imagine a bite that begins with the fresh, zingy pop of lemon and the nutty crunch of poppy seeds. As you reach the center, the warm, spiced chocolate ganache spills out in a silky cascade, enveloping your senses in a rich and aromatic embrace. The balance of sweetness and spice is delicate yet pronounced, creating a flavor experience that lingers beautifully on the palate.

    Every element of this dish works in harmony: the zesty brightness of the lemon cake, the subtle warmth of the spices, and the deep, rich chocolate — all coming together in a symphony of flavors that feels both nostalgic and novel.

    Ingredients

    • 1 cup all-purpose flour
    • 1 tablespoon grated lemon rind
    • 2 tablespoons poppy seeds
    • 3 large egg yolks
    • 3/4 cup granulated sugar
    • 1/2 cup unsalted butter, melted
    • 3 large egg whites
    • 6 ounces bittersweet chocolate, chopped
    • 1 teaspoon ground cardamom
    • 1/2 teaspoon ground ginger
    • 1 teaspoon vanilla extract
    • Pinch of salt

    Instructions

    1. Position a rack in the center of the oven and preheat to 400 degrees F. Lightly butter six 6-ounce ramekins, dust with sugar, and place on a baking sheet.
    2. In a small bowl, whisk together the flour, lemon rind, and poppy seeds; set aside.
    3. In the 4-1/2 quart bowl of a heavy-duty electric mixer using the wire whip attachment, whip the egg yolks and sugar until the mixture is pale and forms a ribbon when the whip is lifted. Add the vanilla extract and a pinch of salt for enhanced depth of flavor.
    4. Place the egg whites in a medium grease-free bowl and using a hand-held electric mixer, whip the whites to soft peaks.
    5. Fold the flour mixture into the yolk/sugar mixture, then add the melted butter and gently mix until combined. Fold in the egg whites until combined.
    6. In a small saucepan, melt the chocolate over low heat. Once melted, remove from heat and stir in the ground cardamom and ground ginger for a spiced kick.
    7. Fill each of the prepared ramekins 3/4 full with the cake batter and place a 1-ounce piece of the spiced chocolate ganache in the center of the batter.
    8. Bake for 15 minutes or until the cakes are firm yet have a slight jiggle in the center. Allow to cool on a wire rack for 5 minutes.
    9. Gently invert each cake onto a dessert plate and serve warm, letting the spiced chocolate ganache ooze out enticingly.

    Pro Tips from Meaghan’s Kitchen

    • For a more intense lemon flavor, consider adding a bit of freshly squeezed lemon juice to the batter.
    • Ensure your egg whites are at room temperature before whipping for maximum volume.
    • Gently fold the egg whites into the batter to maintain airiness — overmixing can result in dense cakes.
    • If you’re short on time, you can prepare the spiced chocolate ganache in advance and refrigerate it until needed.
    • Use a serrated knife to chop the chocolate; it will prevent the chocolate from flying everywhere.

    Variations & Dietary Swaps

    • For a gluten-free version, substitute the all-purpose flour with a gluten-free flour blend.
    • Spice it up by adding a pinch of cayenne pepper to the ganache for an extra kick.
    • Make it kid-friendly by omitting the spices and using milk chocolate instead of bittersweet chocolate.

    What to Serve With It

    These Zesty Lemon Poppy Seed Lava Cakes with Spiced Chocolate Ganache are a show-stopping dessert on their own, but for a truly indulgent experience, pair them with a chilled glass of sparkling Moscato. The effervescence and sweetness of the wine complement the rich flavors perfectly. Alternatively, a scoop of vanilla bean ice cream adds a creamy contrast to the warm, gooey center.

    Storage & Meal Prep

    These lava cakes are best enjoyed fresh from the oven, but if you have leftovers, you can store them in an airtight container in the refrigerator for up to 2 days. To reheat, place them in a preheated oven at 350 degrees F for about 5-7 minutes or until warmed through. If freezing, wrap each cake tightly in plastic wrap and then aluminum foil. They can be frozen for up to 1 month. Thaw in the refrigerator overnight before reheating.

    FAQ

    Can I use milk chocolate instead of bittersweet chocolate?

    Yes, you can substitute milk chocolate for a sweeter, creamier ganache. Keep in mind that it will be less intense than bittersweet chocolate.

    What if I don’t have cardamom at home?

    No worries! You can substitute with cinnamon, though the flavor profile will be slightly different. The warmth of cinnamon pairs well with ginger and chocolate.

    How do I know when the cakes are done baking?

    The cakes should be firm around the edges but have a slight jiggle in the center. This indicates that the chocolate core remains gooey.

    Can I make the batter ahead of time?

    It’s best to prepare and bake the batter immediately for optimal texture. However, you can prepare the dry and wet ingredients separately a day in advance and combine them right before baking.

    What if I don’t have ramekins?

    If you don’t have ramekins, you can use muffin tins as an alternative. Just be sure to adjust the baking time slightly as they may cook faster.

    Final Thoughts

    Thank you for joining me on this delicious journey of creating Zesty Lemon Poppy Seed Lava Cakes with Spiced Chocolate Ganache. I hope this recipe brings as much joy and warmth to your kitchen as it does to mine. I encourage you to experiment and adapt as you see fit — after all, cooking is as much about personal expression as it is about flavor. Don’t hesitate to share your culinary creations and experiences in the comments below. Happy baking, my dear friends!

    Related update: Zesty Lemon Poppy Seed Lava Cakes with Spiced Chocolate Ganache

    Related update: Decadent Honey-Roasted Peanut Butter Ice Cream with Dark Chocolate Shards

  • Decadent Spiced Chocolate Mousse in Hazelnut Chocolate Shells | Made by Meaghan Moineau

    Decadent Spiced Chocolate Mousse in Hazelnut Chocolate Shells | Made by Meaghan Moineau

    Decadent Spiced Chocolate Mousse in Hazelnut Chocolate Shells

    Imagine the moment you break through a perfectly crisp chocolate shell, revealing a velvety, spiced chocolate mousse that caresses your taste buds with warmth and richness. The nutty aroma of toasted hazelnuts mingles with the sweet scent of cinnamon and cardamom, creating an unforgettable dessert experience. This is not just any chocolate mousse — it’s an indulgence that elevates the classic French dessert to new heights.

    Personal Story

    My first encounter with chocolate mousse was a revelation. I was a teenager on a family trip to Paris, where I experienced the magic of French pâtisserie for the first time. The mousse was served in a quaint café tucked away in a cobblestone alley, and it was love at first bite. The lightness, the richness — it was a delicate balance I had never tasted before. Fast forward a few years, and my love for this dessert led me to experiment in my own kitchen, determined to recreate that Parisian magic.

    But, as many of us know, not all kitchen experiments go according to plan. My first attempt was more of a chocolate soup than a mousse. Undeterred, I delved into research, learning about the chemistry of chocolate and the art of creating that perfect airy texture. It was during one of these trials that I accidentally added a pinch of cinnamon and cardamom into the mix. What might have been a mishap turned into a serendipitous discovery.

    Infused with warming spices and encased in a delightful hazelnut chocolate shell, my version of the chocolate mousse was born. It was a hit at family gatherings and quickly became a requested favorite. The spices added warmth and depth, while the hazelnut shell provided a delightful crunch — a combination that was both nostalgic and refreshingly new.

    What Makes This Version Special

    This isn’t your typical chocolate mousse. Infused with warming spices and encased in a delightful hazelnut chocolate shell, this mousse elevates the classic dessert with a nutty and aromatic touch. By blooming spices in melted butter, we release their essential oils, enhancing the depth of flavor. The crunchy hazelnut shell provides a delightful contrast to the rich, creamy mousse inside. It’s a dessert that’s both sophisticated and approachable — a tribute to the beloved classic with a modern twist.

    Flavor Profile

    The first thing you’ll notice with this decadent spiced chocolate mousse is the aroma — the hazelnuts toasted to perfection, mingling with the sweet, exotic scents of cinnamon and cardamom. Upon tasting, the mousse reveals its rich, chocolatey core, elevated by the subtle warmth of the spices. The nutty crunch of the hazelnut shell adds texture, while the chocolate melts luxuriously on the tongue. It’s a symphony of flavors and textures, each bite more indulgent than the last.

    Ingredients

    • 1 3/4 cups whipping cream, divided
    • 8 oz quality semi-sweet chocolate chips
    • 1/4 cup strong coffee
    • 2 tbsp dark rum
    • 2 tbsp butter
    • 1 tsp gelatin
    • 1/2 tsp ground cinnamon
    • 1/4 tsp ground cardamom
    • 1 tsp vanilla extract
    • 1/2 cup hazelnuts
    • 6 oz extra semi-sweet chocolate chips for shell

    Instructions

    1. Chill 1 1/2 cups of whipping cream in the refrigerator while placing a metal mixing bowl and mixer beaters in the freezer.
    2. In a dry skillet, toast the hazelnuts over medium heat until aromatic, about 5-7 minutes. Allow them to cool slightly before grinding them finely in a food processor.
    3. In a double boiler, combine the 8 oz of chocolate chips, coffee, rum, and butter. Melt over barely simmering water, stirring constantly, until smooth. Remove from heat while a couple of chunks are still visible to prevent scorching.
    4. Bloom the spices by melting butter in a small pan over low heat. Add the ground cinnamon and cardamom, stirring until fragrant, then mix this into the melted chocolate. Allow the mixture to cool to just above body temperature, stirring occasionally.
    5. Pour the remaining 1/4 cup of whipping cream into a metal measuring cup and sprinkle in the gelatin. Let it bloom for 10 minutes, then carefully heat by swirling the cup over a low flame until the gelatin dissolves. Avoid boiling.
    6. Stir the gelatin mixture into the cooled chocolate, then set aside.
    7. Beat the chilled cream in the prepared mixing bowl to medium peaks. Stir 1/4 of the whipped cream into the chocolate mixture to lighten it, then fold in the remaining whipped cream in two additions. It’s okay if there are streaks of whipped cream; do not overwork the mousse.
    8. For the chocolate shells, melt the extra semi-sweet chocolate chips over a double boiler, then stir in the finely ground hazelnuts. Use this mixture to coat the inside of molds or bowls, creating a shell. Allow to set.
    9. Spoon the mousse into the prepared chocolate shells and chill for at least 1 hour before serving. Garnish with fruit if desired.

    Pro Tips from Meaghan’s Kitchen

    • For ultra-smooth mousse, ensure your chocolate mixture is just above body temperature before adding the gelatin. If it’s too hot, it can deflate the whipped cream.
    • Toasting the hazelnuts is key. It intensifies their flavor and adds a wonderful depth to the chocolate shell.
    • When folding the whipped cream into the chocolate, use a gentle hand. This step requires patience to maintain the mousse’s airy texture.
    • If you don’t have a double boiler, a heatproof bowl over a pot of simmering water works just as well. Just make sure the bottom of the bowl doesn’t touch the water.
    • For a glossy finish on your chocolate shells, temper the chocolate by cooling it to 82°F after melting, then gently reheating it to 88°F before forming the shells.

    Variations & Dietary Swaps

    • Vegetarian Version: Substitute the gelatin with agar-agar in equal amounts to make this dessert vegetarian-friendly.
    • Spice-it-Up: For an extra kick, add a pinch of cayenne pepper to the spice mix for a chocolate mousse with a hint of heat.
    • Kids-Friendly Version: Omit the dark rum and substitute the coffee with milk or a milk alternative for a non-caffeinated version.

    What to Serve With It

    This decadent spiced chocolate mousse shines on its own, but it becomes an elevated experience when paired with a glass of tawny port or a shot of espresso. The port’s sweet, nutty flavors complement the mousse perfectly, while the espresso provides a delightful contrast to the dessert’s richness.

    Storage & Meal Prep

    Store any leftover mousse in the refrigerator, covered with plastic wrap to prevent the surface from drying out. It will keep for up to three days. If you wish to freeze it, transfer the mousse into an airtight container and freeze for up to a month. To enjoy, let the mousse thaw in the refrigerator overnight. When reheating the chocolate shells, do so gently over a double boiler to maintain their structure.

    FAQ

    Can I use milk chocolate instead of semi-sweet chocolate?

    Yes, but keep in mind that milk chocolate is sweeter and will alter the flavor profile of the mousse. You might want to reduce the amount of added sugar in other components to balance the sweetness.

    How can I tell if the mousse is properly set?

    When properly set, the mousse should hold its shape when scooped and have a light, airy texture. If it feels too liquid, it may need more chilling time.

    What if my chocolate seizes while melting?

    If your chocolate seizes, add a teaspoon of warm water at a time and stir gently until it becomes smooth again. Ensure that your equipment is completely dry before starting to avoid this issue.

    Can I make this mousse without alcohol?

    Absolutely! Simply omit the dark rum and replace it with additional coffee or a coffee-flavored syrup for added depth without the alcohol content.

    Are there alternatives to hazelnuts for the shell?

    Yes, you can use almonds or pecans as a substitute, though each will impart a slightly different flavor and texture to the shell.

    Final Thoughts

    As you savor this decadent spiced chocolate mousse encased in a hazelnut chocolate shell, I hope it brings you a moment of pure indulgence and joy. Whether you’re crafting it for a special occasion or enjoying it as a luxurious treat for yourself, this mousse is all about the experience. I invite you to share your creations and stories in the comments below — let’s keep the conversation (and the chocolate) flowing!

    Related update: Decadent Spiced Chocolate Mousse in Hazelnut Chocolate Shells

    Related update: Gourmet Candy Cane Cookies with Dark Chocolate Drizzle

  • Mediterranean Citrus-Infused Semolina Cake with Spiced Honey Nuts | Made by Meaghan Moineau

    Mediterranean Citrus-Infused Semolina Cake with Spiced Honey Nuts | Made by Meaghan Moineau

    Mediterranean Citrus-Infused Semolina Cake with Spiced Honey Nuts

    Picture this: A sunlit kitchen filled with the intoxicating aroma of citrus and spices, where a golden-brown cake cools on the counter, glistening with a glossy syrup that catches the light just so. This isn’t just any cake; it’s a Mediterranean Citrus-Infused Semolina Cake with Spiced Honey Nuts, a dessert that promises to transport your taste buds straight to a sun-drenched Mediterranean coast.

    Personal Story

    My love affair with semolina cake began on a spontaneous trip to a small Mediterranean village. I was wandering through a bustling food market, where the air was thick with the scent of fresh spices and citrus. A local vendor, with a warm smile and hands that moved with the grace of a seasoned cook, offered me a slice of what I’d later come to know as basbousa—a semolina cake soaked in syrup. It was love at first bite.

    The texture was unlike anything I’d ever tasted — dense yet tender, with a syrup that was both sweet and subtly spiced. I knew then that I had to bring a piece of this culinary magic back home. Of course, my first few attempts in my kitchen were far from perfect. There was a memorable mishap where I mistook salt for sugar, resulting in a cake that was, let’s say, uniquely inedible.

    But with each attempt, I learned something new. I started experimenting with flavors, wanting to incorporate my own twist on the classic. After many trials, I finally landed on a version that felt like me. My Mediterranean Citrus-Infused Semolina Cake with Spiced Honey Nuts was born, and with it, a little piece of my heart.

    Now, whenever I make this cake, I remember that sunlit market and the taste of adventure. It’s a reminder of how food can connect us to places and moments, and how a single slice of cake can hold a world of memories.

    What Makes This Version Special

    This is not your average semolina cake. The magic starts with the cake itself, which is infused with a fragrant blend of cardamom and rose water. These ingredients add a luxurious, aromatic depth that elevates the entire dessert. But the true star? The spiced honey nut syrup. Featuring a hint of cinnamon, it provides a warm, aromatic finish that complements the citrus-forward flavors perfectly.

    Unlike traditional versions, which can be overly sweet, this cake achieves a harmonious balance of flavors. The syrup is not just a sweetener but a complex layer of taste that brings out the best in the semolina’s nutty notes. Trust me, once you’ve had a taste of this version, there’s no going back to the standard recipe.

    Flavor Profile

    The flavor journey begins with a burst of citrus — a vibrant combination of lemon and orange zest that dances on your palate. As you savor each bite, the subtle floral notes of rose water emerge, adding an ethereal quality to the cake. Finally, the warm, spiced finish from the honey nut syrup, infused with a hint of cinnamon, wraps everything in a comforting embrace. It’s a taste experience that’s both refreshing and indulgent.

    Ingredients

    • 1 cup sugar
    • 4 eggs
    • 1 cup yoghurt
    • Zest of 1 lemon
    • Zest of 1 orange
    • 1 cup almond meal
    • 1 cup semolina
    • 2 teaspoons baking powder
    • 1/2 cup **olive oil**
    • 1 teaspoon **cardamom**
    • 1 teaspoon **rose water**
    • 1/2 cup almonds
    • 1/2 cup raisins
    • 1/2 cup dry cranberries
    • 1 cup **honey**
    • Juice of 1 orange
    • 1 **cinnamon stick**
    • 1/4 cup pistachios

    Instructions

    1. Preheat your oven to 180°C (160°C fan). Prepare a 20-23cm round baking tin by lining it with baking paper or using a silicone mold.
    2. In a small pan, heat the olive oil over low heat. Add the **cardamom** and allow it to bloom for about 2 minutes, stirring gently to release its aroma. Set aside to cool slightly.
    3. In a mixer, whisk the eggs and sugar until the mixture is thick and pale in color, about 5 minutes.
    4. Add the yoghurt, lemon zest, and orange zest to the egg mixture. Mix until well combined.
    5. Gradually add the almond meal, semolina, and baking powder. Mix on low speed until just combined.
    6. Incorporate the cardamom-infused olive oil and rose water into the batter. Mix until smooth.
    7. Pour the mixture into the prepared baking tin. Bake for 35 minutes or until the top is golden-brown and a skewer inserted into the center comes out clean.
    8. While the cake bakes, prepare the syrup: In a pot, combine the honey, orange juice, almonds, raisins, cranberries, and the **cinnamon stick**. Bring to a boil, then reduce to a simmer for 1-2 minutes to enhance the aroma.
    9. Remove the cake from the oven and pierce all over with a skewer. Pour the warm syrup evenly over the cake. Allow it to soak and cool slightly before serving.
    10. Garnish with pistachios just before serving for a touch of color and crunch.

    Pro Tips from Meaghan’s Kitchen

    • Use fresh citrus for zesting — it makes all the difference in flavor and aroma.
    • Blooming spices in oil intensifies their flavor, so don’t skip this step!
    • If your syrup is too thick, thin it with a tablespoon of water while simmering.
    • For a moist cake, ensure your yoghurt is at room temperature before mixing.
    • Don’t overmix the batter once dry ingredients are added, to keep the cake tender.

    Variations & Dietary Swaps

    • Gluten-free version: Substitute semolina with gluten-free flour blend and ensure all other ingredients are certified gluten-free.
    • Vegan option: Replace eggs with a flaxseed mixture (1 tablespoon flaxseed meal + 2.5 tablespoons water per egg) and yoghurt with coconut yoghurt.
    • Spice-it-up version: Add a pinch of saffron to the syrup for an extra layer of flavor complexity.

    What to Serve With It

    This Mediterranean Citrus-Infused Semolina Cake pairs beautifully with a cup of freshly brewed mint tea, enhancing the cake’s aromatic notes. If you’re feeling a bit more indulgent, a glass of sweet dessert wine like Moscato complements the citrus and honey flavors exquisitely. For a complete Mediterranean experience, consider serving it alongside a platter of fresh fruits and nuts.

    Storage & Meal Prep

    To store, wrap the cake tightly in plastic wrap and keep it in the fridge for up to 5 days. For longer storage, slice the cake and freeze the pieces in an airtight container for up to 2 months. To reheat, thaw the slices in the fridge overnight and warm in a low oven for a few minutes or enjoy at room temperature.

    FAQ

    Can I make the cake ahead of time?

    Absolutely! This cake actually tastes better the next day as the flavors meld together. Make it a day ahead and store it in the fridge.

    What other nuts can I use?

    If you don’t have almonds or pistachios, walnuts or pecans are great alternatives. They add a wonderful texture and flavor.

    Can I use bottled lemon and orange juice?

    Fresh is best for zest and juice in this recipe, as it provides the most vibrant flavor. But in a pinch, bottled can work for the syrup component.

    How do I know when the syrup is ready?

    You’ll know it’s ready when it has thickened slightly and coats the back of a spoon. The aroma should also be warm and spiced from the cinnamon.

    What if my cake turns out dry?

    If the cake seems dry, it might have been overbaked. Ensure it’s only baked until a skewer comes out clean. Adding more syrup can help salvage moisture.

    Final Thoughts

    There you have it, my dear baking companions — a cake that’s not just a dessert but a journey through flavors and memories. I hope you enjoy making and eating this Mediterranean Citrus-Infused Semolina Cake with Spiced Honey Nuts as much as I do. If you give it a try, I’d love to hear how it turns out or any personal twists you add. Please share your thoughts in the comments, or better yet, snap a picture and tag me in your delicious creations. Happy baking!

    Related update: Mediterranean Citrus-Infused Semolina Cake with Spiced Honey Nuts

    Related update: Decadent Dark Chocolate Raspberry S’mores Bars with Salted Caramel Drizzle

  • Meyer Lemon Ricotta Pancakes with Vanilla-Infused Blackberry-Cardamom Compote | Made by Meaghan Moineau

    Meyer Lemon Ricotta Pancakes with Vanilla-Infused Blackberry-Cardamom Compote | Made by Meaghan Moineau

    Meyer Lemon Ricotta Pancakes with Vanilla-Infused Blackberry-Cardamom Compote

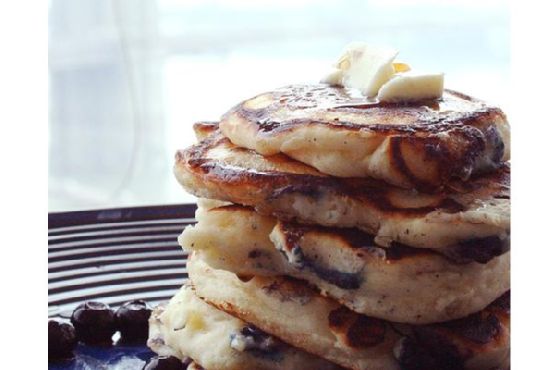
    There’s something undeniably magical about the moment when a stack of pancakes hits the table, their golden-brown edges inviting you to dive in. Picture this: delicate, fluffy Meyer lemon ricotta pancakes crowned with a luscious, aromatic blackberry-cardamom compote. The sweet fragrance of vanilla mingles with the tartness of blackberries, creating a breakfast experience you’ll want to savor slowly.

    Personal Story

    I still remember the first time I tasted pancakes that transcended the usual weekend breakfast fare. It was at a quaint little café tucked away in a bustling city, where the chef had a knack for turning simple dishes into culinary works of art. There, amidst the comforting hum of conversations and the intoxicating scent of fresh coffee, I discovered a delightful twist on the classic pancake.

    This discovery inspired me to experiment in my own kitchen, eager to capture that enchanting blend of flavors and make it my own. One Saturday morning, armed with a bowl of fresh blackberries and a few humble pantry staples, I set out to recreate the magic. A few attempts and a couple of kitchen mishaps later — including one memorable incident involving a runaway vanilla bean — I finally perfected my recipe.

    As I whisked together Meyer lemon zest and ricotta, I realized I was crafting something truly special. The tangy brightness of the lemon melded beautifully with the creamy richness of the ricotta. It was the blackberry compote, however, that truly elevated the dish. Infusing it with a hint of cardamom and vanilla gave it an exotic flair that was both unexpected and delightful.

    Now, these Meyer lemon ricotta pancakes with vanilla-infused blackberry-cardamom compote have become a weekend staple in my home, a dish I love sharing with friends and family. They never fail to impress, and I’m thrilled to share the recipe with you today.

    What Makes This Version Special

    This recipe takes traditional pancakes and gives them a luxurious upgrade. By introducing a hint of cardamom and vanilla to the blackberry compote, we’re elevating the classic flavors to a new level. The fragrant and exotic notes of cardamom pair beautifully with the sweet, juicy blackberries, while the vanilla adds a subtle floral depth that harmonizes with the Meyer lemon’s bright acidity.

    What sets these Meyer lemon ricotta pancakes apart is their ability to transform a simple breakfast into an indulgent experience. The richness of ricotta creates an incredibly tender and moist pancake, while the Meyer lemon zest and juice add a refreshing zing. This version is better than the standard recipe because it combines unexpected flavors in a way that is both comforting and sophisticated.

    Flavor Profile

    Imagine biting into a pancake that’s fruity and creamy, with subtle floral notes and a hint of warm spice. The Meyer lemon ricotta pancakes offer a delicate balance of sweet and tangy, while the blackberry-compote enhances each mouthful with its aromatic infusion of cardamom and vanilla. The browned butter in the batter adds a nutty richness that rounds out the flavor profile, making every bite a taste sensation to remember.

    Ingredients

    • 1 cup all-purpose flour
    • 1 cup fresh blackberries
    • **4 tablespoons butter**
    • 2 large eggs, separated
    • 2 tablespoons granulated sugar
    • Zest of 1 Meyer lemon
    • 2 tablespoons Meyer lemon juice
    • 1 cup ricotta
    • Pinch of salt
    • 2 tablespoons water
    • **1 vanilla bean, split**
    • **1/4 teaspoon ground cardamom**
    • Pure maple syrup, for serving

    Instructions

    1. In a small saucepan over medium heat, add the fresh blackberries, Meyer lemon zest, granulated sugar, and water. Stir to combine.
    2. Add the split vanilla bean and a pinch of ground cardamom to the saucepan. Continue cooking until the water starts to thicken and the berries lose their shape, stirring occasionally, about 10 minutes. Remove from heat and set aside.
    3. In a medium bowl, whisk together the ricotta cheese, Meyer lemon zest, Meyer lemon juice, sugar, and egg yolks until smooth.
    4. Gradually stir in the all-purpose flour until just combined, being careful not to overmix.
    5. Using a stand mixer or hand mixer, beat the egg whites with a pinch of salt until stiff peaks form.
    6. Gently fold a large spoonful of the egg whites into the batter to lighten it. Then, fold in half of the remaining egg whites, slowly turning the bowl while you fold. It’s fine if there are some white streaks left in the batter. Fold in the remaining egg whites.
    7. Set the pancake batter aside and heat a griddle or non-stick pan over medium heat. Add a tablespoon of browned butter to the pre-heated pan, swirling to coat.
    8. Pour about 1/4 cup of batter onto the hot pan, spreading it slightly. Cook until bubbles start to form on the surface and the edges begin to brown slightly, about 2-3 minutes.
    9. Flip the pancakes and cook for an additional minute until golden-brown. Remove and keep warm while you repeat with the remaining batter.
    10. Serve the pancakes stacked high, topped with the vanilla-infused blackberry-cardamom compote and a drizzle of pure maple syrup.

    Pro Tips from Meaghan’s Kitchen

    • Use room temperature ingredients for the batter to ensure a smooth, lump-free mixture.
    • Brown the butter carefully, watching closely as it turns golden and releases a nutty aroma. This adds depth to the pancakes.
    • Don’t overmix the pancake batter; a few lumps are perfectly fine and will result in fluffier pancakes.
    • Keep the pancakes warm in a low oven (around 200°F) if you’re making a large batch.
    • If you don’t have a vanilla bean, substitute with 1 teaspoon of pure vanilla extract added to the compote after cooking.

    Variations & Dietary Swaps

    • Vegetarian Swap: These pancakes are already vegetarian-friendly, but for a vegan version, substitute the ricotta with a vegan option and use flax eggs instead of regular eggs.
    • Spice-It-Up Version: Add a pinch of cinnamon to the compote for an extra layer of warmth and spice.
    • Kids-Friendly Version: Skip the cardamom and vanilla for a simpler blackberry compote. Add some chocolate chips to the pancake batter for a fun twist.

    What to Serve With It

    These Meyer lemon ricotta pancakes pair beautifully with a lavender-infused latte, providing a calming floral note to complement the citrusy and fruity flavors. For a brunch-worthy treat, serve them with a chilled glass of prosecco, adding a touch of sparkle to your leisurely morning.

    Storage & Meal Prep

    Store any leftover pancakes in an airtight container in the refrigerator for up to 3 days. To freeze, layer them between sheets of parchment paper and place in a freezer-safe bag for up to 2 months. Reheat in a toaster or warm oven until heated through. The compote can be stored separately in the fridge for up to a week and reheated gently on the stove before serving.

    FAQ

    Can I use frozen blackberries for the compote?

    Yes, you can use frozen blackberries. Just be sure to thaw them first and drain any excess liquid before using.

    What if I can’t find Meyer lemons?

    If Meyer lemons are unavailable, you can substitute with regular lemons. The flavor will be a bit more tart, so you might want to add a touch more sugar to balance it out.

    How do I know when the pancakes are ready to flip?

    Look for bubbles forming on the surface of the pancakes and the edges starting to look set and slightly browned. That’s your cue to flip!

    Can I make the batter ahead of time?

    It’s best to make the batter just before cooking to keep the pancakes light and fluffy. If you need to prep ahead, you can mix the dry and wet ingredients separately and combine them right before cooking.

    What can I use instead of ricotta?

    If you don’t have ricotta, you can try cottage cheese or mascarpone for a similar creamy texture, though the flavor will vary slightly.

    Final Thoughts

    I hope these Meyer lemon ricotta pancakes with vanilla-infused blackberry-cardamom compote bring as much joy to your kitchen as they do to mine. Whether you’re cooking for a special occasion or just want to elevate your weekend breakfast, this recipe is sure to impress. I’d love to hear how your pancakes turn out and any personal twists you might add — feel free to share your thoughts and photos in the comments below!

    Related update: Meyer Lemon Ricotta Pancakes with Vanilla-Infused Blackberry-Cardamom Compote

    Related update: Truffle-Infused Poached Eggs with Spinach, Tomato, and Crispy Prosciutto