Tag: Baked

  • Bourbon-Infused Mini Cherry Pies with Pecan Streusel | Made by Meaghan Moineau

    Bourbon-Infused Mini Cherry Pies with Pecan Streusel | Made by Meaghan Moineau

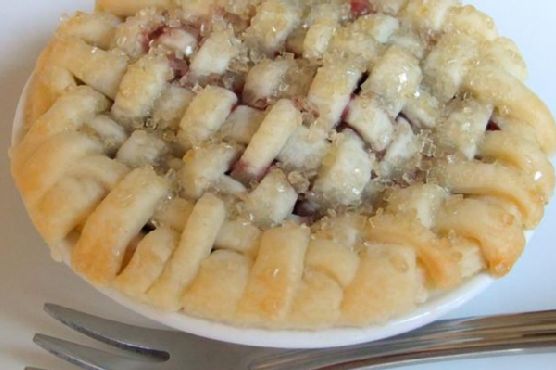
    Bourbon-Infused Mini Cherry Pies with Pecan Streusel

    Imagine a warm summer evening, the air thick with the fragrance of ripe cherries mingling with a hint of vanilla and the subtle allure of bourbon. These mini cherry pies, crowned with a delightful pecan streusel, promise to be the star of any dessert table. Each bite offers a rich tapestry of flavors, leaving you longing for more.

    My Cherry Pie Love Affair

    There’s something about cherry pies that always takes me back to my childhood. Growing up, summer weekends meant visits to my grandmother’s house. Her kitchen was a sanctuary filled with the sweet and tangy aroma of freshly baked pies cooling by the window. I remember her laughing as I tried to sneak a cherry from the bowl while she wasn’t looking, always failing to escape her watchful eye. Those moments sparked my love for baking and the magic of turning simple ingredients into something extraordinary.

    Fast forward a few years, and I’m in my own kitchen, trying to recreate those memories. I soon discovered that while I could replicate the basics, I had a desire to make the recipe my own. I wanted to elevate the classic cherry pie with a twist that would resonate with my adult palate. After a few kitchen experiments, I found that a splash of bourbon in the filling, paired with a crunchy pecan streusel, brought out an intriguing depth and complexity to the pies.

    However, it wasn’t always smooth sailing. There was a time I miscalculated the amount of bourbon, and let’s just say the pies were more suited for a cocktail party than a family gathering! But with each attempt, I fine-tuned the recipe until it became a cherished favorite that I’m thrilled to share with you today.

    What Makes This Version Special

    Our Bourbon-Infused Mini Cherry Pies with Pecan Streusel are not your grandmother’s cherry pies — they’re a bold, grown-up take on the classic. The addition of bourbon adds a smoky undertone that beautifully complements the tart cherries. Meanwhile, the pecan streusel topping provides a delightful crunch that contrasts with the soft, juicy filling. This unique twist transforms a traditional dessert into an unforgettable treat that’s perfect for any occasion.

    Flavor Profile

    These mini pies offer a symphony of flavors and textures that dance on your taste buds. The filling is rich and fruity, with the cherries providing a natural sweetness that’s enhanced by the hint of smokiness from the bourbon. The pecan streusel topping adds a satisfying crunch and a nutty warmth, while the buttery crust holds it all together. Each bite is a complex, satisfying experience that leaves a lingering taste of nostalgia and innovation.

    Ingredients

    • 2 cups fresh or frozen sour cherries, pitted
    • **2 tablespoons bourbon**
    • 1/4 cup granulated sugar
    • 1 tablespoon cornstarch
    • 1 tablespoon fresh lemon juice
    • 1 teaspoon vanilla extract
    • 1 1/2 cups all-purpose flour
    • 1/4 cup **brown sugar**
    • 1/2 teaspoon ground cinnamon
    • 1/2 cup **chopped pecans**
    • 1/2 cup (1 stick) unsalted butter, cold and cut into cubes
    • 2/3 cup cold water
    • 1 tablespoon heavy whipping cream
    • 2 teaspoons turbinado sugar
    • 1/2 teaspoon salt

    Instructions

    1. Start by preparing the pie crust. In a food processor, combine flour and salt. Add butter to the mixture, pulsing until the mixture resembles coarse crumbs, approximately 30 seconds.
    2. With the processor running, gradually add 2/3 cup cold water in a slow, steady stream through the lid opening until the mixture forms a ball. Divide the dough into two disks, wrap in plastic wrap, and refrigerate for 1 hour.
    3. Preheat your oven to 350°F (175°C). On a lightly floured surface, roll one pastry disk to a 1/8-inch thickness. Fit the dough into 12 (2-1/2-inch) mini pie plates. Trim the dough around the edges and freeze until firm, about 10 minutes.
    4. Prick the bottoms and sides of the dough with a fork and bake until golden, about 6 to 8 minutes. Remove from the oven and let cool.
    5. In a small bowl, mix cornstarch with 2 tablespoons cold water until blended. In a large saucepan, combine cherries, bourbon, cornstarch mixture, sugar, and salt. Cook over medium heat until cherries are soft and the mixture is thickened. Stir in lemon juice and vanilla extract, then set aside to cool slightly.
    6. For the pecan streusel topping, mix chopped pecans, brown sugar, flour, and cinnamon in a bowl. Make sure it’s well-combined and set aside.
    7. Roll the remaining pastry disk to a 1/8-inch thickness. Cut into thin strips for lattice topping. Weave strips over each pie to create a lattice pattern. Carefully transfer lattice tops to prepared pie plates and seal the edges.
    8. Brush the tops and edges with cream and sprinkle each pie with turbinado sugar.
    9. Bake until the crusts are golden and the streusel is crisp, about 18 to 24 minutes. Serve warm, perhaps with a scoop of bourbon vanilla ice cream for the perfect finishing touch.

    Pro Tips from Meaghan’s Kitchen

    • For the best crust, keep your butter and water as cold as possible. This ensures a flaky, tender pastry.
    • When weaving your lattice, use a ruler to keep your strips even and straight for a professional-looking finish.
    • If using frozen cherries, thaw and drain them well to prevent a soggy filling.
    • Enhance the streusel by toasting the pecans before adding them for a deeper nutty flavor.
    • Let the pies cool slightly before serving to allow the filling to set, making slicing easier.

    Variations & Dietary Swaps

    • Vegetarian Swap: The original recipe is vegetarian, but ensure your bourbon is vegetarian-friendly by checking for any animal-derived clarifiers.
    • Gluten-Free Version: Use a gluten-free flour blend for the crust and streusel topping to make these pies celiac-friendly.
    • Kid-Friendly Version: Skip the bourbon and add an extra tablespoon of vanilla extract to keep the flavor rich without the alcohol.

    What to Serve With It

    These mini cherry pies are a delight on their own, but pairing them with a glass of chilled dessert wine elevates the experience. Alternatively, a scoop of bourbon vanilla ice cream perfectly complements the smoky undertones of the pie, creating a harmonious dessert duo that will undoubtedly impress your guests.

    Storage & Meal Prep

    To store leftovers, cover the pies with plastic wrap or place them in an airtight container in the refrigerator for up to 3 days. For longer storage, freeze the baked pies in a single layer on a baking sheet, then transfer them to a freezer-safe container for up to 1 month. To reheat, place frozen pies in a preheated 350°F (175°C) oven for about 10-15 minutes or until warmed through.

    FAQ

    Can I make the pie dough ahead of time?

    Absolutely! The dough can be made and refrigerated for up to two days in advance. Just be sure to let it sit at room temperature for about 10 minutes before rolling it out.

    What if I don’t have mini pie plates?

    No mini pie plates? No problem. You can use a muffin tin as an alternative. Simply adjust the dough circle size to fit each muffin cup.

    Can I use canned cherries instead of fresh or frozen?

    Yes, canned cherries can work. Just make sure to drain them well and adjust the sugar in the filling since canned cherries are often in syrup.

    Is there a non-alcoholic substitute for bourbon?

    If you’d prefer to avoid alcohol, replace the bourbon with an equal amount of apple juice or cherry juice for a similar depth of flavor without the booze.

    How do I prevent my pie filling from being too runny?

    Ensure your cornstarch mixture is well combined and cooked until thick before adding it to the pie. If your cherries are particularly juicy, you may need to increase the cornstarch slightly.

    Final Thoughts

    These Bourbon-Infused Mini Cherry Pies with Pecan Streusel are a testament to how a classic can be reimagined with a touch of creativity and a dash of bold flavors. I hope this recipe brings as much joy to your table as it has to mine. I’d love to hear about your baking adventures and any tweaks you make to the recipe. Please feel free to share your experiences or any questions in the comments below. Happy baking, my friends!

    Related update: Bourbon-Infused Mini Cherry Pies with Pecan Streusel

    Related update: Decadent Caramel Bourbon Apple Brown Betty
  • Classic Greek Moussaka | Made by Meaghan Moineau

    Classic Greek Moussaka

    There’s something inherently comforting about a dish that has been passed down through generations, and Classic Greek Moussaka is no exception. I still remember the first time I tasted my grandmother’s moussaka as a child during a family reunion in her sunlit kitchen overlooking the Aegean Sea. The aroma of cinnamon and nutmeg filled the room, and the flavors were like nothing I had experienced before. Now, every time I prepare this dish, it brings back those cherished memories, and I’m delighted to share this recipe with you.

    Why You’ll Love It

    This Classic Greek Moussaka is a hearty and satisfying meal that combines layers of savory eggplants, rich meat sauce, and creamy béchamel topping. It’s perfect for family gatherings or a special dinner. The combination of flavors and textures will transport you to a sun-drenched Greek island, even if just for a meal. Whether you’re a fan of Greek cuisine or trying it for the first time, this dish is sure to become a beloved favorite.

    Ingredients

    • Eggplants
    • Sea salt
    • Olive oil
    • Onions
    • Lean beef
    • Canned tomatoes
    • Garlic
    • Ground cinnamon
    • Ground allspice
    • White salt and ground pepper
    • Tomato paste
    • Butter
    • Flour
    • Warm milk
    • Ground nutmeg
    • Egg yolks
    • Feta cheese
    • Bread crumbs

    Instructions

    1. Sprinkle the eggplant slices with sea salt and let them stand for 45 minutes to draw out the bitterness. Then rinse thoroughly to remove excess salt.
    2. Thinly brush each slice with olive oil and bake in a preheated grill pan for several minutes on each side. Set aside. Repeat until all slices are grilled.
    3. For the meat sauce, lightly sauté the onions in olive oil until tender. Add the ground beef and sauté, stirring frequently to break up the clumps of meat, until the meat is no longer pink.
    4. Stir in canned tomatoes, garlic, cinnamon, allspice, salt, and pepper and simmer briefly on low heat. Add in tomato paste and a little water if the sauce is too thick. Remove from heat and set aside.
    5. For the béchamel sauce, add flour to the melted butter, stirring constantly. When the mixture is evenly thick, gradually whisk in warm milk. Gently bring to a boil, then remove from heat, season with pepper and nutmeg. Whisk in the egg yolks vigorously. Set aside.
    6. Thinly coat with olive oil a suitable ovenproof baking dish, sprinkle the bottom with homemade bread crumbs. Place a layer of eggplant, cover with some meat sauce and feta cheese, and repeat this until the pan is almost full. Finish with a layer of feta cheese.
    7. Top with béchamel sauce. Cover with tin foil and bake in a preheated oven at 180°C for 1 hour.
    8. Remove moussaka from the oven and let it set at room temperature for 45 minutes before serving.

    Tips

    To achieve the perfect moussaka, make sure to let the eggplant slices sit with salt for the full 45 minutes to remove any bitterness. When preparing the béchamel sauce, stir continuously to avoid lumps and ensure a smooth consistency. Lastly, giving the moussaka time to set before serving helps the layers hold together better when sliced.

    Variations & Substitutions

    If you prefer a vegetarian version, you can replace the ground beef with lentils or a plant-based meat substitute. For a slightly different flavor profile, try using ground lamb instead of beef. You can also experiment with different cheeses, such as Parmesan or Ricotta, to suit your taste preferences.

    Storage

    Leftover moussaka can be stored in an airtight container in the refrigerator for up to three days. For longer storage, freeze individual portions in airtight containers for up to three months. To reheat, thaw overnight in the refrigerator and bake in a preheated oven at 175°C until heated through.

    FAQ

    Can I prepare Moussaka ahead of time?

    Yes, you can assemble the moussaka a day in advance and store it in the refrigerator. When ready to bake, allow it to come to room temperature before placing it in the oven.

    What should I serve with Moussaka?

    Moussaka pairs beautifully with a fresh Greek salad and some crusty bread. A glass of red wine complements the flavors wonderfully.

    Nutrition

    Moussaka is a rich and hearty dish, so it is best enjoyed as an occasional treat. It provides a good source of protein from the beef and egg yolks, as well as essential vitamins and minerals from the eggplants and tomatoes. For a lighter option, consider serving with a side of steamed vegetables.

    Final Thoughts

    Classic Greek Moussaka is more than just a dish; it’s a culinary journey that tells a story with every bite. Whether you’re sharing it with family or savoring it on a quiet evening at home, its warmth and richness are sure to bring comfort and joy. I hope this recipe becomes as beloved in your home as it is in mine. Happy cooking!

    Related update: Classic Greek Moussaka

    Related update: How Sweet It Is Sweet Potato Lasagne

  • Chicken Cordon Bleu | Made by Meaghan Moineau

    Chicken Cordon Bleu | Made by Meaghan Moineau

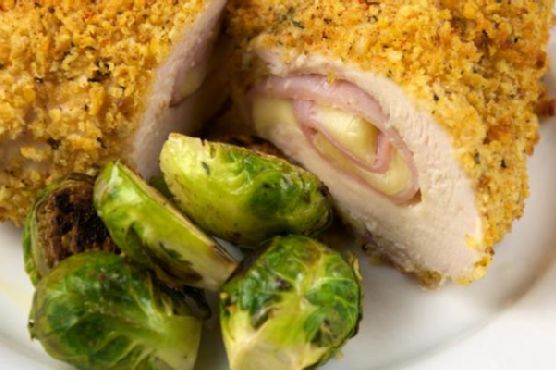
    Chicken Cordon Bleu: A Classic Dish with a Twist

    Welcome to my kitchen! Today, I’m sharing a recipe that brings back fond memories of family gatherings and cozy dinners: Chicken Cordon Bleu. This classic dish, with its crispy exterior and gooey, savory filling, never fails to impress. Whether you’re cooking to impress guests or simply treating yourself to something special, you’ll find this recipe both delightful and rewarding.

    Why You’ll Love It

    Chicken Cordon Bleu is a dish that combines the best of flavors and textures. Imagine tender chicken encasing a melty layer of Swiss cheese and savory ham—it’s pure comfort on a plate. What makes this recipe particularly special is its simplicity and adaptability. No need for complex techniques or obscure ingredients; just straightforward cooking that yields fantastic results. Plus, the satisfaction of slicing into the perfectly cooked roulade is truly unparalleled.

    Ingredients

    • 4 skinless boneless chicken breasts
    • 8 slices of Swiss cheese
    • 8 slices of deli ham
    • 1/2 cup flour
    • 2 eggs
    • 2 tablespoons water
    • 1 cup panko bread crumbs
    • 1 tablespoon fresh thyme leaves
    • 1 teaspoon kosher salt
    • 1/2 teaspoon black pepper
    • 2 tablespoons olive oil

    Instructions

    1. Preheat your oven to 350°F (175°C).
    2. Butterfly the chicken breasts by slicing them in half lengthwise, but do not cut all the way through.
    3. Place each breast between two pieces of plastic wrap. Using the flat side of a meat mallet, gently pound to about 1/4-inch thick, being careful not to tear the meat.
    4. Lay 2 slices of Swiss cheese on each chicken breast, followed by 2 slices of ham, and another 2 slices of cheese, leaving a half-inch margin around the edges.
    5. Tuck in the sides of the chicken and roll it tightly like a jellyroll. Gently squeeze the roll to help seal it.
    6. Season the flour with salt and pepper and spread it on wax paper or a flat dish.
    7. Mix the breadcrumbs with thyme, kosher salt, pepper, and olive oil to help the crust brown nicely.
    8. Beat together the eggs and water until fluid.
    9. Lightly dust each chicken roll with the seasoned flour, dip it into the egg mixture, and then gently coat it with the breadcrumb mixture.
    10. Carefully transfer the rolls to a baking pan and bake for about 20 minutes, or until browned and cooked through.
    11. Serve whole or slice into pinwheels for a beautiful presentation.

    Tips

    To ensure your Chicken Cordon Bleu turns out perfectly, here are a few tips:

    • Even Pounding: Make sure the chicken is evenly pounded to ensure uniform cooking.
    • Sealing the Roll: Tucking in the sides and rolling tightly help keep the cheese and ham contained.
    • Crust Perfection: The olive oil in the breadcrumb mixture is key for a golden crust.

    Variations & Substitutions

    This classic dish is versatile and can be customized to your liking:

    • Cheese: Swap Swiss cheese for Gruyère or mozzarella for a different flavor profile.
    • Ham: Prosciutto is a fantastic alternative, offering a slightly saltier taste.
    • Seasoning: Feel free to add garlic powder or paprika to the breadcrumb mix for an extra kick.

    Storage

    Leftover Chicken Cordon Bleu can be stored in an airtight container in the refrigerator for up to 3 days. To reheat, place it in a preheated oven at 325°F until warmed through. Avoid microwaving as it might make the breadcrumb coating soggy.

    FAQ

    Can I prepare Chicken Cordon Bleu in advance?

    Absolutely! You can prepare the chicken rolls up to the breadcrumb coating step and refrigerate them for up to 24 hours before baking.

    What should I serve with Chicken Cordon Bleu?

    This dish pairs beautifully with a fresh green salad, roasted vegetables, or creamy mashed potatoes.

    Is it possible to make this dish gluten-free?

    Yes, simply substitute the flour and panko bread crumbs with gluten-free alternatives.

    Nutrition

    While Chicken Cordon Bleu is indulgent, it’s also a good source of protein. To make it a bit lighter, you can use reduced-fat cheese and leaner cuts of deli meat.

    Final Thoughts

    Chicken Cordon Bleu is more than just a dish; it’s an experience. From the moment you start preparing it to the first bite, it promises comfort and satisfaction. I hope this recipe brings as much joy to your table as it has to mine. Happy cooking!

    Related update: Chicken Cordon Bleu

  • Eggless Blueberry and White Chocolate Baked Cheesecake | Made by Meaghan Moineau

    Eggless Blueberry and White Chocolate Baked Cheesecake | Made by Meaghan Moineau

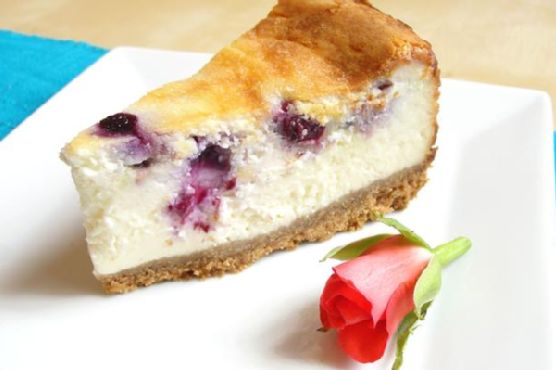
    Eggless Blueberry and White Chocolate Baked Cheesecake

    There are few things more comforting than a slice of cheesecake, and this Eggless Blueberry and White Chocolate Baked Cheesecake is no exception. I remember the first time I tried cheesecake. It was a chilly autumn day, and my grandmother had just pulled a golden, creamy cheesecake out of the oven. The smell alone was enough to make my mouth water. This recipe is inspired by those cherished moments, blending the tangy taste of blueberries with the decadent richness of white chocolate—all without eggs.

    Why You’ll Love It

    This cheesecake is a delightful fusion of flavors and textures. The buttery biscuit crust provides a perfect foundation for the creamy filling, while the blueberries add a burst of freshness, and the white chocolate enhances the dessert’s richness. Whether you’re catering to those with egg allergies or simply looking for a unique twist on the classic cheesecake, this recipe is sure to become a favorite.

    Ingredients

    • 200g digestive biscuits, crushed
    • 100g butter, melted
    • 200g white chocolate, melted
    • 500g cream cheese
    • 250g ricotta cheese
    • 200ml double cream
    • 150g granulated sugar
    • 2 tablespoons cornflour
    • 1 teaspoon vanilla extract
    • 1 tablespoon lemon juice
    • 200g plain blueberries

    Instructions

    1. Preheat your oven to 180 degrees Celsius.
    2. Combine the crushed digestive biscuits with the melted butter. Mix thoroughly to ensure the butter is evenly distributed.
    3. Firmly press the mixture into the base of a greased 10-inch springform tin, creating an even crust.
    4. In a large mixing bowl, beat together the cream cheese, ricotta cheese, double cream, granulated sugar, cornflour, vanilla extract, lemon juice, and melted white chocolate until the mixture is smooth and thickened. Avoid overmixing.
    5. Pour half of the cheese mixture over the prepared crust.
    6. Scatter the blueberries evenly over the cheese mixture.
    7. Pour the remaining cheese mixture over the blueberries, gently spreading it to cover all the berries.
    8. Bake the cheesecake in the oven for 1 to 1 1/4 hours until set. Adjust the time if using a fan oven.
    9. Allow the cheesecake to cool at room temperature, then refrigerate for at least 8 hours or overnight for best results.
    10. Cut into large wedges and serve chilled.

    Tips

    For the best texture, ensure all ingredients are at room temperature before mixing. This will help everything blend smoothly and create a creamier cheesecake. When pressing the crust into the tin, use the bottom of a glass to get an even, compact layer.

    Variations & Substitutions

    If you prefer a gluten-free version, swap the digestive biscuits for a gluten-free alternative. You can also experiment with different berries if blueberries aren’t in season—raspberries or blackberries make excellent substitutes. For a dairy-free twist, use a plant-based cream cheese and coconut cream in place of double cream.

    Storage

    Store the cheesecake in an airtight container in the refrigerator for up to five days. You can also freeze individual slices wrapped in cling film and foil for up to three months. Defrost in the fridge overnight before serving.

    FAQ

    Can I make this cheesecake in advance?

    Absolutely! This cheesecake actually tastes better after it’s had time to set, making it perfect for preparing a day or two ahead of serving.

    How can I tell when the cheesecake is done baking?

    You’ll know the cheesecake is ready when the edges are set, but the center still has a slight wobble. It will firm up as it cools.

    What can I use instead of a springform tin?

    If you don’t have a springform tin, a regular cake tin will work. Just line it with parchment paper for easy removal.

    Nutrition

    This cheesecake is a rich and indulgent dessert, perfect for special occasions. While exact nutritional values can vary, each slice is estimated to contain around 450 calories, 30g of fat, and 35g of sugar, depending on portion size and specific ingredients used.

    Final Thoughts

    Baking can be a beautiful journey of creativity and nostalgia, and this Eggless Blueberry and White Chocolate Baked Cheesecake is a testament to that. Whether you’re baking for loved ones or treating yourself, this recipe is a comforting reminder of how food can be both a sensory delight and a heartfelt hug. Enjoy every bite, and maybe even share a slice with someone special.

    Related update: Eggless Blueberry and White Chocolate Baked Cheesecake

    Related update: Mascarpone & Ricotta Cheese Cake