Tag: Asian Fusion

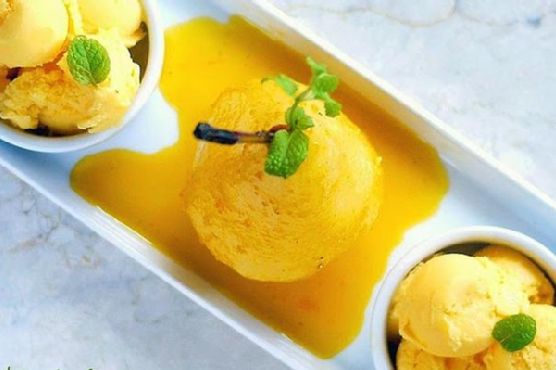
  • Exotic Cardamom-Poached Pears with Spicy Mango-Nectar Reduction and Pistachio Crumble | Made by Meaghan Moineau

    Exotic Cardamom-Poached Pears with Spicy Mango-Nectar Reduction and Pistachio Crumble | Made by Meaghan Moineau

    Exotic Cardamom-Poached Pears with Spicy Mango-Nectar Reduction and Pistachio Crumble

    Imagine the gentle sizzle of cardamom pods toasting in a pan, releasing their intoxicating fragrance, while a golden syrup simmers alongside. This isn’t your average poached pear recipe; it’s an aromatic journey that will transform your kitchen into a paradise of exotic flavors. Your senses are about to be enveloped in a dance of spice, sweetness, and crunch.

    Personal Story

    I still remember that crisp autumn afternoon when I stumbled upon this recipe’s inspiration. Wandering through a bustling farmer’s market, I was drawn to a vendor with an array of vibrant pears, their skins glistening under the soft sunlight. Intrigued, I picked up a Bartlett, its firm texture promising the perfect poach. As I walked away, a gentle breeze carried the scent of cardamom from a nearby spice stall, and an idea began to blossom.

    Back in my cozy kitchen, I set out to create a dish that would marry the traditional elegance of poached pears with the bold allure of global spices. My first attempt was a comedy of errors — too much cardamom, not enough sweetness. My kitchen smelled divine, but the taste didn’t quite match. Not one to be deterred, I tweaked and tested, learning from each delicious mistake.

    And then, finally, that magical balance was struck. The pears, poached to perfection, absorbed the spicy-sweet notes of the cardamom syrup, while a pistachio crumble provided an unexpected crunch. The addition of a spicy mango-nectar reduction elevated the dish to something truly special. Every time I make it now, I’m reminded of that market day and the joy of discovery it sparked.

    What Makes This Version Special

    This is no ordinary poached pear recipe. By infusing the poaching liquid with **cardamom pods**, we unlock a deep, aromatic flavor that dances on your palate. Toasting the pods before adding them to the syrup ensures that their oils fully release, giving the dish an unparalleled depth. But it doesn’t stop there. A **pistachio crumble**, scented with honey and vanilla bean seeds, adds a delightful texture that contrasts beautifully with the tender pears. This combination transforms a classic dessert into a culinary masterpiece, offering layers of flavor and texture in every bite.

    Flavor Profile

    When you bite into these exotic cardamom-poached pears, you’re greeted with a symphony of rich and aromatic flavors. The cardamom infuses the pears with a warm, spicy fragrance that lingers on the tongue, while the spicy mango-nectar reduction adds a sweet and slightly tart contrast. The **pistachio crumble** provides a satisfying crunch, with a fragrant hint of honey and vanilla. Every mouthful is a sensory journey, inviting you to savor the intricate dance of flavors and textures.

    Ingredients

    • 4 firm pears, peeled with stems intact
    • 1 tablespoon lemon juice
    • 1/2 cup sugar
    • 1 cup water
    • 1/2 cup mango pulp
    • 1/2 cup fruit juice (orange or apple)
    • 1 tablespoon orange rind
    • 1 dash cinnamon
    • **5 cardamom pods**
    • **1/2 cup pistachios**
    • **2 tablespoons honey**
    • **Seeds from 1 vanilla bean**
    • Mint leaves, for garnish

    Instructions

    1. Peel the pears and slice a small piece off the bottom so they can stand upright. Gently dab each pear with lemon juice to prevent browning and set aside.
    2. In a medium pot, combine the sugar and water. Heat over medium until the sugar dissolves, creating a simple syrup.
    3. In a dry pan, toast the **cardamom pods** over medium heat until they’re fragrant, about 2 minutes. Add the pods to the syrup.
    4. Add mango pulp, fruit juice, orange rind, and a dash of cinnamon to the syrup. Stir to combine.
    5. Submerge the pears in the syrup. Poach on low heat for 15 to 20 minutes, until the pears are tender and have taken on an amber hue from the mango syrup, ensuring they’re completely immersed.
    6. Meanwhile, create the **pistachio crumble** by pulsing pistachios, honey, and vanilla bean seeds in a food processor until coarse and crumbly.
    7. Once the pears are tender, remove them from the syrup and let them cool slightly on a plate.
    8. Garnish each pear with a mint sprig and drizzle with the spicy mango-nectar reduction. Sprinkle the pistachio crumble generously over the top.

    Pro Tips from Meaghan’s Kitchen

    • Choose pears that are firm to the touch for poaching; they hold their shape better during cooking.
    • Don’t skip toasting the cardamom pods. This step is key to releasing their full flavor potential.
    • If you prefer a less sweet dessert, reduce the sugar in the syrup by a tablespoon or two.
    • For an extra zing, consider adding a tiny pinch of saffron to the syrup during poaching.
    • Ensure the syrup fully covers the pears while poaching to ensure even flavor absorption.

    Variations & Dietary Swaps

    • For a gluten-free version, ensure your vanilla bean and other ingredients are certified gluten-free.
    • To spice it up, add a pinch of cayenne pepper to the pistachio crumble for a subtle heat.
    • For a kid-friendly version, serve the poached pears with a scoop of vanilla ice cream instead of the pistachio crumble.

    What to Serve With It

    This exquisite dessert pairs beautifully with a glass of sweet Riesling, offering a refreshing contrast to the rich flavors of the poached pears and pistachio crumble. Alternatively, a dollop of freshly whipped cream can complement the dish’s spicy and sweet notes.

    Storage & Meal Prep

    To store, place the poached pears in an airtight container with their syrup and refrigerate for up to 3 days. The pistachio crumble should be kept separately in an airtight container at room temperature. To reheat, gently warm the pears in their syrup on the stove until heated through. Avoid reheating the crumble to maintain its crunch.

    FAQ

    Can I use canned pears instead of fresh ones?

    While fresh pears provide the best texture and flavor, canned pears can be used in a pinch. Be sure to choose ones that are not overly sweetened and reduce the sugar in the syrup accordingly.

    What other nuts can I use for the crumble?

    If you don’t have pistachios, almonds or hazelnuts make excellent substitutes, offering a similar crunch and nutty flavor.

    Can I make this dish ahead of time?

    Yes, you can prepare the pears and syrup a day in advance and store them in the refrigerator. Just assemble with the pistachio crumble and mint before serving.

    How do I prevent the pears from browning?

    Dabbing the peeled pears with lemon juice, as mentioned in the recipe, will help prevent browning and maintain their fresh appearance.

    Is there a non-alcoholic pairing suggestion?

    A fragrant herbal tea, such as chamomile or jasmine, complements the exotic flavors of this dish beautifully.

    Final Thoughts

    I hope this recipe brings as much joy to your table as it does to mine. It’s a celebration of flavors and textures that invites you to savor each bite. I’d love to hear how your own culinary adventure unfolds — feel free to leave a comment below or share your experience on social media. Happy cooking!

    Related update: Exotic Cardamom-Poached Pears with Spicy Mango-Nectar Reduction and Pistachio Crumble

    Related update: Chai-Spiced Carrot Raisin Chocolate Chip Cookies
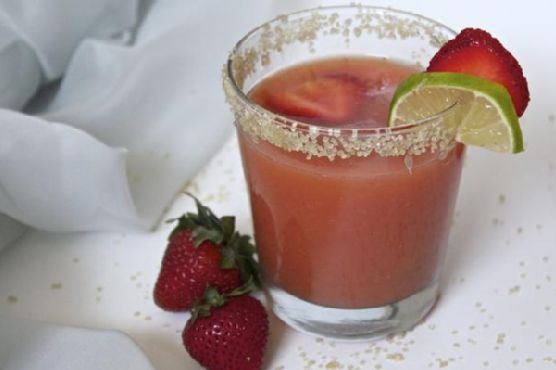
  • Tropical Strawberry-Mango Green Tea Limeade with Ginger Mint Infusion | Made by Meaghan Moineau

    Tropical Strawberry-Mango Green Tea Limeade with Ginger Mint Infusion | Made by Meaghan Moineau

    Tropical Strawberry-Mango Green Tea Limeade with Ginger Mint Infusion

    Imagine sipping a cool, refreshing drink as the sun bathes your backyard in golden light. This isn’t just any ordinary limeade—it’s a Tropical Strawberry-Mango Green Tea Limeade with a Ginger Mint Infusion, bursting with vibrant, invigorating flavors that dance across your palate like a summer fiesta.

    Personal Story

    As a child, my summers were marked by sun-drenched afternoons spent in my grandparents’ garden. They had an old wooden swing where I’d sit with a book in one hand and a tall glass of limeade in the other. Those moments were pure bliss—until the limeade ran out, and I’d concoct my own version using whatever fruits I could pilfer from the kitchen. One day, in a fit of creativity (or perhaps desperation), I tossed in some leftover strawberries and mangoes. That was the moment my love affair with uniquely flavored limeades began.

    Fast forward a few decades, and my passion for crafting refreshing beverages has evolved into a culinary adventure. I recall a particularly hot summer day when I was experimenting with green tea infusions. “Why not combine this with my beloved limeade?” I thought. The result was a revelation. The gentle tannins of green tea played harmoniously with the tartness of lime, while strawberries and mangoes added layers of sweetness.

    Of course, as an adult, I couldn’t resist giving my creation a sophisticated twist. Enter the ginger mint infusion. Inspired by my travels through Southeast Asia, where ginger and mint are culinary staples, this infusion elevates the limeade from simple refreshment to a sophisticated, spa-like experience. It’s become a staple at my summer gatherings, a drink that never fails to impress and delight.

    Now, dear reader, it’s my pleasure to share this little piece of my culinary journey with you. Let’s transform your kitchen into an oasis of flavors with this Tropical Strawberry-Mango Green Tea Limeade with Ginger Mint Infusion.

    What Makes This Version Special

    This isn’t your everyday limeade. The refreshing ginger mint infusion elevates the limeade’s tropical notes with a spicy and herbal kick, making it truly special. While traditional limeade is delightful, this version introduces a depth of flavor that takes it to new heights. The combination of strawberries and mangoes with green tea creates a symphony of tropical and refreshing flavors, while the ginger adds a zingy spice that is beautifully rounded off by the cooling mint finish. It’s a beverage that’s as intriguing as it is refreshing, perfect for those who seek something extraordinary.

    Flavor Profile

    The first sip of this Tropical Strawberry-Mango Green Tea Limeade with Ginger Mint Infusion is like a gentle sea breeze on a warm day. The tropical sweetness of strawberries and mangoes hits first, followed by the lush, tart embrace of lime juice. The green tea provides a subtle, earthy backbone, while the ginger mint infusion brings a zingy spice that dances on your taste buds, leaving a refreshing, cooling mint finish. Every sip is a journey—a vibrant burst of flavor that beckons you back for more.

    Ingredients

    • 1 cup strawberries, hulled
    • 1 cup mango, diced
    • 1/2 cup lime juice, freshly squeezed
    • 2 cups green tea, chilled
    • 1/2 cup simple syrup
    • 1-inch piece of fresh ginger, thinly sliced
    • 1/4 cup fresh mint leaves
    • 1 cup sparkling water

    Instructions

    1. Begin by preparing your green tea infusion. In a saucepan, bring 2 cups of water to a gentle simmer. Add the sliced fresh ginger and mint leaves. Allow them to infuse for about 5 minutes. The aroma should be spicy and herbal. Remove from heat and let it cool.
    2. In a blender or food processor, combine the strawberries, mango, lime juice, and simple syrup. Blend until the mixture is smooth and uniform. The puree should be vibrant and luscious.
    3. Pour the fruit puree over ice in a large pitcher. This will chill the mixture instantly, enhancing its refreshing qualities.
    4. Add the cooled, infused green tea to the pitcher. Stir gently to combine, ensuring that the flavors meld beautifully.
    5. Right before serving, add a splash of sparkling water to the mixture. This will add a slight effervescence, making each sip even more invigorating.
    6. Pour the limeade into glasses and garnish with lime wedges and fresh strawberries for a picture-perfect presentation.

    Pro Tips from Meaghan’s Kitchen

    • To intensify the ginger flavor, grate a small amount of ginger directly into the limeade.
    • For a more pronounced mint note, gently bruise the mint leaves before infusion to release their essential oils.
    • If you prefer a sweeter drink, adjust the simple syrup to taste, but remember that the sparkling water will slightly dilute the sweetness.
    • Chill your glasses in the freezer for a few minutes before serving to keep the limeade cold for longer.
    • Experiment with different varieties of tea, like jasmine or oolong, for a unique spin on the base flavor.

    Variations & Dietary Swaps

    • For a vegetarian-friendly version, swap the simple syrup with agave nectar or maple syrup.
    • Spice it up by adding a pinch of cayenne pepper to the blend; it adds an unexpected kick that complements the ginger.
    • For a kid-friendly version, omit the green tea and replace it with white grape juice to keep the caffeine content low.

    What to Serve With It

    This Tropical Strawberry-Mango Green Tea Limeade with Ginger Mint Infusion pairs beautifully with light, refreshing dishes. Serve it alongside a light quinoa salad with avocado and cucumber for a delightful summer meal. The creamy avocado and crisp cucumber will balance the drink’s fruity and spicy notes perfectly, creating a harmonious dining experience.

    Storage & Meal Prep

    If you have leftovers (unlikely as that may be), store your limeade in an airtight container in the fridge for up to three days. The flavors will continue to meld, becoming even more intense. If you plan to make this ahead of time, prepare the fruit puree and green tea infusion separately, storing them in the fridge until ready to serve. Reheat the green tea gently on the stovetop before combining to restore its aroma and flavor.

    FAQ

    Can I use frozen fruit instead of fresh?

    Yes, frozen strawberries and mangoes work well and will make the drink even colder and more refreshing.

    What if I don’t have a blender?

    No blender? No problem! You can finely chop the fruit and muddle it in the pitcher for a rustic version.

    Is there a way to make this drink less sweet?

    Absolutely. Reduce or omit the simple syrup to suit your taste, or replace it with a naturally sweet fruit juice.

    Can I make this limeade alcoholic?

    Sure! A splash of rum or vodka would complement the tropical flavors beautifully, making it a perfect cocktail for summer gatherings.

    How can I make this drink more visually appealing?

    Consider adding edible flowers as a garnish or layering strawberry slices on the inside of the glass for a stunning presentation.

    Final Thoughts

    There you have it, friends—a Tropical Strawberry-Mango Green Tea Limeade with Ginger Mint Infusion that’s sure to become a staple at your summer gatherings. It’s a drink that invites you to slow down, savor the moment, and relish in the vibrant flavors of the season. I hope you’ll try it, love it, and share your experience. Feel free to leave a comment below with your thoughts or any tweaks you made—let’s keep the conversation delicious and inspiring!

    Related update: Tropical Strawberry-Mango Green Tea Limeade with Ginger Mint Infusion

    Related update: Spiced Cranberry Margarita with Smoked Salt Rim

  • Zesty Lemon-Honey Glazed Chicken with Ginger-Infused Mashed Potatoes | Made by Meaghan Moineau

    Zesty Lemon-Honey Glazed Chicken with Ginger-Infused Mashed Potatoes | Made by Meaghan Moineau

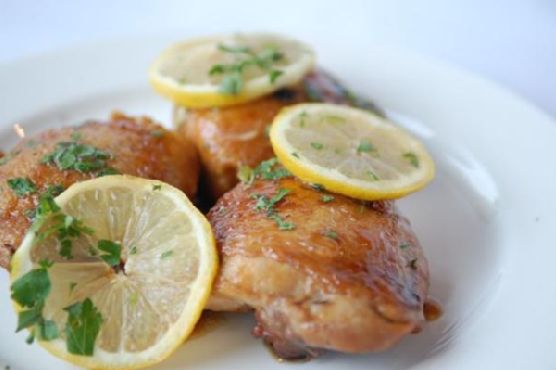
    Zesty Lemon-Honey Glazed Chicken with Ginger-Infused Mashed Potatoes

    Imagine your kitchen filled with the enticing aroma of zesty lemon and sweet honey caramelizing into a perfect glaze, while the gentle hum of bubbling potatoes promises a creamy, aromatic side dish. This dish is a celebration of bold flavors and comforting textures, ready to elevate any dinner gathering or a cozy night in.

    Personal Story

    Growing up, Sunday dinners were a sacred affair in our household. My grandmother would somehow transform a humble chicken into something magical, her secret always a mystery. It wasn’t until years later, when I attempted to replicate her magic, that I stumbled upon my own secret twist: a hint of ginger and turmeric to the mashed potatoes.

    I remember the first time I made this dish vividly. It was a rainy afternoon, the kind that beckons you to stay indoors and embrace the warmth of your kitchen. As I stood there, garlic sizzling in olive oil, I felt a connection to my grandmother’s kitchen, the same comforting symphony of flavors filling the air.

    Of course, there was a mishap or two. Like when I accidentally used too much turmeric, turning my potatoes an alarming shade of yellow. But with each attempt, the recipe became a comforting ritual. The zing of lemon, the sweetness of honey, and the earthy warmth of ginger and turmeric became my signature touch.

    Sharing this recipe with friends and family, I found it brought the same joy to others as it did to me. It’s not just a meal; it’s a shared experience, a conversation starter, and a tribute to culinary creativity.

    What Makes This Version Special

    This version of Zesty Lemon-Honey Glazed Chicken with Ginger-Infused Mashed Potatoes stands out because it introduces a subtle complexity to the classic combination. The addition of fresh ginger and ground turmeric to the mashed potatoes not only adds a burst of color but also a depth of flavor that harmonizes beautifully with the citrusy glaze of the chicken. It’s a fusion of comfort and sophistication, offering a delightful twist that surprises and delights.

    Unlike traditional mashed potatoes, this version boasts a hint of spice and fragrance from the ginger and turmeric, which are bloomed in butter before being mixed into the sweet potatoes. This technique elevates the dish, transforming it from a simple side into a star on your plate. Accompanied by the sweet and tart glaze on the chicken, this meal becomes a symphony of flavors, each bite more intriguing than the last.

    Flavor Profile

    Sink your teeth into the sweet and tangy chicken, where a citrusy glaze envelops each piece in a delightful, sticky hug. The garlic and thyme infuse the meat with a savory depth, while the honey and lemon slices caramelize into a glossy finish. Paired with the warm, earthy notes of ginger and turmeric in the creamy mashed potatoes, this dish offers a balanced flavor journey. The potatoes are rich and velvety, with a pop of freshness from scallions and a slight nuttiness from the buttermilk.

    Ingredients

    • 8 chicken thighs
    • 2 teaspoons black sea salt
    • 1 teaspoon pepper
    • 2 tablespoons olive oil
    • 4 cloves garlic, minced
    • 4 sprigs thyme
    • 1 splash red wine vinegar
    • 2 tablespoons dark soy sauce
    • 3 tablespoons honey
    • 1 lemon, thinly sliced
    • 2 tablespoons flat leaf parsley, chopped
    • 1 inch fresh ginger, grated
    • 1 teaspoon ground turmeric
    • 1 cup buttermilk
    • 4 large sweet potatoes, peeled and cubed
    • 2 scallions, sliced

    Instructions

    1. Season the chicken thighs with salt and pepper. Heat olive oil in a large sauté pan over medium-high heat. Add the chicken, skin-side down, in a single layer. Brown the chicken pieces (in batches if necessary) along with the garlic and thyme for 2-3 minutes on each side until golden brown. Remove and set aside.
    2. Return all the chicken to the pan. Add a splash of red wine vinegar and let it bubble until reduced by half. Drizzle the soy sauce and honey over the chicken, then shake the pan to mix all ingredients thoroughly.
    3. Pour 1/2 cup of hot water into the pan and add the lemon slices. Let the liquid bubble and reduce down until syrupy, which will take about 10 minutes or so. By now, the chicken should be cooked through. Transfer the chicken to a platter and sprinkle over the chopped parsley.
    4. Meanwhile, boil the sweet potatoes in salted water until tender, about 15-20 minutes. Drain and set aside.
    5. In a small pan, melt a tablespoon of butter over low heat. Add the grated ginger and turmeric, and bloom them in the butter for about 1-2 minutes until fragrant.
    6. In a large bowl, mash the sweet potatoes with the buttermilk and the spiced butter mixture until smooth and creamy. Stir in the scallions for a fresh finish.
    7. Serve the chicken hot, accompanied by the ginger-infused mashed sweet potatoes.

    Pro Tips from Meaghan’s Kitchen

    • Bloom spices: Always bloom your ginger and turmeric in butter before adding them to the mashed potatoes. This step releases their essential oils, enhancing the fragrance and flavor.
    • Use the right soy sauce: Dark soy sauce adds a richer color and deeper flavor to the glaze. Don’t substitute with regular soy sauce if you want that deep umami.
    • Caramelize your lemons: Allow the lemon slices to caramelize slightly in the pan for an extra depth of flavor that complements the sweet and savory notes of the glaze.
    • Adjust sweetness: If you prefer a slightly less sweet glaze, reduce the honey by one tablespoon and add a touch more vinegar for balance.
    • Rest the chicken: Let the chicken rest for a few minutes after cooking to reabsorb juices, ensuring moist and flavorful meat.

    Variations & Dietary Swaps

    • Vegetarian Swap: Replace chicken with tofu. Use the same glaze ingredients and method for a plant-based alternative.
    • Spice-it-up Version: Add a pinch of cayenne pepper to the glaze for a spicy kick that pairs beautifully with the sweetness of the honey.
    • Kids-Friendly Version: Substitute sweet potatoes with regular potatoes for a milder flavor and skip the turmeric if your little ones aren’t fan of the color or taste.

    What to Serve With It

    This dish pairs beautifully with a chilled Riesling, whose crispness complements the sweet and tart glaze of the chicken. Alternatively, a lightly sparkling elderflower soda is a refreshing, non-alcoholic option that enhances the floral notes of the dish. For a complete meal, consider serving with a side of lightly sautéed green beans or a simple arugula salad tossed in lemon vinaigrette.

    Storage & Meal Prep

    Store any leftovers in an airtight container in the fridge for up to 3 days. To reheat, place in a 350°F oven until warmed through, about 15 minutes. Alternatively, you can freeze the chicken and mashed potatoes separately for up to 2 months. Thaw overnight in the fridge before reheating.

    FAQ

    Can I use chicken breasts instead of thighs?

    Yes, you can use boneless chicken breasts. Keep in mind they cook faster, so monitor them closely to avoid drying out.

    Can I make this dish ahead of time?

    Absolutely! Prepare the chicken and mashed potatoes in advance, then reheat before serving. The flavors meld beautifully, making it an ideal make-ahead dish.

    What if I don’t have fresh ginger?

    You can substitute with 1/2 teaspoon of ground ginger, but the flavor might not be as vibrant as fresh ginger.

    Is there a non-dairy substitute for buttermilk?

    Yes, use almond milk with a teaspoon of apple cider vinegar or lemon juice. Let it sit for a few minutes to curdle slightly before using.

    How can I thicken the glaze if it’s too runny?

    If the glaze is too runny, let it simmer longer to reduce or add a cornstarch slurry (1 teaspoon cornstarch mixed with 1 tablespoon cold water) to thicken it quickly.

    Final Thoughts

    There you have it, a dish that combines tradition with a twist, bringing warmth and flavor to your table. I hope you find as much joy in making Zesty Lemon-Honey Glazed Chicken with Ginger-Infused Mashed Potatoes as I do. I’d love to hear about your experiences and any creative spins you might add. Don’t forget to share your culinary adventures and spread the love of cooking!

    Related update: Zesty Lemon-Honey Glazed Chicken with Ginger-Infused Mashed Potatoes

  • Honey-Lime Glazed Baked Salmon with Crispy Ginger Garlic Topping | Made by Meaghan Moineau

    Honey-Lime Glazed Baked Salmon with Crispy Ginger Garlic Topping | Made by Meaghan Moineau

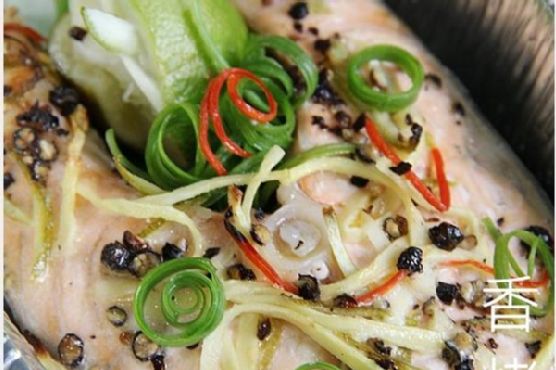
    Honey-Lime Glazed Baked Salmon with Crispy Ginger Garlic Topping

    Imagine a sizzling salmon fillet, its skin crackling as it bakes to perfection. As you lean closer, a fragrant wave of honey and lime envelops your senses, and you can almost taste the sweet, tangy glaze. The crispy ginger garlic topping offers an unexpected crunch that leaves you craving more with every bite.

    Personal Story

    I can still remember the first time I tried salmon. It was during a family vacation to the Pacific Northwest, and the memory is as vivid as the taste was profound. We dined at a cozy little restaurant by the sea, where the air was filled with the salty breeze and the distant calls of seagulls. I was hesitant, but my curiosity got the better of me. The moment that piece of salmon touched my tongue, I was hooked.

    Back home, I was determined to recreate that magic. My first attempt was far from perfect — perhaps a bit too much lime, a touch too little honey. But that was the start of my love affair with cooking salmon, and I’ve been refining my technique ever since. Each salmon dish I create is a tribute to that first taste, a journey to capture and elevate the flavors I experienced by the sea.

    This new honey-lime glazed baked salmon with a crispy ginger garlic topping is my latest triumph. Every time I prepare this dish, I am transported back to that maritime memory, yet it feels distinctively mine — a fusion of my love for classic flavors with a modern twist.

    What Makes This Version Special

    The magic of this honey-lime glazed baked salmon lies in its unique combination of flavors and textures. The addition of a honey and lime glaze not only enhances the salmon’s natural flavors but also introduces a delightful sweet and tangy profile. The real game-changer, however, is the crispy ginger garlic topping. By mixing shredded ginger, minced garlic, and panko breadcrumbs with sesame oil, we create a topping that broils to a golden-brown finish. This topping provides a delightful crunch that contrasts beautifully with the tender, flaky salmon beneath.

    Flavor Profile

    When you take a bite of this honey-lime glazed baked salmon, your taste buds are treated to a symphony of flavors. The sweet and tangy glaze dances on your palate, with a hint of heat from the chili that adds an intriguing edge. The crispy, savory topping is not just an afterthought — it’s an integral part of the dish that enhances the overall experience. It’s like a melody where every note is in perfect harmony.

    Ingredients

    • 1 salmon cutlet, cleaned and scales removed
    • 2 tablespoons cooking wine
    • **Rind of 1 lime**
    • **Juice of 1 lime**
    • 1 tablespoon crushed black peppercorns
    • 1 tablespoon shredded ginger
    • 1 red chili, finely chopped
    • 2 spring onions, chopped
    • 2 tablespoons butter, cubed
    • **3 tablespoons honey**
    • 3 cloves garlic, minced
    • 1/4 cup panko breadcrumbs
    • 2 tablespoons sesame oil
    • Fresh cilantro, chopped, for garnish

    Instructions

    1. Preheat your oven to 200°C (about 390°F).
    2. Clean the salmon cutlet thoroughly, ensuring all scales are removed. Pat it dry with a paper towel and place it on a baking tray lined with foil.
    3. Season the salmon all over with cooking wine, then sprinkle with the lime rind and juice. Top with crushed black peppercorns, shredded ginger, chopped chili, spring onions, and butter cubes.
    4. In a small saucepan over medium heat, combine **honey** and **lime juice**. Allow the mixture to reduce slightly, creating a glaze. Brush this glaze generously over the salmon.
    5. Bake the salmon in the preheated oven for 12 minutes. Alternatively, you can toast it in an oven toaster for 15-18 minutes depending on thickness and desired doneness.
    6. Meanwhile, in a bowl, mix shredded ginger, minced garlic, and panko breadcrumbs with sesame oil.
    7. After the initial baking time, remove the salmon and sprinkle the breadcrumb mixture over it. Return to the oven and broil for the last 2 minutes until the topping is golden-brown.
    8. Garnish with fresh cilantro before serving.

    Pro Tips from Meaghan’s Kitchen

    • For extra flavor, marinate the salmon with lime juice and rind a few hours before cooking.
    • Ensure your oven is preheated to the right temperature to get that perfect crispy topping.
    • For an even crunchier topping, add a tablespoon of finely chopped nuts to the breadcrumb mixture.
    • Use a fish spatula to carefully transfer the salmon to a serving dish without breaking the fillet.
    • Don’t skip the cilantro — it adds a fresh, bright note that balances the dish beautifully.

    Variations & Dietary Swaps

    • Vegetarian Swap: Replace the salmon with firm tofu. The honey-lime and ginger garlic flavors work wonderfully with tofu’s texture.
    • Spice-It-Up Version: Add a teaspoon of sriracha to the glaze for an extra kick.
    • Kids-Friendly Version: Omit the chili and reduce the garlic for a milder taste that children will love.

    What to Serve With It

    This honey-lime glazed baked salmon pairs beautifully with a chilled glass of Sauvignon Blanc, complementing the zesty lime and savory notes. For a side, consider coconut rice, which adds a creamy, tropical undertone that balances the dish’s vibrant flavors. A simple green salad or steamed asparagus would also make a fresh, complementary side.

    Storage & Meal Prep

    Leftovers can be stored in an airtight container in the fridge for up to 2 days. To reheat, gently warm in the oven at 150°C (about 300°F) until heated through. Avoid microwaving, as this can make the topping soggy. If you wish to freeze, do so without the topping and add fresh topping before reheating.

    FAQ

    Can I use frozen salmon?

    Yes, you can use frozen salmon. Just make sure it is fully thawed and pat it dry before seasoning to remove excess moisture.

    What if I don’t have sesame oil?

    No worries! Olive oil can be used as a substitute, though it will slightly alter the flavor profile by adding a more Mediterranean note.

    How do I know when the salmon is fully cooked?

    The salmon is done when it flakes easily with a fork and appears opaque in the center. A cooking thermometer should read 145°F (62.8°C) at the thickest part.

    Can I make the glaze ahead of time?

    Absolutely! You can prepare the honey-lime glaze up to two days in advance. Just store it in the fridge and reheat gently before using.

    Is there a substitute for panko breadcrumbs?

    If panko isn’t available, regular breadcrumbs can be used; however, the topping may not be as crispy. You can also try crushed cornflakes for a gluten-free option.

    Final Thoughts

    Cooking this honey-lime glazed baked salmon is more than just preparing a meal; it’s an experience, a celebration of flavors that come together in perfect harmony. I hope you feel inspired to give this recipe a try and let it transport you to your own culinary bliss. As always, I love hearing from you, so please share your thoughts and variations in the comments below. Happy cooking, and may your kitchen be filled with love and laughter!

    Related update: Honey-Lime Glazed Baked Salmon with Crispy Ginger Garlic Topping

    Related update: Smoky Grilled Paneer Jalfrezi with Charred Peppers

  • Decadent Mocha Almond Dark Chocolate Truffles | Made by Meaghan Moineau

    Decadent Mocha Almond Dark Chocolate Truffles | Made by Meaghan Moineau

    Decadent Mocha Almond Dark Chocolate Truffles

    Imagine biting into a truffle so rich it feels like velvet on your tongue, bursting with the intense flavors of chocolate and espresso, and a delicate hint of almond. These decadent mocha almond dark chocolate truffles are my go-to indulgence when I crave something deeply satisfying yet sophisticated.

    Personal Story

    One winter evening, I found myself snowed in, craving something sweet yet luxurious. The pantry revealed a modest selection of ingredients: cocoa powder, almonds, and a lingering bottle of almond liqueur from my last holiday bash. I was inspired by a memory of visiting a quaint chocolatier in Brussels, where the air was perfumed with the intoxicating scent of roasting cocoa beans and freshly brewed espresso. That visit left me in awe of how a simple truffle could transport you to another world.

    Driven by the memory, I decided to recreate that experience right in my cozy kitchen. I began experimenting, infusing my truffle mixture with espresso and almond liqueur. As the mixture came together, the aroma enveloped the kitchen—a perfect blend of chocolate and coffee, with a flirtatious whisper of almond.

    My first batch was a revelation. Each truffle was a tiny bomb of flavor, instantly transporting me back to that Belgian chocolatier. My husband, a self-proclaimed chocoholic, declared them the best thing I’d ever made. And so, my version of mocha almond dark chocolate truffles was born, becoming a staple in my dessert repertoire.

    Since then, these truffles have been my go-to gift for friends and family, never failing to impress with their complex yet harmonious flavors. They are a testament to how a few humble ingredients can be transformed into something truly extraordinary.

    What Makes This Version Special

    What sets these mocha almond dark chocolate truffles apart is their luxurious depth of flavor, achieved by infusing the classic treat with a hint of espresso and a touch of almond liqueur. This combination enhances the cocoa’s natural richness, while the almond liqueur adds a sophisticated nutty undertone. The result is a gourmet experience that elevates the classic chocolate truffle to new heights.

    Flavor Profile

    Each bite of these truffles delivers a rich, intense chocolate-espresso flavor, enveloped in a smooth, velvety texture. The nutty undertones from the almonds and almond liqueur create a beautifully balanced finish that lingers on your palate. It’s a sensory delight that makes every morsel feel indulgent and special.

    Ingredients

    • 1 cup dried dates, pitted
    • 1 cup slivered almonds
    • 1/2 cup pecans
    • 1/4 cup cocoa powder
    • 1 teaspoon vanilla extract
    • 2 tablespoons agave nectar
    • 1/4 teaspoon sea salt
    • 1 tablespoon **instant espresso powder**
    • 2 tablespoons hot water
    • 1 tablespoon **almond liqueur**
    • 1/4 cup roasted almond pieces
    • 1/4 cup dark chocolate shavings

    Instructions

    1. Soak the dates in hot water for about 5 minutes. The water should be hot to the touch but not scorching. This will soften the dates, making them easier to blend.
    2. In a small bowl, bloom the **instant espresso powder** by mixing it with 2 tablespoons of hot water. Let it sit for a minute to enhance the aroma.
    3. Process the slivered almonds in a food processor until a coarse almond meal is formed.
    4. Add the pecans to the processor and continue until they are ground into a coarse meal as well.
    5. Drain the dates and squeeze out any excess water using your hands. Add the dates, cocoa powder, vanilla extract, agave nectar, sea salt, and the bloomed espresso to the food processor. Process until a smooth paste forms.
    6. Incorporate a splash of **almond liqueur** into the mixture for a subtle, sophisticated flavor boost.
    7. Use a tablespoon measure to form the truffles. Pack a heaping tablespoon of the mixture into the measure, then slide it out and form a tightly packed ball with your hands. Be gentle, as they can fall apart if over-handled.
    8. Roll each truffle in roasted almond pieces or dark chocolate shavings for added texture and flavor.

    Pro Tips from Meaghan’s Kitchen

    • Ensure the dates are adequately hydrated by soaking them in warm, not boiling, water. This ensures a smooth texture.
    • When forming the truffles, keep your hands slightly damp to prevent sticking and achieve a smooth finish.
    • For a creamier texture, briefly refrigerate the mixture before forming the truffles; this helps the ingredients bind together better.
    • Experiment with different coatings, such as finely crushed pistachios or freeze-dried raspberries, for a burst of color and flavor.
    • If you find the mixture too sticky, a light dusting of cocoa powder on your hands will make it easier to work with.

    Variations & Dietary Swaps

    • Vegan Version: Substitute almond liqueur with almond extract and ensure all ingredients are certified vegan.
    • Spice-It-Up Version: Add a pinch of cayenne pepper to the mixture for a subtle heat that complements the chocolate.
    • Kids-Friendly Version: Omit the almond liqueur and add a teaspoon of orange zest for a bright, fruity twist.

    What to Serve With It

    These truffles pair beautifully with a fresh shot of espresso, echoing the rich coffee notes within. For a more leisurely, indulgent experience, serve with a glass of tawny port, which complements the chocolate’s depth and enhances the overall tasting experience.

    Storage & Meal Prep

    Store the truffles in an airtight container in the fridge for up to a week. For longer storage, freeze them in a single layer on a baking sheet, then transfer to a freezer-safe bag. Thaw in the fridge before serving. To enjoy them at their best, bring to room temperature before indulging.

    FAQ

    Can I use fresh dates instead of dried?

    Yes, but you’ll need to reduce the soaking time. Fresh dates are softer and may not require soaking at all.

    What if I don’t have a food processor?

    A high-powered blender can work as a substitute, but you may need to process in smaller batches to achieve the right consistency.

    Can I skip the almond liqueur?

    Absolutely! You can replace it with a teaspoon of almond or vanilla extract for a non-alcoholic version.

    Is there a substitute for pecans?

    Walnuts or hazelnuts make excellent substitutes, providing a similar texture and flavor profile.

    How do I prevent the truffles from sticking?

    Keep your hands slightly damp when rolling the truffles, and use cocoa powder or chopped nuts to coat them if needed.

    Final Thoughts

    These decadent mocha almond dark chocolate truffles are more than just a treat—they’re an experience, a little piece of luxury in every bite. Whether you’re sharing them with loved ones or savoring them solo, they promise to delight with their complex flavors and creamy texture. I’d love to hear how they turn out for you, so feel free to share your creations or any twists you make. After all, the best recipes are those that are shared and savored together. Happy truffle-making!

    Related update: Decadent Mocha Almond Dark Chocolate Truffles

    Related update: Lavender-Infused Upside-Down Blueberry Puffs with Honey-Citrus Drizzle

  • Zesty Crab Salad Avocado Boats with Mango Salsa | Made by Meaghan Moineau

    Zesty Crab Salad Avocado Boats with Mango Salsa | Made by Meaghan Moineau

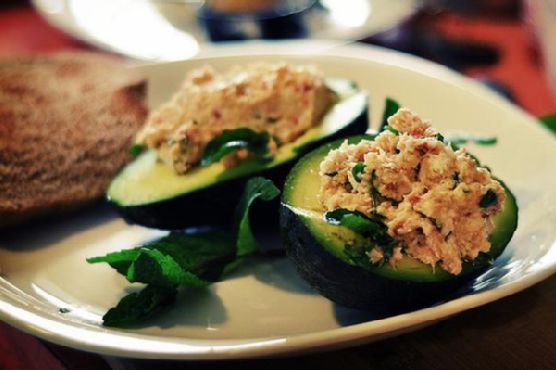
    Zesty Crab Salad Avocado Boats with Mango Salsa

    Imagine diving into a sun-drenched oasis of flavors where every bite whisks you away to a tropical paradise. The creamy richness of avocado cradles a vibrant crab salad, crowned with a fresh mango salsa that dances with a hint of heat. This isn’t just a meal; it’s a mini vacation for your taste buds.

    Personal Story

    It was during my first trip to the Bahamas that I fell head over heels for the tropical fusion cuisine. I remember sitting on a sun-bleached patio, the ocean breeze tousling my hair, as I tasted the most incredible crab salad. It was a medley of flavors — tangy, sweet, and just the right amount of spice. That moment lingered with me, becoming a cherished culinary memory that I often revisited in my own kitchen.

    Back home, I was determined to recreate that experience. But my initial attempts were rather forgettable. The crab salad was missing that spark, that tropical zing that made the original dish unforgettable. I was about to give up when I had a lightbulb moment: why not add a fresh mango salsa and a hint of coconut milk to infuse it with that island magic?

    After a few tweaks and taste tests, my Zesty Crab Salad Avocado Boats with Mango Salsa was born. Each spoonful felt like a celebration of those Bahamian days, and I couldn’t wait to share it. This dish wasn’t just a recipe; it was a story, a piece of my heart on a plate.

    What Makes This Version Special

    In this version, the classic crab salad is elevated with a tropical twist that makes it truly unforgettable. By incorporating fresh mango salsa and a hint of coconut milk, the salad becomes a delightful fusion dish that sings with both flavor and texture. The mango introduces a juicy sweetness that pairs beautifully with the delicate crab meat, while the coconut milk adds a creamy, luxurious touch. The hot sauce lends a subtle kick, balancing the sweetness and bringing everything together. This isn’t just any crab salad; it’s a vibrant celebration of flavors that transports you to a tropical paradise with every bite.

    Flavor Profile

    The flavor profile of these Zesty Crab Salad Avocado Boats with Mango Salsa is a harmonious blend of tropical, creamy, and subtly spicy notes. Imagine the lushness of ripe avocados, their creamy flesh offering a perfect counterpoint to the delicate, slightly sweet crab meat. The mango salsa adds a pop of sweetness and freshness, while the coconut milk provides a silky, tropical backdrop. A dash of hot sauce introduces a gentle heat that tingles the palate, and the toasted coconut flakes add a crunchy, nutty finish. It’s a symphony of flavors and textures — every mouthful is a delightful surprise.

    Ingredients

    • 1 small red onion, finely chopped
    • 1/2 cup mayonnaise
    • 2 teaspoons hot sauce (such as sriracha)
    • 1/4 cup fresh cilantro, chopped
    • 3 teaspoons fresh lime juice, divided
    • 1/2 teaspoon ground cumin
    • 1 teaspoon lime zest
    • 1 pound lump crab meat, picked over for shells
    • 2 large avocados, halved and pitted
    • 1 cup **diced mango**
    • 1/4 cup **coconut milk**
    • 2 tablespoons fresh mint leaves, chopped
    • 1/4 cup **toasted coconut flakes**

    Instructions

    1. In a medium bowl, stir together the red onion, mayonnaise, hot sauce, cilantro, 2 teaspoons of lime juice, cumin, and lime zest until well blended.
    2. Gently fold in the crab meat, being careful not to break up the lumps. Season the salad with salt and pepper to taste.
    3. Heat a dry pan over medium heat and add the coconut flakes. Toast them, stirring frequently, until they are golden brown and fragrant, about 3-4 minutes. Remove from heat and set aside to cool.
    4. For the mango salsa, combine the diced mango, mint leaves, and remaining lime juice in a small bowl. Stir gently to mix.
    5. Mix the coconut milk with the mayonnaise mixture to create a creamy tropical base that binds everything together.
    6. Brush each avocado half with the remaining teaspoon of lime juice to prevent browning.
    7. Mound the crab salad onto each avocado half, then top with a generous spoonful of mango salsa.
    8. Sprinkle the toasted coconut flakes over the top for a crunchy finish. Serve immediately with lime wedges on the side.

    Pro Tips from Meaghan’s Kitchen

    • When selecting avocados, choose ones that give slightly to gentle pressure — they’ll be perfectly ripe and creamy.
    • For the crab meat, fresh is best, but if you’re using canned, ensure it’s well-drained to avoid a watery salad.
    • Toasting the coconut flakes is key; it enhances their natural nutty flavor and adds a delightful crunch to the dish.
    • Feel free to adjust the hot sauce to your taste. If you love a fiery kick, add a dash more.
    • Prepare the mango salsa just before serving to keep it fresh and vibrant.

    Variations & Dietary Swaps

    • For a vegetarian version, substitute crab meat with hearts of palm or chickpeas for a similar texture.
    • If you prefer a spicier profile, add finely chopped jalapeños to the mango salsa.
    • Make it kid-friendly by omitting the hot sauce and serving the avocado boats with a side of tortilla chips for dipping.

    What to Serve With It

    These Zesty Crab Salad Avocado Boats pair beautifully with a chilled glass of Sauvignon Blanc, which complements the tropical notes of the dish perfectly. Alternatively, a light mango smoothie would be a refreshing, non-alcoholic option that enhances the fruitiness of the mango salsa.

    Storage & Meal Prep

    This dish is best enjoyed fresh, but if you need to prepare it in advance, store the components separately. Keep the crab salad in an airtight container in the fridge for up to two days. The mango salsa should be made just before serving to maintain its vibrant texture and flavor. Avocados tend to brown quickly, so it’s best to slice them right before assembling the dish. If you have leftovers, consume them within a day for the best taste.

    FAQ

    Can I use frozen mango for the salsa?

    Yes, you can use frozen mango if fresh is not available. Just make sure to thaw and drain it well to prevent excess water in the salsa.

    What if my avocado isn’t ripe enough?

    If your avocado isn’t quite ripe, you can speed up the process by placing it in a paper bag with a banana overnight.

    Is there a dairy-free option for this recipe?

    This recipe is naturally dairy-free, thanks to the use of coconut milk instead of cream.

    Can I make this dish ahead for a party?

    Yes, you can prepare the crab salad a day in advance. Assemble the avocado boats just before your guests arrive to ensure freshness.

    Final Thoughts

    There you have it, my friends — a fusion dish that brings a taste of the tropics right to your table. These Zesty Crab Salad Avocado Boats with Mango Salsa are sure to impress with their vibrant flavors and beautiful presentation. Whether you’re looking for a unique appetizer or a light, satisfying meal, this recipe is a winner. I’d love to hear how your version turned out, so feel free to leave a comment or share your photos. Let’s cook and create memories together!

    Related update: Zesty Crab Salad Avocado Boats with Mango Salsa

    Related update: Zesty Quinoa Tabbouleh with Pomegranate and Toasted Almonds

    Related update: Gourmet Truffle Goat Cheese, Fig, and Prosciutto Crostini

  • Umami-Packed Truffle Veggie Fried Rice with Crispy Shiitake | Made by Meaghan Moineau

    Umami-Packed Truffle Veggie Fried Rice with Crispy Shiitake | Made by Meaghan Moineau

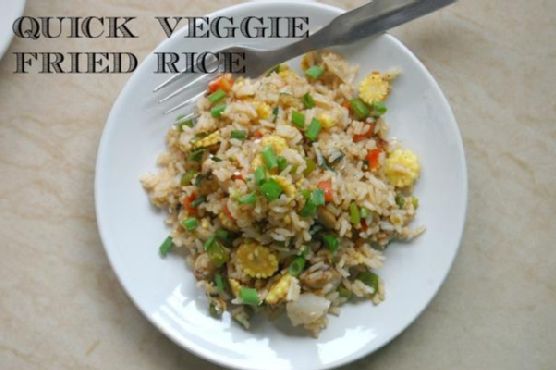
    Umami-Packed Truffle Veggie Fried Rice with Crispy Shiitake

    Imagine walking into a kitchen filled with the earthy aroma of sautéed garlic and ginger, mingling with the rich scent of truffle oil. The sound of sizzling vegetables in the wok invites you closer, promising a dish that’s both comforting and luxurious. This is not just any fried rice; this is an Umami-Packed Truffle Veggie Fried Rice with Crispy Shiitake — a gourmet twist on a beloved classic.

    Personal Story

    My journey with fried rice started in my grandmother’s bustling kitchen, where the scent of soy sauce and sesame oil was as familiar as a warm hug. I remember sitting on the counter, peering over the edge of her well-worn wok, entranced by the rhythm of her spatula as she expertly tossed the rice and vegetables. Despite my fascination, I was too young to understand the magic of her seasoned hands, but I could certainly taste it.

    Years later, as I began exploring my culinary path, I found myself yearning to recreate those flavors. However, a kitchen mishap became a turning point: I accidentally added a drizzle of truffle oil to my rice while reaching for the soy sauce. What I expected to be a disaster turned out to be a revelation. The truffle oil added an unexpected depth, transforming the dish from simple to sensational. It was as if I had discovered a secret ingredient that could elevate a classic to new heights.

    Since that day, Umami-Packed Truffle Veggie Fried Rice with Crispy Shiitake has become a staple in my kitchen, a dish that marries the comforting nostalgia of my grandmother’s recipe with the sophisticated allure of gourmet dining. It’s a dish that tells a story — of tradition and innovation, of happy accidents and culinary inspiration.

    On a recent evening, as I stood in my kitchen, I couldn’t help but smile. The aroma of the sizzling shiitake mushrooms brought me back to those childhood days, but the luxurious twist of truffle reminded me of how far I’ve come. Each bite is a celebration of flavors that I can’t wait for you to experience.

    What Makes This Version Special

    What sets this version of fried rice apart is its luxurious infusion of truffle oil and the delightful crunch of crispy shiitake mushrooms. Traditional fried rice is undeniably comforting, but adding a touch of truffle oil transforms it into a sophisticated dish that’s perfect for any occasion. The crispy shiitake mushrooms provide a textural contrast that elevates the dish, making every bite an experience.

    Most fried rice recipes skip the step of separately sautéing the mushrooms, but this simple technique makes all the difference. By cooking the mushrooms until they’re golden and crisp, you add a layer of flavor that’s both earthy and umami-rich. This dish is not just a meal; it’s a journey of flavors and textures that will make you rethink everything you thought you knew about fried rice.

    Flavor Profile

    Prepare to be swept away by the earthy, aromatic notes of ginger and garlic, which form the foundation of this dish. The truffle oil adds a luxurious umami depth that’s both velvety and intoxicating, while the citrusy hint of lime juice cuts through the richness, leaving a refreshing finish on your palate. The crispy shiitake mushrooms bring an additional dimension with their nutty, savory crunch, creating a symphony of flavors that dance in your mouth.

    Ingredients

    • 3 teaspoons sesame oil, divided
    • 1 tablespoon minced ginger
    • 2 teaspoons minced garlic, divided
    • **1 cup shiitake mushrooms, sliced**
    • 1 cup baby corns, sliced
    • 1/2 cup green onions (white part), chopped
    • 1 carrot, julienned
    • 1 bell pepper, sliced
    • 2 tablespoons low sodium soy sauce
    • Salt and black pepper, to taste
    • **1 tablespoon truffle oil**
    • 1/2 cup edamame, shelled
    • Fresh cilantro, for garnish
    • **Juice of 1 lime**
    • 2 cups cooked cold rice
    • Sesame seeds, for garnish

    Instructions

    1. Heat a wok or large skillet over medium-high heat and add 1 teaspoon of sesame oil. Once shimmering, add the minced ginger and 1 teaspoon of minced garlic. Sauté for about 1 minute until fragrant but not burnt.
    2. Add the sliced shiitake mushrooms to the wok. Cook them until they are golden-brown and crispy, about 5-6 minutes. Keep an eye on them to prevent burning. Once done, transfer them to a bowl along with any juices.
    3. Heat the wok again and add another teaspoon of sesame oil. Add the remaining garlic and sauté until fragrant, about 30 seconds.
    4. Introduce all the vegetables (baby corns, green onions, carrot, bell pepper) to the wok. Stir them together over high heat, adding a pinch of salt, black pepper, and a splash of soy sauce. Toss to coat and let them cook for a few more minutes until they’re tender but still have a slight crunch.
    5. Add the cold, cooked rice to the wok. Gently stir everything together to combine, taking care not to break the rice grains. Allow the rice to warm through, maintaining a medium-high heat.
    6. Drizzle the remaining teaspoon of sesame oil over the rice, along with the rest of the soy sauce, and season with salt and pepper to taste. Return the crispy mushrooms to the pan. Mix gently, ensuring everything is well combined.
    7. Finish the dish with a drizzle of truffle oil and a squeeze of lime juice. Toss and taste, adjusting seasoning if necessary.
    8. Serve the fried rice garnished with the green parts of the green onions, a sprinkle of sesame seeds, and fresh cilantro.

    Pro Tips from Meaghan’s Kitchen

    • Use cold, day-old rice for the best texture in your fried rice. Freshly cooked rice can become mushy when stir-fried.
    • For the crispiest shiitake mushrooms, make sure not to overcrowd the pan. Cook them in batches if necessary to ensure even browning.
    • Adjust the amount of truffle oil to your taste. A little goes a long way, so start with a small amount and add more if desired.
    • To enhance the umami flavor, try adding a splash of fish sauce or miso paste to the rice during cooking.
    • If you’re short on time, pre-chop all your vegetables and have them ready to go before you start cooking. This will make the stir-frying process much smoother.

    Variations & Dietary Swaps

    • Vegetarian Swap: Use tofu instead of mushrooms for a protein-packed vegetarian option. Cook the tofu cubes until golden before adding them to the rice.
    • Spice-It-Up Version: Add a diced chili pepper or a dash of sriracha sauce for a spicy kick that complements the savory flavors.
    • Kids-Friendly Version: Omit the truffle oil and add a handful of sweet peas or corn kernels for a milder, kid-approved version of this dish.

    What to Serve With It

    This Umami-Packed Truffle Veggie Fried Rice with Crispy Shiitake pairs beautifully with a chilled glass of sake or a light, crisp white wine. For a complete meal, serve it alongside a simple cucumber salad or a bowl of miso soup to enhance the Asian fusion experience. The refreshing notes of these sides will balance the rich flavors of the fried rice perfectly.

    Storage & Meal Prep

    If you have leftovers, store the fried rice in an airtight container in the refrigerator for up to 3 days. To reheat, add a splash of water or soy sauce to a pan and warm the rice over medium heat, stirring occasionally to ensure even heating. For longer storage, freeze the fried rice in portions for up to 2 months. Thaw in the fridge overnight before reheating.

    FAQ

    Can I use other types of mushrooms?

    Absolutely! While shiitake mushrooms add a unique flavor and texture, you can substitute them with button mushrooms or portobello for a different taste.

    Do I have to use truffle oil?

    Truffle oil is optional, but it adds a luxurious depth to the dish. If you prefer a simpler flavor, you can omit it or substitute with a flavored olive oil.

    Why is my rice mushy?

    Mushy rice usually results from using freshly cooked rice. Be sure to use cold, day-old rice for the best texture in your fried rice.

    Can I add protein to this dish?

    Yes, you can easily add protein such as shrimp, chicken, or tofu. Cook the protein separately and add it to the rice during the final mixing stage.

    How can I make this dish gluten-free?

    To make this dish gluten-free, use tamari or a gluten-free soy sauce instead of regular soy sauce. Ensure all other ingredients are gluten-free as well.

    Final Thoughts

    Cooking is about embracing creativity and making each dish your own. This Umami-Packed Truffle Veggie Fried Rice with Crispy Shiitake is not just a recipe, but an invitation to explore flavors and techniques that elevate a classic into something extraordinary. I hope you enjoy making and sharing this dish as much as I do. I’d love to hear your thoughts and see your creations — feel free to leave a comment below or tag me in your culinary adventures. Happy cooking!

    Related update: Umami-Packed Truffle Veggie Fried Rice with Crispy Shiitake

    Related update: Mediterranean Stuffed Eggplants with Spiced Sausage and Herb-Crust