Category: Salad

  • Easy Tabouleh | Made by Meaghan Moineau

    Easy Tabouleh | Made by Meaghan Moineau

    Easy Tabouleh

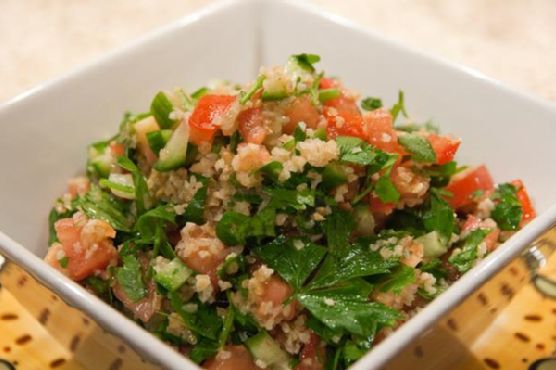
    Welcome to my kitchen! Today, I’m thrilled to share a recipe that is close to my heart—Easy Tabouleh. This vibrant and refreshing salad has been a staple in my family for generations. I vividly remember summers at my grandmother’s house, where she would prepare a massive bowl of tabouleh for our family gatherings. The aroma of freshly chopped parsley and the tang of lemon juice would fill the air, signaling that something delicious was on its way. I’m excited to bring that same joy to your table with this simple and delightful recipe.

    Why You’ll Love It

    Tabouleh is more than just a salad; it’s a celebration of fresh ingredients and bold flavors. Here’s why you’ll love this easy tabouleh recipe:

    • Quick and Simple: With only a handful of ingredients and minimal prep time, you can whip up this dish in no time.
    • Nutritious and Healthy: Packed with fresh vegetables and herbs, this dish is a nutritious powerhouse that is both satisfying and light.
    • Perfect for Any Occasion: Whether it’s a family picnic, a potluck, or a simple weeknight dinner, tabouleh is a versatile dish that fits any occasion.
    • Flavorful and Refreshing: The combination of lemon juice and fresh herbs makes every bite a burst of refreshing flavor.

    Ingredients

    • 1 cup bulgur
    • 2 cucumbers, finely chopped
    • 1 bunch of flat leaf parsley, finely chopped
    • Juice from 1 lemon
    • 3 tablespoons olive oil
    • Salt, to taste
    • 2 tomatoes, finely chopped

    Instructions

    1. Start by preparing the bulgur. Place it in a fine mesh sieve and rinse under cold water. Allow it to drain thoroughly.
    2. Finely chop the cucumbers, parsley, and tomatoes. The key is to keep the vegetables diced fairly small to stay true to the traditional tabouleh texture.
    3. In a large bowl, combine the rinsed bulgur, chopped cucumbers, parsley, and tomatoes.
    4. Add the lemon juice and olive oil to the bowl. Mix everything together gently to ensure the ingredients are well combined.
    5. Season with salt to taste. Start with a small amount, and add more if needed as you mix and taste.
    6. Let the salad sit for at least 30 minutes before serving. This allows the flavors to meld together beautifully.

    Tips

    • Chill for Flavor: For the best flavor, let the tabouleh chill in the refrigerator for an hour before serving. This gives the bulgur time to absorb the lemon juice and olive oil.
    • Use Fresh Ingredients: Fresh parsley and ripe tomatoes make a huge difference in the taste, so opt for the freshest produce you can find.
    • Adjust to Taste: Feel free to adjust the amount of lemon juice and salt to your liking. Some prefer a tangier salad, while others enjoy a milder version.

    Variations & Substitutions

    Tabouleh is a versatile salad with room for creativity. Here are some variations and substitutions you can try:

    • Quinoa Substitute: For a gluten-free version, substitute the bulgur with cooked quinoa. It offers a similar texture and absorbs the flavors wonderfully.
    • Add Mint: Incorporating a handful of finely chopped mint leaves adds an extra layer of freshness to the dish.
    • Additional Veggies: Feel free to add other vegetables such as bell peppers or red onions for added crunch and color.

    Storage

    Tabouleh can be stored in an airtight container in the refrigerator for up to 3 days. The flavors will continue to develop, making it even more delicious the next day. However, the texture of the vegetables might soften over time, so it’s best enjoyed fresh.

    FAQ

    Can I make tabouleh ahead of time?

    Absolutely! Making tabouleh ahead of time is a great idea as it allows the flavors to meld. Prepare it a few hours before serving and let it chill in the refrigerator. Just give it a good stir before serving to redistribute the dressing.

    Is tabouleh served cold or warm?

    Tabouleh is traditionally served cold or at room temperature. Chilling it enhances its refreshing qualities and makes it a perfect dish for warm weather.

    Nutrition

    This easy tabouleh is not only delicious but also nutritious. It is rich in vitamins from the fresh vegetables and herbs, and the bulgur provides a good source of fiber. The olive oil adds healthy fats, while the lemon juice offers a boost of vitamin C. It’s a wholesome dish that fits well into a balanced diet.

    Final Thoughts

    Thank you for joining me in making this easy tabouleh recipe. I hope it brings as much joy to your table as it has to mine. Whether you’re enjoying it as a side dish, a light lunch, or a part of a larger meal, tabouleh is a delightful way to embrace fresh, simple ingredients. I’d love to hear how it turns out for you, so feel free to share your experiences and any personal twists you add to the recipe. Bon appétit!

    Related update: Easy Tabouleh

    Related update: Maple Pecan Honey Cornbread with Orange Zest

    Related update: Zesty Tropical Lump Crab and Avocado Salad with Mango-Lime Dressing
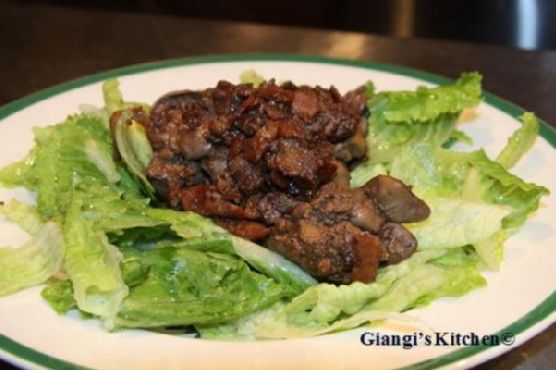
  • Chicken Liver Salad | Made by Meaghan Moineau

    Chicken Liver Salad | Made by Meaghan Moineau

    Chicken Liver Salad: A Warm and Hearty Delight

    There’s something inherently comforting about the aromas wafting through the kitchen as chicken livers sizzle with onions and bacon. This Chicken Liver Salad takes me back to Sunday afternoons at my grandmother’s house. She would whip up a batch of this savory salad while recounting stories from her childhood. The combination of rich, tender chicken livers with the crisp freshness of Boston lettuce was, and still is, my favorite part of those cherished family gatherings.

    Why You’ll Love It

    This Chicken Liver Salad is more than just a dish; it’s a sensory experience. The savory, slightly tangy flavor of the chicken livers, when combined with crispy bacon and balsamic vinegar, creates a taste explosion. Besides its delightful flavors, this salad is also packed with nutrients, making it a wholesome option for those who want to enjoy a hearty meal without compromising on health. It’s simple to make, requiring only a handful of ingredients and minimal preparation time, yet it never fails to impress both family and guests alike.

    Ingredients

    • Bacon
    • Balsamic vinegar
    • Boston lettuce
    • Chicken livers
    • Olive oil
    • Onion
    • Salt and pepper

    Instructions

    1. In a large skillet, heat the olive oil over medium-high heat.
    2. Add the sliced onion and bacon to the skillet, sautéing until the bacon is slightly crisp and the onions are soft.
    3. Add the chicken livers to the skillet, stirring well to combine with the bacon and onions.
    4. Pour in the balsamic vinegar, allowing the livers to simmer slowly. Stir occasionally, and add more vinegar if necessary to keep the mixture moist.
    5. Once the livers are cooked through and tender, season with salt and pepper to taste.
    6. Arrange a bed of Boston lettuce on a serving platter, and spoon the warm liver mixture over the top.
    7. Serve immediately, ensuring each plate has a generous portion of both liver mixture and lettuce.

    Tips

    For the best results, use fresh chicken livers and make sure to clean them thoroughly before cooking. If you’re not a fan of balsamic vinegar, you can substitute it with red wine vinegar for a slightly different flavor profile. Make sure to taste as you go, adjusting the seasoning according to your preference. To add an extra layer of texture, consider topping the salad with toasted nuts, such as walnuts or pine nuts.

    Variations & Substitutions

    There are numerous ways to tweak this recipe to better suit your palate or dietary needs:

    • Vegetarian Option: Replace chicken livers with grilled portobello mushrooms for a vegetarian-friendly version.
    • Different Greens: Swap Boston lettuce for arugula or spinach for a peppery or more robust flavor.
    • Additional Vegetables: Incorporate roasted red peppers or cherry tomatoes for a burst of color and sweetness.
    • Herbs: Add fresh herbs like thyme or rosemary to enhance the aromatic profile of the dish.

    Storage

    If you have leftovers, store the chicken liver mixture separately from the lettuce to prevent it from becoming soggy. Place the liver mixture in an airtight container and refrigerate for up to two days. Reheat gently in a skillet before serving over fresh lettuce. Note that the texture of the liver might change slightly upon reheating, but the flavors will remain delightful.

    FAQ

    Can I prepare this dish in advance?

    While you can prepare the liver mixture a day ahead, it’s best to serve the salad fresh to retain the crispness of the lettuce. Reheat the liver mixture just before serving.

    Is chicken liver healthy?

    Yes, chicken liver is a rich source of protein, iron, and various vitamins, including vitamin A and B12. It can be a nutritious addition to your diet when consumed in moderation.

    Nutrition

    Chicken Liver Salad is a nutrient-dense dish, offering a substantial amount of protein and essential vitamins. A serving provides approximately:

    • Calories: 250
    • Protein: 20g
    • Fat: 15g
    • Carbohydrates: 8g
    • Iron: 10mg

    Please note that these values are estimates and can vary based on specific brands and preparation methods.

    Final Thoughts

    This Chicken Liver Salad is more than just a meal; it’s a journey back to simpler times filled with love, laughter, and delicious food. It’s a testament to how traditional recipes can still hold a special place in our modern lives. Whether you’re a fan of chicken livers or looking to try something new, this salad is a delightful way to enjoy a nutritious and flavorful meal. Gather your loved ones, share stories, and enjoy this comforting dish together.

    Related update: Chicken Liver Salad

    Related update: Crab Cakes Rockefeller

    Related update: Easy Tabouleh

  • Strawberry Pretzel Salad | Made by Meaghan Moineau

    Strawberry Pretzel Salad | Made by Meaghan Moineau

    Strawberry Pretzel Salad

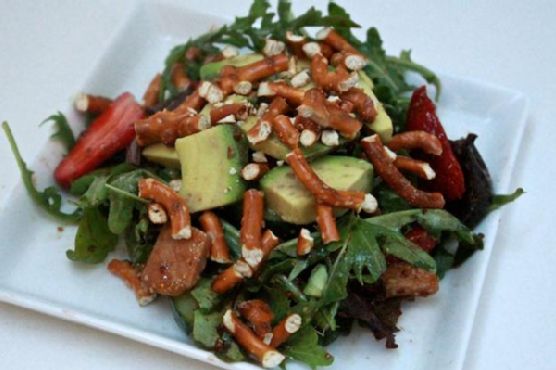
    Welcome to a delightful world of flavors with our Strawberry Pretzel Salad—a refreshing and vibrant dish that combines sweet, salty, and savory in a way that is sure to become your new favorite. This salad is not only delicious but also brings a touch of nostalgia with every bite. Let me take you on a journey back to my childhood summers at my grandmother’s house, where I first tasted the magic of strawberries and pretzels together. I remember sitting on her porch, the sun warming my face, as I enjoyed this unique combination that seemed to capture the essence of summer. Now, I am thrilled to share this cherished recipe with you.

    Why You’ll Love It

    This Strawberry Pretzel Salad is a symphony of flavors and textures. Here are a few reasons why you’ll fall in love with it:

    • Sweet and Savory Balance: The sweetness of strawberries paired with the salty crunch of pretzels creates a perfect harmony.
    • Texture Delight: Crisp cucumbers, creamy avocado, and crunchy pretzels make every bite exciting.
    • Healthy and Nutritious: Packed with greens, healthy fats, and fresh ingredients, this salad is as wholesome as it is delicious.
    • Easy to Make: With simple steps and readily available ingredients, this salad comes together in no time.
    • Versatile: Perfect as a light lunch, a side dish, or a beautiful addition to your dinner table.

    Ingredients

    • 2 cups arugula
    • 1 avocado, sliced
    • 6 slices bacon
    • 2 tablespoons balsamic vinegar
    • 1 cucumber, sliced
    • 2 tablespoons flax seed oil
    • 4 cups mixed spring greens
    • 1 red bell pepper, sliced
    • 1 cup pretzels, crushed
    • Salt and pepper to taste
    • 1 cup strawberries, sliced
    • 1 tablespoon whole grain mustard

    Instructions

    1. Preheat your oven to 300°F (150°C).
    2. Arrange the bacon slices on a baking sheet lined with tin foil.
    3. Bake the bacon for 30 minutes, turning once halfway through. Set aside and let cool.
    4. In a small bowl, combine flax seed oil, balsamic vinegar, whole grain mustard, salt, and pepper. Mix well and set aside.
    5. In a large salad bowl, place strawberries, cucumber, mixed greens, arugula, and bacon. Toss lightly to combine.
    6. Add the prepared dressing to the salad and toss to coat evenly.
    7. Divide the salad among four plates and serve topped with sliced avocado and crushed pretzels.

    Tips

    • Choose Fresh Ingredients: For the best flavor, select ripe strawberries and fresh greens.
    • Prepare Ahead: You can pre-cook the bacon and mix the dressing ahead of time to save on prep work.
    • Serving Suggestion: Pair this salad with grilled chicken or fish for a more substantial meal.

    Variations & Substitutions

    Feel free to get creative with this recipe:

    • Nuts for Crunch: Substitute pretzels with toasted almonds or pecans for a different kind of crunch.
    • Vegan Option: Omit the bacon and add grilled tofu or chickpeas for protein.
    • Seasonal Fruits: Swap strawberries for other seasonal fruits like peaches or blueberries.

    Storage

    To store leftovers, keep the salad and dressing separate in airtight containers in the refrigerator. The salad can be stored for up to 2 days. Add the dressing and pretzels just before serving to maintain freshness and crunch.

    FAQ

    Can I make this salad ahead of time?

    Yes, you can prepare the components like the bacon and dressing in advance. However, for the freshest taste, it’s best to assemble the salad just before serving.

    What can I use instead of flax seed oil?

    If you don’t have flax seed oil, you can substitute it with extra virgin olive oil or avocado oil for a similar flavor profile.

    Nutrition

    This salad is a nutritious choice, offering a good balance of healthy fats, vitamins, and fiber. The combination of greens, avocado, and strawberries provides a wealth of nutrients, while the bacon and pretzels add protein and carbohydrates to keep you satisfied.

    Final Thoughts

    This Strawberry Pretzel Salad is more than just a dish; it’s a celebration of flavors and memories. Whether you’re serving it at a family gathering or enjoying it as a rewarding meal for yourself, it is sure to bring joy and satisfaction. I hope this recipe becomes a staple in your kitchen, as it has in mine. Enjoy the delightful crunch, the burst of fruity sweetness, and the comforting savory notes in every bite. Happy cooking!

    Related update: Strawberry Pretzel Salad

    Related update: Roasted Broccoli with Lemon and Garlic

    Related update: Chicken Liver Salad

  • Lentil Salad With Vegetables | Made by Meaghan Moineau

    Lentil Salad With Vegetables | Made by Meaghan Moineau

    Lentil Salad With Vegetables

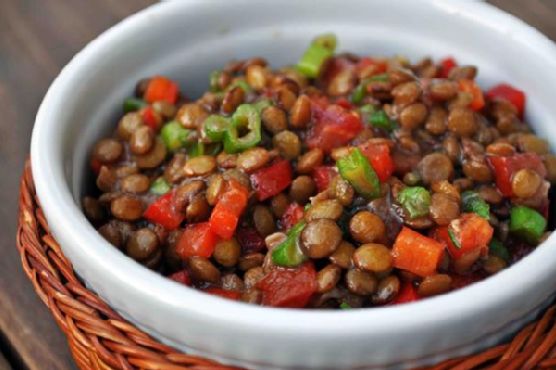
    Welcome to our kitchen! Today, we’re diving into a dish that not only satisfies the taste buds but also brings a delightful burst of nutrition to your table. Lentil Salad with Vegetables is a recipe that has been passed down in our family for generations, and I’m thrilled to share it with you today. I still remember the warm summer evenings spent at my grandmother’s house, where this salad was a staple. The vibrant colors and fresh flavors were always a highlight of our meals, and now I hope it becomes a cherished part of your family dinners too.

    Why You’ll Love It

    This Lentil Salad with Vegetables is a delightful medley of flavors and textures that will elevate any meal. Whether you’re looking for a refreshing side dish, a nutritious lunch, or a light dinner, this salad fits the bill. Here’s why you’ll fall in love with this recipe:

    • Nutritious: Packed with protein-rich lentils and a variety of vegetables, this salad is a nutrient powerhouse.
    • Flavorful: The combination of balsamic and red wine vinegar gives a tangy kick, while rosemary adds a fragrant touch.
    • Versatile: Perfect for summer picnics, potlucks, or a cozy dinner at home.
    • Easy to Make: With simple ingredients and straightforward steps, this salad is quick to prepare.

    Ingredients

    • 2 tablespoons balsamic vinegar
    • 3 tablespoons extra virgin olive oil
    • 2 green onions, chopped
    • 1 cup lentils
    • 1 bell pepper, diced
    • 1 red bell pepper, diced
    • 1 tablespoon red wine vinegar
    • 1 teaspoon fresh rosemary, chopped
    • Salt, to taste
    • 2 tomatoes, diced
    • 1 white onion, diced

    Instructions

    1. Heat the extra virgin olive oil in a saucepan over medium-high heat and add the diced white onion.
    2. Cook the onion until just translucent, stirring occasionally to ensure even cooking.
    3. Add the lentils to the saucepan and pour in enough water to cover them. Cook according to the package directions until tender.
    4. Once cooked, drain the lentils and let them cool to room temperature.
    5. In a large mixing bowl, combine the cooled lentils with the diced tomatoes, bell peppers, and green onions.
    6. Add the chopped rosemary, balsamic vinegar, and red wine vinegar to the vegetable mixture.
    7. Season with salt to taste. You can also add more olive oil or vinegar according to your preference.
    8. Toss everything together until well combined.
    9. Serve the salad cold or at room temperature, and enjoy!

    Tips

    To make the most out of your Lentil Salad with Vegetables, here are some tips to keep in mind:

    • Choose Fresh Ingredients: Fresh vegetables make a big difference in flavor and texture.
    • Cook Lentils Properly: Ensure the lentils are cooked just right – they should be tender but not mushy.
    • Adjust Seasoning: Feel free to adjust the amount of vinegar and olive oil based on your taste preferences.

    Variations & Substitutions

    This salad is incredibly adaptable. Here are a few variations and substitutions you might consider:

    • Add Cheese: Crumble some feta or goat cheese on top for added creaminess.
    • Include Nuts: Toss in some toasted walnuts or almonds for extra crunch.
    • Use Different Vinegars: Try apple cider vinegar or white wine vinegar for a different flavor profile.
    • Herbs: Swap rosemary with thyme or parsley for a different herbal touch.

    Storage

    This salad can be stored in an airtight container in the refrigerator for up to 3 days. It’s a great make-ahead dish for busy weeks, and the flavors only deepen over time. Just give it a good toss before serving to redistribute the dressing.

    FAQ

    Can I use canned lentils for this recipe?

    Yes, you can use canned lentils to save time. Just make sure to rinse and drain them well before adding them to the salad.

    Is this salad vegan?

    Yes, this Lentil Salad with Vegetables is completely vegan, making it a great option for those following a plant-based diet.

    What can I serve with this salad?

    This salad pairs well with grilled chicken, fish, or tofu. It also makes a great accompaniment to hearty soups or stews.

    Nutrition

    This salad is not only delicious but also nutritious. Packed with protein, fiber, and vitamins, it’s a wholesome addition to any meal. Lentils are an excellent source of plant-based protein, while the assortment of vegetables provides a rainbow of nutrients.

    Final Thoughts

    I hope this Lentil Salad with Vegetables becomes as beloved in your home as it is in ours. It’s a simple yet flavorful dish that brings people together around the table. Whether you’re enjoying it as a light lunch or serving it as a side at a family gathering, it’s sure to bring smiles and satisfaction. Don’t forget to share your own twists and experiences with this recipe in the comments below. Happy cooking!

    Related update: Lentil Salad With Vegetables

    Related update: Pennsylvania Dutch Pickled Eggs

    Related update: Strawberry Pretzel Salad

  • Dairy Free Chicken Salad | Made by Meaghan Moineau

    Dairy Free Chicken Salad | Made by Meaghan Moineau

    Dairy Free Chicken Salad

    Welcome to a delightful culinary journey with our Dairy Free Chicken Salad! This dish is a nostalgic nod to family picnics in the park. I remember those sunny days when my mom would whip up this comforting salad, and we’d enjoy it under the sprawling oak tree in our local park. The savory aroma of seasoned chicken mixed with the tangy zest of pickles and lemon would tantalize our senses, making each bite a moment to cherish. Now, I’m excited to share this recipe with you, hoping it brings as much joy to your table as it did to ours.

    Why You’ll Love It

    This Dairy Free Chicken Salad is a perfect blend of flavors and textures, making it a crowd-pleaser for any occasion. Whether you’re looking for a quick lunch, a picnic staple, or a dish for a potluck, this recipe has got you covered. It’s not only delicious and satisfying but also healthy, as it’s dairy-free and packed with protein. The combination of tender chicken with crunchy pickles and creamy Veganaise creates a perfect harmony that will leave your taste buds dancing. Plus, it’s incredibly easy to make, requiring minimal prep time so you can spend more time enjoying the company of your loved ones.

    Ingredients

    • 2 tablespoons olive oil
    • 1 pound skinless boneless chicken tenderloins
    • 1 teaspoon pepper
    • 1 teaspoon salt
    • 1 teaspoon paprika
    • 3 cooked whole eggs
    • 1/2 cup chopped dill pickles
    • 1/2 cup Veganaise
    • 1 tablespoon lemon juice
    • 1 teaspoon seasoned salt

    Instructions

    1. Thaw the chicken if needed.
    2. Add the olive oil to a large skillet and bring to medium heat.
    3. Add the chicken to the skillet and season with paprika, salt, and pepper.
    4. Turn every few minutes and cook until chicken is cooked through and juices run clear.
    5. Remove the chicken and place on a large cutting board.
    6. Using two forks, shred the chicken and place in a large bowl.
    7. If you haven’t already, boil the eggs. Cover the eggs with cold water in a large pot. Place pot over medium-high heat. As soon as it starts boiling, set your timer for 7 minutes. Done!
    8. Peel and chop up your eggs, then place them in the bowl with your shredded chicken.
    9. Chop up your dill pickles and add them to the bowl.
    10. Add the Veganaise, lemon juice, and seasoned salt.
    11. Toss to combine. Serve with your favorite bread.

    Tips

    For the best results, use fresh chicken tenderloins and cook them just until done to ensure they stay juicy. When shredding the chicken, don’t worry about making the pieces too small, as a bit of texture adds to the salad’s appeal. If you’re in a hurry, you can use pre-cooked rotisserie chicken as a time-saving alternative. And remember, the key to a perfect salad is tasting as you go, so feel free to adjust the seasoning to your liking.

    Variations & Substitutions

    This recipe is wonderfully adaptable. If you prefer a bit of sweetness, try adding a handful of dried cranberries or grapes. For a touch of crunch, toss in some chopped celery or nuts such as almonds or walnuts. If you don’t have Veganaise, regular mayonnaise or Greek yogurt can be used as substitutes, keeping in mind the latter will add dairy. For a spicier kick, a dash of hot sauce or a sprinkle of cayenne pepper works wonders.

    Storage

    Store any leftover chicken salad in an airtight container in the refrigerator. It will keep well for up to three days, making it a convenient option for meal prep. When ready to eat, give it a good stir and adjust the seasoning if necessary. Unfortunately, this dish doesn’t freeze well due to the mayonnaise-based dressing, so it’s best enjoyed fresh.

    FAQ

    Can I make this salad in advance?

    Absolutely! In fact, making it a day ahead allows the flavors to meld together beautifully. Just store it in the fridge and give it a good stir before serving.

    Is this recipe gluten-free?

    Yes, the salad itself is gluten-free. However, if you’re serving it with bread, make sure to choose a gluten-free variety if needed.

    Can I add fruits to this salad?

    Yes, adding fruits like grapes or diced apples can add a nice sweetness and additional texture to the salad. Just be sure to add them right before serving to maintain their freshness.

    Nutrition

    This Dairy Free Chicken Salad is a nutritious choice, packed with protein from the chicken and eggs. It’s also a good source of healthy fats from the olive oil and Veganaise. While exact nutritional values will vary based on portion sizes, you can rest assured that this dish is both satisfying and nourishing.

    Final thoughts

    Our Dairy Free Chicken Salad is a versatile dish that fits seamlessly into any meal plan. Its delightful combination of flavors and textures is sure to please even the pickiest eaters. Whether you’re making it for a family gathering, a picnic, or just a quick meal, it’s bound to become a household favorite. So gather your ingredients, follow the simple steps, and enjoy a taste of nostalgia with every bite. Happy cooking!

    Related update: Dairy Free Chicken Salad

    Related update: Lentil Salad With Vegetables

  • Amaranth and Roast Veggie Salad | Made by Meaghan Moineau

    Amaranth and Roast Veggie Salad | Made by Meaghan Moineau

    Amaranth and Roast Veggie Salad

    Intro

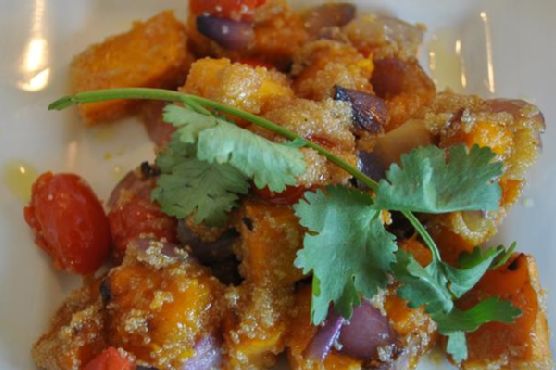
    There’s something magical about the aroma of vegetables roasting in the oven, the warmth of the kitchen embracing you as you anticipate the delightful meal ahead. I remember my grandmother’s kitchen, where every Sunday, she would prepare a hearty roast that filled the house with comforting scents. Her kitchen was a haven, a place where the worries of the world would melt away with each delicious bite. Inspired by those cherished moments, I’ve created a dish that combines the wholesome goodness of roasted vegetables with the unique texture of amaranth. This Amaranth and Roast Veggie Salad is my homage to those Sundays, and I’m thrilled to share it with you.

    Why You’ll Love It

    This Amaranth and Roast Veggie Salad is a delightful blend of flavors and textures. The nutty, slightly crunchy amaranth pairs perfectly with the tender, caramelized roasted vegetables. The basil-infused olive oil adds a fragrant touch, while the herbal salt enhances the natural sweetness of the vegetables. It’s a dish that’s not only delicious but also packed with nutrients, making it a perfect addition to any meal. Whether you’re a seasoned cook or a kitchen novice, you’ll find this salad both easy to prepare and deeply satisfying.

    Ingredients

    • 1 cup amaranth
    • 2 tablespoons basil-infused olive oil
    • 1 bell pepper, sliced
    • 1 cup diced pumpkin
    • 1 red onion, roughly chopped
    • A handful of rocket leaves
    • Herbal salt, to taste
    • 1 punnet baby tomatoes

    Instructions

    1. Cook the amaranth with about a cup of water. Bring it to a boil, then reduce the heat and simmer until it reaches a sticky consistency. This should take around 15-20 minutes.
    2. While the amaranth is cooking, preheat your oven to 400°F (200°C).
    3. Cut the red onion roughly into chunks and dice the pumpkin into bite-sized pieces.
    4. Add the onion and diced pumpkin to a tinfoil-lined baking tray.
    5. Drizzle the vegetables with basil-infused olive oil and sprinkle with herbal salt and pepper.
    6. Place the tray in the hot oven and roast for about 25-30 minutes, or until the edges of the pumpkin become crispy.
    7. Just before the veggies are done roasting, add the baby tomatoes to the tray and return to the oven for an additional 5 minutes.
    8. Once the vegetables are roasted, remove them from the oven and coat them with the cooked amaranth.
    9. Tear a few rocket leaves and add them to the mixture.
    10. Toss everything together gently, serve warm, and enjoy your unusual roast veggie salad!

    Tips

    For the best results, use fresh, seasonal vegetables. If you’re in a hurry, you can prepare the amaranth in advance and simply reheat it when you’re ready to assemble the salad. Don’t hesitate to adjust the seasoning to your taste—more herbal salt can bring out the flavors even more.

    Variations & Substitutions

    If you can’t find amaranth, quinoa is a great substitute that will give you a similar texture. For a bit of heat, consider adding a pinch of chili flakes to the roasted vegetables. You can also vary the veggies based on what you have on hand; zucchini or sweet potatoes would be excellent additions.

    Storage

    This salad is best enjoyed fresh, but any leftovers can be stored in an airtight container in the refrigerator for up to 2 days. When reheating, try to do so gently to maintain the texture of the vegetables.

    FAQ

    Can I make this salad in advance?

    Yes, you can prepare the components of the salad ahead of time. Cook the amaranth and roast the vegetables, then store them separately in the refrigerator. When you’re ready to serve, warm them slightly and toss everything together with the rocket leaves.

    Is this salad gluten-free?

    Absolutely! Amaranth is a naturally gluten-free grain, making this salad a perfect option for those with gluten sensitivities.

    What can I serve with this salad?

    This salad is versatile and pairs well with grilled chicken, fish, or even a simple lentil soup for a complete meal. It’s also an excellent side dish for a larger dinner spread.

    Nutrition

    This Amaranth and Roast Veggie Salad is not only flavorful but also nutritious. Amaranth is a great source of protein and fiber, while the roasted vegetables provide essential vitamins and minerals. The addition of olive oil offers healthy fats, making this a well-rounded, wholesome dish.

    Conclusion

    Creating this Amaranth and Roast Veggie Salad is like taking a comforting journey back to simpler times, where the kitchen was filled with warmth and love. It’s a dish that brings together the best of both worlds: a touch of nostalgia and a healthy, modern twist. I hope this salad finds a cherished place at your table, just as it has in mine. Enjoy every bite!

    Related update: Amaranth and Roast Veggie Salad

    Related update: Pasta with Peas and Italian Sausage

    Related update: Dairy Free Chicken Salad